tow CHEVROLET TRAX 2020 Owner's Manual
[x] Cancel search | Manufacturer: CHEVROLET, Model Year: 2020, Model line: TRAX, Model: CHEVROLET TRAX 2020Pages: 355, PDF Size: 5.75 MB
Page 175 of 355

Chevrolet TRAX Owner Manual (GMNA-Localizing-U.S./Canada/Mexico-
13556235) - 2020 - CRC - 9/19/19
174 Driving and Operating
Caution (Continued)
breaking-in guideline every
time you get new brake
linings.
Following break-in, engine speed
and load can be gradually
increased.
Ignition Positions (Key
Access)
0. Stopping the Engine/LOCK/OFF
1. ACC/ACCESSORY 2. ON/RUN
3. START
The ignition switch has four
positions.
To shift out of P (Park) with an
automatic transmission, the ignition
must be in ON/RUN and the brake
pedal must be applied.
0 (Stopping the Engine/LOCK/
OFF) :
This position turns off the
vehicle. It also locks the ignition, the
transmission on an automatic
transmission vehicle, and the
steering column, if equipped with a
locking steering column.
To turn off the vehicle:
1. Make sure that the vehicle is stopped.
2. Shift to P (Park) with an automatic transmission,
or Neutral with a manual
transmission.
3. Continue to hold the brake pedal, then set the parking
brake. See Parking Brake
0 192.
4. Push the key all the way in toward the steering column (1),
then turn the key to
LOCK/OFF (2).
5. Remove the key.
6. Release the brake pedal.
See your dealer if the key can be
removed in any other position.
Retained Accessory Power (RAP)
will remain active. See Retained
Accessory Power (RAP) 0181.
A warning chime will sound when
the driver door is opened and the
key is in the ignition.
Page 176 of 355
Chevrolet TRAX Owner Manual (GMNA-Localizing-U.S./Canada/Mexico-
13556235) - 2020 - CRC - 9/19/19
Driving and Operating 175
If equipped with a locking steering
column, the steering can bind with
the front wheels turned off center,
which may prevent key rotation out
of LOCK/OFF. If this happens, move
the steering wheel from right to left
while turning the key to ACC/
ACCESSORY. If this does not work,
then the vehicle needs service.
{Warning
Turning off the vehicle while
moving may cause loss of power
assist in the brake and steering
systems and disable the airbags.
While driving, turn off the vehicle
only in an emergency.
In an emergency, if the vehicle
cannot be pulled over and must be
turned off while driving: 1. Push the key all the way in toward the steering column,
then turn the key to ACC/
ACCESSORY. 2. Brake using firm and steady
pressure. Do not pump the
brakes repeatedly. This may
deplete power assist, requiring
increased brake pedal force.
3. Shift the vehicle to N (Neutral). This can be done while the
vehicle is moving. Continue
braking and steer the vehicle to
a safe location.
4. Come to a complete stop.
5. Shift to P (Park) with an automatic transmission,
or Neutral with a manual
transmission.
6. Continue to hold the brake pedal, then set the parking
brake. See Parking Brake
0 192.
7. Push the key all the way in toward the steering column,
then turn the ignition to
LOCK/OFF.
8. Remove the key.
9. Release the brake pedal.
Caution
Use the correct key, make sure it
is all the way in —or pushed all
the way in toward the steering
column when turning off the
vehicle —and turn it only with
your hand.
1 (ACC/ACCESSORY) : This
position allows features such as the
infotainment system to operate
while the vehicle is off. It also
unlocks the steering column,
if equipped with a locking steering
column. Use this position if the
vehicle must be pushed or towed.
See Retained Accessory Power
(RAP) 0181.
From ON/RUN, push the key all the
way in toward the steering column,
then turn the key to ACC/
ACCESSORY.
If the key is left in ACC/
ACCESSORY with the engine off,
the battery could drain and the
vehicle may not start.
Page 183 of 355
Chevrolet TRAX Owner Manual (GMNA-Localizing-U.S./Canada/Mexico-
13556235) - 2020 - CRC - 9/19/19
182 Driving and Operating
.Audio System
. OnStar System
Shifting Into Park
1. Hold the brake pedal down and
set the parking brake. See
Parking Brake 0192.
2. Move the shift lever into P (Park) by pressing the button
on the shift lever and pushing
the lever all the way toward the
front of the vehicle.
3. Push the ignition key in, towards the steering column
and then turn the ignition off.
4. Remove the key and take it with you. If you can leave the
vehicle with the ignition key in
your hand, the vehicle is in
P (Park).
Leaving the Vehicle with the
Engine Running (Automatic
Transmission)
{Warning
It can be dangerous to leave the
vehicle with the engine running.
It could overheat and catch fire.
It is dangerous to get out of the
vehicle if the shift lever is not fully
in P (Park) with the parking brake
firmly set. The vehicle can roll.
Do not leave the vehicle when the
engine is running. If you have left
the engine running, the vehicle
can move suddenly. You or others
could be injured. To be sure the
vehicle will not move, even when
you are on fairly level ground,
always set the parking brake and
move the shift lever to P (Park).
See Shifting Into Park 0182.
If you have to leave the vehicle with
the engine running, be sure the
vehicle is in P (Park) and the parking brake is firmly set before
you leave it. After you have moved
the shift lever into P (Park), hold the
brake pedal down. Then see if you
can move the shift lever away from
P (Park) without first pushing the
button on the shift lever. If you can,
it means that the shift lever was not
fully locked into P (Park).
Torque Lock (Automatic
Transmission)
If you are parking on a hill and you
do not shift the transmission into
P (Park) properly, the weight of the
vehicle may put too much force on
the parking pawl in the
transmission. You may find it difficult
to pull the shift lever out of P (Park).
This is called
“torque lock.”
To prevent torque lock, set the
parking brake and then shift into
P (Park) properly before you leave
the driver seat. To find out how, see
“Shifting Into Park” previously in this
section.
When you are ready to drive, move
the shift lever out of P (Park) before
you release the parking brake.
Page 198 of 355
Chevrolet TRAX Owner Manual (GMNA-Localizing-U.S./Canada/Mexico-
13556235) - 2020 - CRC - 9/19/19
Driving and Operating 197
The cruise control indicator on the
instrument cluster turns green after
cruise control has been set to the
desired speed. SeeInstrument
Cluster 097.
Resuming a Set Speed
If the cruise control is set at a
desired speed and then the brakes
or clutch for manual transmissions
are applied, the cruise control is
disengaged without erasing the set
speed from memory.
Once the vehicle reaches about
40 km/h (25 mph) or more, move the
thumbwheel up toward RES/+
briefly. The vehicle returns to the
previous set speed.
Increasing Speed While Using
Cruise Control
If the cruise control system is
already activated:
. Move the thumbwheel up toward
RES/+ and hold it until the
desired speed is reached, then
release it. .
To increase vehicle speed in
small increments, move the
thumbwheel up toward RES/+
briefly. For each press, the
vehicle goes about 1 km/h
(1 mph) faster.
The speedometer reading can be
displayed in either English or metric
units. See Instrument Cluster 097.
The increment value used depends
on the units displayed.
Reducing Speed While Using
Cruise Control
If the cruise control system is
already activated:
. Move the thumbwheel toward
SET/− and hold until the desired
lower speed is reached, then
release it.
. To decrease the vehicle speed in
small increments, move the
thumbwheel toward SET/−
briefly. For each press, the
vehicle goes about 1 km/h
(1 mph) slower. The speedometer reading can be
displayed in either English or metric
units. See
Instrument Cluster 097.
The increment value used depends
on the units displayed.
Passing Another Vehicle While
Using Cruise Control
Use the accelerator pedal to
increase the vehicle speed. When
you take your foot off the pedal, the
vehicle slows down to the previously
set cruise control speed. While
pressing the accelerator pedal or
shortly following the release to
override cruise, briefly moving the
thumbwheel toward SET/− will result
in cruise set to the current vehicle
speed.
Using Cruise Control on Hills
How well cruise control works on
hills depends on the vehicle speed,
load, and the steepness of the hills.
When going up steep hills, you
might have to step on the
accelerator pedal to maintain the
vehicle speed. When going
downhill, you might have to brake or
shift to a lower gear to keep your
Page 207 of 355
Chevrolet TRAX Owner Manual (GMNA-Localizing-U.S./Canada/Mexico-
13556235) - 2020 - CRC - 9/19/19
206 Driving and Operating
If SBZA is disabled by the driver,
the SBZA mirror displays will not
light up.
When the System Does Not
Seem to Work Properly
SBZA displays may not come on
when passing a vehicle quickly or
for a stopped vehicle. SBZA may
alert to objects attached to the
vehicle, such as a bicycle, or object
extending out to either side of the
vehicle. This is normal system
operation; the vehicle does not need
service.
SBZA may not always alert the
driver to vehicles in the side blind
zone, especially in wet conditions.
The system does not need to be
serviced. The system may light up
due to guardrails, signs, trees,
shrubs, and other non-moving
objects. This is normal system
operation; the vehicle does not need
service.
SBZA may not operate when the
SBZA sensors in the left or right
corners of the rear bumper are
covered with mud, dirt, snow, ice,or slush, or in heavy rainstorms. For
cleaning instructions, see "Washing
the Vehicle" under
Exterior Care
0 288. If the DIC still displays the
system unavailable message after
cleaning both sides of the vehicle
toward the rear corners of the
vehicle, see your dealer.
If the SBZA displays do not light up
when vehicles are in the blind zone
and the system is clean, the system
may need service. Take the vehicle
to your dealer.
When SBZA is disabled for any
reason other than the driver turning
it off, the Side Blind Zone Alert On
option will not be available on the
personalization menu.
Radio Frequency Information
See Radio Frequency Statement
0 327.
Lane Departure
Warning (LDW)
If equipped, LDW may help avoid
crashes due to unintentional lane
departures. LDW uses a camera sensor to detect the lane markings
at speeds of 56 km/h (35 mph) or
greater. It may provide an alert if the
vehicle is crossing a lane without
using a turn signal in that direction.
LDW light will not alert if the turn
signal is active in the direction of
lane departure, or if LDW detects
that you are accelerating, braking or
actively steering.
{Warning
The LDW system does not steer
the vehicle. The LDW system
may not:
. Provide enough time to
avoid a crash.
. Detect lane markings under
poor weather or visibility
conditions. This can occur if
the windshield or
headlamps are blocked by
dirt, snow, or ice; if they are
not in proper condition; or if
the sun shines directly into
the camera.
(Continued)
Page 212 of 355
Chevrolet TRAX Owner Manual (GMNA-Localizing-U.S./Canada/Mexico-
13556235) - 2020 - CRC - 9/19/19
Driving and Operating 211
Filling a Portable Fuel
Container
{Warning
Never fill a portable fuel container
while it is in the vehicle. Static
electricity discharge from the
container can ignite the fuel
vapor. You or others could be
badly burned and the vehicle
could be damaged. To help avoid
injury to you and others:. Dispense fuel only into
approved containers.
. Do not fill a container while
it is inside a vehicle, in a
vehicle's trunk, in a pickup
bed, or on any surface other
than the ground.
. Bring the fill nozzle in
contact with the inside of
the fill opening before
operating the nozzle.
Maintain contact until filling
is complete.
(Continued)
Warning (Continued)
.Keep sparks, flames, and
smoking materials away
from fuel.
. Do not use electronic
devices while pumping fuel.
Trailer Towing
General Towing
Information
{Warning
Never tow a trailer with your
vehicle. It was not designed or
intended to tow a trailer.
Page 215 of 355
Chevrolet TRAX Owner Manual (GMNA-Localizing-U.S./Canada/Mexico-
13556235) - 2020 - CRC - 9/19/19
214 Vehicle Care
Different Size Tires andWheels . . . . . . . . . . . . . . . . . . . . . . 271
Uniform Tire Quality Grading . . . . . . . . . . . . . . . . . . . . . 271
Wheel Alignment and Tire
Balance . . . . . . . . . . . . . . . . . . . . . 273
Wheel Replacement . . . . . . . . . . 273
Tire Chains . . . . . . . . . . . . . . . . . . . 274
If a Tire Goes Flat . . . . . . . . . . . . 274
Tire Changing . . . . . . . . . . . . . . . . 276
Compact Spare Tire . . . . . . . . . . 281
Jump Starting
Jump Starting - North America . . . . . . . . . . . . . . . . . . . . . 282
Towing the Vehicle
Towing the Vehicle . . . . . . . . . . . 285
Recreational VehicleTowing . . . . . . . . . . . . . . . . . . . . . . 286
Appearance Care
Exterior Care . . . . . . . . . . . . . . . . . 288
Interior Care . . . . . . . . . . . . . . . . . . 293
Floor Mats . . . . . . . . . . . . . . . . . . . . 296
General Information
For service and parts needs, visit
your dealer. You will receive
genuine GM parts and GM-trained
and supported service people.
Genuine GM parts have one of
these marks:
California Proposition
65 Warning
{Warning
Most motor vehicles, including
this one, as well as many of its
service parts and fluids, contain
and/or emit chemicals known to
the State of California to cause
cancer and birth defects or other
reproductive harm. Engine
exhaust, many parts and
systems, many fluids, and some
component wear by-products
contain and/or emit these
chemicals. For more information
go to www.P65Warnings.ca.gov/
passenger-vehicle.
See Battery - North America 0236
and
Jump Starting - North America
0 282 and the back cover.
Page 217 of 355
Chevrolet TRAX Owner Manual (GMNA-Localizing-U.S./Canada/Mexico-
13556235) - 2020 - CRC - 9/19/19
216 Vehicle Care
If equipped with remote vehicle
start, open the hood before
performing any service work to
prevent remote starting the vehicle
accidentally. SeeRemote Vehicle
Start 020.
Keep a record with all parts receipts
and list the mileage and the date of
any service work performed. See
Maintenance Records 0312.
Caution
Even small amounts of
contamination can cause damage
to vehicle systems. Do not allow
contaminants to contact the fluids,
reservoir caps, or dipsticks.
Hood
{Warning
Turn the vehicle off before
opening the hood. If the engine is
running with the hood open, you
or others could be injured.
{Warning
Components under the hood can
get hot from running the engine.
To help avoid the risk of burning
unprotected skin, never touch
these components until they have
cooled, and always use a glove or
towel to avoid direct skin contact.
Clear any snow from the hood
before opening.
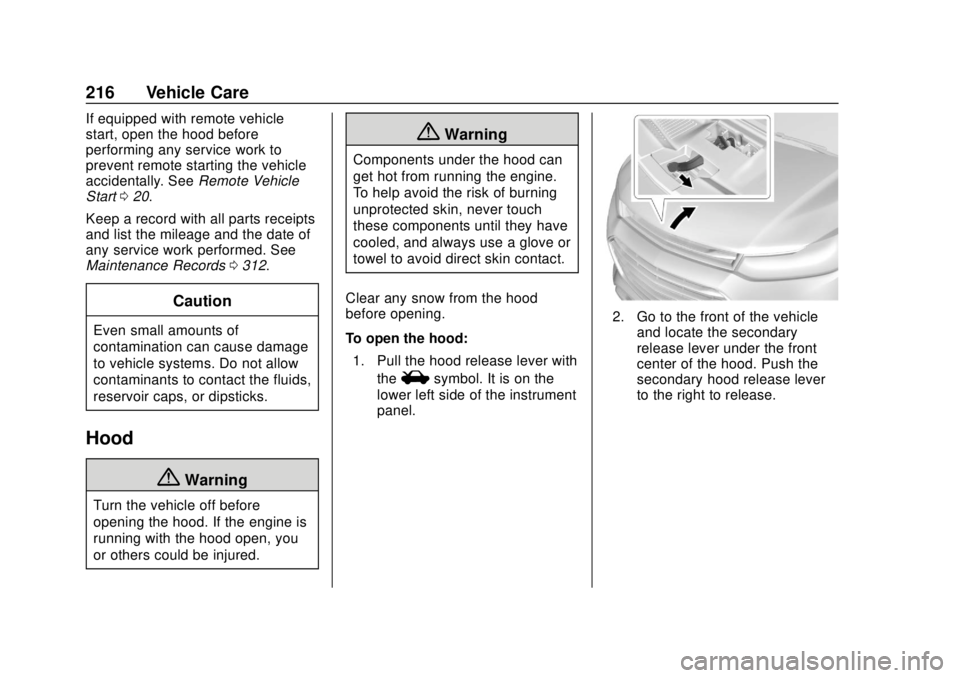
To open the hood: 1. Pull the hood release lever with the
isymbol. It is on the
lower left side of the instrument
panel.
2. Go to the front of the vehicle and locate the secondary
release lever under the front
center of the hood. Push the
secondary hood release lever
to the right to release.
Page 222 of 355
Chevrolet TRAX Owner Manual (GMNA-Localizing-U.S./Canada/Mexico-
13556235) - 2020 - CRC - 9/19/19
Vehicle Care 221
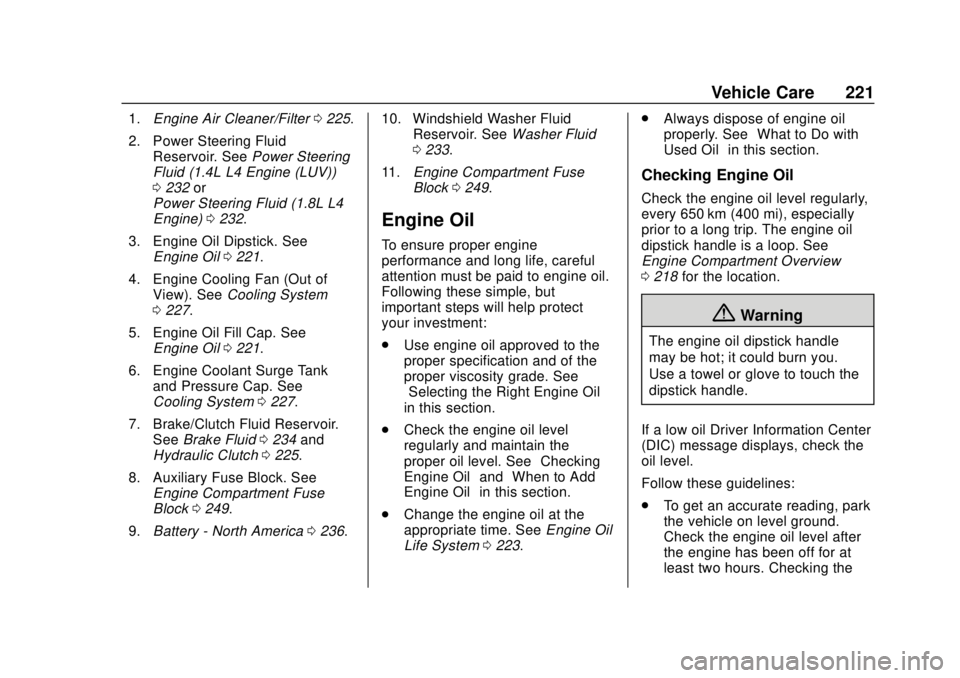
1.Engine Air Cleaner/Filter 0225.
2. Power Steering Fluid Reservoir. See Power Steering
Fluid (1.4L L4 Engine (LUV))
0 232 or
Power Steering Fluid (1.8L L4
Engine) 0232.
3. Engine Oil Dipstick. See Engine Oil 0221.
4. Engine Cooling Fan (Out of View). See Cooling System
0 227.
5. Engine Oil Fill Cap. See Engine Oil 0221.
6. Engine Coolant Surge Tank and Pressure Cap. See
Cooling System 0227.
7. Brake/Clutch Fluid Reservoir. See Brake Fluid 0234 and
Hydraulic Clutch 0225.
8. Auxiliary Fuse Block. See Engine Compartment Fuse
Block 0249.
9. Battery - North America 0236. 10. Windshield Washer Fluid
Reservoir. See Washer Fluid
0 233.
11. Engine Compartment Fuse
Block 0249.
Engine Oil
To ensure proper engine
performance and long life, careful
attention must be paid to engine oil.
Following these simple, but
important steps will help protect
your investment:
.
Use engine oil approved to the
proper specification and of the
proper viscosity grade. See
“Selecting the Right Engine Oil”
in this section.
. Check the engine oil level
regularly and maintain the
proper oil level. See “Checking
Engine Oil” and“When to Add
Engine Oil” in this section.
. Change the engine oil at the
appropriate time. See Engine Oil
Life System 0223. .
Always dispose of engine oil
properly. See “What to Do with
Used Oil” in this section.
Checking Engine Oil
Check the engine oil level regularly,
every 650 km (400 mi), especially
prior to a long trip. The engine oil
dipstick handle is a loop. See
Engine Compartment Overview
0218 for the location.
{Warning
The engine oil dipstick handle
may be hot; it could burn you.
Use a towel or glove to touch the
dipstick handle.
If a low oil Driver Information Center
(DIC) message displays, check the
oil level.
Follow these guidelines:
. To get an accurate reading, park
the vehicle on level ground.
Check the engine oil level after
the engine has been off for at
least two hours. Checking the
Page 223 of 355
Chevrolet TRAX Owner Manual (GMNA-Localizing-U.S./Canada/Mexico-
13556235) - 2020 - CRC - 9/19/19
222 Vehicle Care
engine oil level on steep grades
or too soon after engine shutoff
can result in incorrect readings.
Accuracy improves when
checking a cold engine prior to
starting. Remove the dipstick
and check the level.
. If unable to wait two hours, the
engine must be off for at least
15 minutes if the engine is
warm, or at least 30 minutes if
the engine is not warm. Pull out
the dipstick, wipe it with a clean
paper towel or cloth, then push it
back in all the way. Remove it
again, keeping the tip down, and
check the level.
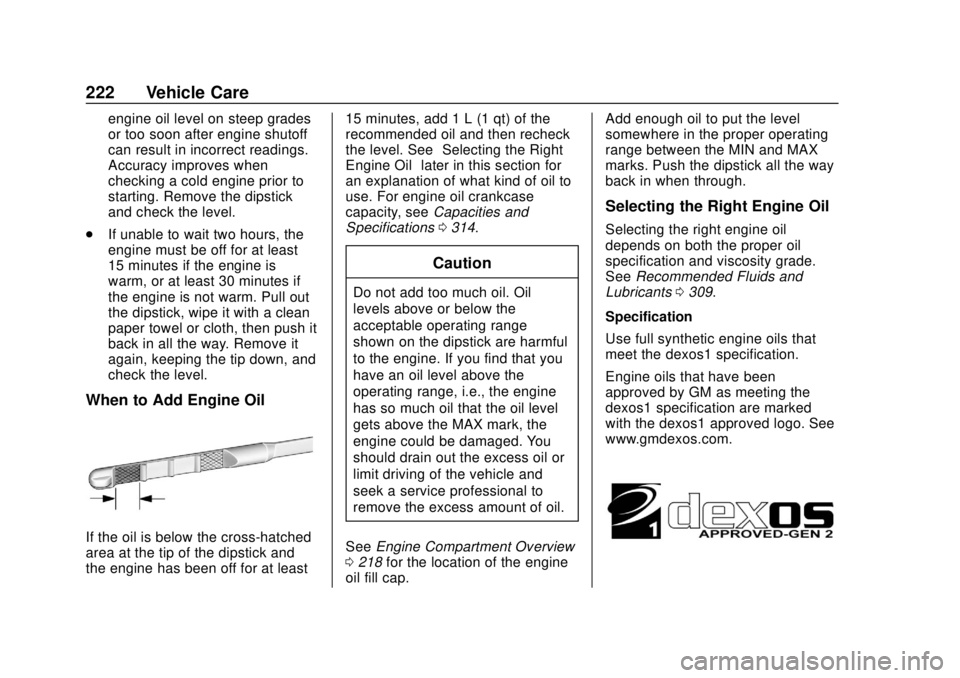
When to Add Engine Oil
If the oil is below the cross-hatched
area at the tip of the dipstick and
the engine has been off for at least 15 minutes, add 1 L (1 qt) of the
recommended oil and then recheck
the level. See
“Selecting the Right
Engine Oil” later in this section for
an explanation of what kind of oil to
use. For engine oil crankcase
capacity, see Capacities and
Specifications 0314.
Caution
Do not add too much oil. Oil
levels above or below the
acceptable operating range
shown on the dipstick are harmful
to the engine. If you find that you
have an oil level above the
operating range, i.e., the engine
has so much oil that the oil level
gets above the MAX mark, the
engine could be damaged. You
should drain out the excess oil or
limit driving of the vehicle and
seek a service professional to
remove the excess amount of oil.
See Engine Compartment Overview
0 218 for the location of the engine
oil fill cap. Add enough oil to put the level
somewhere in the proper operating
range between the MIN and MAX
marks. Push the dipstick all the way
back in when through.
Selecting the Right Engine Oil
Selecting the right engine oil
depends on both the proper oil
specification and viscosity grade.
See
Recommended Fluids and
Lubricants 0309.
Specification
Use full synthetic engine oils that
meet the dexos1 specification.
Engine oils that have been
approved by GM as meeting the
dexos1 specification are marked
with the dexos1 approved logo. See
www.gmdexos.com.