tow CHEVROLET TRAX 2020 Owner's Guide
[x] Cancel search | Manufacturer: CHEVROLET, Model Year: 2020, Model line: TRAX, Model: CHEVROLET TRAX 2020Pages: 355, PDF Size: 5.75 MB
Page 240 of 355
Chevrolet TRAX Owner Manual (GMNA-Localizing-U.S./Canada/Mexico-
13556235) - 2020 - CRC - 9/19/19
Vehicle Care 239
2. Press the release button on thetop side of the wiper and pull
the wiper blade out of the end
of the wiper arm.
3. Install the wiper blade connector by sliding into the
end of the wiper arm until the
button on the wiper blade clicks
into place with the wiper arm.
4. Place the wiper arm with the wiper blade in place back on
the windshield.
Caution
Damage may occur if the wiper
blades are not in contact with the
windshield before turning on the
wiper system.
Rear Wiper Blade Replacement
The rear wiper blade and wiper arm
have a cover for protection. The
cover must be removed before the
wiper blade can be replaced.
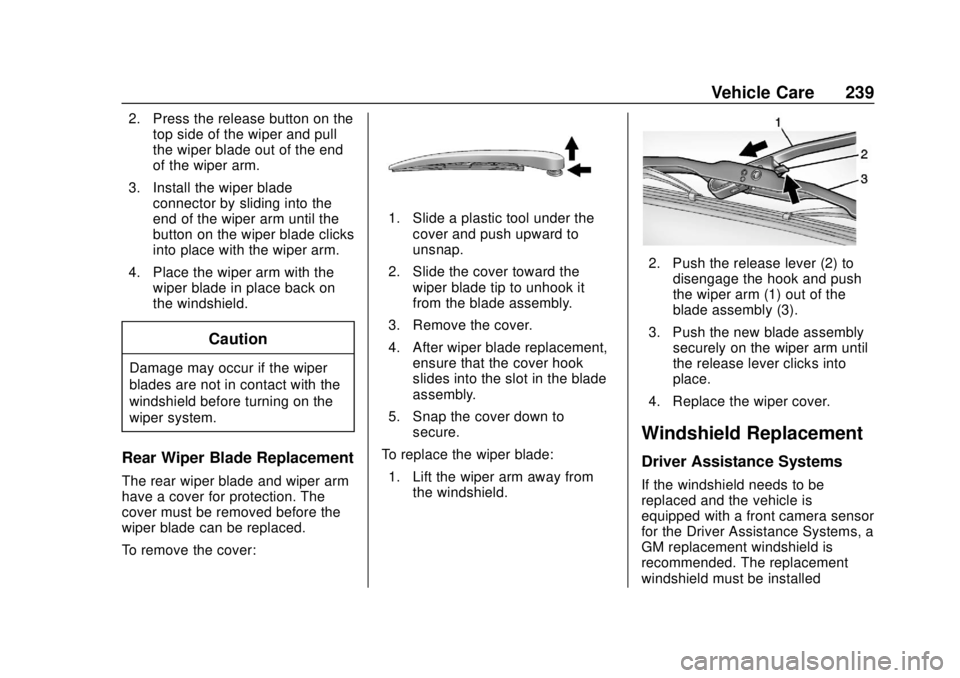
To remove the cover:
1. Slide a plastic tool under thecover and push upward to
unsnap.
2. Slide the cover toward the wiper blade tip to unhook it
from the blade assembly.
3. Remove the cover.
4. After wiper blade replacement, ensure that the cover hook
slides into the slot in the blade
assembly.
5. Snap the cover down to secure.
To replace the wiper blade: 1. Lift the wiper arm away from the windshield.
2. Push the release lever (2) todisengage the hook and push
the wiper arm (1) out of the
blade assembly (3).
3. Push the new blade assembly securely on the wiper arm until
the release lever clicks into
place.
4. Replace the wiper cover.
Windshield Replacement
Driver Assistance Systems
If the windshield needs to be
replaced and the vehicle is
equipped with a front camera sensor
for the Driver Assistance Systems, a
GM replacement windshield is
recommended. The replacement
windshield must be installed
Page 248 of 355
Chevrolet TRAX Owner Manual (GMNA-Localizing-U.S./Canada/Mexico-
13556235) - 2020 - CRC - 9/19/19
Vehicle Care 247
4. Remove the old bulb from thebulb socket by pulling it
straight out.
5. Insert a new bulb into the bulb socket.
6. Install the bulb socket into the taillamp asembly.
7. Install the taillamp assembly to the vehicle body with the two
screws.
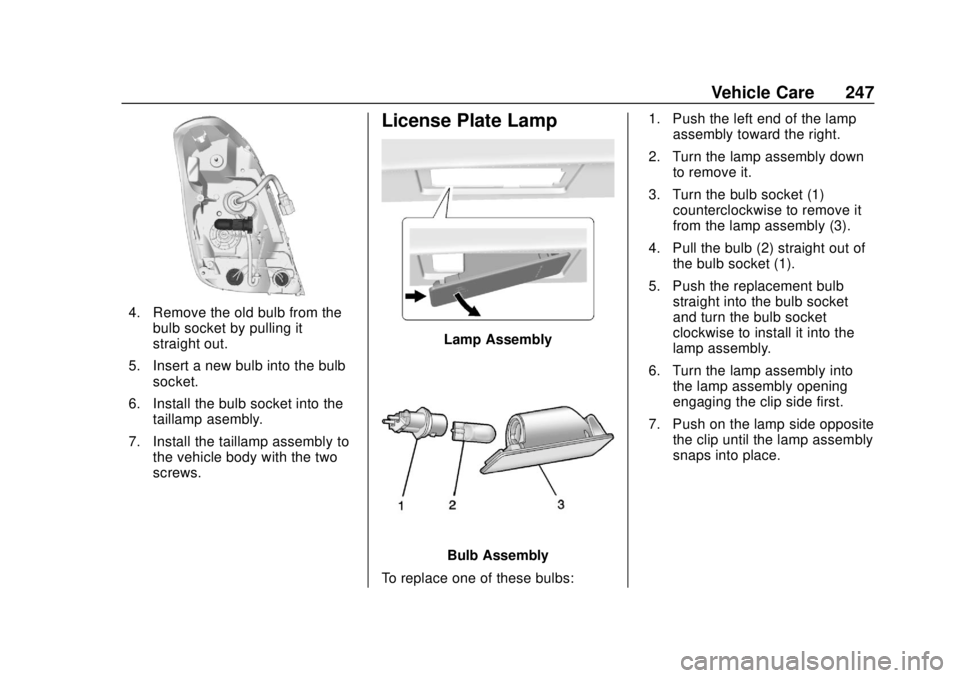
License Plate Lamp
Lamp Assembly
Bulb Assembly
To replace one of these bulbs: 1. Push the left end of the lamp
assembly toward the right.
2. Turn the lamp assembly down to remove it.
3. Turn the bulb socket (1) counterclockwise to remove it
from the lamp assembly (3).
4. Pull the bulb (2) straight out of the bulb socket (1).
5. Push the replacement bulb straight into the bulb socket
and turn the bulb socket
clockwise to install it into the
lamp assembly.
6. Turn the lamp assembly into the lamp assembly opening
engaging the clip side first.
7. Push on the lamp side opposite the clip until the lamp assembly
snaps into place.
Page 270 of 355
Chevrolet TRAX Owner Manual (GMNA-Localizing-U.S./Canada/Mexico-
13556235) - 2020 - CRC - 9/19/19
Vehicle Care 269
Warning (Continued)
the wheel attaches to the
vehicle. In an emergency, a
cloth or a paper towel can be
used; however, use a scraper
or wire brush later to remove
all rust or dirt.
Lightly coat the inner diameter of
the wheel hub opening with
wheel bearing grease after a
wheel change or tire rotation to
prevent corrosion or rust
buildup. Do not get grease on
the wheel mounting surface or
on the wheel nuts or bolts.
When It Is Time for New
Tires
Factors such as maintenance,
temperatures, driving speeds,
vehicle loading, and road conditions
affect the wear rate of the tires.
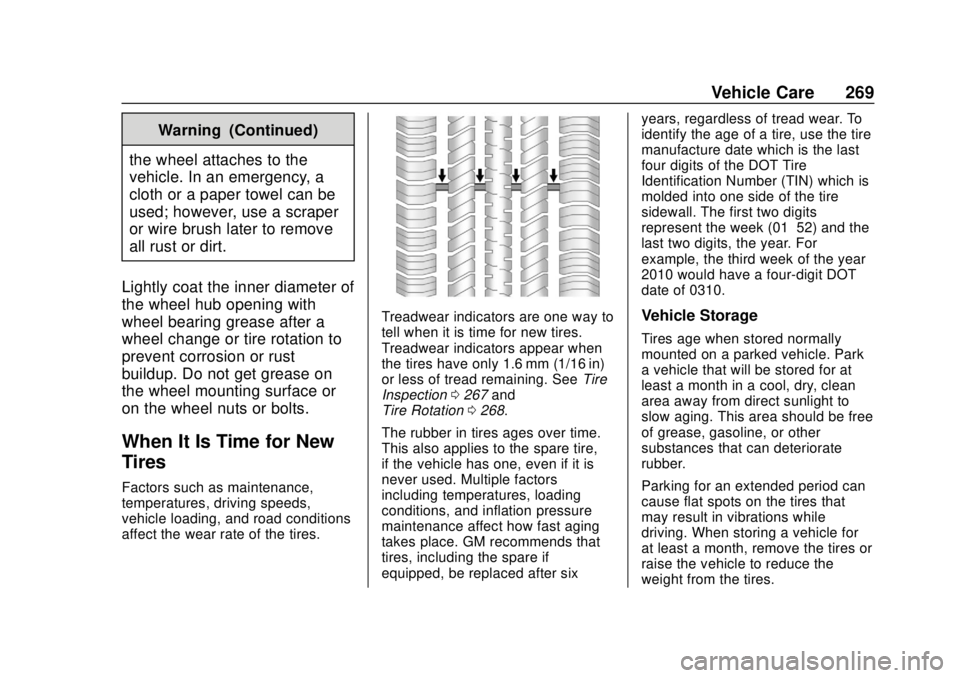
Treadwear indicators are one way to
tell when it is time for new tires.
Treadwear indicators appear when
the tires have only 1.6 mm (1/16 in)
or less of tread remaining. See Tire
Inspection 0267 and
Tire Rotation 0268.
The rubber in tires ages over time.
This also applies to the spare tire,
if the vehicle has one, even if it is
never used. Multiple factors
including temperatures, loading
conditions, and inflation pressure
maintenance affect how fast aging
takes place. GM recommends that
tires, including the spare if
equipped, be replaced after six years, regardless of tread wear. To
identify the age of a tire, use the tire
manufacture date which is the last
four digits of the DOT Tire
Identification Number (TIN) which is
molded into one side of the tire
sidewall. The first two digits
represent the week (01–52) and the
last two digits, the year. For
example, the third week of the year
2010 would have a four-digit DOT
date of 0310.Vehicle Storage
Tires age when stored normally
mounted on a parked vehicle. Park
a vehicle that will be stored for at
least a month in a cool, dry, clean
area away from direct sunlight to
slow aging. This area should be free
of grease, gasoline, or other
substances that can deteriorate
rubber.
Parking for an extended period can
cause flat spots on the tires that
may result in vibrations while
driving. When storing a vehicle for
at least a month, remove the tires or
raise the vehicle to reduce the
weight from the tires.
Page 275 of 355
Chevrolet TRAX Owner Manual (GMNA-Localizing-U.S./Canada/Mexico-
13556235) - 2020 - CRC - 9/19/19
274 Vehicle Care
Caution
The wrong wheel can also cause
problems with bearing life, brake
cooling, speedometer or
odometer calibration, headlamp
aim, bumper height, vehicle
ground clearance, and tire or tire
chain clearance to the body and
chassis.
Used Replacement Wheels
{Warning
Replacing a wheel with a used
one is dangerous. How it has
been used or how far it has been
driven may be unknown. It could
fail suddenly and cause a crash.
When replacing wheels, use a
new GM original equipment
wheel.
Tire Chains
{Warning
Do not use tire chains. There is
not enough clearance. Tire chains
used on a vehicle without the
proper amount of clearance can
cause damage to the brakes,
suspension, or other vehicle
parts. The area damaged by the
tire chains could cause loss of
control and a crash.
Use another type of traction
device only if its manufacturer
recommends it for the vehicle's
tire size combination and road
conditions. Follow that
manufacturer's instructions. To
avoid vehicle damage, drive slow
and readjust or remove the
traction device if it contacts the
vehicle. Do not spin the wheels.
If traction devices are used, install
them on the front tires.
If a Tire Goes Flat
It is unusual for a tire to blow out
while driving, especially if the tires
are maintained properly. SeeTires
0 255. If air goes out of a tire, it is
much more likely to leak out slowly.
But if there ever is a blowout, here
are a few tips about what to expect
and what to do:
If a front tire fails, the flat tire
creates a drag that pulls the vehicle
toward that side. Take your foot off
the accelerator pedal and grip the
steering wheel firmly. Steer to
maintain lane position, and then
gently brake to a stop, well off the
road, if possible.
A rear blowout, particularly on a
curve, acts much like a skid and
may require the same correction as
used in a skid. Stop pressing the
accelerator pedal and steer to
straighten the vehicle. It may be
very bumpy and noisy. Gently brake
to a stop, well off the road,
if possible.
Page 277 of 355
Chevrolet TRAX Owner Manual (GMNA-Localizing-U.S./Canada/Mexico-
13556235) - 2020 - CRC - 9/19/19
276 Vehicle Care
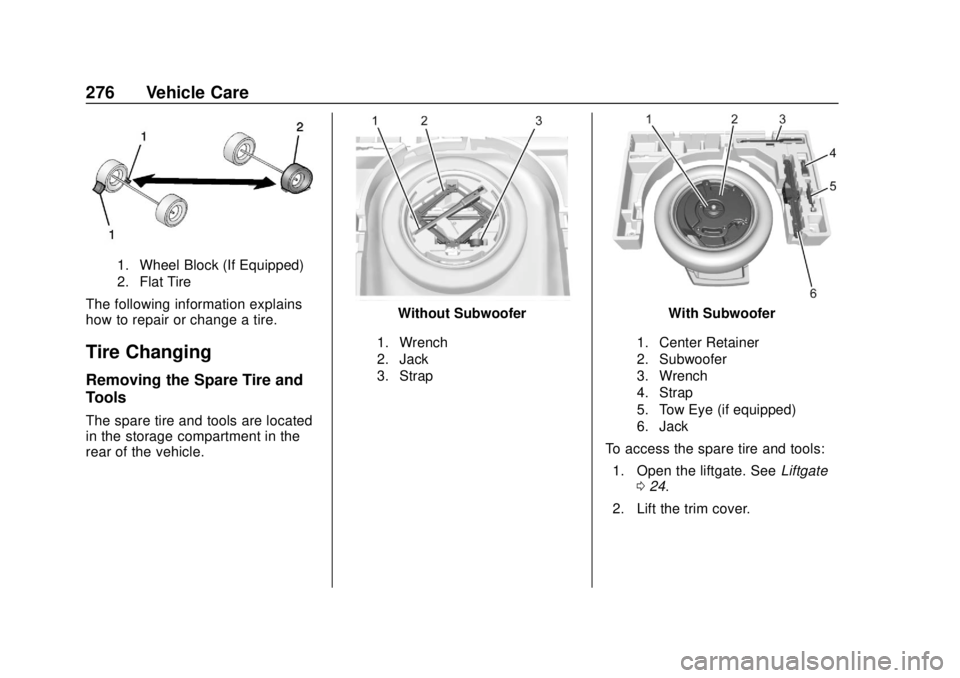
1. Wheel Block (If Equipped)
2. Flat Tire
The following information explains
how to repair or change a tire.
Tire Changing
Removing the Spare Tire and
Tools
The spare tire and tools are located
in the storage compartment in the
rear of the vehicle.
Without Subwoofer
1. Wrench
2. Jack
3. Strap
With Subwoofer
1. Center Retainer
2. Subwoofer
3. Wrench
4. Strap
5. Tow Eye (if equipped)
6. Jack
To access the spare tire and tools:1. Open the liftgate. See Liftgate
0 24.
2. Lift the trim cover.
Page 280 of 355
Chevrolet TRAX Owner Manual (GMNA-Localizing-U.S./Canada/Mexico-
13556235) - 2020 - CRC - 9/19/19
Vehicle Care 279
Warning (Continued)
nuts become loose after time.
The wheel could come off and
cause a crash. When
changing a wheel, remove any
rust or dirt from places where
the wheel attaches to the
vehicle. In an emergency, a
cloth or a paper towel can be
used; however, use a scraper
or wire brush later to remove
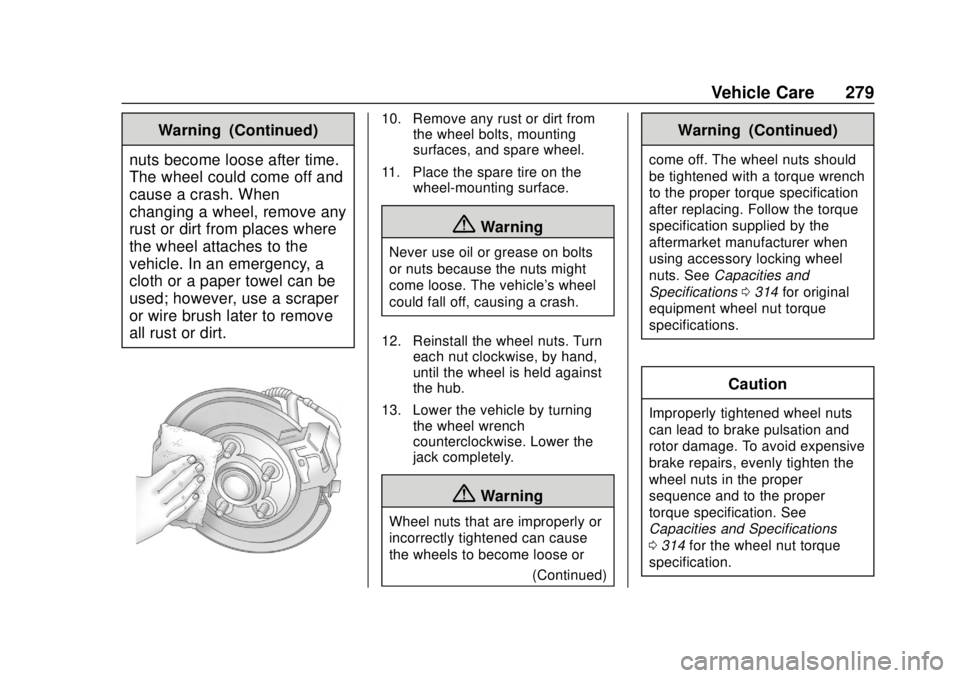
all rust or dirt.10. Remove any rust or dirt from the wheel bolts, mounting
surfaces, and spare wheel.
11. Place the spare tire on the wheel-mounting surface.
{Warning
Never use oil or grease on bolts
or nuts because the nuts might
come loose. The vehicle's wheel
could fall off, causing a crash.
12. Reinstall the wheel nuts. Turn each nut clockwise, by hand,
until the wheel is held against
the hub.
13. Lower the vehicle by turning the wheel wrench
counterclockwise. Lower the
jack completely.
{Warning
Wheel nuts that are improperly or
incorrectly tightened can cause
the wheels to become loose or
(Continued)
Warning (Continued)
come off. The wheel nuts should
be tightened with a torque wrench
to the proper torque specification
after replacing. Follow the torque
specification supplied by the
aftermarket manufacturer when
using accessory locking wheel
nuts. SeeCapacities and
Specifications 0314 for original
equipment wheel nut torque
specifications.
Caution
Improperly tightened wheel nuts
can lead to brake pulsation and
rotor damage. To avoid expensive
brake repairs, evenly tighten the
wheel nuts in the proper
sequence and to the proper
torque specification. See
Capacities and Specifications
0 314 for the wheel nut torque
specification.
Page 286 of 355
Chevrolet TRAX Owner Manual (GMNA-Localizing-U.S./Canada/Mexico-
13556235) - 2020 - CRC - 9/19/19
Vehicle Care 285
Towing the Vehicle
Caution
Incorrectly towing a disabled
vehicle may cause damage. The
damage would not be covered by
the vehicle warranty. Do not lash
or hook to suspension
components. Use the proper
straps around the tires to secure
the vehicle. Do not drag a locked
wheel/tire. Use tire skates or
dollies under any locked wheel/
tire while loading the vehicle. Do
not use a sling type lift to tow the
vehicle. This could damage the
vehicle.
GM recommends a flatbed tow truck
to transport a disabled vehicle. Use
ramps to help reduce approach
angles, if necessary. A towed
vehicle should have its drive wheels
off the ground. Contact Roadside
Assistance or a professional towing
service if the disabled vehicle must
be towed. If the vehicle is equipped with a tow
eye, only use the tow eye to pull the
vehicle onto a flatbed or car carrier
from a flat road surface. Do not use
the tow eye to pull the vehicle from
snow, mud, or sand.
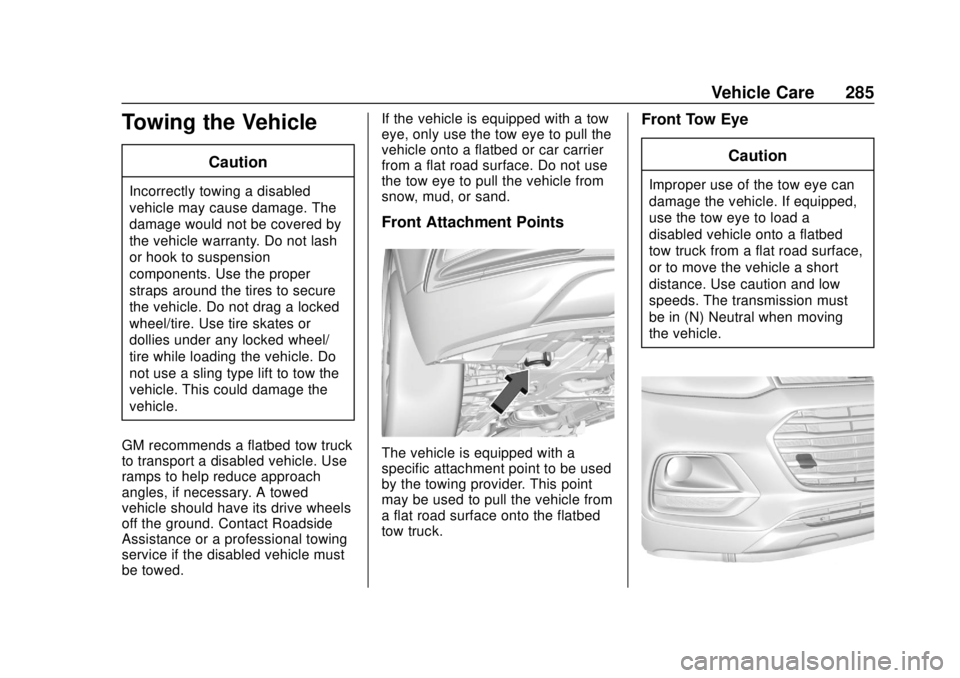
Front Attachment Points
The vehicle is equipped with a
specific attachment point to be used
by the towing provider. This point
may be used to pull the vehicle from
a flat road surface onto the flatbed
tow truck.
Front Tow Eye
Caution
Improper use of the tow eye can
damage the vehicle. If equipped,
use the tow eye to load a
disabled vehicle onto a flatbed
tow truck from a flat road surface,
or to move the vehicle a short
distance. Use caution and low
speeds. The transmission must
be in (N) Neutral when moving
the vehicle.
Page 287 of 355
Chevrolet TRAX Owner Manual (GMNA-Localizing-U.S./Canada/Mexico-
13556235) - 2020 - CRC - 9/19/19
286 Vehicle Care
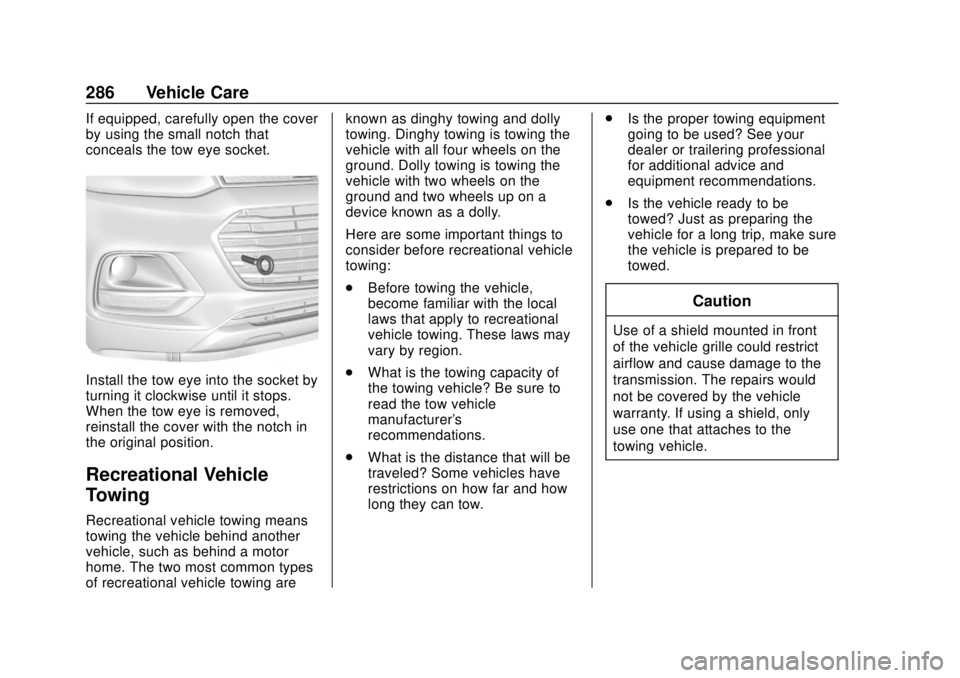
If equipped, carefully open the cover
by using the small notch that
conceals the tow eye socket.
Install the tow eye into the socket by
turning it clockwise until it stops.
When the tow eye is removed,
reinstall the cover with the notch in
the original position.
Recreational Vehicle
Towing
Recreational vehicle towing means
towing the vehicle behind another
vehicle, such as behind a motor
home. The two most common types
of recreational vehicle towing areknown as dinghy towing and dolly
towing. Dinghy towing is towing the
vehicle with all four wheels on the
ground. Dolly towing is towing the
vehicle with two wheels on the
ground and two wheels up on a
device known as a dolly.
Here are some important things to
consider before recreational vehicle
towing:
.
Before towing the vehicle,
become familiar with the local
laws that apply to recreational
vehicle towing. These laws may
vary by region.
. What is the towing capacity of
the towing vehicle? Be sure to
read the tow vehicle
manufacturer's
recommendations.
. What is the distance that will be
traveled? Some vehicles have
restrictions on how far and how
long they can tow. .
Is the proper towing equipment
going to be used? See your
dealer or trailering professional
for additional advice and
equipment recommendations.
. Is the vehicle ready to be
towed? Just as preparing the
vehicle for a long trip, make sure
the vehicle is prepared to be
towed.
Caution
Use of a shield mounted in front
of the vehicle grille could restrict
airflow and cause damage to the
transmission. The repairs would
not be covered by the vehicle
warranty. If using a shield, only
use one that attaches to the
towing vehicle.
Page 288 of 355
Chevrolet TRAX Owner Manual (GMNA-Localizing-U.S./Canada/Mexico-
13556235) - 2020 - CRC - 9/19/19
Vehicle Care 287
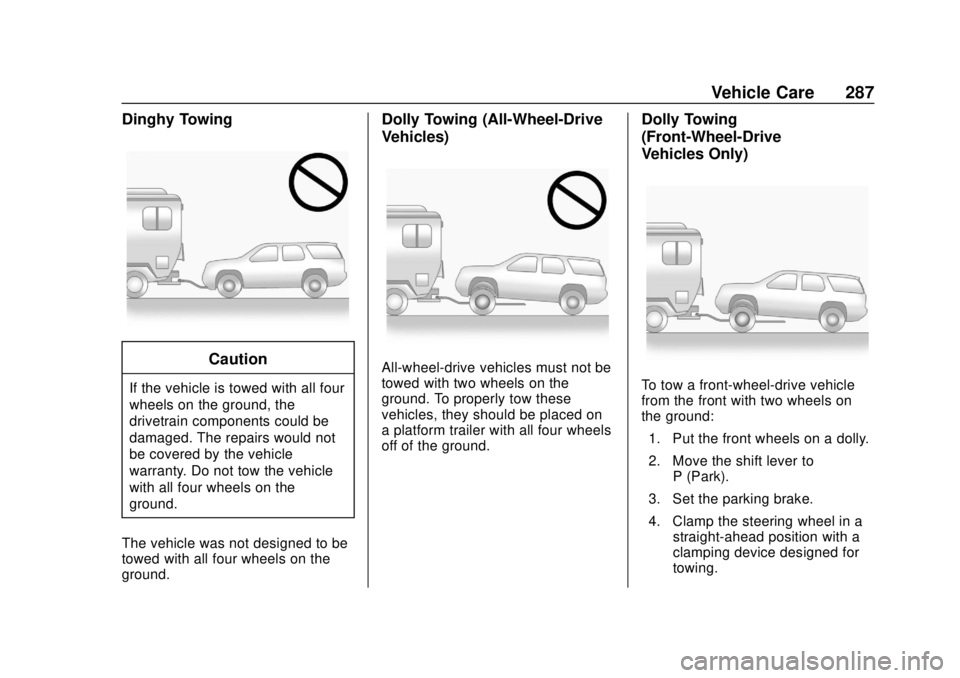
Dinghy Towing
Caution
If the vehicle is towed with all four
wheels on the ground, the
drivetrain components could be
damaged. The repairs would not
be covered by the vehicle
warranty. Do not tow the vehicle
with all four wheels on the
ground.
The vehicle was not designed to be
towed with all four wheels on the
ground.
Dolly Towing (All-Wheel-Drive
Vehicles)
All-wheel-drive vehicles must not be
towed with two wheels on the
ground. To properly tow these
vehicles, they should be placed on
a platform trailer with all four wheels
off of the ground.
Dolly Towing
(Front-Wheel-Drive
Vehicles Only)
To tow a front-wheel-drive vehicle
from the front with two wheels on
the ground: 1. Put the front wheels on a dolly.
2. Move the shift lever to P (Park).
3. Set the parking brake.
4. Clamp the steering wheel in a straight-ahead position with a
clamping device designed for
towing.
Page 289 of 355
Chevrolet TRAX Owner Manual (GMNA-Localizing-U.S./Canada/Mexico-
13556235) - 2020 - CRC - 9/19/19
288 Vehicle Care
5. Turn the vehicle off.
6. Secure the vehicle to the dolly.
7. Release the parking brake.
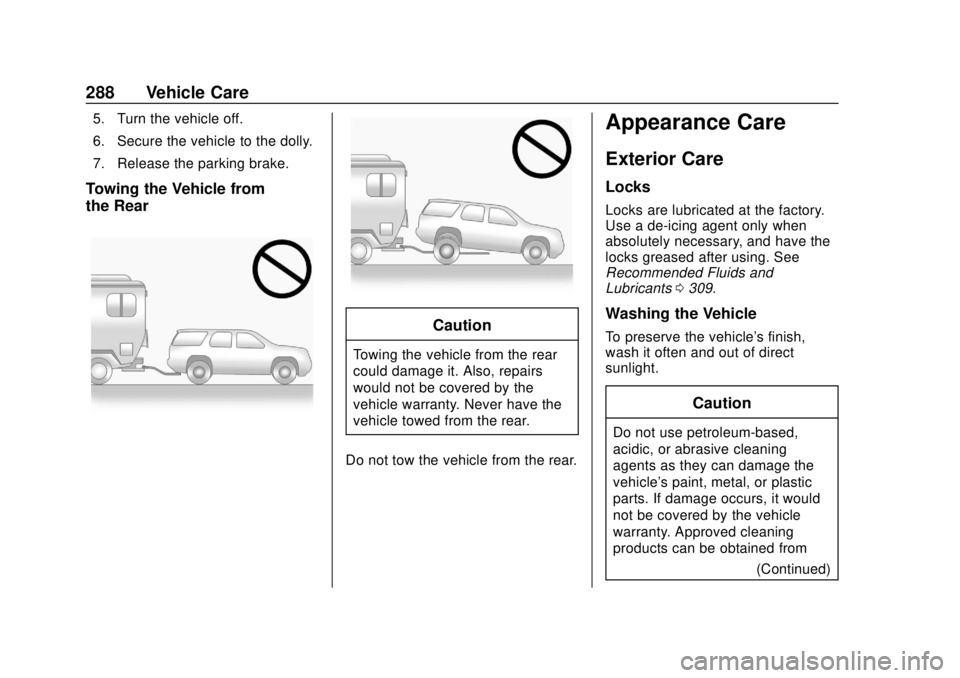
Towing the Vehicle from
the Rear
Caution
Towing the vehicle from the rear
could damage it. Also, repairs
would not be covered by the
vehicle warranty. Never have the
vehicle towed from the rear.
Do not tow the vehicle from the rear.
Appearance Care
Exterior Care
Locks
Locks are lubricated at the factory.
Use a de-icing agent only when
absolutely necessary, and have the
locks greased after using. See
Recommended Fluids and
Lubricants 0309.
Washing the Vehicle
To preserve the vehicle's finish,
wash it often and out of direct
sunlight.
Caution
Do not use petroleum-based,
acidic, or abrasive cleaning
agents as they can damage the
vehicle's paint, metal, or plastic
parts. If damage occurs, it would
not be covered by the vehicle
warranty. Approved cleaning
products can be obtained from
(Continued)