ECU CHEVROLET TRAX 2021 Owner's Manual
[x] Cancel search | Manufacturer: CHEVROLET, Model Year: 2021, Model line: TRAX, Model: CHEVROLET TRAX 2021Pages: 280, PDF Size: 8.76 MB
Page 7 of 280
Chevrolet TRAX Owner Manual (GMNA-Localizing-U.S./Canada-14609828) -
2021 - CRC - 8/21/20
6 Keys, Doors, and Windows
Keys, Doors, and
Windows
Keys and Locks
Keys (Key Access) . . . . . . . . . . . . . . . . . . . . . . . 6
Keys (Keyless Access) . . . . . . . . . . . . . . . . . . . . 8
Remote Keyless Entry (RKE) System . . . . . 9
Remote Keyless Entry (RKE) SystemOperation (Key Access) . . . . . . . . . . . . . . . . 9
Remote Keyless Entry (RKE) System Operation (Keyless Access) . . . . . . . . . . . . 12
Remote Vehicle Start . . . . . . . . . . . . . . . . . . . 17
Door Locks . . . . . . . . . . . . . . . . . . . . . . . . . . . . . . 19
Power Door Locks . . . . . . . . . . . . . . . . . . . . . . . 19
Delayed Locking . . . . . . . . . . . . . . . . . . . . . . . . 20
Automatic Door Locks . . . . . . . . . . . . . . . . . . 20
Lockout Protection . . . . . . . . . . . . . . . . . . . . . 20
Safety Locks . . . . . . . . . . . . . . . . . . . . . . . . . . . . 20
Doors
Liftgate . . . . . . . . . . . . . . . . . . . . . . . . . . . . . . . . . 21
Vehicle Security
Vehicle Security . . . . . . . . . . . . . . . . . . . . . . . . 22
Vehicle Alarm System . . . . . . . . . . . . . . . . . . 22
Steering Column Lock . . . . . . . . . . . . . . . . . . . 23
Immobilizer . . . . . . . . . . . . . . . . . . . . . . . . . . . . . 23
Immobilizer Operation (Key Access) . . . . 24 Immobilizer Operation (Keyless
Access) . . . . . . . . . . . . . . . . . . . . . . . . . . . . . . . 24
Exterior Mirrors
Convex Mirrors . . . . . . . . . . . . . . . . . . . . . . . . . 25
Power Mirrors . . . . . . . . . . . . . . . . . . . . . . . . . . 25
Folding Mirrors . . . . . . . . . . . . . . . . . . . . . . . . . 25
Heated Mirrors . . . . . . . . . . . . . . . . . . . . . . . . . 25
Interior Mirrors
Interior Rearview Mirrors . . . . . . . . . . . . . . . 25
Manual Rearview Mirror . . . . . . . . . . . . . . . . 26
Automatic Dimming Rearview Mirror . . . 26
Windows
Windows . . . . . . . . . . . . . . . . . . . . . . . . . . . . . . . 26
Power Windows . . . . . . . . . . . . . . . . . . . . . . . . 26
Sun Visors . . . . . . . . . . . . . . . . . . . . . . . . . . . . . . 28
Keys and Locks
Keys (Key Access)
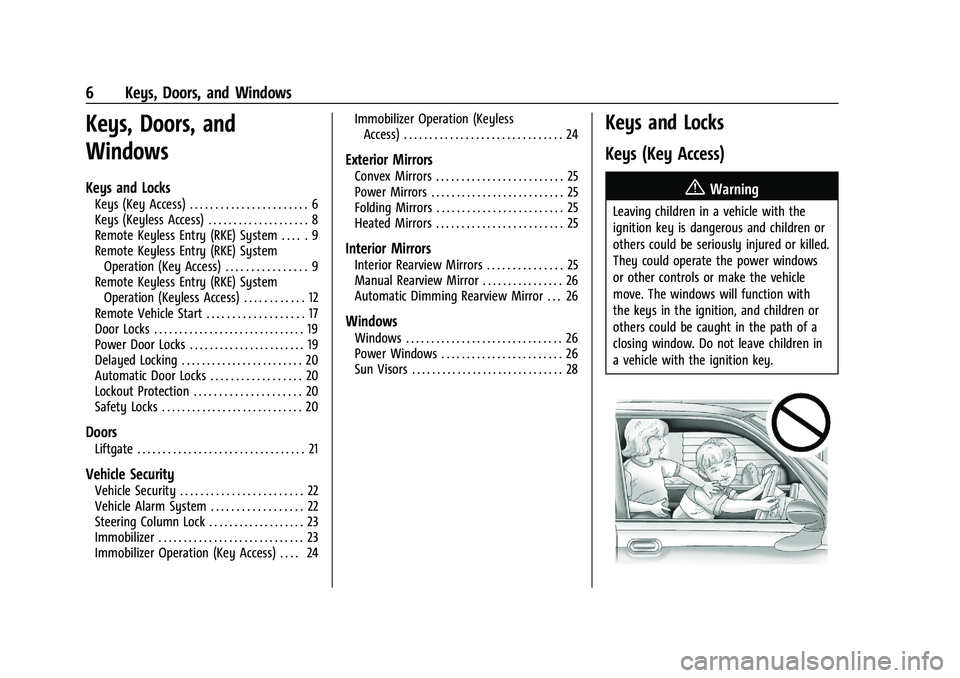
{Warning
Leaving children in a vehicle with the
ignition key is dangerous and children or
others could be seriously injured or killed.
They could operate the power windows
or other controls or make the vehicle
move. The windows will function with
the keys in the ignition, and children or
others could be caught in the path of a
closing window. Do not leave children in
a vehicle with the ignition key.
Page 11 of 280
Chevrolet TRAX Owner Manual (GMNA-Localizing-U.S./Canada-14609828) -
2021 - CRC - 8/21/20
10 Keys, Doors, and Windows
Press and hold7for at least three seconds
to sound the panic alarm. The horn sounds
and the turn signals flash for 30 seconds,
or until
7is pressed again or the key is
placed in the ignition and turned on or to
ACC/ACCESSORY.
/: If equipped, pressQand then press
and hold
/to start the engine from
outside the vehicle using the RKE
transmitter. See Remote Vehicle Start 017.
The RKE transmitter buttons will not operate
when the key is in the ignition.
Programming Keys to the Vehicle
Only RKE keys programmed to this vehicle
will work. If a key is lost or stolen, a
replacement can be purchased and
programmed through your dealer. When the
replacement key is programmed to this
vehicle, all remaining keys must also be
reprogrammed. Any lost or stolen keys will
no longer work once the new key is
programmed. Programming with Recognized Keys
To program a new key:
1. Insert the original, already programmed key in the ignition and turn the
ignition on.
2. Turn the ignition off and remove the key.
3. Quickly, within five seconds, insert the second original already programmed key
in the ignition and turn the ignition on.
4. Turn the ignition off, and remove the key.
5. Insert the new key to be programmed and turn the ignition on within
five seconds.
The security light will turn off once the
key has been programmed.
6. Repeat Steps 1–5 if additional keys are to be programmed.
If a key is lost or damaged, see your dealer
to have a new key made.
Programming without Recognized Keys
Program a new key to the vehicle when a
recognized key is not available. Canadian
regulations require that owners see their
dealer. If two currently recognized keys are not
available, follow this procedure to program
the first key.
This procedure will take approximately
30 minutes to complete for the first key.
The vehicle must be off and all of the keys
you wish to program must be with you.
1. Insert the new vehicle key into the ignition.
2. Turn the ignition on. The security light will come on.
3. Wait 10 minutes until the security light turns off.
4. Turn the ignition off.
5. Repeat Steps 2–4 two more times. After the third time, turn the ignition on; the
key is learned and all previously known
keys will no longer work with the
vehicle.
6. To learn the second key, turn the ignition off, insert the second key to be
learned, and turn the ignition on.
After two keys are learned, the remaining
keys can be learned by following the
procedure in “Programming with Two
Recognized Keys.”
Page 16 of 280
Chevrolet TRAX Owner Manual (GMNA-Localizing-U.S./Canada-14609828) -
2021 - CRC - 8/21/20
Keys, Doors, and Windows 15
procedure will take approximately
30 minutes to complete. The vehicle must
be off and all of the transmitters to be
programmed must be with you.1. Remove the key from the RKE transmitter.
2. Insert the vehicle key of the transmitter into the key lock cylinder on the outside
of the driver door and turn the key to
the unlock position five times within
10 seconds.
The DIC displays REMOTE LEARN
PENDING, PLEASE WAIT.
3. Wait for 10 minutes until the DIC displays PRESS ENGINE START BUTTON TO
LEARN and then press ENGINE
START/STOP.
The DIC displays will again show REMOTE
LEARN PENDING, PLEASE WAIT.
4. Repeat Step 2 two additional times. After the third time, all previously known
transmitters will no longer work with the
vehicle. Remaining transmitters can be
relearned during the next steps.
The DIC display should now show READY
FOR REMOTE # 1.
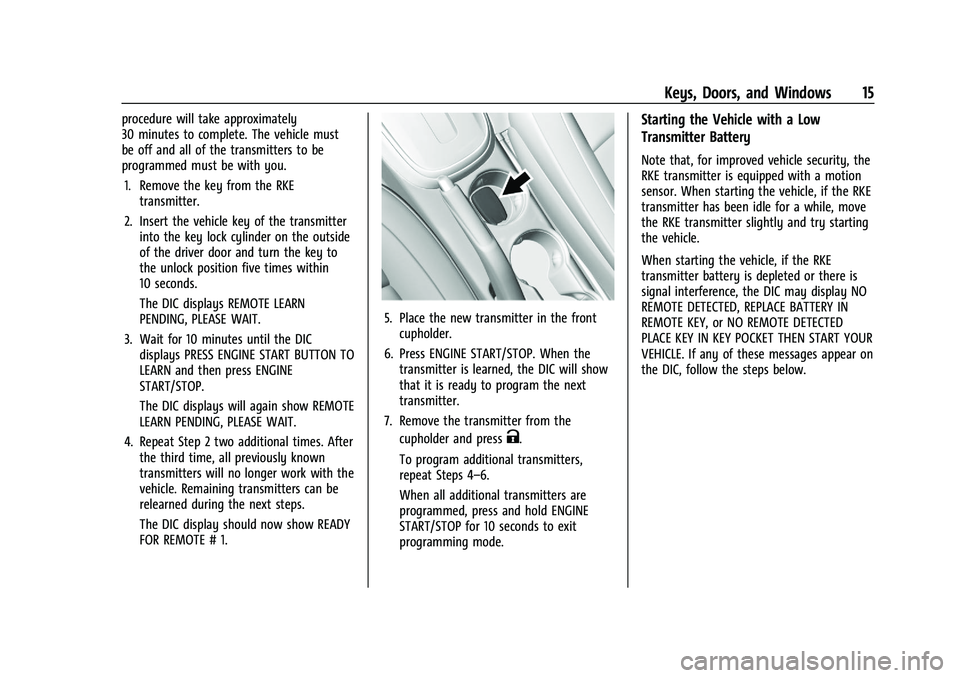
5. Place the new transmitter in the frontcupholder.
6. Press ENGINE START/STOP. When the transmitter is learned, the DIC will show
that it is ready to program the next
transmitter.
7. Remove the transmitter from the cupholder and press
K.
To program additional transmitters,
repeat Steps 4–6.
When all additional transmitters are
programmed, press and hold ENGINE
START/STOP for 10 seconds to exit
programming mode.
Starting the Vehicle with a Low
Transmitter Battery
Note that, for improved vehicle security, the
RKE transmitter is equipped with a motion
sensor. When starting the vehicle, if the RKE
transmitter has been idle for a while, move
the RKE transmitter slightly and try starting
the vehicle.
When starting the vehicle, if the RKE
transmitter battery is depleted or there is
signal interference, the DIC may display NO
REMOTE DETECTED, REPLACE BATTERY IN
REMOTE KEY, or NO REMOTE DETECTED
PLACE KEY IN KEY POCKET THEN START YOUR
VEHICLE. If any of these messages appear on
the DIC, follow the steps below.
Page 23 of 280
Chevrolet TRAX Owner Manual (GMNA-Localizing-U.S./Canada-14609828) -
2021 - CRC - 8/21/20
22 Keys, Doors, and Windows
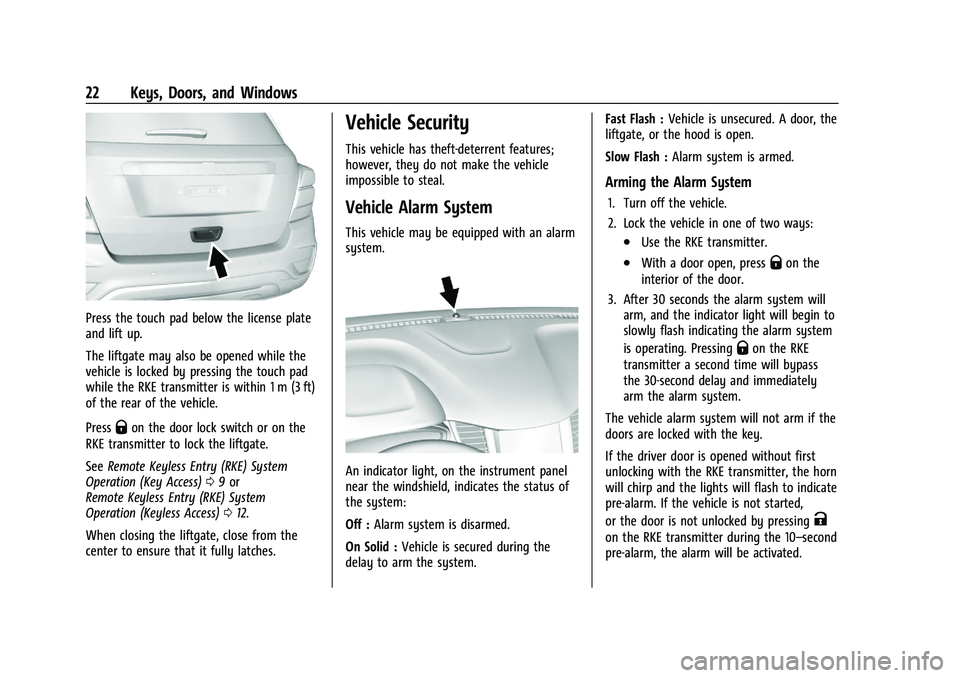
Press the touch pad below the license plate
and lift up.
The liftgate may also be opened while the
vehicle is locked by pressing the touch pad
while the RKE transmitter is within 1 m (3 ft)
of the rear of the vehicle.
Press
Qon the door lock switch or on the
RKE transmitter to lock the liftgate.
See Remote Keyless Entry (RKE) System
Operation (Key Access) 09or
Remote Keyless Entry (RKE) System
Operation (Keyless Access) 012.
When closing the liftgate, close from the
center to ensure that it fully latches.
Vehicle Security
This vehicle has theft-deterrent features;
however, they do not make the vehicle
impossible to steal.
Vehicle Alarm System
This vehicle may be equipped with an alarm
system.
An indicator light, on the instrument panel
near the windshield, indicates the status of
the system:
Off : Alarm system is disarmed.
On Solid : Vehicle is secured during the
delay to arm the system. Fast Flash :
Vehicle is unsecured. A door, the
liftgate, or the hood is open.
Slow Flash : Alarm system is armed.
Arming the Alarm System
1. Turn off the vehicle.
2. Lock the vehicle in one of two ways:
.Use the RKE transmitter.
.With a door open, pressQon the
interior of the door.
3. After 30 seconds the alarm system will arm, and the indicator light will begin to
slowly flash indicating the alarm system
is operating. Pressing
Qon the RKE
transmitter a second time will bypass
the 30-second delay and immediately
arm the alarm system.
The vehicle alarm system will not arm if the
doors are locked with the key.
If the driver door is opened without first
unlocking with the RKE transmitter, the horn
will chirp and the lights will flash to indicate
pre-alarm. If the vehicle is not started,
or the door is not unlocked by pressing
K
on the RKE transmitter during the 10–second
pre-alarm, the alarm will be activated.
Page 25 of 280
Chevrolet TRAX Owner Manual (GMNA-Localizing-U.S./Canada-14609828) -
2021 - CRC - 8/21/20
24 Keys, Doors, and Windows
Immobilizer Operation (Key
Access)
This vehicle has a passive theft-deterrent
system.
The system does not have to be manually
armed or disarmed.
The vehicle is automatically immobilized
when the key is removed from the ignition.
The system is automatically disarmed when
the vehicle is started with the correct key.
The key uses a transponder that matches an
immobilizer control unit in the vehicle and
automatically disarms the system. Only an
authorized key starts the vehicle. The vehicle
may not start if the key is damaged.
The security light in the instrument cluster
comes on if there is a problem with arming
or disarming the theft-deterrent system.
When trying to start the vehicle, the
security light comes on briefly when the
ignition is turned on.If the engine does not start and the security
light stays on, there is a problem with the
system. Turn the ignition off and try again.
If the engine still does not start, and the
key appears to be undamaged or the light
continues to stay on, try another ignition
key. If the engine does not start with the
other key, the vehicle needs service. If the
vehicle does start, the first key may be
damaged. See your dealer who can service
the theft-deterrent system and have a new
key made.
Do not leave the transmitter or device that
disarms or deactivates the theft-deterrent
system in the vehicle.
Immobilizer Operation (Keyless
Access)
This vehicle has a passive theft-deterrent
system.
The system does not have to be manually
armed or disarmed.
The vehicle is automatically immobilized
when the transmitter leaves the vehicle.
The immobilization system is disarmed
when ENGINE START/STOP is pressed and a
valid transmitter is found in the vehicle.
The security light in the instrument cluster
comes on when there is a problem with
arming or disarming the theft-deterrent
system.
The system has one or more transmitters
matched to an immobilizer control unit in
your vehicle. Only a correctly matched
transmitter will start the vehicle. If the
transmitter is ever damaged, you may not
be able to start your vehicle.
When trying to start the vehicle, the
security light comes on briefly when the
ignition is turned on.
If the engine does not start and the security
light stays on, there is a problem with the
system. Turn the vehicle off and try again.
If the RKE transmitter appears to be
undamaged, try another transmitter. Or, you
may try placing the transmitter in the front
cupholder. See
“Starting the Vehicle with a
Page 30 of 280
Chevrolet TRAX Owner Manual (GMNA-Localizing-U.S./Canada-14609828) -
2021 - CRC - 8/21/20
Seats and Restraints 29
Seats and Restraints
Head Restraints
Head Restraints . . . . . . . . . . . . . . . . . . . . . . . . 29
Front Seats
Seat Adjustment . . . . . . . . . . . . . . . . . . . . . . . 30
Power Seat Adjustment . . . . . . . . . . . . . . . . . 31
Lumbar Adjustment . . . . . . . . . . . . . . . . . . . . . 32
Reclining Seatbacks . . . . . . . . . . . . . . . . . . . . . 32
Front Seat Armrest . . . . . . . . . . . . . . . . . . . . . 33
Heated Front Seats . . . . . . . . . . . . . . . . . . . . . 33
Folding Seatback . . . . . . . . . . . . . . . . . . . . . . . 34
Rear Seats
Rear Seats . . . . . . . . . . . . . . . . . . . . . . . . . . . . . . 35
Rear Seat Armrest . . . . . . . . . . . . . . . . . . . . . . 38
Seat Belts
Seat Belts . . . . . . . . . . . . . . . . . . . . . . . . . . . . . . 38
How to Wear Seat Belts Properly . . . . . . 39
Lap-Shoulder Belt . . . . . . . . . . . . . . . . . . . . . . . 41
Seat Belt Use During Pregnancy . . . . . . . . 43
Seat Belt Extender . . . . . . . . . . . . . . . . . . . . . . 43
Safety System Check . . . . . . . . . . . . . . . . . . . 44
Seat Belt Care . . . . . . . . . . . . . . . . . . . . . . . . . . 44
Replacing Seat Belt System Parts after aCrash . . . . . . . . . . . . . . . . . . . . . . . . . . . . . . . . . 44
Airbag System
Airbag System . . . . . . . . . . . . . . . . . . . . . . . . . . 45
Where Are the Airbags? . . . . . . . . . . . . . . . . 46
When Should an Airbag Inflate? . . . . . . . . 47
What Makes an Airbag Inflate? . . . . . . . . 48
How Does an Airbag Restrain? . . . . . . . . . 48
What Will You See after an AirbagInflates? . . . . . . . . . . . . . . . . . . . . . . . . . . . . . . 49
Passenger Sensing System . . . . . . . . . . . . . 50
Servicing the Airbag-Equipped Vehicle . . . . . . . . . . . . . . . . . . . . . . . . . . . . . . . . 53
Adding Equipment to the Airbag-Equipped Vehicle . . . . . . . . . . . . . . 53
Airbag System Check . . . . . . . . . . . . . . . . . . . 54
Replacing Airbag System Parts after a Crash . . . . . . . . . . . . . . . . . . . . . . . . . . . . . . . . . 54
Child Restraints
Older Children . . . . . . . . . . . . . . . . . . . . . . . . . . 55
Infants and Young Children . . . . . . . . . . . . . 56
Child Restraint Systems . . . . . . . . . . . . . . . . 58
Where to Put the Restraint . . . . . . . . . . . . 60
Lower Anchors and Tethers for Children(LATCH System) . . . . . . . . . . . . . . . . . . . . . . . 61
Replacing LATCH System Parts After a Crash . . . . . . . . . . . . . . . . . . . . . . . . . . . . . . . . . 67
Securing Child Restraints (With the Seat Belt in the Rear Seat) . . . . . . . . . . . . . . . . 68
Securing Child Restraints (With the Seat Belt in the Front Seat) . . . . . . . . . . . . . . . . 70
Head Restraints
{
Warning
With head restraints that are not
installed and adjusted properly, there is a
greater chance that occupants will suffer
a neck/spinal injury in a crash. Do not
drive until the head restraints for all
occupants are installed and adjusted
properly.
Front Seats
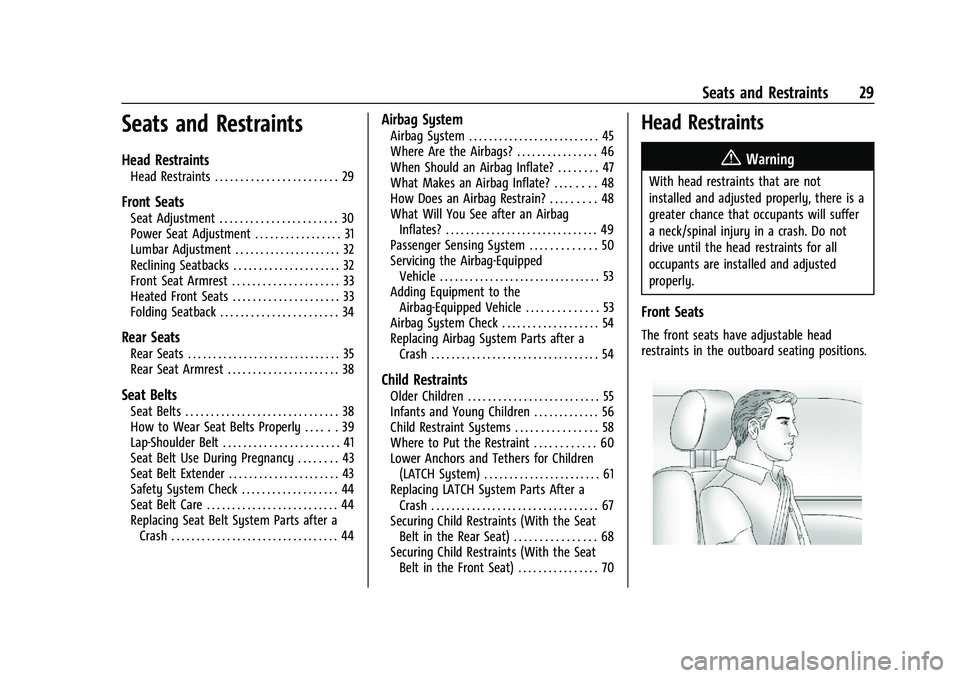
The front seats have adjustable head
restraints in the outboard seating positions.
Page 31 of 280
Chevrolet TRAX Owner Manual (GMNA-Localizing-U.S./Canada-14609828) -
2021 - CRC - 8/21/20
30 Seats and Restraints
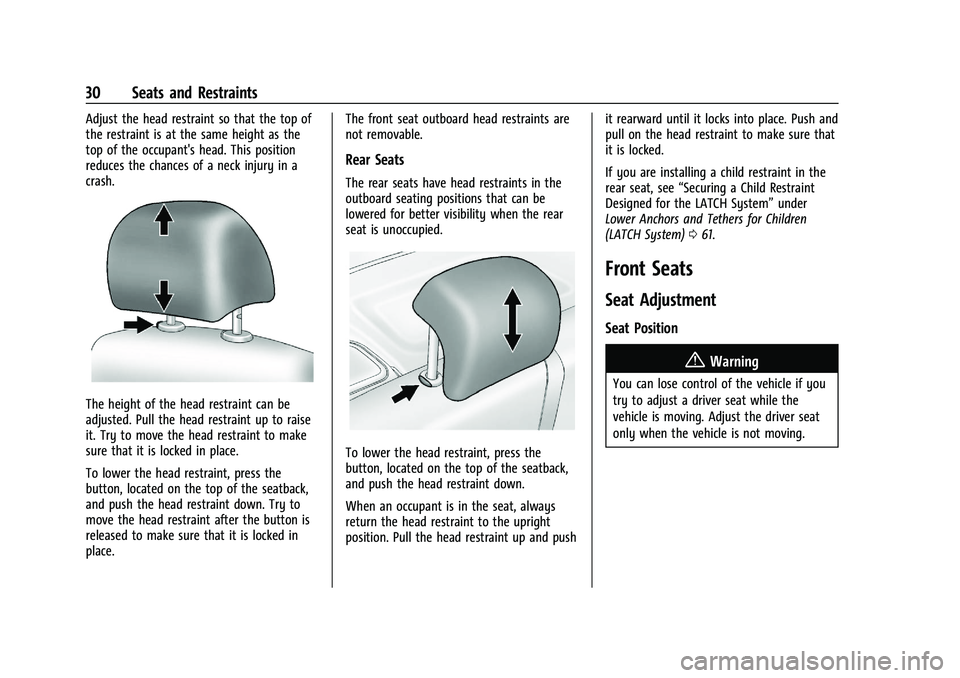
Adjust the head restraint so that the top of
the restraint is at the same height as the
top of the occupant's head. This position
reduces the chances of a neck injury in a
crash.
The height of the head restraint can be
adjusted. Pull the head restraint up to raise
it. Try to move the head restraint to make
sure that it is locked in place.
To lower the head restraint, press the
button, located on the top of the seatback,
and push the head restraint down. Try to
move the head restraint after the button is
released to make sure that it is locked in
place.The front seat outboard head restraints are
not removable.
Rear Seats
The rear seats have head restraints in the
outboard seating positions that can be
lowered for better visibility when the rear
seat is unoccupied.
To lower the head restraint, press the
button, located on the top of the seatback,
and push the head restraint down.
When an occupant is in the seat, always
return the head restraint to the upright
position. Pull the head restraint up and push
it rearward until it locks into place. Push and
pull on the head restraint to make sure that
it is locked.
If you are installing a child restraint in the
rear seat, see
“Securing a Child Restraint
Designed for the LATCH System” under
Lower Anchors and Tethers for Children
(LATCH System) 061.
Front Seats
Seat Adjustment
Seat Position
{Warning
You can lose control of the vehicle if you
try to adjust a driver seat while the
vehicle is moving. Adjust the driver seat
only when the vehicle is not moving.
Page 35 of 280
Chevrolet TRAX Owner Manual (GMNA-Localizing-U.S./Canada-14609828) -
2021 - CRC - 8/21/20
34 Seats and Restraints
will be canceled when the ignition is turned
on. Press the control to use the heated seats
after the vehicle is started.
The heated seat indicator lights do not turn
on during a remote start.
The temperature performance of an
unoccupied seat may be reduced. This is
normal.
The heated seats will not turn on during a
remote start unless the heated seat feature
is enabled in the vehicle personalization
menu. SeeRemote Vehicle Start 017 and
Vehicle Personalization 093.
Folding Seatback
The front passenger seatback may fold flat.
{Warning
If you fold the seatback forward to carry
longer objects, such as skis, be sure any
such cargo is not near an airbag. In a
crash, an inflating airbag might force that
object toward a person. This could cause
severe injury or even death. Secure
objects away from the area in which an
airbag would inflate. For more
(Continued)
Warning (Continued)
information, seeWhere Are the Airbags?
0 46 and
Vehicle Load Limits 0134.
{Warning
Things you put on this seatback can
strike and injure people in a sudden stop
or turn, or in a crash. Remove or secure
all items before driving.
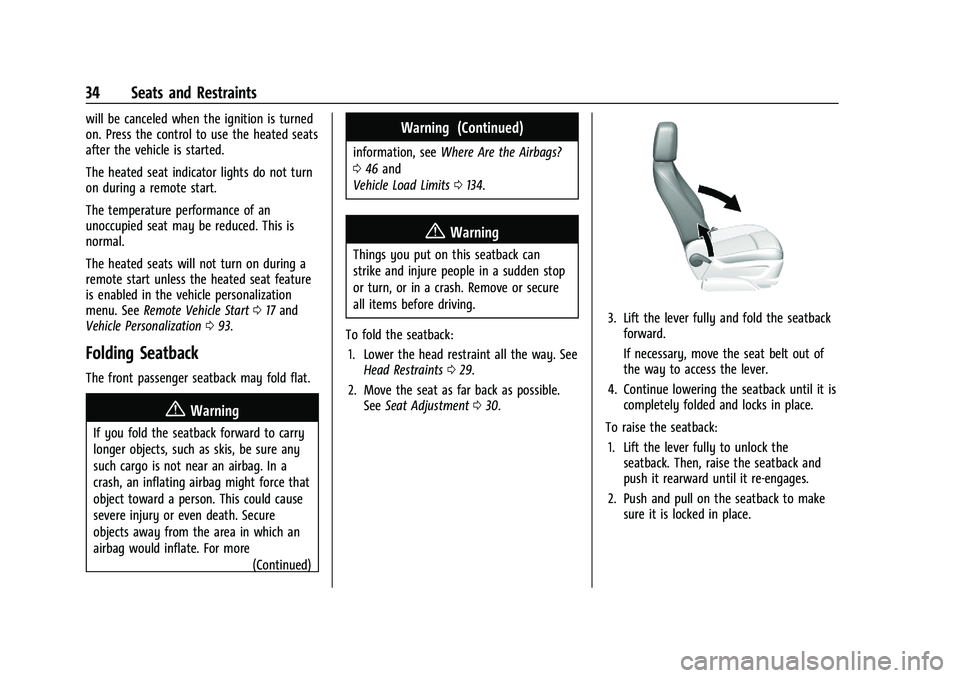
To fold the seatback: 1. Lower the head restraint all the way. See Head Restraints 029.
2. Move the seat as far back as possible. See Seat Adjustment 030.
3. Lift the lever fully and fold the seatback
forward.
If necessary, move the seat belt out of
the way to access the lever.
4. Continue lowering the seatback until it is completely folded and locks in place.
To raise the seatback: 1. Lift the lever fully to unlock the seatback. Then, raise the seatback and
push it rearward until it re-engages.
2. Push and pull on the seatback to make sure it is locked in place.
Page 43 of 280
Chevrolet TRAX Owner Manual (GMNA-Localizing-U.S./Canada-14609828) -
2021 - CRC - 8/21/20
42 Seats and Restraints
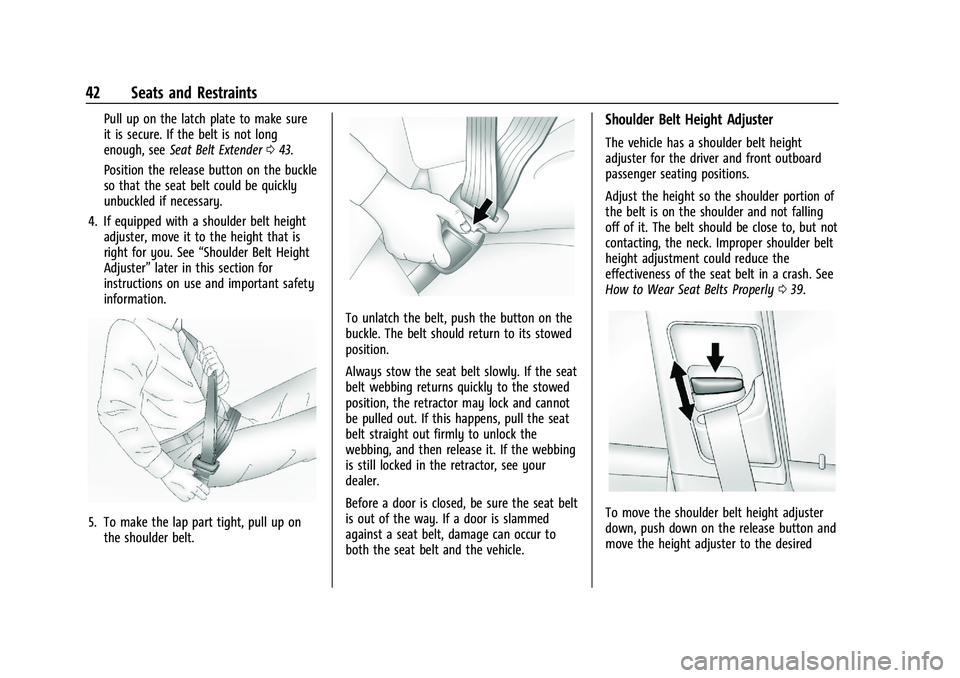
Pull up on the latch plate to make sure
it is secure. If the belt is not long
enough, seeSeat Belt Extender 043.
Position the release button on the buckle
so that the seat belt could be quickly
unbuckled if necessary.
4. If equipped with a shoulder belt height adjuster, move it to the height that is
right for you. See “Shoulder Belt Height
Adjuster” later in this section for
instructions on use and important safety
information.
5. To make the lap part tight, pull up on the shoulder belt.
To unlatch the belt, push the button on the
buckle. The belt should return to its stowed
position.
Always stow the seat belt slowly. If the seat
belt webbing returns quickly to the stowed
position, the retractor may lock and cannot
be pulled out. If this happens, pull the seat
belt straight out firmly to unlock the
webbing, and then release it. If the webbing
is still locked in the retractor, see your
dealer.
Before a door is closed, be sure the seat belt
is out of the way. If a door is slammed
against a seat belt, damage can occur to
both the seat belt and the vehicle.
Shoulder Belt Height Adjuster
The vehicle has a shoulder belt height
adjuster for the driver and front outboard
passenger seating positions.
Adjust the height so the shoulder portion of
the belt is on the shoulder and not falling
off of it. The belt should be close to, but not
contacting, the neck. Improper shoulder belt
height adjustment could reduce the
effectiveness of the seat belt in a crash. See
How to Wear Seat Belts Properly 039.
To move the shoulder belt height adjuster
down, push down on the release button and
move the height adjuster to the desired
Page 45 of 280
Chevrolet TRAX Owner Manual (GMNA-Localizing-U.S./Canada-14609828) -
2021 - CRC - 8/21/20
44 Seats and Restraints
But if a seat belt is not long enough, your
dealer will order you an extender. When
you go in to order it, take the heaviest coat
you will wear, so the extender will be long
enough for you. To help avoid personal
injury, do not let someone else use it, and
use it only for the seat it is made to fit. The
extender has been designed for adults.
Never use it for securing child restraints. For
more information on the proper use and fit
of seat belt extenders see the instruction
sheet that comes with the extender.
Safety System Check
Periodically check the seat belt reminder,
seat belts, buckles, latch plates, retractors,
shoulder belt height adjusters (if equipped),
and seat belt anchorages to make sure they
are all in working order. Look for any other
loose or damaged seat belt system parts
that might keep a seat belt system from
performing properly. See your dealer to
have it repaired. Torn, frayed, or twisted
seat belts may not protect you in a crash.
Torn or frayed seat belts can rip apart under
impact forces. If a belt is torn or frayed,
have it replaced immediately. If a belt is
twisted, it may be possible to untwist byreversing the latch plate on the webbing.
If the twist cannot be corrected, ask your
dealer to fix it.
Make sure the seat belt reminder light is
working. See
Seat Belt Reminders 081.
Keep seat belts clean and dry. See Seat Belt
Care 044.
Seat Belt Care
Keep belts clean and dry.
Seat belts should be properly cared for and
maintained.
Seat belt hardware should be kept dry and
free of dust or debris. As necessary, exterior
hard surfaces and seat belt webbing may be
lightly cleaned with mild soap and water.
Ensure there is not excessive dust or debris
in the mechanism. If dust or debris exists in
the system please see the dealer. Parts may
need to be replaced to ensure proper
functionality of the system.
{Warning
Do not bleach or dye seat belt webbing.
It may severely weaken the webbing. In
a crash, they might not be able to
(Continued)
Warning (Continued)
provide adequate protection. Clean and
rinse seat belt webbing only with mild
soap and lukewarm water. Allow the
webbing to dry.
Replacing Seat Belt System Parts
after a Crash
{Warning
A crash can damage the seat belt system
in the vehicle. A damaged seat belt
system may not properly protect the
person using it, resulting in serious injury
or even death in a crash. To help make
sure the seat belt systems are working
properly after a crash, have them
inspected and any necessary
replacements made as soon as possible.
After a minor crash, replacement of seat
belts may not be necessary. But the seat
belt assemblies that were used during any
crash may have been stressed or damaged.
See your dealer to have the seat belt
assemblies inspected or replaced.