buttons CHEVROLET TRAX 2022 Owners Manual
[x] Cancel search | Manufacturer: CHEVROLET, Model Year: 2022, Model line: TRAX, Model: CHEVROLET TRAX 2022Pages: 280, PDF Size: 12.13 MB
Page 11 of 280
Chevrolet TRAX Owner Manual (GMNA-Localizing-U.S./Canada-15498927) -
2022 - CRC - 5/27/21
10 Keys, Doors, and Windows
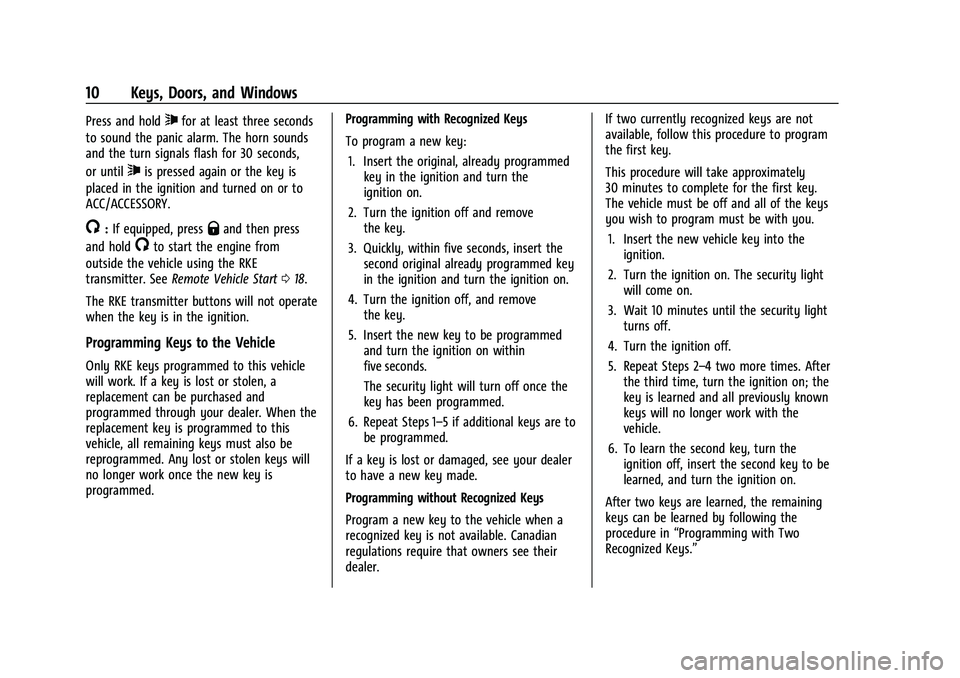
Press and hold7for at least three seconds
to sound the panic alarm. The horn sounds
and the turn signals flash for 30 seconds,
or until
7is pressed again or the key is
placed in the ignition and turned on or to
ACC/ACCESSORY.
/: If equipped, pressQand then press
and hold
/to start the engine from
outside the vehicle using the RKE
transmitter. See Remote Vehicle Start 018.
The RKE transmitter buttons will not operate
when the key is in the ignition.
Programming Keys to the Vehicle
Only RKE keys programmed to this vehicle
will work. If a key is lost or stolen, a
replacement can be purchased and
programmed through your dealer. When the
replacement key is programmed to this
vehicle, all remaining keys must also be
reprogrammed. Any lost or stolen keys will
no longer work once the new key is
programmed. Programming with Recognized Keys
To program a new key:
1. Insert the original, already programmed key in the ignition and turn the
ignition on.
2. Turn the ignition off and remove the key.
3. Quickly, within five seconds, insert the second original already programmed key
in the ignition and turn the ignition on.
4. Turn the ignition off, and remove the key.
5. Insert the new key to be programmed and turn the ignition on within
five seconds.
The security light will turn off once the
key has been programmed.
6. Repeat Steps 1–5 if additional keys are to be programmed.
If a key is lost or damaged, see your dealer
to have a new key made.
Programming without Recognized Keys
Program a new key to the vehicle when a
recognized key is not available. Canadian
regulations require that owners see their
dealer. If two currently recognized keys are not
available, follow this procedure to program
the first key.
This procedure will take approximately
30 minutes to complete for the first key.
The vehicle must be off and all of the keys
you wish to program must be with you.
1. Insert the new vehicle key into the ignition.
2. Turn the ignition on. The security light will come on.
3. Wait 10 minutes until the security light turns off.
4. Turn the ignition off.
5. Repeat Steps 2–4 two more times. After the third time, turn the ignition on; the
key is learned and all previously known
keys will no longer work with the
vehicle.
6. To learn the second key, turn the ignition off, insert the second key to be
learned, and turn the ignition on.
After two keys are learned, the remaining
keys can be learned by following the
procedure in “Programming with Two
Recognized Keys.”
Page 27 of 280
Chevrolet TRAX Owner Manual (GMNA-Localizing-U.S./Canada-15498927) -
2022 - CRC - 5/27/21
26 Keys, Doors, and Windows
Folding Mirrors
Manual Folding Mirrors
If equipped, the outside mirrors can be
folded inward to prevent damage. To fold,
pull the mirror toward the vehicle. Push the
mirror outward to return it to the original
position.
Heated Mirrors
1:If equipped, press to heat the mirrors.
See “Rear Window Defogger” underClimate
Control Systems 0125.
Interior Mirrors
Interior Rearview Mirrors
Adjust the rearview mirror for a clear view
of the area behind your vehicle.
If equipped with OnStar, the vehicle may
have three control buttons at the bottom of
the mirror. See OnStar Overview 0261.
To avoid accidental OnStar calls, clean the
mirror with the ignition off. Do not spray
glass cleaner directly on the mirror. Use a
soft towel dampened with water.
Manual Rearview Mirror
If equipped with a manual rearview mirror,
push the tab forward for daytime use and
pull it for nighttime use to avoid glare from
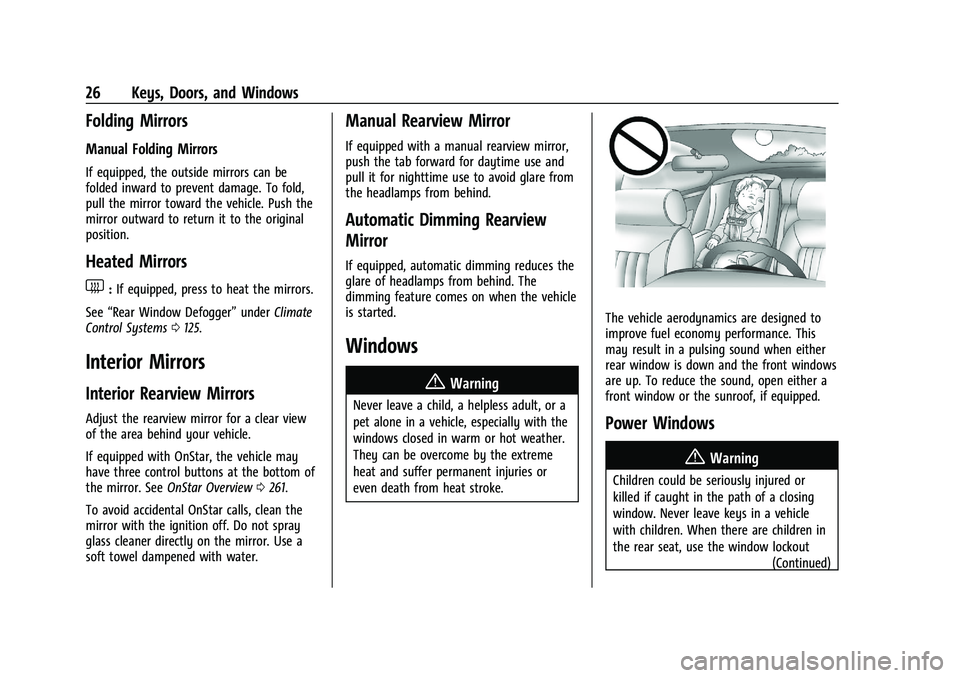
the headlamps from behind.
Automatic Dimming Rearview
Mirror
If equipped, automatic dimming reduces the
glare of headlamps from behind. The
dimming feature comes on when the vehicle
is started.
Windows
{
Warning
Never leave a child, a helpless adult, or a
pet alone in a vehicle, especially with the
windows closed in warm or hot weather.
They can be overcome by the extreme
heat and suffer permanent injuries or
even death from heat stroke.
The vehicle aerodynamics are designed to
improve fuel economy performance. This
may result in a pulsing sound when either
rear window is down and the front windows
are up. To reduce the sound, open either a
front window or the sunroof, if equipped.
Power Windows
{Warning
Children could be seriously injured or
killed if caught in the path of a closing
window. Never leave keys in a vehicle
with children. When there are children in
the rear seat, use the window lockout (Continued)
Page 67 of 280
Chevrolet TRAX Owner Manual (GMNA-Localizing-U.S./Canada-15498927) -
2022 - CRC - 5/27/21
66 Seats and Restraints
3. Before placing a child in the childrestraint, make sure it is securely held in
place. To check, grasp the child restraint
at the LATCH path and attempt to move
it side to side and back and forth. There
should be no more than 2.5 cm (1 in) of
movement for proper installation.
Head Restraint Removal and
Reinstallation
The rear outboard head restraints can be
removed if they interfere with the proper
installation of the child restraint.
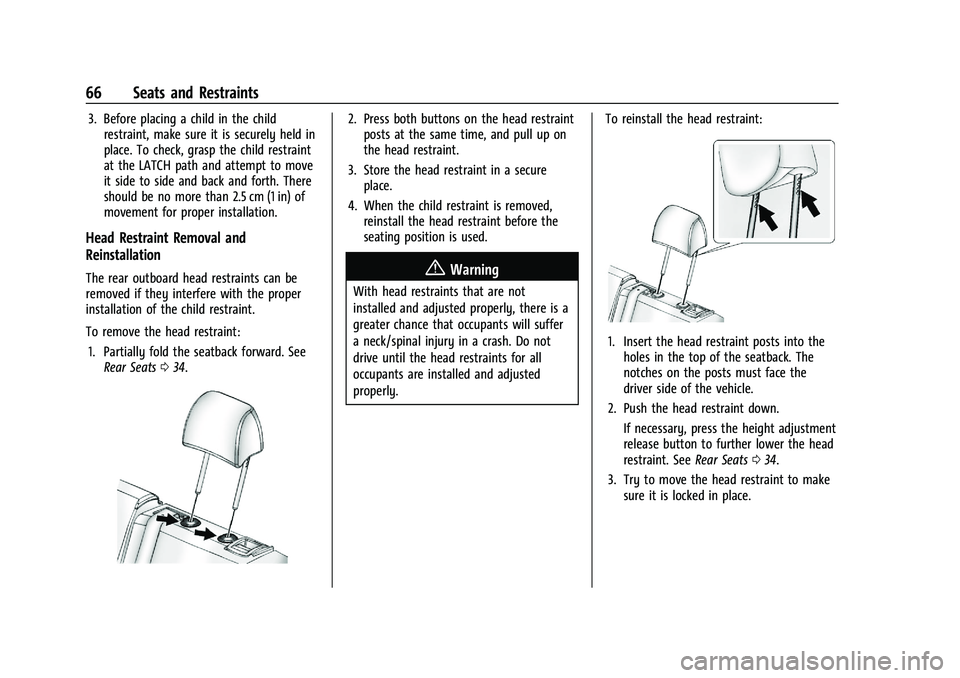
To remove the head restraint:
1. Partially fold the seatback forward. See Rear Seats 034.
2. Press both buttons on the head restraint
posts at the same time, and pull up on
the head restraint.
3. Store the head restraint in a secure place.
4. When the child restraint is removed, reinstall the head restraint before the
seating position is used.
{Warning
With head restraints that are not
installed and adjusted properly, there is a
greater chance that occupants will suffer
a neck/spinal injury in a crash. Do not
drive until the head restraints for all
occupants are installed and adjusted
properly. To reinstall the head restraint:
1. Insert the head restraint posts into the
holes in the top of the seatback. The
notches on the posts must face the
driver side of the vehicle.
2. Push the head restraint down. If necessary, press the height adjustment
release button to further lower the head
restraint. See Rear Seats034.
3. Try to move the head restraint to make sure it is locked in place.
Page 79 of 280

Chevrolet TRAX Owner Manual (GMNA-Localizing-U.S./Canada-15498927) -
2022 - CRC - 5/27/21
78 Instruments and Controls
Compass
The vehicle may have a compass display in
the Driver Information Center (DIC).
Setting the Compass Zone
Under certain circumstances, such as during
a long trip or moving to a new area, the
compass zone will need to be reset. If the
compass is not set to the correct zone, it
may give false readings. The compass zone
should be set to the area in which the
vehicle is currently traveling.
Use the DIC buttons to set the
compass zone:1. While the vehicle is in P (Park), press the MENU button to display the DIC menu.
2. Press and hold SET/CLR while the Set Area display is active.
3. Find the vehicle's current location andzone number on the map. Zones 1
through 15 are available.
4. Use
w xto change to the correct zone
number.
5. Press SET/CLR to confirm the setting.
The compass system is designed to operate
for a certain number of miles or degrees of
turn before needing a signal from the GPS
satellites. When the compass display shows
CAL, drive the vehicle for a short distance in
an open area where it can receive a GPS
signal. The compass system will
automatically determine when a GPS signal
is restored and provide a heading again.
Clock
Set the time and date using the
infotainment system. See "Time / Date"
under Settings 0118.
Power Outlets
Power Outlet 110/120 Volt Alternating
Current
If equipped, this power outlet is on the rear
of the center console. It can be used to plug
in electrical equipment that uses a
maximum limit of 150 watts.
Page 91 of 280
Chevrolet TRAX Owner Manual (GMNA-Localizing-U.S./Canada-15498927) -
2022 - CRC - 5/27/21
90 Instruments and Controls
Information Displays
Driver Information Center (DIC)
The DIC displays information about the
vehicle. It also displays warning messages if
a system problem is detected. All messages
appear in the DIC display in the instrument
cluster.
DIC Operation and Displays
On some models, the trip odometer reset
stem is used to operate the DIC. On other
models, the controls for the DIC are on the
turn signal lever.
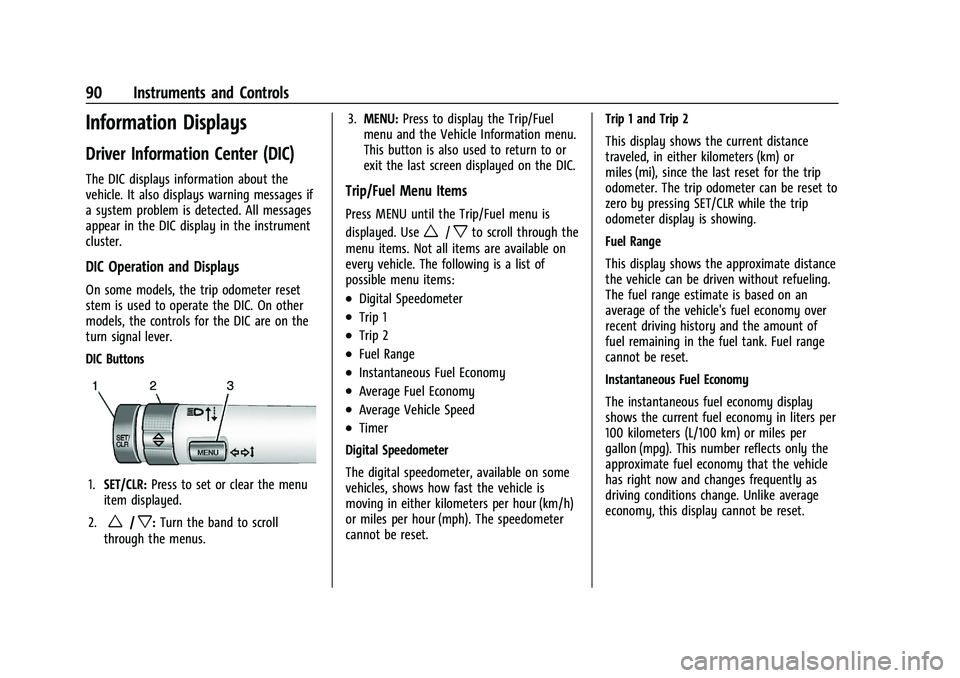
DIC Buttons
1.SET/CLR: Press to set or clear the menu
item displayed.
2.
w/x: Turn the band to scroll
through the menus. 3.
MENU: Press to display the Trip/Fuel
menu and the Vehicle Information menu.
This button is also used to return to or
exit the last screen displayed on the DIC.
Trip/Fuel Menu Items
Press MENU until the Trip/Fuel menu is
displayed. Use
w/xto scroll through the
menu items. Not all items are available on
every vehicle. The following is a list of
possible menu items:
.Digital Speedometer
.Trip 1
.Trip 2
.Fuel Range
.Instantaneous Fuel Economy
.Average Fuel Economy
.Average Vehicle Speed
.Timer
Digital Speedometer
The digital speedometer, available on some
vehicles, shows how fast the vehicle is
moving in either kilometers per hour (km/h)
or miles per hour (mph). The speedometer
cannot be reset. Trip 1 and Trip 2
This display shows the current distance
traveled, in either kilometers (km) or
miles (mi), since the last reset for the trip
odometer. The trip odometer can be reset to
zero by pressing SET/CLR while the trip
odometer display is showing.
Fuel Range
This display shows the approximate distance
the vehicle can be driven without refueling.
The fuel range estimate is based on an
average of the vehicle's fuel economy over
recent driving history and the amount of
fuel remaining in the fuel tank. Fuel range
cannot be reset.
Instantaneous Fuel Economy
The instantaneous fuel economy display
shows the current fuel economy in liters per
100 kilometers (L/100 km) or miles per
gallon (mpg). This number reflects only the
approximate fuel economy that the vehicle
has right now and changes frequently as
driving conditions change. Unlike average
economy, this display cannot be reset.
Page 114 of 280
Chevrolet TRAX Owner Manual (GMNA-Localizing-U.S./Canada-15498927) -
2022 - CRC - 5/27/21
Infotainment System 113
Phone
Bluetooth (Overview)
The Bluetooth-capable system can interact
with many cell phones, allowing:
.Placement and receipt of calls in a
hands-free mode.
.Sharing of the cell phone’s address book
or contact list with the vehicle.
To minimize driver distraction, before
driving, and with the vehicle parked:
.Become familiar with the features of the
cell phone. Organize the phone book and
contact lists clearly and delete duplicate
or rarely used entries. If possible,
program speed dial or other shortcuts.
.Review the controls and operation of the
infotainment system.
.Pair cell phone(s) to the vehicle. The
system may not work with all cell
phones. See “Pairing”later in this section.
Vehicles with a Bluetooth system can use a
Bluetooth-capable cell phone with a
Hands-Free Profile to make and receive
phone calls. The infotainment system and
voice recognition are used to control the
system. The system can be used while the
ignition is on or in ACC/ACCESSORY. The range of the Bluetooth system can be up to
9.1 m (30 ft). Not all phones support all
functions and not all phones work with the
Bluetooth system. See
www.my.chevrolet.com for more information
about compatible phones.
Controls
Use the buttons on the infotainment system
and the steering wheel to operate the
Bluetooth system.
Steering Wheel Controls
See
Steering Wheel Controls 0104.
Infotainment System Controls
For information about how to navigate the
menu system using the infotainment
controls, see Overview0103.
PHONE : Touch the PHONE icon on the
Home Page to enter the phone main menu.
Audio System
When using the Bluetooth phone system,
sound comes through the vehicle's front
audio system speakers and overrides the
audio system. The volume level while on a
phone call can be adjusted by pressing the
steering wheel controls or touching the
volume control on the center stack. The adjusted volume level remains in memory
for later calls. The volume cannot be
lowered beyond a certain level.
Bluetooth (Pairing and Using the
Phone)
Pairing
A Bluetooth-enabled cell phone must be
paired to the Bluetooth system and then
connected to the vehicle before it can be
used. See the cell phone manufacturer's user
guide for Bluetooth functions before pairing
the cell phone.
Pairing Information
.A Bluetooth phone with music capability
can be paired to the vehicle as a phone
and a music player at the same time.
.Up to 10 devices can be paired to the
Bluetooth system.
.The pairing process is disabled when the
vehicle is moving.
.Pairing only needs to be completed once,
unless the pairing information on the cell
phone changes or the cell phone is
deleted from the system.
Page 262 of 280

Chevrolet TRAX Owner Manual (GMNA-Localizing-U.S./Canada-15498927) -
2022 - CRC - 5/27/21
OnStar 261
OnStar
OnStar Overview
OnStar Overview . . . . . . . . . . . . . . . . . . . . . . 261
OnStar Services
Emergency . . . . . . . . . . . . . . . . . . . . . . . . . . . . 262
Security . . . . . . . . . . . . . . . . . . . . . . . . . . . . . . . 262
OnStar Additional Information
OnStar Additional Information . . . . . . . . . 263
OnStar Overview
=Voice Command Button
QBlue OnStar Button
>Red Emergency Button
This vehicle may be equipped with a
comprehensive, in-vehicle system that can
connect to an OnStar Advisor for Emergency,
Security, Navigation, Connections, and
Diagnostics Services. OnStar services may
require a paid service plan and data plan.
OnStar requires the vehicle battery and
electrical system, cellular service, and GPS
satellite signals to be available and
operating. OnStar acts as a link to existing
emergency service providers. OnStar may
collect information about you and your
vehicle, including location information. See
OnStar User Terms, Privacy Statement, and
Software Terms for more details including
system limitations at www.onstar.com (U.S.)
or www.onstar.ca (Canada). The OnStar system status light is next to
the OnStar buttons. If the status light is:
.Solid Green: System is ready.
.Flashing Green: On a call.
.Red: Indicates a problem.
.Off: System is off. PressQtwice to
speak with an OnStar Advisor.
Press
Qor call 1-888-4ONSTAR
(1-888-466-7827) to speak to an Advisor.
Functionality of the Voice Command button
may vary by vehicle and region.
Press
=to:
.Open the OnStar app on the infotainment
display. If equipped, the infotainment
system has OnStar controls in the
embedded OnStar app on the Home Page.
Most OnStar functions that can be
performed with the buttons can be done
using the app. To open the app, touch the
OnStar icon on the Home Page. App
updates require a corresponding service
plan. Features vary by region and model.
Features are subject to change. For more
information, see my.chevrolet.com/learn
or press
Q.
Or