display CHEVROLET TRAX 2023 Owners Manual
[x] Cancel search | Manufacturer: CHEVROLET, Model Year: 2023, Model line: TRAX, Model: CHEVROLET TRAX 2023Pages: 280, PDF Size: 12.13 MB
Page 15 of 280
Chevrolet TRAX Owner Manual (GMNA-Localizing-U.S./Canada-15498927) -
2022 - CRC - 5/27/21
14 Keys, Doors, and Windows
If other electronic devices interfere with the
RKE transmitter signal, the vehicle may not
detect the RKE transmitter inside the vehicle.
If passive locking is enabled, the doors may
lock with the RKE transmitter inside the
vehicle. Do not leave the RKE transmitter in
an unattended vehicle.
Remote Left in Vehicle Alert
When the vehicle is turned off and an RKE
transmitter is left in the vehicle, the horn
will chirp three times after all doors are
closed.
To turn on or off seeVehicle Personalization
0 92.
Remote No Longer in Vehicle Alert
If the vehicle is on with a door open, and
then all doors are closed, the vehicle will
check for RKE transmitters inside. If an RKE
transmitter is not detected, the Driver
Information Center (DIC) will display NO
REMOTE DETECTED and the horn will chirp
three times. This occurs only once each time
the vehicle is driven.
To turn on or off see Vehicle Personalization
0 92. Temporary Disable of Passive Locking
Temporarily disable passive locking by
pressing and holding
Kon the interior door
switch with a door open for several seconds,
or until three chimes are heard. Passive
locking will then remain disabled until
Qon
the interior door is pressed, or until the
vehicle is turned on.
To customize the doors to automatically lock
when exiting the vehicle, see Vehicle
Personalization 092.
Keyless Liftgate Opening
To open the liftgate, press the touch pad on
the rear of the liftgate above the license
plate. The doors must be unlocked or the
RKE transmitter must be within 1 m (3 ft)
Key Access
To access a vehicle with a weak transmitter
battery, see Door Locks019.
Programming Transmitters to the Vehicle
Only RKE transmitters programmed to the
vehicle will work. If a transmitter is lost or
stolen, a replacement can be purchased and
programmed through your dealer. The
vehicle can be reprogrammed so that lost or
stolen transmitters no longer work. Any remaining transmitters will need to be
reprogrammed. Each vehicle can have up to
eight transmitters matched to it.
Programming with Recognized Transmitters
A new transmitter can be programmed to
the vehicle when there are two recognized
transmitters. To program, the vehicle must
be off and all of the transmitters, both
currently recognized and new, must be
with you.
1. Remove the key from the RKE transmitter.
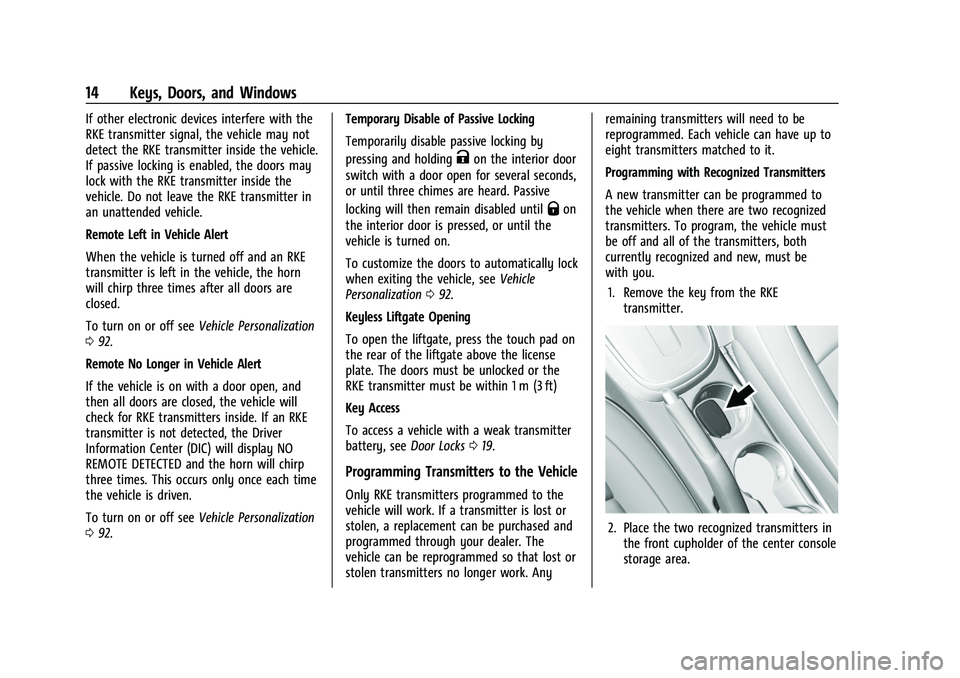
2. Place the two recognized transmitters inthe front cupholder of the center console
storage area.
Page 16 of 280
Chevrolet TRAX Owner Manual (GMNA-Localizing-U.S./Canada-15498927) -
2022 - CRC - 5/27/21
Keys, Doors, and Windows 15
3. Insert the vehicle key of the newtransmitter into the key lock cylinder on
the outside of the driver door and turn
the key to the unlock position five times
within 10 seconds.
The DIC displays READY FOR REMOTE #3,
4 or 5.
4. Place the new transmitter in the front cupholder.
5. Press ENGINE START/STOP. When the transmitter is learned, the DIC will show
that it is ready to program the next
transmitter.
6. Remove the transmitter from the front cupholder and press
K.
To program additional transmitters,
repeat Steps 3–5.
When all additional transmitters are
programmed, press and hold ENGINE
START/STOP for 12 seconds to exit
programming mode.
Programming without Recognized
Transmitters
If two currently recognized transmitters are
not available, follow this procedure to
program up to eight transmitters. This
feature is not available in Canada. This procedure will take approximately
30 minutes to complete. The vehicle must
be off and all of the transmitters to be
programmed must be with you.
1. Remove the key from the RKE transmitter.
2. Insert the vehicle key of the transmitter into the key lock cylinder on the outside
of the driver door and turn the key to
the unlock position five times within
10 seconds.
The DIC displays REMOTE LEARN
PENDING, PLEASE WAIT.
3. Wait for 10 minutes until the DIC displays PRESS ENGINE START BUTTON TO
LEARN and then press ENGINE
START/STOP.
The DIC displays will again show REMOTE
LEARN PENDING, PLEASE WAIT.
4. Repeat Step 2 two additional times. After the third time, all previously known
transmitters will no longer work with the
vehicle. Remaining transmitters can be
relearned during the next steps.
The DIC display should now show READY
FOR REMOTE # 1.
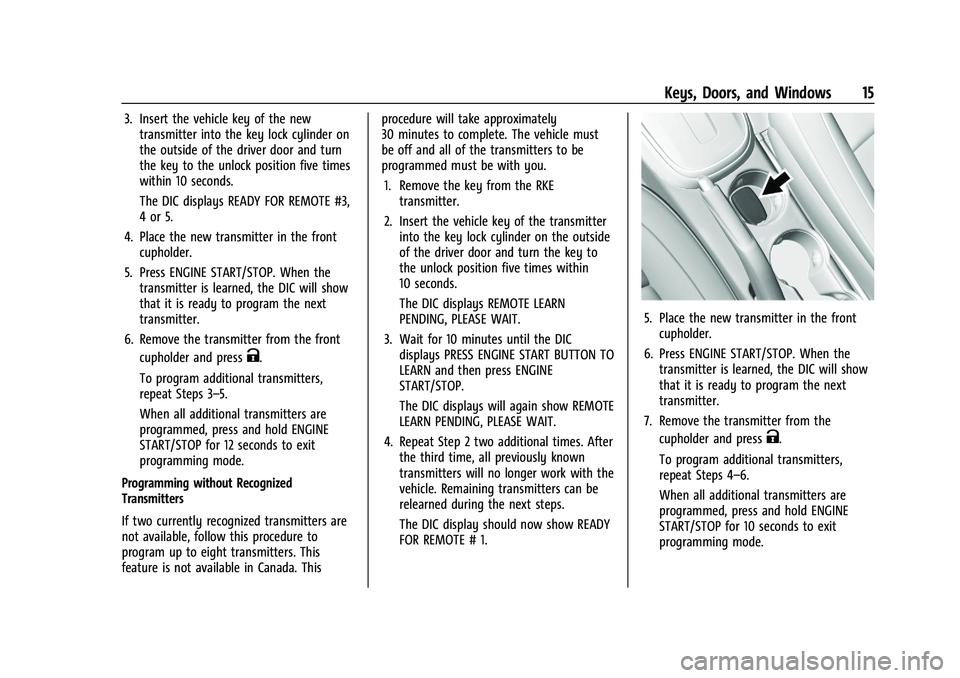
5. Place the new transmitter in the frontcupholder.
6. Press ENGINE START/STOP. When the transmitter is learned, the DIC will show
that it is ready to program the next
transmitter.
7. Remove the transmitter from the cupholder and press
K.
To program additional transmitters,
repeat Steps 4–6.
When all additional transmitters are
programmed, press and hold ENGINE
START/STOP for 10 seconds to exit
programming mode.
Page 17 of 280
Chevrolet TRAX Owner Manual (GMNA-Localizing-U.S./Canada-15498927) -
2022 - CRC - 5/27/21
16 Keys, Doors, and Windows
Starting the Vehicle with a Low
Transmitter Battery
Note that, for improved vehicle security, the
RKE transmitter is equipped with a motion
sensor. When starting the vehicle, if the RKE
transmitter has been idle for a while, move
the RKE transmitter slightly and try starting
the vehicle.
When starting the vehicle, if the RKE
transmitter battery is depleted or there is
signal interference, the DIC may display NO
REMOTE DETECTED, REPLACE BATTERY IN
REMOTE KEY, or NO REMOTE DETECTED
PLACE KEY IN KEY POCKET THEN START YOUR
VEHICLE. If any of these messages appear on
the DIC, follow the steps below.To start the vehicle:
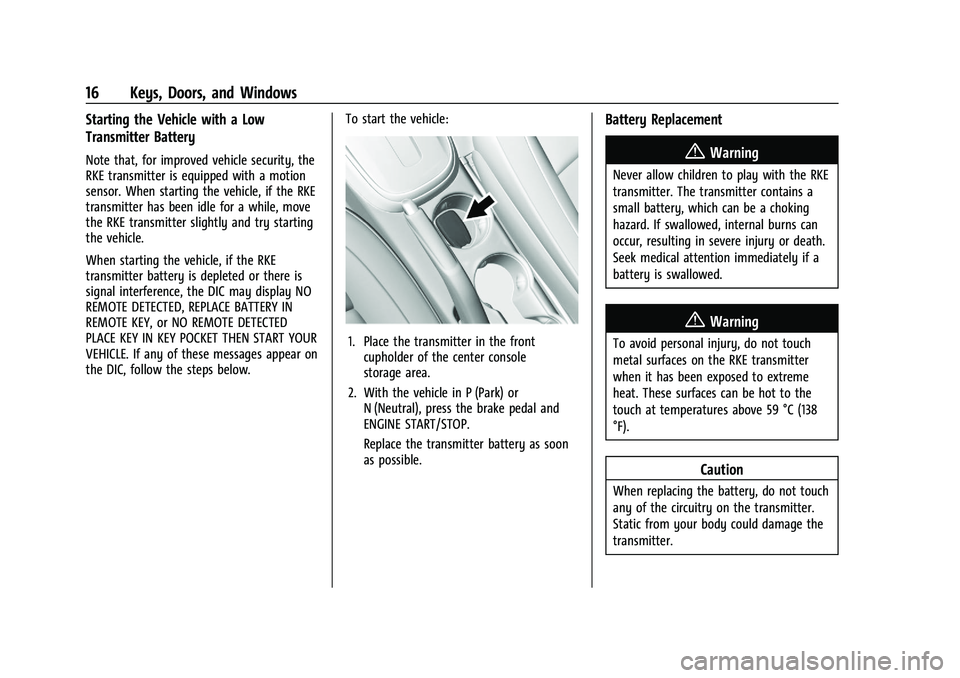
1. Place the transmitter in the front
cupholder of the center console
storage area.
2. With the vehicle in P (Park) or N (Neutral), press the brake pedal and
ENGINE START/STOP.
Replace the transmitter battery as soon
as possible.
Battery Replacement
{Warning
Never allow children to play with the RKE
transmitter. The transmitter contains a
small battery, which can be a choking
hazard. If swallowed, internal burns can
occur, resulting in severe injury or death.
Seek medical attention immediately if a
battery is swallowed.
{Warning
To avoid personal injury, do not touch
metal surfaces on the RKE transmitter
when it has been exposed to extreme
heat. These surfaces can be hot to the
touch at temperatures above 59 °C (138
°F).
Caution
When replacing the battery, do not touch
any of the circuitry on the transmitter.
Static from your body could damage the
transmitter.
Page 18 of 280
Chevrolet TRAX Owner Manual (GMNA-Localizing-U.S./Canada-15498927) -
2022 - CRC - 5/27/21
Keys, Doors, and Windows 17
Caution
Always replace the battery with the
correct type. Replacing the battery with
an incorrect type could potentially create
a risk of battery explosion. Dispose of
used batteries according to instructions
and local laws. Do not attempt to burn,
crush, or cut the used battery, and avoid
exposing the battery to environments
with extremely low air pressures or high
temperatures.
Replace the battery if the REPLACE BATTERY
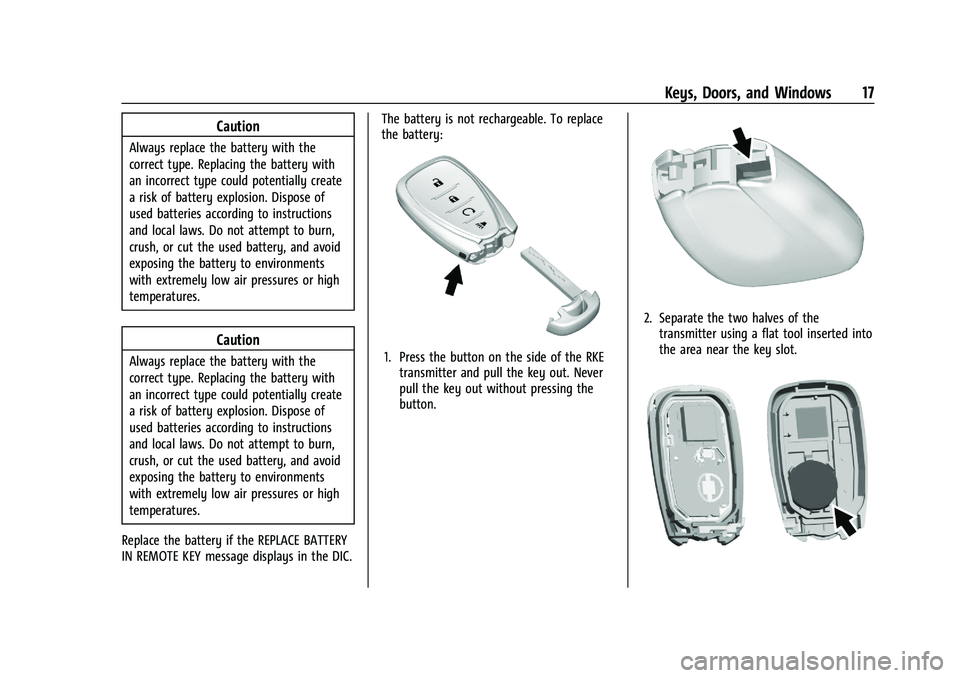
IN REMOTE KEY message displays in the DIC. The battery is not rechargeable. To replace
the battery:1. Press the button on the side of the RKE
transmitter and pull the key out. Never
pull the key out without pressing the
button.
2. Separate the two halves of thetransmitter using a flat tool inserted into
the area near the key slot.
Page 24 of 280
Chevrolet TRAX Owner Manual (GMNA-Localizing-U.S./Canada-15498927) -
2022 - CRC - 5/27/21
Keys, Doors, and Windows 23
Fast Flash :Vehicle is unsecured. A door, the
liftgate, or the hood is open.
Slow Flash : Alarm system is armed.
Arming the Alarm System
1. Turn off the vehicle.
2. Lock the vehicle in one of two ways:
.Use the RKE transmitter.
.With a door open, pressQon the
interior of the door.
3. After 30 seconds the alarm system will arm, and the indicator light will begin to
slowly flash indicating the alarm system
is operating. Pressing
Qon the RKE
transmitter a second time will bypass
the 30-second delay and immediately
arm the alarm system.
The vehicle alarm system will not arm if the
doors are locked with the key.
If the driver door is opened without first
unlocking with the RKE transmitter, the horn
will chirp and the lights will flash to indicate
pre-alarm. If the vehicle is not started,
or the door is not unlocked by pressing
K
on the RKE transmitter during the 10–second
pre-alarm, the alarm will be activated. The alarm will also be activated if a
passenger door, the liftgate, or the hood is
opened without first disarming the system.
When the alarm is activated, the turn
signals flash and the horn sounds for about
30 seconds. The alarm system will then
re-arm to monitor for the next unauthorized
event.
Disarming the Alarm System
To disarm the alarm system or turn off the
alarm if it has been activated:
.PressKon the RKE transmitter.
.Start the vehicle.
Avoid setting off the alarm by accident by
locking the vehicle after all occupants have
left the vehicle and all doors are closed.
To avoid setting off the alarm by accident:
.Lock the vehicle after all occupants have
exited.
.Always unlock the vehicle with the RKE
transmitter.
Unlocking the driver door with the key will
not disarm the system or turn off the alarm.
How to Detect a Tamper Condition
IfKis pressed on the RKE transmitter and
the horn chirps and the lights flash three
times, an alarm occurred previously while
the system was armed.
Steering Column Lock
If equipped, the steering column lock is a
theft-deterrent device. This feature locks the
steering column when the vehicle is turned
off and the driver door is opened, or when
the driver door is opened and then the
vehicle is turned off. The steering column
unlocks when the vehicle is turned on.
The Driver Information Center (DIC) may
display one of these messages:
.A message to service the steering column
lock indicates that an issue has been
detected with the column lock feature
and the vehicle should be serviced.
.A message that the steering column is
locked indicates that the engine is
running, but the steering column is still
locked. It is normal for the column to be
locked during a remote start, but the
column should unlock after the brake
Page 25 of 280
Chevrolet TRAX Owner Manual (GMNA-Localizing-U.S./Canada-15498927) -
2022 - CRC - 5/27/21
24 Keys, Doors, and Windows
pedal is pressed and the vehicle is started.
No message will display during a remote
start.
.A message that the steering wheel must
be turned and the vehicle must be started
again indicates that the column lock
mechanism is bound, the column locking
device was unable to unlock the steering
column, and the vehicle did not start.
If this happens, immediately turn the
steering wheel from side to side to
unbind the column lock. If this does not
unlock the steering column, turn the
vehicle off and open the driver door to
reset the system. Then turn the vehicle
on and immediately turn the steering
wheel side to side for about 15 seconds.
In some cases, it may take significant
force to unbind the column.
To keep the steering column from binding,
straighten the front wheels before turning
off the vehicle.
Immobilizer
See Radio Frequency Statement 0257.
Immobilizer Operation (Key
Access)
This vehicle has a passive theft-deterrent
system.
The system does not have to be manually
armed or disarmed.
The vehicle is automatically immobilized
when the key is removed from the ignition.
The system is automatically disarmed when
the vehicle is started with the correct key.
The key uses a transponder that matches an
immobilizer control unit in the vehicle and
automatically disarms the system. Only an
authorized key starts the vehicle. The vehicle
may not start if the key is damaged.
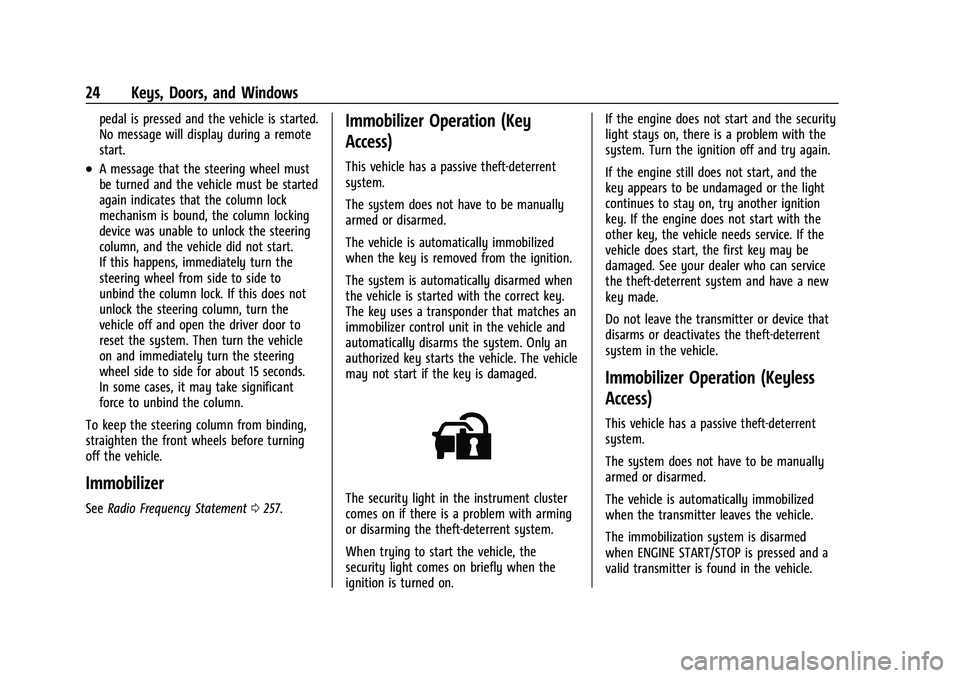
The security light in the instrument cluster
comes on if there is a problem with arming
or disarming the theft-deterrent system.
When trying to start the vehicle, the
security light comes on briefly when the
ignition is turned on. If the engine does not start and the security
light stays on, there is a problem with the
system. Turn the ignition off and try again.
If the engine still does not start, and the
key appears to be undamaged or the light
continues to stay on, try another ignition
key. If the engine does not start with the
other key, the vehicle needs service. If the
vehicle does start, the first key may be
damaged. See your dealer who can service
the theft-deterrent system and have a new
key made.
Do not leave the transmitter or device that
disarms or deactivates the theft-deterrent
system in the vehicle.
Immobilizer Operation (Keyless
Access)
This vehicle has a passive theft-deterrent
system.
The system does not have to be manually
armed or disarmed.
The vehicle is automatically immobilized
when the transmitter leaves the vehicle.
The immobilization system is disarmed
when ENGINE START/STOP is pressed and a
valid transmitter is found in the vehicle.
Page 35 of 280
Chevrolet TRAX Owner Manual (GMNA-Localizing-U.S./Canada-15498927) -
2022 - CRC - 5/27/21
34 Seats and Restraints
The passenger seat may take longer to
heat up.
Remote Start Heated Seats
If available, the heated seats can be turned
on automatically during a remote start
when it is cold outside. The heated seats
will be canceled when the ignition is turned
on. Press the control to use the heated seats
after the vehicle is started.
The heated seat indicator lights do not turn
on during a remote start.
The temperature performance of an
unoccupied seat may be reduced. This is
normal.
The heated seats will not turn on during a
remote start unless the heated seat feature
is enabled in the vehicle personalization
menu. SeeRemote Vehicle Start 018 and
Vehicle Personalization 092.
Rear Seats
Rear Seat Reminder
If equipped, the message REAR SEAT
REMINDER LOOK IN REAR SEAT displays
under certain conditions indicating there
may be an item or passenger in the rear
seat. Check before exiting the vehicle.
This feature will activate when a second row
door is opened while the vehicle is on or up
to 10 minutes before the vehicle is turned
on. There will be an alert when the vehicle
is turned off. The alert does not directly
detect objects in the rear seat; instead,
under certain conditions, it detects when a
rear door is opened and closed, indicating
that there may be something in the
rear seat.
The feature is active only once each time
the vehicle is turned on and off, and will
require reactivation by opening and closing
the second row doors. There may be an
alert even when there is nothing in the rear
seat; for example, if a child entered the
vehicle through the rear door and left the
vehicle without the vehicle being shut off.
The feature can be turned on or off. See
Vehicle Personalization 092.
Folding the Seatback
Either side of the seatback can be folded
down for more cargo space. Fold a seatback
only when the vehicle is not moving.
Caution
Folding a rear seat with the seat belts
still fastened may cause damage to the
seat or the seat belts. Always unbuckle
the seat belts and return them to their
normal stowed position before folding a
rear seat.
Caution
Folding the rear seatback prior to tilting
the seat cushion forward may damage
the rear seat. Always tilt the rear seat
cushion forward before folding the
seatback.
To fold a seatback down: 1. Make sure the floor area in front of the rear seats is clear.
2. Fully lower the head restraint. See Head
Restraints 029.
Page 76 of 280
Chevrolet TRAX Owner Manual (GMNA-Localizing-U.S./Canada-15498927) -
2022 - CRC - 5/27/21
Instruments and Controls 75
Instruments and Controls
Controls
Steering Wheel Adjustment . . . . . . . . . . . . . 75
Steering Wheel Controls . . . . . . . . . . . . . . . . 76
Horn . . . . . . . . . . . . . . . . . . . . . . . . . . . . . . . . . . . 76
Windshield Wiper/Washer . . . . . . . . . . . . . . 76
Rear Window Wiper/Washer . . . . . . . . . . . 77
Compass . . . . . . . . . . . . . . . . . . . . . . . . . . . . . . . . 78
Clock . . . . . . . . . . . . . . . . . . . . . . . . . . . . . . . . . . . 78
Power Outlets . . . . . . . . . . . . . . . . . . . . . . . . . . 78
Warning Lights, Gauges, and Indicators
Warning Lights, Gauges, andIndicators . . . . . . . . . . . . . . . . . . . . . . . . . . . . . 79
Instrument Cluster . . . . . . . . . . . . . . . . . . . . . 80
Speedometer . . . . . . . . . . . . . . . . . . . . . . . . . . . 80
Odometer . . . . . . . . . . . . . . . . . . . . . . . . . . . . . . 80
Trip Odometer . . . . . . . . . . . . . . . . . . . . . . . . . 80
Tachometer . . . . . . . . . . . . . . . . . . . . . . . . . . . . 80
Fuel Gauge . . . . . . . . . . . . . . . . . . . . . . . . . . . . . 81
Seat Belt Reminders . . . . . . . . . . . . . . . . . . . . 81
Airbag Readiness Light . . . . . . . . . . . . . . . . . 82
Passenger Airbag Status Indicator . . . . . . 82
Charging System Light . . . . . . . . . . . . . . . . . 83
Malfunction Indicator Lamp (Check Engine Light) . . . . . . . . . . . . . . . . . . . . . . . . . 83
Service Vehicle Soon Light . . . . . . . . . . . . . . 85
Owner Manual Indicator . . . . . . . . . . . . . . . . 85
Brake System Warning Light . . . . . . . . . . . 85 Antilock Brake System (ABS) Warning
Light . . . . . . . . . . . . . . . . . . . . . . . . . . . . . . . . . . 85
Power Steering Warning Light . . . . . . . . . . 86
Ultrasonic Parking Sensor Light . . . . . . . . . 86
Traction Off Light . . . . . . . . . . . . . . . . . . . . . . 86
StabiliTrak OFF Light . . . . . . . . . . . . . . . . . . . 86
Traction Control System (TCS)/StabiliTrak Light . . . . . . . . . . . . . . . . . . . . . . . . . . . . . . . . . . 87
Engine Coolant Temperature Warning Light . . . . . . . . . . . . . . . . . . . . . . . . . . . . . . . . . . 87
Tire Pressure Light . . . . . . . . . . . . . . . . . . . . . . 87
Engine Oil Pressure Light . . . . . . . . . . . . . . . 88
Low Fuel Warning Light . . . . . . . . . . . . . . . . 88
Immobilizer Light . . . . . . . . . . . . . . . . . . . . . . . 88
Reduced Engine Power Light . . . . . . . . . . . 89
High-Beam On Light . . . . . . . . . . . . . . . . . . . . 89
Lamps On Reminder . . . . . . . . . . . . . . . . . . . . 89
Cruise Control Light . . . . . . . . . . . . . . . . . . . . 89
Door Ajar Light . . . . . . . . . . . . . . . . . . . . . . . . . 89
Information Displays
Driver Information Center (DIC) . . . . . . . . 90
Vehicle Messages
Vehicle Messages . . . . . . . . . . . . . . . . . . . . . . . 92
Engine Power Messages . . . . . . . . . . . . . . . . 92
Vehicle Speed Messages . . . . . . . . . . . . . . . . 92
Vehicle Personalization
Vehicle Personalization . . . . . . . . . . . . . . . . . 92
Controls
Steering Wheel Adjustment
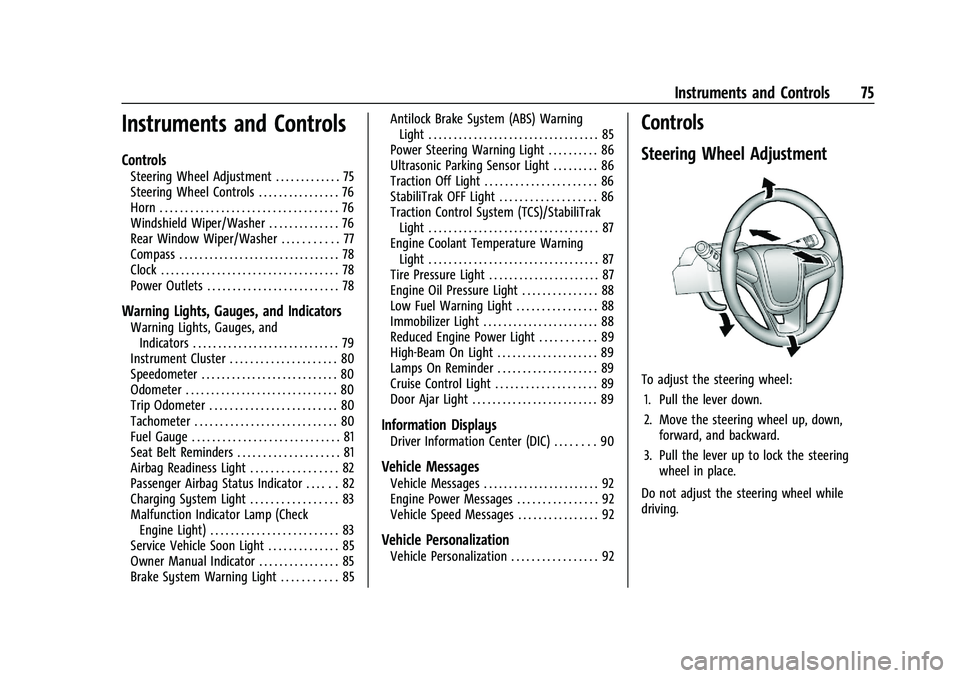
To adjust the steering wheel:
1. Pull the lever down.
2. Move the steering wheel up, down, forward, and backward.
3. Pull the lever up to lock the steering wheel in place.
Do not adjust the steering wheel while
driving.
Page 79 of 280
Chevrolet TRAX Owner Manual (GMNA-Localizing-U.S./Canada-15498927) -
2022 - CRC - 5/27/21
78 Instruments and Controls
Compass
The vehicle may have a compass display in
the Driver Information Center (DIC).
Setting the Compass Zone
Under certain circumstances, such as during
a long trip or moving to a new area, the
compass zone will need to be reset. If the
compass is not set to the correct zone, it
may give false readings. The compass zone
should be set to the area in which the
vehicle is currently traveling.
Use the DIC buttons to set the
compass zone:1. While the vehicle is in P (Park), press the MENU button to display the DIC menu.
2. Press and hold SET/CLR while the Set Area display is active.
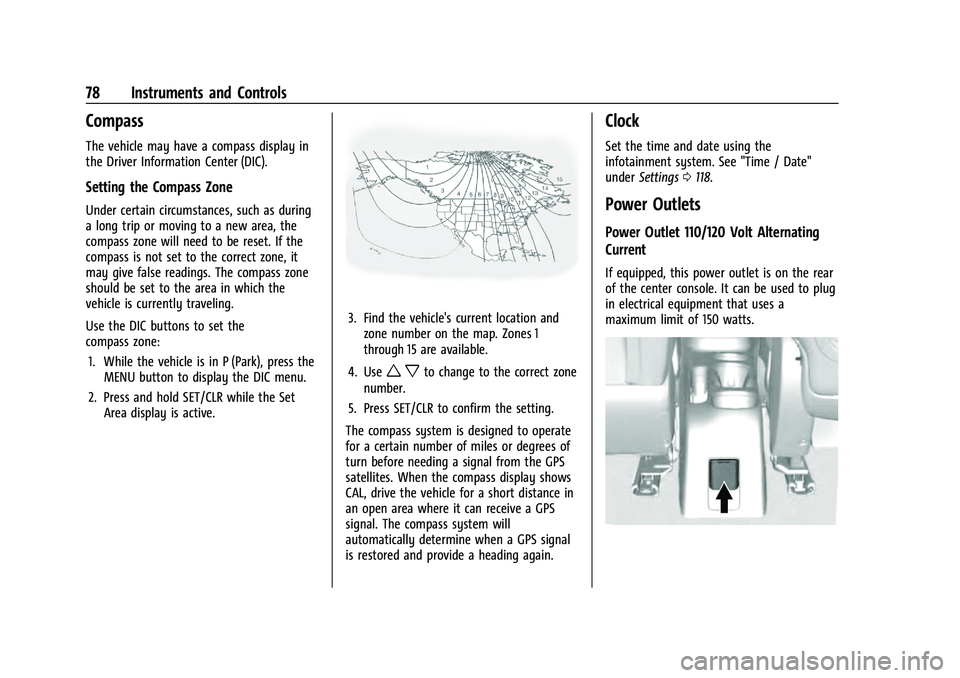
3. Find the vehicle's current location andzone number on the map. Zones 1
through 15 are available.
4. Use
w xto change to the correct zone
number.
5. Press SET/CLR to confirm the setting.
The compass system is designed to operate
for a certain number of miles or degrees of
turn before needing a signal from the GPS
satellites. When the compass display shows
CAL, drive the vehicle for a short distance in
an open area where it can receive a GPS
signal. The compass system will
automatically determine when a GPS signal
is restored and provide a heading again.
Clock
Set the time and date using the
infotainment system. See "Time / Date"
under Settings 0118.
Power Outlets
Power Outlet 110/120 Volt Alternating
Current
If equipped, this power outlet is on the rear
of the center console. It can be used to plug
in electrical equipment that uses a
maximum limit of 150 watts.
Page 81 of 280
Chevrolet TRAX Owner Manual (GMNA-Localizing-U.S./Canada-15498927) -
2022 - CRC - 5/27/21
80 Instruments and Controls
Instrument Cluster
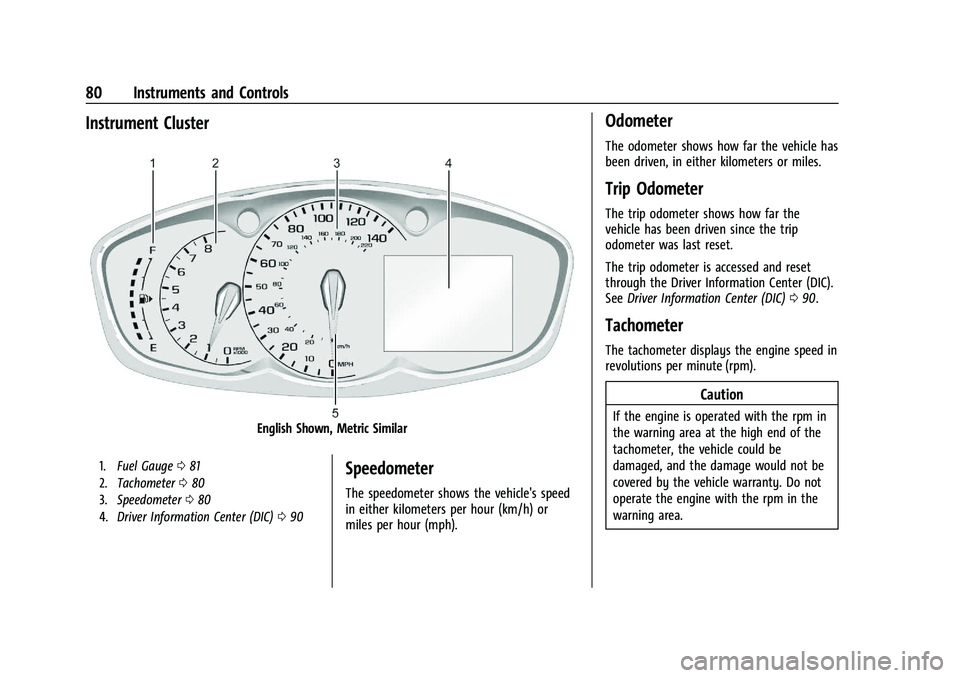
English Shown, Metric Similar
1.Fuel Gauge 081
2. Tachometer 080
3. Speedometer 080
4. Driver Information Center (DIC) 090Speedometer
The speedometer shows the vehicle's speed
in either kilometers per hour (km/h) or
miles per hour (mph).
Odometer
The odometer shows how far the vehicle has
been driven, in either kilometers or miles.
Trip Odometer
The trip odometer shows how far the
vehicle has been driven since the trip
odometer was last reset.
The trip odometer is accessed and reset
through the Driver Information Center (DIC).
See Driver Information Center (DIC) 090.
Tachometer
The tachometer displays the engine speed in
revolutions per minute (rpm).
Caution
If the engine is operated with the rpm in
the warning area at the high end of the
tachometer, the vehicle could be
damaged, and the damage would not be
covered by the vehicle warranty. Do not
operate the engine with the rpm in the
warning area.