stop start CHEVROLET TRAX 2024 Owners Manual
[x] Cancel search | Manufacturer: CHEVROLET, Model Year: 2024, Model line: TRAX, Model: CHEVROLET TRAX 2024Pages: 328, PDF Size: 7.3 MB
Page 5 of 328
Chevrolet TRAX Owner Manual (GMNA-Localizing-U.S./Canada/Mexico-
17041293) - 2024 - CRC - 12/2/22
4 Introduction
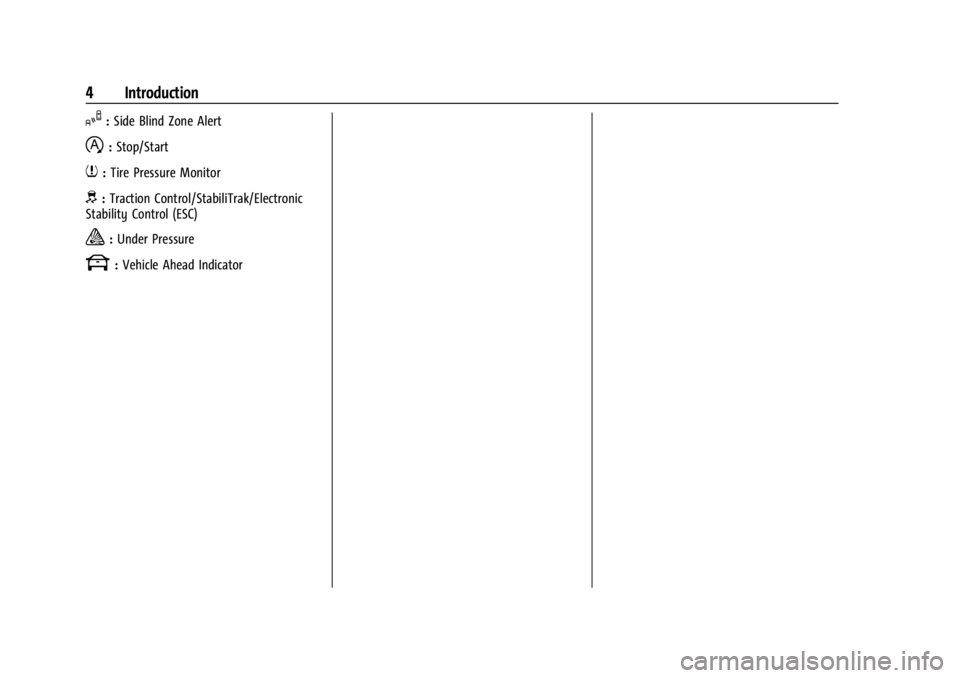
I:Side Blind Zone Alert
h:Stop/Start
7:Tire Pressure Monitor
d:Traction Control/StabiliTrak/Electronic
Stability Control (ESC)
a: Under Pressure
k: Vehicle Ahead Indicator
Page 7 of 328

Chevrolet TRAX Owner Manual (GMNA-Localizing-U.S./Canada/Mexico-
17041293) - 2024 - CRC - 12/2/22
6 Introduction
1.Air Vents 0162.
2. Turn Signal Lever. See Turn and
Lane-Change Signals 0111.
IntelliBeam System Button (If Equipped).
See Exterior Lamp Controls 0108.
3. Instrument Cluster (Uplevel) 087 or
Instrument Cluster (Base Level) 086.
Driver Information Center (DIC) Display.
See Driver Information Center (DIC) (Base
Level) 0101 or
Driver Information Center (DIC) (Uplevel)
0 103.
4. Windshield Wiper/Washer 080.
Rear Window Wiper/Washer 081.
5. Infotainment System. See Overview
(11 inch screen radio) 0116.
6. Light Sensor. See Automatic Headlamp
System 0110.
Vehicle Alarm System 024.
7. Hazard Warning Flashers 0111.
8. Climate Control Systems 0158.
Automatic Climate Control System 0160.
Heated Front Seats 034. (If Equipped).
9. USB Port (11 inch screen radio) 0122.
10. Wireless Charging 083 (If Equipped). 11. Auto Stop Disable. See
Stop/Start System
0 179.
Lane Keep Assist (LKA) 0209.
12. Power Outlets 082.
13. Electric Parking Brake 0187.
14. Shift Lever. See Automatic Transmission
0 184.
15. ENGINE START/STOP Button (Out of View) (If Equipped). See Ignition Positions
(Key Access) 0175 or
Ignition Positions (Keyless Access) 0177.
16. Steering Wheel Controls (11 inch screen
radio) 0117.
17. Column Ignition Switch (Out of View) (If Equipped). See Ignition Positions (Key
Access) 0175 or
Ignition Positions (Keyless Access) 0177.
18. Horn 080.
19. Steering Wheel Adjustment 080 (Out
of View).
20. Cruise Control 0190.
Adaptive Cruise Control 0192 (If
Equipped).
Forward Collision Alert (FCA) System
0 203 (If Equipped).
21. Hood Release. See Hood0217. 22. Data Link Connector (DLC) (Out of View).
SeeMalfunction Indicator Lamp (Check
Engine Light) 093.
23. Instrument Panel Storage 074.
Instrument Panel Fuse Block 0241.
24. Instrument Panel Illumination Control
0112.
Exterior Lamp Controls 0108.
Page 14 of 328
Chevrolet TRAX Owner Manual (GMNA-Localizing-U.S./Canada/Mexico-
17041293) - 2024 - CRC - 12/6/22
Keys, Doors, and Windows 13
Programming with Recognized Transmitters
A new transmitter can be programmed to
the vehicle when there are two recognized
transmitters.
To program, the vehicle must be off and all
of the transmitters, both currently
recognized and new, must be with you.1. Place the two recognized transmitters in transmitter pocket.
2. Insert the vehicle key of the new transmitter into the key lock cylinder on
the outside of the driver door and turn
the key to the unlock position five times
within 10 seconds.
The DIC displays READY FOR REMOTE #2,
3, 4, ETC.
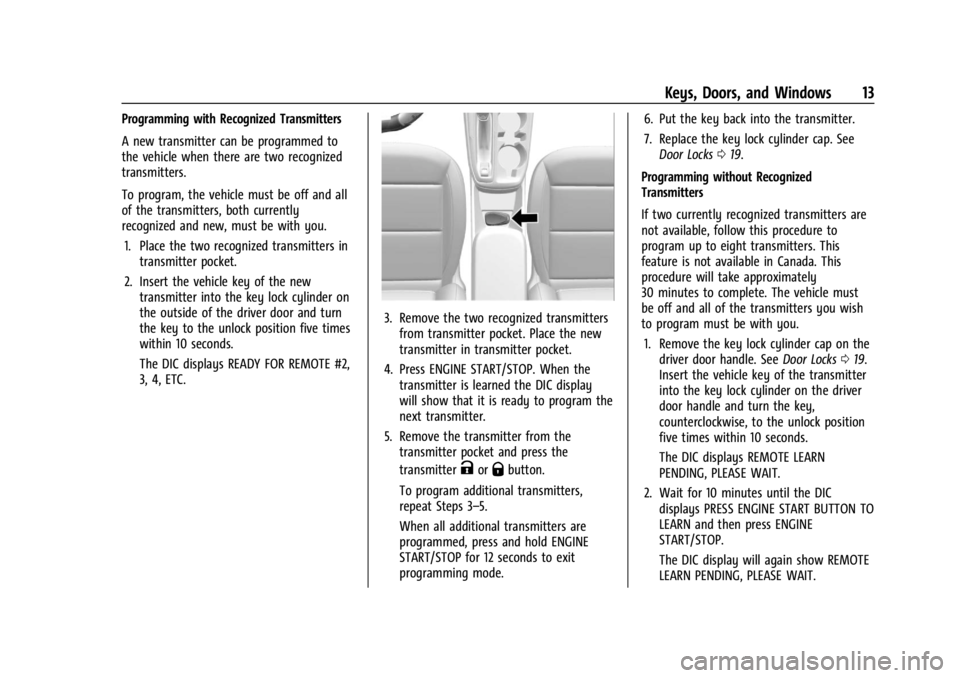
3. Remove the two recognized transmittersfrom transmitter pocket. Place the new
transmitter in transmitter pocket.
4. Press ENGINE START/STOP. When the transmitter is learned the DIC display
will show that it is ready to program the
next transmitter.
5. Remove the transmitter from the transmitter pocket and press the
transmitter
KorQbutton.
To program additional transmitters,
repeat Steps 3–5.
When all additional transmitters are
programmed, press and hold ENGINE
START/STOP for 12 seconds to exit
programming mode. 6. Put the key back into the transmitter.
7. Replace the key lock cylinder cap. See
Door Locks 019.
Programming without Recognized
Transmitters
If two currently recognized transmitters are
not available, follow this procedure to
program up to eight transmitters. This
feature is not available in Canada. This
procedure will take approximately
30 minutes to complete. The vehicle must
be off and all of the transmitters you wish
to program must be with you. 1. Remove the key lock cylinder cap on the driver door handle. See Door Locks019.
Insert the vehicle key of the transmitter
into the key lock cylinder on the driver
door handle and turn the key,
counterclockwise, to the unlock position
five times within 10 seconds.
The DIC displays REMOTE LEARN
PENDING, PLEASE WAIT.
2. Wait for 10 minutes until the DIC displays PRESS ENGINE START BUTTON TO
LEARN and then press ENGINE
START/STOP.
The DIC display will again show REMOTE
LEARN PENDING, PLEASE WAIT.
Page 15 of 328
Chevrolet TRAX Owner Manual (GMNA-Localizing-U.S./Canada/Mexico-
17041293) - 2024 - CRC - 12/6/22
14 Keys, Doors, and Windows
3. Repeat Step 2 two additional times. Afterthe third time all previously known
transmitters will no longer work with the
vehicle. Remaining transmitters can be
relearned during the next steps.
The DIC display should now show READY
FOR REMOTE # 1.
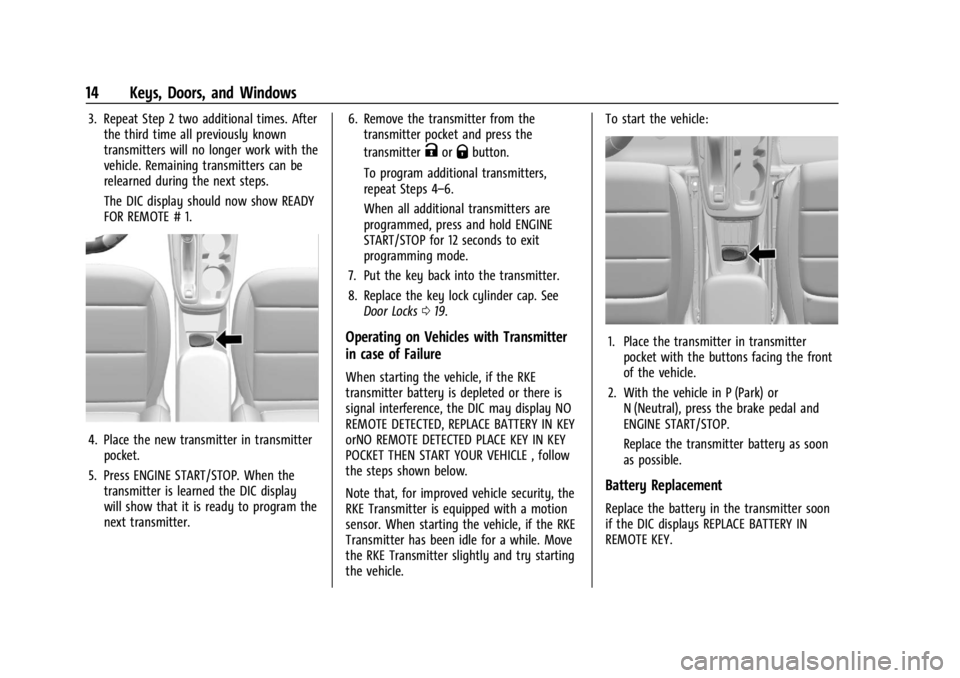
4. Place the new transmitter in transmitterpocket.
5. Press ENGINE START/STOP. When the transmitter is learned the DIC display
will show that it is ready to program the
next transmitter. 6. Remove the transmitter from the
transmitter pocket and press the
transmitter
KorQbutton.
To program additional transmitters,
repeat Steps 4–6.
When all additional transmitters are
programmed, press and hold ENGINE
START/STOP for 12 seconds to exit
programming mode.
7. Put the key back into the transmitter.
8. Replace the key lock cylinder cap. See Door Locks 019.
Operating on Vehicles with Transmitter
in case of Failure
When starting the vehicle, if the RKE
transmitter battery is depleted or there is
signal interference, the DIC may display NO
REMOTE DETECTED, REPLACE BATTERY IN KEY
orNO REMOTE DETECTED PLACE KEY IN KEY
POCKET THEN START YOUR VEHICLE , follow
the steps shown below.
Note that, for improved vehicle security, the
RKE Transmitter is equipped with a motion
sensor. When starting the vehicle, if the RKE
Transmitter has been idle for a while. Move
the RKE Transmitter slightly and try starting
the vehicle. To start the vehicle:
1. Place the transmitter in transmitter
pocket with the buttons facing the front
of the vehicle.
2. With the vehicle in P (Park) or N (Neutral), press the brake pedal and
ENGINE START/STOP.
Replace the transmitter battery as soon
as possible.
Battery Replacement
Replace the battery in the transmitter soon
if the DIC displays REPLACE BATTERY IN
REMOTE KEY.
Page 19 of 328

Chevrolet TRAX Owner Manual (GMNA-Localizing-U.S./Canada/Mexico-
17041293) - 2024 - CRC - 12/6/22
18 Keys, Doors, and Windows
2. Remove the battery with a small tool bypushing it toward the top of the
transmitter.
3. Insert a new battery, positive side up, pushing it down until it is held in place.
Use a CR 2032 or equivalent battery.
4. Snap the battery cover back on to the transmitter.
Remote Vehicle Start
The vehicle has a remote starting feature
that starts the engine from outside of the
vehicle.
/:This button is on the RKE transmitter. Laws in some communities may restrict the
use of remote starters. For example, some
laws may require a person using the remote
start to have the vehicle in view when doing
so. Check local regulations for any
requirements on remote starting of vehicles.
Do not use the remote start feature if the
vehicle is low on fuel. The vehicle could run
out of fuel.
The RKE transmitter range may be less while
the vehicle is running.
Other conditions can affect the performance
of the transmitter. See
Remote Key
Operation (Keyless Access) 010 or
Remote Key Operation (Key Access) 015.
Starting the Engine Using Remote Start
To start the vehicle:
1. Press and release
Qon the RKE
transmitter.
2. Immediately after completing Step 1, press and hold
/until the lamps flash.
If the vehicle's lights cannot be seen,
press and hold
/for at least
four seconds. When the vehicle starts, the park lamps will
turn on and remain on as long as the
engine is running. The doors will be locked
and the climate control system will operate
automatically if the vehicle has the
automatic system, or at the same setting as
when the vehicle was last turned off.
With an automatic climate control system
and if equipped with heated seats, the
heated seats turn on during colder outside
temperatures and shut off when the ignition
is turned on.
The rear window defogger and heated
mirrors, if equipped, turn on during colder
outside temperatures and turn off when the
ignition is turned on.
After entering the vehicle during a remote
start, press the brake and ENGINE START/
STOP with the transmitter in the vehicle to
drive the vehicle.
If the vehicle is left running, it automatically
shuts off after 15 minutes unless a time
extension has been done.Extending Engine Run Time
To extend the engine run time by
15 minutes, repeat Steps 1 and 2 while the
engine is still running. An extension can be
Page 20 of 328
Chevrolet TRAX Owner Manual (GMNA-Localizing-U.S./Canada/Mexico-
17041293) - 2024 - CRC - 12/6/22
Keys, Doors, and Windows 19
requested 30 seconds after starting. The
engine run time can only be extended if it is
the first remote start since the vehicle has
been driven. Remote start can be extended
one time.
If the remote start procedure is used again
while the engine is still running, 15 minutes
will be added on for a total of 30 minutes.
For example, if
Qand then/are pressed
again while the engine is still running,
15 minutes will be added on for a total of
30 minutes.
A maximum of two remote starts or remote
start with an extension are allowed between
ignition cycles.
After the vehicle's engine has been started
two times using the remote start button or
a start with an extension, the ignition must
be turned on and then back off before the
remote start procedure can be used again.
Canceling a Remote Start
To manually shut off a remote start:
.Press and hold/until the lamps
turn off.
.Turn on the hazard warning flashers.
.Turn the ignition switch on and then off.
Conditions in Which the Remote Start
Will Not Work
The vehicle cannot be started using the
remote start feature if the key is in the
ignition, the hood is open, or there is an
emission control system malfunction.
The engine turns off during a remote start if
the coolant temperature gets too high or if
the oil pressure gets low.
Door Locks
{Warning
Unlocked doors can be dangerous.
.Passengers, especially children, can
easily open the doors and fall out of a
moving vehicle. The doors can be
unlocked and opened while the vehicle
is moving. The chance of being thrown
out of the vehicle in a crash is
increased if the doors are not locked.
So, all passengers should wear seat
belts properly and the doors should be
locked whenever the vehicle is driven.
.Young children who get into unlocked
vehicles may be unable to get out.
A child can be overcome by extreme (Continued)
Warning (Continued)
heat and can suffer permanent injuries
or even death from heat stroke.
Always lock the vehicle whenever
leaving it.
.Outsiders can easily enter through an
unlocked door when you slow down
or stop the vehicle. Locking the doors
can help prevent this from happening.
To lock/unlock the doors from the outside:
.PressQorKon the Remote Keyless
Entry (RKE) transmitter. See Remote Key
Operation (Keyless Access) 010 or
Remote Key Operation (Key Access) 015.
.Use the key in the driver door. The key
lock cylinder is covered with a cap.
To lock/unlock the doors from the inside:
.PressQorKon the power door lock
switch.
.Push down on the door lock knob to lock
a door.
.Pull the door handle once to unlock it.
Pull the door handle again to unlatch it.
Page 36 of 328

Chevrolet TRAX Owner Manual (GMNA-Localizing-U.S./Canada/Mexico-
17041293) - 2024 - CRC - 12/7/22
Seats and Restraints 35
Warning (Continued)
cause the seat heater to overheat. An
overheated seat heater may cause a burn
or may damage the seat.
If equipped, the controls are on the climate
control panel. The engine must be running
to operate the heated seats.
Press
MorLto heat the driver or
passenger seat cushion and seatback.
Press the control once for the highest
setting. With each press of the control, the
heated seat will change to the next lower setting, and then the off setting. Three
lights indicate the highest setting and one
light the lowest.
The passenger seat may take longer to
heat up.
Remote Start Heated Seats
During a remote start, the heated seats,
if equipped, can be turned on automatically.
When it is cold outside, the heated seats
will turn on. The heated seats are canceled
when the vehicle is turned on.
Press the heated seat button to use the
heated seats after the vehicle is started. The
heated seat indicator lights do not turn on
during a remote start.
The temperature performance of an
unoccupied seat may be reduced. This is
normal.
To enable or disable remote start heated
seats, select Settings > Vehicle > Remote
Lock, Unlock, and Start > Remote Start Auto
Heat Seats > ON or OFF.
Folding Seatback
The front passenger seatback may fold flat.
{Warning
If you fold the seatback forward to carry
longer objects, such as skis, be sure any
such cargo is not near an airbag. In a
crash, an inflating airbag might force that
object toward a person. This could cause
severe injury or even death. Secure
objects away from the area in which an
airbag would inflate.
Where Are the
Airbags? 046. Vehicle Load Limits 0171.
{Warning
Things you put on this seatback can
strike and injure people in a sudden stop
or turn, or in a crash. Remove or secure
all items before driving.
To fold the seatback: 1. Lower the head restraint all the way. See Head Restraints 030.
2. Move the seat as far back as possible. See Seat Adjustment 032 or
Power Seat Adjustment 032.
Page 40 of 328
Chevrolet TRAX Owner Manual (GMNA-Localizing-U.S./Canada/Mexico-
17041293) - 2024 - CRC - 12/7/22
Seats and Restraints 39
If the vehicle is on and the brake pedal is
pressed with the vehicle in P (Park) but the
driver seat belt is not buckled, a message
displays in the Driver Information
Center (DIC) and the vehicle will be delayed
from shifting out of P (Park). Buckle the
driver seat belt to clear the message and
shift out of P (Park). Shifting from P (Park)
will be delayed once for each time the
vehicle is started.
For some fleet vehicles, shifting out of
P (Park) will be delayed each time the driver
attempts to do so while the driver seat belt
is not buckled, whether Teen Driver is ON or
OFF. Turning the vehicle off then on will not
change this condition.
On some models, Buckle to Drive may also
delay shifting out of P (Park) if a front
passenger is unbuckled under similar
conditions. A message displays in the DIC.
Buckle the front passenger seat belt to shift
out of P (Park). This feature may delay the
vehicle from shifting out of P (Park) if an
object, such as a briefcase, handbag, grocery
bag, laptop, or other electronic device, is on
the front passenger seat. If this happens,
remove the object from the seat or buckle
the seat belt to shift out of P (Park).If the driver, or on some vehicles, the
present front passenger seat belt remains
unbuckled, the DIC message will turn off
after several seconds and the vehicle can be
shifted out of P (Park). See
“Seat Belts”and
“Child Restraints” in the Index for
information about the importance of proper
restraint use.
If the driver seat belt or the front passenger
seat belt is unbuckled when driving, the seat
belt reminder chime and light(s) will come
on. See Seat Belt Reminders 091. This
feature may not function properly if the
airbag readiness light is on. See Airbag
Readiness Light 091.
How to Wear Seat Belts Properly
Follow these rules for everyone's protection.
There are additional things to know about
seat belts and children, including smaller
children and infants. If a child will be riding
in the vehicle, see Older Children054 or
Infants and Young Children 056. Review
and follow the rules for children in addition
to the following rules.
It is very important for all occupants to
buckle up. Statistics show that unbelted
people are hurt more often in crashes than
those who are wearing seat belts. There are important things to know about
wearing a seat belt properly.
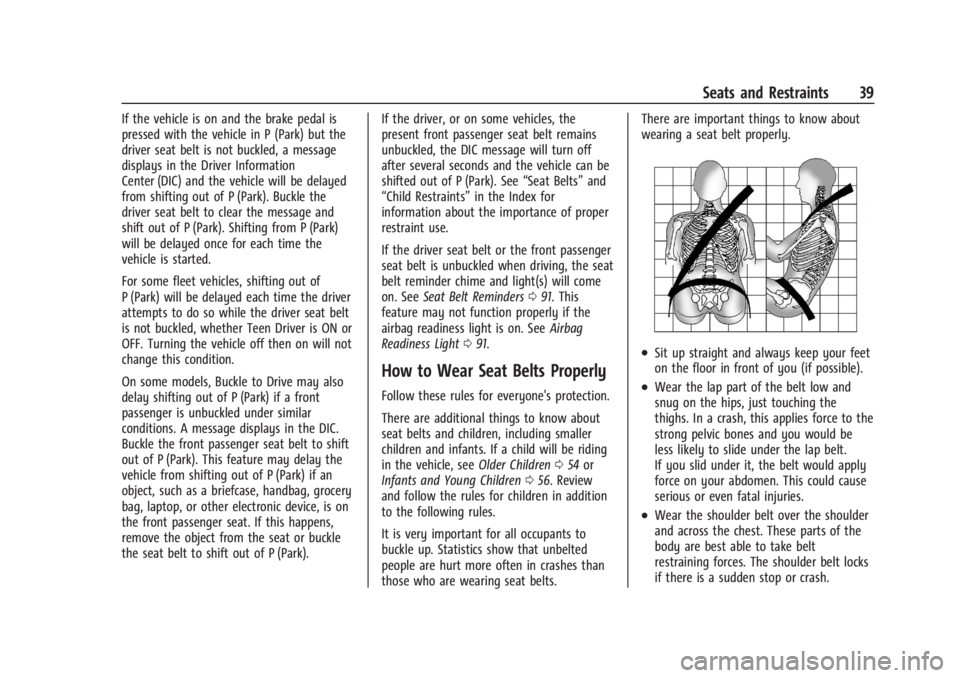
.Sit up straight and always keep your feet
on the floor in front of you (if possible).
.Wear the lap part of the belt low and
snug on the hips, just touching the
thighs. In a crash, this applies force to the
strong pelvic bones and you would be
less likely to slide under the lap belt.
If you slid under it, the belt would apply
force on your abdomen. This could cause
serious or even fatal injuries.
.Wear the shoulder belt over the shoulder
and across the chest. These parts of the
body are best able to take belt
restraining forces. The shoulder belt locks
if there is a sudden stop or crash.
Page 79 of 328

Chevrolet TRAX Owner Manual (GMNA-Localizing-U.S./Canada/Mexico-
17041293) - 2024 - CRC - 12/2/22
78 Storage
If driving for a long distance, on rough
roads, or at high speeds, occasionally stop
the vehicle to make sure the cargo remains
in its place.
Cargo Weight Limits
Do not exceed the maximum cargo weight
for the roof rack system, including the
weight of the cross rails and any other
accessories used to carry the cargo such as
bike racks or roof boxes. The maximum
cargo weight that can be loaded onto the
roof rack system is 100 kg (220 lb) or the
weight designated in the instructions that
came with the cross rails or other roof rack
accessories, whichever is less.
{Warning
Never load the roof rack with more
weight than specified in this section.
Loading cargo on the roof rack will make
the vehicle's center of gravity higher. To
avoid losing control of the vehicle, avoid
overloading, high speeds, sudden starts,
sharp turns, sudden braking, or abrupt
maneuvers when carrying cargo on the
roof rack.The weight of any cargo carried on the roof
rack system must be included in calculating
the loaded weight of the vehicle. Do not
exceed the maximum vehicle capacity when
loading the vehicle, including cargo carried
on the roof rack system and passengers and
cargo carried in the vehicle. For more
information on vehicle capacity and loading,
see
Vehicle Load Limits 0171.
Page 82 of 328
Chevrolet TRAX Owner Manual (GMNA-Localizing-U.S./Canada/Mexico-
17041293) - 2024 - CRC - 12/2/22
Instruments and Controls 81
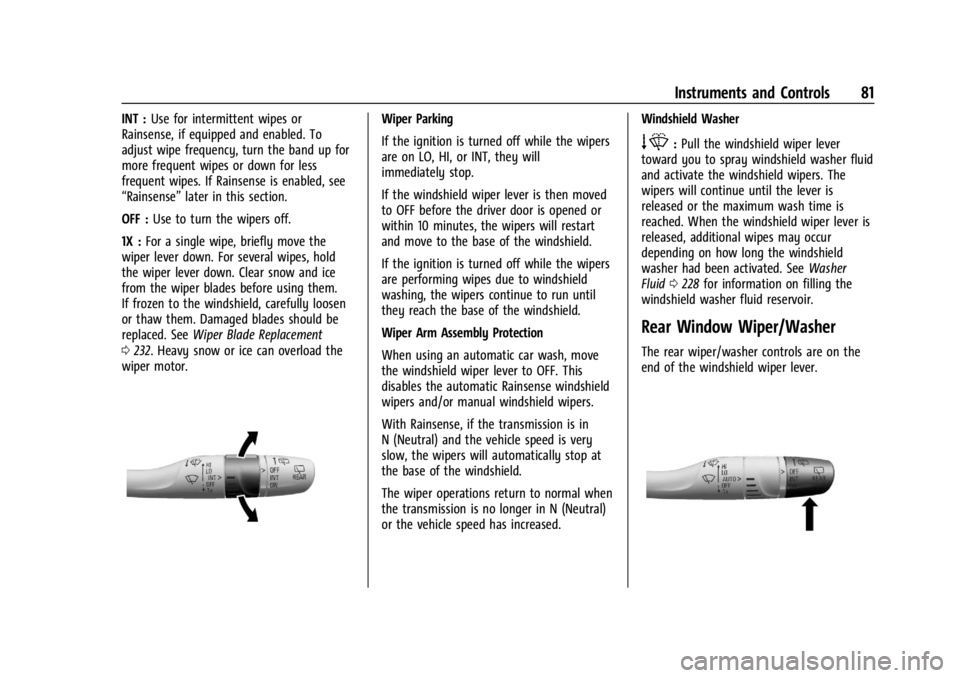
INT :Use for intermittent wipes or
Rainsense, if equipped and enabled. To
adjust wipe frequency, turn the band up for
more frequent wipes or down for less
frequent wipes. If Rainsense is enabled, see
“Rainsense” later in this section.
OFF : Use to turn the wipers off.
1X : For a single wipe, briefly move the
wiper lever down. For several wipes, hold
the wiper lever down. Clear snow and ice
from the wiper blades before using them.
If frozen to the windshield, carefully loosen
or thaw them. Damaged blades should be
replaced. See Wiper Blade Replacement
0 232. Heavy snow or ice can overload the
wiper motor.Wiper Parking
If the ignition is turned off while the wipers
are on LO, HI, or INT, they will
immediately stop.
If the windshield wiper lever is then moved
to OFF before the driver door is opened or
within 10 minutes, the wipers will restart
and move to the base of the windshield.
If the ignition is turned off while the wipers
are performing wipes due to windshield
washing, the wipers continue to run until
they reach the base of the windshield.
Wiper Arm Assembly Protection
When using an automatic car wash, move
the windshield wiper lever to OFF. This
disables the automatic Rainsense windshield
wipers and/or manual windshield wipers.
With Rainsense, if the transmission is in
N (Neutral) and the vehicle speed is very
slow, the wipers will automatically stop at
the base of the windshield.
The wiper operations return to normal when
the transmission is no longer in N (Neutral)
or the vehicle speed has increased. Windshield Washer
e:
Pull the windshield wiper lever
toward you to spray windshield washer fluid
and activate the windshield wipers. The
wipers will continue until the lever is
released or the maximum wash time is
reached. When the windshield wiper lever is
released, additional wipes may occur
depending on how long the windshield
washer had been activated. See Washer
Fluid 0228 for information on filling the
windshield washer fluid reservoir.
Rear Window Wiper/Washer
The rear wiper/washer controls are on the
end of the windshield wiper lever.