CHEVROLET VOLT 2011 Owner's Manual
Manufacturer: CHEVROLET, Model Year: 2011, Model line: VOLT, Model: CHEVROLET VOLT 2011Pages: 516, PDF Size: 6.61 MB
Page 401 of 516

Black plate (35,1)Chevrolet Volt Owner Manual - 2011
Vehicle Care 10-35
Passenger Side Headlamps
To replace the high/low‐beam
headlamp:
1. Open the hood. SeeHood on
page 10‑9.
2. Remove the air cleaner cover. See Engine Air Cleaner/Filter on
page 10‑16.
3. Remove the air cleaner assembly by pulling up to
release the rear two retention
posts from the securing
grommets. Then pull it forward to
remove the remaining retention
post from the securing grommet.
4. Remove the cover from the back
of the headlamp assembly by
turning it counterclockwise.
5. Remove the bulb from the headlamp assembly by turning
it counterclockwise.
6. Disconnect the bulb from the wiring harness connector.
7. Install the new bulb in the headlamp assembly by turning
it clockwise.
8. Reconnect the wiring harness connector.
9. Install the cover on the back of the headlamp assembly by
turning it clockwise.
10. Install the air cleaner assembly by lowering the three retention
posts into the grommets. 11. Install the engine air
cleaner/filter assembly cover.
SeeEngine Air Cleaner/Filter
on page 10‑16.
Back-Up Lamps
The back-up lamp is in the rear
fascia.
To replace a bulb:
1. Remove the two inboard screws from the aero panel located
under the rear fascia.
2. Push up on the aero panel to locate the bulb socket.
Page 402 of 516

Black plate (36,1)Chevrolet Volt Owner Manual - 2011
10-36 Vehicle Care
3. Turn the bulb socketcounterclockwise to remove it
from the bulb assembly.
4. Pull the bulb from the bulb socket.
5. Push a new bulb straight into the bulb socket.
6. Reinstall the bulb socket by lining up the tabs in the lamp
assembly and turn it clockwise
to lock it into place.
7. Replace the two inboard screws from the aero panel.License Plate Lamp
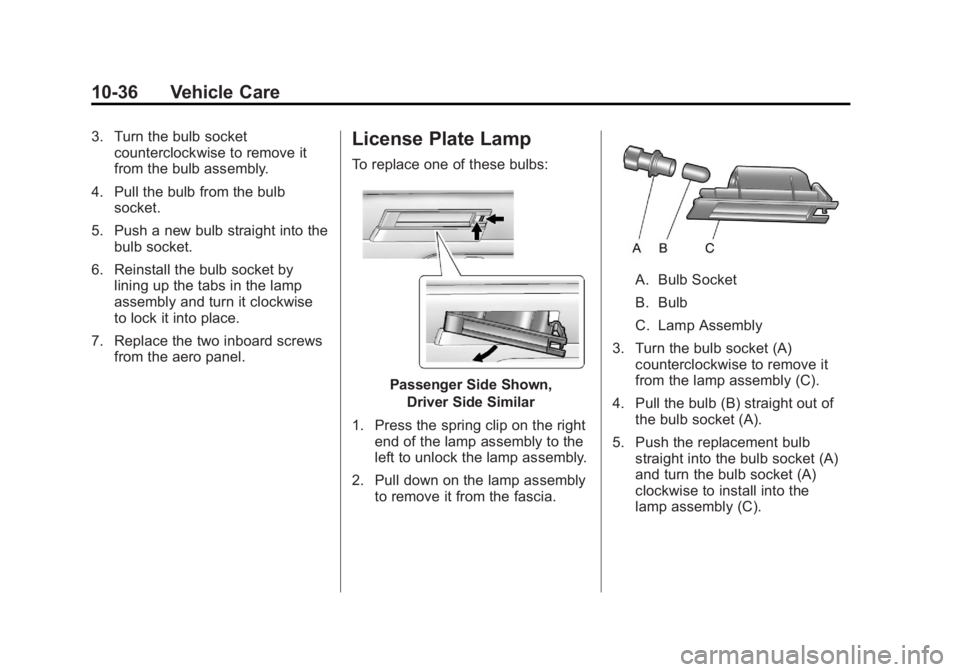
To replace one of these bulbs:
Passenger Side Shown,
Driver Side Similar
1. Press the spring clip on the right end of the lamp assembly to the
left to unlock the lamp assembly.
2. Pull down on the lamp assembly to remove it from the fascia.
A. Bulb Socket
B. Bulb
C. Lamp Assembly
3. Turn the bulb socket (A) counterclockwise to remove it
from the lamp assembly (C).
4. Pull the bulb (B) straight out of the bulb socket (A).
5. Push the replacement bulb straight into the bulb socket (A)
and turn the bulb socket (A)
clockwise to install into the
lamp assembly (C).
Page 403 of 516

Black plate (37,1)Chevrolet Volt Owner Manual - 2011
Vehicle Care 10-37
6. Reinstall the lamp assembly (C)into the fascia by inserting the
left side first.
7. Push the spring clip side into place.
Replacement Bulbs
Exterior Lamp Bulb
Number
Back-Up Lamps 3157K
High/Low‐Beam
Headlamps HIR2 (9012)
License Plate
Lamps 168LL
(W5W)
For replacement bulbs not listed
here, contact your dealer.
Electrical System
High Voltage Devices and
Wiring
{WARNING
Exposure to high voltage
can cause shock, burns, and
even death. The high voltage
components in the vehicle can
only be serviced by technicians
with special training.
High voltage components are
identified by labels. Do not
remove, open, take apart,
or modify these components.
High voltage cable or wiring has
orange covering. Do not probe,
tamper with, cut, or modify high
voltage cable or wiring.
Electrical System
Overload
The vehicle has fuses and circuit
breakers to protect against an
electrical system overload.
When the current electrical load is
too heavy, the circuit breaker opens
and closes, protecting the circuit
until the current load returns to
normal or the problem is fixed.
This greatly reduces the chance
of circuit overload and fire caused
by electrical problems.
Fuses and circuit breakers protect
the following in the vehicle:
.Headlamp Wiring
.Windshield Wiper Motor
.Power Windows and other
Power Accessories
Replace a bad fuse with a new one
of the identical size and rating.
Page 404 of 516

Black plate (38,1)Chevrolet Volt Owner Manual - 2011
10-38 Vehicle Care
If there is a problem on the road
and a fuse needs to be replaced,
the same amperage fuse can be
borrowed. Choose some feature of
the vehicle that is not needed to use
and replace it as soon as possible.
Headlamp Wiring
An electrical overload may cause
the lamps to go on and off, or in
some cases to remain off. Have
the headlamp wiring checked right
away if the lamps go on and off or
remain off.
Windshield Wipers
If the wiper motor overheats due to
heavy snow or ice, the windshield
wipers will stop until the motor cools
and the wiper control is turned off.
After removal of the blockage,
the wiper motor will restart when
the control is then moved to the
desired operating position.
Although the circuit is protected
from electrical overload, overload
due to heavy snow or ice, may
cause wiper linkage damage.
Always clear ice and heavy snow
from the windshield before using
the windshield wipers.
If the overload is caused by an
electrical problem and not snow
or ice, be sure to get it fixed.
Engine Compartment
Fuse Block
To open the fuse block cover, press
the clips at the front and back and
rotate the cover up to the side.
Notice:Spilling liquid on any
electrical component on the
vehicle may damage it. Always
keep the covers on any electrical
component.
Page 405 of 516

Black plate (39,1)Chevrolet Volt Owner Manual - 2011
Vehicle Care 10-39
Engine Compartment Fuse Block
A fuse puller is located in the engine
compartment fuse block.
The vehicle may not be equipped
with all of the fuses, relays, and
features shown. Mini Fuses Usage
1 Engine Control
Module
–Switched
Power
2 Emissions
3 Not Used Mini Fuses Usage
4 Ignition
Coils/Injectors
5 Empty
6a Empty
6b Rear Defogger
(Lower Grid)
7 Empty
8 Empty
9 Heated Mirrors
10 Air Conditioning
Control Module
11 Traction
Power Inverter
Module
–Battery
12 Cabin Heater Pump
and Valve
13 Empty
14 Empty
Page 406 of 516

Black plate (40,1)Chevrolet Volt Owner Manual - 2011
10-40 Vehicle Care
Mini Fuses Usage15 Traction Power
Inverter Module
and Transmission
Control
Module
–Battery
17 Engine Control
Module
–Battery
22 Left High‐Beam
Headlamp
24 Empty
25 Empty
26 Empty
31 Rechargeable
Energy Storage
System (High
Voltage Battery)
Coolant Pump
32 Sensing Diagnostic
Module
–Run/Crank Mini Fuses Usage
33 Run/Crank for Fuel
System Control
Module/Vehicle
Integration Control
Module
34 Vehicle
Integration Control
Module
–Battery
35 Power Electronics
Coolant Pump
36 Empty
37 Cabin Heater
Control Module
38 Empty
39 Rechargeable
Energy Storage
System (High
Voltage Battery)
Control Module Mini Fuses Usage
40 Front Windshield
Washer
41 Right High‐Beam
Headlamp
46 Empty
47 Empty
49 Empty
50 Rear Vision
Camera
–Run/
Crank (If Equipped)
51 Run/Crank for
ABS/Rechargeable
Energy Storage
System (High
Voltage Battery)/
Charger
52 Engine
Control Module/
Transmission
Control
Module
–Run/Crank
Page 407 of 516

Black plate (41,1)Chevrolet Volt Owner Manual - 2011
Vehicle Care 10-41
Mini Fuses Usage53 Traction
Power Inverter
Module
–Run/Crank
54 Run/Crank for Air
Conditioning Control
Module/Instrument
Cluster/Passenger
Airbag Display/
Accessory Power
Module
J‐Case Fuses Usage
16 Empty
18 Empty
19 Power
Window
–Front
20 Empty
21 Antilock Brake
System Electronic
Control Unit J‐Case
Fuses Usage
23 Charge Port Door
27 Empty
28 Empty
29 Empty
30 Antilock Brake
System Motor
42 Cooling Fan –Right
43 Front Wipers
44 Charger
45 Empty
48 Cooling Fan –Left
Mini Relays Usage 3 Powertrain
4 Rear Defog (Lower
Grid)/Heated Mirrors
7 Empty Mini Relays Usage
9 Empty
11 Empty
12 Empty
13 Empty
14 Run/Crank
Micro
Relays Usage
1 Empty
2 Empty
6 Empty
8 Empty
10 Empty
Ultra Micro Relays Usage
5 Charge Port Door
Page 408 of 516

Black plate (42,1)Chevrolet Volt Owner Manual - 2011
10-42 Vehicle Care
Instrument Panel Fuse
Block (Left Side)
The instrument panel fuse block
is on the driver side end of the
instrument panel. To access the
fuses, open the fuse panel door
by pulling out.
To reinstall the door, insert the
bottom tab first, then push the
door back into its original location.
Instrument Panel Fuse Block
A fuse puller is located in the engine
compartment fuse block.
The vehicle may not be equipped
with all of the fuses, relays, and
features shown. Fuses Usage
F1 Power Outlet
–Top
of IP Storage Bin
F2 Radio
F3 Instrument Cluster
F4 Infotainment Display Fuses Usage
F5 Heating, Ventilation
& Air Conditioning/
Integrated Center
Stack Switches
F6 Airbag (Sensing
Diagnostic Module/
Passenger Sensing
Module)
F7 Data Link
Connector 1/Data
Link Connector 2
Page 409 of 516

Black plate (43,1)Chevrolet Volt Owner Manual - 2011
Vehicle Care 10-43
FusesUsage
F8 Empty
F9 Empty
F10 Body Control
Module 1/Body
Control Module
Electronics/Keyless
Entry/Power Moding/
Center High Mount
Stoplamp/License
Lamps/Left Daytime
Running Lamp/Left
Front Parking Lamp/
Right Rear Taillamp/
Hatch Release
Relay Control/
Washer Pump Relay
Control/Switch
Indicator Lights
F11 Body Control
Module 4/Left
Headlamp
F12 Empty
F13 Empty Fuses
Usage
F14 Empty
F15 Power Outlet (Inside
Floor Console/Rear
of Floor Console)
F16 Empty
F17 Empty
F18 Empty
Relays Usage
R1 Retained Accessory
Power Relay for
Power Outlets
R2 Empty
R3 Empty
R4 Empty
Diodes Usage DIODE EmptyInstrument Panel Fuse
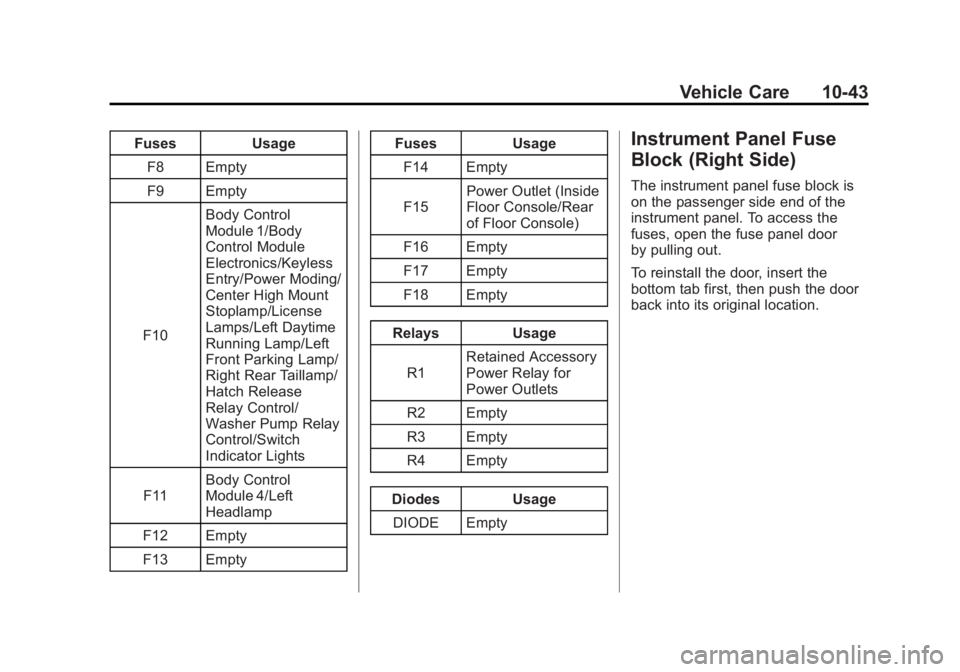
Block (Right Side)
The instrument panel fuse block is
on the passenger side end of the
instrument panel. To access the
fuses, open the fuse panel door
by pulling out.
To reinstall the door, insert the
bottom tab first, then push the door
back into its original location.
Page 410 of 516

Black plate (44,1)Chevrolet Volt Owner Manual - 2011
10-44 Vehicle Care
Instrument Panel Fuse Block
A fuse puller is located in the engine
compartment fuse block.
The vehicle may not be equipped
with all of the fuses, relays, and
features shown. Fuses Usage
F1 Steering Wheel
Switch Backlighting
F2 Empty
F3 Empty
F4 Body Control
Module 3/Right
Headlamp Fuses Usage
F5 Body Control
Module 2/Body
Control Module
Electronics/Hatch
Lamp/Right Daytime
Running Lamp/
Shifter Lock/Switch
Backlighting
F6 Body Control
Module 5/Retained
Accessory Power
Relay Control/Right
Front Turn Signal
Lamp/Left Rear Stop
and Turn Signal
Lamp/Right Front
Parking Lamp/Left
Rear Taillamp
F7 Body Control
Module 6/
Map Lights/
Courtesy Lights/
Back
–up Lamp