sensor CHEVROLET VOLT 2012 1.G User Guide
[x] Cancel search | Manufacturer: CHEVROLET, Model Year: 2012, Model line: VOLT, Model: CHEVROLET VOLT 2012 1.GPages: 454, PDF Size: 7.89 MB
Page 280 of 454
Black plate (42,1)Chevrolet Volt Owner Manual - 2012
9-42 Driving and Operating
Using Cruise Control on Hills
How well the cruise control works
on hills depends upon the vehicle
speed, load, and the steepness of
the hills. When going up steep hills,
you might have to step on the
accelerator pedal to maintain the
vehicle speed. When going
downhill, you might have to brake or
shift to a lower gear to maintain the
vehicle speed. When the brakes are
applied the cruise control is
disengaged.Ending Cruise Control
There are three ways to end cruise
control:
.Step lightly on the brake pedal;
when cruise control disengages,
the indicator light will not be lit.
.Press*.
.Press1to turn the cruise
control system off completely.
The cruise control cannot be
resumed.
Erasing Speed Memory
The cruise control set speed is
erased from memory by pressing
1
or if the vehicle is turned off.
Object Detection
Systems
Ultrasonic Parking Assist
If available, the Ultrasonic Front and
Rear Parking Assist (UFRPA)
system assists the driver with
parking and avoiding objects.
UFRPA operates at speeds less
than 8 km/h (5 mph). The sensors
on the front and rear bumper detect
objects up to 1.2 m (4 ft) in front of
the vehicle, 2.5 m (8 ft) behind the
vehicle, and at least 25 cm (10 in)
off the ground.
Page 281 of 454
Black plate (43,1)Chevrolet Volt Owner Manual - 2012
Driving and Operating 9-43
{WARNING
The Ultrasonic Front and Rear
Parking Assist (UFRPA) system
does not replace driver vision.
It cannot detect:
.Objects that are below the
bumper, under the vehicle,
or too close or far from the
vehicle.
.Children, pedestrians,
bicyclists, or pets.
If you do not use proper care
before moving forward and while
backing up, vehicle damage,
injury, or death could occur. Even
with UFRPA, always check in
front of the vehicle before moving
forward and behind the vehicle
before backing up. While moving
forward and backing up, be sure
to look for objects and check the
vehicle mirrors.
How the System Works
When the vehicle is shifted into
R (Reverse) the front and rear
sensors are automatically turned on.
After the vehicle is shifted out of
R (Reverse), the rear sensors are
turned off and the front sensors stay
on until the vehicle is above a
speed of 8 km/h (5 mph). For the
front park assist system to be active
again without shifting into
R (Reverse), the park assist button
in the overhead console must be
pressed. See “Turning the System
On and Off” later in this section.
UFRPA operates only at speeds
less than 8 km/h (5 mph).
When the vehicle is in N (Neutral),
the system may be active. If the
vehicle is in a car wash, the sensors
may detect objects in the car wash.
See “Turning the System On and
Off” later in this section to turn the
system off. High-toned beeps from the front
speakers are for objects detected
near the front bumper. Low-toned
beeps from the rear speakers are
for objects detected near the rear
bumper. The interval between the
beeps becomes shorter as the
vehicle gets closer to the obstacle.
When the distance is less than
30 cm (12 in) the beeping is a
continuous tone for five seconds.
To be detected, objects must be at
least 25 cm (10 in) off the ground
and below hatch level. Objects must
also be within 1.2 m (4 ft) in front of
the vehicle and 2.5 m (8 ft) from the
rear bumper. This distance may be
less during warmer or humid
weather.
Page 282 of 454
Black plate (44,1)Chevrolet Volt Owner Manual - 2012
9-44 Driving and Operating
Objects Detected by Both the
Front and Rear Sensors
In general, if objects are detected at
the same time near both the front
and rear bumpers while backing up,
the beeps only sound to indicate
that objects are close to the rear
bumper.
However, if an object comes within
0.3 m (1 ft) of the front bumper while
the vehicle is backing up and at the
same time there is another object
further than 0.3 m (1 ft) from the rear
bumper, then the beeps only sound
to indicate the object that is closer
to the front bumper.Turning the System On and Off
The UFRPA system can be turned
on and off by pressing the park
assist button located in the
overhead console.
The LED next to the park assist
button lights up when the system is
on and turns off when it has been
disabled.
When the system is off, PARK
ASSIST OFF displays on the Driver
Information Center (DIC). The
message disappears after a short
period of time.
UFRPA defaults to the on setting
each time the vehicle is started.
When the System Does Not
Seem to Work Properly
The following messages may be
displayed on the DIC:
SERVICE PARKING ASSIST:If
this message occurs, take the
vehicle to your dealer to repair the
system.
PARK ASSIST OFF: If the UFRPA
system does not activate due to a
temporary condition, the message
displays on the DIC. This can occur
under the following conditions:
.The driver has disabled the
system.
.The ultrasonic sensors are not
clean. Keep the vehicle's
bumpers free of mud, dirt, snow,
ice, and slush. For cleaning
instructions, see Exterior Care
on page 10‑85.
Page 283 of 454
Black plate (45,1)Chevrolet Volt Owner Manual - 2012
Driving and Operating 9-45
.The park assist sensors are
covered by frost or ice. Frost or
ice can form around and behind
the sensors and may not always
be seen; this can occur after
washing the vehicle in cold
weather. The message may not
clear until the frost or ice has
melted.
.An object was hanging out of the
hatch during the last drive cycle.
Once the object is removed,
UFRPA will return to normal
operation.
.An object or cover is attached to
the front of the vehicle.
.The bumper is damaged. Take
the vehicle to your dealer to
repair the system.
.Other conditions, such as
vibrations from a jackhammer or
the compression of air brakes on
a very large truck, are affecting
system performance.
Rear Vision
Camera (RVC)
The vehicle may have a Rear Vision
Camera (RVC) system. Read this
entire section before using it.
The RVC system can assist the
driver when backing up by
displaying a view of the area behind
the vehicle.
{WARNING
The RVC system does not display
pedestrians, bicyclists, animals,
or any other object located
outside the camera's field of view,
below the bumper, or under the
vehicle.(Continued)
WARNING (Continued)
Do not back the vehicle using
only the RVC screen or by using
the screen during longer, higher
speed backing maneuvers,
or where there could be
cross-traffic. Perceived distances
may be different from actual
distances.
Failure to use proper care before
backing may result in injury,
death, or vehicle damage. Always
check before backing by checking
behind and around the vehicle.
Page 355 of 454
Black plate (51,1)Chevrolet Volt Owner Manual - 2012
Vehicle Care 10-51
For additional information
regarding how much weight the
vehicle can carry, and an
example of the Tire and Loading
Information label, seeVehicle
Load Limits on page 9‑12. How
the vehicle is loaded affects
vehicle handling and ride
comfort. Never load the vehicle
with more weight than it was
designed to carry.
When to Check
Check the tires once a month
or more.
How to Check
Use a good quality pocket-type
gauge to check the tire
pressure. Proper tire inflation
cannot be determined by looking
at the tire. Check the tire
inflation pressure when the tires
are cold, meaning the vehicle has not been driven for at least
three hours or no more than
1.6 km (1 mi).
Remove the valve cap from the
tire valve stem. Press the tire
gauge firmly onto the valve to
get the pressure measurement.
If the cold tire inflation pressure
matches the recommended
pressure on the Tire and
Loading Information label, no
further adjustment is necessary.
If the inflation pressure is low,
add air until the recommended
pressure is reached. If the
inflation pressure in high, press
on the metal stem in the center
of the tire valve to release air.
Re‐check the tire pressure with
the tire gauge.
Return the valve caps on the
valve stems to keep out dirt and
moisture and prevent leaks.Tire Pressure Monitor
System
The Tire Pressure Monitor System
(TPMS) uses radio and sensor
technology to check tire pressure
levels. The TPMS sensors monitor
the air pressure in your tires and
transmit tire pressure readings to a
receiver located in the vehicle.
Each tire, including the spare
(if provided), should be checked
monthly when cold and inflated to
the inflation pressure recommended
by the vehicle manufacturer on the
vehicle placard or tire inflation
pressure label. (If your vehicle has
tires of a different size than the size
indicated on the vehicle placard or
tire inflation pressure label, you
should determine the proper tire
inflation pressure for those tires.)
Page 357 of 454
Black plate (53,1)Chevrolet Volt Owner Manual - 2012
Vehicle Care 10-53
Federal Communications
Commission (FCC) Rules and
with Industry Canada
Standards
SeeRadio Frequency Statement on
page 13‑17 for information
regarding Part 15 of the Federal
Communications Commission (FCC)
Rules and with Industry Canada
Standards RSS-GEN/210/220/310.
Tire Pressure Monitor
Operation
This vehicle may have a Tire
Pressure Monitor System (TPMS).
The TPMS is designed to warn the
driver when a low tire pressure
condition exists. TPMS sensors are
mounted onto each tire and wheel
assembly. The TPMS sensors
monitor the air pressure in the tires
and transmit the tire pressure
readings to a receiver located in the
vehicle.
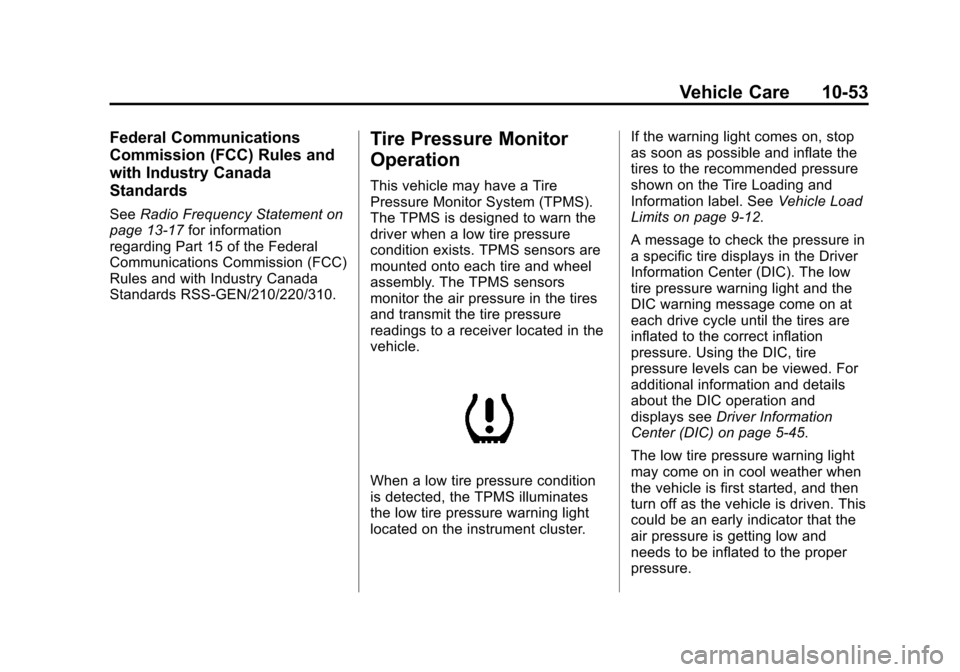
When a low tire pressure condition
is detected, the TPMS illuminates
the low tire pressure warning light
located on the instrument cluster. If the warning light comes on, stop
as soon as possible and inflate the
tires to the recommended pressure
shown on the Tire Loading and
Information label. See
Vehicle Load
Limits on page 9‑12.
A message to check the pressure in
a specific tire displays in the Driver
Information Center (DIC). The low
tire pressure warning light and the
DIC warning message come on at
each drive cycle until the tires are
inflated to the correct inflation
pressure. Using the DIC, tire
pressure levels can be viewed. For
additional information and details
about the DIC operation and
displays see Driver Information
Center (DIC) on page 5‑45.
The low tire pressure warning light
may come on in cool weather when
the vehicle is first started, and then
turn off as the vehicle is driven. This
could be an early indicator that the
air pressure is getting low and
needs to be inflated to the proper
pressure.
Page 358 of 454
Black plate (54,1)Chevrolet Volt Owner Manual - 2012
10-54 Vehicle Care
A Tire and Loading Information label
shows the size of the original
equipment tires and the correct
inflation pressure for the tires when
they are cold. SeeVehicle Load
Limits on page 9‑12, for an example
of the Tire and Loading Information
label and its location. Also see Tire
Pressure on page 10‑50.
The TPMS can warn about a low
tire pressure condition but it
does not replace normal tire
maintenance. See Tire Inspection
on page 10‑57, Tire Rotation on
page 10‑57, and Tires on
page 10‑44. Notice:
Tire sealant materials are
not all the same. A non-approved
tire sealant could damage the
TPMS sensors. TPMS sensor
damage caused by using an
incorrect tire sealant is not
covered by the vehicle warranty.
Always use only the
GM-approved tire sealant
available through your dealer or
included in the vehicle.
Factory-installed Tire Inflator Kits
use a GM-approved liquid tire
sealant. Using non-approved tire
sealants could damage the TPMS
sensors. See Tire Sealant and
Compressor Kit on page 10‑67 for
information regarding the inflator kit
materials and instructions.TPMS Malfunction Light and
Message
The TPMS will not function properly
if one or more of the TPMS sensors
are missing or inoperable. When the
system detects a malfunction, the
low tire pressure warning light
flashes for about one minute and
then stays on for the remainder of
the vehicle on/off cycle. A DIC
warning message also displays. The
malfunction light and DIC warning
message come on at each vehicle
on/off cycle until the problem is
corrected. Some of the conditions
that can cause these to come
on are:
.One of the road tires has been
replaced with the spare tire,
if the vehicle has one. The spare
tire does not have a TPMS
sensor. The malfunction light
and DIC message should go off
after the road tire is replaced
and the sensor matching
process is performed
Page 359 of 454
Black plate (55,1)Chevrolet Volt Owner Manual - 2012
Vehicle Care 10-55
successfully. See "TPMS Sensor
Matching Process" later in this
section.
.The TPMS sensor matching
process was started but not
completed or not completed
successfully after rotating the
tires. The DIC message and
malfunction light should go off
once the TPMS sensor matching
process is performed
successfully. See“TPMS Sensor
Matching Process” later in this
section.
.One or more TPMS sensors are
missing or damaged. The DIC
message and the malfunction
light should go off when the
TPMS sensors are installed and
the sensor matching process is
performed successfully. See
your dealer for service.
.Replacement tires or wheels do
not match the original equipment
tires or wheels. Tires and wheels
other than those recommended
could prevent the TPMS from
functioning properly. See Buying
New Tires on page 10‑59.
.Operating electronic devices or
being near facilities using radio
wave frequencies similar to the
TPMS could cause the TPMS
sensors to malfunction.
If the TPMS is not functioning
properly , it cannot detect or signal a
low tire condition. See your dealer
for service if the TPMS malfunction
light and DIC message come on
and stay on.
TPMS Sensor Matching
Process
Each TPMS sensor has a unique
identification code. The identification
code needs to be matched to a new
tire/wheel position after rotating the
vehicle’s tires or replacing one or
more of the TPMS sensors. Also,
the TPMS sensor matching process
should be performed after replacing
a spare tire with a road tire
containing the TPMS sensor. The
malfunction light and the DIC
message should go off at the next
drive cycle. The sensors are
matched to the tire/wheel positions,
using a TPMS relearn tool, in the
following order: driver side front tire,
passenger side front tire, passenger
side rear tire, and driver side rear.
See your dealer for service or to
purchase a relearn tool.
There are two minutes to match
the first tire/wheel position, and
five minutes overall to match all four
tire/wheel positions. If it takes
longer, the matching process stops
and must be restarted.
Page 360 of 454

Black plate (56,1)Chevrolet Volt Owner Manual - 2012
10-56 Vehicle Care
Follow the TPMS sensor matching
process:
1. Set the parking brake.
2. Put the vehicle in ON/RUN andplace the vehicle in P (Park).
3. If the DIC display is minimized, press the SELECT knob to
maximize it.
4. Use the SELECT knob to scroll to the Tire Pressure display
screen.
5. Press and hold the SELECT knob for five seconds to begin
the sensor matching process.
A message displays confirming
to begin the process.
6. Use the SELECT knob to select YES with the highlighted
selection, and press the
SELECT knob again to confirm
the selection. The horn sounds twice to signal
the receiver is in relearn mode
and the TIRE LEARNING
ACTIVE message displays on
the DIC screen.
7. Start with the driver side front tire.
8. Place the relearn tool against the tire sidewall, near the valve
stem. Then press the button to
activate the TPMS sensor.
A horn chirp confirms that the
sensor identification code has
been matched to this tire and
wheel position.
9. Proceed to the passenger side front tire, and repeat the
procedure in Step 8.
10. Proceed to the passenger side rear tire, and repeat the
procedure in Step 8. 11. Proceed to the driver side rear
tire, and repeat the procedure
in Step 8. The horn sounds
two times to indicate the
sensor identification code has
been matched to the driver
side rear tire, and the TPMS
sensor matching process is no
longer active. The TIRE
LEARNING ACTIVE message
on the DIC display screen
goes off.
12. Turn the vehicle off.
13. Set all four tires to the recommended air pressure
level as indicated on the Tire
and Loading Information label.
Page 367 of 454
Black plate (63,1)Chevrolet Volt Owner Manual - 2012
Vehicle Care 10-63
A represent higher levels of
performance on the laboratory
test wheel than the minimum
required by law. Warning: The
temperature grade for this tire is
established for a tire that is
properly inflated and not
overloaded. Excessive speed,
underinflation, or excessive
loading, either separately or in
combination, can cause heat
buildup and possible tire failure.
Wheel Alignment and Tire
Balance
The tires and wheels were aligned
and balanced at the factory to
provide the longest tire life and best
overall performance. Adjustments to
wheel alignment and tire balancing
will not be necessary on a regular
basis. However, check the
alignment if there is unusual tire
wear or if the vehicle is pulling to
one side or the other. If the vehicle
vibrates when driving on a smoothroad, the tires and wheels might
need to be rebalanced. See your
dealer for proper diagnosis.
Wheel Replacement
Replace any wheel that is bent,
cracked, or badly rusted or
corroded. If wheel nuts keep coming
loose, the wheel, wheel bolts and
wheel nuts should be replaced.
If the wheel leaks air, replace it.
Some aluminum wheels can be
repaired. See your dealer if any of
these conditions exist.
Your dealer will know the kind of
wheel that is needed.
Each new wheel should have the
same load-carrying capacity,
diameter, width, offset and be
mounted the same way as the one it
replaces.
Replace wheels, wheel bolts, wheel
nuts, or Tire Pressure Monitor
System (TPMS) sensors with new
GM original equipment parts.
{WARNING
Using the wrong replacement
wheels, wheel bolts, or wheel
nuts can be dangerous. It could
affect the braking and handling of
the vehicle. Tires can lose air,
and cause loss of control, causing
a crash. Always use the correct
wheel, wheel bolts, and wheel
nuts for replacement.
Notice: The wrong wheel can
also cause problems with bearing
life, brake cooling, speedometer
or odometer calibration,
headlamp aim, bumper height,
vehicle ground clearance, and tire
clearance to the body and
chassis.