tow CHEVROLET VOLT 2016 2.G User Guide
[x] Cancel search | Manufacturer: CHEVROLET, Model Year: 2016, Model line: VOLT, Model: CHEVROLET VOLT 2016 2.GPages: 366, PDF Size: 5.4 MB
Page 92 of 366
Chevrolet VOLT Owner Manual (GMNA-Localizing-U.S/Canada/Mexico-
9159388) - 2016 - crc - 5/20/15
Seats and Restraints 91
Position the release button on
the buckle so that the safety
belt could be quickly unbuckled
if necessary.
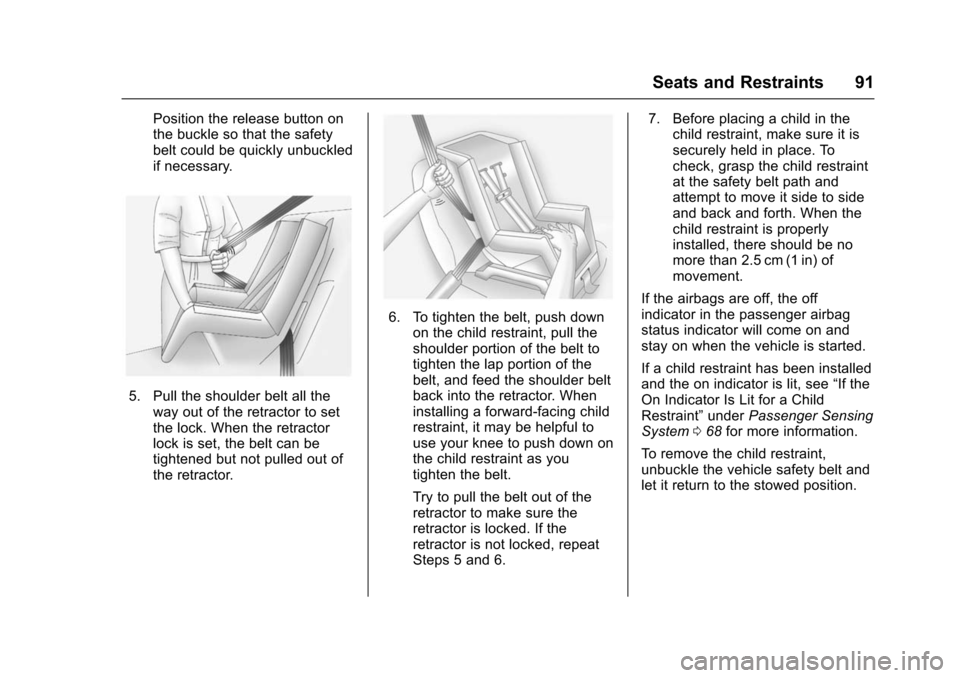
5. Pull the shoulder belt all theway out of the retractor to set
the lock. When the retractor
lock is set, the belt can be
tightened but not pulled out of
the retractor.
6. To tighten the belt, push downon the child restraint, pull the
shoulder portion of the belt to
tighten the lap portion of the
belt, and feed the shoulder belt
back into the retractor. When
installing a forward-facing child
restraint, it may be helpful to
use your knee to push down on
the child restraint as you
tighten the belt.
Try to pull the belt out of the
retractor to make sure the
retractor is locked. If the
retractor is not locked, repeat
Steps 5 and 6. 7. Before placing a child in the
child restraint, make sure it is
securely held in place. To
check, grasp the child restraint
at the safety belt path and
attempt to move it side to side
and back and forth. When the
child restraint is properly
installed, there should be no
more than 2.5 cm (1 in) of
movement.
If the airbags are off, the off
indicator in the passenger airbag
status indicator will come on and
stay on when the vehicle is started.
If a child restraint has been installed
and the on indicator is lit, see “If the
On Indicator Is Lit for a Child
Restraint” underPassenger Sensing
System 068 for more information.
To remove the child restraint,
unbuckle the vehicle safety belt and
let it return to the stowed position.
Page 97 of 366
Chevrolet VOLT Owner Manual (GMNA-Localizing-U.S/Canada/Mexico-
9159388) - 2016 - crc - 5/20/15
96 Instruments and Controls
Horn
Pressaon the steering wheel pad
to sound the horn.
Windshield Wiper/Washer
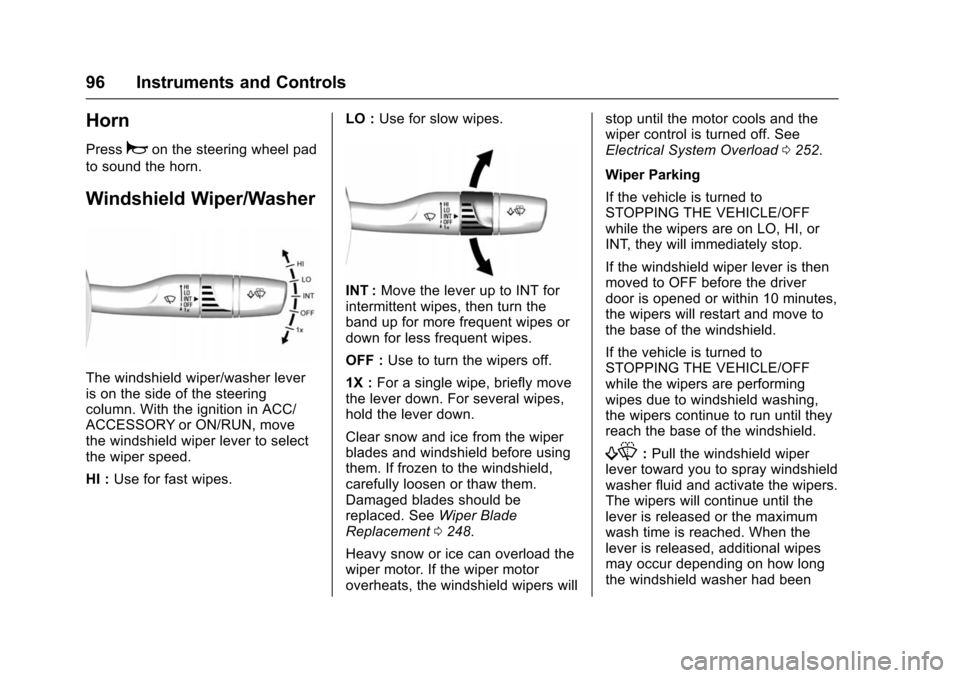
The windshield wiper/washer lever
is on the side of the steering
column. With the ignition in ACC/
ACCESSORY or ON/RUN, move
the windshield wiper lever to select
the wiper speed.
HI : Use for fast wipes. LO :
Use for slow wipes.
INT : Move the lever up to INT for
intermittent wipes, then turn the
band up for more frequent wipes or
down for less frequent wipes.
OFF : Use to turn the wipers off.
1X : For a single wipe, briefly move
the lever down. For several wipes,
hold the lever down.
Clear snow and ice from the wiper
blades and windshield before using
them. If frozen to the windshield,
carefully loosen or thaw them.
Damaged blades should be
replaced. See Wiper Blade
Replacement 0248.
Heavy snow or ice can overload the
wiper motor. If the wiper motor
overheats, the windshield wipers will stop until the motor cools and the
wiper control is turned off. See
Electrical System Overload
0252.
Wiper Parking
If the vehicle is turned to
STOPPING THE VEHICLE/OFF
while the wipers are on LO, HI, or
INT, they will immediately stop.
If the windshield wiper lever is then
moved to OFF before the driver
door is opened or within 10 minutes,
the wipers will restart and move to
the base of the windshield.
If the vehicle is turned to
STOPPING THE VEHICLE/OFF
while the wipers are performing
wipes due to windshield washing,
the wipers continue to run until they
reach the base of the windshield.
f: Pull the windshield wiper
lever toward you to spray windshield
washer fluid and activate the wipers.
The wipers will continue until the
lever is released or the maximum
wash time is reached. When the
lever is released, additional wipes
may occur depending on how long
the windshield washer had been
Page 112 of 366
Chevrolet VOLT Owner Manual (GMNA-Localizing-U.S/Canada/Mexico-
9159388) - 2016 - crc - 5/20/15
Instruments and Controls 111
{Warning
The brake system might not be
working properly if the brake
system warning light is on.
Driving with the brake system
warning light on can lead to a
crash. If the light is still on after
the vehicle has been pulled off
the road and carefully stopped,
have the vehicle towed for
service.
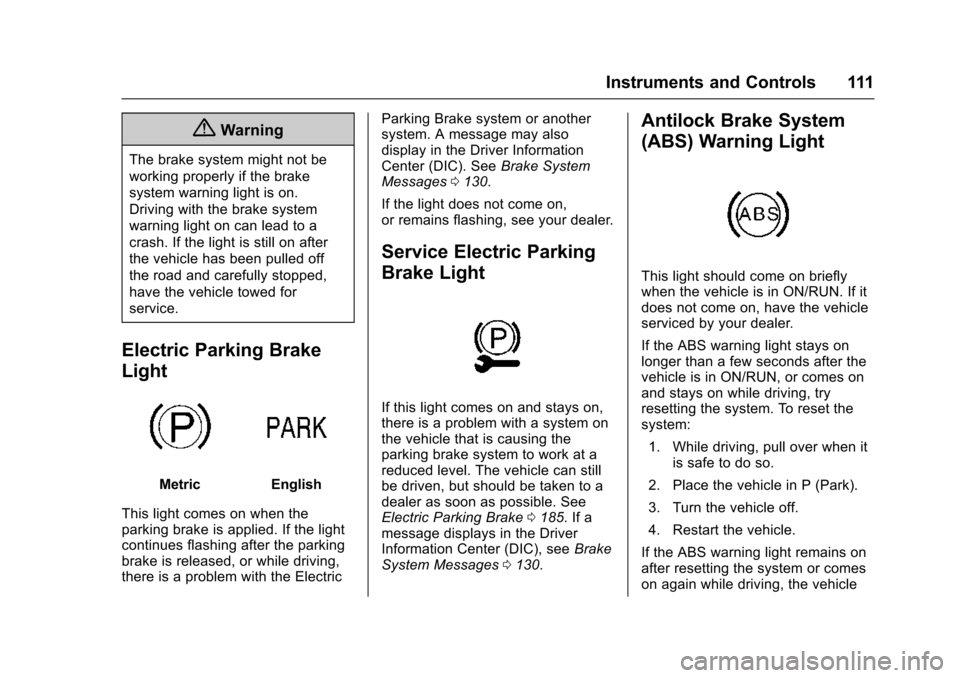
Electric Parking Brake
Light
MetricEnglish
This light comes on when the
parking brake is applied. If the light
continues flashing after the parking
brake is released, or while driving,
there is a problem with the Electric Parking Brake system or another
system. A message may also
display in the Driver Information
Center (DIC). See
Brake System
Messages 0130.
If the light does not come on,
or remains flashing, see your dealer.
Service Electric Parking
Brake Light
If this light comes on and stays on,
there is a problem with a system on
the vehicle that is causing the
parking brake system to work at a
reduced level. The vehicle can still
be driven, but should be taken to a
dealer as soon as possible. See
Electric Parking Brake 0185. If a
message displays in the Driver
Information Center (DIC), see Brake
System Messages 0130.
Antilock Brake System
(ABS) Warning Light
This light should come on briefly
when the vehicle is in ON/RUN. If it
does not come on, have the vehicle
serviced by your dealer.
If the ABS warning light stays on
longer than a few seconds after the
vehicle is in ON/RUN, or comes on
and stays on while driving, try
resetting the system. To reset the
system:
1. While driving, pull over when it is safe to do so.
2. Place the vehicle in P (Park).
3. Turn the vehicle off.
4. Restart the vehicle.
If the ABS warning light remains on
after resetting the system or comes
on again while driving, the vehicle
Page 113 of 366
Chevrolet VOLT Owner Manual (GMNA-Localizing-U.S/Canada/Mexico-
9159388) - 2016 - crc - 5/20/15
112 Instruments and Controls
needs service. If the ABS warning
light is on, but the regular brake
system warning light is not on, the
antilock brakes are not working
properly, but the regular brakes are
still functioning. Have the vehicle
serviced right away. If both brake
lights are on, the vehicle does not
have antilock brakes, and there is a
problem with the regular brakes as
well. Have the vehicle towed for
service. SeeTowing the Vehicle
0 300.
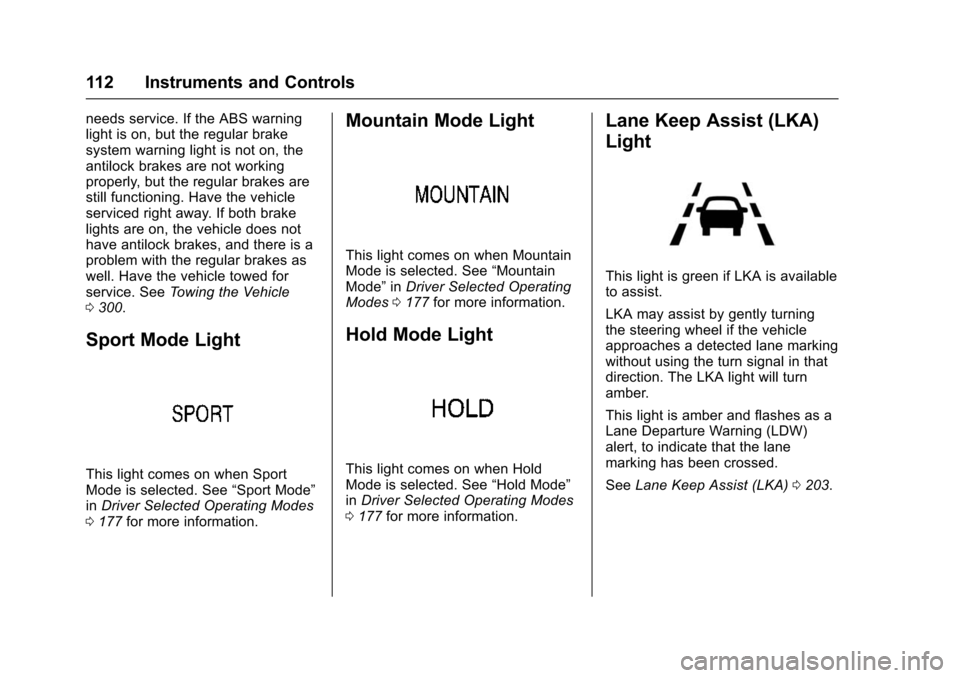
Sport Mode Light
This light comes on when Sport
Mode is selected. See “Sport Mode”
in Driver Selected Operating Modes
0 177 for more information.
Mountain Mode Light
This light comes on when Mountain
Mode is selected. See “Mountain
Mode” inDriver Selected Operating
Modes 0177 for more information.
Hold Mode Light
This light comes on when Hold
Mode is selected. See “Hold Mode”
in Driver Selected Operating Modes
0 177 for more information.
Lane Keep Assist (LKA)
Light
This light is green if LKA is available
to assist.
LKA may assist by gently turning
the steering wheel if the vehicle
approaches a detected lane marking
without using the turn signal in that
direction. The LKA light will turn
amber.
This light is amber and flashes as a
Lane Departure Warning (LDW)
alert, to indicate that the lane
marking has been crossed.
See Lane Keep Assist (LKA) 0203.
Page 148 of 366
Chevrolet VOLT Owner Manual (GMNA-Localizing-U.S/Canada/Mexico-
9159388) - 2016 - crc - 5/20/15
Lighting 147
high-beam on light appears on the
instrument cluster when the high
beams are on.
Driving with IntelliBeam
The system only activates the high
beams when driving over 40 km/h
(25 mph).
There is a sensor near the top
center of the windshield that
automatically controls the system.
Keep this area of the windshield
clear of debris to allow for best
system performance.
The high-beam headlamps remain
on, under the automatic control,
until one of the following situations
occurs:
.The system detects an
approaching vehicle's
headlamps.
. The system detects a preceding
vehicle's taillamps.
. The outside light is bright
enough that high-beam
headlamps are not required.
. The vehicle's speed drops below
20 km/h (12 mph). .
The IntelliBeam system is
disabled by the high/low-beam
changer or the flash-to-pass
feature. If this happens,
press
bon the turn signal
lever when the exterior lamp
control is in the AUTO or
5
position to reactivate the
IntelliBeam system. The
instrument cluster light will come
on to indicate the IntelliBeam
system is reactivated. See
Headlamp High/Low-Beam
Changer 0147 and
Flash-to-Pass 0148.
The high beams may not turn off
automatically if the system cannot
detect another vehicle's lamps
because of any of the following:
. The other vehicle's lamps are
missing, damaged, obstructed
from view, or otherwise
undetected.
. The other vehicle's lamps are
covered with dirt, snow, and/or
road spray. .
The other vehicle's lamps cannot
be detected due to dense
exhaust, smoke, fog, snow, road
spray, mist, or other airborne
obstructions.
. The vehicle's windshield is dirty,
cracked, or obstructed by
something that blocks the view
of the light sensor.
. The vehicle is loaded such that
the front end points upward,
causing the light sensor to aim
high and not detect headlamps
and taillamps.
. The vehicle is being driven on
winding or hilly roads.
The IntelliBeam system may need to
be disabled if any of the above
conditions exist.
Headlamp High/
Low-Beam Changer
2 3
: Push the turn signal lever
away from you and release, to turn
the high beams on. To return to low
beams, push the lever again or pull
it toward you and release.
Page 149 of 366
Chevrolet VOLT Owner Manual (GMNA-Localizing-U.S/Canada/Mexico-
9159388) - 2016 - crc - 5/20/15
148 Lighting
This indicator light turns on in the
instrument cluster when the
high-beam headlamps are on.
Flash-to-Pass
The flash-to-pass feature works with
the low beams or Daytime Running
Lamps (DRL) on or off.
To flash the high beams, pull the
turn signal lever toward you
momentarily and then release it.
Daytime Running
Lamps (DRL)
The DRL system comes on in
daylight when the following
conditions are met:
.The vehicle is on.
. The exterior lamp control is in
the automatic position. .
The electric drive unit is not in
P (Park).
. The light sensor determines it is
daytime.
Fully functional DRL are required on
all vehicles first sold in Canada.
When the DRL are on, the taillamps,
sidemarker lamps, instrument panel
lights, and other lamps will not be
on. The instrument cluster will be lit.
When the exterior lamp control is
turned to the headlamp position, the
low-beam headlamps come on. The
other lamps that come on with the
headlamps will also come on.
When the vehicle is on and you are
stopped, the DRL can be turned off
by moving the shift lever to P (Park).
The DRL will stay off until the shift
lever is moved out of the P (Park)
position.
The regular headlamp system
should be turned on when needed.
Automatic Headlamp
System
When the exterior lamp control is
set to AUTO and it is dark enough
outside, the headlamps come on
automatically.
There is a light sensor on top of the
instrument panel. Do not cover the
sensor, otherwise the headlamps
will come on when they are not
needed.
The system may also turn on the
headlamps when driving through a
parking garage or tunnel.
Page 161 of 366
Chevrolet VOLT Owner Manual (GMNA-Localizing-U.S/Canada/Mexico-
9159388) - 2016 - crc - 5/20/15
160 Climate Controls
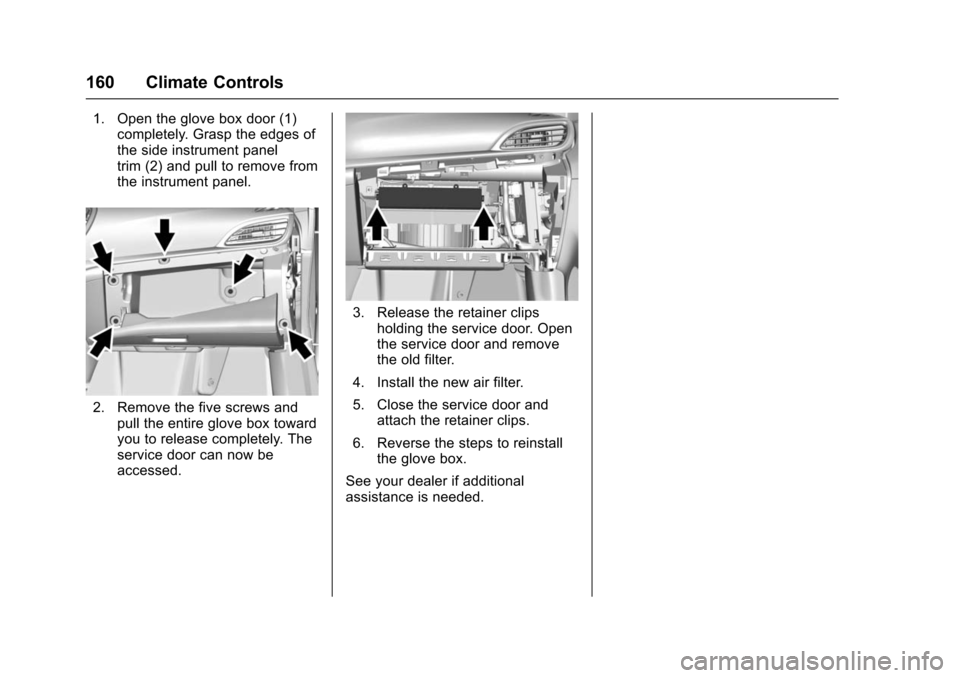
1. Open the glove box door (1)completely. Grasp the edges of
the side instrument panel
trim (2) and pull to remove from
the instrument panel.
2. Remove the five screws and
pull the entire glove box toward
you to release completely. The
service door can now be
accessed.
3. Release the retainer clipsholding the service door. Open
the service door and remove
the old filter.
4. Install the new air filter.
5. Close the service door and attach the retainer clips.
6. Reverse the steps to reinstall the glove box.
See your dealer if additional
assistance is needed.
Page 163 of 366
Chevrolet VOLT Owner Manual (GMNA-Localizing-U.S/Canada/Mexico-
9159388) - 2016 - crc - 5/20/15
162 Driving and Operating
Fuel
Fuel . . . . . . . . . . . . . . . . . . . . . . . . . . 219
California FuelRequirements . . . . . . . . . . . . . . . 220
Fuels in Foreign Countries . . . 221
Fuel Additives . . . . . . . . . . . . . . . . 221
Filling the Tank . . . . . . . . . . . . . . . 221
Filling a Portable Fuel Container . . . . . . . . . . . . . . . . . . . 223
Trailer Towing
General TowingInformation . . . . . . . . . . . . . . . . . . 223
Conversions and Add-Ons
Add-On ElectricalEquipment . . . . . . . . . . . . . . . . . . 224
Driving Information
Distracted Driving
Distraction comes in many forms
and can take your focus from the
task of driving. Exercise good
judgment and do not let other
activities divert your attention away
from the road. Many local
governments have enacted laws
regarding driver distraction. Become
familiar with the local laws in
your area.
To avoid distracted driving, always
keep your eyes on the road, hands
on the wheel, and mind on the drive.
. Do not use a phone in
demanding driving situations.
Use a hands-free method to
place or receive necessary
phone calls.
. Watch the road. Do not read,
take notes, or look up
information on phones or other
electronic devices.
. Designate a front seat
passenger to handle potential
distractions. .
Become familiar with vehicle
features before driving, such as
programming favorite radio
stations and adjusting climate
control and seat settings.
Program all trip information into
any navigation device prior to
driving.
. Wait until the vehicle is parked
to retrieve items that have fallen
to the floor.
. Stop or park the vehicle to tend
to children.
. Keep pets in an appropriate
carrier or restraint.
. Avoid stressful conversations
while driving, whether with a
passenger or on a cell phone.
{Warning
Taking your eyes off the road too
long or too often could cause a
crash resulting in injury or death.
Focus your attention on driving.
Page 169 of 366
Chevrolet VOLT Owner Manual (GMNA-Localizing-U.S/Canada/Mexico-
9159388) - 2016 - crc - 5/20/15
168 Driving and Operating
To save fuel, start the vehicle for
short periods to warm the vehicle
and then shut the engine off and
partially close the window. Moving
about to keep warm also helps.
If the Vehicle Is Stuck
Slowly and cautiously spin the
wheels to free the vehicle when
stuck in sand, mud, ice, or snow.
The Traction Control System (TCS)
must be turned off by pressing the
TCS/ESC button. Traction control is
not completely off, but will only
engage if the maneuver can cause
damage to the electric drive unit.
{Warning
If the vehicle's tires spin at high
speed, they can explode, and you
or others could be injured. The
vehicle can overheat, causing an
engine compartment fire or other
damage. Spin the wheels as little
as possible and avoid going
above 56 km/h (35 mph).
Rocking the Vehicle to Get
it Out
Turn the steering wheel left and
right to clear the area around the
front wheels. Shift back and forth
between R (Reverse) and a forward
gear, spinning the wheels as little as
possible. The Traction Control
System prevents the tires from
spinning at high speeds. To prevent
electric drive unit wear, wait until the
wheels stop spinning before shifting
gears. Release the accelerator
pedal while shifting, and press
lightly on the accelerator pedal
when the electric drive unit is in
gear. Slowly spinning the wheels in
the forward and reverse directions
causes a rocking motion that could
free the vehicle. If that does not get
the vehicle out after a few tries, it
might need to be towed out. If the
vehicle does need to be towed out,
seeTowing the Vehicle 0300.
Vehicle Load Limits
It is very important to know how
much weight the vehicle can
carry. This weight is called the vehicle capacity weight and
includes the weight of all
occupants, cargo, and all
nonfactory-installed options.
Two labels on the vehicle may
show how much weight it may
properly carry: the Tire and
Loading Information label and
the Certification label.
{Warning
Do not load the vehicle any
heavier than the Gross
Vehicle Weight Rating
(GVWR), or either the
maximum front or rear Gross
Axle Weight Rating (GAWR).
This can cause systems to
break and change the way the
vehicle handles. This could
cause loss of control and a
crash. Overloading can also
reduce stopping distance,
damage the tires, and shorten
the life of the vehicle.
Page 170 of 366
Chevrolet VOLT Owner Manual (GMNA-Localizing-U.S/Canada/Mexico-
9159388) - 2016 - crc - 5/20/15
Driving and Operating 169
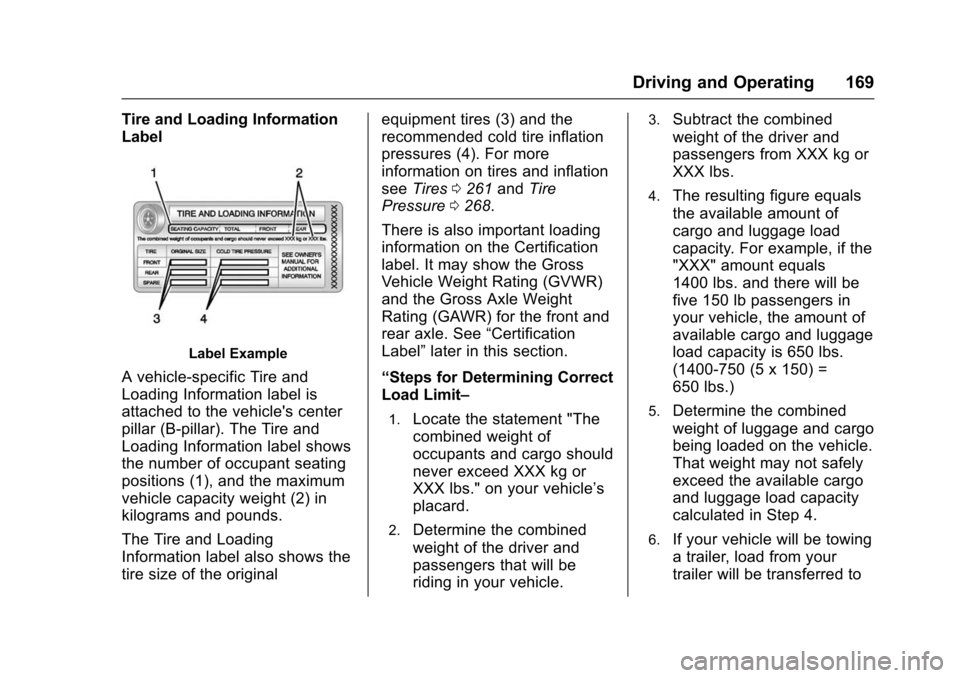
Tire and Loading Information
Label
Label Example
A vehicle-specific Tire and
Loading Information label is
attached to the vehicle's center
pillar (B-pillar). The Tire and
Loading Information label shows
the number of occupant seating
positions (1), and the maximum
vehicle capacity weight (2) in
kilograms and pounds.
The Tire and Loading
Information label also shows the
tire size of the originalequipment tires (3) and the
recommended cold tire inflation
pressures (4). For more
information on tires and inflation
see
Tires 0261 andTire
Pressure 0268.
There is also important loading
information on the Certification
label. It may show the Gross
Vehicle Weight Rating (GVWR)
and the Gross Axle Weight
Rating (GAWR) for the front and
rear axle. See “Certification
Label” later in this section.
“Steps for Determining Correct
Load Limit–
1.Locate the statement "The
combined weight of
occupants and cargo should
never exceed XXX kg or
XXX lbs." on your vehicle’s
placard.
2.Determine the combined
weight of the driver and
passengers that will be
riding in your vehicle.
3.Subtract the combined
weight of the driver and
passengers from XXX kg or
XXX lbs.
4.The resulting figure equals
the available amount of
cargo and luggage load
capacity. For example, if the
"XXX" amount equals
1400 lbs. and there will be
five 150 lb passengers in
your vehicle, the amount of
available cargo and luggage
load capacity is 650 lbs.
(1400-750 (5 x 150) =
650 lbs.)
5.Determine the combined
weight of luggage and cargo
being loaded on the vehicle.
That weight may not safely
exceed the available cargo
and luggage load capacity
calculated in Step 4.
6.If your vehicle will be towing
a trailer, load from your
trailer will be transferred to