radio CHEVROLET VOLT 2019 User Guide
[x] Cancel search | Manufacturer: CHEVROLET, Model Year: 2019, Model line: VOLT, Model: CHEVROLET VOLT 2019Pages: 373, PDF Size: 5.66 MB
Page 192 of 373
Chevrolet VOLT Owner Manual (GMNA-Localizing-U.S./Canada/Mexico-
12163007) - 2019 - CRC - 11/5/18
Driving and Operating 191
Ending Cruise Control
There are five ways to end cruise
control:
.Step lightly on the brake pedal.
. Press
*.
. Shift the electric drive unit to
N (Neutral).
. Press
5to turn the cruise
control system off completely.
. Press the Regen on Demand
paddle.
Erasing Speed Memory
The cruise control set speed is
erased from memory if
5is pressed
or if the vehicle is turned off.
Adaptive Cruise Control
If equipped, Adaptive Cruise Control
(ACC) allows the cruise control set
speed and following gap to be
selected. Read this entire section
before using this system. The
following gap is the following time
between your vehicle and a vehicle
detected directly ahead in your path, moving in the same direction. If no
vehicle is detected in your path,
ACC works like regular cruise
control. ACC uses camera and
radar sensors. See
Radio
Frequency Statement 0345.
If a vehicle is detected in your path,
ACC can apply acceleration or
limited, moderate braking to
maintain the selected following gap.
To disengage ACC, apply the brake.
If ACC is controlling your vehicle
speed when the traction control
system (TCS) or StabiliTrak/
Electronic Stability Control (ESC)
system activates, ACC may
automatically disengage. See
Traction Control/Electronic Stability
Control 0186. When road
conditions allow ACC to be safely
used, the ACC can be turned back
on. Disabling the TCS or StabiliTrak/
ESC system will disengage and
prevent engagement of ACC.
ACC will not engage if the TCS or
StabiliTrak/ESC system is disabled. ACC can reduce the need for you to
frequently brake and accelerate,
especially when used on
expressways, freeways, and
interstate highways. When used on
other roads, you may need to take
over the control of braking or
acceleration more often.
{Warning
ACC has limited braking ability
and may not have time to slow
the vehicle down enough to avoid
a collision with another vehicle
you are following. This can occur
when vehicles suddenly slow or
stop ahead, or enter your lane.
Also see
“Alerting the Driver” in
this section. Complete attention is
always required while driving and
you should be ready to take
action and apply the brakes. See
Defensive Driving 0159.
Page 213 of 373
Chevrolet VOLT Owner Manual (GMNA-Localizing-U.S./Canada/Mexico-
12163007) - 2019 - CRC - 11/5/18
212 Driving and Operating
If the LCA displays do not light up
when moving vehicles are in the
side blind zone or rapidly
approaching this zone and the
system is clean, the system may
need service. Take the vehicle to
your dealer.
Radio Frequency Information
SeeRadio Frequency Statement
0 345.
Lane Departure
Warning (LDW)
If equipped, LDW may help avoid
crashes due to unintentional lane
departures. It may provide a
warning if the vehicle is crossing a
detected lane marking without using
a turn signal in the lane departure
direction. Since this system is part
of the Lane Keep Assist (LKA)
system, read the entire LKA section
before using this feature.
Lane Keep Assist (LKA)
If equipped, LKA may help avoid
crashes due to unintentional lane
departures. It may assist by gently
turning the steering wheel if the
vehicle approaches a detected lane
marking without using a turn signal
in that direction. It may also provide
a Lane Departure Warning (LDW)
system alert as the lane marking is
crossed. The LKA system will not
assist or provide an LDW alert if it
detects that you are actively
steering. Override LKA by turning
the steering wheel. LKA uses a
camera to detect lane markings
between 60 km/h (37 mph) and
180 km/h (112 mph).
{Warning
The LKA system does not
continuously steer the vehicle.
It may not keep the vehicle in the
lane or give a Lane Departure
Warning (LDW) alert, even if a
lane marking is detected.
(Continued)
Warning (Continued)
The LKA and LDW systems
may not:
. Provide an alert or enough
steering assist to avoid a
lane departure or crash.
. Detect lane markings under
poor weather or visibility
conditions. This can occur if
the windshield or
headlamps are blocked by
dirt, snow, or ice, if they are
not in proper condition, or if
the sun shines directly into
the camera.
. Detect road edges.
. Detect lanes on winding or
hilly roads.
If LKA only detects lane markings
on one side of the road, it will
only assist or provide an LDW
alert when approaching the lane
on the side where it has detected
a lane marking. Even with LKA (Continued)
Page 222 of 373

Chevrolet VOLT Owner Manual (GMNA-Localizing-U.S./Canada/Mexico-
12163007) - 2019 - CRC - 11/5/18
Driving and Operating 221
Charge Cord
IMPORTANT SAFETY
INSTRUCTIONS
This symbol means Warning: Risk
of electrical shock.
SeeRadio Frequency Statement
0 345.
A portable charge cord used to
charge the vehicle high voltage
battery is stored in the left storage
compartment in the rear cargo area.
1. Wall Plug
2. Status Indicators
3. Vehicle Plug
4. Release Button
Important Information about
Portable Electric Vehicle Charging
. Charging an electric vehicle can
stress a building’ s electrical
system more than a typical
household appliance. .
Before plugging into any
electrical outlet, have a qualified
electrician inspect and verify the
electrical system for heavy-duty
service at a 12 amp
continuous load.
. Electrical outlets may wear out
with normal usage or may be
damaged over time, making
them unsuitable for electric
vehicle charging.
. Check the electrical outlet/plug
while charging and discontinue
use if the electrical outlet/plug is
hot, then have the electrical
outlet serviced by a qualified
electrician.
. When outdoors, plug into a
weatherproof electrical outlet.
. Mount the charging cord to
reduce strain on the electrical
outlet/plug.
Page 228 of 373
Chevrolet VOLT Owner Manual (GMNA-Localizing-U.S./Canada/Mexico-
12163007) - 2019 - CRC - 11/5/18
Driving and Operating 227
5. Securely mount the chargecord on to the screws.
6. Connect the wall plug to the electrical outlet.
7. Connect the vehicle plug to the charge port.
Lock Feature
A lock can be added to the vehicle
plug for additional security.
FCC Notice
This unit has systems that operate
on a radio frequency that complies
with Part 15 of the Federal
Communications Commission (FCC)
rules and with ICES-003E of
Industry Canada.
FCC rules, ICES-003E of Industry
Canada, and EMC Directive 2004/
108/EC.
Operation is subject to the following
two conditions:
.The device may not cause
interference. .
The device must accept any
interference received, including
interference that may cause
undesired operation of the
device.
Changes or modifications to any of
these systems by other than an
authorized service facility could void
authorization to use this equipment.
Utility Interruption of
Charging
If using AC charging, this vehicle
will respond to remote requests
through OnStar to limit or
completely block electrical power
grid usage for brief time periods.
A utility interruption of charging may
increase AC vehicle charge times.
When electrical grid power is
completely blocked, the vehicle will
delay charging until the utility
interruption has expired. The vehicle
should be left plugged in so that the
vehicle can automatically begin
charging.
Page 281 of 373
Chevrolet VOLT Owner Manual (GMNA-Localizing-U.S./Canada/Mexico-
12163007) - 2019 - CRC - 11/5/18
280 Vehicle Care
If the inflation pressure is low,
add air until the recommended
pressure is reached. If the
inflation pressure in high, press
on the metal stem in the center
of the tire valve to release air.
Re-check the tire pressure with
the tire gauge.
Put the valve caps back on the
valve stems to keep out dirt and
moisture and prevent leaks. Use
only valve caps designed for the
vehicle by GM. TPMS sensors
could be damaged and would
not be covered by the vehicle
warranty.
Tire Pressure Monitor
System
The Tire Pressure Monitor System
(TPMS) uses radio and sensor
technology to check tire pressure
levels. The TPMS sensors monitor
the air pressure in your tires and
transmit tire pressure readings to a
receiver located in the vehicle.Each tire, including the spare (if
provided), should be checked
monthly when cold and inflated to
the inflation pressure recommended
by the vehicle manufacturer on the
vehicle placard or tire inflation
pressure label. (If your vehicle has
tires of a different size than the size
indicated on the vehicle placard or
tire inflation pressure label, you
should determine the proper tire
inflation pressure for those tires.)
As an added safety feature, your
vehicle has been equipped with a
tire pressure monitoring system
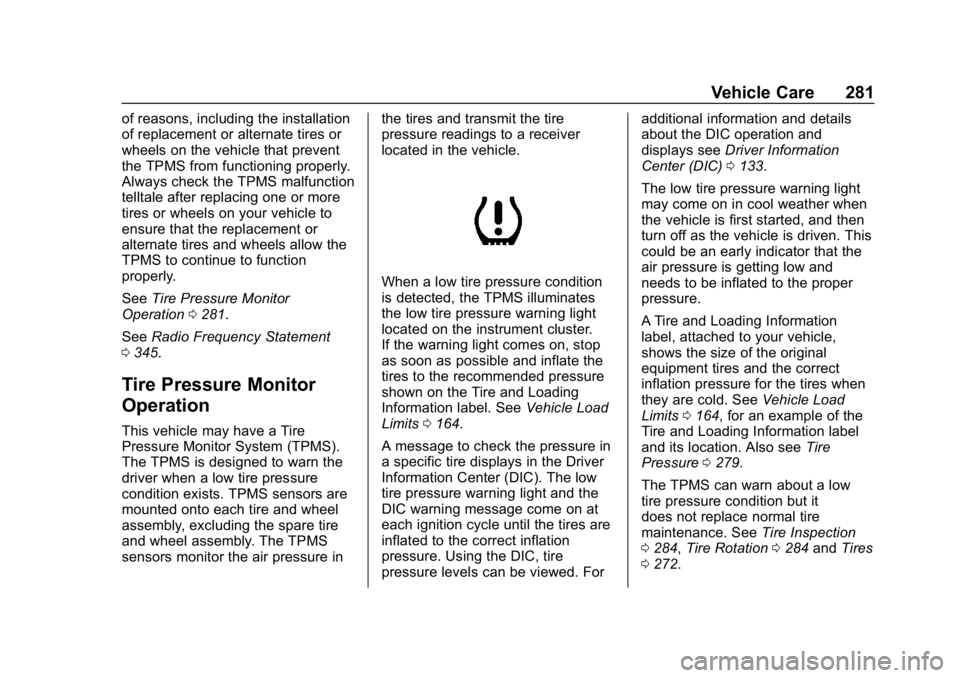
(TPMS) that illuminates a low tire
pressure telltale when one or more
of your tires is significantly
under-inflated.
Accordingly, when the low tire
pressure telltale illuminates, you
should stop and check your tires as
soon as possible, and inflate them
to the proper pressure. Driving on a
significantly under-inflated tire
causes the tire to overheat and can
lead to tire failure. Under-inflation
also reduces fuel efficiency and tire
tread life, and may affect the
vehicle's handling and stopping
ability.
Please note that the TPMS is not a
substitute for proper tire
maintenance, and it is the driver's
responsibility to maintain correct tire
pressure, even if under-inflation has
not reached the level to trigger
illumination of the TPMS low tire
pressure telltale.
Your vehicle has also been
equipped with a TPMS malfunction
indicator to indicate when the
system is not operating properly.
The TPMS malfunction indicator is
combined with the low tire pressure
telltale. When the system detects a
malfunction, the telltale will flash for
approximately one minute and then
remain continuously illuminated.
This sequence will continue upon
subsequent vehicle start-ups as
long as the malfunction exists.
When the malfunction indicator is
illuminated, the system may not be
able to detect or signal low tire
pressure as intended. TPMS
malfunctions may occur for a variety
Page 282 of 373
Chevrolet VOLT Owner Manual (GMNA-Localizing-U.S./Canada/Mexico-
12163007) - 2019 - CRC - 11/5/18
Vehicle Care 281
of reasons, including the installation
of replacement or alternate tires or
wheels on the vehicle that prevent
the TPMS from functioning properly.
Always check the TPMS malfunction
telltale after replacing one or more
tires or wheels on your vehicle to
ensure that the replacement or
alternate tires and wheels allow the
TPMS to continue to function
properly.
SeeTire Pressure Monitor
Operation 0281.
See Radio Frequency Statement
0 345.
Tire Pressure Monitor
Operation
This vehicle may have a Tire
Pressure Monitor System (TPMS).
The TPMS is designed to warn the
driver when a low tire pressure
condition exists. TPMS sensors are
mounted onto each tire and wheel
assembly, excluding the spare tire
and wheel assembly. The TPMS
sensors monitor the air pressure in the tires and transmit the tire
pressure readings to a receiver
located in the vehicle.
When a low tire pressure condition
is detected, the TPMS illuminates
the low tire pressure warning light
located on the instrument cluster.
If the warning light comes on, stop
as soon as possible and inflate the
tires to the recommended pressure
shown on the Tire and Loading
Information label. See
Vehicle Load
Limits 0164.
A message to check the pressure in
a specific tire displays in the Driver
Information Center (DIC). The low
tire pressure warning light and the
DIC warning message come on at
each ignition cycle until the tires are
inflated to the correct inflation
pressure. Using the DIC, tire
pressure levels can be viewed. For additional information and details
about the DIC operation and
displays see
Driver Information
Center (DIC) 0133.
The low tire pressure warning light
may come on in cool weather when
the vehicle is first started, and then
turn off as the vehicle is driven. This
could be an early indicator that the
air pressure is getting low and
needs to be inflated to the proper
pressure.
A Tire and Loading Information
label, attached to your vehicle,
shows the size of the original
equipment tires and the correct
inflation pressure for the tires when
they are cold. See Vehicle Load
Limits 0164, for an example of the
Tire and Loading Information label
and its location. Also see Tire
Pressure 0279.
The TPMS can warn about a low
tire pressure condition but it
does not replace normal tire
maintenance. See Tire Inspection
0 284, Tire Rotation 0284 andTires
0 272.
Page 283 of 373
Chevrolet VOLT Owner Manual (GMNA-Localizing-U.S./Canada/Mexico-
12163007) - 2019 - CRC - 11/5/18
282 Vehicle Care
Caution
Tire sealant materials are not all
the same. A non-approved tire
sealant could damage the TPMS
sensors. TPMS sensor damage
caused by using an incorrect tire
sealant is not covered by the
vehicle warranty. Always use only
the GM approved tire sealant
available through your dealer or
included in the vehicle.
Factory-installed Tire Inflator Kits
use a GM-approved liquid tire
sealant. Using non-approved tire
sealants could damage the TPMS
sensors. See Tire Sealant and
Compressor Kit 0292 for
information regarding the inflator kit
materials and instructions.
TPMS Malfunction Light and
Message
The TPMS will not function properly
if one or more of the TPMS sensors
are missing or inoperable. When the
system detects a malfunction, the low tire pressure warning light
flashes for about one minute and
then stays on for the remainder of
the ignition cycle. A DIC warning
message also displays. The
malfunction light and DIC warning
message come on at each ignition
cycle until the problem is corrected.
Some of the conditions that can
cause these to come on are:
.
One of the road tires has been
replaced with the spare tire. The
spare tire does not have a
TPMS sensor. The malfunction
light and DIC message should
go off after the road tire is
replaced and the sensor
matching process is performed
successfully. See “TPMS Sensor
Matching Process” later in this
section.
. One or more TPMS sensors are
missing or damaged. The
malfunction light and the DIC
message should go off when the
TPMS sensors are installed and
the sensor matching process is
performed successfully. See
your dealer for service. .
Replacement tires or wheels do
not match the original equipment
tires or wheels. Tires and wheels
other than those recommended
could prevent the TPMS from
functioning properly. See Buying
New Tires 0286.
. Operating electronic devices or
being near facilities using radio
wave frequencies similar to the
TPMS could cause the TPMS
sensors to malfunction.
If the TPMS is not functioning
properly it cannot detect or signal a
low tire pressure condition. See
your dealer for service if the TPMS
malfunction light and DIC message
comes on and stays on.
Tire Fill Alert (If Equipped)
This feature provides visual and
audible alerts outside the vehicle to
help when inflating an underinflated
tire to the recommended cold tire
pressure.
Page 302 of 373
Chevrolet VOLT Owner Manual (GMNA-Localizing-U.S./Canada/Mexico-
12163007) - 2019 - CRC - 11/5/18
Vehicle Care 301
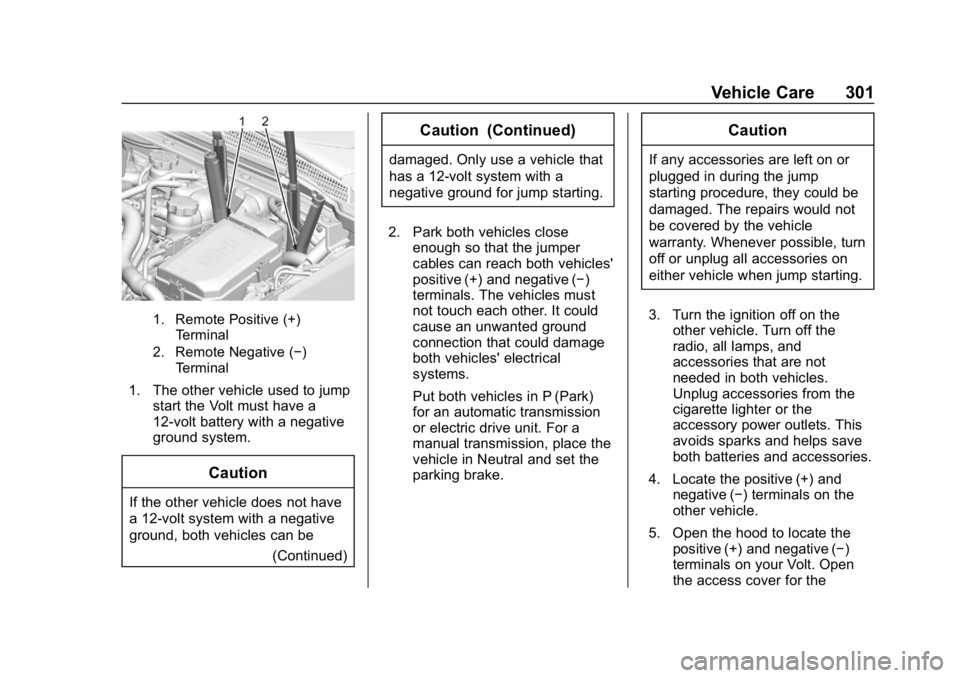
1. Remote Positive (+)Terminal
2. Remote Negative (−) Terminal
1. The other vehicle used to jump start the Volt must have a
12-volt battery with a negative
ground system.
Caution
If the other vehicle does not have
a 12-volt system with a negative
ground, both vehicles can be
(Continued)
Caution (Continued)
damaged. Only use a vehicle that
has a 12-volt system with a
negative ground for jump starting.
2. Park both vehicles close enough so that the jumper
cables can reach both vehicles'
positive (+) and negative (−)
terminals. The vehicles must
not touch each other. It could
cause an unwanted ground
connection that could damage
both vehicles' electrical
systems.
Put both vehicles in P (Park)
for an automatic transmission
or electric drive unit. For a
manual transmission, place the
vehicle in Neutral and set the
parking brake.
Caution
If any accessories are left on or
plugged in during the jump
starting procedure, they could be
damaged. The repairs would not
be covered by the vehicle
warranty. Whenever possible, turn
off or unplug all accessories on
either vehicle when jump starting.
3. Turn the ignition off on the other vehicle. Turn off the
radio, all lamps, and
accessories that are not
needed in both vehicles.
Unplug accessories from the
cigarette lighter or the
accessory power outlets. This
avoids sparks and helps save
both batteries and accessories.
4. Locate the positive (+) and negative (−) terminals on the
other vehicle.
5. Open the hood to locate the positive (+) and negative (−)
terminals on your Volt. Open
the access cover for the
Page 305 of 373

Chevrolet VOLT Owner Manual (GMNA-Localizing-U.S./Canada/Mexico-
12163007) - 2019 - CRC - 11/5/18
304 Vehicle Care
Caution
If any accessories are left on or
plugged in during the jump
starting procedure, they could be
damaged. The repairs would not
be covered by the vehicle
warranty. Whenever possible, turn
off or unplug all accessories on
either vehicle when jump starting.
3. Turn off both vehicles. Turn off the radio, all lamps, and
accessories that are not
needed in both vehicles.
Unplug accessories from the
cigarette lighter or the
accessory power outlets. This
avoids sparks and helps save
both batteries and accessories.
4. Locate the positive (+) and negative (−) terminals on the
vehicle with the run-down
battery.
5. Locate the positive (+) and negative (−) battery terminals
on the Volt. The 12-volt battery
is under the load floor in the rear cargo area. Open the
access covers for the
positive (+) terminal (1) and the
negative (−) terminal (2).
6. Check that the jumper cables do not have loose or missing
insulation or a shock could
result and the vehicles could
be damaged.
Before connecting the jumper
cables, here are some basic
things to know. Positive (+)
jumper cable goes to
positive (+) battery terminal or
a remote positive (+) terminal if
available. Negative (−) jumper
cable goes to remote
negative (−) terminal if
available, or a heavy,
unpainted metal engine part or
a solid engine ground on the
vehicle with the run-down
battery.
Do not connect positive (+) to
negative (−) or there will be a
short that may damage the
battery or other parts of the
vehicle. Do not connect the
negative (−) cable to the negative (−) terminal on the
run-down battery because this
can cause sparks.
Caution
If the jumper cables are
connected or removed in the
wrong order, electrical shorting
may occur and damage the
vehicle. The repairs would not be
covered by the vehicle warranty.
Always connect and remove the
jumper cables in the correct order,
making sure that the cables do
not touch each other or other
metal.
Connecting the Jumper Cables 1. Connect the red positive (+) jumper cable to the positive (+)
terminal of the other vehicle
with the run-down battery. Use
a remote positive (+) terminal if
available. Do not let the other
end touch metal.
Page 317 of 373

Chevrolet VOLT Owner Manual (GMNA-Localizing-U.S./Canada/Mexico-
12163007) - 2019 - CRC - 11/5/18
316 Vehicle Care
to a clean area frequently to
prevent forcing the soil in to the
fabric.
4. Continue gently rubbing the soiled area until there is no
longer any color transfer from
the soil to the cleaning cloth.
5. If the soil is not completely removed, use a mild soap
solution followed only by plain
water.
If the soil is not completely
removed, it may be necessary to
use a commercial upholstery
cleaner or spot lifter. Test a small
hidden area for colorfastness before
using a commercial upholstery
cleaner or spot lifter. If ring
formation occurs, clean the entire
fabric or carpet.
After cleaning, use a paper towel to
blot excess moisture.Cleaning High Gloss Surfaces
and Vehicle Information and
Radio Displays
Use a microfiber cloth on high gloss
surfaces or vehicle displays. First,
use a soft bristle brush to remove
dirt that can scratch the surface.
Then gently clean by rubbing with a
microfiber cloth. Never use window
cleaners or solvents. Periodically
hand wash the microfiber cloth
separately, using mild soap. Do not
use bleach or fabric softener. Rinse
thoroughly and air dry before
next use.
Caution
Do not attach a device with a
suction cup to the display. This
may cause damage and would
not be covered by the vehicle
warranty.
Instrument Panel, Leather,
Vinyl, Other Plastic Surfaces,
Low Gloss Paint Surfaces, and
Natural Open Pore Wood
Surfaces
Use a soft microfiber cloth
dampened with water to remove
dust and loose dirt. For a more
thorough cleaning, use a soft
microfiber cloth dampened with a
mild soap solution.
Caution
Soaking or saturating leather,
especially perforated leather, as
well as other interior surfaces,
may cause permanent damage.
Wipe excess moisture from these
surfaces after cleaning and allow
them to dry naturally. Never use
heat, steam, or spot removers. Do
not use cleaners that contain
silicone or wax-based products.
Cleaners containing these
solvents can permanently change (Continued)