navigation system CHRYSLER 200 2015 2.G User Guide
[x] Cancel search | Manufacturer: CHRYSLER, Model Year: 2015, Model line: 200, Model: CHRYSLER 200 2015 2.GPages: 220, PDF Size: 3.7 MB
Page 70 of 220
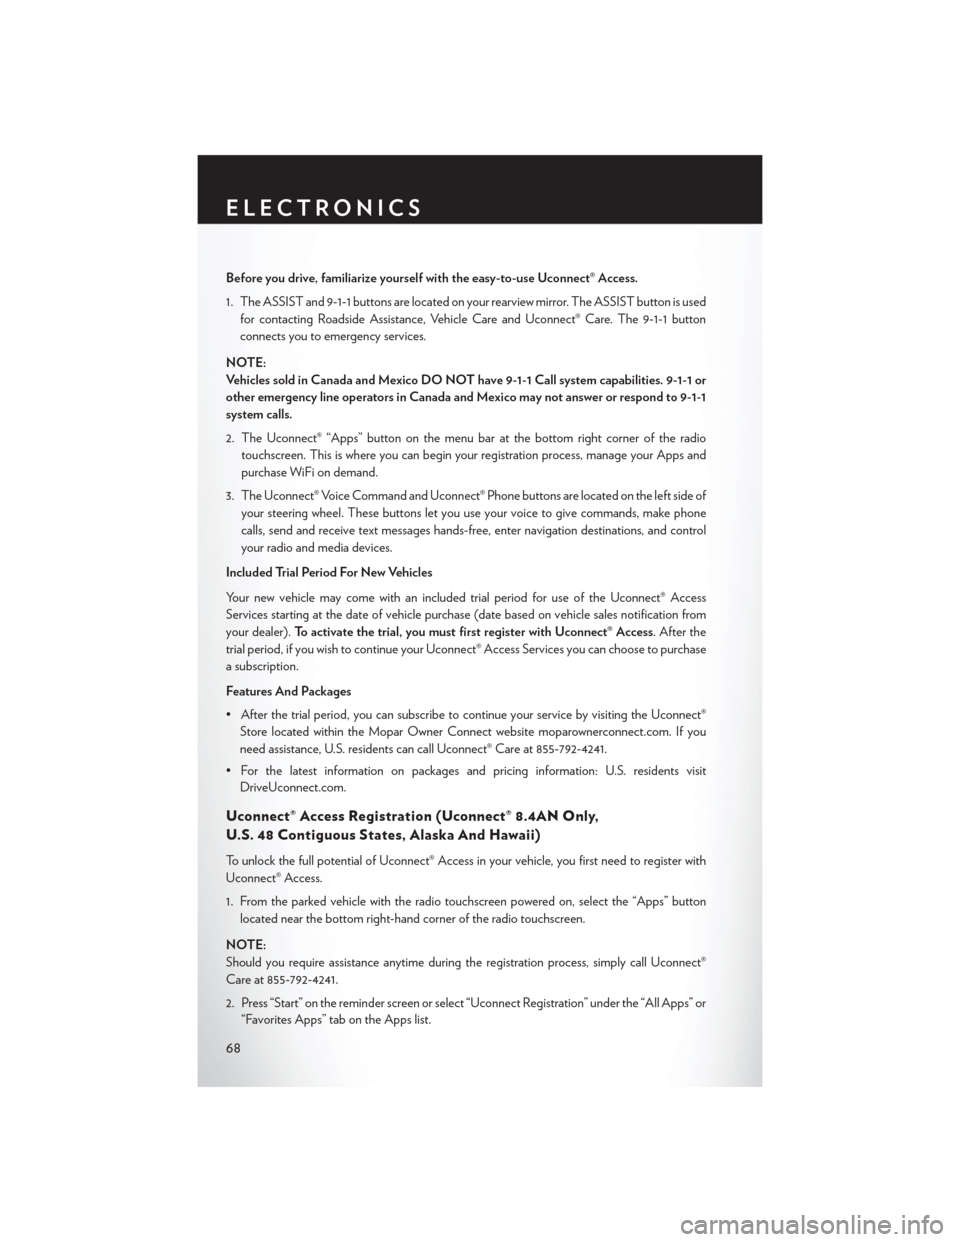
Before you drive, familiarize yourself with the easy-to-use Uconnect® Access.
1. The ASSIST and 9-1-1 buttons are located on your rearview mirror. The ASSIST button is usedfor contacting Roadside Assistance, Vehicle Care and Uconnect® Care. The 9-1-1 button
connects you to emergency services.
NOTE:
Vehicles sold in Canada and Mexico DO NOT have 9-1-1 Call system capabilities. 9-1-1 or
other emergency line operators in Canada and Mexico may not answer or respond to 9-1-1
system calls.
2. The Uconnect® “Apps” button on the menu bar at the bottom right corner of the radio touchscreen. This is where you can begin your registration process, manage your Apps and
purchase WiFi on demand.
3. The Uconnect® Voice Command and Uconnect® Phone buttons are located on the left side of your steering wheel. These buttons let you use your voice to give commands, make phone
calls, send and receive text messages hands-free, enter navigation destinations, and control
your radio and media devices.
Included Trial Period For New Vehicles
Your new vehicle may come with an included trial period for use of the Uconnect® Access
Services starting at the date of vehicle purchase (date based on vehicle sales notification from
your dealer). To activate the trial, you must first register with Uconnect® Access. After the
trial period, if you wish to continue your Uconnect® Access Services you can choose to purchase
a subscription.
Features And Packages
• After the trial period, you can subscribe to continue your service by visiting the Uconnect® Store located within the Mopar Owner Connect website moparownerconnect.com. If you
need assistance, U.S. residents can call Uconnect® Care at 855-792-4241.
• For the latest information on packages and pricing information: U.S. residents visit DriveUconnect.com.
Uconnect® Access Registration (Uconnect® 8.4AN Only,
U.S. 48 Contiguous States, Alaska And Hawaii)
To unlock the full potential of Uconnect® Access in your vehicle, you first need to register with
Uconnect® Access.
1. From the parked vehicle with the radio touchscreen powered on, select the “Apps” button
located near the bottom right-hand corner of the radio touchscreen.
NOTE:
Should you require assistance anytime during the registration process, simply call Uconnect®
Care at 855-792-4241.
2. Press “Start” on the reminder screen or select “Uconnect Registration” under the “All Apps” or “Favorites Apps” tab on the Apps list.
ELECTRONICS
68
Page 109 of 220
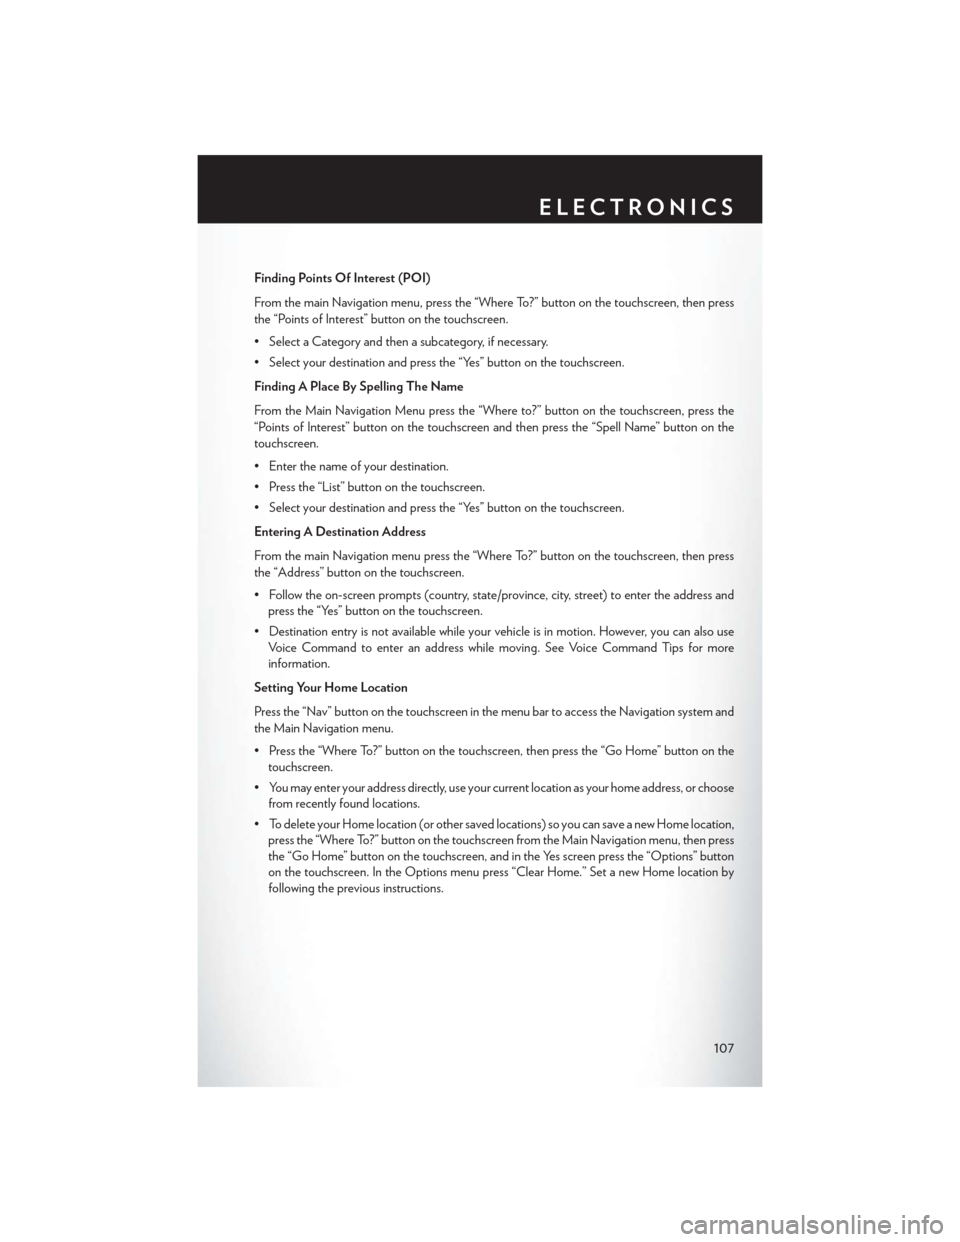
Finding Points Of Interest (POI)
From the main Navigation menu, press the “Where To?” button on the touchscreen, then press
the “Points of Interest” button on the touchscreen.
• Select a Category and then a subcategory, if necessary.
• Select your destination and press the “Yes” button on the touchscreen.
Finding A Place By Spelling The Name
From the Main Navigation Menu press the “Where to?” button on the touchscreen, press the
“Points of Interest” button on the touchscreen and then press the “Spell Name” button on the
touchscreen.
• Enter the name of your destination.
• Press the “List” button on the touchscreen.
• Select your destination and press the “Yes” button on the touchscreen.
Entering A Destination Address
From the main Navigation menu press the “Where To?” button on the touchscreen, then press
the “Address” button on the touchscreen.
• Follow the on-screen prompts (country, state/province, city, street) to enter the address andpress the “Yes” button on the touchscreen.
• Destination entry is not available while your vehicle is in motion. However, you can also use Voice Command to enter an address while moving. See Voice Command Tips for more
information.
Setting Your Home Location
Press the “Nav” button on the touchscreen in the menu bar to access the Navigation system and
the Main Navigation menu.
• Press the “Where To?” button on the touchscreen, then press the “Go Home” button on the touchscreen.
• You may enter your address directly, use your current location as your home address, or choose from recently found locations.
• To delete your Home location (or other saved locations) so you can save a new Home location, press the “Where To?” button on the touchscreen from the Main Navigation menu, then press
the “Go Home” button on the touchscreen, and in the Yes screen press the “Options” button
on the touchscreen. In the Options menu press “Clear Home.” Set a new Home location by
following the previous instructions.
ELECTRONICS
107
Page 110 of 220
Go Home
A Home location must be saved in the system. From the Main Navigation menu, press the
“Where To?” button on the touchscreen, then press the “Go Home” button on the touchscreen.
Your route is marked with a blue line on the map. If you depart from the original route, your route
is recalculated. A speed limit icon could appear as you travel on major roadways.
Adding A Stop
To add a stop you must be navigating a route.
• Press the “Menu” button on the touchscreen to return to the Main Navigation menu.
• Press the “Where To?” button on the touchscreen, then search for the extra stop. Whenanother location has been selected, you can choose to cancel your previous route, add as the
first destination or add as the last destination.
• Press the desired selection and press the “Yes” button on the touchscreen.
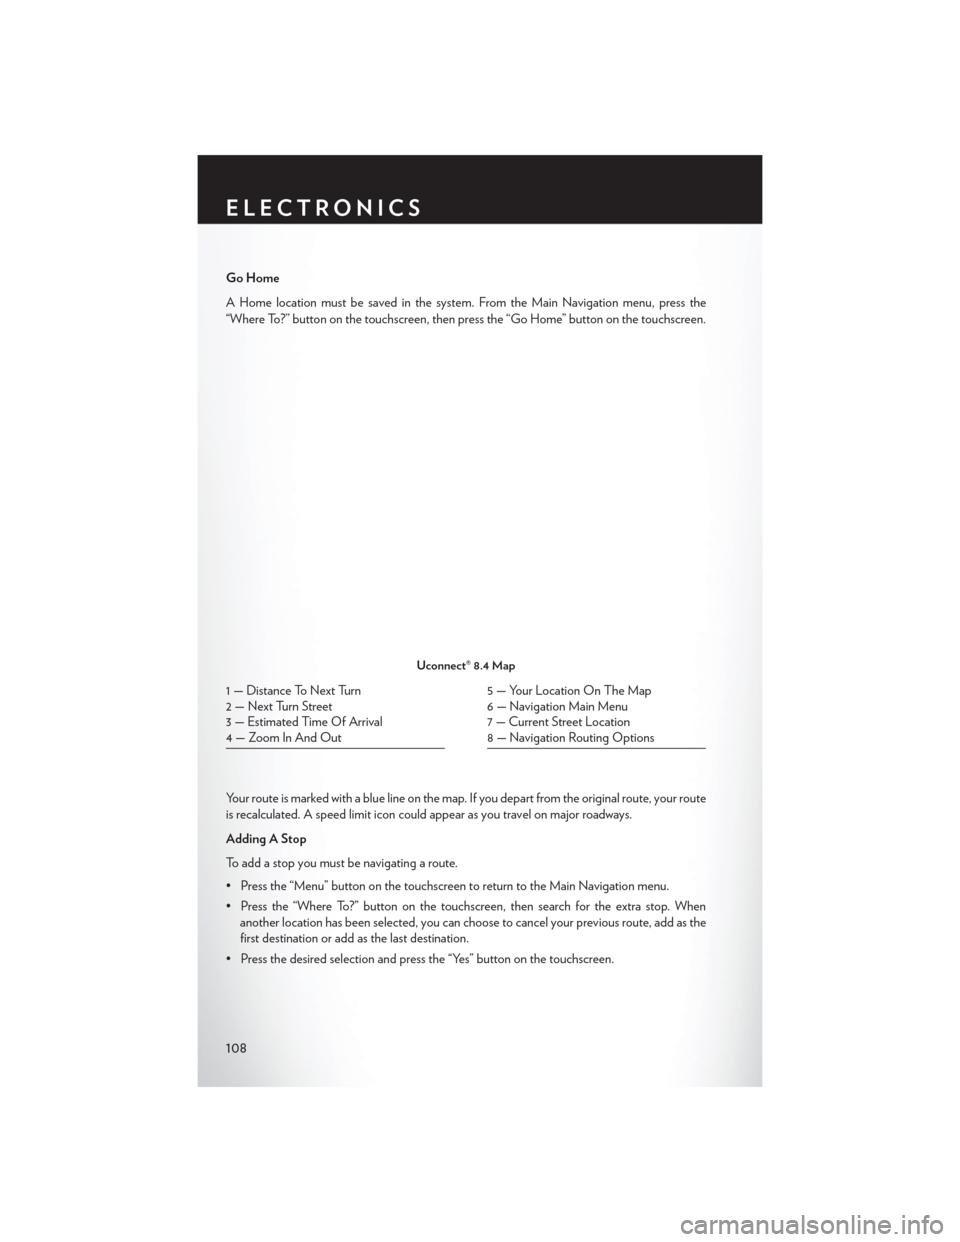
Uconnect® 8.4 Map
1 — Distance To Next Turn
2 — Next Turn Street
3 — Estimated Time Of Arrival
4 — Zoom In And Out5 — Your Location On The Map
6 — Navigation Main Menu
7 — Current Street Location
8 — Navigation Routing Options
ELECTRONICS
108
Page 116 of 220
Get Started
1. VisitUconnectPhone.com to check mobile device and feature compatibility and to find
phone pairing instructions.
2. Reduce background noise. Wind and passenger conversations are examples of noise that may impact recognition.
3. Speak clearly at a normal pace and volume while facing straight ahead. The microphone is positioned on the rearview mirror and aimed at the driver.
4. Each time you give a Voice Command, you must first push either the VR or Phone button, wait until afterthe beep, then say your Voice Command.
5. You can interrupt the help message or system prompts by pushing the VR or Phone button and saying a Voice Command from current category.
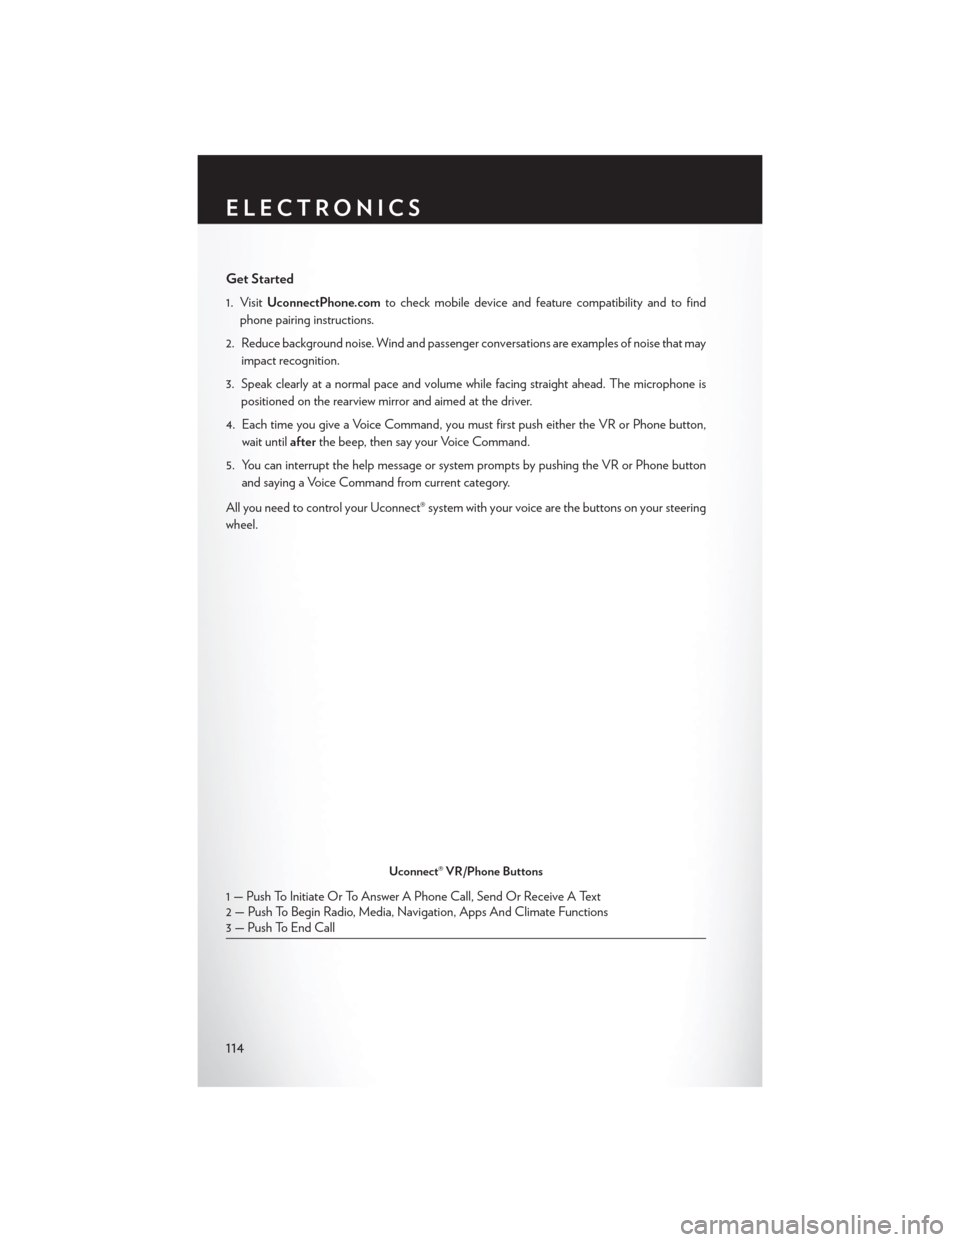
All you need to control your Uconnect® system with your voice are the buttons on your steering
wheel.
Uconnect® VR/Phone Buttons
1 — Push To Initiate Or To Answer A Phone Call, Send Or Receive A Text
2 — Push To Begin Radio, Media, Navigation, Apps And Climate Functions
3 — Push To End Call
ELECTRONICS
114
Page 123 of 220
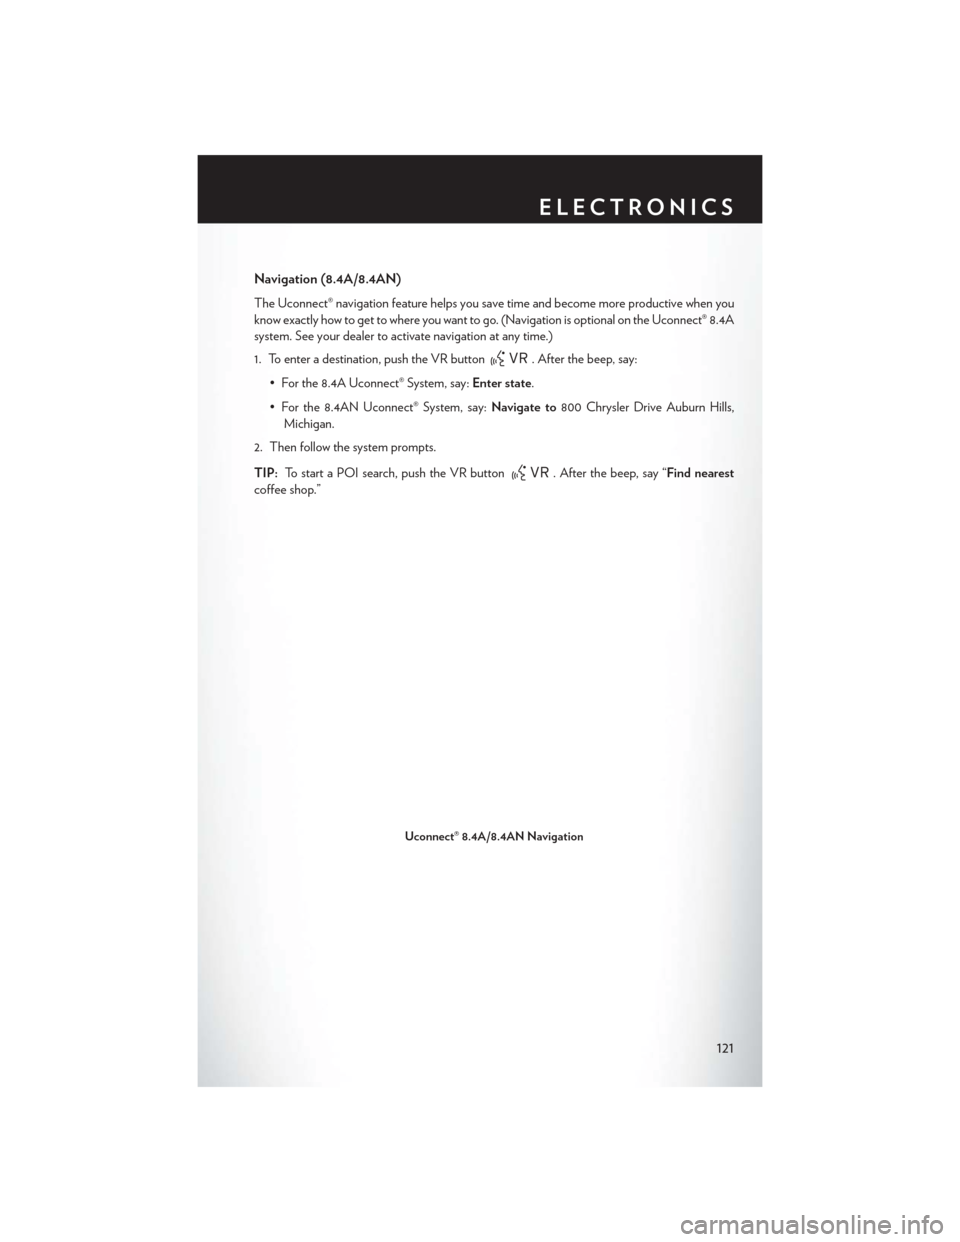
Navigation (8.4A/8.4AN)
The Uconnect® navigation feature helps you save time and become more productive when you
know exactly how to get to where you want to go. (Navigation is optional on the Uconnect® 8.4A
system. See your dealer to activate navigation at any time.)
1. To enter a destination, push the VR button
. After the beep, say:
• For the 8.4A Uconnect® System, say: Enter state.
• For the 8.4AN Uconnect® System, say: Navigate to800 Chrysler Drive Auburn Hills,
Michigan.
2. Then follow the system prompts.
TIP: To start a POI search, push the VR button
. After the beep, say “Find nearest
coffee shop.”
Uconnect® 8.4A/8.4AN Navigation
ELECTRONICS
121
Page 140 of 220
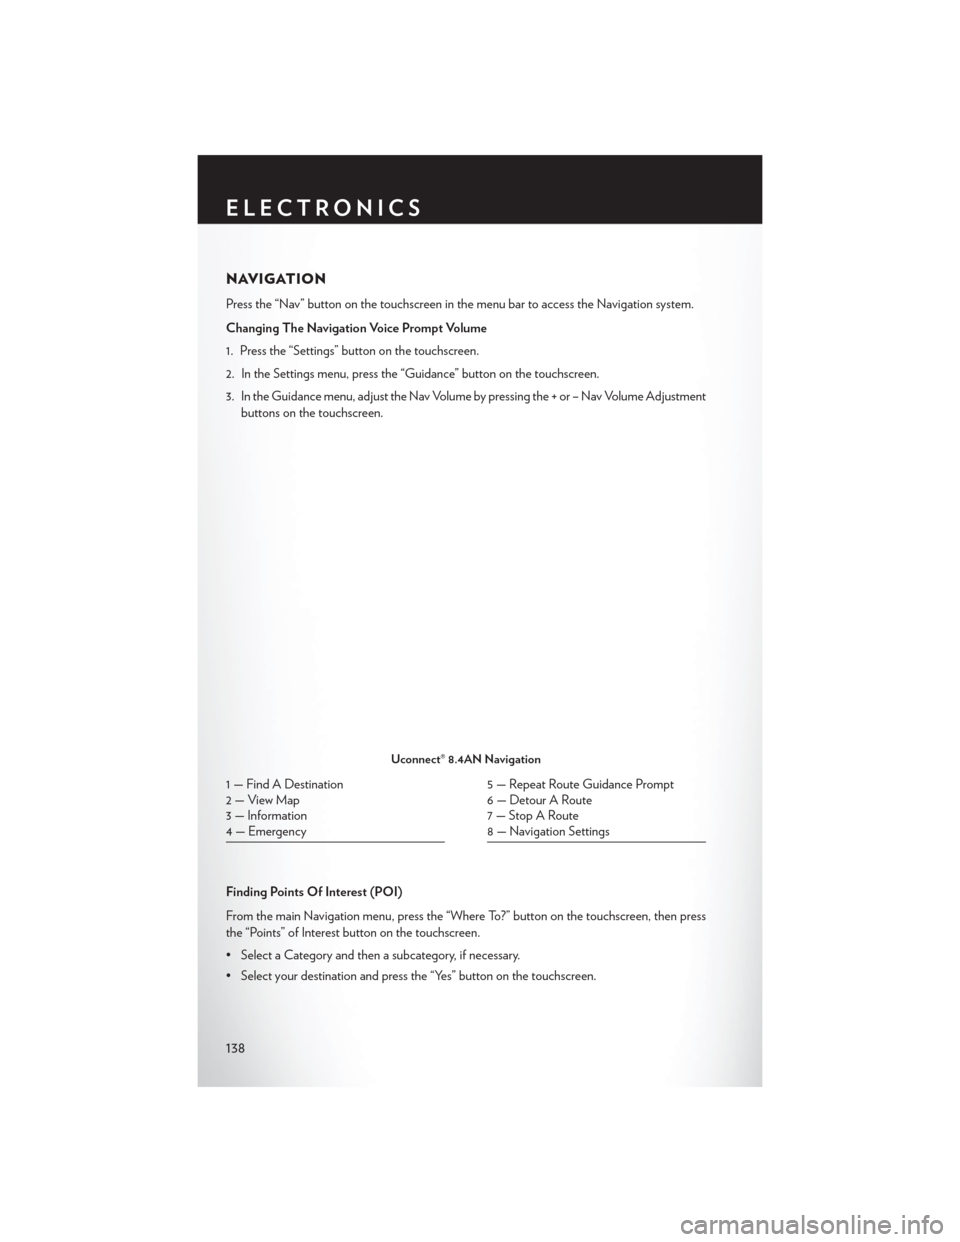
NAVIGATION
Press the “Nav” button on the touchscreen in the menu bar to access the Navigation system.
Changing The Navigation Voice Prompt Volume
1. Press the “Settings” button on the touchscreen.
2. In the Settings menu, press the “Guidance” button on the touchscreen.
3. In the Guidance menu, adjust the Nav Volume by pressing the + or – Nav Volume Adjustmentbuttons on the touchscreen.
Finding Points Of Interest (POI)
From the main Navigation menu, press the “Where To?” button on the touchscreen, then press
the “Points” of Interest button on the touchscreen.
• Select a Category and then a subcategory, if necessary.
• Select your destination and press the “Yes” button on the touchscreen.
Uconnect® 8.4AN Navigation
1 — Find A Destination
2 — View Map
3 — Information
4 — Emergency5 — Repeat Route Guidance Prompt
6 — Detour A Route
7 — Stop A Route
8 — Navigation Settings
ELECTRONICS
138
Page 141 of 220
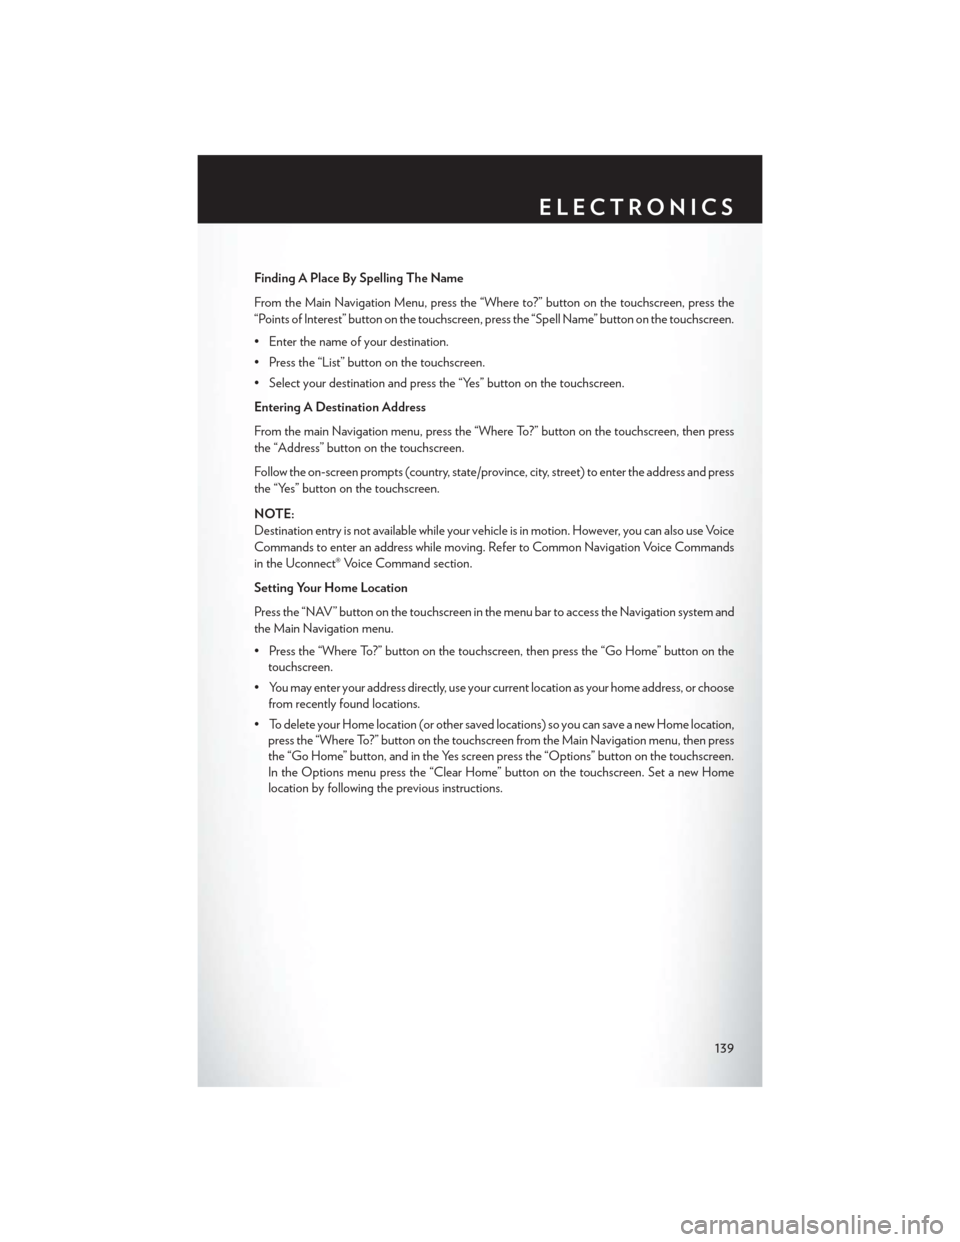
Finding A Place By Spelling The Name
From the Main Navigation Menu, press the “Where to?” button on the touchscreen, press the
“Points of Interest” button on the touchscreen, press the “Spell Name” button on the touchscreen.
• Enter the name of your destination.
• Press the “List” button on the touchscreen.
• Select your destination and press the “Yes” button on the touchscreen.
Entering A Destination Address
From the main Navigation menu, press the “Where To?” button on the touchscreen, then press
the “Address” button on the touchscreen.
Follow the on-screen prompts (country, state/province, city, street) to enter the address and press
the “Yes” button on the touchscreen.
NOTE:
Destination entry is not available while your vehicle is in motion. However, you can also use Voice
Commands to enter an address while moving. Refer to Common Navigation Voice Commands
in the Uconnect® Voice Command section.
Setting Your Home Location
Press the “NAV” button on the touchscreen in the menu bar to access the Navigation system and
the Main Navigation menu.
• Press the “Where To?” button on the touchscreen, then press the “Go Home” button on thetouchscreen.
• You may enter your address directly, use your current location as your home address, or choose from recently found locations.
• To delete your Home location (or other saved locations) so you can save a new Home location, press the “Where To?” button on the touchscreen from the Main Navigation menu, then press
the “Go Home” button, and in the Yes screen press the “Options” button on the touchscreen.
In the Options menu press the “Clear Home” button on the touchscreen. Set a new Home
location by following the previous instructions.
ELECTRONICS
139
Page 142 of 220
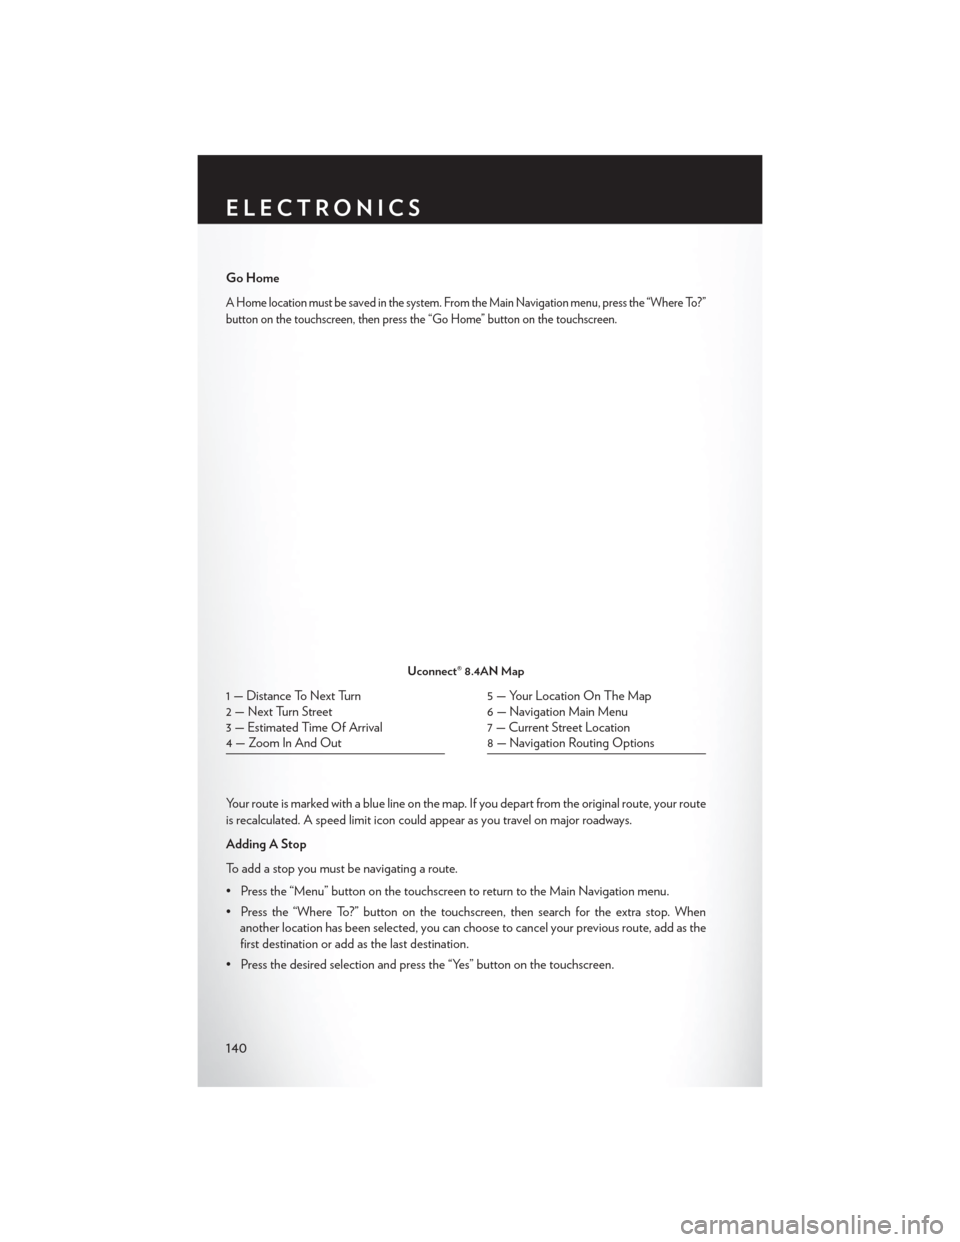
Go Home
A Home location must be saved in the system. From the Main Navigation menu, press the “Where To?”
button on the touchscreen, then press the “Go Home” button on the touchscreen.
Your route is marked with a blue line on the map. If you depart from the original route, your route
is recalculated. A speed limit icon could appear as you travel on major roadways.
Adding A Stop
To add a stop you must be navigating a route.
• Press the “Menu” button on the touchscreen to return to the Main Navigation menu.
• Press the “Where To?” button on the touchscreen, then search for the extra stop. Whenanother location has been selected, you can choose to cancel your previous route, add as the
first destination or add as the last destination.
• Press the desired selection and press the “Yes” button on the touchscreen.
Uconnect® 8.4AN Map
1 — Distance To Next Turn
2 — Next Turn Street
3 — Estimated Time Of Arrival
4 — Zoom In And Out5 — Your Location On The Map
6 — Navigation Main Menu
7 — Current Street Location
8 — Navigation Routing Options
ELECTRONICS
140
Page 143 of 220
Taking A Detour
To take a detour you must be navigating a route.
• Press the “Detour” button on the touchscreen.
NOTE:
• If the route you are currently taking is the only reasonable option, the device might notcalculate a detour.
• For more information, see your Uconnect® Supplement Manual.
SiriusXM TRAFFIC (US Market Only)
Don't Drive Through Traffic. Drive Around It.
Avoid congestion before you reach it. By enhancing your vehicle's navigation system with the
ability to see detailed traffic information, you can pinpoint traffic incidents, determine average
traffic speed and estimate travel time along your route. Since the service is integrated with a
vehicle's navigation system, SiriusXM Traffic can help drivers pick the fastest route based on
traffic conditions.
1. Detailed information on traffic speed, accidents, construction, and road closings.
2. Traffic information from multiple sources, including police and emergency services, cameras and road sensors.
3. Coast-to-coast delivery of traffic information.
4. View conditions for points along your route and beyond. Available in over 130 markets.
SiriusXM TRAVEL LINK (US Market Only)
In addition to delivering over 130 channels of the best sports, entertainment, talk, and
commercial-free music, SiriusXM offers premium data services that work in conjunction with
compatible navigation systems. SiriusXM Travel Link brings a wealth of useful information into
your vehicle and right to your fingertips.
• Fuel Prices — Check local gas and diesel prices in your area and route to the station of your
choice.
• Movie Listings — Check local movie theatres and listings in your area and route to the theater
of your choice.
• Sports Scores — In-game and final scores as well as weekly schedules.
• Weather — Check variety of local and national weather information from radar maps to
current and 5-day forecast.
SiriusXM Travel Link feature is completely integrated into your vehicle. A few minutes after you
start your vehicle, Travel Link information arrives and updates in the background. You can access
the information whenever you like, with no waiting.
To access SiriusXM Travel Link, press “Apps” button on the touchscreen, then press the
“SiriusXM Travel Link” button on the touchscreen.
ELECTRONICS
141
Page 207 of 220
FAQ’s
GETTING STARTED
• How do I install my LATCH Equipped Child Seat? pg. 25
• How do I fold down my rear seat? pg. 31
ELECTRONICS
Which radio is in my vehicle?
• Uconnect® 3.0 pg. 84
• Uconnect® 5.0 pg. 86
• Uconnect® 8.4A pg. 98
• Uconnect® 8.4AN pg. 129
How do I activate the Audio Jack?
• Uconnect® 3.0 pg. 85
• Uconnect® 5.0 pg. 89
• Uconnect® 8.4A pg. 103
• Uconnect® 8.4AN pg. 103
How do I set the clock on my radio?
• Uconnect® 3.0 pg. 84
• Uconnect® 5.0 pg. 87
• Uconnect® 8.4A pg. 98
• Uconnect® 8.4AN pg. 129
How do I use the Navigation feature?
• Uconnect® 8.4A pg. 106
• Uconnect® 8.4AN pg. 138
How do I pair my cell phone via Bluetooth® with the Uconnect® Hands-Free Voice Activation
System? pg. 142
How do I use my iPod®? pg. 103
How do I use my USB port to listen to audio through my touch-screen radio? pg. 103
How do I configure my Universal Garage Door Opener (HomeLink)? pg. 148
UTILITY
How do I know how much I can tow with my Chrysler 200? pg. 153
FREQUENTLY ASKED QUESTIONS
205