remote start CHRYSLER 200 2015 2.G User Guide
[x] Cancel search | Manufacturer: CHRYSLER, Model Year: 2015, Model line: 200, Model: CHRYSLER 200 2015 2.GPages: 220, PDF Size: 3.7 MB
Page 3 of 220
INTRODUCTION/WELCOME
WELCOME FROM CHRYSLER
GROUPLLC ..................3
CONTROLS AT A GLANCE
DRIVER COCKPIT...............6
INSTRUMENT CLUSTER ...........8
GETTING STARTED
KEYFOB ....................10
REMOTE START...............11
KEYLESS ENTER-N-GO™ ..........12
TRUNK LOCK AND RELEASE ........16
VEHICLE SECURITY ALARM ........17
SEAT BELT SYSTEMS .............18
SUPPLEMENTAL RESTRAINT SYSTEM
(SRS)—AIRBAGS ..............19
CHILD RESTRAINTS .............25
HEAD RESTRAINTS .............28
FRONTSEATS .................29
REAR SEAT ...................31
HEATED/VENTILATED SEATS .......32
HEATED STEERING WHEEL ........33
TILT/TELESCOPING STEERING
COLUMN ...................34
OPERATING YOUR VEHICLE
ENGINE BREAK-IN
RECOMMENDATIONS ............35
TURN SIGNAL/HIGH BEAM LEVER ....35
HEADLIGHT SWITCH ............36
WIPER/WASHER LEVER ...........37
ELECTRONIC SPEED CONTROL .....38
ADAPTIVE CRUISE CONTROL (ACC) . . 40
FORWARD COLLISION WARNING (FCW)
WITHMITIGATION .............43
MANUAL CLIMATE CONTROLS WITHOUT
TOUCHSCREEN ...............45
MANUAL CLIMATE CONTROLS WITH
TOUCHSCREEN ...............46
AUTOMATIC TEMPERATURE CONTROLS
(ATC) .....................48
NINE-SPEED AUTOMATIC
TRANSMISSION ................51
PADDLE SHIFT MODE ............53
STOP/START SYSTEM — 2.4L ENGINE . . . 54
ELECTRIC PARKING BRAKE (EPB) .....55
PARKSENSE® ..................57
LANESENSE . .................59
PARKVIEW® REAR BACK-UP CAMERA . . 60
BLIND SPOT MONITORING ........60
POWER SUNROOF ..............61
WIND BUFFETING . . ............63
ELECTRONICS
YOUR VEHICLE'S SOUND SYSTEM . . . . 64
IDENTIFYING YOUR RADIO ........66
Uconnect® ACCESS . . . ...........67
Uconnect® 3.0 . . ................84
Uconnect® 5.0 ..................86
Uconnect® 8.4A ................98
Uconnect® 8.4AN . . .............129
STEERING WHEEL AUDIO CONTROLS. . 145
ELECTRONIC VEHICLE INFORMATION
CENTER (EVIC) AND DRIVER
INFORMATION DISPLAY (DID) ......146
PROGRAMMABLE FEATURES .......148
UNIVERSAL GARAGE DOOR OPENER
(HomeLink®) ..................148
POWER INVERTER .............151
POWER OUTLET ..............152
UTILITY
TRAILER TOWING WEIGHTS (MAXIMUM
TRAILER WEIGHT RATINGS) .......153
RECREATIONAL TOWING (BEHIND
MOTORHOME, ETC.) ...........153
WHAT TO DO IN EMERGENCIES
ROADSIDE ASSISTANCE ..........155
INSTRUMENT CLUSTER WARNING
LIGHTS ....................155
INSTRUMENT CLUSTER INDICATOR
LIGHTS ....................160
IF YOUR ENGINE OVERHEATS ......161
TIRESERVICEKIT ..............161
JACKING AND TIRE CHANGING ....168
JUMP-STARTING ..............176
FREEING A STUCK VEHICLE .......178
MANUAL PARK RELEASE ..........179
TOWING A DISABLED VEHICLE .....181
EVENT DATA RECORDER (EDR) .....181
MAINTAINING YOUR VEHICLE
OPENING THE HOOD...........182
ENGINE COMPARTMENT .........184
FLUIDCAPACITIES .............188
FLUIDS, LUBRICANTS AND
GENUINE PARTS ..............188
MAINTENANCE PROCEDURES ......189
MAINTENANCE SCHEDULE .......190
FUSES .....................193
TIRE PRESSURES ...............198
SPARE TIRES — IF EQUIPPED .......199
WHEEL AND WHEEL TRIM CARE . . . . 200
REPLACEMENT BULBS ...........201
TABLE OF CONTENTS
Page 7 of 220
USE OF AFTERMARKET PRODUCTS (ELECTRONICS)
The use of aftermarket devices including cell phones, MP3 players, GPS systems, or chargers
may affect the performance of on-board wireless features including Keyless Enter-N-Go™ and
Remote Start range. If you are experiencing difficulties with any of your wireless features, try
disconnecting your aftermarket devices to see if the situation improves. If your symptoms persist,
please see an authorized dealer.
CHRYSLER, DODGE, JEEP, RAM, SRT, MOPAR and Uconnect are registered trademarks of
Chrysler Group LLC.
COPYRIGHT ©2014 CHRYSLER GROUP LLC
INTRODUCTION/WELCOME
5
Page 12 of 220
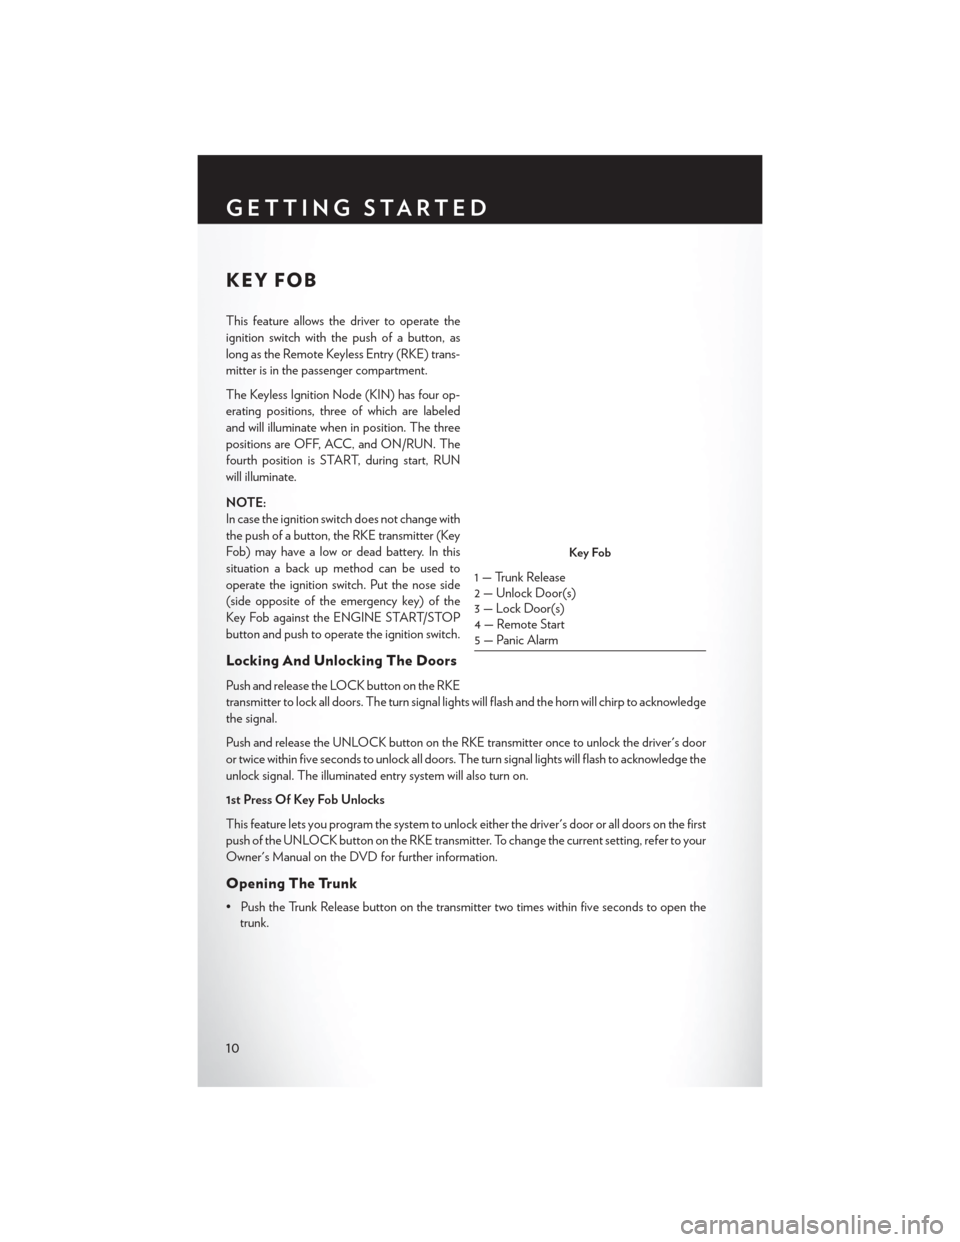
KEY FOB
This feature allows the driver to operate the
ignition switch with the push of a button, as
long as the Remote Keyless Entry (RKE) trans-
mitter is in the passenger compartment.
The Keyless Ignition Node (KIN) has four op-
erating positions, three of which are labeled
and will illuminate when in position. The three
positions are OFF, ACC, and ON/RUN. The
fourth position is START, during start, RUN
will illuminate.
NOTE:
In case the ignition switch does not change with
the push of a button, the RKE transmitter (Key
Fob) may have a low or dead battery. In this
situation a back up method can be used to
operate the ignition switch. Put the nose side
(side opposite of the emergency key) of the
Key Fob against the ENGINE START/STOP
button and push to operate the ignition switch.
Locking And Unlocking The Doors
Push and release the LOCK button on the RKE
transmitter to lock all doors. The turn signal lights will flash and the horn will chirp to acknowledge
the signal.
Push and release the UNLOCK button on the RKE transmitter once to unlock the driver's door
or twice within five seconds to unlock all doors. The turn signal lights will flash to acknowledge the
unlock signal. The illuminated entry system will also turn on.
1st Press Of Key Fob Unlocks
This feature lets you program the system to unlock either the driver's door or all doors on the first
push of the UNLOCK button on the RKE transmitter. To change the current setting, refer to your
Owner's Manual on the DVD for further information.
Opening The Trunk
• Push the Trunk Release button on the transmitter two times within five seconds to open thetrunk.
Key Fob
1 — Trunk Release
2 — Unlock Door(s)
3 — Lock Door(s)
4 — Remote Start
5 — Panic Alarm
GETTING STARTED
10
Page 13 of 220
Panic Alarm
• To turn the Panic Alarm feature ON or OFF, push and hold the PANIC button on the RKEtransmitter for at least one second and release. When the Panic Alarm is on, the headlights and
park lights will flash, the horn will pulse on and off and the interior lights will turn on.
• The Panic Alarm will stay on for three minutes unless you turn it off by pushing the PANIC button a second time or if the vehicle speed is 5 mph (8 km/h) or greater.
NOTE:
When you turn off the Panic Alarm by pushing the PANIC button a second time, you may have
to move closer to the vehicle due to the radio frequency noises of the system.
WARNING!
• When leaving the vehicle, always make sure the ignition is in the OFF position, remove the key fob from the vehicle, and lock your vehicle.
• Never leave children alone in a vehicle, or with access to an unlocked vehicle. Allowing
children to be in a vehicle unattended is dangerous for a number of reasons. A child or
others could be seriously or fatally injured. Children should be warned not to touch the
parking brake, brake pedal or the transmission gear selector.
• Do not leave the Key Fob in or near the vehicle (or in a location accessible to children). A
child could operate power windows, other controls, or move the vehicle.
REMOTE START
• Push the REMOTE START buttonx2on the Key Fob twice within five seconds. Pushing
the REMOTE START button a third time shuts the engine off.
• To drive the vehicle, push the UNLOCK button and cycle the ignition to the ON/RUN position.
With Remote Start, the engine will only run for 15 minutes (timeout) unless the ignition is cycled
to the ON/RUN position.
The vehicle must be cycled to the ON/RUN position after two consecutive timeouts.
WARNING!
• Do not start or run an engine in a closed garage or confined area. Exhaust gas contains Carbon Monoxide (CO) which is odorless and colorless. Carbon Monoxide is poisonous
and can cause you or others to be severely injured or killed when inhaled.
• Keep Key Fob transmitters away from children. Operation of the Remote Start System,
windows, door locks or other controls could cause you and others to be severely injured or
killed.
GETTING STARTED
11
Page 18 of 220
TRUNK LOCK AND RELEASE
• The decklid can be released from inside the vehicle by pushing the TRUNK RELEASE buttonlocated on the instrument panel to the left of the steering wheel.
NOTE:
The transmission must be in PARK before the
button will operate.
• The decklid can be released from outside the vehicle by pushing the TRUNK button
on the Remote Keyless Entry (RKE) trans-
mitter twice within five seconds, or, Passive
Entry by hand.
With the ignition in the ON/RUN position, the
Trunk Open symbol will display indicating that
the trunk is open. The EVIC/DID display will
reappear once the trunk is closed. With the
ignition in the OFF position, the Trunk Open
symbol will display until the trunk is closed.
Trunk Emergency Release
As a security measure, a Trunk Internal Emer-
gency Release lever is built into the trunk latch-
ing mechanism. In the event of an individual
being locked inside the trunk, the trunk can be
simply opened by pushing the glow-in-the-
dark handle attached to the trunk latching
mechanism to the right.
WARNING!
Do not allow children to have access to the trunk, either by climbing into the trunk from
outside, or through the inside of the vehicle. Always close the trunk lid when your vehicle is
unattended. Once in the trunk, young children may not be able to escape, even if they entered
through the rear seat. If trapped in the trunk, children can die from suffocation or heat stroke.
Trunk Release Button
Emergency Trunk Release
GETTING STARTED
16
Page 19 of 220
VEHICLE SECURITY ALARM
This Vehicle Security Alarm monitors the doors, liftgate, and ignition switch for unauthorized
operation.
When the alarm is activated, the interior switches for door locks are disabled. The Vehicle
Security Alarm provides both audio and visual signals repeatedly for three minutes. If the
disturbance is still present (driver's door, passenger door, other doors, ignition) after three
minutes, the parking lights and tail lights will flash for an additional 15 minutes.
To Arm:
• Lock the door using either the power door lock switch (one door must be open) or the LOCKbutton on the Remote Keyless Entry (RKE) transmitter (doors can be open or closed), and
close all doors.
NOTE:
The Vehicle Security Alarm will not arm if you lock the doors with the manual door lock rocker
button.
The Vehicle Security Light in the instrument cluster will flash for 16 seconds. This shows that the
Vehicle Security Alarm is arming. During this period, if a door is opened, the ignition is cycled to
ON/RUN, or the power door locks are unlocked in any manner, the Vehicle Security Alarm will
automatically disarm.
NOTE:
Once armed, the Vehicle Security Alarm disables the unlock switch on the driver door trim panel
and passenger door trim panel.
To Disarm The System:
• Push the Key Fob UNLOCK button or cycle the ignition to the ON/RUN position.
The Vehicle Security Alarm is designed to protect your vehicle; however, you can create
conditions where the Vehicle Security Alarm will give you a false alarm. If one of the previously
described arming sequences has occurred, the Vehicle Security Alarm will arm regardless of
whether you are in the vehicle or not. If you remain in the vehicle and open a door, the alarm will
sound. If this occurs, disarm the Vehicle Security Alarm.
If the Vehicle Security Alarm is armed and the battery becomes disconnected the Vehicle
Security Alarm will remain armed when the battery is reconnected. The exterior lights will flash,
and the horn will sound. If this occurs, disarm the Vehicle Security Alarm.
GETTING STARTED
17
Page 34 of 220
WARNING!
• Be certain that the seatback is securely locked into position. If the seatback is not securelylocked into position, the seat will not provide the proper stability for child seats and/or
passengers. An improperly latched seat could cause you and others to severely injured or
killed.
• The cargo area in the rear of the vehicle (with the rear seatbacks in the locked-up or
folded-down position) should not be used as a play area by children when the vehicle is in
motion. They could be severely injured or killed in a collision. Children should be seated
and using the proper restraint system.
HEATED/VENTILATED SEATS
Front Ventilated Seats
Located in the seat cushion and seatback are small fans that draw the air from the passenger
compartment and pull air through fine perforations in the seat cover to help keep the driver and
front passenger cooler in higher ambient temperatures.
There are two ventilated seat control buttons located in the touchscreen that allow the driver and
passenger to operate the seats independently.
The ventilated seat buttons are used to control the speed of the fans located in the seat.
To operate the system, press the “Controls” button on touchscreen located on the bottom of the
Uconnect® display.
• Press the ventilated seat button
once to choose HIGH.
• Press the ventilated seat button
a second time to choose LOW.
• Press the ventilated seat button
a third time to turn the ventilated seat OFF.
NOTE:
Vehicle Equipped With Remote Start
On models that are equipped with remote start, this feature can be programmed to come on
during a remote start through the Uconnect® system. Refer to “Uconnect® Settings” in “Under-
standing Your Instrument Panel” in the Owner's Manual on the DVD.
Front Heated Seats
The front heated seats control buttons are located within the climate or controls screen of the
touchscreen.
• Press the heated seat button
once to turn the High setting On.
• Press the heated seat button
a second time to turn the Low setting On.
• Press the heated seat button
a third time to turn the heating elements Off.
If the High-level setting is selected, the system will automatically switch to Low-level after
approximately 60 minutes. The Low-level setting will turn Off automatically after approximately
45 minutes.
GETTING STARTED
32
Page 35 of 220
NOTE:
Vehicle Equipped With Remote Start
On models that are equipped with remote start, this feature can be programmed to come on
during a remote start through the Uconnect® system. Refer to “Uconnect® Settings” in “Under-
standing Your Instrument Panel” in the Owner's Manual on the DVD.
WARNING!
• Persons who are unable to feel pain to the skin because of advanced age, chronic illness,diabetes, spinal cord injury, medication, alcohol use, exhaustion or other physical condi-
tions must exercise care when using the seat heater. It may cause burns even at low
temperatures, especially if used for long periods of time.
• Do not place anything on the seat that insulates against heat, such as a blanket or cushion.
This may cause the seat heater to overheat. Sitting in a seat that has been overheated
could cause serious burns due to the increased surface temperature of the seat.
HEATED STEERING WHEEL
The steering wheel contains a heating element that heats the steering wheel to one temperature
setting.
The heated steering wheel control button is located within the Uconnect® system. You can gain
access to the control buttons through the climate screen or the controls screen.
• Press the heated steering wheel button
once to turn the heating element ON.
• Press the heated steering wheel button
a second time to turn the heating element OFF.
Once the heated steering wheel has been turned on, it will operate for up to 80 minutes before
automatically shutting off. The heated steering wheel can shut off early or may not turn on when
the steering wheel is already warm.
NOTE:
Vehicle Equipped With Remote Start
On models that are equipped with remote start, this feature can be programmed to come on
during a remote start through the Uconnect® system. Refer to “Uconnect® Settings” in “Under-
standing Your Instrument Panel” in the Owner's Manual on the DVD.
WARNING!
• Persons who are unable to feel pain to the skin because of advanced age, chronic illness, diabetes, spinal cord injury, medication, alcohol use, exhaustion, or other physical condi-
tions must exercise care when using the steering wheel heater. It may cause burns even at
low temperatures, especially if used for long periods.
• Do not place anything on the steering wheel that insulates against heat, such as a blanket
or steering wheel covers of any type and material. This may cause the steering wheel
heater to overheat.
GETTING STARTED
33
Page 69 of 220
Uconnect® 8.4AN
• 8.4” Touchscreen
• Climate button on the touchscreen in lowermenu bar
• HD Button will be visible on right side of screen when viewing AM or FM
• SiriusXM Travel Link feature listed within Apps
Uconnect® ACCESS
Uconnect® Access — If Equipped (Available On Uconnect® 8.4AN — U.S.
Residents Only)
WARNING!
ALWAYS drive safely with your hands on the steering wheel. You have full responsibility and
assume all risks related to the use of the Uconnect® features and applications in this vehicle.
Only use Uconnect® when it is safe to do so. Failure to do so may result in an accident involving
serious injury or death.
Uconnect® Access enhances your ownership and driving experience by connecting your vehicle
with a built-in cellular connection. With Uconnect® Access, you can:
• Place a call to a local 9-1-1 Operator for emergency assistance.
• Remotely lock/unlock your doors and start your vehicle from virtually anywhere, using the Uconnect® Access App for your smartphone. You can also do so by logging into Mopar
Owner Connect, or by calling Uconnect® Care. (Vehicle must be within the United States and
have network coverage).
• Turn your vehicle into a WiFi Hotspot and connect your devices to the internet.
• Receive text or email notifications if your vehicle's theft alarm goes off.
• Receive stolen vehicle assistance, using GPS technology to help authorities locate your vehicle if it is stolen.
• Listen to your text messages or send free-form text messages with your voice while keeping your hands on the wheel, using the Voice Texting feature. Requires a cell phone that supports
Bluetooth Message Access Profile (MAP).
•
Search for places to eat, shop, relax and play with Yelp®, using your voice or on-screen menu. Then
navigate to them (navigation standard on Uconnect® 8.4AN, optional on Uconnect® 8.4A).
• Get operator assistance using the ASSIST button on your interior rearview mirror.
Uconnect® 8.4AN
ELECTRONICS
67
Page 71 of 220
3. The Uconnect® Access Registration App will open and display step-by-step instructions tostart your registration.
4. Enter your email address into the radio touchscreen.
5. A message will display on the touchscreen indicating your email submission was accepted. In a few minutes, you will receive an email which will allow you to register your vehicle for
Uconnect® Access. You should open this email and begin your Uconnect® Access registration
within 72 hours.
6. Check for an email from Uconnect® Access that contains your personalized registration link. If you don't see it, check your spam or junk mail folder. Open the email and click on the link to
continue registering.
NOTE:
For security reasons, this link is valid for 72 hours from the time you’ve submitted your email
address into the radio touchscreen. If the link has expired, simply re-enter your email address into
the Uconnect® Registration App on the radio touchscreen to receive another link. The secured
registration link will take you through the Uconnect® Access registration process step by step.
7. T
o unlock the full potential of Uconnect® Access in your vehicle, you will need to create or validate
an existing Mopar Owner Connect account previously (Owner Center). Uconnect® along with
Mopar Owner Connect have joined forces to create one destination to manage all of your vehicle
needs, from managing your Uconnect® Access account, to tracking service history and finding
recommended accessories for your vehicle. If you already have a Mopar Owner Connect account,
log in to the website with your existing username/email and password. For assistance with this web
based registration process, call Uconnect® Care at 1-855-792-4241.
8. Once you are logged in to your Mopar Owner Connect account, you will create a personal
Uconnect® Security PIN. The Uconnect® Security PIN will be required to authenticate you
when accessing your account via Uconnect® Care or performing any remote services such as
Remote Door Lock/Unlock, Remote Horn & Lights or Starting and Stopping the engine.
9. If your vehicle qualifies for a trial package it will be presented. Simply agree to the Uconnect® Terms of Service (checkbox) and then select the “Start Service” button.
At this point your vehicle is registered with Uconnect® Access. Continue to set up Via Mobile.
Apps will be downloaded the next time you start your vehicle. If the Apps have not appeared after
24 hours, please contact Uconnect® Care.
ELECTRONICS
69