odometer CHRYSLER 200 CONVERTIBLE 2011 1.G User Guide
[x] Cancel search | Manufacturer: CHRYSLER, Model Year: 2011, Model line: 200 CONVERTIBLE, Model: CHRYSLER 200 CONVERTIBLE 2011 1.GPages: 84, PDF Size: 2.9 MB
Page 9 of 84

Indicators
- Turn Signal Indicators
- High Beam Indicator
- Front Fog Light Indicator
- Vehicle Security Indicator*
- Cruise Indicator
- Electronic Stability Control (ESC) Off Indicator
- Park/Headlight ON Indicator
Odometer Messages
door - Door AjarCHANgE OIL* - Change Engine Oil
dECK - Trunk Ajar gASCAP - Fuel Cap Fault
HOTOIL* - Transaxle Oil Temperature Exceeds
Safe Threshold LoW tirE* - Low Tire Pressure
TOP nOT SECUrE - Convertible Top Not
Secure
* If equipped
** Bulb Check with Key On
CONTROLS AT A GLANCE
07
Page 19 of 84

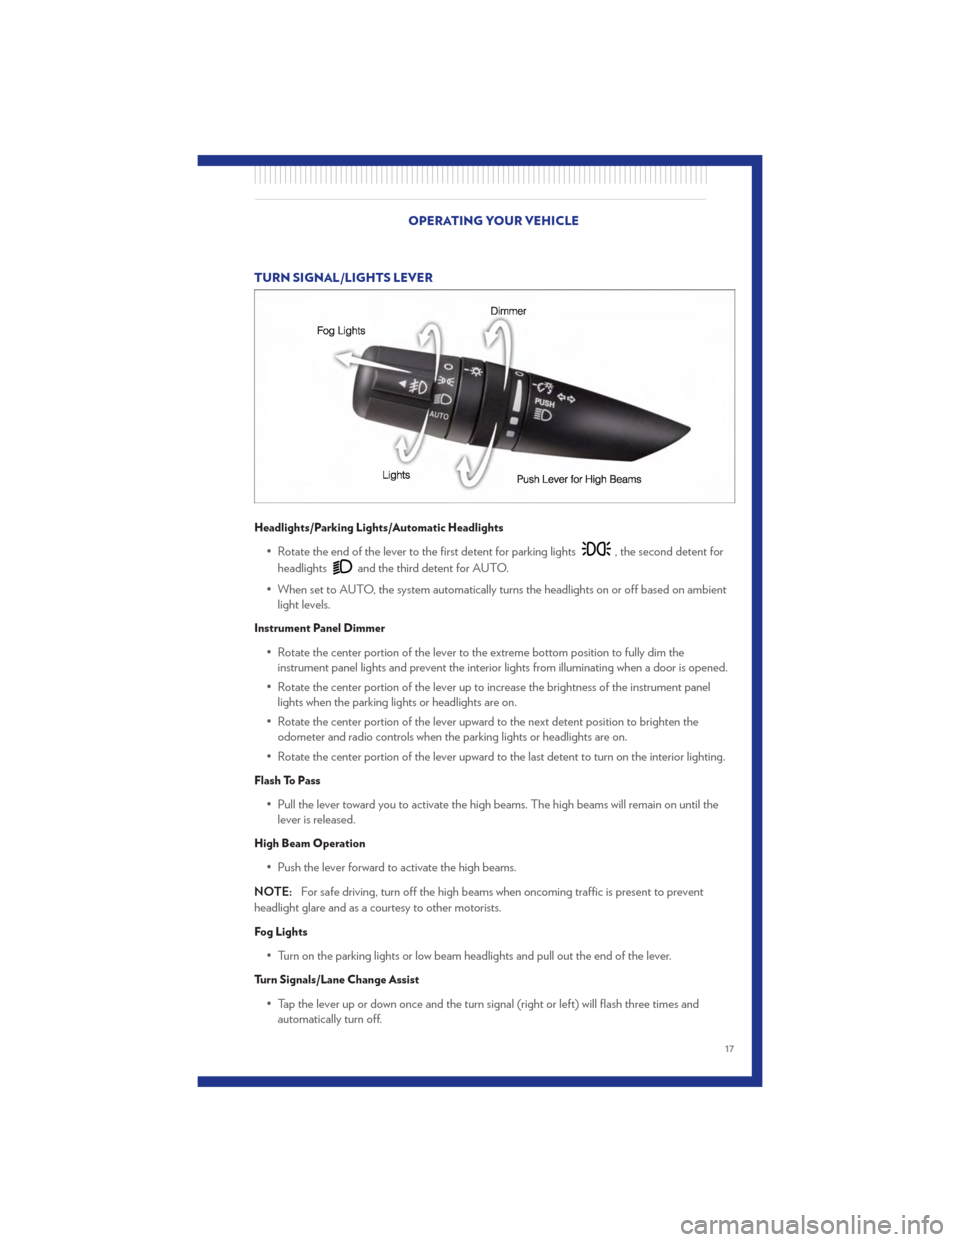
TURN SIGNAL/LIGHTS LEVER
Headlights/Parking Lights/Automatic Headlights
• Rotate the end of the lever to the first detent for parking lights, the second detent for
headlights
and the third detent for AUTO.
• When set to AUTO, the system automatically turns the headlights on or off based on ambient light levels.
Instrument Panel Dimmer
• Rotate the center portion of the lever to the extreme bottom position to fully dim theinstrument panel lights and prevent the interior lights from illuminating when a door is opened.
• Rotate the center portion of the lever up to increase the brightness of the instrument panel lights when the parking lights or headlights are on.
• Rotate the center portion of the lever upward to the next detent position to brighten the odometer and radio controls when the parking lights or headlights are on.
• Rotate the center portion of the lever upward to the last detent to turn on the interior lighting.
Flash To Pass
• Pull the lever toward you to activate the high beams. The high beams will remain on until the lever is released.
High Beam Operation
• Push the lever forward to activate the high beams.
NOTE: For safe driving, turn off the high beams when oncoming traffic is present to prevent
headlight glare and as a courtesy to other motorists.
Fog Lights
• Turn on the parking lights or low beam headlights and pull out the end of the lever.
Turn Signals/Lane Change Assist
• Tap the lever up or down once and the turn signal (right or left) will flash three times and automatically turn off.
OPERATING YOUR VEHICLE
17
Page 23 of 84

POWER CONVERTIBLE TOP OPERATION• Before lowering the top, verify the cargo shield is perfectly positioned in the trunk.
Positioning The Cargo Shield For Top Operation
• Pull the cargo shield toward you to begin unfolding the panels. Grasp the handle in the centerof the outermost (top) panel and raise the cargo shield. Then, align and seat the tabs at each
end of the cargo shield in the V slots in the trunk liner as shown in the illustration.
• The power top switch will operate when theignition switch is turned to the ON/RUN or
ACC position and when in the power
accessory delay.
Lowering
• The power top switch is located on thecenter console.
• The power top switch has two top down positions which affect window position when
lowering the top.
• Press and hold the switch halfway down to the first detent position to lower the top
and maintain the current window positions.
• Press and hold the switch fully down to the second detent position to lower the top
and completely lower all four windows.
Raising
• Press and hold the switch in the top up position until the operation of raising the top and
latching is complete. “TOP DONE” will be displayed in the odometer or “CONVERTIBLE
TOP COMPLETE” in the Electronic Vehicle Information Center once the convertible top is
completely raised and latched.
• Continue to hold the switch in the up position to completely raise all four windows.
Emergency Bypass Mode (To Raise The Top Only)
• This procedure is only to be used to raise the top when the top cannot be returned to the UP (raised) position by pressing the POWER TOP switch or is in a position in which the vehicle
cannot be driven. Please follow these emergency bypass instructions to return the top to the
UP (raised) position.
• Press the POWER TOP switch in the Top Up direction five times within two seconds and hold the switch in the Top Up position for a minimum of two minutes.
• If damage starts to occur while in the Emergency Bypass Mode, immediately release the POWER TOP switch and see your authorized dealer.
NOTE: This procedure may take more time to fully raise and close the power top. It is not
uncommon to see delays of up to 30 seconds before operation begins.
OPERATING YOUR VEHICLE
21
Page 51 of 84

- Transmission Temperature Warning Light
• This light indicates that there is excessive transmission fluid temperature that might occur withsevere usage such as trailer towing. If this light turns on, stop the vehicle and run the engine at
idle, with the transmission in NEUTRAL, until the light turns off. Once the light turns off, you
may continue to drive normally.
- Airbag Warning Light
• If the light is not on during starting, stays on, or turns on while driving, have the vehicle servicedby an authorized service center immediately.
Fuel Cap/Loose Gas Cap Message
• If a “gas cap” message (shown as gASCAP) appears, tighten the gas cap until a “clicking” soundis heard.
• Press the odometer reset button to turn the message off.
• If the message continues to appear for more than three days after tightening the gas cap, see your authorized service center.
Oil Change Indicator
Message
• If an “oil change” message (shown as CHANgE OIL) appears and a single chime sounds, it is time for your next required oil change.
Resetting The Light After Servicing
• Turn the ignition switch to the ON/RUN position (do not start engine).
• Fully depress the accelerator pedal three times within 10 seconds.
• Turn the ignition switch to the OFF/LOCK position.
IF YOUR ENGINE OVERHEATS • In any of the following situations, you can reduce the potential for overheating by taking theappropriate action.
• On the highways — slow down.
• In city traffic — while stopped, shift transmission into NEUTRAL, but do not increase engine idle speed.
NOTE: There are steps that you can take to slow down an impending overheat condition:
• If your air conditioner (A/C) is on, turn it off. The A/C system adds heat to the engine cooling system and turning the A/C off can help remove this heat.
• You can also turn the Temperature Control to maximum heat, the Mode Control to floor and the Fan Control to high. This allows the heater core to act as a supplement to the radiator and aids in
removing heat from the engine cooling system.
• If the temperature reading does not return to normal, turn the engine off immediately.
• We recommend that you do not operate the vehicle or engine damage will occur. Have the vehicle serviced immediately. WHAT TO DO IN EMERGENCIES
49
Page 52 of 84

CAUTION!
Driving with a hot cooling system could damage your vehicle. If the temperature gauge
reads HOT (H), pull over and stop the vehicle. Idle the vehicle with the air conditioner
turned off until the pointer drops back into the normal range. If the pointer remains on
HOT (H), and you hear continuous chimes, turn the engine off immediately, and call for
service.
WARNING!
You or others can be badly burned by hot engine coolant (antifreeze) or steam from your
radiator. If you see or hear steam coming from under the hood, do not open the hood until
the radiator has had time to cool. Never try to open a cooling system pressure cap when
the radiator or coolant bottle is hot.
Engine Oil Overheating — 2.4L Gas
• On hot days the engine oil temperature may become too hot during sustained high-speeddriving or if towing a trailer up long grades. If this happens, a HOTOIL message will flash in the
odometer and the vehicle speed will be reduced to 48 mph (77 km/h) maximum until the
engine oil temperature is reduced.
NOTE: Although the maximum vehicle speed is reduced to 48 mph (77 km/h), you may reduce
vehicle speed further as needed. Once the engine oil temperature is reduced, you may continue to
drive normally. WHAT TO DO IN EMERGENCIES
50
Page 67 of 84

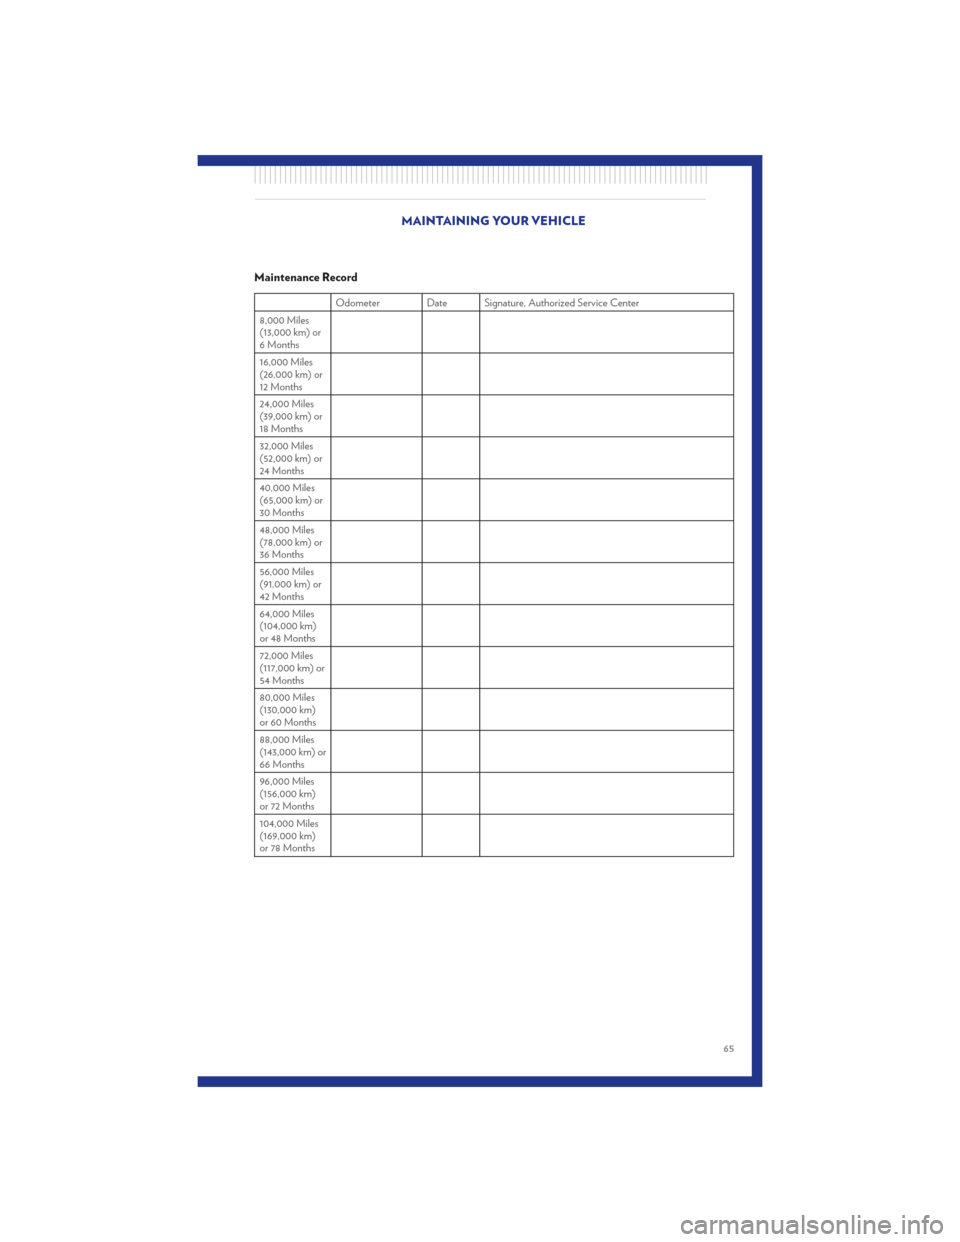
Maintenance Record
Odometer Date Signature, Authorized Service Center
8,000 Miles
(13,000 km) or
6 Months
16,000 Miles
(26,000 km) or
12 Months
24,000 Miles
(39,000 km) or
18 Months
32,000 Miles
(52,000 km) or
24 Months
40,000 Miles
(65,000 km) or
30 Months
48,000 Miles
(78,000 km) or
36 Months
56,000 Miles
(91,000 km) or
42 Months
64,000 Miles
(104,000 km)
or 48 Months
72,000 Miles
(117,000 km) or
54 Months
80,000 Miles
(130,000 km)
or 60 Months
88,000 Miles
(143,000 km) or
66 Months
96,000 Miles
(156,000 km)
or 72 Months
104,000 Miles
(169,000 km)
or 78 Months
MAINTAINING YOUR VEHICLE
65