CHRYSLER 300 2010 1.G Owner's Manual
Manufacturer: CHRYSLER, Model Year: 2010, Model line: 300, Model: CHRYSLER 300 2010 1.GPages: 88, PDF Size: 11.01 MB
Page 21 of 88

TILT / TELESCOPING STEERING COLUMN
Manual - Tilt / Telescoping Steering Column
• The tilt/telescoping control handle islocated below the steering wheel at the
end of the steering column.
• Pull the handle rearward to unlock the steering column.
• To tilt the steering column, move the steering wheel upward or downward as
desired. To lengthen or shorten the
steering column, pull the steering wheel
outward or push it inward as desired.
• Push forward on the handle to lock the column firmly in place.
WARNING!
Do not adjust the steering wheel while driving. The tilt/telescoping adjustment
must be locked while driving. Adjusting the steering wheel while driving or driving
without the tilt/telescoping adjustment locked could cause the driver to lose
control of the vehicle. Failure to follow this warning may result in serious injury or
death.
Power - Tilt / Telescoping Steering Column
• The power tilt/telescoping steering lever is located below the turn signal/wiper/
washer/high beam lever on the steering
column.
• To tilt the steering column, move the power tilt/telescoping lever up or down as
desired. To lengthen or shorten the
steering column, pull the lever toward you
or push the lever away from you as
desired.
WARNING!
Moving the steering column while the vehicle is moving is dangerous. Without a
stable steering column, you could lose control of the vehicle and have an accident.
Adjust the column only while the vehicle is stopped.
19
GETTING STARTED
Page 22 of 88
PROGRAMMABLE FEATURES
Electronic Vehicle Information Center (EVIC) – If Equipped
• The EVIC can be used to program the following Personal Settings. Press andrelease the MENU button
until Personal Settings displays, then press the
SCROLL button
to scroll through the settings. Press the FUNCTION SELECT
button
to change the setting.
• Language • Key-Off Power Delay
• Auto Door Locks • AWD System Displays
• Auto UNLK On Exit • Display ECO
• RKE Unlock • Turn-by-Turn Navigation
• RKE Linked To Memory • Confirmation of Voice Commands
• Sound Horn With RKE Lock • Park ASST. System
• Flash Lamp Lock • Display Units of Measure
• Headlamp Off Delay • Automatic High Beams
• Easy Exit Seat • Rain Sensing Intermittent Wipers
• Tilt MIRR. In Reverse • Turn Headlamps On With Wipers
• Turn Headlamps On With Remote Key Unlock • Passive Entry
Key Fob Programmable Features
• The following features may also be programmed by using the Key Fob transmitter
or the ignition switch and driver’s door lock switch.
NOTE: Pressing the LOCK button while you are inside the vehicle will activate the
Vehicle Security Alarm. Opening a door with the Vehicle Security Alarm activated will
cause the alarm to sound. Press the UNLOCK button to deactivate the Vehicle
Security Alarm.
Unlock On First Press
• To unlock either the driver’s side, or all doors, on the first press of the UNLOCK button:
• Press and hold the LOCK button for at least 4 seconds, but no longer than 10 seconds. Then, press and hold the UNLOCK button while still holding the
LOCK button.
• Release both buttons at the same time.
Auto Unlock Doors On Exit
• To have all of the vehicle doors unlock when any door is opened: • Enter your vehicle and close all the doors.
• Within 15 seconds, cycle the ignition switch between LOCK and ON and then backto LOCK four times, ending up in the LOCK position (do not start the engine).
• Within 30 seconds, press the power door UNLOCK switch to unlock the doors. A single chime will indicate that programming is complete.
GETTING STARTED
20
Page 23 of 88

Auto Door Lock
• To have the doors lock automatically when the vehicle’s speed exceeds 15 mph(24 km/h):
• Enter your vehicle and close all the doors.
• Cycle the ignition switch between LOCK and ON and then back to LOCK four times, ending up in the LOCK position (do not start the engine).
• Press the power door LOCK switch to lock the doors. A single chime will indicate that programming is complete.
Sound Horn With Lock
• To turn the horn chirp on or off when the doors are locked:
• Press the LOCK button for at least 4 seconds, but no longer than 10 seconds.Then, press the PANIC button while still holding the LOCK button.
• Release both buttons at the same time.
Flashing Lights With Lock
• The turn signal lights flashing, when the doors are locked or unlocked, feature can be turned on or off. To turn this feature on or off:
• Press and hold the UNLOCK button for at least 4 seconds, but no longer than 10 seconds. Then, press and hold the LOCK button while still holding the
UNLOCK button.
• Release both buttons at the same time.
21
GETTING STARTED
Page 24 of 88

TURN SIGNAL/WIPER/WASHER/HIGH BEAM LEVER
Turn Signal/Lane Change Assist
• Tap the lever up or down once and the turn signal (right or left) will flash threetimes and automatically turn off.
Front Wipers
Intermittent, Low And High Operation
• Rotate the end of the lever to the first detent position for one of five intermittentsettings, the second detent for low wiper operation and the third detent for high
wiper operation.
Rain Sensing Wipers
• This feature senses moisture on the vehicle’s windshield and automaticallyactivates the wipers for the driver when the switch is in the intermittent positions.
Refer to Programmable Features in Getting Started for further details.
Mist
• Push the end of the lever inward to the first detent when a single wipe is desired.
Washer Operation
• Push the end of the lever inward to the second detent and hold for as long as sprayis desired.
High Beam Operation
• Push the lever forward to activate the high beams. Pull the lever toward you forflash to pass.
NOTE: For safe driving, turn off high beams when oncoming traffic is present to
prevent headlight glare and as a courtesy to other motorists.
OPERATING YOUR VEHICLE
22
Page 25 of 88
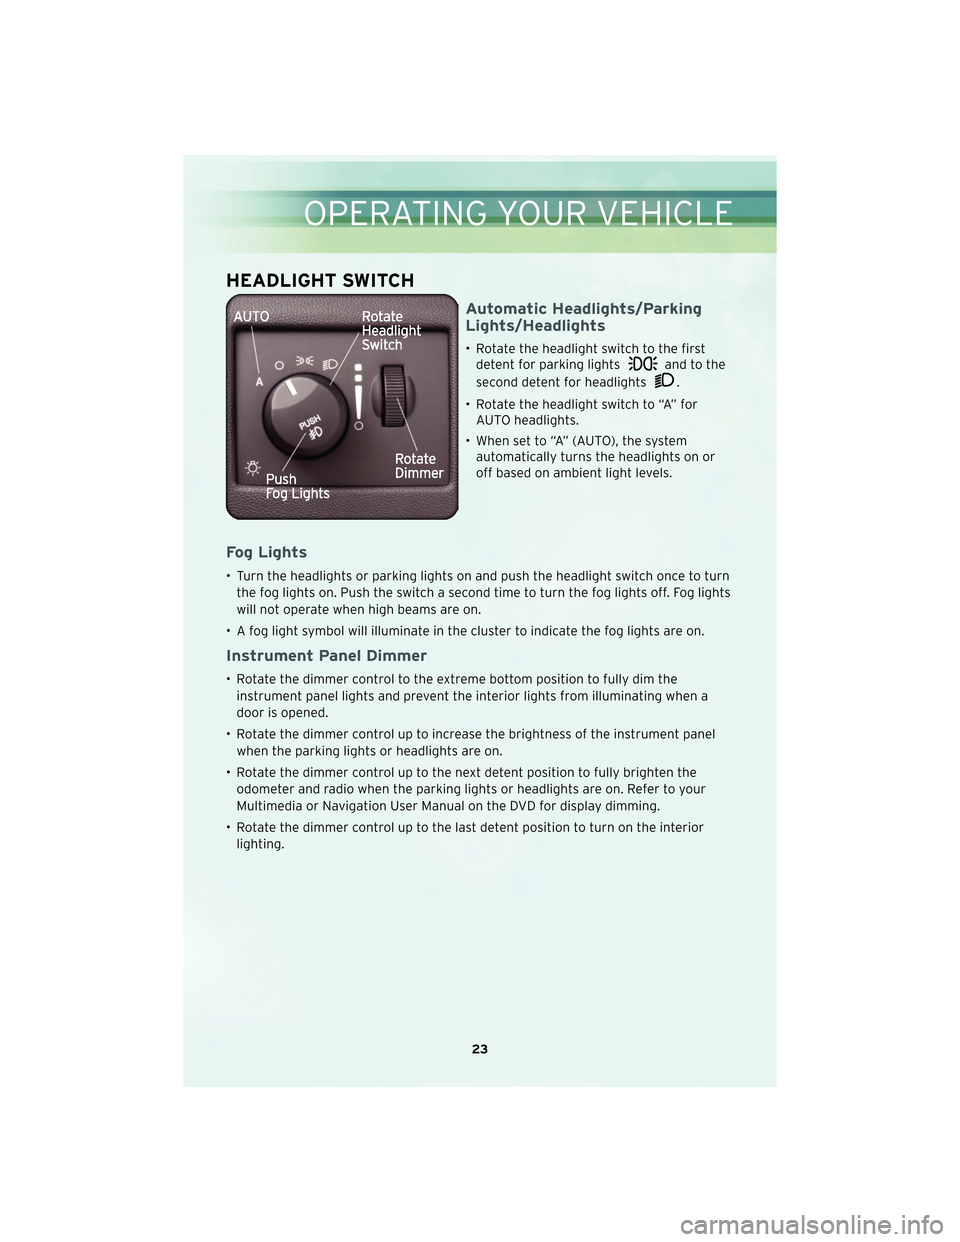
HEADLIGHT SWITCH
Automatic Headlights/Parking
Lights/Headlights
• Rotate the headlight switch to the firstdetent for parking lights
and to the
second detent for headlights
.
• Rotate the headlight switch to “A” for AUTO headlights.
• When set to “A” (AUTO), the system automatically turns the headlights on or
off based on ambient light levels.
Fog Lights
• Turn the headlights or parking lights on and push the headlight switch once to turn
the fog lights on. Push the switch a second time to turn the fog lights off. Fog lights
will not operate when high beams are on.
• A fog light symbol will illuminate in the cluster to indicate the fog lights are on.
Instrument Panel Dimmer
• Rotate the dimmer control to the extreme bottom position to fully dim the instrument panel lights and prevent the interior lights from illuminating when a
door is opened.
• Rotate the dimmer control up to increase the brightness of the instrument panel when the parking lights or headlights are on.
• Rotate the dimmer control up to the next detent position to fully brighten the odometer and radio when the parking lights or headlights are on. Refer to your
Multimedia or Navigation User Manual on the DVD for display dimming.
• Rotate the dimmer control up to the last detent position to turn on the interior lighting.
23
OPERATING YOUR VEHICLE
Page 26 of 88

SPEED CONTROL LEVER
Cruise ON/OFF
• Push the ON/OFF button to activate theSpeed Control.
• CRUISE will appear on the instrument cluster to indicate the Speed Control is on.
• Push the ON/OFF button a second time to turn the system off.
WARNING!
Leaving the Electronic Speed Control system on when not in use is dangerous. You
could accidentally set the system or cause it to go faster than you want. You could
lose control and have an accident. Always leave the Electronic Speed Control
system off when you are not using it.
Set
• With Speed Control on, push down and release the lever to set a desired speed.
WARNING!
Electronic Speed Control can be dangerous where the system cannot maintain a
constant speed. Your vehicle could go too fast for the conditions, and you could
lose control. An accident could be the result. Do not use Electronic Speed Control
in heavy traffic or on roads that are winding, icy, snow-covered or slippery.
Accel/Decel
• Push and hold the lever up to accelerate or down to decelerate the vehicle; release
the lever to save the new set speed.
• Once a speed is set, tapping the lever up or down will increase or decrease the set speed approximately 1 mph (2 km/h).
Cancel
• Pull the lever toward you or apply the brakes to cancel the set speed and maintainthe set speed in memory.
• Push the ON/OFF button to turn the system off and erase the set speed memory.
OPERATING YOUR VEHICLE
24
Page 27 of 88
Resume
• To resume a previously selected speed in memory, push the lever up and release.
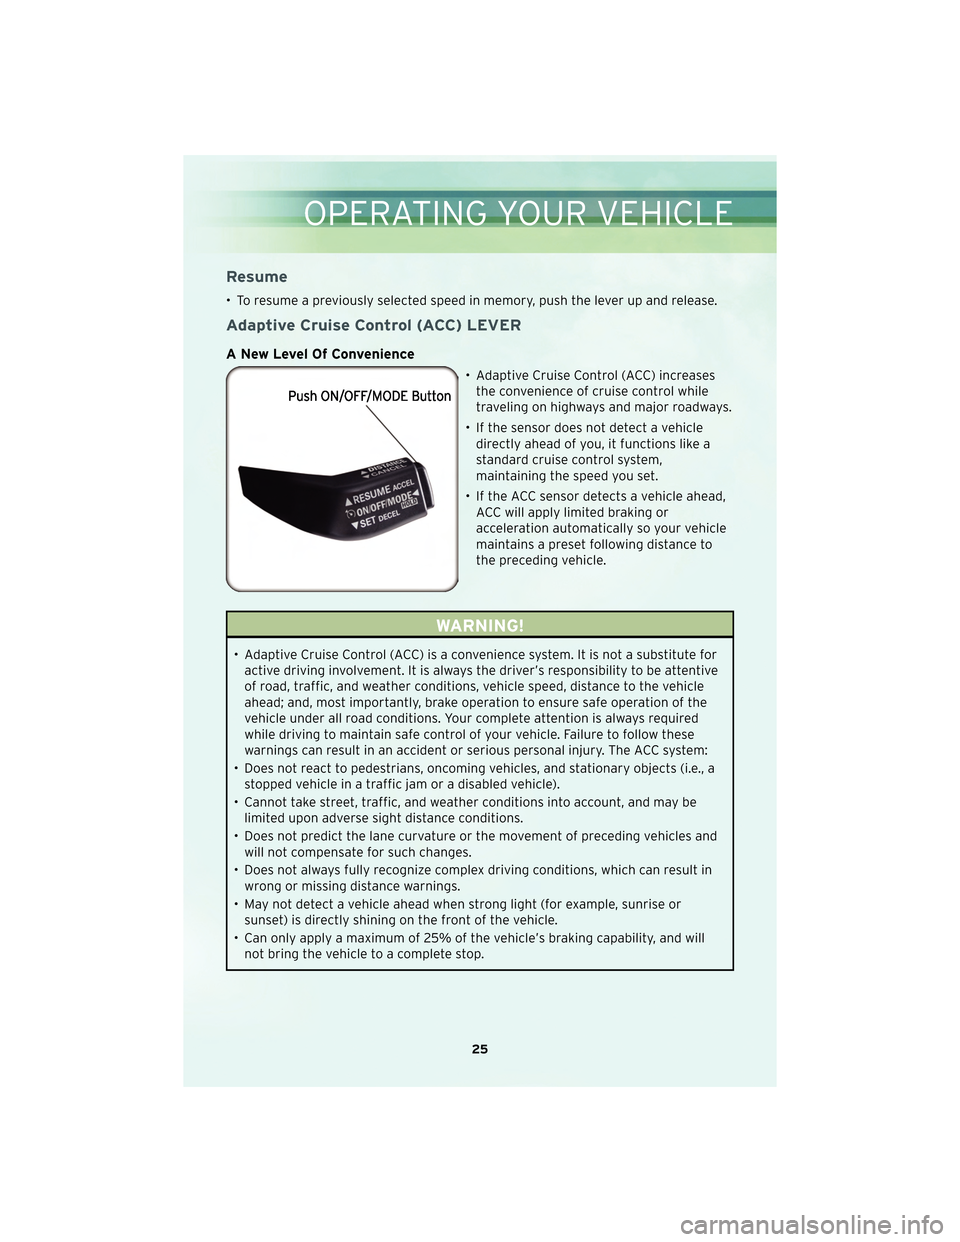
Adaptive Cruise Control (ACC) LEVER
A New Level Of Convenience
• Adaptive Cruise Control (ACC) increasesthe convenience of cruise control while
traveling on highways and major roadways.
• If the sensor does not detect a vehicle directly ahead of you, it functions like a
standard cruise control system,
maintaining the speed you set.
• If the ACC sensor detects a vehicle ahead, ACC will apply limited braking or
acceleration automatically so your vehicle
maintains a preset following distance to
the preceding vehicle.
WARNING!
• Adaptive Cruise Control (ACC) is a convenience system. It is not a substitute foractive driving involvement. It is always the driver’s responsibility to be attentive
of road, traffic, and weather conditions, vehicle speed, distance to the vehicle
ahead; and, most importantly, brake operation to ensure safe operation of the
vehicle under all road conditions. Your complete attention is always required
while driving to maintain safe control of your vehicle. Failure to follow these
warnings can result in an accident or serious personal injury. The ACC system:
• Does not react to pedestrians, oncoming vehicles, and stationary objects (i.e., a stopped vehicle in a traffic jam or a disabled vehicle).
• Cannot take street, traffic, and weather conditions into account, and may be limited upon adverse sight distance conditions.
• Does not predict the lane curvature or the movement of preceding vehicles and will not compensate for such changes.
• Does not always fully recognize complex driving conditions, which can result in wrong or missing distance warnings.
• May not detect a vehicle ahead when strong light (for example, sunrise or sunset) is directly shining on the front of the vehicle.
• Can only apply a maximum of 25% of the vehicle’s braking capability, and will not bring the vehicle to a complete stop.
25
OPERATING YOUR VEHICLE
Page 28 of 88
ACC Cruise ON/OFF/MODE
• Push the ON/OFF/MODE button to activate the ACC speed control.
• ACC READY will appear in the EVIC display to indicate the ACC speed control is on.
• Push the ON/OFF/MODE button a second time to turn the system off.
WARNING!
Leaving the Electronic Speed Control system on when not in use is dangerous. You
could accidentally set the system or cause it to go faster than you want. You could
lose control and have an accident. Always leave the Electronic Speed Control
system off when you are not using it.
Set
• With ACC speed control on, push down and release the lever to set a desired speed.
WARNING!
Electronic Speed Control can be dangerous where the system cannot maintain a
constant speed. Your vehicle could go too fast for the conditions, and you could
lose control. An accident could be the result. Do not use Electronic Speed Control
in heavy traffic or on roads that are winding, icy, snow-covered or slippery.
Accel/Decel
• Push and hold the lever up to accelerate or down to decelerate the vehicle, releasethe lever to save the new set speed.
• Once a speed is set, tapping the lever up or down will increase or decrease the set speed approximately 1 mph (2 km/h).
Cancel
• Pull the lever toward you or apply the brakes to cancel the set speed and maintainthe set speed in memory.
Resume
• To resume a previously selected speed in memory, push the lever up and release.The EVIC will display the last set speed.
Setting The Following Distance
• With ACC speed control on, push the lever away from you and release to set thedesired distance. Each time the lever is pushed, the distance setting adjusts
between long, medium and short.
Changing To Normal (Fixed Speed) Cruise Control
• In addition to adaptive mode, ACC has a normal (fixed speed) cruise control modefor cruising at fixed speeds.
• Press and hold the “ON/OFF/MODE” button for at least one second to activate the normal speed control. “Normal Cruise Ready” will be displayed in the EVIC.
OPERATING YOUR VEHICLE
26
Page 29 of 88
The ACC Warning
• The ACC Blinded message will display in the EVIC when conditions temporarily limitthe system performance and the system will be deactivated. The most likely cause
for a deactivated system is a dirty or obstructed sensor, occurring mostly during
snow, fog, heavy rain, or by obstruction from dirt or ice. In these cases, the EVIC
will display “ACC BLINDED.” Examine the sensor (behind the grille, slightly offset
from the center of the grille) which may need simple cleaning, or removal of the
obstruction.
System Maintenance
• Always keep the sensor clean for optimum system performance.
• See your authorized dealer for services if the sensor is damaged.
• Do not attach or install any accessories near the sensor, including transparentmaterial or aftermarket grilles. Doing so could cause an ACC system failure or
malfunction.
• Refer to your Owner’s Manual on the DVD for complete details.
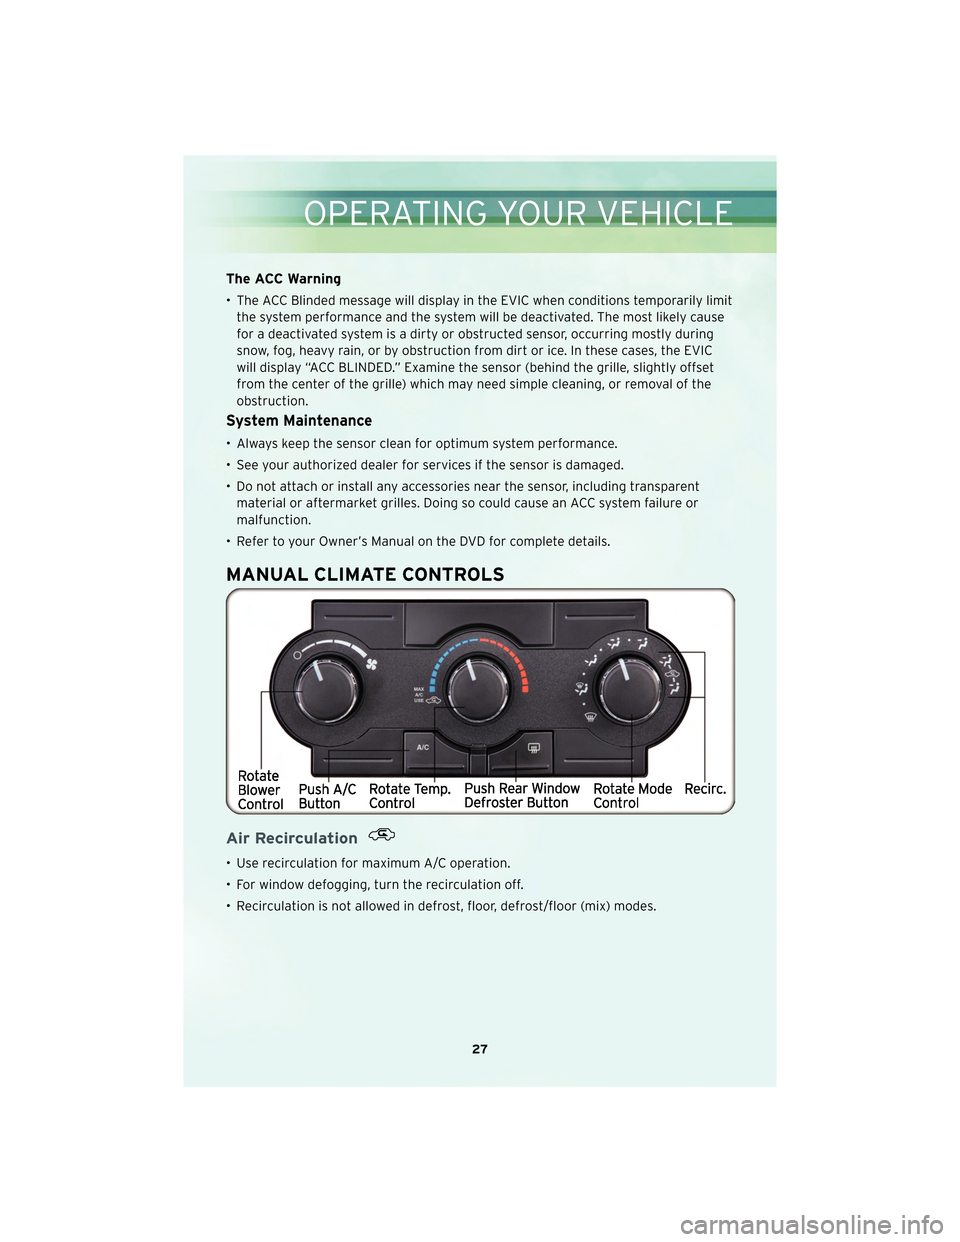
MANUAL CLIMATE CONTROLS
Air Recirculation
• Use recirculation for maximum A/C operation.
• For window defogging, turn the recirculation off.
• Recirculation is not allowe d in defrost, floor, defrost/f loor (mix) modes.
27
OPERATING YOUR VEHICLE
Page 30 of 88

AUTOMATIC TEMPERATURE CONTROLS (ATC)
Automatic Operation
• Turn the mode control to the AUTO position and the blower control to either LOAUTO or HIGH AUTO position.
• Select the desired temperature by rotating the temperature control for the driver or passenger.
• The system will maintain the set temperature automatically.
Air Conditioning (A/C)
• If the air conditioning button is pressed while in the AUTO mode, the indicator light
may flash three times to indicate the air conditioning is being controlled
automatically.
Air Recirculation
• Use recirculation for maximum A/C operation.
• For window defogging, turn the recirculation button off.
• If the recirculation butto n is pressedwhile in the AUTO mode, the indicator light
may flash three times to indicate the cabin air is being controlled automatically.
POWER SUNROOF
• The power sunroof switch is located on the overhead console.
WARNING!
• Never leave children in a vehicle with the key in the ignition switch. Occupants, particularly unattended children, can become entrapped by the power sunroof
while operating the power sunroof switch. Such entrapment may result in
serious injury or death.
(Continued)
OPERATING YOUR VEHICLE
28