steering wheel CHRYSLER 300 2012 2.G User Guide
[x] Cancel search | Manufacturer: CHRYSLER, Model Year: 2012, Model line: 300, Model: CHRYSLER 300 2012 2.GPages: 124, PDF Size: 3.67 MB
Page 3 of 124
INTRODUCTION/WELCOMEWelcome From Chrysler Group LLC......2
CONTROLS AT A GLANCEDriver Cockpit................4
Instrument Cluster ..............6
GETTING STARTEDKeyFob ...................8
Remote Start.................8
Keyless Enter-N-Go™ .............9
Theft Alarm .................11
Seat Belt ...................12
Supplemental Restraint System
(SRS) — Air Bags ...............13
Child Restraints ................14
Front Seats ..................16
Rear Seat ...................18
Heated Seats .................18
Heated And Cooled Cupholders .......19
Adjustable Pedals ...............20
Tilt/Telescoping Steering Column .......20
OPERATING YOUR VEHICLEEngine Break-In Recommendations ......22
Turn Signal/Wiper/Washer/High
Beam Lever .................23
Headlight Switch ...............24
Speed Control ................25
Electronic Shifter – 3.6L Engine ........28
Transmission Modes/AutoStick® ........30
Climate Controls ...............32
Power Sunroof ................34
Wind Buffeting ................35
ELECTRONICSYour Vehicle's Sound System .........36
Identifying Your Radio .............38
Uconnect Touch™ 8.4 & 8.4N At A Glance . . . 38
Radio ....................40
Sirius XM™ Satellite Radio ...........41
iPod®/CD/AUX Controls ...........43
Garmin® Navigation (8.4N Only) .......44
Sirius Travel Link (8.4N Only) .........47
Playing iPod/USB/MP3 Devices ........48
Uconnect™ Phone (Bluetooth® Hands
Free Calling) .................49
Uconnect™ Voice Command .........53
Electronic Vehicle Information
Center (EVIC) ................55
Programmable Features ............56
Universal Garage Door Opener
(HomeLink®) .................57 Power Outlets
................59
UTILITYTrailer Towing Weights (Maximum
Trailer Weight Ratings) ............61
Recreational Towing
(Behind Motorhome, Etc.) ...........62
SRT8AutoStick®..................63
Electronic Control Damping System ......64
Performance Features .............65
Summer/Three-Season Tires .........67
WHAT TO DO IN EMERGENCIES24-Hour Towing Assistance..........68
Instrument Cluster Warning Lights .......68
If Your Engine Overheats ...........72
Jacking And Tire Changing ..........73
TIREFIT Kit .................78
Battery Location ...............83
Jump-Starting ................83
Shift Lever Override .............85
Towing A Disabled Vehicle ..........87
Freeing A Stuck Vehicle ............88
Event Data Recorder (EDR) ..........89
MAINTAINING YOUR VEHICLEOpening The Hood..............90
Fuel Door Release ..............91
Engine Compartment .............93
Fluids And Capacities .............96
Maintenance Chart ..............99
Fuses ....................104
Tire Pressures ................108
Wheel And Wheel Trim Care ........108
Exterior Bulbs ................109
CONSUMER ASSISTANCEChrysler Group LLC Customer Center ....110
Chrysler Canada Inc. Customer Center . . . 110
Assistance For The Hearing Impaired ....110
Publications Ordering ............110
Reporting Safety Defects In
The 50 United States
And Washington, D.C. ............111
MOPAR ACCESSORIESAuthentic Accessories By MOPAR® ..... 112
INDEX................. 113
FAQ(HowTo?)Frequently Asked Questions......... 116
TABLE OF CONTENTS
Page 7 of 124
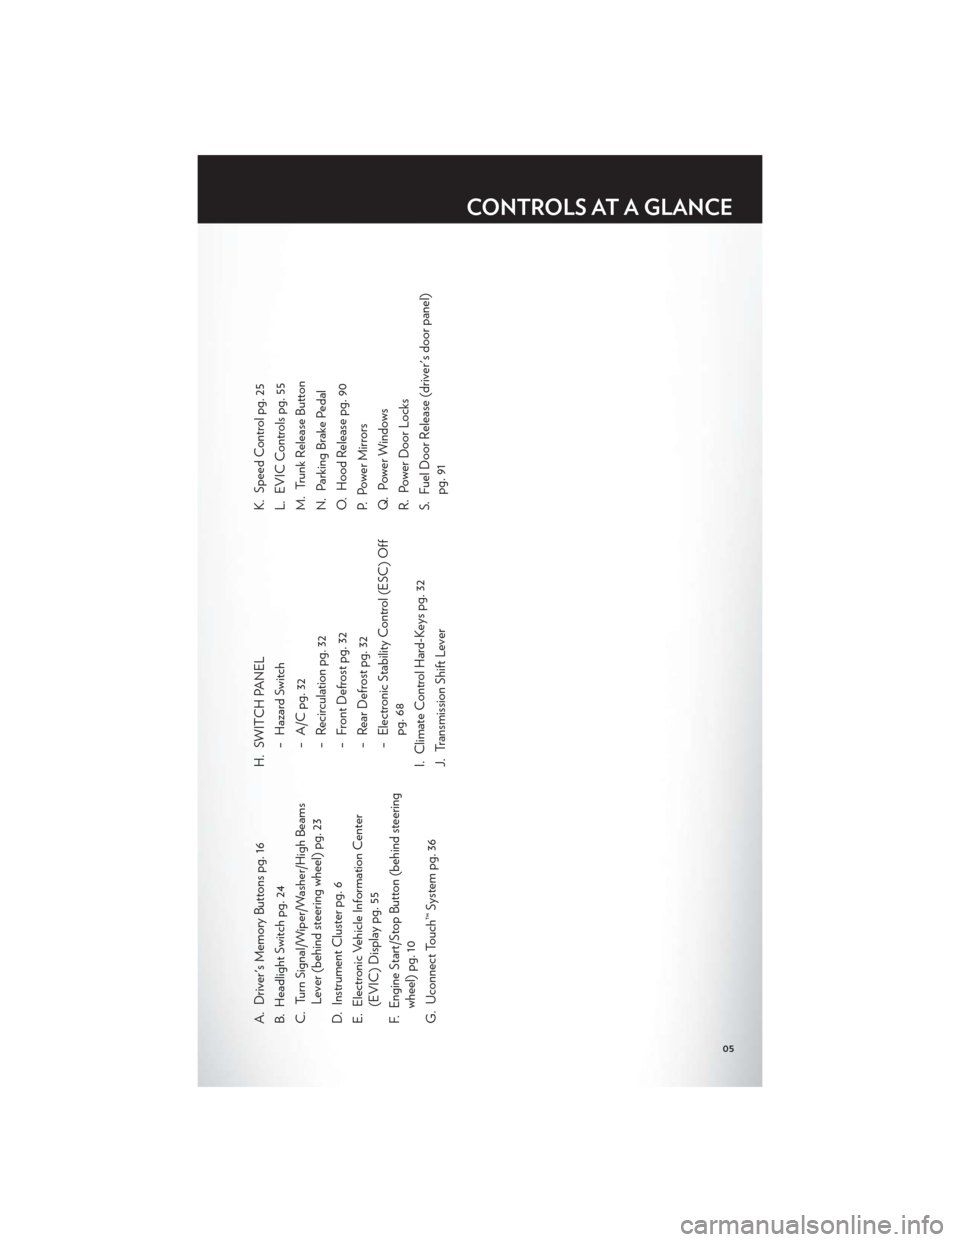
A. Driver's Memory Buttons pg. 16
B. Headlight Switch pg. 24
C. Turn Signal/Wiper/Washer/High BeamsLever (behind steering wheel) pg. 23
D. Instrument Cluster pg. 6
E. Electronic Vehicle Information Center (EVIC) Display pg. 55
F. Engine Start/Stop Button (behind steering wheel) pg. 10
G. Uconnect Touch™ System pg. 36 H. SWITCH PANEL
− Hazard Switch
− A/C pg. 32
− Recirculation pg. 32
− Front Defrost pg. 32
− Rear Defrost pg. 32
− Electronic Stability Control (ESC) Offpg. 68
I. Climate Control Hard-Keys pg. 32
J. Transmission Shift Lever K. Speed Control pg. 25
L. EVIC Controls pg. 55
M. Trunk Release Button
N. Parking Brake Pedal
O. Hood Release pg. 90
P. Power Mirrors
Q. Power Windows
R. Power Door Locks
S. Fuel Door Release (driver's door panel)
pg. 91
CONTROLS AT A GLANCE
05
Page 15 of 124
SUPPLEMENTAL RESTRAINT SYSTEM (SRS) — AIR
BAGS
• This vehicle has Advanced Front Air Bags for both the driver and right front passenger asa supplement to the seat belt restraint system. The Advanced Front Air Bags will not
deploy in every type of collision.
• Advanced Front Air Bags are designed to provide additional protection by supplementing the seat belts in certain frontal collisions depending on the severity and type of collision.
Advanced Front Air Bags are not expected to reduce the risk of injury in rear, side, or
rollover collisions.
• This vehicle is equipped with Supplemental Side Air Bag Inflatable Curtains to protect the driver, front and rear passengers sitting next to a window.
• This vehicle is equipped with Supplemental Seat-Mounted Side Air Bags to provide enhanced protection to help protect an occupant during a side impact.
• This vehicle is equipped with a Supplemental Driver Side Knee Air Bag to provide enhanced protection and work together with the Driver Advanced Front Air Bag during a
frontal impact.
• If the Air Bag Warning Light
is not on during starting, stays on, or turns on while
driving, have the vehicle serviced by an authorized service center immediately.
• Refer to the Owner's Manual on the DVD for further details regarding the Supplemental Restraint System (SRS).
WARNING!
• Relying on the air bags alone could lead to more severe injuries in a collision. The airbags work with your seat belt to restrain you properly. In some collisions, the air bags
won't deploy at all. Always wear your seat belts even though you have air bags.
• Being too close to the steering wheel or instrument panel during Advanced Front Air Bag deployment could cause serious injury, including death. Air bags need room to inflate. Sit
back, comfortably extending your arms to reach the steering wheel or instrument panel.
• Supplemental Side Air Bag Inflatable Curtains and Supplemental Seat-Mounted Side Air Bags need room to inflate. Do not lean against the door or window. Sit upright in the
center of the seat.
• Being too close to the Supplemental Side Air Bag Inflatable Curtain and/or Seat-Mounted Side Air Bag during deployment could cause you to be severely injured or
killed.
• Do not drive your vehicle after the air bags have deployed. If you are involved in another
collision, the air bags will not be in place to protect you.
• After any collision, the vehicle should be taken to an authorized dealer immediately.
GETTING STARTED
13
Page 22 of 124
ADJUSTABLE PEDALS
• The adjustable pedal switch is located onthe front side of the driver’s seat cushion
side shield.
• Press the switch forward to move the pedals forward (toward the front of the
vehicle).
• Press the switch rearward to move the pedals rearward (toward the driver).
NOTE:The pedals cannot be adjusted when the vehicle is in REVERSE or when the
Electronic Speed Control is set.
CAUTION!
Do not place any article under the adjustable pedals or impede its ability to move, as it may
cause damage to the pedal controls. Pedal travel may become limited if movement is
stopped by an obstruction in the adjustable pedal's path.
WARNING!
Do not adjust the pedals while the vehicle is moving. You could lose control and have a
collision. Always adjust the pedals while the vehicle is parked.
TILT/TELESCOPING STEERING COLUMN
Manual - Tilt/Telescoping Steering Column
• The tilt/telescoping control handle is located below the steering wheel at the end of the steering column.
• To unlock the steering column, push the lever downward (toward the floor).
• To tilt the steering column, move the steering wheel upward or downward as desired. To lengthen or shorten the steering column, pull the steering wheel outward or push it inward
as desired.
• To lock the steering column in position, push the lever upward until fully engaged.
GETTING STARTED
20
Page 23 of 124
Power - Tilt/Telescoping Steering Column
• The power tilt/telescoping steeringcontrol is located below the turn
signal/wiper/washer/high beam lever on
the steering column.
• To tilt the steering column, move the power tilt/telescoping control up or down
as desired. To lengthen or shorten the
steering column, pull the control toward
you or push the control away from you as
desired.
WARNING!
• Do not adjust the steering wheel while driving. The tilt/telescoping adjustment must belocked while driving. Adjusting the steering wheel while driving or driving without the
tilt/telescoping adjustment locked could cause the driver to lose control of the vehicle.
Failure to follow this warning may result in you and others being severely injured or killed.
• Moving the steering column while the vehicle is moving is dangerous. Without a stable steering column, you could lose control of the vehicle and have a collision. Adjust the
column only while the vehicle is stopped.
GETTING STARTED
21
Page 26 of 124
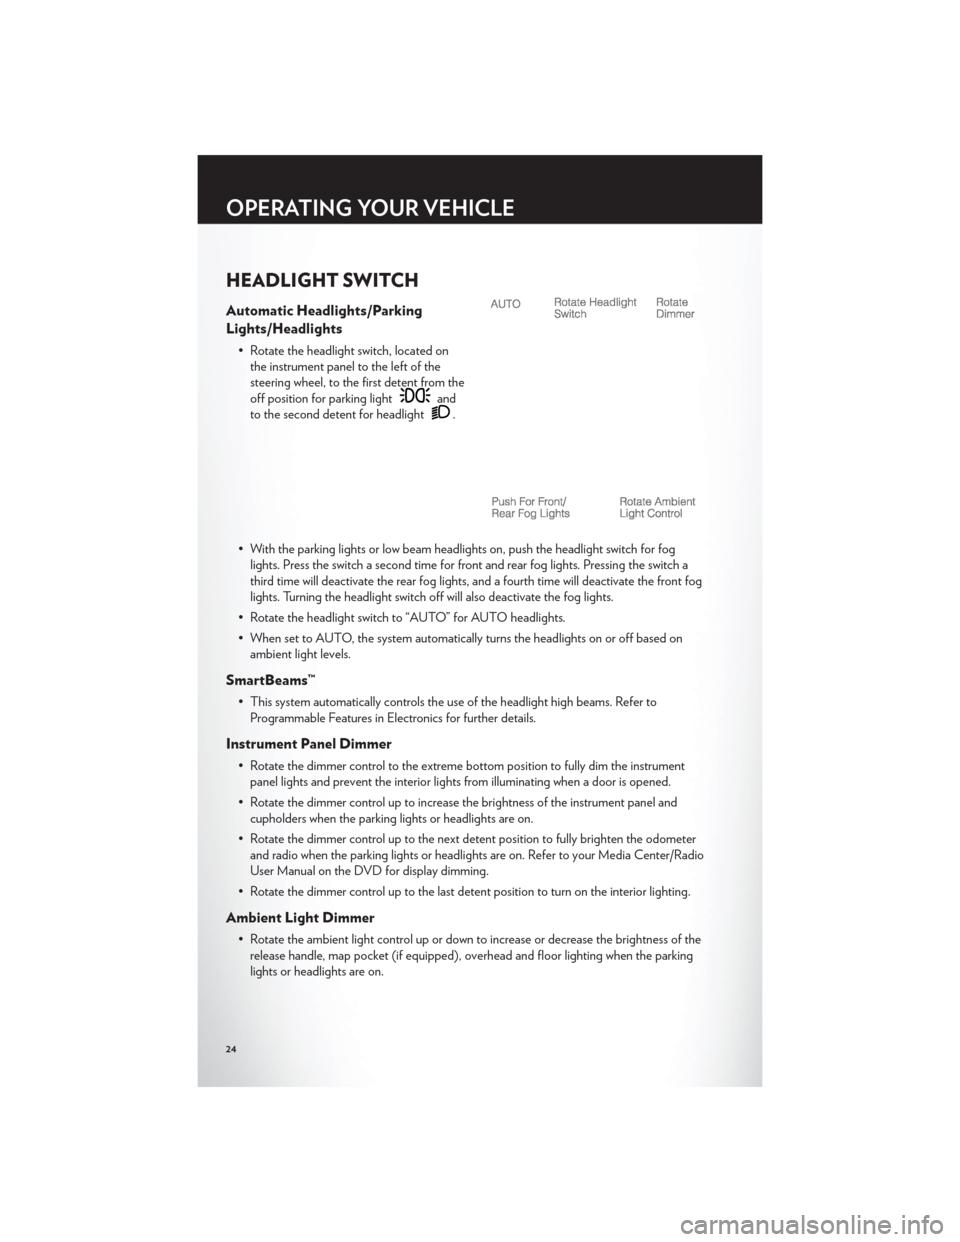
HEADLIGHT SWITCH
Automatic Headlights/Parking
Lights/Headlights
• Rotate the headlight switch, located onthe instrument panel to the left of the
steering wheel, to the first detent from the
off position for parking light
and
to the second detent for headlight
.
• With the parking lights or low beam headlights on, push the headlight switch for fog lights. Press the switch a second time for front and rear fog lights. Pressing the switch a
third time will deactivate the rear fog lights, and a fourth time will deactivate the front fog
lights. Turning the headlight switch off will also deactivate the fog lights.
• Rotate the headlight switch to “AUTO” for AUTO headlights.
• When set to AUTO, the system automatically turns the headlights on or off based on ambient light levels.
SmartBeams™
• This system automatically controls the use of the headlight high beams. Refer toProgrammable Features in Electronics for further details.
Instrument Panel Dimmer
• Rotate the dimmer control to the extreme bottom position to fully dim the instrumentpanel lights and prevent the interior lights from illuminating when a door is opened.
• Rotate the dimmer control up to increase the brightness of the instrument panel and cupholders when the parking lights or headlights are on.
• Rotate the dimmer control up to the next detent position to fully brighten the odometer and radio when the parking lights or headlights are on. Refer to your Media Center/Radio
User Manual on the DVD for display dimming.
• Rotate the dimmer control up to the last detent position to turn on the interior lighting.
Ambient Light Dimmer
• Rotate the ambient light control up or down to increase or decrease the brightness of the release handle, map pocket (if equipped), overhead and floor lighting when the parking
lights or headlights are on.
OPERATING YOUR VEHICLE
24
Page 27 of 124
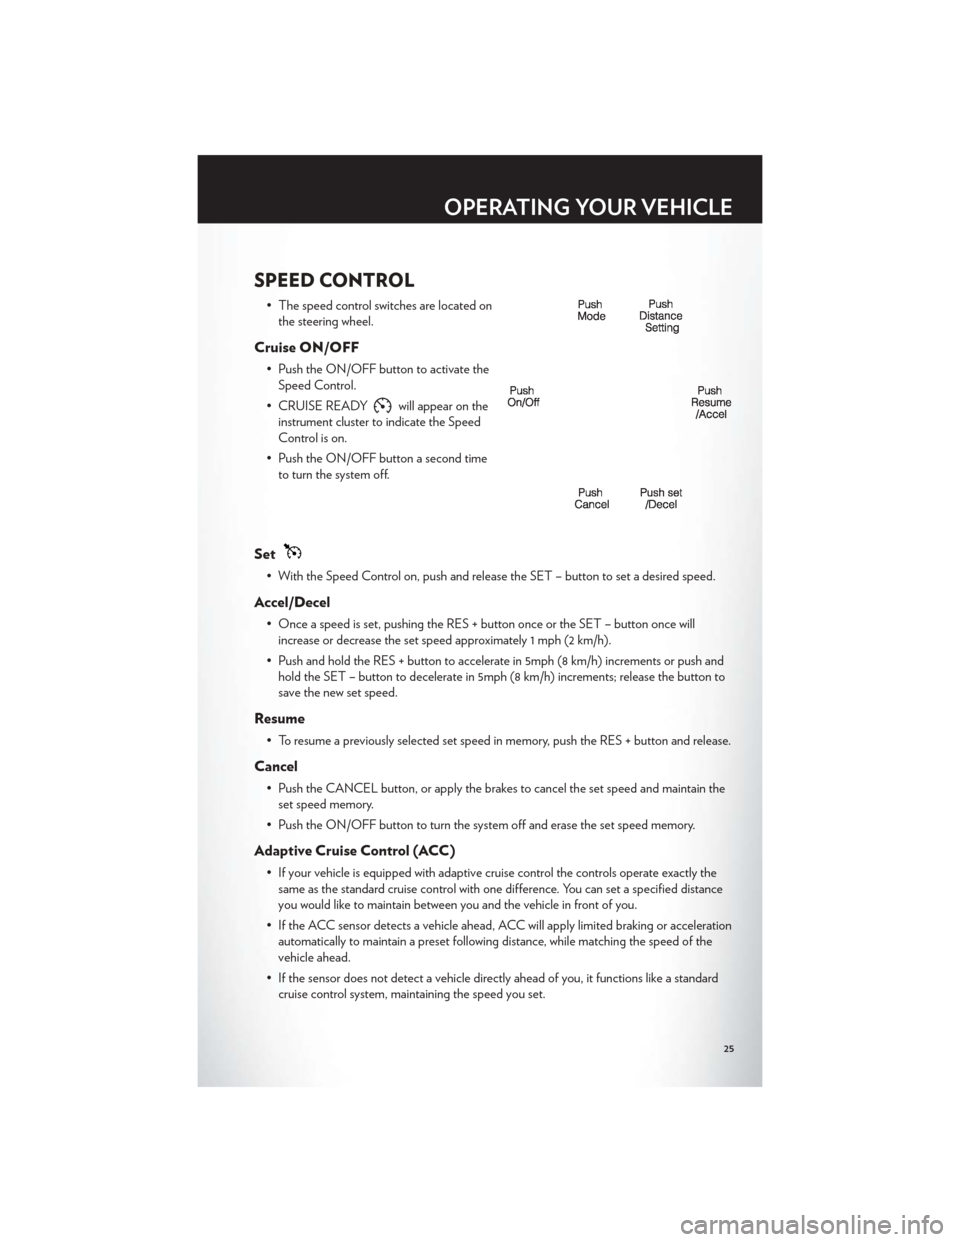
SPEED CONTROL
• The speed control switches are located onthe steering wheel.
Cruise ON/OFF
• Push the ON/OFF button to activate theSpeed Control.
• CRUISE READY
will appear on the
instrument cluster to indicate the Speed
Control is on.
• Push the ON/OFF button a second time to turn the system off.
Set
• With the Speed Control on, push and release the SET – button to set a desired speed.
Accel/Decel
• Once a speed is set, pushing the RES + button once or the SET – button once willincrease or decrease the set speed approximately 1 mph (2 km/h).
• Push and hold the RES + button to accelerate in 5mph (8 km/h) increments or push and hold the SET – button to decelerate in 5mph (8 km/h) increments; release the button to
save the new set speed.
Resume
• To resume a previously selected set speed in memory, push the RES + button and release.
Cancel
• Push the CANCEL button, or apply the brakes to cancel the set speed and maintain theset speed memory.
• Push the ON/OFF button to turn the system off and erase the set speed memory.
Adaptive Cruise Control (ACC)
• If your vehicle is equipped with adaptive cruise control the controls operate exactly the same as the standard cruise control with one difference. You can set a specified distance
you would like to maintain between you and the vehicle in front of you.
• If the ACC sensor detects a vehicle ahead, ACC will apply limited braking or acceleration automatically to maintain a preset following distance, while matching the speed of the
vehicle ahead.
• If the sensor does not detect a vehicle directly ahead of you, it functions like a standard cruise control system, maintaining the speed you set.
OPERATING YOUR VEHICLE
25
Page 33 of 124
AUTOSTICK®
• When the transmission is in DRIVE, it willoperate automatically, shifting between
the eight available gears. While in SPORT
mode, the transmission will only shift
between seven of the eight available
gears.
• To engage AutoStick®, simply tap one of the steering wheel-mounted shift paddles
(+/-).
• In AutoStick® mode, the transmission will only shift up or down when (+/-) is manually selected by the driver, except as described below. It will remain in the selected gear until
another upshift or downshift is chosen.
• When AutoStick® is active, the current transmission gear is displayed in the EVIC.
• If AutoStick® is engaged while in DRIVE mode, lack of accelerator pedal activity will cause the transmission to revert to automatic operation. The transmission will also upshift
automatically once redline, (where the tachometer needle points to the red portion of the
gauge) is reached. If the accelerator is pressed to the floor, the transmission will downshift
when possible (based on current vehicle speed and gear).
• When AutoStick® is used in SPORT mode, the transmission will only shift up or down when commanded by the driver, except as noted below.
• In either DRIVE or SPORT mode, the transmission will automatically downshift as the vehicle slows to a stop (to prevent engine lugging) and will display the current gear.
Tapping the (+) paddle (at a stop) will allow starting in second gear. After a stop, the
driver should manually upshift (+) the transmission as the vehicle accelerates.
NOTE:To disengage AutoStick® mode, press and hold the (+) shift paddle until “D” or “S” is
once again displayed in the EVIC. You can shift in or out of the AutoStick® mode at any time
without taking your foot off the accelerator pedal.
OPERATING YOUR VEHICLE
31
Page 50 of 124
PLAYING iPod/USB/MP3 DEVICES
• There are many ways to play music from iPod®/MP3 players or USB devices through yourvehicle's sound system.
1. Audio Jack
• The Audio Jack allows a portable device, such as an MP3 player or a cassette player, tobe plugged into the radio and utilize the vehicle’s sound system, using a 3.5 mm audio
cable, to amplify the source and play through the vehicle speakers.
• Touching the Player soft-key then choose AUX source will change the mode to auxiliary device if the Audio Jack is connected, allowing the music from your portable device to be
heard through the vehicle's speakers.
• The functions of the portable device are controlled using the device buttons. The volume may be controlled using the radio or portable device.
• To route the audio cable out of the center console, use the access cut out in the front of the console.
2. USB Port
• Connect your iPod® or compatible device using a USB cable into the USB Port. USBMemory sticks with audio files can also be used. Then, audio from the device can be
played on the vehicles sound system while providing metadata (artist, track title, album,
etc.) information on the radio display.
• When connected, the iPod®/compatible USB device can be controlled using the radio or Steering Wheel Audio Controls to play, skip to the next or previous track, browse, and list
the contents.
ELECTRONICS
48
Page 51 of 124
• The iPod® battery charges when plugged into the USB port (if supported by the specificdevice).
• To route the USB/iPod® cable out of the center console, use the access cut out in the front of the console.
NOTE:
• When connecting your iPod® device for the first time, the system may take several minutesto read your music, depending on the number of files. For example, the system will take
approximately 5 minutes for every 1000 songs loaded on the device. Also during the
reading process, the Shuffle and Browse functions will be disabled. This process is needed to
ensure the full use of your iPod® features and only happens the first time it is connected.
After the first time, the reading process of your iPod® will take considerably less time unless
changes are made or new songs are added to the playlist.
• The USB port supports certain Mini, Classic, Nano, Touch, and iPhone® devices. The USB port also supports playing music from compatible external USB Mass Storage Class
memory devices. Some iPod® software versions may not fully support the USB port features.
Please visit Apple’s website for iPod® software updates.
3. SD Card
• Play songs stored on an SD card inserted into the SD card slot.
• Song playback can be controlled using the radio or Steering Wheel Audio Controls toplay, skip to the next or previous track, browse, and list the contents.
4. Bluetooth® Streaming Audio
• If equipped with Uconnect™ Voice Command, your Bluetooth-equipped iPod® devices,cell phones or other media players, may also be able to stream music to your vehicle's
sound system. Your connected device must be Bluetooth-compatible, and paired with
your Uconnect Touch® system (see Uconnect™ Phone for pairing instructions). You can
access the music from your connected Bluetooth® device by touching the Source soft-key
while in Player mode.
Uconnect™ Phone (Bluetooth® HANDS FREE CALLING)
• If the Uconnect™ PhoneButton exists on your steering wheel, then you have the
Uconnect™ Phone features.
• The Uconnect™ Phone is a voice-activated, hands-free, in-vehicle communications system with Voice Command Capability (see Voice Command section).
• The Uconnect™ Phone allows you to dial a phone number with your mobile phone using simple voice commands or using screen soft-keys.
• Refer to the Understand The Features Of Your Vehicle section of your vehicle's Owner's Manual on the DVD for further details.
NOTE:The Uconnect™ Phone requires a mobile phone equipped with the Bluetooth®
Hands-Free Profile, Version 1.0 or higher. For Uconnect™ customer support, call
1–877–855–8400 or visit www.UconnectPhone.com.
ELECTRONICS
49