radio CHRYSLER 300 2014 2.G User Guide
[x] Cancel search | Manufacturer: CHRYSLER, Model Year: 2014, Model line: 300, Model: CHRYSLER 300 2014 2.GPages: 132, PDF Size: 3.65 MB
Page 2 of 132
IF YOU ARE THE FIRST REGISTERED RETAIL OWNER OF YOUR
VEHICLE, YOU MAY OBTAIN A COMPLIMENTARY PRINTED COPY
OF THE OWNER’S MANUAL, NAVIGATION/ UCONNECT® MANUALS
OR WARRANTY BOOKLET BY CALLING 1-800-247-9753 (U.S.) OR
1-800-387-1143 (CANADA) OR BY CONTACTING YOUR DEALER.
The driver’s primary responsibility is the safe operation of the vehicle. Driving while distracted can
result in loss of vehicle control, resulting in a collision and personal injury. Chrysler Group LLC
strongly recommends that the driver use extreme caution when using any device or feature that
may take their attention off the road. Use of any electrical devices such as cell phones, computers,
portable radios, vehicle navigation or other devices by the driver while the vehicle is moving is
dangerous and could lead to a serious collision. Texting while driving is also dangerous and should
never be done while the vehicle is moving. If you find yourself unable to devote your full attention
to vehicle operation, pull off the road to a safe location and stop your vehicle. Some States or
Provinces prohibit the use of cellular telephones or texting while driving. It is always the driver’s
responsibility to comply with all local laws.
IMPORTANT: This User Guide is intended to familiarize you with the important features of
your vehicle. The DVD enclosed contains your Owner’s Manual, Navigation/ Uconnect®
Manuals, Warranty Booklets, Tire Warranty and Roadside Assistance (new vehicles
purchased in the U.S.) or Roadside Assistance (new vehicles purchased in Canada) in
electronic format. We hope you find it useful. Replacement DVD kits may be purchased by
visiting www.techauthority.com. Copyright 2014 Chrysler Group LLC.
This guide has been prepared to help you get quickly acquainted with your new
Chrysler and to provide a convenient reference source for common questions. However, it is not a substitute for your Owner’s Manual. For complete operational
instructions, maintenance procedures and important safety messages, please
consult your Owner’s Manual, Navigation/ Uconnect® Manuals and other Warning
Labels in your vehicle. Not all features shown in this guide may apply to your vehicle.
For additional information on accessories to help personalize your vehicle, visit
mopar.com (U.S.), mopar.ca (Canada) or your local Chrysler dealer.
DRIVING AND ALCOHOL: Drunken driving is one of the most frequent
causes of collisions. Your driving ability can be seriously impaired with blood alcohol
levels far below the legal minimum. If you are drinking, don’t drive. Ride with a
designated non-drinking driver, call a cab, a friend, or use public transportation.
WARNING
Driving after drinking can lead to a collision. Your perceptions are less sharp, your
reflexes are slower, and your judgment is impaired when you have been drinking.
Never drink and then drive.
1626630_14d_300_UG_031014.indd 23/10/14 9:36 AM
Page 3 of 132
INTRODUCTION/WELCOME
WELCOME FROM CHRYSLER GROUP LLC..2
CONTROLS AT A GLANCE
DRIVER COCKPIT...............4
INSTRUMENT CLUSTER ...........6
GETTING STARTED
KEYFOB ....................8
REMOTE START...............10
KEYLESS ENTER-N-GO™ ..........10
VEHICLE SECURITY ALARM ........13
SEATBELT ...................14
SUPPLEMENTAL RESTRAINT
SYSTEM (SRS) — AIR BAGS .........14
CHILD RESTRAINTS .............15
FRONTSEATS ................18
REAR SEAT ...................21
HEATEDSEATS ................21
HEATED AND COOLED CUPHOLDERS..22ADJUSTABLE PEDALS............23TILT/TELESCOPING STEERING COLUMN..24
OPERATING YOUR VEHICLE
ENGINE BREAK-IN
RECOMMENDATIONS ............25
TURN SIGNAL/WIPER/WASHER/HIGH
BEAM LEVER . ................26
HEADLIGHT SWITCH ............27
SPEED CONTROL ..............28
ELECTRONIC SHIFTER — 3.6L ENGINE . . 32
TRANSMISSION MODES/AUTOSTICK® . . 33
CLIMATE CONTROLS ............35
BLIND SPOT MONITORING ........36
POWER SUNROOF ..............37
WIND BUFFETING ..............39
ELECTRONICS
YOUR VEHICLE'S SOUND SYSTEM ....40
IDENTIFYING YOUR RADIO ........42
Uconnect® 8.4 & 8.4N AT A GLANCE ....42
RADIO .....................44
SiriusXM SATELLITE RADIO .........45
STEERING WHEEL AUDIO CONTROLS...47
SETTING THE ANALOG CLOCK .....47
iPod®/CD/AUX CONTROLS .........48
GARMIN® NAVIGATION (8.4N Only) ....48
SiriusXM TRAVEL LINK (8.4N ONLY) . . . . 52
PLAYING iPod/USB/MP3 DEVICES .....53
Uconnect® PHONE
(Bluetooth® HANDS FREE CALLING) ....54
Uconnect® VOICE COMMAND
(8.4&8.4NONLY) ...............58
ELECTRONIC VEHICLE INFORMATION
CENTER (EVIC) ................61
PROGRAMMABLE FEATURES .......62UNIVERSAL GARAGE DOOR OPENER
(HomeLink®)
..................62
POWER OUTLETS ..............65
UTILITY
TRAILER TOWING WEIGHTS (MAXIMUM
TRAILER WEIGHT RATINGS) . ......66
RECREATIONAL TOWING (BEHIND
MOTORHOME, ETC.) . . ..........66
SRT
AUTOSTICK® .................67
ELECTRONIC CONTROL DAMPING
SYSTEM....................68
SRT PERFORMANCE FEATURES .....69
SUMMER/THREE-SEASON TIRES ......71
WHAT TO DO IN EMERGENCIES
ROADSIDE ASSISTANCE..........72
INSTRUMENT CLUSTER WARNING
LIGHTS .....................72
IF YOUR ENGINE OVERHEATS .......76
JACKING AND TIRE CHANGING .....76
TIREFIT KIT ..................82
BATTERY LOCATION ............88
JUMP-STARTING ...............88
SHIFT LEVER OVERRIDE — 5 SPEED
TRANSMISSION ...............90
TOWING A DISABLED VEHICLE . . ....92
FREEING A STUCK VEHICLE ........93
EVENT DATA RECORDER (EDR) ......94
MAINTAINING YOUR VEHICLE
OPENING THE HOOD . . .........95
FUEL DOOR RELEASE . . .........96
ENGINE COMPARTMENT .........98
FLUIDSANDCAPACITIES .........101
MAINTENANCE SCHEDULE .......104
FUSES .....................112
TIRE PRESSURES ...............117
WHEEL AND WHEEL TRIM CARE . ....118
EXTERIOR BULBS ..............118
CONSUMER ASSISTANCE
CHRYSLER GROUP LLC
CUSTOMER CENTER ............119
CHRYSLER CANADA INC.
CUSTOMER CENTER ............119
PUBLICATIONS ORDERING ........119
ASSISTANCE FOR THE HEARING
IMPAIRED ...................119
REPORTING SAFETY DEFECTS IN
THEUNITEDSTATES ............120
MOPAR® ACCESSORIES
AUTHENTIC ACCESSORIES BY MOPAR®. . 121
FREQUENTLY ASKED QUESTIONS
FREQUENTLY ASKED QUESTIONS ....122
INDEX................... 123
TABLE OF CONTENTS
Page 4 of 132
WELCOME FROM CHRYSLER GROUP LLC
Congratulations on selecting your new Chrysler Group LLC vehicle. Be assured that it represents
precision workmanship, distinctive styling, and high quality - all essentials that are traditional to
our vehicles.
Your new Chrysler Group LLC vehicle has characteristics to enhance the driver's control under
some driving conditions. These are to assist the driver and are never a substitute for attentive
driving. They can never take the driver's place. Always drive carefully.
Your new vehicle has many features for the comfort and convenience of you and your passengers.
Some of these should not be used when driving because they take your eyes from the road or
your attention from driving. Never text while driving or take your eyes more than momentarily off
the road.
This guide illustrates and describes the operation of features and equipment that are either
standard or optional on this vehicle. This guide may also include a description of features
and equipment that are no longer available or were not ordered on this vehicle. Please disregard
any features and equipment described in this guide that are not available on this vehicle.
Chrysler Group LLC reserves the right to make changes in design and specifications and/or
make additions to or improvements to its products without imposing any obligation upon itself to
install them on products previously manufactured.
This User Guide has been prepared to help you quickly become acquainted with the important
features of your vehicle. It contains most things you will need to operate and maintain the vehicle,
including emergency information.
The DVD includes a computer application containing detailed owner's information which can be
viewed on a personal computer or MAC computer. The multimedia DVD also includes videos
which can be played on any standard DVD player (including the Uconnect® Touchscreen
Radios). Additional DVD operational information is located on the back of the DVD sleeve.
For complete owner information, refer to your Owner's Manual on the DVD in the owner’s
kit provided at the time of new vehicle purchase.For your convenience, the information
contained on the DVD may also be printed and saved for future reference.
Chrysler Group LLC is committed to protecting our environment and natural resources. By con-
verting from paper to electronic delivery for the majority of the user information for your vehicle,
together we greatly reduce the demand for tree-based products and lessen the stress on our
environment.
INTRODUCTION/WELCOME
2
Page 6 of 132
DRIVER COCKPIT
1. Memory Seat pg. 19
2. Headlight Switch pg. 27
3. Turn Signal/Wiper/Washer/High Beams Lever (behind steering wheel) pg. 26
4. Instrument Cluster pg. 6
5. Electronic Vehicle Information Center (EVIC) Display
6. Engine Starting/Stopping pg. 12
7. Audio System (Touch-Screen Radio Shown) pg. 40
8. Switch Panel• Hazard Lights
• Electronic Stability Control (ESC) OFF pg. 74
9. Climate Control Knobs pg. 35
CONTROLS AT A GLANCE
4
Page 21 of 132
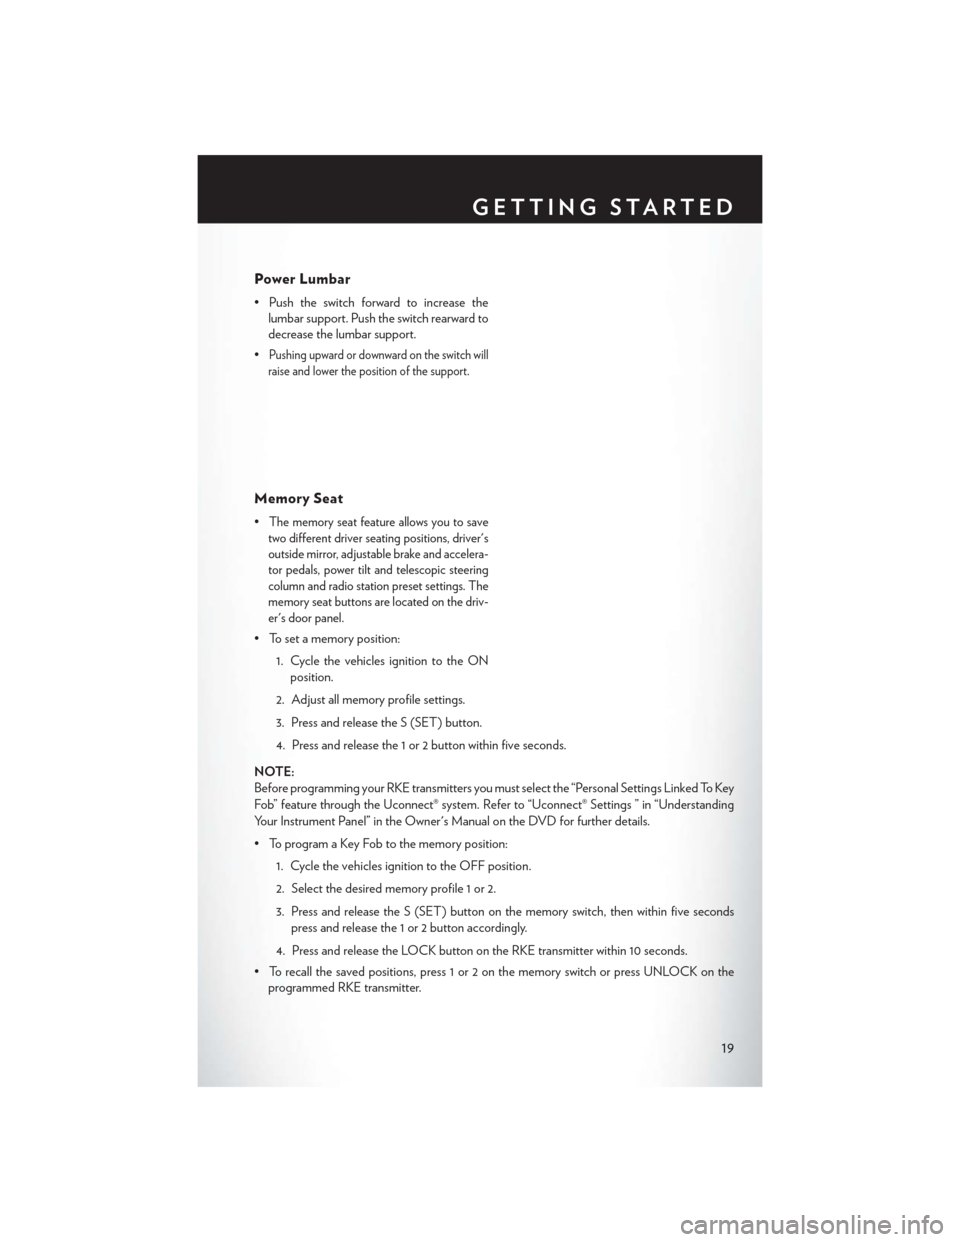
Power Lumbar
• Push the switch forward to increase thelumbar support. Push the switch rearward to
decrease the lumbar support.
•
Pushing upward or downward on the switch will
raise and lower the position of the support.
Memory Seat
•The memory seat feature allows you to save
two different driver seating positions, driver's
outside mirror, adjustable brake and accelera-
tor pedals, power tilt and telescopic steering
column and radio station preset settings. The
memory seat buttons are located on the driv-
er's door panel.
• To set a memory position:
1. Cycle the vehicles ignition to the ONposition.
2. Adjust all memory profile settings.
3. Press and release the S (SET) button.
4. Press and release the 1 or 2 button within five seconds.
NOTE:
Before programming your RKE transmitters you must select the “Personal Settings Linked To Key
Fob” feature through the Uconnect® system. Refer to “Uconnect® Settings ” in “Understanding
Your Instrument Panel” in the Owner's Manual on the DVD for further details.
• To program a Key Fob to the memory position: 1. Cycle the vehicles ignition to the OFF position.
2. Select the desired memory profile 1 or 2.
3. Press and release the S (SET) button on the memory switch, then within five secondspress and release the 1 or 2 button accordingly.
4. Press and release the LOCK button on the RKE transmitter within 10 seconds.
• To recall the saved positions, press 1 or 2 on the memory switch or press UNLOCK on the programmed RKE transmitter.
GETTING STARTED
19
Page 29 of 132
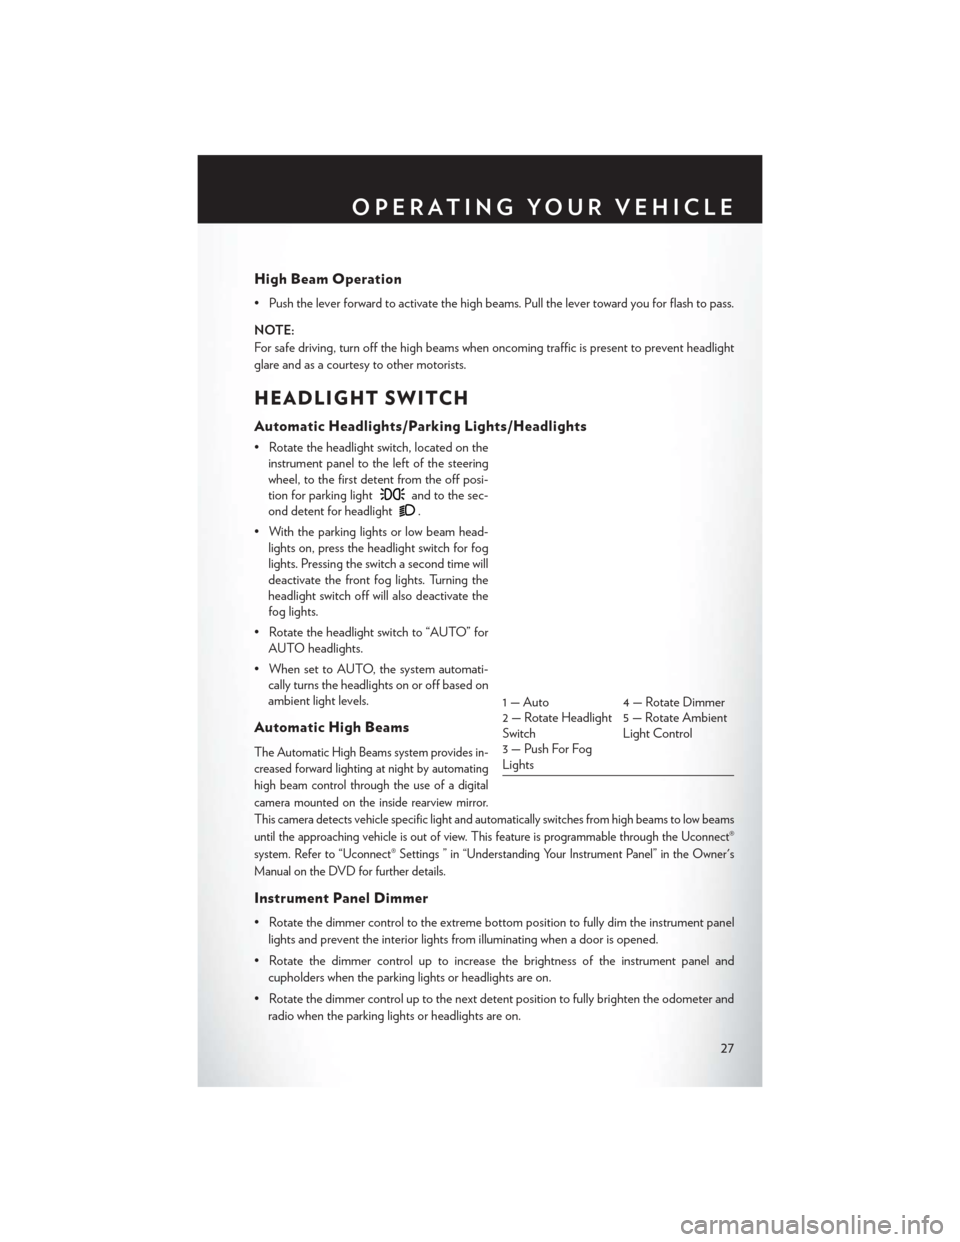
High Beam Operation
• Push the lever forward to activate the high beams. Pull the lever toward you for flash to pass.
NOTE:
For safe driving, turn off the high beams when oncoming traffic is present to prevent headlight
glare and as a courtesy to other motorists.
HEADLIGHT SWITCH
Automatic Headlights/Parking Lights/Headlights
• Rotate the headlight switch, located on theinstrument panel to the left of the steering
wheel, to the first detent from the off posi-
tion for parking light
and to the sec-
ond detent for headlight
.
• With the parking lights or low beam head- lights on, press the headlight switch for fog
lights. Pressing the switch a second time will
deactivate the front fog lights. Turning the
headlight switch off will also deactivate the
fog lights.
• Rotate the headlight switch to “AUTO” for AUTO headlights.
• When set to AUTO, the system automati- cally turns the headlights on or off based on
ambient light levels.
Automatic High Beams
The Automatic High Beams system provides in-
creased forward lighting at night by automating
high beam control through the use of a digital
camera mounted on the inside rearview mirror.
This camera detects vehicle specific light and automatically switches from high beams to low beams
until the approaching vehicle is out of view. This feature is programmable through the Uconnect®
system. Refer to “Uconnect® Settings ” in “Understanding Your Instrument Panel” in the Owner's
Manual on the DVD for further details.
Instrument Panel Dimmer
• Rotate the dimmer control to the extreme bottom position to fully dim the instrument panel
lights and prevent the interior lights from illuminating when a door is opened.
• Rotate the dimmer control up to increase the brightness of the instrument panel and cupholders when the parking lights or headlights are on.
• Rotate the dimmer control up to the next detent position to fully brighten the odometer and radio when the parking lights or headlights are on.
1 — Auto 4 — Rotate Dimmer
2 — Rotate Headlight
Switch 5 — Rotate Ambient
Light Control
3 — Push For Fog
Lights
OPERATING YOUR VEHICLE
27
Page 38 of 132
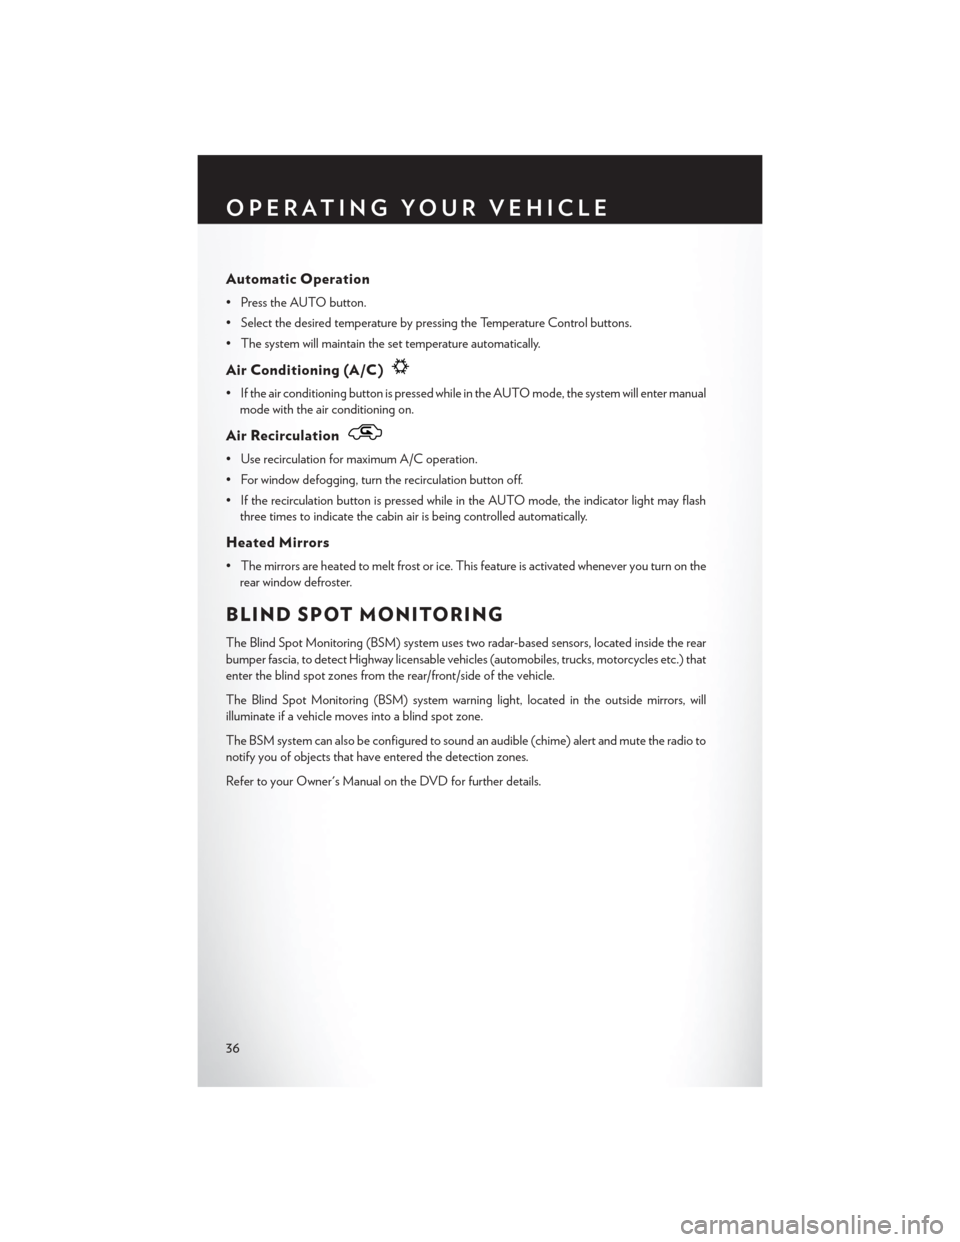
Automatic Operation
• Press the AUTO button.
• Select the desired temperature by pressing the Temperature Control buttons.
• The system will maintain the set temperature automatically.
Air Conditioning (A/C)
• If the air conditioning button is pressed while in the AUTO mode, the system will enter manualmode with the air conditioning on.
Air Recirculation
• Use recirculation for maximum A/C operation.
• For window defogging, turn the recirculation button off.
• If the recirculation button is pressed while in the AUTO mode, the indicator light may flashthree times to indicate the cabin air is being controlled automatically.
Heated Mirrors
• The mirrors are heated to melt frost or ice. This feature is activated whenever you turn on therear window defroster.
BLIND SPOT MONITORING
The Blind Spot Monitoring (BSM) system uses two radar-based sensors, located inside the rear
bumper fascia, to detect Highway licensable vehicles (automobiles, trucks, motorcycles etc.) that
enter the blind spot zones from the rear/front/side of the vehicle.
The Blind Spot Monitoring (BSM) system warning light, located in the outside mirrors, will
illuminate if a vehicle moves into a blind spot zone.
The BSM system can also be configured to sound an audible (chime) alert and mute the radio to
notify you of objects that have entered the detection zones.
Refer to your Owner's Manual on the DVD for further details.
OPERATING YOUR VEHICLE
36
Page 43 of 132
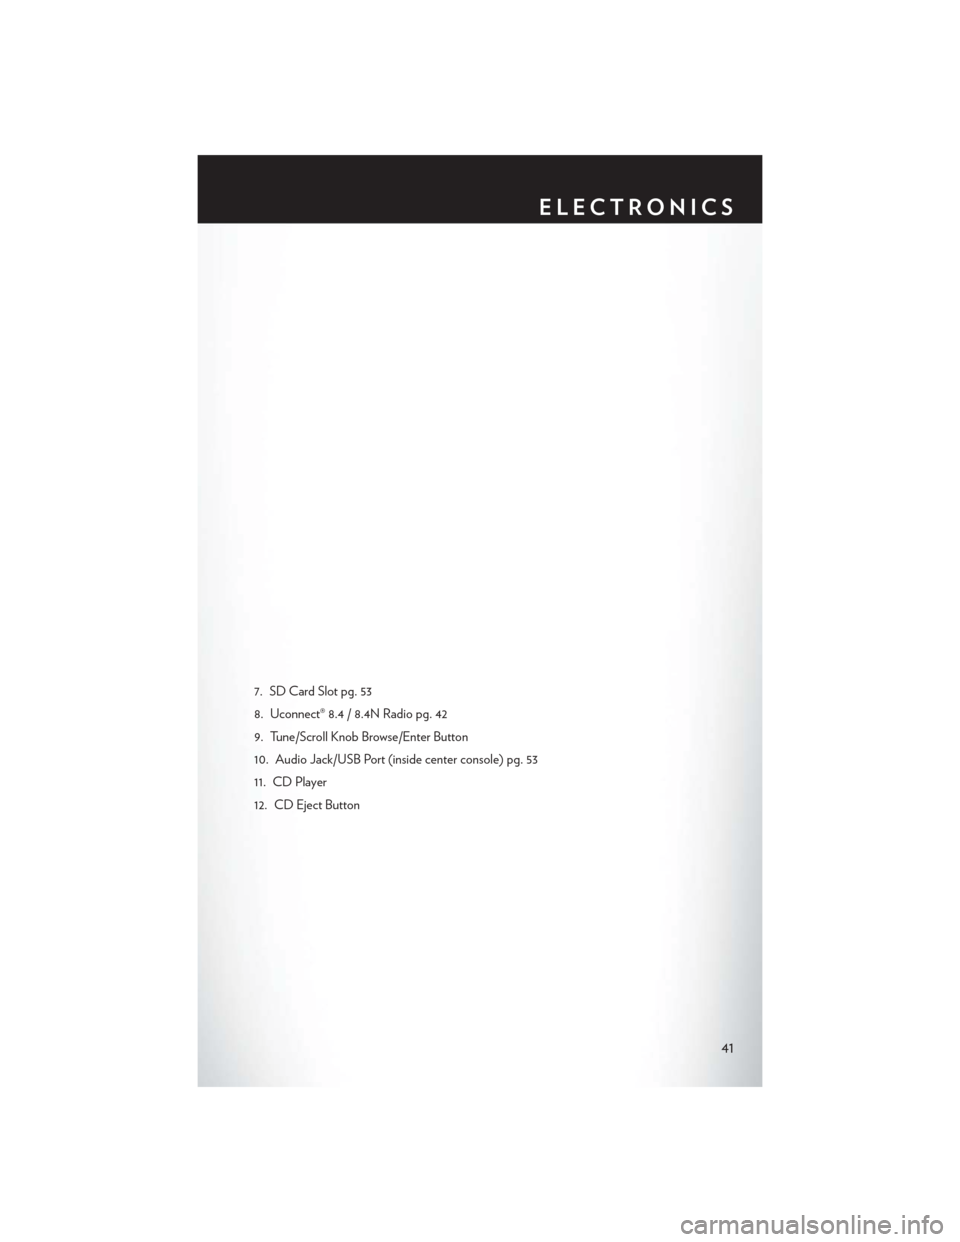
7. SD Card Slot pg. 53
8. Uconnect® 8.4 / 8.4N Radio pg. 42
9. Tune/Scroll Knob Browse/Enter Button
10. Audio Jack/USB Port (inside center console) pg. 53
11. CD Player
12. CD Eject Button
ELECTRONICS
41
Page 44 of 132
IDENTIFYING YOUR RADIO
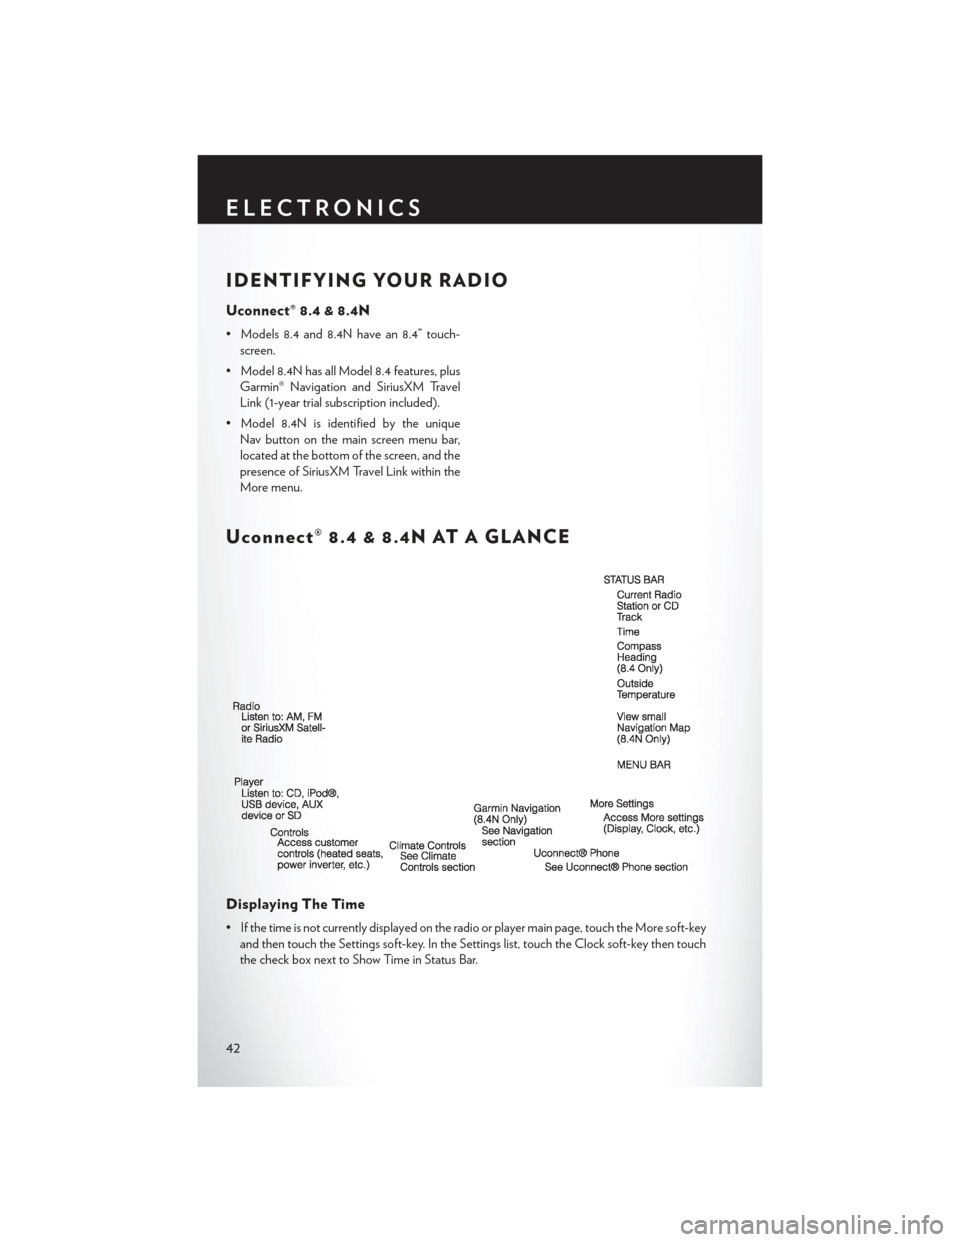
Uconnect® 8.4 & 8.4N
• Models 8.4 and 8.4N have an 8.4” touch-screen.
• Model 8.4N has all Model 8.4 features, plus Garmin® Navigation and SiriusXM Travel
Link (1-year trial subscription included).
• Model 8.4N is identified by the unique Nav button on the main screen menu bar,
located at the bottom of the screen, and the
presence of SiriusXM Travel Link within the
More menu.
Uconnect® 8.4 & 8.4N AT A GLANCE
Displaying The Time
• If the time is not currently displayed on the radio or player main page, touch the More soft-keyand then touch the Settings soft-key. In the Settings list, touch the Clock soft-key then touch
the check box next to Show Time in Status Bar.
ELECTRONICS
42
Page 45 of 132
Setting The Time
• Model 8.4N synchronizes time automatically via GPS, so should not require any timeadjustment. If you do need to set the time manually, follow the instructions below for
Model 8.4.
• For Model 8.4, turn the unit on, then touch the time display at the top of the screen. Touch the Yes soft-key.
• If the time is not displayed at the top of the screen, touch the More soft-key and then touch the Settings soft-key. In the Settings screen, touch the Clock soft-key, then check or uncheck this
option.
• Touch + or – next to Set Time Hours and Set Time Minutes to adjust the time.
• If these features are not available, uncheck the Sync with GPS box.
• Touch the X soft-key to save your settings and exit out of the Clock Setting screen.
Audio Settings
• Touch the Audio soft-key to activate the Audio settings screen to adjust Balance/Fade, Equalizer, and Speed Adjusted Volume.
• You can return to the Radio screen by touching the X soft-key located at the top right.
Balance/Fade
• Touch the Balance/Fade soft-key to Balance audio between the front speakers or fade the audio between the rear and front speakers.
• Touching the Front, Rear, Left, or Right soft-keys or touch and drag the blue Speaker Icon to adjust the Balance/Fade.
Equalizer
• Touch the Equalizer soft-key to activate the Equalizer screen.
• Touch the + or - soft-keys, or by touching and dragging over the level bar for each of the equalizer bands. The level value, which spans between plus or minus 9, is displayed at the
bottom of each of the Bands.
Speed Adjusted Volume
• Touch the Speed Adjusted Volume soft-key to activate the Speed Adjusted Volume screen. The Speed Adjusted Volume is adjusted by touching the + and - buttons or by touching and
dragging over the level bar. This alters the automatic adjustment of the audio volume with
variation to vehicle speed.
ELECTRONICS
43