charging CHRYSLER 300 2015 2.G User Guide
[x] Cancel search | Manufacturer: CHRYSLER, Model Year: 2015, Model line: 300, Model: CHRYSLER 300 2015 2.GPages: 180, PDF Size: 30.54 MB
Page 79 of 180
•TheiPod®batterychargeswhenpluggedintotheUSBport(ifsupportedbythespecific
device).
• To route the USB/iPod® cable out of the center console, use the access cut out.
NOTE:
•WhenconnectingyouriPod®deviceforthefirsttime,thesystemmaytakeseveralminutesto
read your music, depending on the number of files. For example, the system will take
approximately five minutes for every 1,000 songs loaded on the device. Also during the
reading process, the Shuffle and Browse functions will be disabled. This process is needed to
ensure the full use of your iPod® features and only happens the first time it is connected. After
the first time, the reading process of your iPod® will take considerably less time unless changes
are made or new songs are added to the playlist.
• The USB port supports certain Mini, Classic, Nano, Touch, and iPhone® devices. The USB
port also supports playing music from compatible external USB Mass Storage Class memory
devices. Some iPod® software versions may not fully support the USB port features. Please visit
Apple’s website for iPod® software updates.
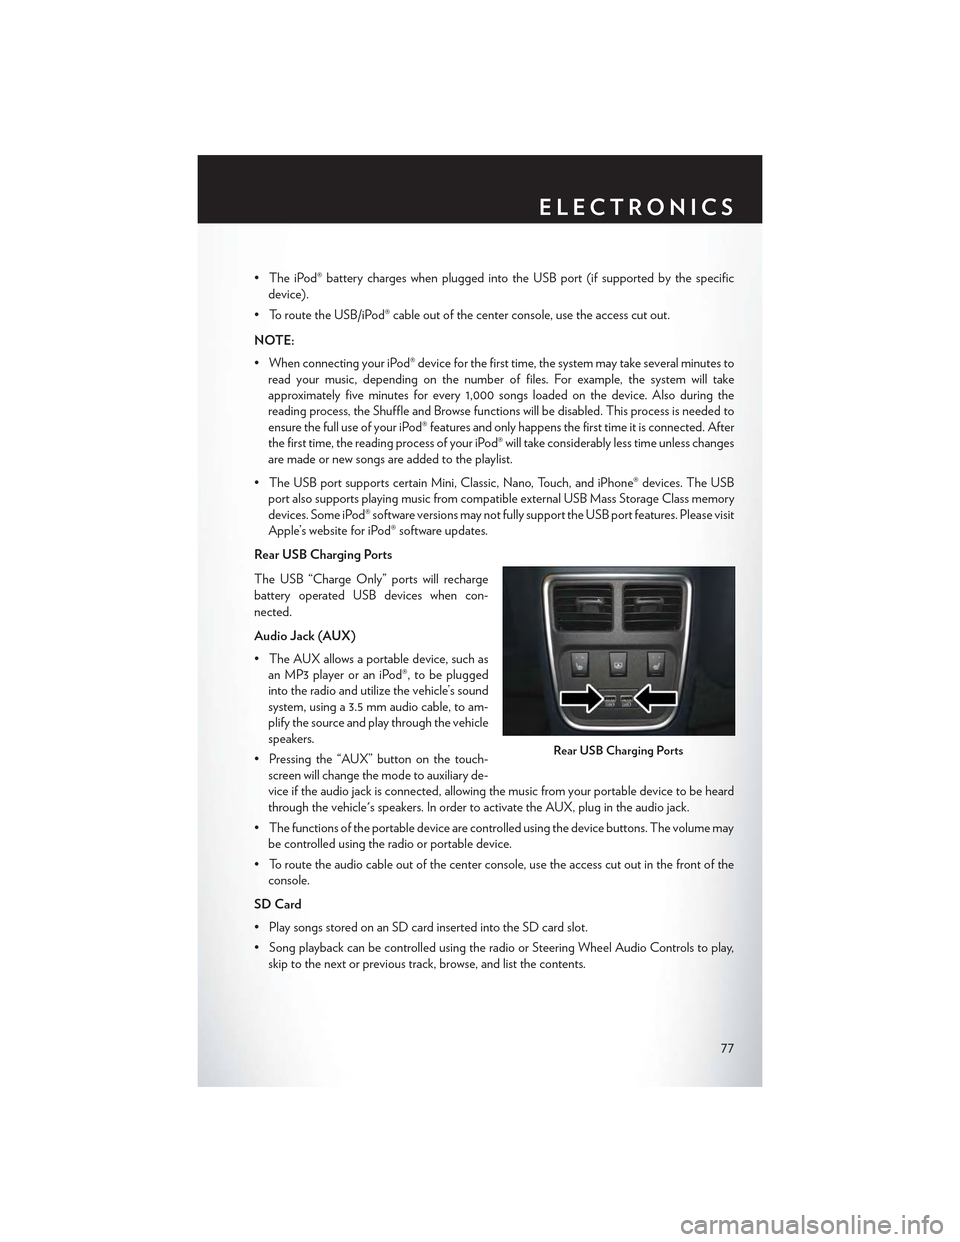
Rear USB Charging Ports
The USB “Charge Only” ports will recharge
battery operated USB devices when con-
nected.
Audio Jack (AUX)
• The AUX allows a portable device, such as
an MP3 player or an iPod®, to be plugged
into the radio and utilize the vehicle’s sound
system, using a 3.5 mm audio cable, to am-
plify the source and play through the vehicle
speakers.
• Pressing the “AUX” button on the touch-
screen will change the mode to auxiliary de-
vice if the audio jack is connected, allowing the music from your portable device to be heard
through the vehicle's speakers. In order to activate the AUX, plug in the audio jack.
•Thefunctionsoftheportabledevicearecontrolledusingthedevicebuttons.Thevolumemay
be controlled using the radio or portable device.
• To route the audio cable out of the center console, use the access cut out in the front of the
console.
SD Card
• Play songs stored on an SD card inserted into the SD card slot.
•SongplaybackcanbecontrolledusingtheradioorSteeringWheelAudioControlstoplay,
skip to the next or previous track, browse, and list the contents.
Rear USB Charging Ports
ELECTRONICS
77
Page 80 of 180
Bluetooth® Streaming Audio
•IfusingaBluetooth®-equippeddevice,youmayalsobeabletostreammusictoyourvehicle'ssound system. Your connected device must be Bluetooth-compatible, and paired with yoursystem (see Uconnect® Phone for pairing instructions).
•YoucanaccessthemusicfromyourconnectedBluetooth®devicebypressingthe
“Bluetooth®”button on the touchscreen while in Media mode.
Uconnect® 8.4A& 8.4AN
Media Hub (USB,AUX Ports)Media Hub (SD,USB, AUX Ports)Remote USB Port(Fully Functional)
Remote USBPorts(Charging Only)
-S-S
S = Standard Equipment
O = Optional Equipment
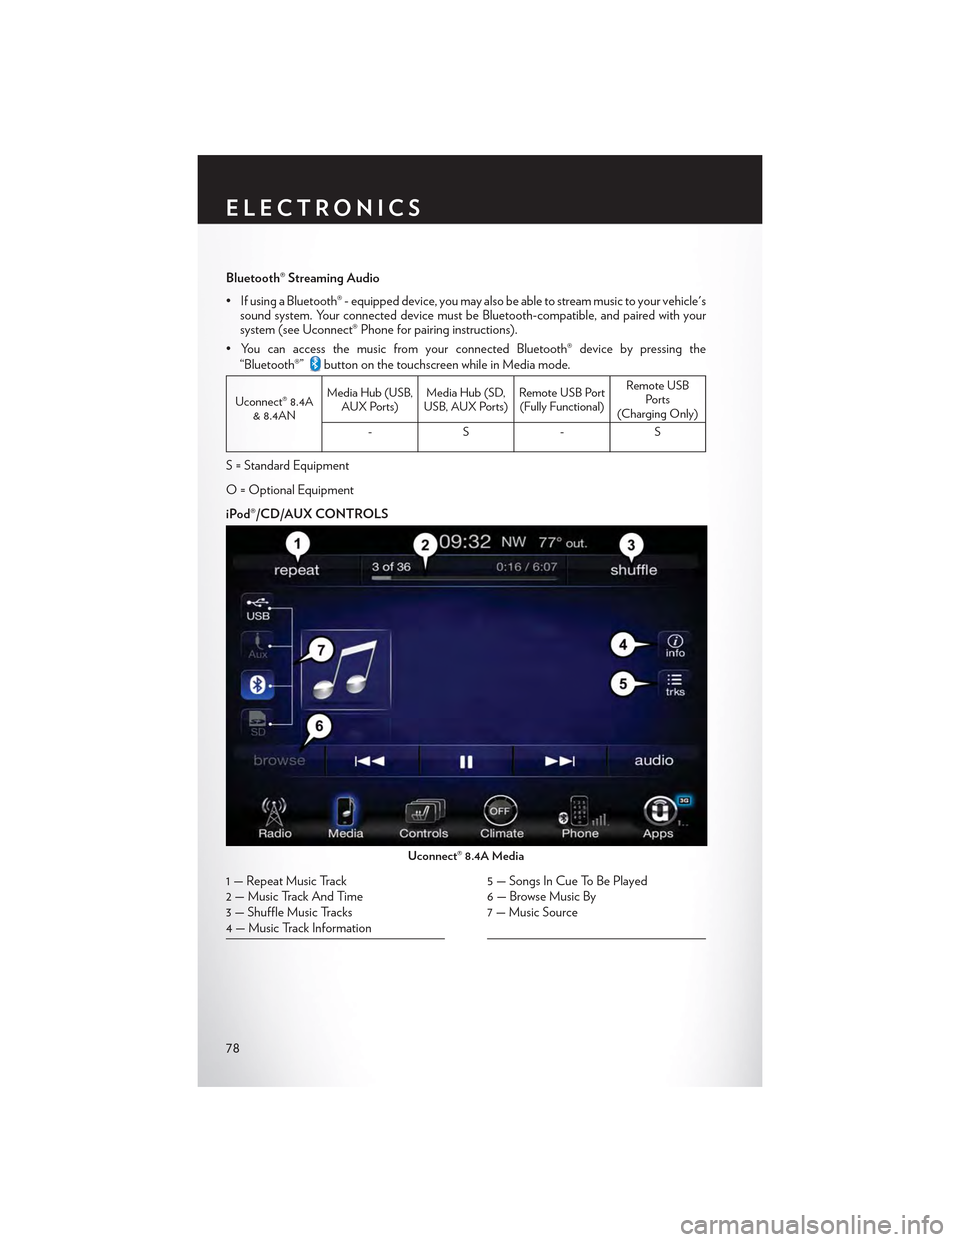
iPod®/CD/AUX CONTROLS
Uconnect® 8.4A Media
1—RepeatMusicTrack2 — Music Track And Time3—ShuffleMusicTracks4—MusicTrackInformation
5—SongsInCueToBePlayed6—BrowseMusicBy7 — Music Source
ELECTRONICS
78
Page 103 of 180
USB Port
Connect your iPod® or compatible device using a USB cable into the USB Port. USB Memory
sticks with audio files can also be used. Audio from the device can be played on the vehicle's
sound system while providing metadata (artist, track title, album, etc.) information on the radio
display.
When connected, the iPod®/compatible USB device can be controlled using the radio or
Steering Wheel Audio Controls to play, skip to the next or previous track, browse, and list the
contents.
The iPod® battery charges when plugged into the USB port (if supported by the specific device).
To route the USB/iPod® cable out of the center console, use the access cut out.
NOTE:
•WhenconnectingyouriPod®deviceforthefirsttime,thesystemmaytakeseveralminutesto
read your music, depending on the number of files. For example, the system will take
approximately five minutes for every 1000 songs loaded on the device. Also during the
reading process, the Shuffle and Browse functions will be disabled. This process is needed to
ensure the full use of your iPod® features and only happens the first time it is connected. After
the first time, the reading process of your iPod® will take considerably less time unless changes
are made or new songs are added to the playlist.
• The USB port supports certain Mini, Classic, Nano, Touch, and iPhone® devices. The USB
port also supports playing music from compatible external USB Mass Storage Class memory
devices. Some iPod® software versions may not fully support the USB port features. Please visit
Apple’s website for iPod® software updates.
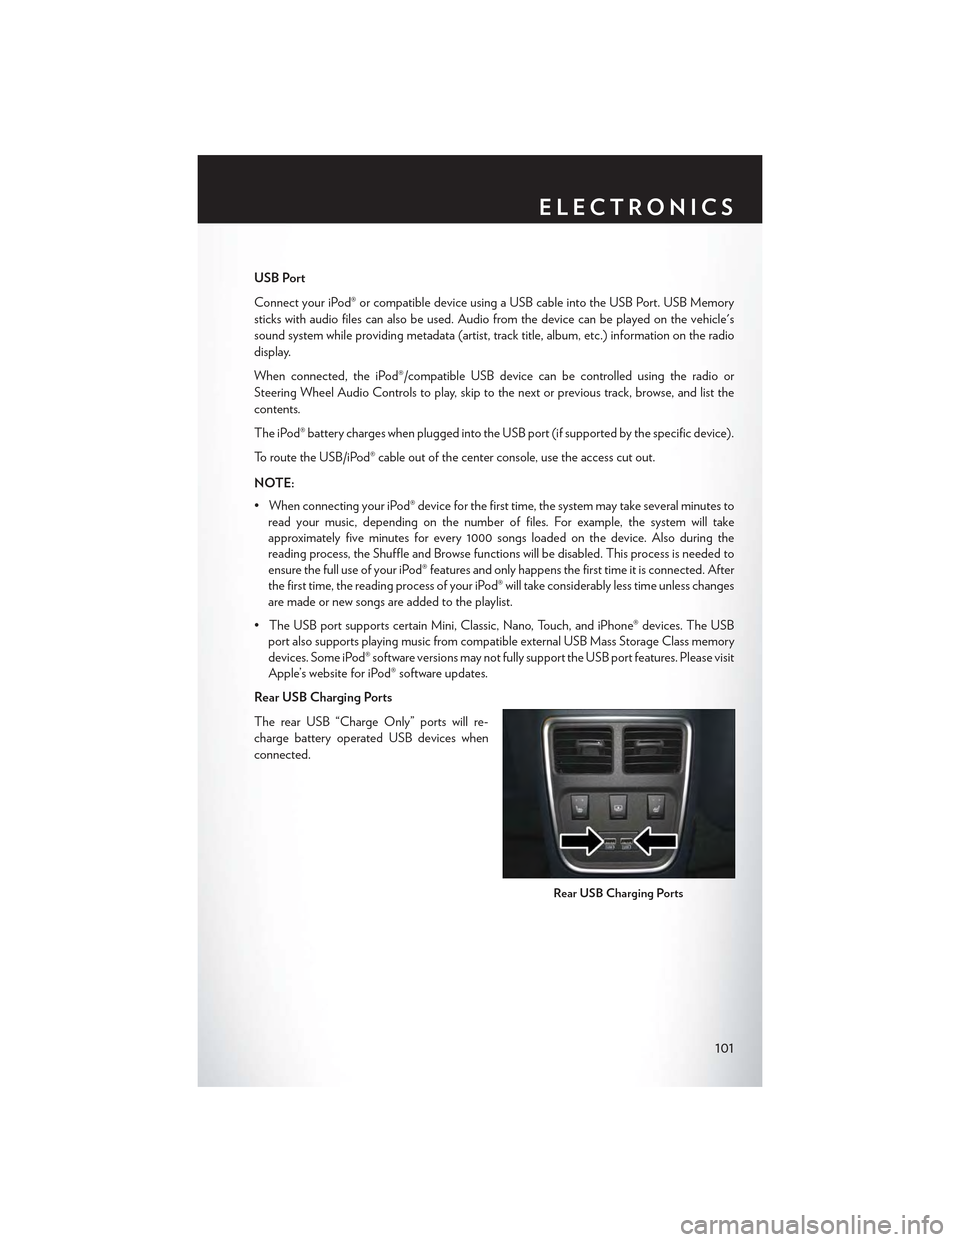
Rear USB Charging Ports
The rear USB “Charge Only” ports will re-
charge battery operated USB devices when
connected.
Rear USB Charging Ports
ELECTRONICS
101
Page 104 of 180
Audio Jack (AUX)
The AUX allows a portable device, such as an MP3 player or an iPod®, to be plugged into the radio
and utilize the vehicle’s sound system, using a 3.5 mm stereo audio cable, to amplify the source and
play through the vehicle speakers.
• Pressing the “AUX” button on the touchscreen will change the mode to auxiliary device if the
audio jack is connected, allowing the music from your portable device to be heard through the
vehicle's speakers. In order to activate the AUX, plug in the audio jack.
•Thefunctionsoftheportabledevicearecontrolledusingthedevicebuttons.Thevolumemay
be controlled using the radio or portable device.
• To route the audio cable out of the center console, use the access cut out in the front of the
console.
SD Card
• Play songs stored on an SD card inserted into the SD card slot.
•SongplaybackcanbecontrolledusingtheradioorSteeringWheelAudioControlstoplay,
skip to the next or previous track, browse, and list the contents.
Bluetooth® Streaming Audio
If using a Bluetooth® - equipped device, you may also be able to stream music to your vehicle's
sound system. Your connected device must be Bluetooth-compatible, and paired with your
system (see Uconnect® Phone for pairing instructions).
•YoucanaccessthemusicfromyourconnectedBluetooth®devicebypressingthe
“Bluetooth®”button on the touchscreen while in Media mode.
Uconnect® 8.4A& 8.4AN
Media Hub (USB,AUX Ports)Media Hub (SD,USB, AUX Ports)Remote USB Port(Fully Functional)
Remote USBPorts (Charging Only)
-S-S
S = Standard Equipment
O = Optional Equipment
ELECTRONICS
102
Page 131 of 180
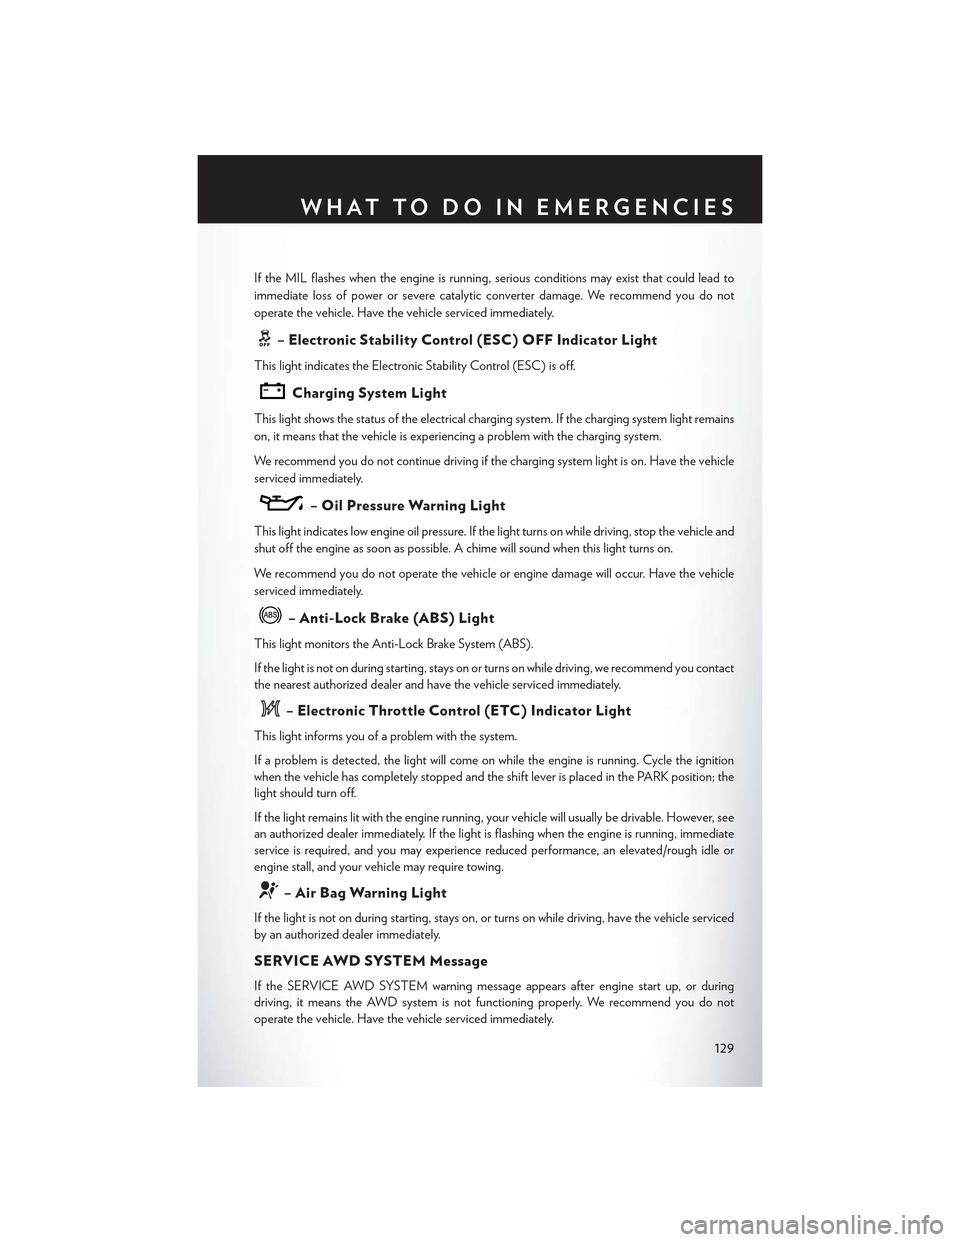
If the MIL flashes when the engine is running, serious conditions may exist that could lead to
immediate loss of power or severe catalytic converter damage. We recommend you do not
operate the vehicle. Have the vehicle serviced immediately.
–ElectronicStabilityControl(ESC)OFFIndicatorLight
This light indicates the Electronic Stability Control (ESC) is off.
Charging System Light
This light shows the status of the electrical charging system. If the charging system light remains
on, it means that the vehicle is experiencing a problem with the charging system.
We r e c o m m e n d y o u d o n o t c o n t i n u e d r i v i n g i f t h e c h a r g i n g s y s t e m l i g h t i s o n . H a v e t h e v e h i c l e
serviced immediately.
–OilPressureWarningLight
This light indicates low engine oil pressure. If the light turns on while driving, stop the vehicle and
shut off the engine as soon as possible. A chime will sound when this light turns on.
We r e c o m m e n d y o u d o n o t o p e r a t e t h e v e h i c l e o r e n g i n e d a m a g e w i l l o c c u r. H a v e t h e v e h i c l e
serviced immediately.
–Anti-LockBrake(ABS)Light
This light monitors the Anti-Lock Brake System (ABS).
If the light is not on during starting, stays on or turns on while driving, we recommend you contact
the nearest authorized dealer and have the vehicle serviced immediately.
–ElectronicThrottleControl(ETC)IndicatorLight
This light informs you of a problem with the system.
If a problem is detected, the light will come on while the engine is running. Cycle the ignition
when the vehicle has completely stopped and the shift lever is placed in the PARK position; the
light should turn off.
If the light remains lit with the engine running, your vehicle will usually be drivable. However, see
an authorized dealer immediately. If the light is flashing when the engine is running, immediate
service is required, and you may experience reduced performance, an elevated/rough idle or
engine stall, and your vehicle may require towing.
–AirBagWarningLight
If the light is not on during starting, stays on, or turns on while driving, have the vehicle serviced
by an authorized dealer immediately.
SERVICE AWD SYSTEM Message
If the SERVICE AWD SYSTEM warning message appears after engine start up, or during
driving, it means the AWD system is not functioning properly. We recommend you do not
operate the vehicle. Have the vehicle serviced immediately.
WHAT TO DO IN EMERGENCIES
129
Page 142 of 180

Jump-Starting Procedure
1. Connect the positive(+)end of the jumper cable to the remote positive(+)post of the
discharged vehicle.
2. Connect the opposite end of the positive(+)jumper cable to the positive(+)post of the
booster battery.
3. Connect the negative end(-)of the jumper cable to the negative(-)post of the booster
battery.
4. Connect the opposite end of the negative(-)jumper cable to the remote negative(-)post of
the vehicle with the discharged battery.
5. Start the engine in the vehicle that has the booster battery, let the engine idle a few minutes,
and then start the engine in the vehicle with the discharged battery.
Once the engine is started, remove the jumper cables in the reverse sequence:
1. Disconnect the negative(-)end of the jumper cable from the remote negative(-)post of the
vehicle with the discharged battery.
2. Disconnect the opposite end of the negative(-)jumper cable from the negative(-)post of
the booster battery.
3. Disconnect the positive(+)end of the jumper cable from the positive(+)post of the booster
battery.
4. Disconnect the opposite end of the positive(+)jumper cable from the remote positive(+)
post of the discharged vehicle.
NOTE:
If frequent jump-starting is required to start your vehicle you should have the battery and
charging system inspected at your authorized dealer.
CAUTION!
•Donotuseaportablebatteryboosterpackoranyotherboostersourcewithasystem
voltage greater than 12 Volts or damage to the battery, starter motor, alternator or
electrical system may occur.
•Failuretofollowtheseprocedurescouldresultindamagetothechargingsystemofthe
booster vehicle or the discharged vehicle.
•Accessoriesthatcanbepluggedintothevehiclepoweroutletsdrawpowerfromthe
vehicle’s battery, even when not in use (e.g., cellular phones, etc.). Eventually, if plugged in
long enough, the vehicle’s battery discharges sufficiently to degrade battery life and/or
prevent the engine from starting.
WHAT TO DO IN EMERGENCIES
140
Page 173 of 180
Access
Uconnect...............55
Access, Uconnect.............55
Adaptive Cruise Control (ACC) (Cruise
Control)................37
Adding Engine Coolant (Antifreeze) . . .152
Adding Washer Fluid...........152
Adjustable Pedals.............29Air BagAdvanced Front Air Bag........15Advance Front Air Bag.........15Air Bags . . . . . . . . . . . . . . . .15Air Bag Warning Light.........15Driver Knee Air Bag . . . . . . . . . .17Front Air Bag . . . . . . . . . . . . .15Passenger Knee Air Bag........17Rollover . . . . . . . . . . . . . . . .15Side Impacts..............15Air Bag Light . . . . . . . . . . . . . ..129Air Bag, Side . . . . . . . . . . . . . . . .15Air Cleaner, Engine (Engine Air CleanerFilter).................152Air Conditioner Maintenance.......152Air Conditioning............46, 47Air Conditioning Refrigerant.......152Air Conditioning System.........152AlarmVehicle Security Alarm.........14Alarm (Security Alarm)........14, 130Antifreeze (Engine Coolant).....150, 152Disposal................152Anti-Lock Warning Light.........129APPUconnect Access............57Appearance Care.............152Arming System (Security Alarm)......14Assistance Towing.............126Automatic Headlights...........33Automatic High Beams..........34Automatic Oil Change Indicator.....131Automatic Temperature Control (ATC) . .46Automatic Transmission..........43Adding Fluid.............151Fluid Type..............151Axle Fluid.................151Axle Lubrication..............151
Back-Up Camera . . . . . . . . . . . . .42
Battery..................152
Blind Spot Monitoring...........48
Body Mechanism Lubrication.......152
Brake Fluid................151
Brakes. . . . . . . . . . . . . . . . . ..152
BrakeSystem...............152
Fluid Check..............151
Master Cylinder...........152Warning Light............128Break-In Recommendations, New Vehicle. .31Bulb Replacement............166Bulbs, Light................166
Calibration, Compass...........119Capacities, Fluid.............150Caps, FillerOil (Engine).............152Car Washes................152Changing A Flat Tire...........132Charging System Light..........129Child Restraint...............18Child RestraintsCar Seat................18Child Restraints............18Child Tether Anchorage Locations . . .21Lower Anchors And Tethers ForChildren................18CleaningWheels................152Windshield Wiper Blades.......152Climate Control..............46Clock . . . . . . . . . . . . . . . . . ..118Cluster Warning/Indicator LightsAnti-Lock Brake (ABS) Light.....129Brake Warning Light..........128Charging System Light........129Electronic Throttle Control (ETC) Indica-tor Light...............129Engine Temperature Warning Light . .127Front Fog Light Indicator.......130High Beam Indicator.........130Oil Pressure Warning Light......129Ti re Pre s s u re M o n i t o r i n g S y s t e m ( T P M S )Light.................126Turn Signal Indicator.........130Vehicle Security Light.........130Clutch . . . . . . . . . . . . . . . . ..152Clutch Fluid................152
INDEX
171