brake CHRYSLER 300 2020 Owners Manual
[x] Cancel search | Manufacturer: CHRYSLER, Model Year: 2020, Model line: 300, Model: CHRYSLER 300 2020Pages: 328, PDF Size: 14.28 MB
Page 6 of 328
4
EMISSIONS INSPECTION AND MAINTENANCE
PROGRAMS ...........................................................93
SAFETY
SAFETY FEATURES ...............................................95 Anti-Lock Brake System (ABS) ................... 95
Electronic Brake Control (EBC) System ...... 96
AUXILIARY DRIVING SYSTEMS ........................ 102
Blind Spot Monitoring (BSM) —
If Equipped .................................................102 Forward Collision Warning (FCW) With
Mitigation Operation - If Equipped ............106 Tire Pressure Monitoring
System (TPMS) ........................................... 109
OCCUPANT RESTRAINT SYSTEMS .................. 113
Occupant Restraint Systems Features ....113
Important Safety Precautions ...................114Seat Belt Systems ..................................... 114Supplemental Restraint Systems (SRS) ...121Child Restraints..........................................130Transporting Pets ......................................142
SAFETY TIPS ...................................................... 142
Transporting Passengers ..........................142
Exhaust Gas ...............................................143Safety Checks You Should Make Inside
The Vehicle ................................................143 Periodic Safety Checks You Should
Make Outside The Vehicle ........................ 145
STARTING AND OPERATING
STARTING THE ENGINE ....................................146
Automatic Transmission ........................... 146
Keyless Enter-N-Go — Ignition ................... 146
Normal Starting ......................................... 146
Cold Weather Operation
(Below –22°F Or −30°C) ......................... 149 If Engine Fails To Start .............................. 149
After Starting .............................................. 149
ENGINE BLOCK HEATER — IF EQUIPPED .......149
ENGINE BREAK-IN RECOMMENDATIONS .......150
PARKING BRAKE ................................................ 150
AUTOMATIC TRANSMISSION ............................ 151
Ignition Park Interlock ............................... 153Brake/Transmission Shift Interlock
System ....................................................... 153 Eight-Speed Automatic Transmission ...... 153
SPORT MODE — IF EQUIPPED .......................... 159
FUEL SAVER TECHNOLOGY 5.7L ONLY —
IF EQUIPPED ....................................................... 160
POWER STEERING .............................................160
SPEED CONTROL — IF EQUIPPED .................... 160
To Activate.................................................. 161
To Set A Desired Speed ............................ 161
To Vary The Speed Setting ....................... 161
To Accelerate For Passing ........................ 162
To Resume Speed .................................... 162
To Deactivate ............................................ 162 ADAPTIVE CRUISE CONTROL (ACC) —
IF EQUIPPED ...................................................... 163
Adaptive Cruise Control (ACC)
Operation ................................................... 164 Activating Adaptive Cruise
Control (ACC) .............................................. 165 To Activate/Deactivate.............................. 165
To Set A Desired ACC Speed..................... 166
To Cancel ................................................... 166
To Turn Off ................................................. 166To Resume ................................................. 166To Vary The ACC Speed ............................. 167
Setting The Following Distance In ACC .... 168
Overtake Aid............................................... 169
ACC Operation At Stop............................... 169Adaptive Cruise Control (ACC) Menu ........ 170
Display Warnings And Maintenance ........ 170
Precautions While Driving With ACC......... 172
General Information .................................. 174
Normal (Fixed Speed) Cruise Control
Mode .......................................................... 174
PARKSENSE FRONT AND REAR PARK ASSIST —
IF EQUIPPED ....................................................... 177
ParkSense Sensors ................................... 177
ParkSense Warning Display...................... 177
ParkSense Display..................................... 178
Enabling And Disabling ParkSense .......... 181
20_LX_OM_EN_USC_t.book Page 4
Page 8 of 328
6
DEALER SERVICE .............................................. 239 Engine Oil .................................................. 240Engine Oil Filter ..........................................241Engine Air Cleaner Filter ...........................241
Air Conditioner Maintenance ...................242Accessory Drive Belt Inspection................243Body Lubrication ........................................244
Windshield Wiper Blades ..........................244
Exhaust System .........................................246
Cooling System .........................................247
Brake System ............................................250
Automatic Transmission ...........................251
All Wheel Drive (AWD) — If Equipped .......253
Rear Axle ....................................................253
RAISING THE VEHICLE ...................................... 253
TIRES ................................................................... 253
Tire Safety Information .............................253Tires — General Information .....................261Tire Types ...................................................265
Spare Tires — If Equipped .........................266
Wheel And Wheel Trim Care ....................268
Tire Chains and Traction Devices .............269
Tire Rotation Recommendations .............270 DEPARTMENT OF TRANSPORTATION
UNIFORM TIRE QUALITY GRADES .................. 270
Treadwear .................................................. 270
Traction Grades ......................................... 271
Temperature Grades ................................. 271
VEHICLE STORAGE .............................................271
BODYWORK ........................................................ 272
Protection From Atmospheric Agents....... 272
Body And Underbody Maintenance .......... 272Preserving The Bodywork .......................... 272
INTERIORS ......................................................... 273
Seats And Fabric Parts .............................. 273
Plastic And Coated Parts ........................... 274
Leather Parts ............................................. 274
Glass Surfaces .......................................... 274
TECHNICAL SPECIFICATIONS
IDENTIFICATION DATA .......................................275Vehicle Identification Number .................. 275
BRAKE SYSTEM ................................................. 275
WHEEL AND TIRE TORQUE
SPECIFICATIONS ................................................ 275
Torque Specifications ................................ 275 FUEL REQUIREMENTS ...................................... 276
3.6L Engine ................................................ 276
5.7L Engine ................................................ 276
Reformulated Gasoline ............................ 277Materials Added To Fuel ........................... 277
Gasoline/Oxygenate Blends ..................... 277
Do Not Use E-85 In Non-Flex Fuel
Vehicles ...................................................... 278 CNG And LP Fuel System Modifications .. 278MMT In Gasoline........................................ 278
Fuel System Cautions................................ 279
Carbon Monoxide Warnings...................... 279
FLUID CAPACITIES ............................................ 280
FLUIDS AND LUBRICANTS ............................... 281
Engine ........................................................ 281
Chassis ...................................................... 283MULTIMEDIA
UCONNECT SYSTEMS ....................................... 284
CYBERSECURITY ............................................... 284
UCONNECT SETTINGS ...................................... 285 Customer Programmable Features —
Uconnect 4C/4C NAV Settings ................ 285
20_LX_OM_EN_USC_t.book Page 6
Page 19 of 328
GETTING TO KNOW YOUR VEHICLE17
(Continued)
(Continued)
ON/RUN
Driving position.
All the electrical devices are available.
START
The engine will start.
NOTE:
Refer to "Starting The Engine" in "Starting And
Operating" for further information.
VEHICLE ON MESSAGE
When opening the driver's door and the ignition
is in the ON/RUN (engine not running) position,
a chime will sound to remind you to place the
ignition in the OFF position.
In addition to the chime, the Vehicle On
message will display in the cluster (if equipped). NOTE:
The power window switches and power sunroof
(if equipped) will remain active for three
minutes after the ignition is placed in the OFF
position. Opening either front door will cancel
this feature. The timing for this feature is
programmable.
WARNING!
When exiting the vehicle, always remove
the key fob from the vehicle and lock your
vehicle.
Never leave children alone in a vehicle, or
with access to an unlocked vehicle.
Allowing children to be in a vehicle unat
-
tended is dangerous for a number of
reasons. A child or others could be seriously
or fatally injured. Children should be
warned not to touch the parking brake,
brake pedal or the gear selector.
Do not leave the key fob in or near the
vehicle, or in a location accessible to chil-
dren, and do not leave the ignition of a
vehicle equipped with Keyless Enter-N-Go
in the ON/RUN mode. A child could operate
power windows, other controls, or move the
vehicle.
Do not leave children or animals inside
parked vehicles in hot weather. Interior
heat build-up may cause serious injury
or death.
CAUTION!
An unlocked vehicle is an invitation for
thieves. Always remove key fob from the
vehicle and lock all doors when leaving the
vehicle unattended.
WARNING! (Continued)
WARNING!
Before exiting a vehicle, always come to a
complete stop, then shift the automatic
transmission into PARK, apply the parking
brake, place the engine in the OFF position,
remove the key fob from the vehicle and
lock your vehicle. If equipped with Keyless
Enter-N-Go, always make sure the keyless
ignition is in “OFF” position, remove the key
fob from the vehicle and lock the vehicle.
Never leave children alone in a vehicle, or
with access to an unlocked vehicle.
Allowing children to be in a vehicle unat -
tended is dangerous for a number of
reasons. A child or others could be seriously
or fatally injured. Children should be
warned not to touch the parking brake,
brake pedal or the gear selector.
2
20_LX_OM_EN_USC_t.book Page 17
Page 20 of 328
18GETTING TO KNOW YOUR VEHICLE
(Continued)
REMOTE START — IF EQUIPPED
HOW TO USE REMOTE START — IF
E
QUIPPED
Push remote start button on the key
fob twice within five seconds. Pushing
the remote start button a third time
shuts the engine off.
To drive the vehicle, push the unlock button,
and push the ignition to the ON/RUN position.
NOTE:
With remote start, the engine will only run for
15 minutes (timeout) unless the ignition is
placed in the ON/RUN position.
The vehicle must be started using the START/
STOP ignition button after two consecutive
timeouts.
All of the following conditions must be met
before the engine will remote start:
Gear selector in PARK
Doors closed
Hood closed
Trunk closed
Hazard switch off
Brake switch inactive (brake pedal not
pushed)
Battery at an acceptable charge level
PANIC button not pushed
System not disabled from previous remote
start event
Vehicle alarm system indicator flashing
Ignition in STOP/OFF position
Fuel level meets minimum requirement
Vehicle security alarm is not signaling an
intrusion
Malfunction indicator is not illuminated
Do not leave the key fob in or near the
vehicle, or in a location accessible to chil-
dren, and do not leave the ignition of a
vehicle equipped with Keyless Enter-N-Go
in the ON/RUN mode. A child could operate
power windows, other controls, or move the
vehicle.
Do not leave children or animals inside
parked vehicles in hot weather. Interior
heat build-up may cause serious injury or
death.
CAUTION!
An unlocked vehicle is an invitation for
thieves. Always remove key fob from the
vehicle and lock all doors when leaving the
vehicle unattended.
WARNING! (Continued)
WARNING!
Do not start or run an engine in a closed
garage or confined area. Exhaust gas
contains Carbon Monoxide (CO) which is
odorless and colorless. Carbon Monoxide is
poisonous and can cause serious injury or
death when inhaled.
20_LX_OM_EN_USC_t.book Page 18
Page 22 of 328
20GETTING TO KNOW YOUR VEHICLE
For vehicles not equipped with the Keyless
Enter-N-Go — Passive Entry feature, the
message “Remote Start Active — Insert Key
and Turn To Run” will show in the instrument
cluster display until you insert the key.
For vehicles equipped with the Keyless
Enter-N-Go — Passive Entry feature, the
message “Remote Start Active — Push Start
Button” will show in the instrument cluster
display until you push the START/STOP igni -
tion button.
To Cancel Remote Start
Remote Starting will also cancel if any of the
following occur:
The engine stalls or engine speed exceeds
2500 RPM.
Any engine warning lights come on.
Low Fuel Light turns on.
The hood is opened.
The hazard switch is pushed.
The gear selector is moved out of PARK.
The brake pedal is pushed.
REMOTE START COMFORT SYSTEMS —
I
F EQUIPPED
When remote start is activated, the heated
steering wheel and driver heated seat features
will automatically turn on in cold weather. In
warm weather, the driver vented seat feature
will automatically turn on when the remote start
is activated. These features will stay on through
the duration of remote start or until the ignition
switch is placed in the ON/RUN position.
GENERAL INFORMATION
The following regulatory statement applies to all
Radio Frequency (RF) devices equipped in this
vehicle:
This device complies with Part 15 of the FCC
Rules and with Innovation, Science and
Economic Development Canada license-exempt
RSS standard(s). Operation is subject to the
following two conditions:
1. This device may not cause harmful
interference, and
2. This device must accept any interference received, including interference that may
cause undesired operation. Le présent appareil est conforme aux CNR
d`Innovation, Science and Economic
Development applicables aux appareils radio
exempts de licence. L'exploitation est autorisée
aux deux conditions suivantes:
1. l'appareil ne doit pas produire de
brouillage, et
2. l'utilisateur de l'appareil doit accepter tout brouillage radioélectrique subi, même si le
brouillage est susceptible d'en compro -
mettre le fonctionnement.
La operación de este equipo está sujeta a las
siguientes dos condiciones:
1. es posible que este equipo o dispositivo no cause interferencia perjudicial y
2. este equipo o dispositivo debe aceptar cualquier interferencia, incluyendo la que
pueda causar su operación no deseada.
NOTE:
Changes or modifications not expressly
approved by the party responsible for compli -
ance could void the user’s authority to operate
the equipment.
20_LX_OM_EN_USC_t.book Page 20
Page 26 of 328
24GETTING TO KNOW YOUR VEHICLE
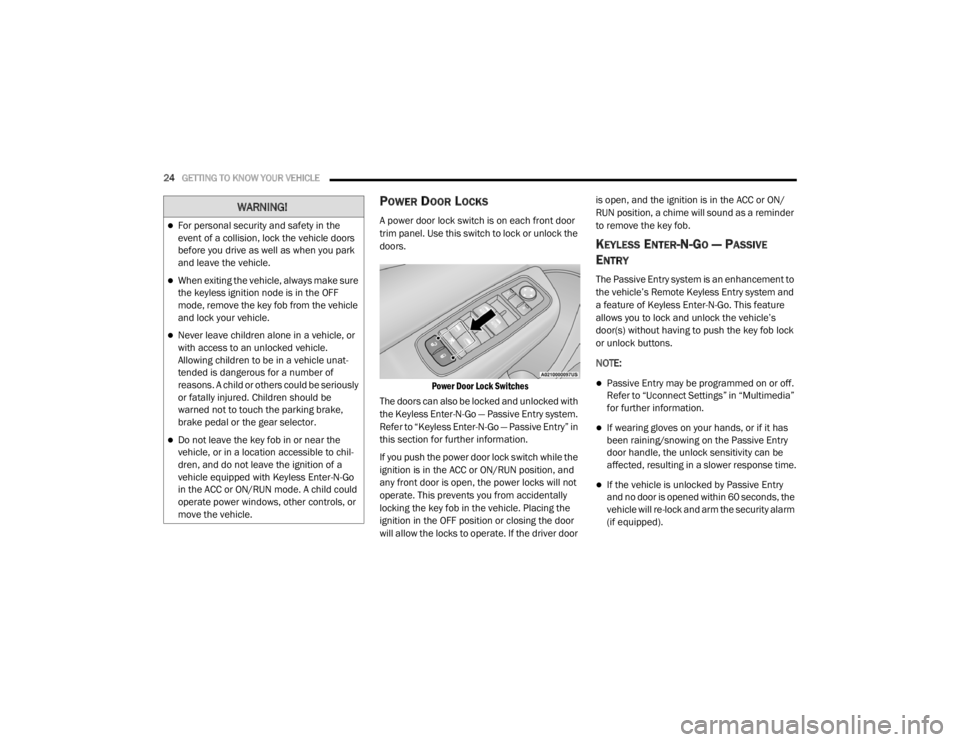
POWER DOOR LOCKS
A power door lock switch is on each front door
trim panel. Use this switch to lock or unlock the
doors.
Power Door Lock Switches
The doors can also be locked and unlocked with
the Keyless Enter-N-Go — Passive Entry system.
Refer to “Keyless Enter-N-Go — Passive Entry” in
this section for further information.
If you push the power door lock switch while the
ignition is in the ACC or ON/RUN position, and
any front door is open, the power locks will not
operate. This prevents you from accidentally
locking the key fob in the vehicle. Placing the
ignition in the OFF position or closing the door
will allow the locks to operate. If the driver door is open, and the ignition is in the ACC or ON/
RUN position, a chime will sound as a reminder
to remove the key fob.
KEYLESS ENTER-N-GO — PASSIVE
E
NTRY
The Passive Entry system is an enhancement to
the vehicle’s Remote Keyless Entry system and
a feature of Keyless Enter-N-Go. This feature
allows you to lock and unlock the vehicle’s
door(s) without having to push the key fob lock
or unlock buttons.
NOTE:
Passive Entry may be programmed on or off.
Refer to “Uconnect Settings” in “Multimedia”
for further information.
If wearing gloves on your hands, or if it has
been raining/snowing on the Passive Entry
door handle, the unlock sensitivity can be
affected, resulting in a slower response time.
If the vehicle is unlocked by Passive Entry
and no door is opened within 60 seconds, the
vehicle will re-lock and arm the security alarm
(if equipped).
WARNING!
For personal security and safety in the
event of a collision, lock the vehicle doors
before you drive as well as when you park
and leave the vehicle.
When exiting the vehicle, always make sure
the keyless ignition node is in the OFF
mode, remove the key fob from the vehicle
and lock your vehicle.
Never leave children alone in a vehicle, or
with access to an unlocked vehicle.
Allowing children to be in a vehicle unat -
tended is dangerous for a number of
reasons. A child or others could be seriously
or fatally injured. Children should be
warned not to touch the parking brake,
brake pedal or the gear selector.
Do not leave the key fob in or near the
vehicle, or in a location accessible to chil-
dren, and do not leave the ignition of a
vehicle equipped with Keyless Enter-N-Go
in the ACC or ON/RUN mode. A child could
operate power windows, other controls, or
move the vehicle.
20_LX_OM_EN_USC_t.book Page 24
Page 45 of 328
GETTING TO KNOW YOUR VEHICLE43
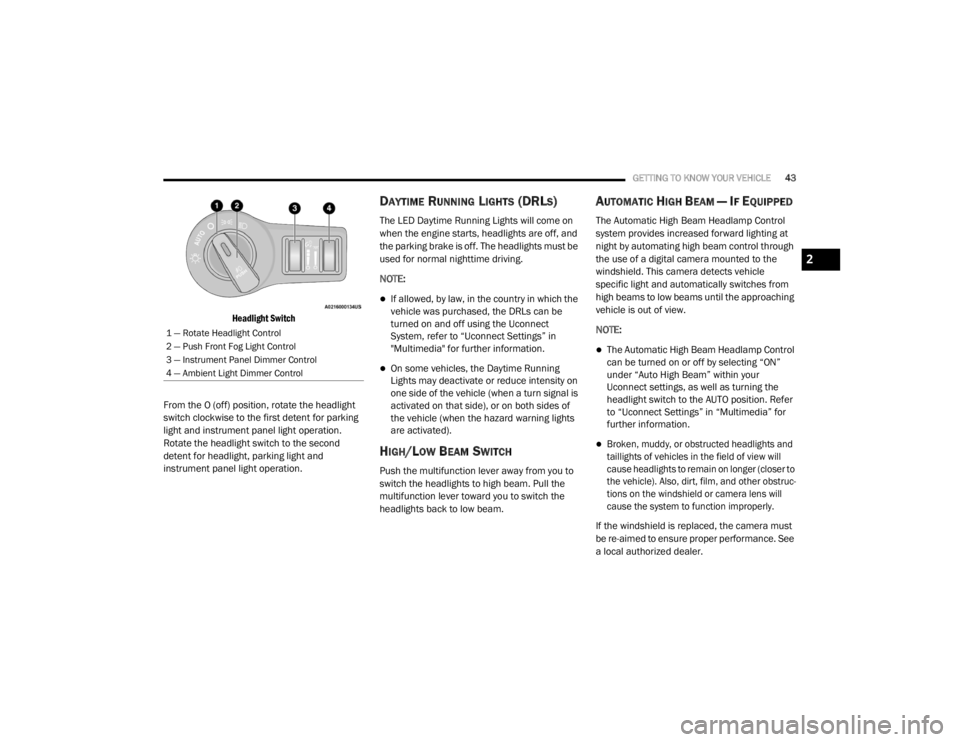
Headlight Switch
From the O (off) position, rotate the headlight
switch clockwise to the first detent for parking
light and instrument panel light operation.
Rotate the headlight switch to the second
detent for headlight, parking light and
instrument panel light operation.
DAYTIME RUNNING LIGHTS (DRLS)
The LED Daytime Running Lights will come on
when the engine starts, headlights are off, and
the parking brake is off. The headlights must be
used for normal nighttime driving.
NOTE:
If allowed, by law, in the country in which the
vehicle was purchased, the DRLs can be
turned on and off using the Uconnect
System, refer to “Uconnect Settings” in
"Multimedia" for further information.
On some vehicles, the Daytime Running
Lights may deactivate or reduce intensity on
one side of the vehicle (when a turn signal is
activated on that side), or on both sides of
the vehicle (when the hazard warning lights
are activated).
HIGH/LOW BEAM SWITCH
Push the multifunction lever away from you to
switch the headlights to high beam. Pull the
multifunction lever toward you to switch the
headlights back to low beam.
AUTOMATIC HIGH BEAM — IF EQUIPPED
The Automatic High Beam Headlamp Control
system provides increased forward lighting at
night by automating high beam control through
the use of a digital camera mounted to the
windshield. This camera detects vehicle
specific light and automatically switches from
high beams to low beams until the approaching
vehicle is out of view.
NOTE:
The Automatic High Beam Headlamp Control
can be turned on or off by selecting “ON”
under “Auto High Beam” within your
Uconnect settings, as well as turning the
headlight switch to the AUTO position. Refer
to “Uconnect Settings” in “Multimedia” for
further information.
Broken, muddy, or obstructed headlights and
taillights of vehicles in the field of view will
cause headlights to remain on longer (closer to
the vehicle). Also, dirt, film, and other obstruc -
tions on the windshield or camera lens will
cause the system to function improperly.
If the windshield is replaced, the camera must
be re-aimed to ensure proper performance. See
a local authorized dealer.
1 — Rotate Headlight Control
2 — Push Front Fog Light Control
3 — Instrument Panel Dimmer Control
4 — Ambient Light Dimmer Control
2
20_LX_OM_EN_USC_t.book Page 43
Page 82 of 328
80GETTING TO KNOW YOUR INSTRUMENT PANEL
Vehicles Equipped With Keyless Enter-N-Go —
Ignition
Use the steering wheel instrument cluster
display controls for the following procedure(s):
1. Without pressing the brake pedal, push the
ENGINE START/STOP button and place the
ignition in the ON/RUN position (do not
start the engine).
2. Push and release the down arrow button
to scroll downward through the main menu
to “Vehicle Info.”
3. Push and release the right arrow button
to access the ”Oil Life” screen.
4. Push and hold the OK button to reset oil life.
If conditions are met, the gauge and
numeric display will update to show 100%.
If conditions are not met a pop-up message
of "To reset oil life engine must be off with
ignition in run" will be displayed (for five
seconds), and the user will remain at the Oil
Life screen. 5. Push and release the
up or down
arrow button to exit the submenu screen.
NOTE:
If the indicator message illuminates when you
start the vehicle, the oil change indicator
system did not reset. If necessary, repeat this
procedure.
Secondary Method Of Resetting Engine Oil Life
1. Without pressing the brake pedal, push the ENGINE START/STOP button and place the
ignition to the ON/RUN position (do not
start the engine).
2. Fully press the accelerator pedal, slowly, three times within ten seconds.
3. Without pushing the brake pedal, push the ENGINE START/STOP button once to return
the ignition to the OFF/LOCK position.
NOTE:
If the indicator message illuminates when you
start the vehicle, the oil change indicator
system did not reset. If necessary, repeat this
procedure.INSTRUMENT CLUSTER DISPLAY
S
ELECTABLE MENU ITEMS
Push and release the up or down arrow
button until the desired Selectable Menu item is
displayed in the instrument cluster display.
Follow the Menu or submenu prompts as
desired.
Speedometer
Push and release the OK button to toggle
between mph and km/h.
Vehicle Info
The Vehicle Info consists of the following
submenu (pushing the left or right arrow
button will allow you to scroll through the
submenu):
Tire Pressure Monitor
Coolant Temperature
Transmission Temperature
Oil Temperature
Oil Pressure
Oil Life
20_LX_OM_EN_USC_t.book Page 80
Page 87 of 328
GETTING TO KNOW YOUR INSTRUMENT PANEL85
RED WARNING LIGHTS
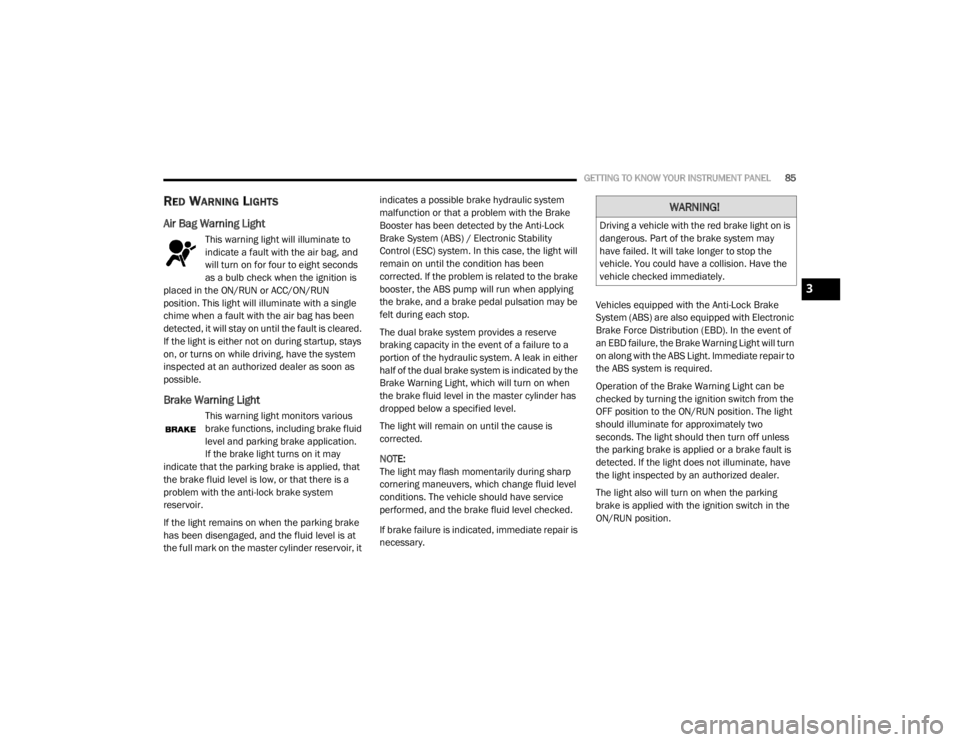
Air Bag Warning Light
This warning light will illuminate to
indicate a fault with the air bag, and
will turn on for four to eight seconds
as a bulb check when the ignition is
placed in the ON/RUN or ACC/ON/RUN
position. This light will illuminate with a single
chime when a fault with the air bag has been
detected, it will stay on until the fault is cleared.
If the light is either not on during startup, stays
on, or turns on while driving, have the system
inspected at an authorized dealer as soon as
possible.
Brake Warning Light
This warning light monitors various
brake functions, including brake fluid
level and parking brake application.
If the brake light turns on it may
indicate that the parking brake is applied, that
the brake fluid level is low, or that there is a
problem with the anti-lock brake system
reservoir.
If the light remains on when the parking brake
has been disengaged, and the fluid level is at
the full mark on the master cylinder reservoir, it indicates a possible brake hydraulic system
malfunction or that a problem with the Brake
Booster has been detected by the Anti-Lock
Brake System (ABS) / Electronic Stability
Control (ESC) system. In this case, the light will
remain on until the condition has been
corrected. If the problem is related to the brake
booster, the ABS pump will run when applying
the brake, and a brake pedal pulsation may be
felt during each stop.
The dual brake system provides a reserve
braking capacity in the event of a failure to a
portion of the hydraulic system. A leak in either
half of the dual brake system is indicated by the
Brake Warning Light, which will turn on when
the brake fluid level in the master cylinder has
dropped below a specified level.
The light will remain on until the cause is
corrected.
NOTE:
The light may flash momentarily during sharp
cornering maneuvers, which change fluid level
conditions. The vehicle should have service
performed, and the brake fluid level checked.
If brake failure is indicated, immediate repair is
necessary.
Vehicles equipped with the Anti-Lock Brake
System (ABS) are also equipped with Electronic
Brake Force Distribution (EBD). In the event of
an EBD failure, the Brake Warning Light will turn
on along with the ABS Light. Immediate repair to
the ABS system is required.
Operation of the Brake Warning Light can be
checked by turning the ignition switch from the
OFF position to the ON/RUN position. The light
should illuminate for approximately two
seconds. The light should then turn off unless
the parking brake is applied or a brake fault is
detected. If the light does not illuminate, have
the light inspected by an authorized dealer.
The light also will turn on when the parking
brake is applied with the ignition switch in the
ON/RUN position.
WARNING!
Driving a vehicle with the red brake light on is
dangerous. Part of the brake system may
have failed. It will take longer to stop the
vehicle. You could have a collision. Have the
vehicle checked immediately.
3
20_LX_OM_EN_USC_t.book Page 85
Page 88 of 328
86GETTING TO KNOW YOUR INSTRUMENT PANEL
NOTE:
This light shows only that the parking brake is
applied. It does not show the degree of brake
application.
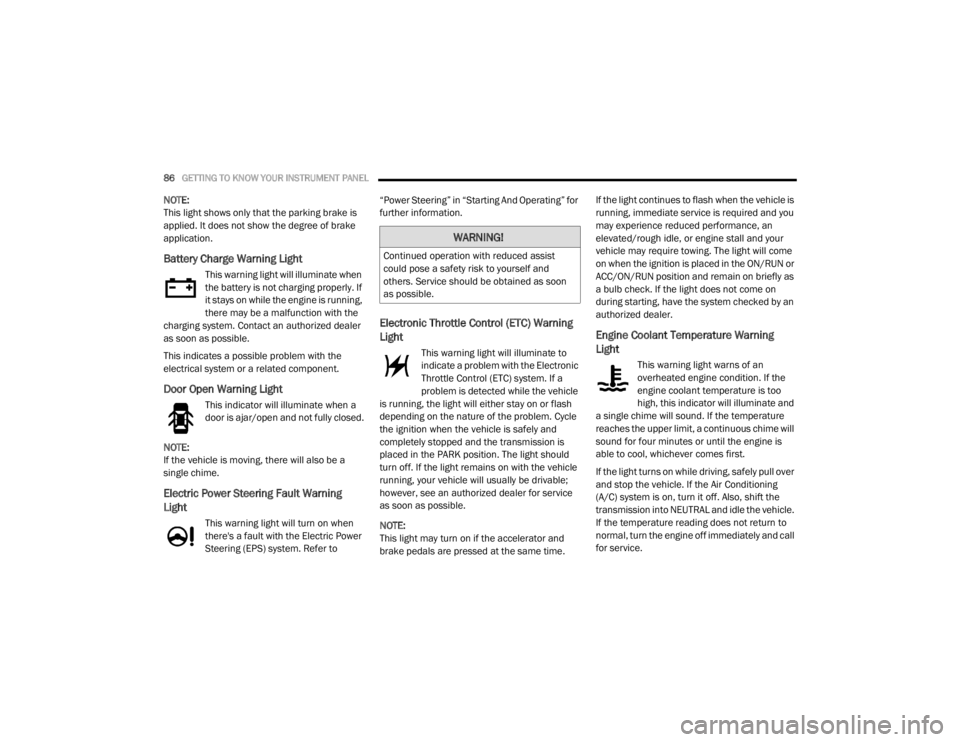
Battery Charge Warning Light
This warning light will illuminate when
the battery is not charging properly. If
it stays on while the engine is running,
there may be a malfunction with the
charging system. Contact an authorized dealer
as soon as possible.
This indicates a possible problem with the
electrical system or a related component.
Door Open Warning Light
This indicator will illuminate when a
door is ajar/open and not fully closed.
NOTE:
If the vehicle is moving, there will also be a
single chime.
Electric Power Steering Fault Warning
Light
This warning light will turn on when
there's a fault with the Electric Power
Steering (EPS) system. Refer to “Power Steering” in “Starting And Operating” for
further information.
Electronic Throttle Control (ETC) Warning
Light
This warning light will illuminate to
indicate a problem with the Electronic
Throttle Control (ETC) system. If a
problem is detected while the vehicle
is running, the light will either stay on or flash
depending on the nature of the problem. Cycle
the ignition when the vehicle is safely and
completely stopped and the transmission is
placed in the PARK position. The light should
turn off. If the light remains on with the vehicle
running, your vehicle will usually be drivable;
however, see an authorized dealer for service
as soon as possible.
NOTE:
This light may turn on if the accelerator and
brake pedals are pressed at the same time. If the light continues to flash when the vehicle is
running, immediate service is required and you
may experience reduced performance, an
elevated/rough idle, or engine stall and your
vehicle may require towing. The light will come
on when the ignition is placed in the ON/RUN or
ACC/ON/RUN position and remain on briefly as
a bulb check. If the light does not come on
during starting, have the system checked by an
authorized dealer.
Engine Coolant Temperature Warning
Light
This warning light warns of an
overheated engine condition. If the
engine coolant temperature is too
high, this indicator will illuminate and
a single chime will sound. If the temperature
reaches the upper limit, a continuous chime will
sound for four minutes or until the engine is
able to cool, whichever comes first.
If the light turns on while driving, safely pull over
and stop the vehicle. If the Air Conditioning
(A/C) system is on, turn it off. Also, shift the
transmission into NEUTRAL and idle the vehicle.
If the temperature reading does not return to
normal, turn the engine off immediately and call
for service.
WARNING!
Continued operation with reduced assist
could pose a safety risk to yourself and
others. Service should be obtained as soon
as possible.
20_LX_OM_EN_USC_t.book Page 86