automatic transmission CHRYSLER 300 2021 Owners Manual
[x] Cancel search | Manufacturer: CHRYSLER, Model Year: 2021, Model line: 300, Model: CHRYSLER 300 2021Pages: 268, PDF Size: 15.24 MB
Page 6 of 268
4
STARTING AND OPERATING
STARTING THE ENGINE ......................................... 81
Automatic Transmission .. ...............................81
Keyless Enter ‘n Go™ — Ignition. . ....................81
Normal Starting . . ..............................................81
AutoPark . ..........................................................82
C old Weather Operation (Below –22°F Or
−30°C) . ............................................................83
I
f Engine Fails To Start . . ...................................83
After Starting. . ...................................................84
ENGINE BLOCK HEATER — IF EQUIPPED . . ......... 84
ENGINE BREAK-IN RECOMMENDATIONS .. ......... 84
PARKING BRAKE .. ................................................. 84
AUTOMATIC TRANSMISSION.. .............................. 85
Ignition Park Interlock .. ....................................86
Brake Transmission Shift Interlock (BTSI)
System . .............................................................87
8
-Speed Automatic Transmission . . .................87
SPORT MODE — IF EQUIPPED . . ............................ 91
FUEL SAVER TECHNOLOGY 5.7L ONLY —
IF EQUIPPED ..
......................................................... 92
POWER STEERING .. ............................................... 92
CRUISE CONTROL SYSTEMS — IF EQUIPPED .. . 92
Cruise Control .. ................................................92
Adaptive Cruise Control (ACC) . . .......................94PARKSENSE FRONT AND REAR PARK
ASSIST — IF EQUIPPED. .
..................................... 103
ParkSense Sensors .. ..................................... 103
ParkSense Display . . ...................................... 103
ParkSense Warning Display . . ....................... 106
Enabling And Disabling ParkSense . . ............ 106
Service The ParkSense Park Assist
System . .......................................................... 106
C
leaning The ParkSense System . . ............... 107
ParkSense System Usage Precautions. . ...... 107
LANESENSE — IF EQUIPPED . . ........................... 108
LaneSense Operation .. ................................. 108
Turning LaneSense On Or Off . . ..................... 108
LaneSense Warning Message . . .................... 108
Changing LaneSense Status . . ...................... 110
PARKVIEW REAR BACK UP CAMERA. . ............. 110
REFUELING THE VEHICLE .. ................................. 111
Emergency Fuel Filler Door Release .. .......... 112
VEHICLE LOADING . . ............................................ 113
Vehicle Certification Label .. .......................... 113
Gross Vehicle Weight Rating (GVWR) . . ........ 113
Gross Axle Weight Rating (GAWR) . . ............. 113
Overloading. . .................................................. 113
Loading . ......................................................... 113 T RAILER TOWING .
.
.............................................. 114
Common Towing Definitions.. ....................... 114
Trailer Hitch Classification. . .......................... 115
Trailer Towing Weights (Maximum Trailer
Weight Ratings) . .
........................................... 116
Trailer And Tongue Weight . . ........................ 116
Towing Requirements . . ................................. 116
Towing Tips . . ................................................. 118
RECREATIONAL TOWING (BEHIND
MOTORHOME) . .
.................................................... 119
DRIVING TIPS .. ..................................................... 119
Driving On Slippery Surfaces .. ...................... 119
Driving Through Water . . ............................... 120
MULTIMEDIA
UCONNECT SYSTEMS ......................................... 121
CYBERSECURITY ................................................. 121
UCONNECT SETTINGS .. ...................................... 122
Customer Programmable Features —
Uconnect 4C/4C NAV Settings . .
.................. 122
RADIO OPERATION AND MOBILE PHONES. . .... 136
Regulatory And Safety Information .. ............ 136
Page 7 of 268
5
SAFETY
SAFETY FEATURES .............................................. 137
Anti-Lock Brake System (ABS) .. ................... 137
Electronic Brake Control (EBC) System . . ..... 138
AUXILIARY DRIVING SYSTEMS . . ........................ 142
Blind Spot Monitoring (BSM) —
If Equipped. .
................................................... 142
Forward Collision Warning (FCW) With
Mitigation Operation — If Equipped. .
............ 146
Tire Pressure Monitoring System (TPMS) . . .. 148
OCCUPANT RESTRAINT SYSTEMS . . .................. 151
Occupant Restraint Systems Features .. ..... 151
Important Safety Precautions. . ..................... 152
Seat Belt Systems . . ...................................... 152
Supplemental Restraint Systems (SRS) . . .... 158
Child Restraints . . ........................................... 166
SAFETY TIPS . . ....................................................... 176
Transporting Passengers .. ............................ 176
Transporting Pets . . ........................................ 176
Safety Checks You Should Make Inside
The Vehicle . .
................................................. 176
Periodic Safety Checks You Should Make
Outside The Vehicle . .
.................................... 177
Exhaust Gas . . ................................................ 178
Carbon Monoxide Warnings . . ....................... 178
IN CASE OF EMERGENCY
HAZARD WARNING FLASHERS......................... 179
ASSIST AND SOS MIRROR — IF EQUIPPED .. ... 179
JACKING AND TIRE CHANGING .. ....................... 182
Preparations For Jacking .. ........................... 182
Jack Location/Spare Tire Stowage . . ............ 183
Jacking And Changing A Tire . . ..................... 184
JUMP STARTING . . ............................................... 186
Preparations For Jump Start .. ...................... 187
Jump Starting Procedure . . ............................ 188
REFUELING IN AN EMERGENCY –
IF EQUIPPED . .
..................................................... 189
IF YOUR ENGINE OVERHEATS .. ........................ 190
MANUAL PARK RELEASE .. ................................ 190
FREEING A STUCK VEHICLE .. ............................ 192
TOWING A DISABLED VEHICLE .. ....................... 193
All Wheel Drive (AWD) Models .. .................... 194
Rear Wheel Drive (RWD) Models . . ............... 194
ENHANCED ACCIDENT RESPONSE SYSTEM
(EARS) . ................................................................. 194
E
VENT DATA RECORDER (EDR) .. ...................... 194
SERVICING AND MAINTENANCE
SCHEDULED SERVICING ................................... 195
Maintenance Plan .. ....................................... 196
ENGINE COMPARTMENT . . .................................. 199
3.6L Engine .. ................................................ 199
5.7L Engine . . ................................................ 200
Checking Oil Level . . ....................................... 201 Adding Washer Fluid .
.
................................... 201
Maintenance-Free Battery . . ......................... 201
Pressure Washing . . ....................................... 202
VEHICLE MAINTENANCE . . .................................. 202
Engine Oil ...................................................... 202
E ngine Oil Filter . . ........................................... 203
Engine Air Cleaner Filter . . ............................. 203
Air Conditioner Maintenance. . ...................... 204
Accessory Drive Belt Inspection . . ................. 205
Body Lubrication . . ......................................... 206
Windshield Wiper Blades. . ............................ 206
Exhaust System . . ........................................... 208
Cooling System . . ........................................... 209
Brake System . . ............................................. 212
Automatic Transmission . . ............................ 212
All Wheel Drive (AWD) — If Equipped . . ........ 213
Rear Axle. ....................................................... 213
F uses. ............................................................. 214
B ulb Replacement . . ...................................... 221
TIRES . .................................................................... 225
T ire Safety Information .. ............................... 225
Tires — General Information . . ...................... 232
Tire Types. ...................................................... 235
S pare Tires — If Equipped. . ........................... 236
Wheel And Wheel Trim Care. . ....................... 238
Snow Traction Devices. . ................................ 239
Tire Rotation Recommendations . . .............. 240
Page 24 of 268
22 GETTING TO KNOW YOUR VEHICLE
NOTE:
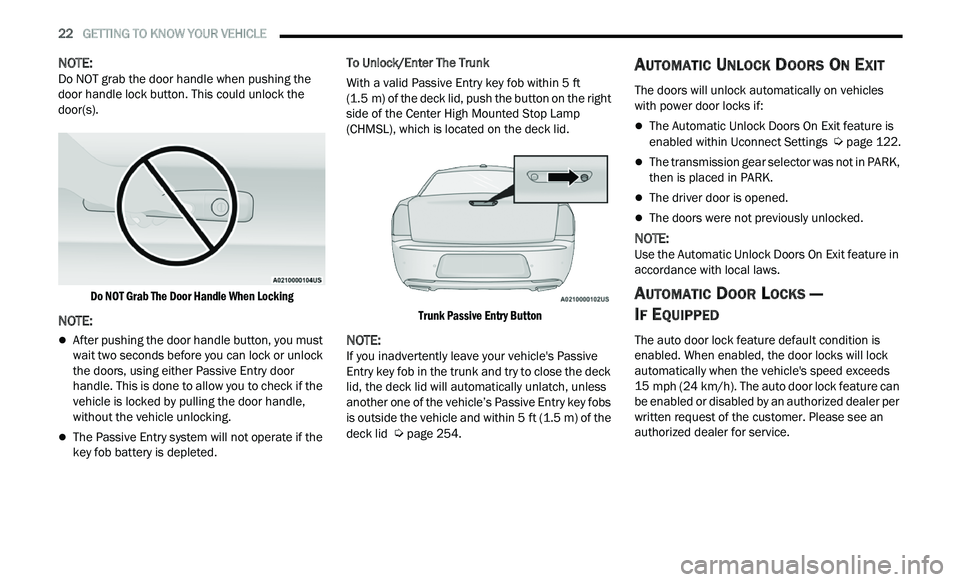
Do NOT grab the door handle when pushing the
d oor
handle lock button. This could unlock the
door(s).
Do NOT Grab The Door Handle When Locking
NOTE:
After pushing the door handle button, you must
wait two seconds before you can lock or unlock
the doors, using either Passive Entry door
handle. This is done to allow you to check if the
vehicle is locked by pulling the door handle,
without the vehicle unlocking.
The Passive Entry system will not operate if the
key fob battery is depleted. To Unlock/Enter The Trunk
With a valid Passive Entry key fob within 5
ft
( 1
.5 m) of the deck lid, push the button on the right
s i
de of the Center High Mounted Stop Lamp
(CHMSL), which is located on the deck lid.
Trunk Passive Entry Button
NOTE:
If you inadvertently leave your vehicle's Passive
E n
try key fob in the trunk and try to close the deck
lid, the deck lid will automatically unlatch, unless
another one of the vehicle’s Passive Entry key fobs
is outside the vehicle and within 5 ft (1.5 m) of the
de
ck lid Ú page 254.
AUTOMATIC UNLOCK DOORS ON EXIT
The doors will unlock automatically on vehicles
with power door locks if:
The Automatic Unlock Doors On Exit feature is
enabled within Uconnect Settings Ú page 122.
The transmission gear selector was not in PARK,
then is placed in PARK.
The driver door is opened.
The doors were not previously unlocked.
NOTE:
Use the Automatic Unlock Doors On Exit feature in
a c
cordance with local laws.
AUTOMATIC DOOR LOCKS —
I
F EQUIPPED
The auto door lock feature default condition is
enabled. When enabled, the door locks will lock
automatically when the vehicle's speed exceeds
15 mph (24 km/h). The auto door lock feature can
b e
enabled or disabled by an authorized dealer per
written request of the customer. Please see an
authorized dealer for service.
Page 49 of 268
GETTING TO KNOW YOUR VEHICLE 47
The Rain Sensing system has protection features
for the wiper blades and arms, and will not operate
under the following conditions:
Low Ambient Temperature — When the ignition
is first placed in the ON position, the Rain
Sensing system will not operate until the wiper
switch is moved, vehicle speed is greater than
3 mph (5 km/h), or the outside temperature is
gr
eater than 32°F (0°C).
Transmission In NEUTRAL Position — When the
ignition is ON, and the automatic transmission
is in the NEUTRAL position, the Rain Sensing
system will not operate until the wiper switch is
moved, vehicle speed is greater than 3 mph
(5
km/h), or the gear selector is moved out of
t h
e NEUTRAL position.
Remote Start Mode Inhibit — On vehicles
equipped with a Remote Start system, Rain
Sensing wipers are not operational when the
vehicle is in Remote Start mode.
CLIMATE CONTROLS
The Climate Control system allows you to regulate
the temperature, air flow, and direction of air
circulating throughout the vehicle. The controls are
located on the touchscreen (if equipped) and on
the instrument panel below the radio.
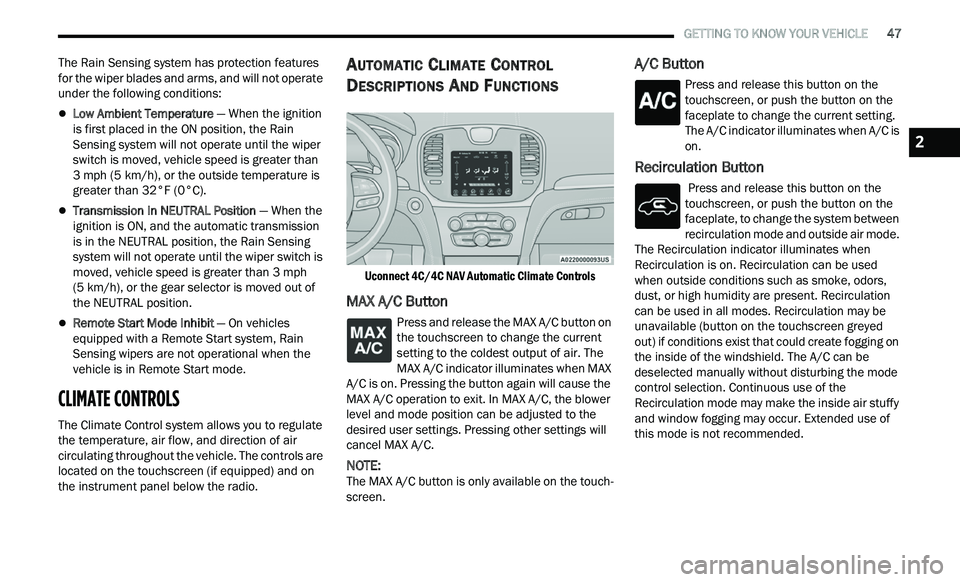
AUTOMATIC CLIMATE CONTROL
D
ESCRIPTIONS AND FUNCTIONS
Uconnect 4C/4C NAV Automatic Climate Controls
MAX A/C Button
Press and release the MAX A/C button on
the touchscreen to change the current
s e
tting to the coldest output of air. The
MAX A/C indicator illuminates when MAX
A/C is on. Pressing the button again will cause the
MAX A/C operation to exit. In MAX A/C, the blower
level and mode position can be adjusted to the
desired user settings. Pressing other settings will
cancel MAX A/C.
NOTE:
The MAX A/C button is only available on the touch -
screen.
A/C Button
Press and release this button on the
touchscreen, or push the button on the
f a
ceplate to change the current setting.
The A/C indicator illuminates when A/C is
on.
Recirculation Button
Press and release this button on the
touchscreen, or push the button on the
f a
ceplate, to change the system between
recirculation mode and outside air mode.
The Recirculation indicator illuminates when
Recirculation is on. Recirculation can be used
when outside conditions such as smoke, odors,
dust, or high humidity are present. Recirculation
can be used in all modes. Recirculation may be
unavailable (button on the touchscreen greyed
out) if conditions exist that could create fogging on
the inside of the windshield. The A/C can be
deselected manually without disturbing the mode
control selection. Continuous use of the
Recirculation mode may make the inside air stuffy
and window fogging may occur. Extended use of
this mode is not recommended.
2
Page 56 of 268
54 GETTING TO KNOW YOUR VEHICLE
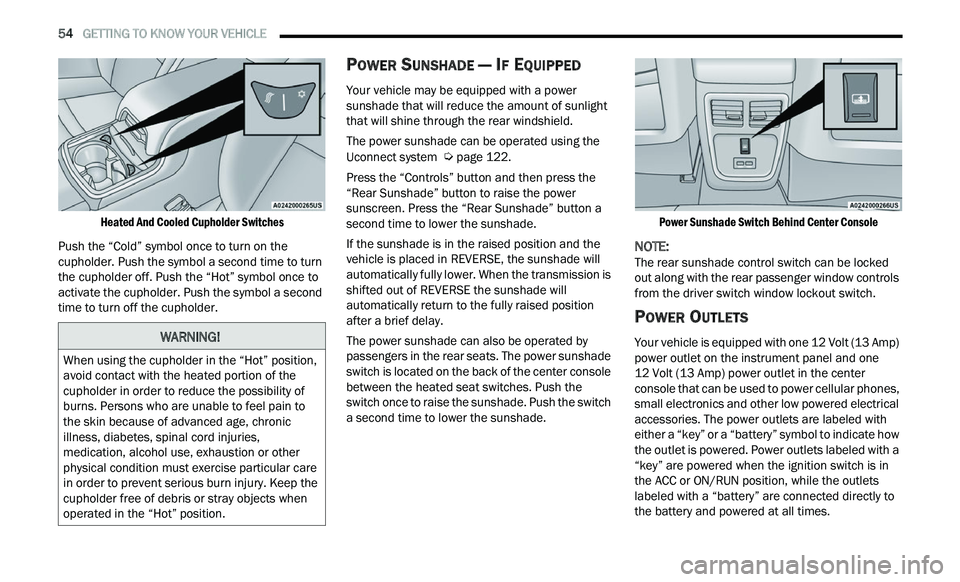
Heated And Cooled Cupholder Switches
Push the “Cold” symbol once to turn on the
cu
pholder. Push the symbol a second time to turn
the cupholder off. Push the “Hot” symbol once to
activate the cupholder. Push the symbol a second
time to turn off the cupholder.
POWER SUNSHADE — IF EQUIPPED
Your vehicle may be equipped with a power
sunshade that will reduce the amount of sunlight
that will shine through the rear windshield.
The power sunshade can be operated using the
U c
onnect system Ú page 122.
Press the “Controls” button and then press the
“ R
ear Sunshade” button to raise the power
sunscreen. Press the “Rear Sunshade” button a
second time to lower the sunshade.
If the sunshade is in the raised position and the
ve
hicle is placed in REVERSE, the sunshade will
automatically fully lower. When the transmission is
shifted out of REVERSE the sunshade will
automatically return to the fully raised position
after a brief delay.
The power sunshade can also be operated by
p a
ssengers in the rear seats. The power sunshade
switch is located on the back of the center console
between the heated seat switches. Push the
switch once to raise the sunshade. Push the switch
a second time to lower the sunshade.
Power Sunshade Switch Behind Center Console
NOTE:
The rear sunshade control switch can be locked
ou t
along with the rear passenger window controls
from the driver switch window lockout switch.
POWER OUTLETS
Your vehicle is equipped with one 12 Volt (13 Amp)
power outlet on the instrument panel and one
12 Volt (13 Amp) power outlet in the center
c on
sole that can be used to power cellular phones,
small electronics and other low powered electrical
accessories. The power outlets are labeled with
either a “key” or a “battery” symbol to indicate how
the outlet is powered. Power outlets labeled with a
“key” are powered when the ignition switch is in
the ACC or ON/RUN position, while the outlets
labeled with a “battery” are connected directly to
the battery and powered at all times.
WARNING!
When using the cupholder in the “Hot” position,
avoid contact with the heated portion of the
cupholder in order to reduce the possibility of
burns. Persons who are unable to feel pain to
the skin because of advanced age, chronic
illness, diabetes, spinal cord injuries,
medication, alcohol use, exhaustion or other
physical condition must exercise particular care
in order to prevent serious burn injury. Keep the
cupholder free of debris or stray objects when
operated in the “Hot” position.
Page 77 of 268
GETTING TO KNOW YOUR INSTRUMENT PANEL 75
If the ABS light does not turn on when the ignition
is placed in the ON/RUN or ACC/ON/RUN position,
have the brake system inspected by an authorized
dealer.
Electronic Stability Control (ESC) Active
Warning Light — If Equipped
This warning light will indicate when the
Electronic Stability Control system is
Ac
tive. The ESC Indicator Light in the
instrument cluster will come on when the
ignition is placed in the ON/RUN or ACC/ON/RUN
position, and when ESC is activated. It should go
out with the engine running. If the ESC Indicator
Light comes on continuously with the engine
running, a malfunction has been detected in the
ESC system. If this warning light remains on after
several ignition cycles, and the vehicle has been
driven several miles (kilometers) at speeds greater
than 30 mph (48 km/h), see an authorized dealer
a s
soon as possible to have the problem
diagnosed and corrected.
The ESC OFF Indicator Light and the ESC Indi -
cator Light come on momentarily each time the
ig nition is placed in the ON/RUN or ACC/ON/
RUN position.
The ESC system will make buzzing or clicking
sounds when it is active. This is normal; the
sounds will stop when ESC becomes inactive.
This light will come on when the vehicle is in an
ESC event.
Electronic Stability Control (ESC) OFF
Warning Light — If Equipped
This warning light indicates the ESC is off.
Each time the ignition is turned to ON/
R U
N or ACC/ON/RUN, the ESC system
will be on, even if it was turned off previously.
Service LaneSense Warning Light —
If Equipped
This warning light will illuminate when the
LaneSense system is not operating and
r e
quires service. Please see an
authorized dealer.
LaneSense Warning Light — If Equipped
The LaneSense system provides the
driver with visual and steering torque
w a
rnings when the vehicle starts to drift
out of its lane unintentionally without the
use of a turn signal.
When the LaneSense system senses a lane drift
situation, the LaneSense indicator changes
from solid green to solid yellow.
When the LaneSense system senses the lane
has been approached and is in a lane departure
situation, the LaneSense indicator changes
from solid white/green to flashing yellow
Ú page 108.
Low Fuel Warning Light
When the fuel level reaches
approximately 1.9 gal (7.13 L), this light
wi
ll turn on and a single chime will sound.
Low Washer Fluid Warning Light —
If Equipped
This warning light will illuminate when the
windshield washer fluid is low
Ú page 201.
Engine Check/Malfunction Indicator
Warning Light (MIL)
The Engine Check/Malfunction Indicator
Light (MIL) is a part of an Onboard
Di
agnostic System called OBD II that
monitors engine and automatic
transmission control systems. This warning light
will illuminate when the ignition is in the ON/RUN
position before engine start. If the bulb does not
come on when turning the ignition switch from OFF
to ON/RUN, have the condition checked promptly.
Certain conditions, such as a loose or missing gas
c a
p, poor quality fuel, etc., may illuminate the light
after engine start. The vehicle should be serviced if
the light stays on through several typical driving
styles. In most situations, the vehicle will drive
normally and will not require towing.
3
Page 83 of 268
81
(Continued)
STARTING AND OPERATING
STARTING THE ENGINE
Before starting your vehicle, adjust your seat,
adjust the inside and outside mirrors, fasten your
seat belt, and if present, instruct all other
occupants to buckle their seat belts.
AUTOMATIC TRANSMISSION
The gear selector must be in the PARK position
before you can start the engine. Apply the brakes
before shifting into any driving gear.
KEYLESS ENTER ‘N GO™ — IGNITION
This feature allows the driver to operate the
ignition switch with the push of a button, as long as
the Remote Start/Keyless Enter ‘n Go™ key fob is
in the passenger compartment.
NORMAL STARTING
To Turn On The Engine Using The ENGINE START/
STOP Button
1. The transmission must be in PARK.
2
. P ress and hold the brake pedal while pushing
t
he ENGINE START/STOP button once.
3. The system takes over and attempts to start t
he vehicle. If the vehicle fails to start, the
starter will disengage automatically after
10 seconds.
4. I f you wish to stop the cranking of the engine
p
rior to the engine starting, push the ENGINE
START/STOP button again.
NOTE:
Normal starting of either a cold or a warm engine is
ob t
ained without pumping or pressing the accel -
erator pedal.
WARNING!
When exiting the vehicle, always make sure
the ignition is in OFF mode, remove the key
fob from the vehicle and lock the vehicle.
Never leave children alone in a vehicle, or with
access to an unlocked vehicle. Leaving chil -
dren in a vehicle unattended is dangerous for
a
number of reasons. A child or others could
be seriously or fatally injured. Children should
be warned not to touch the parking brake,
brake pedal or the transmission gear selector.
Do not leave the key fob in or near the vehicle
(or in a location accessible to children), and do
not leave the ignition (of a vehicle equipped
with Keyless Enter ‘n Go™) in the ACC or ON/
RUN mode. A child could operate power
windows, other controls, or move the vehicle.
Do not leave children or animals inside parked
vehicles in hot weather. Interior heat build-up
may cause serious injury or death.
CAUTION!
Shift into or out of PARK or REVERSE only after
the vehicle has come to a complete stop.
Do not shift between PARK, REVERSE,
NEUTRAL, or DRIVE when the engine is above
idle speed.
Before shifting into any gear, make sure your
foot is firmly pressing the brake pedal.
WARNING!
4
Page 86 of 268
84 STARTING AND OPERATING
AFTER STARTING
The idle speed is controlled automatically, and it
will decrease as the engine warms up.
ENGINE BLOCK HEATER — IF EQUIPPED
The engine block heater warms the engine, and
permits quicker starts in cold weather. Connect the
cord to a standard 110-115 Volt AC electrical
outlet with a grounded, three-wire extension cord.
The engine block heater must be plugged in at
le
ast one hour to have an adequate warming effect
on the engine.
The engine block heater cord is routed under the
h ood
on the driver side of the vehicle. It has a
removable cap that is located near the air box.
ENGINE BREAK-IN RECOMMENDATIONS
A long break-in period is not required for the
drivetrain (engine, transmission, and rear axle) in
your new vehicle.
Drive moderately during the first 300 miles
( 5
00 km). After the initial 60 miles (100 km),
s p
eeds up to 50 or 55 mph (80 or 90 km/h) are
d e
sirable.
While cruising, brief full-throttle acceleration within
th
e limits of local traffic laws contributes to a good
break-in. However, wide-open throttle acceleration
in low gear can be detrimental and should be
avoided.
The engine oil, transmission fluid, and axle
l u
bricant installed at the factory are high-quality
and energy-conserving. Oil, fluid, and lubricant
changes should be consistent with anticipated
climate and conditions under which vehicle
operations will occur. For the recommended
viscosity and quality grades
Ú page 249.
NOTE:
A new engine may consume some oil during its first
f e
w thousand miles (kilometers) of operation. This should be considered a normal part of the break-in
and not interpreted as an indication of difficulty.
Please check your oil level with the engine oil indi
-
cator often during the break in period. Add oil as
r e
quired.
PARKING BRAKE
Before leaving the vehicle, make sure that the
parking brake is fully applied and place the gear
selector in the PARK position.
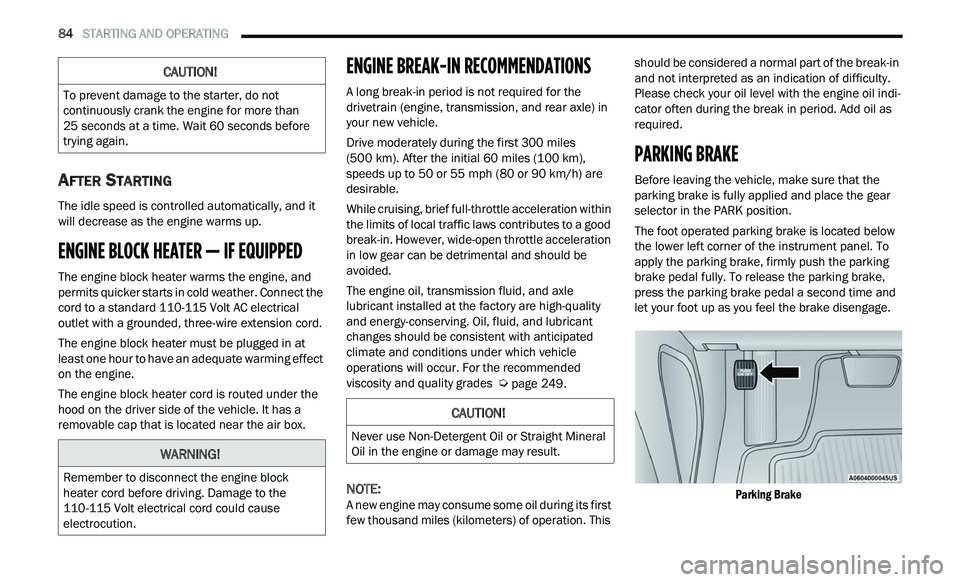
The foot operated parking brake is located below
th
e lower left corner of the instrument panel. To
apply the parking brake, firmly push the parking
brake pedal fully. To release the parking brake,
press the parking brake pedal a second time and
let your foot up as you feel the brake disengage.
Parking Brake
CAUTION!
To prevent damage to the starter, do not
continuously crank the engine for more than
25 seconds at a time. Wait 60 seconds before
t r
ying again.
WARNING!
Remember to disconnect the engine block
heater cord before driving. Damage to the
110-115 Volt electrical cord could cause
electrocution.
CAUTION!
Never use Non-Detergent Oil or Straight Mineral
Oil in the engine or damage may result.
Page 87 of 268
STARTING AND OPERATING 85
(Continued)
(Continued)
(Continued)
When the parking brake is applied with the ignition
switch in the ON/RUN position, the Brake Warning
Light in the instrument cluster will illuminate.
NOTE:
When the parking brake is applied and the trans -
mission is placed in gear, the Brake Warning Light
w i
ll flash. If vehicle speed is detected, a chime will
sound to alert the driver. Fully release the parking
brake before attempting to move the vehicle.
This light only shows that the parking brake is
applied. It does not show the degree of brake
application.
When parking on a hill, it is important to turn the
f r
ont wheels toward the curb on a downhill grade
and away from the curb on an uphill grade. Apply
the parking brake before placing the gear selector
in PARK, otherwise the load on the transmission
locking mechanism may make it difficult to move
the gear selector out of PARK. The parking brake
should always be applied whenever the driver is
not in the vehicle.
AUTOMATIC TRANSMISSION
NOTE:
You must press and hold the brake pedal while
s h
ifting out of PARK.
WARNING!
Never use the PARK position as a substitute
for the parking brake. Always apply the
parking brake fully when parked to guard
against vehicle movement and possible injury
or damage.
When exiting the vehicle, always remove the
key fob from the ignition and lock your vehicle.
Never leave children alone in a vehicle, or with
access to an unlocked vehicle. Allowing chil -
dren to be in a vehicle unattended is
d a
ngerous for a number of reasons. A child or
others could be seriously or fatally injured.
Children should be warned not to touch the
parking brake, brake pedal or the gear
selector.
When exiting the vehicle, always make sure
the keyless ignition node is in the OFF mode,
remove the key fob from the vehicle and lock
the vehicle.
Do not leave the key fob in or near the vehicle
or in a location accessible to children, and do
not leave the ignition of a vehicle equipped
with Keyless Enter ‘n Go™ in the ACC or ON/
RUN mode. A child could operate power
windows, other controls, or move the vehicle.
Be sure the parking brake is fully disengaged
before driving; failure to do so can lead to
brake failure and a collision.
WARNING!
Always fully apply the parking brake when
leaving your vehicle, or it may roll and cause
damage or injury. Also be certain to leave the
transmission in PARK. Failure to do so may
allow the vehicle to roll and cause damage or
injury.
CAUTION!
If the Brake Warning Light remains on with the
parking brake released, a brake system
malfunction is indicated. Have the brake system
serviced by an authorized dealer immediately.
WARNING!
Never use the PARK position as a substitute
for the parking brake. Always apply the
parking brake fully when exiting the vehicle to
guard against vehicle movement and possible
injury or damage.
WARNING!
4
Page 89 of 268
STARTING AND OPERATING 87
BRAKE TRANSMISSION SHIFT
I
NTERLOCK (BTSI) SYSTEM
This vehicle is equipped with BTSI that holds the
transmission gear selector in PARK unless the
brakes are applied. To shift the transmission out of
PARK, the engine must be running and the brake
pedal must be pressed. The brake pedal must also
be pressed to shift from NEUTRAL into DRIVE or
REVERSE when the vehicle is stopped or moving at
low speeds.
8-SPEED AUTOMATIC TRANSMISSION
The transmission is controlled using a rotary
electronic gear selector located on the center
console. The transmission gear range (PRNDL/S)
is displayed both above the gear selector and in
the instrument cluster. To select a gear range,
simply rotate the gear selector. To access the L or
S position, push down on the gear selector and
then rotate it. You must also press the brake pedal
to shift the transmission out of PARK (or NEUTRAL,
when the vehicle is stopped or moving at low
speeds). To shift past multiple gear ranges at once
(such as PARK to DRIVE), simply rotate the gear
selector to the appropriate detent. Select the
DRIVE range for normal driving.
NOTE:
In the event of a mismatch between the gear
s e
lector position and the actual transmission gear
(for example, driver selects PARK while driving),
the position indicator will blink continuously until
the selector is returned to the proper position, or
the requested shift can be completed.
The electronically-controlled transmission adapts
it
s shift schedule based on driver inputs, along
with environmental and road conditions. The
transmission electronics are self-calibrating;
therefore, the first few shifts on a new vehicle may
be somewhat abrupt. This is a normal condition,
and precision shifts will develop within a few
hundred miles (kilometers).
Only shift from DRIVE to PARK or REVERSE when
t h
e accelerator pedal is released and the vehicle is
stopped. Be sure to keep your foot on the brake
pedal when shifting between these gears.
Standard Gear Selector
The standard transmission gear selector has
P A
RK, REVERSE, NEUTRAL, DRIVE, and LOW shift
positions. Using the LOW position manually
downshifts the transmission to a lower gear based
on vehicle speed.
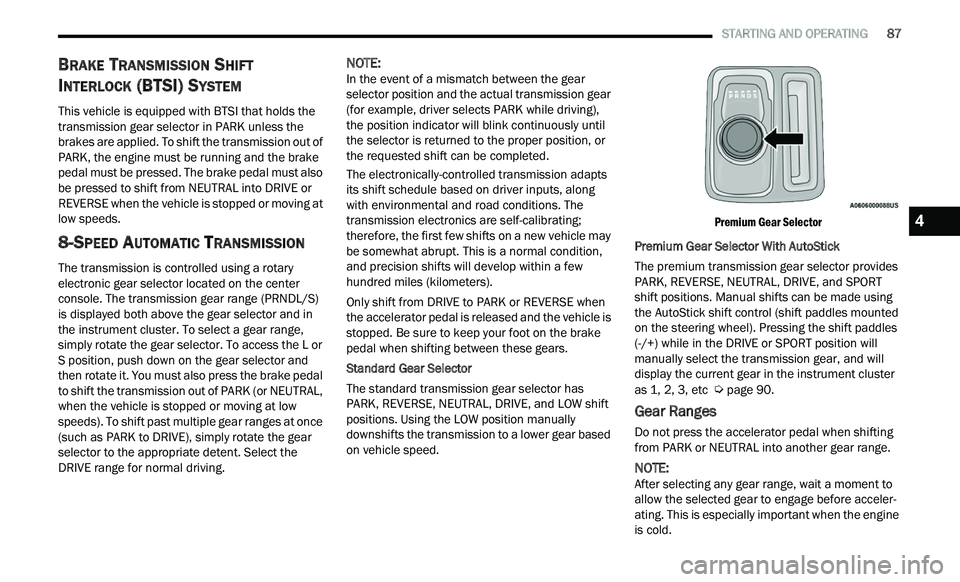
Premium Gear Selector
Premium Gear Selector With AutoStick
The premium transmission gear selector provides
P A
RK, REVERSE, NEUTRAL, DRIVE, and SPORT
shift positions. Manual shifts can be made using
the AutoStick shift control (shift paddles mounted
on the steering wheel). Pressing the shift paddles
(-/+) while in the DRIVE or SPORT position will
manually select the transmission gear, and will
display the current gear in the instrument cluster
as 1, 2, 3, etc
Ú page 90.
Gear Ranges
Do not press the accelerator pedal when shifting
from PARK or NEUTRAL into another gear range.
NOTE:
After selecting any gear range, wait a moment to
a l
low the selected gear to engage before acceler -
ating. This is especially important when the engine
i s
cold.
4