open hood CHRYSLER 300 LX 2005 Owners Manual
[x] Cancel search | Manufacturer: CHRYSLER, Model Year: 2005, Model line: 300 LX, Model: CHRYSLER 300 LX 2005Pages: 374, PDF Size: 7.09 MB
Page 62 of 374
mSeats................................89
NPower Seats..........................89
NPower Reclining Seats...................90
NLumbar Support.......................91
NHeated SeatsÐIf Equipped...............92
NMemory FeatureÐIf Equipped.............93
NProgramming The Remote Keyless Transmitter
For The Memory Feature.................94
NDriver's Seat Glide ±To ± Exit Feature Ð
If Equipped..........................95
NHead Restraints.......................96
NFolding Rear Seat......................97
mAdjustable Pedals Ð If Equipped...........98
mTo Open And Close The Hood.............99
mLights..............................101
NOverhead Console Map/Reading Lights.....101NInterior Lights.......................101
NHeadlight Switch.....................102
NMulti-Function Lever...................103
NHeadlights, Parking Lights, Instrument Panel
Lights.............................103
NAutomatic Headlights±If Equipped.........104
NHeadlamps On With Wipers
(Available With Auto Headlights Only)......104
NDaytime Running Lights (Canada Only).....104
NLights-On Reminder...................104
NHeadlight Time Delay..................104
NFog Lights Ð If Equipped...............105
NTurn Signals.........................105
NHighbeam/Lowbeam Select Switch.........106
NFlash To Pass........................106
62 UNDERSTANDING THE FEATURES OF YOUR VEHICLE
ProCarManuals.com
Page 99 of 374
CAUTION!
Do not place any article under the adjustable pedals
or impede its ability to move as it may cause damage
to the pedal controls. Pedal travel may become
limited if movement is stopped by an obstruction in
the adjustable pedal's path.
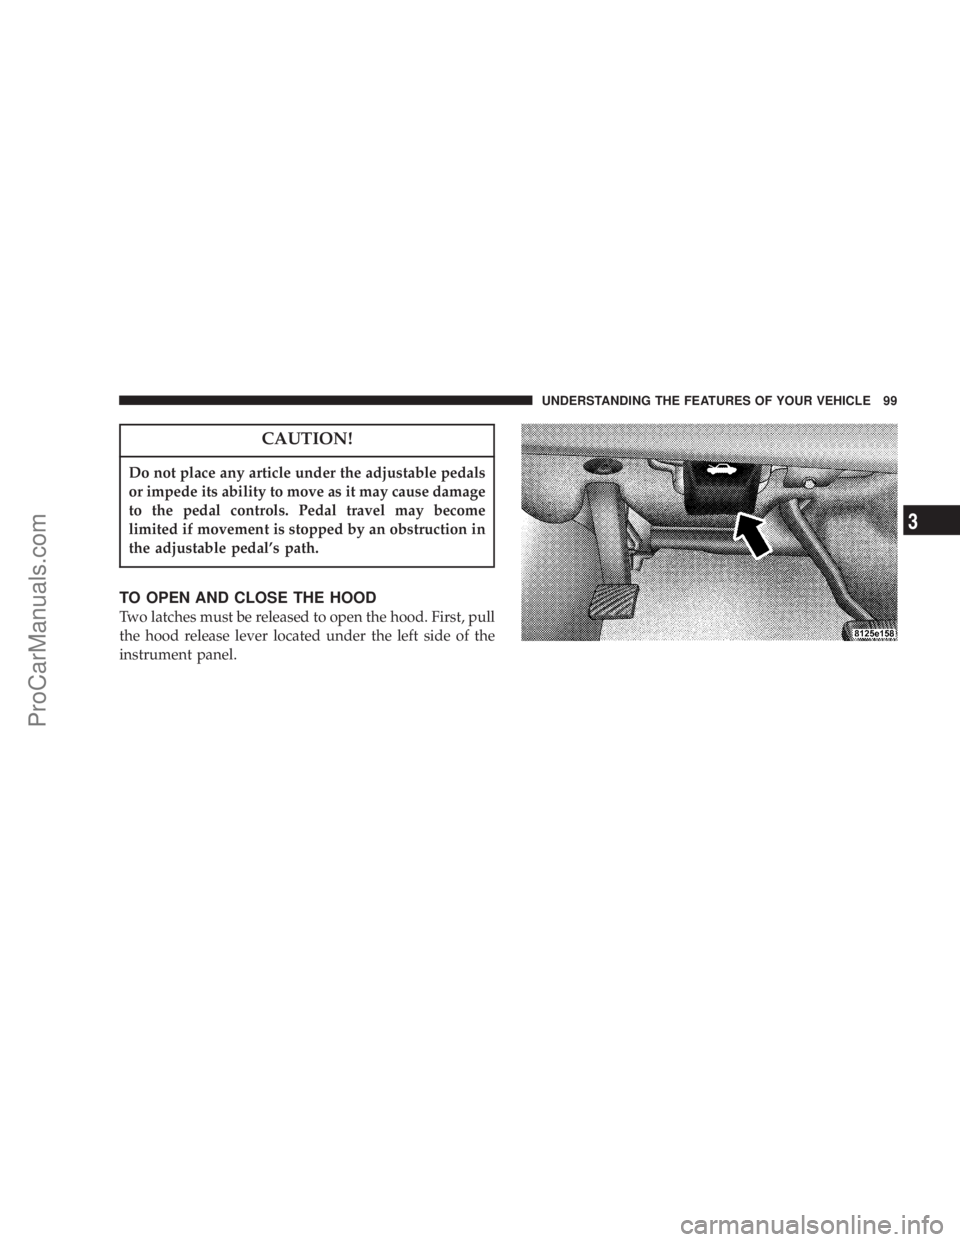
TO OPEN AND CLOSE THE HOOD
Two latches must be released to open the hood. First, pull
the hood release lever located under the left side of the
instrument panel.
UNDERSTANDING THE FEATURES OF YOUR VEHICLE 99
3
ProCarManuals.com
Page 100 of 374
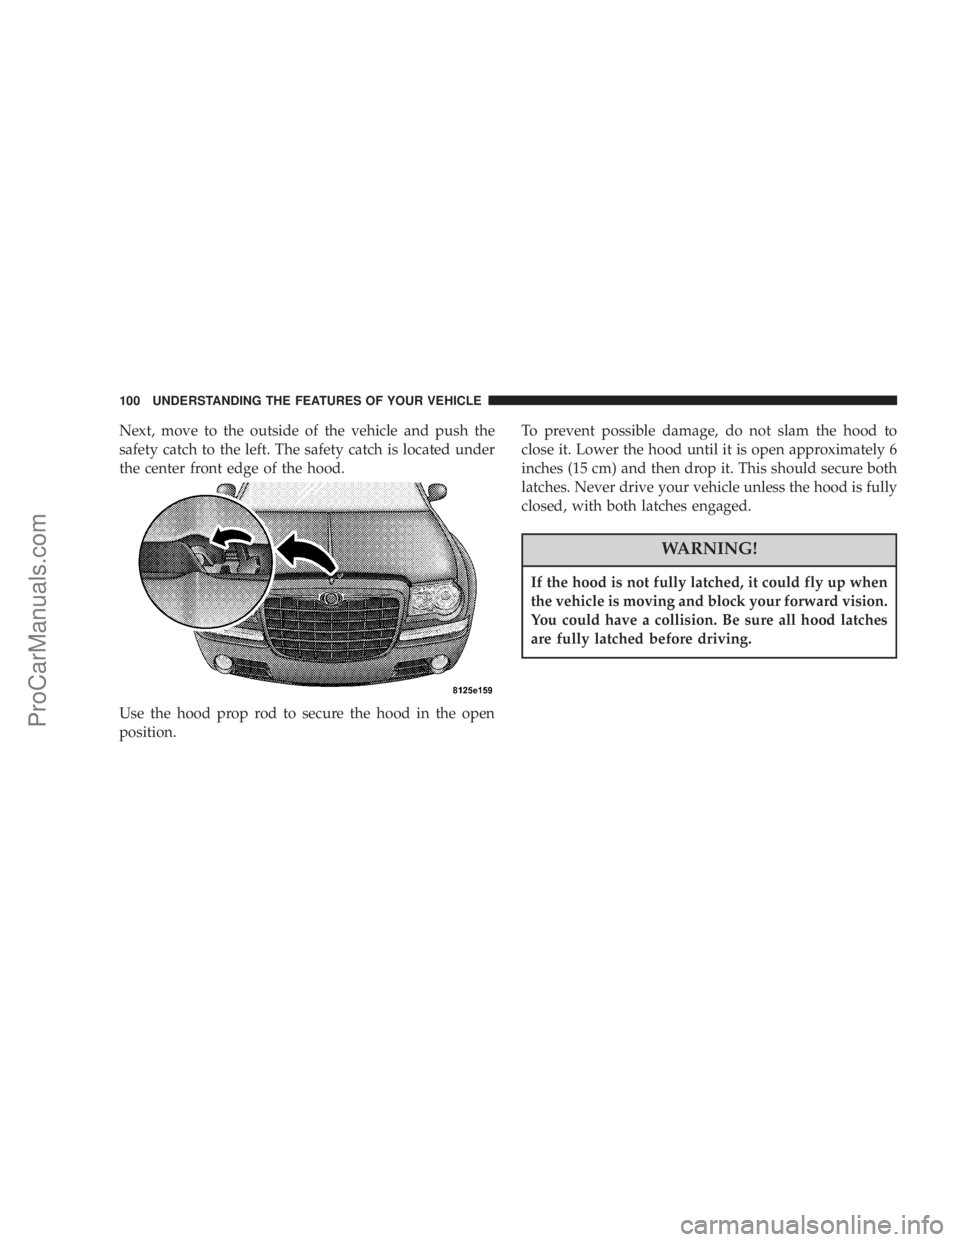
Next, move to the outside of the vehicle and push the
safety catch to the left. The safety catch is located under
the center front edge of the hood.
Use the hood prop rod to secure the hood in the open
position.To prevent possible damage, do not slam the hood to
close it. Lower the hood until it is open approximately 6
inches (15 cm) and then drop it. This should secure both
latches. Never drive your vehicle unless the hood is fully
closed, with both latches engaged.
WARNING!
If the hood is not fully latched, it could fly up when
the vehicle is moving and block your forward vision.
You could have a collision. Be sure all hood latches
are fully latched before driving.
100 UNDERSTANDING THE FEATURES OF YOUR VEHICLE
ProCarManuals.com
Page 303 of 374
Whenever a change is noticed in the sound of the exhaust
system, when exhaust fumes can be detected inside the
vehicle, or when the underside or rear of the vehicle is
damaged, have a competent mechanic inspect the com-
plete exhaust system and adjacent body areas for broken,
damaged, deteriorated, or mispositioned parts. Open
seams or loose connections could permit exhaust fumes
to seep into the passenger compartment. In addition,
inspect the exhaust system each time the vehicle is raised
for lubrication or oil change. Replace as required.
WARNING!
Exhaust gases can injure or kill. They contain carbon
monoxide (CO) which is colorless and odorless.
Breathing it can make you unconscious and can
eventually poison you. To avoid breathing CO, fol-
low the preceding safety tips.
Cooling System
Inspection
WARNING!
²When working near the radiator cooling fan, turn
the ignition key to the OFF position. The fan is
temperature controlled and can start at any time
when the ignition key is in the ON position.
²You or others can be badly burned by hot coolant
or steam from your radiator. If you see or hear
steam coming from under the hood, don't open
the hood until the radiator has had time to cool.
Never try to open a cooling system pressure cap
when the radiator is hot.
MAINTAINING YOUR VEHICLE 303
7
ProCarManuals.com
Page 323 of 374
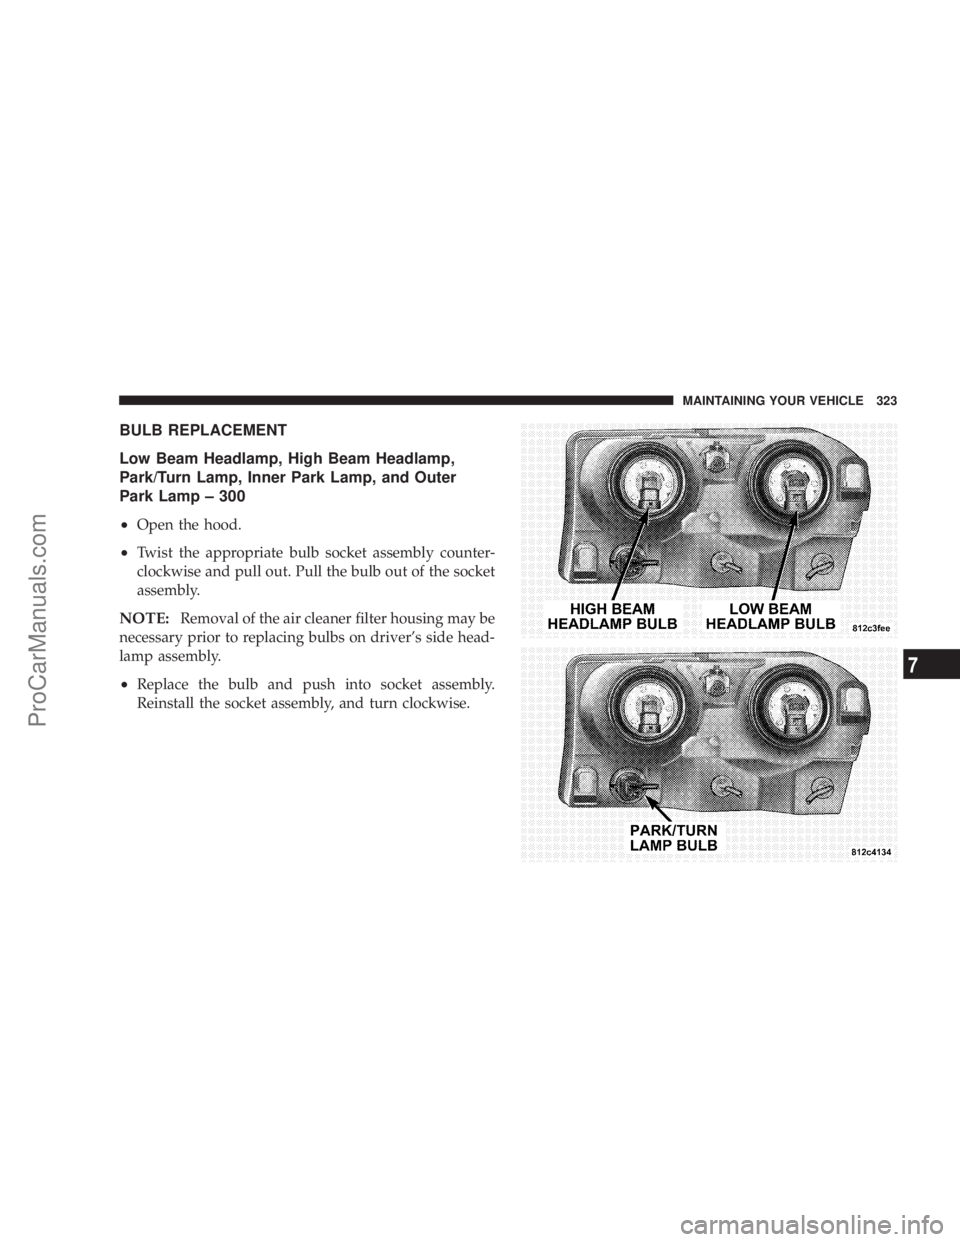
BULB REPLACEMENT
Low Beam Headlamp, High Beam Headlamp,
Park/Turn Lamp, Inner Park Lamp, and Outer
Park Lamp ± 300
²
Open the hood.
²Twist the appropriate bulb socket assembly counter-
clockwise and pull out. Pull the bulb out of the socket
assembly.
NOTE:Removal of the air cleaner filter housing may be
necessary prior to replacing bulbs on driver's side head-
lamp assembly.
²Replace the bulb and push into socket assembly.
Reinstall the socket assembly, and turn clockwise.
MAINTAINING YOUR VEHICLE 323
7
ProCarManuals.com
Page 325 of 374
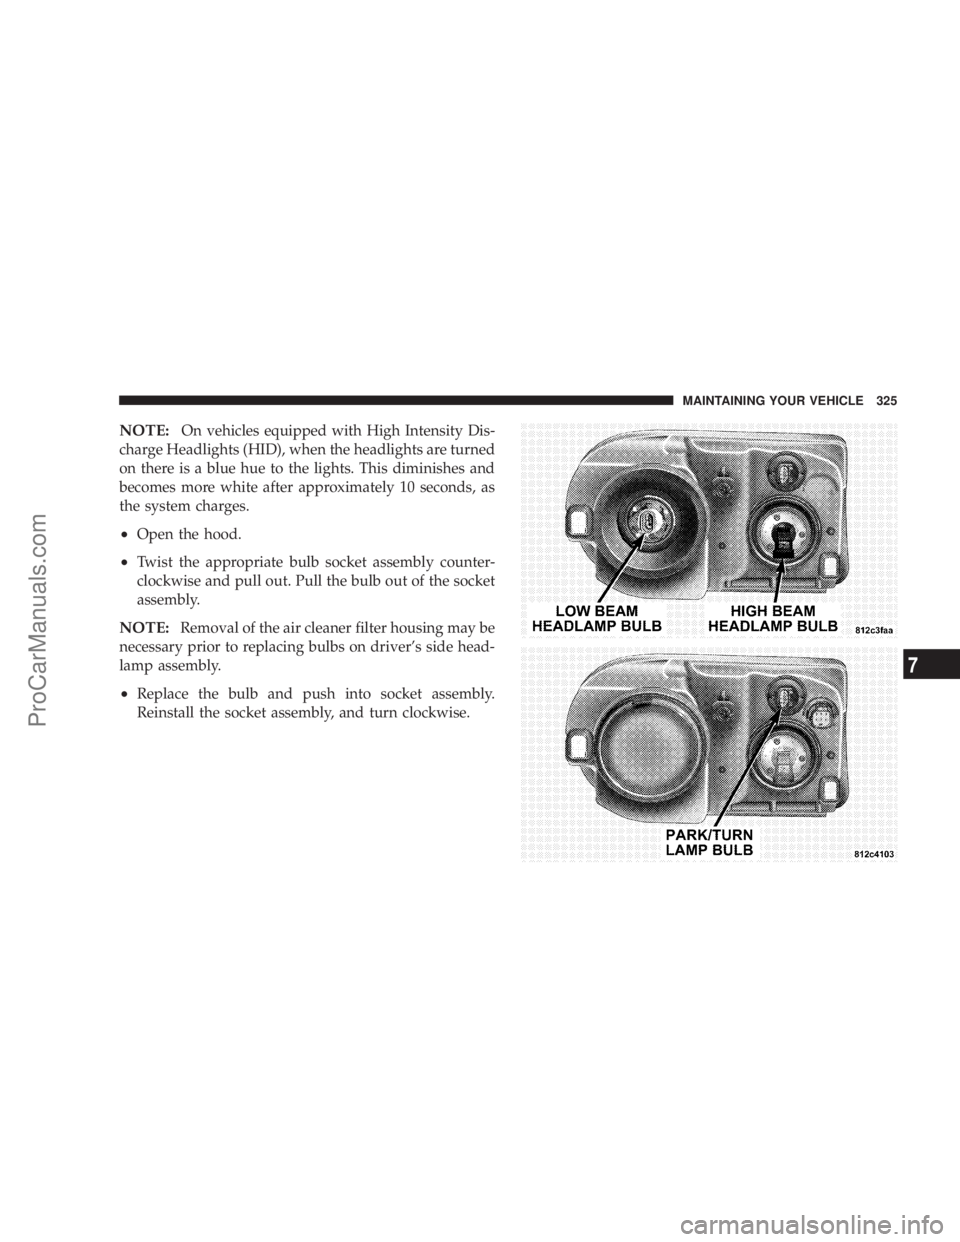
NOTE:On vehicles equipped with High Intensity Dis-
charge Headlights (HID), when the headlights are turned
on there is a blue hue to the lights. This diminishes and
becomes more white after approximately 10 seconds, as
the system charges.
²Open the hood.
²Twist the appropriate bulb socket assembly counter-
clockwise and pull out. Pull the bulb out of the socket
assembly.
NOTE:Removal of the air cleaner filter housing may be
necessary prior to replacing bulbs on driver's side head-
lamp assembly.
²Replace the bulb and push into socket assembly.
Reinstall the socket assembly, and turn clockwise.
MAINTAINING YOUR VEHICLE 325
7
ProCarManuals.com