Ac button CHRYSLER 300 SRT 2012 2.G User Guide
[x] Cancel search | Manufacturer: CHRYSLER, Model Year: 2012, Model line: 300 SRT, Model: CHRYSLER 300 SRT 2012 2.GPages: 557, PDF Size: 5.22 MB
Page 37 of 557
Preventing Inadvertent Locking Of Passive Entry RKE
Transmitter In Vehicle
To minimize the possibility of unintentionally locking a
Passive Entry RKE transmitter inside your vehicle, the
Passive Entry system is equipped with an automatic door
unlock feature which will function if the ignition switch
is in the OFF position.
If one of the vehicle doors is open and the door panel
switch is used to lock the vehicle, once all open doors
have been closed the vehicle checks the inside and
outside of the vehicle for any valid Passive Entry RKE
transmitters. If one of the vehicle’s Passive Entry RKE
transmitters is detected inside the vehicle, and no other
valid Passive Entry RKE transmitters are detected out-
side the vehicle, the Passive Entry System automatically
unlocks all vehicle doors and chirps the horn three times
(on the third attempt ALL doors will lock and the Passive
Entry RKE transmitter can be locked in the vehicle).NOTE:
The vehicle will only unlock the doors when the
doors are locked using the door panel switch, a valid
Passive Entry RKE transmitter is detected inside the
vehicle, and no valid Passive Entry RKE transmitter is
detected outside the vehicle. The vehicle will not unlock
the doors when any of the following conditions are true:
•The doors are locked using the RKE transmitter.
•The doors are locked using the LOCK button on the
Passive Entry door handles.
•The doors are manually locked using the door lock
knobs.
•There is a valid Passive Entry RKE transmitter outside
the vehicle and within 5 ft (1.5 m) of either Passive
Entry door handle.
•Three attempts are made to lock the doors using the
door panel switch and then close the doors.
2
THINGS TO KNOW BEFORE STARTING YOUR VEHICLE 35
Page 38 of 557
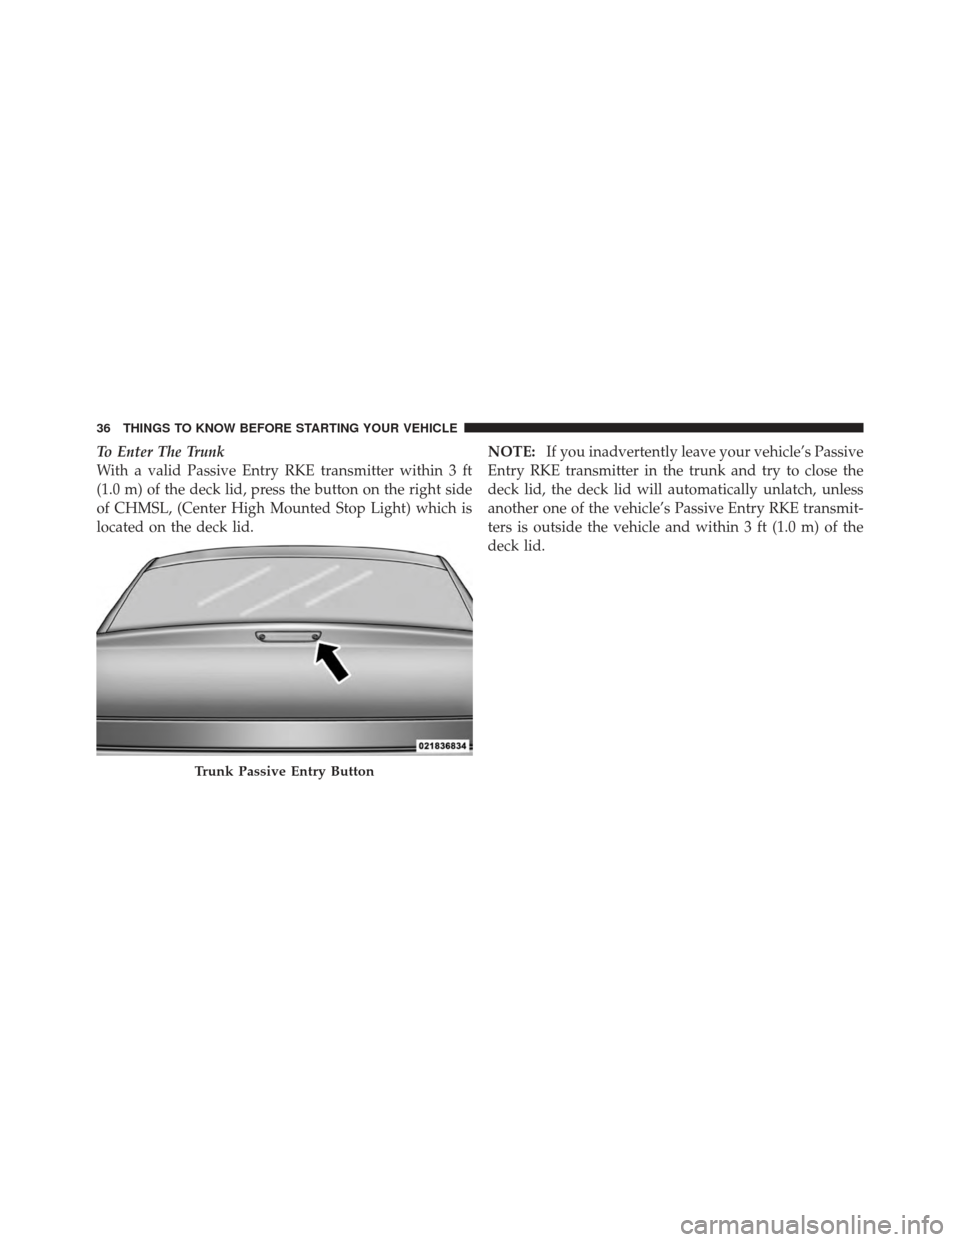
To Enter The Trunk
With a valid Passive Entry RKE transmitter within 3 ft
(1.0 m) of the deck lid, press the button on the right side
of CHMSL, (Center High Mounted Stop Light) which is
located on the deck lid.NOTE:
If you inadvertently leave your vehicle’s Passive
Entry RKE transmitter in the trunk and try to close the
deck lid, the deck lid will automatically unlatch, unless
another one of the vehicle’s Passive Entry RKE transmit-
ters is outside the vehicle and within 3 ft (1.0 m) of the
deck lid.
Trunk Passive Entry Button
36 THINGS TO KNOW BEFORE STARTING YOUR VEHICLE
Page 39 of 557
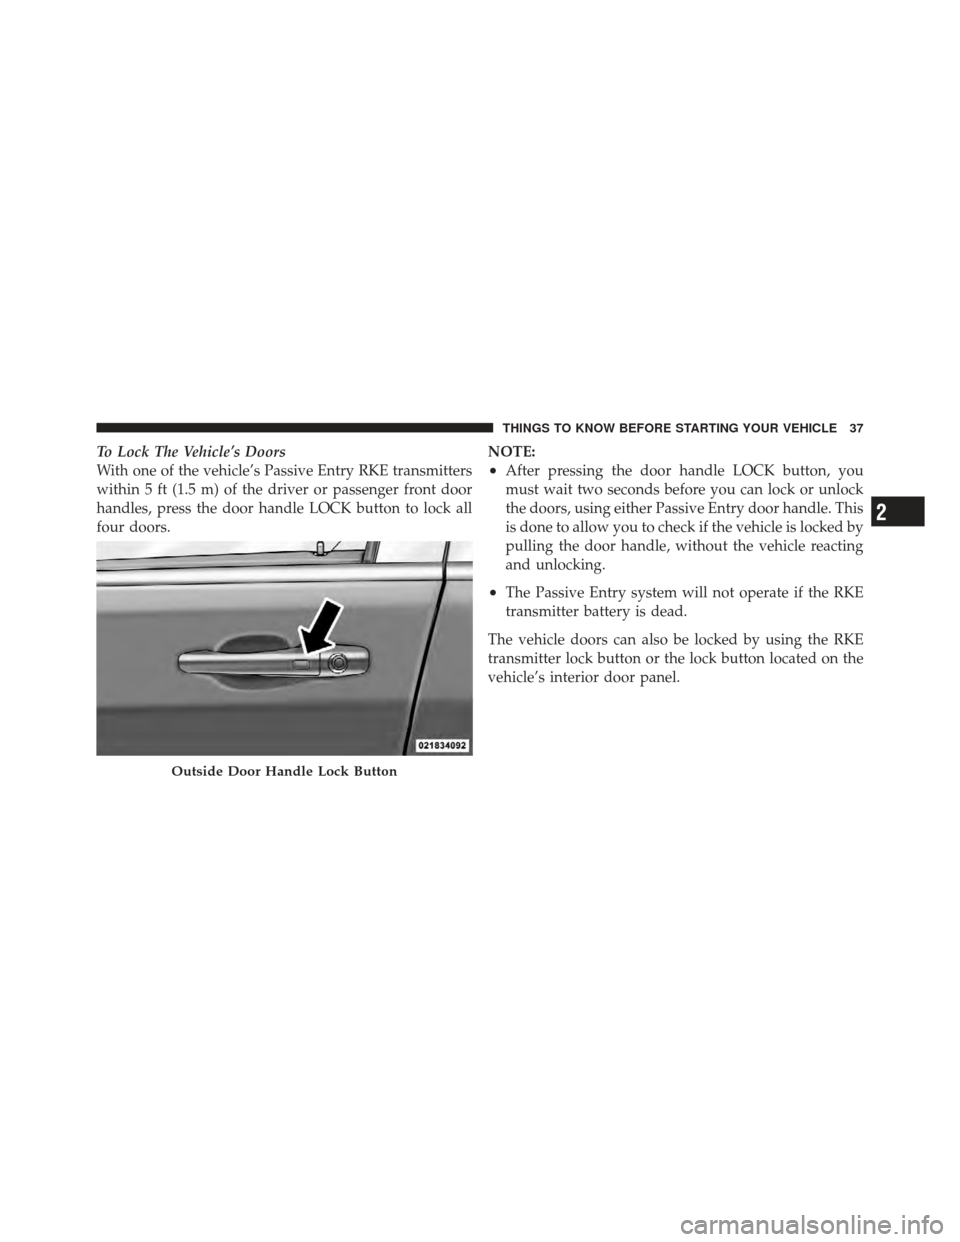
To Lock The Vehicle’s Doors
With one of the vehicle’s Passive Entry RKE transmitters
within 5 ft (1.5 m) of the driver or passenger front door
handles, press the door handle LOCK button to lock all
four doors.NOTE:
•After pressing the door handle LOCK button, you
must wait two seconds before you can lock or unlock
the doors, using either Passive Entry door handle. This
is done to allow you to check if the vehicle is locked by
pulling the door handle, without the vehicle reacting
and unlocking.
•The Passive Entry system will not operate if the RKE
transmitter battery is dead.
The vehicle doors can also be locked by using the RKE
transmitter lock button or the lock button located on the
vehicle’s interior door panel.
Outside Door Handle Lock Button
2
THINGS TO KNOW BEFORE STARTING YOUR VEHICLE 37
Page 42 of 557
Reset Auto Up
Should the Auto Up feature stop working, the window
probably needs to be reset. To reset Auto Up:
1. Pull the window switch up to close the window
completely and continue to hold the switch up for an
additional two seconds after the window is closed.
2. Push the window switch down firmly to the second
detent to open the window completely and continue to
hold the switch down for an additional two seconds after
the window is fully open.
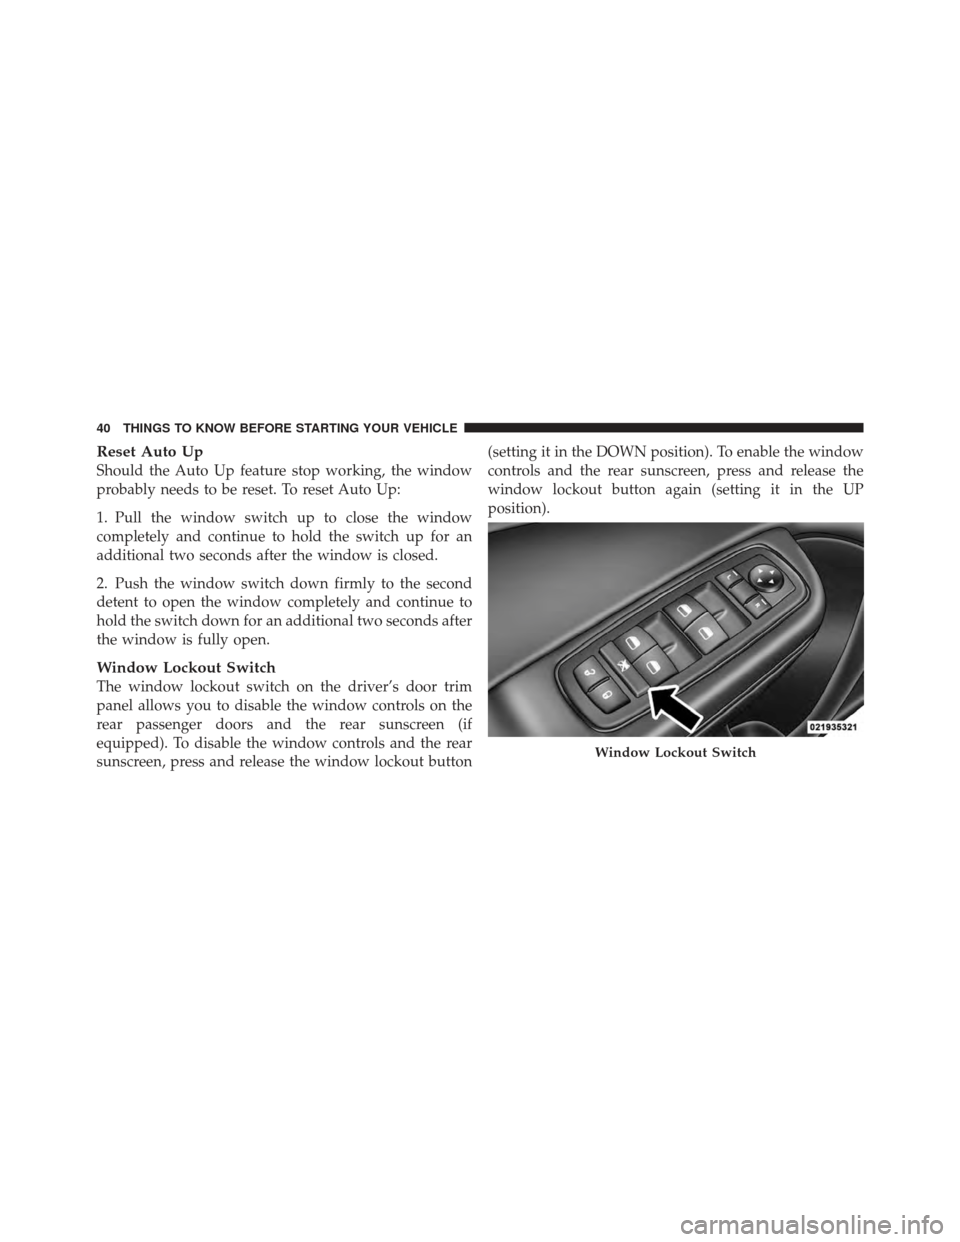
Window Lockout Switch
The window lockout switch on the driver’s door trim
panel allows you to disable the window controls on the
rear passenger doors and the rear sunscreen (if
equipped). To disable the window controls and the rear
sunscreen, press and release the window lockout button(setting it in the DOWN position). To enable the window
controls and the rear sunscreen, press and release the
window lockout button again (setting it in the UP
position).
Window Lockout Switch
40 THINGS TO KNOW BEFORE STARTING YOUR VEHICLE
Page 43 of 557
Wind Buffeting
Wind buffeting can be described as the perception of
pressure on the ears or a helicopter-type sound in the
ears. Your vehicle may exhibit wind buffeting with the
windows down, or the sunroof (if equipped) in certain
open or partially open positions. This is a normal occur-
rence and can be minimized. If the buffeting occurs with
the rear windows open, then open the front and rear
windows together to minimize the buffeting. If the
buffeting occurs with the sunroof open, then adjust the
sunroof opening to minimize the buffeting.
TRUNK LOCK AND RELEASE
The trunk lid can be released from inside the vehicle by
pressing the TRUNK RELEASE button located on the
instrument panel to the left of the steering wheel.
NOTE:The transmission must be in PARK before the
button will operate. The trunk lid can be released from
outside the vehicle by pressing the
TRUNK button on the Remote
Keyless Entry (RKE) transmitter
twice within five seconds or by
using the external release switch
located on the underside of the
decklid overhang. The release fea-
ture will function only when the
vehicle is in the unlock condition.
With the ignition in the ON/RUN position, the Trunk
Open symbol will display in the instrument cluster
indicating that the trunk is open. The odometer display
will reappear once the trunk is closed.
With the ignition in the OFF position, the Trunk Open
symbol will display until the trunk is closed.
Refer to “Keyless Enter-N-Go” in “Things To Know
Before Starting Your Vehicle” for more information on
trunk operation with the Passive Entry feature.
Trunk Release Button
2
THINGS TO KNOW BEFORE STARTING YOUR VEHICLE 41
Page 53 of 557
6. To release the belt, push the red button on the buckle.
The belt will automatically retract to its stowed position.
If necessary, slide the latch plate down the webbing to
allow the belt to retract fully.
WARNING!
A frayed or torn belt could rip apart in a collision and
leave you with no protection. Inspect the belt system
periodically, checking for cuts, frays, or loose parts.
Damaged parts must be replaced immediately. Do
not disassemble or modify the system. Seat belt
assemblies must be replaced after a collision if they
have been damaged (bent retractor, torn webbing,
etc.).
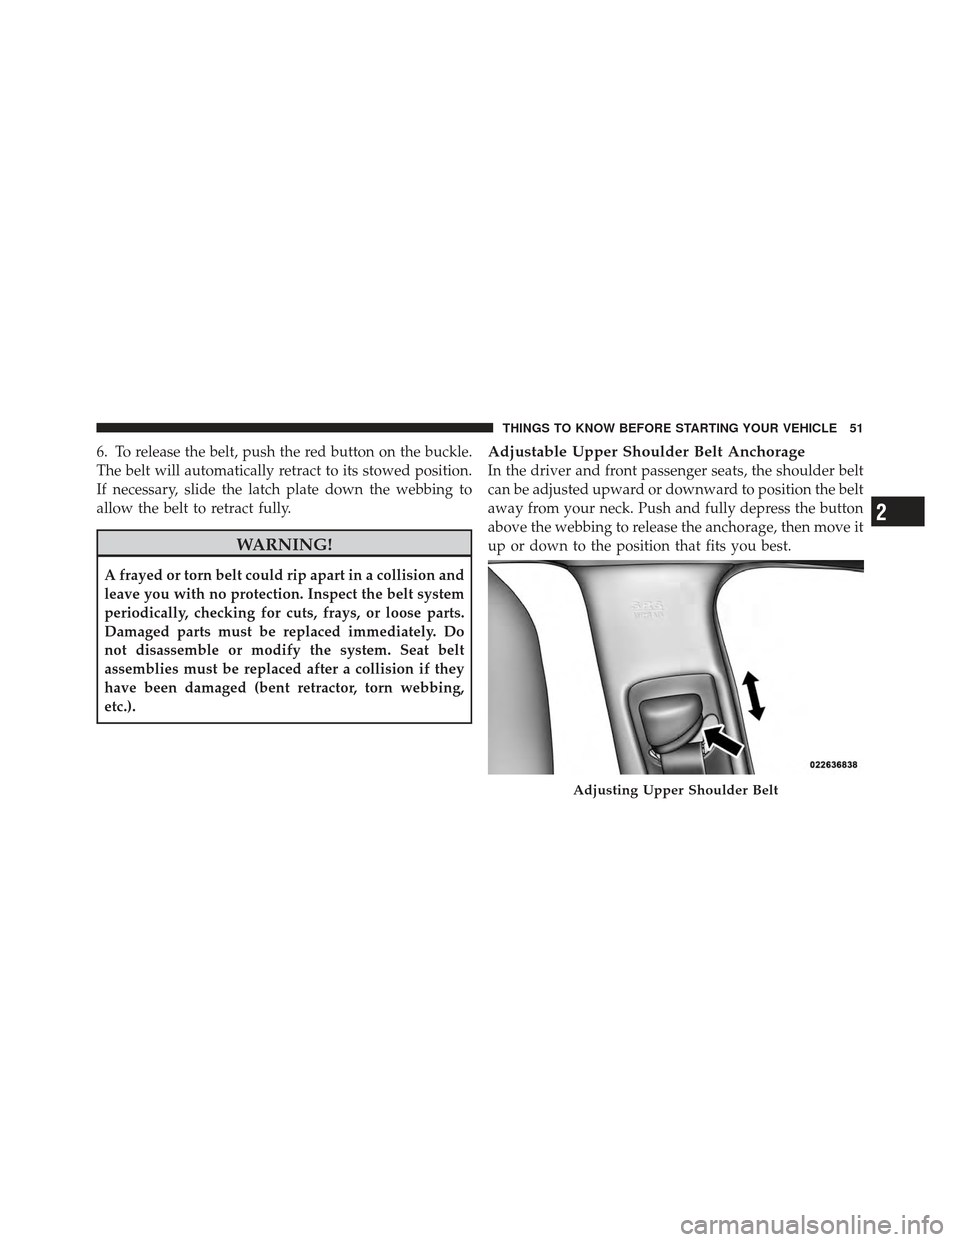
Adjustable Upper Shoulder Belt Anchorage
In the driver and front passenger seats, the shoulder belt
can be adjusted upward or downward to position the belt
away from your neck. Push and fully depress the button
above the webbing to release the anchorage, then move it
up or down to the position that fits you best.
Adjusting Upper Shoulder Belt
2
THINGS TO KNOW BEFORE STARTING YOUR VEHICLE 51
Page 69 of 557
•Turn on the interior lights, which remain on as long as
the battery has power, until the ignition key is re-
moved or the ignition switch is changed to OFF using
the Keyless Go Start/Stop button.
•Unlock the doors automatically.
In order to reset the Enhanced Accident Response System
functions after an event, the ignition switch must be
changed from IGN ON to IGN OFF.
If A Deployment Occurs
The Advanced Front Air Bags are designed to deflate
immediately after deployment.
NOTE: Front and/or side air bags will not deploy in all
collisions. This does not mean something is wrong with
the air bag system. If you do have a collision which deploys the air bags, any
or all of the following may occur:
•The nylon air bag material may sometimes cause
abrasions and/or skin reddening to the driver and
front passenger as the air bags deploy and unfold. The
abrasions are similar to friction rope burns or those
you might get sliding along a carpet or gymnasium
floor. They are not caused by contact with chemicals.
They are not permanent and normally heal quickly.
However, if you haven’t healed significantly within a
few days, or if you have any blistering, see your doctor
immediately.
•As the air bags deflate, you may see some smoke-like
particles. The particles are a normal by-product of the
process that generates the non-toxic gas used for air
bag inflation. These airborne particles may irritate the
skin, eyes, nose, or throat. If you have skin or eye
irritation, rinse the area with cool water. For nose or
2
THINGS TO KNOW BEFORE STARTING YOUR VEHICLE 67
Page 79 of 557
Installing The LATCH-Compatible Child Restraint
System
We urge you to follow the manufacturer’s directions
carefully when installing your child restraint. Not all
child restraint systems will be installed as described here.
Again, carefully follow the installation instructions that
are provided with the child restraint system.The rear seat lower anchorages are round bars
located at the rear of the seat cushion where it
meets the seatback and are located just below
the button with the anchorage symbol on the
rear seat, but are not visible. You will easily feel them if
you run your finger along the intersection of the seatback
and seat cushion surfaces. In addition, there are tether strap anchorages
behind each rear seating position located in the
panel between the rear seatback and the rear
window. These tether strap anchorages are
under a plastic cover with this symbol on it.
Many, but not all, restraint systems will be equipped with
separate straps on each side, with each having a hook or
connector for attachment to the lower anchorage and a
means of adjusting the tension in the strap. Forward-
facing toddler restraints and some rear-facing infant
restraints will also be equipped with a tether strap, a
hook for attachment to the tether strap anchorage and a
means of adjusting the tension of the strap.
2
THINGS TO KNOW BEFORE STARTING YOUR VEHICLE 77
Page 80 of 557
You will first loosen the child seat adjusters on the lower
straps and on the tether strap so that you can more easily
attach the hooks or connectors to the vehicle anchorages.
Next, attach the lower hooks or connectors over the top
of the seat cover material. Then, rotate the tether anchor-
age cover directly behind the seat where you are placing
the child restraint and attach the tether strap to the
anchorage, being careful to route the tether strap to
provide the most direct path between the anchor and the
child restraint. Finally, tighten all three straps as you
push the child restraint rearward and downward into the
seat, removing slack in the straps according to the child
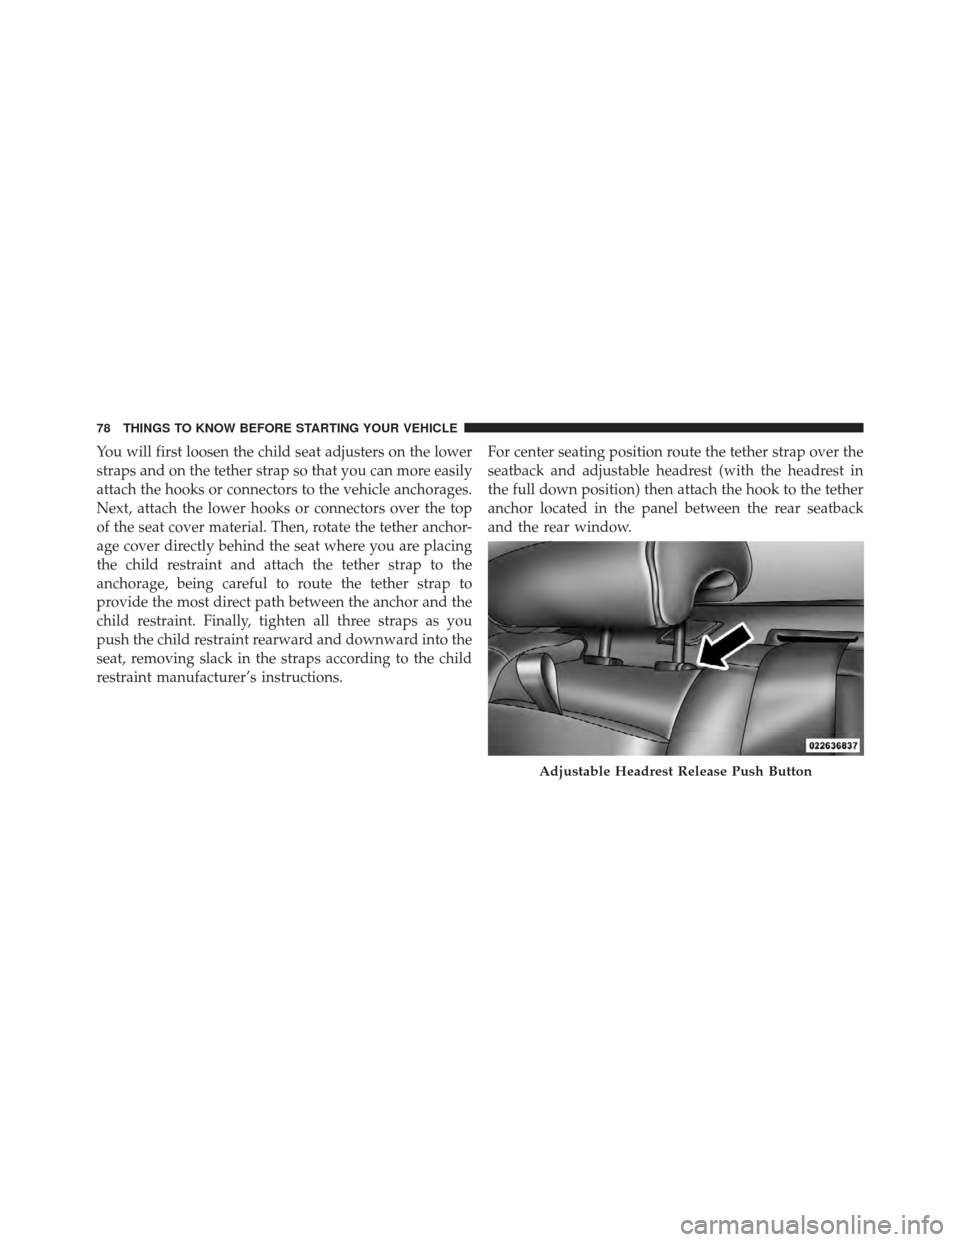
restraint manufacturer’s instructions.For center seating position route the tether strap over the
seatback and adjustable headrest (with the headrest in
the full down position) then attach the hook to the tether
anchor located in the panel between the rear seatback
and the rear window.
Adjustable Headrest Release Push Button
78 THINGS TO KNOW BEFORE STARTING YOUR VEHICLE
Page 99 of 557
Outside Mirrors
To receive maximum benefit, adjust the outside mirror(s)
to center on the adjacent lane of traffic and a slight
overlap of the view obtained from the inside mirror.
NOTE:The passenger side convex outside mirror will
give a much wider view to the rear, and especially of the
lane next to your vehicle.
WARNING!
Vehicles and other objects seen in the passenger side
convex mirror will look smaller and farther away
than they really are. Relying too much on your
passenger side convex mirror could cause you to
collide with another vehicle or other object. Use your
inside mirror when judging the size or distance of a
vehicle seen in the passenger side convex mirror.
Outside Mirrors Folding Feature — If Equipped
Some models have outside mirrors that are hinged. The
hinge allows the mirror to pivot forward and rearward to
resist damage. The hinge has three detent positions: full
forward, full rearward and normal.
Driver’s Automatic Dimming Mirror — If Equipped
The driver’s outside mirror will automatically adjust for
glare from vehicles behind you. This feature is controlled
by the inside automatic dimming mirror and can be
turned on or off by pressing the button at the base of the
inside mirror. The mirror will automatically adjust for
headlight glare when the inside mirror adjusts.
NOTE: This feature is also available on the passenger’s
side when equipped with turn signal and approach
lighting.
3
UNDERSTANDING THE FEATURES OF YOUR VEHICLE 97