oil CHRYSLER 300 SRT 2013 2.G Owner's Guide
[x] Cancel search | Manufacturer: CHRYSLER, Model Year: 2013, Model line: 300 SRT, Model: CHRYSLER 300 SRT 2013 2.GPages: 580, PDF Size: 4.26 MB
Page 505 of 580
Fluid And Filter Changes
Refer to the “Maintenance Schedule” for the proper
maintenance intervals.
In addition, change the fluid and filter if the transmission
is disassembled for any reason.
Rear Axle
For normal service, periodic fluid level checks are not
required. When the vehicle is serviced for other reasons the
exterior surfaces of the axle assembly should be inspected.
If gear oil leakage is suspected inspect the fluid level. Refer
to “Fluids, Lubricants, and Genuine Parts” in “Maintaining
Your Vehicle” for further information.
Fluid Level Check
Check the fluid level by removing the fill plug on the axle.
The fluid level should be at the bottom of the fill hole. Add
fluid, if necessary, to maintain the proper level. Refer to
“Fluids, Lubricants, and Genuine Parts” in “Maintaining
Your Vehicle” for further information.
Change Axle Fluid
Refer to the “Maintenance Schedule” for the proper
maintenance intervals.
7
MAINTAINING YOUR VEHICLE 503
Page 508 of 580
•If you carry special cargo such as chemicals, fertilizers,
de-icer salt, etc., be sure that such materials are well
packaged and sealed.
• If a lot of driving is done on gravel roads, consider
mud or stone shields behind each wheel.
• Use MOPAR® Touch Up Paint on scratches as soon as
possible. Your authorized dealer has touch up paint to
match the color of your vehicle.
Wheel And Wheel Trim Care
• All wheels and wheel trim, especially aluminum and
chrome plated wheels, should be cleaned regularly
with a mild soap and water to prevent corrosion.
• To remove heavy soil and/or excessive brake dust, use
MOPAR® Wheel Cleaner or equivalent or select a
non-abrasive, non-acidic cleaner.
CAUTION!
Do not use scouring pads, steel wool, a bristle brush,
or metal polishes. Do not use oven cleaner. These
products may damage the wheel’s protective finish.
Avoid automatic car washes that use acidic solutions
or harsh brushes that may damage the wheel’s pro-
tective finish. Only MOPAR® Wheel Cleaner or
equivalent is recommended.
NOTE: If your vehicle is equipped with Dark Vapor
Chrome wheels DO NOT USE wheel cleaners, abrasives
or polishing compounds. They will permanently damage
this finish and such damage is not covered by the New
Vehicle Limited Warranty. USE ONLY MILD SOAP AND
WATER WITH A SOFT CLOTH. Used on a regular basis
this is all that is required to maintain this finish.
506 MAINTAINING YOUR VEHICLE
Page 509 of 580
Stain Repel Fabric Cleaning Procedure – If
Equipped
Stain Repel seats may be cleaned in the following man-
ner:
•Remove as much of the stain as possible by blotting
with a clean, dry towel.
• Blot any remaining stain with a clean, damp towel.
• For tough stains, apply MOPAR® Total Clean, or a
mild soap solution to a clean, damp cloth and remove
stain. Use a fresh, damp towel to remove soap residue.
• For grease stains, apply MOPAR® Multi-Purpose
Cleaner to a clean, damp cloth and remove stain. Use
a fresh, damp towel to remove soap residue.
• Do not use any harsh solvents or any other form of
protectants on Stain Repel products.
Interior Care
Use MOPAR® Total Clean to clean fabric upholstery and
carpeting.
Use MOPAR® Total Clean to clean vinyl upholstery.
MOPAR® Total Clean is specifically recommended for
leather upholstery.
Your leather upholstery can be best preserved by regular
cleaning with a damp soft cloth. Small particles of dirt
can act as an abrasive and damage the leather upholstery
and should be removed promptly with a damp cloth.
Stubborn soils can be removed easily with a soft cloth
and MOPAR® Total Clean. Care should be taken to avoid
soaking your leather upholstery with any liquid. Please
do not use polishes, oils, cleaning fluids, solvents, deter-
gents, or ammonia-based cleaners to clean your leather
upholstery. Application of a leather conditioner is not
required to maintain the original condition.
7
MAINTAINING YOUR VEHICLE 507
Page 523 of 580
CAUTION!
Do not touch the new bulb with your fingers. Oil
contamination will severely shorten bulb life. If the
bulb comes in contact with an oily surface, clean the
bulb with rubbing alcohol.
Rear Backup Lamp And Turn Signal Lamps
1. Open the trunk.
2. Remove the trunk trim by removing the grocery hook(using a T-20 torque driver or similar tool), remove the
fastener, and pull back the weather strip.
3. Pull back the trunk liner to gain access to the tail lamp wing nuts.
4. Remove the three wing nuts from the back of the tail lamp assembly. 5. Pull the tail lamp assembly away from the vehicle
enough to access the electrical connector.
6. Push the electrical connector locking tab to the side.
7. Disconnect the electrical connector.
8. Continue removing lamp from vehicle in order to access the bulb(s).
9. Turn the appropriate bulb and socket assembly coun- terclockwise to remove it from the tail lamp assembly.
10. Disconnect the bulb from the socket assembly and install the replacement bulb.
11. Reinstall the bulb and socket assembly into the tail lamp assembly, and then turn it clockwise.
7
MAINTAINING YOUR VEHICLE 521
Page 525 of 580
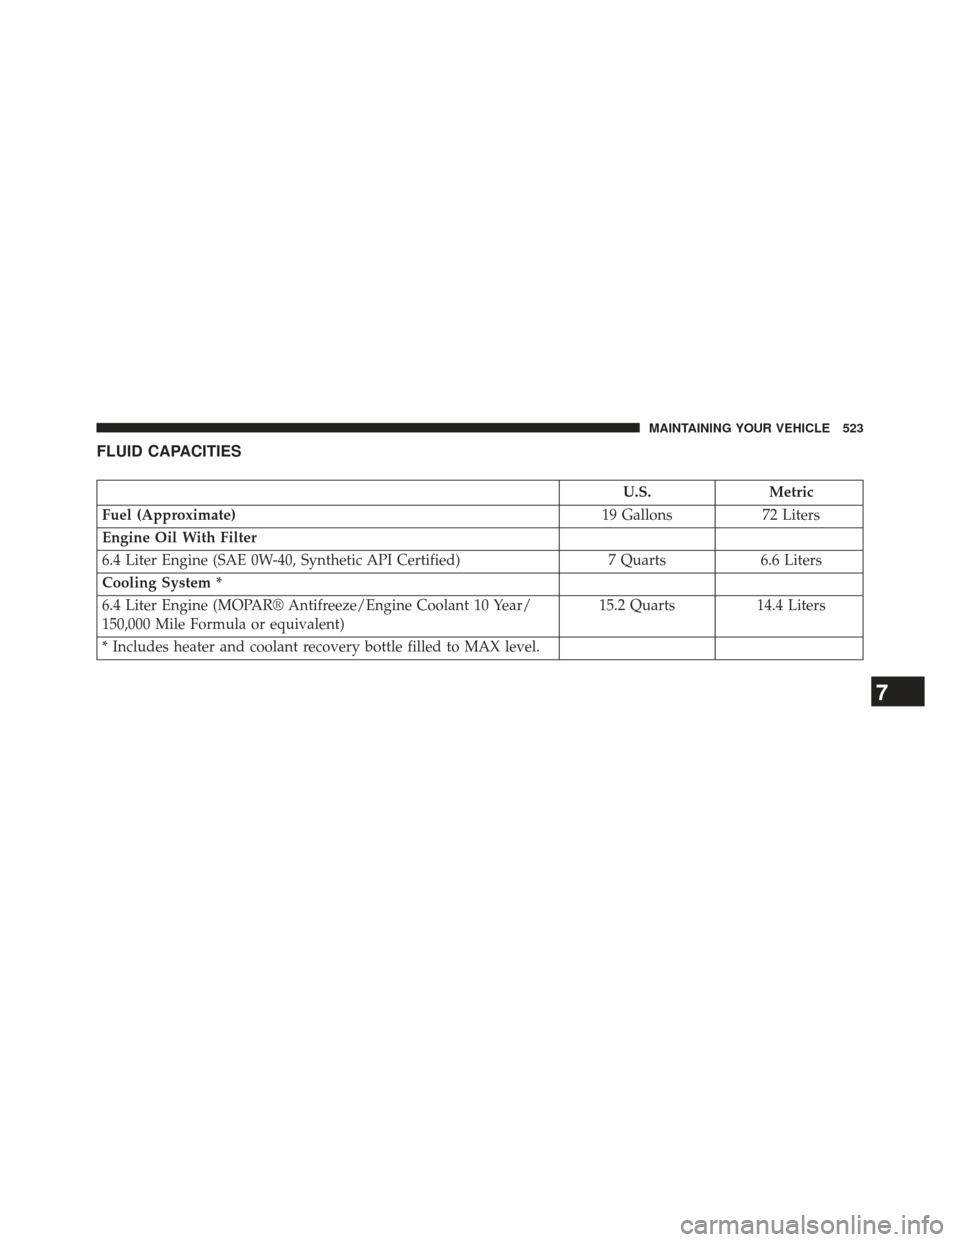
FLUID CAPACITIES
U.S.Metric
Fuel (Approximate) 19 Gallons72 Liters
Engine Oil With Filter
6.4 Liter Engine (SAE 0W-40, Synthetic API Certified) 7 Quarts6.6 Liters
Cooling System *
6.4 Liter Engine (MOPAR® Antifreeze/Engine Coolant 10 Year/
150,000 Mile Formula or equivalent) 15.2 Quarts
14.4 Liters
* Includes heater and coolant recovery bottle filled to MAX level.
7
MAINTAINING YOUR VEHICLE 523
Page 526 of 580
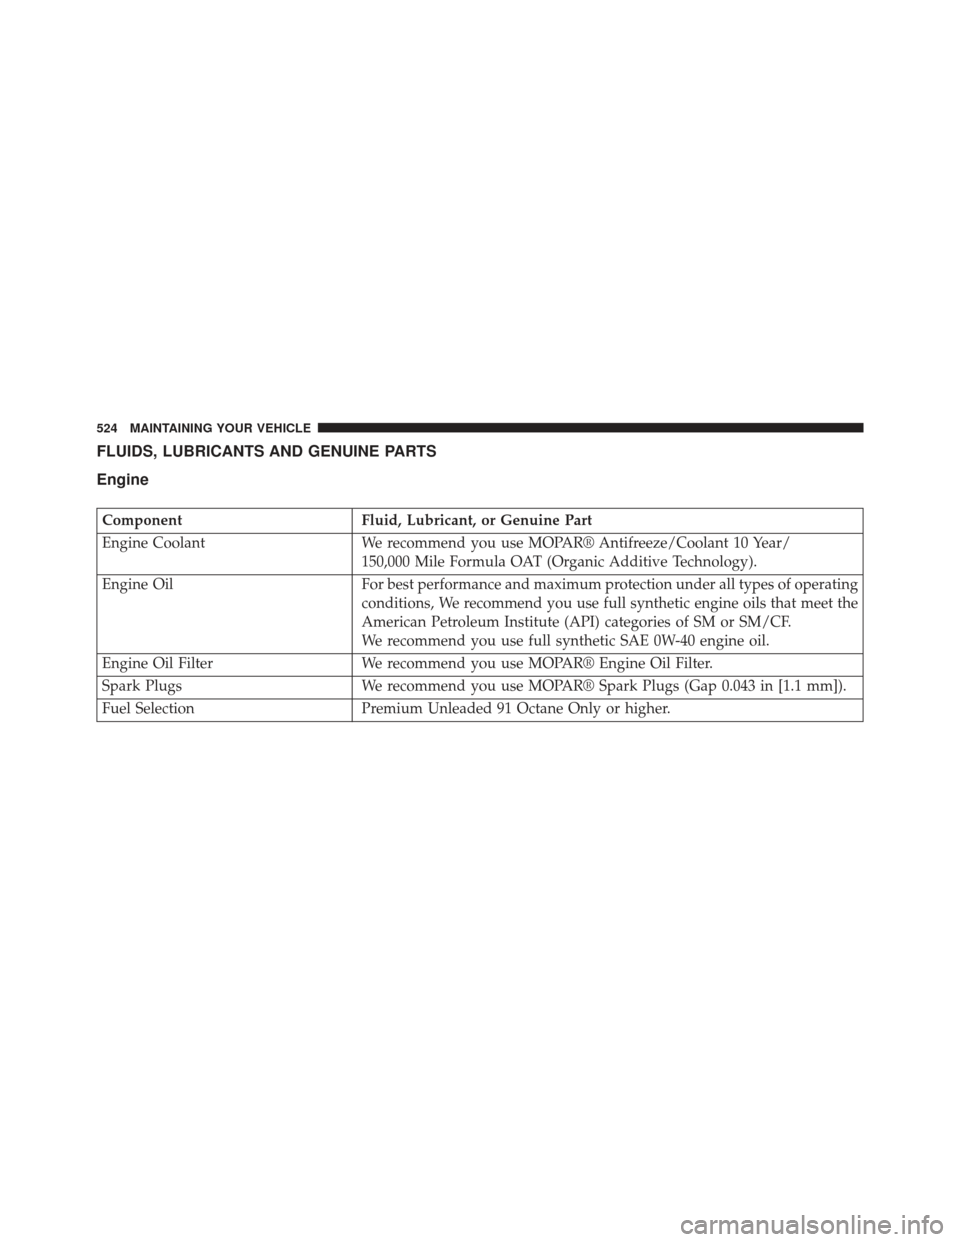
FLUIDS, LUBRICANTS AND GENUINE PARTS
Engine
ComponentFluid, Lubricant, or Genuine Part
Engine Coolant We recommend you use MOPAR® Antifreeze/Coolant 10 Year/
150,000 Mile Formula OAT (Organic Additive Technology).
Engine Oil For best performance and maximum protection under all types of operating
conditions, We recommend you use full synthetic engine oils that meet the
American Petroleum Institute (API) categories of SM or SM/CF.
We recommend you use full synthetic SAE 0W-40 engine oil.
Engine Oil Filter We recommend you use MOPAR® Engine Oil Filter.
Spark Plugs We recommend you use MOPAR® Spark Plugs (Gap 0.043 in [1.1 mm]).
Fuel Selection Premium Unleaded 91 Octane Only or higher.
524 MAINTAINING YOUR VEHICLE
Page 530 of 580
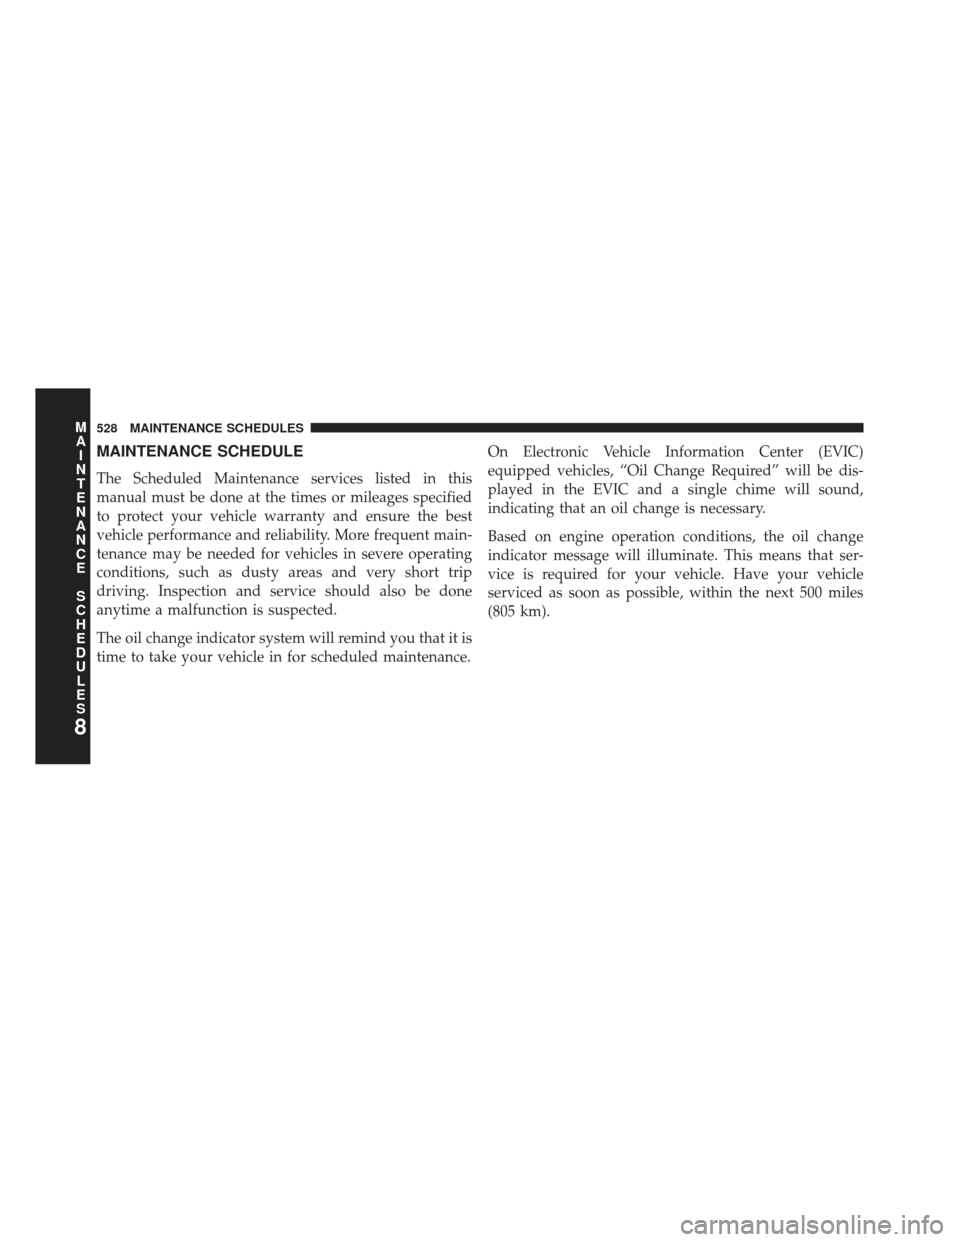
MAINTENANCE SCHEDULE
The Scheduled Maintenance services listed in this
manual must be done at the times or mileages specified
to protect your vehicle warranty and ensure the best
vehicle performance and reliability. More frequent main-
tenance may be needed for vehicles in severe operating
conditions, such as dusty areas and very short trip
driving. Inspection and service should also be done
anytime a malfunction is suspected.
The oil change indicator system will remind you that it is
time to take your vehicle in for scheduled maintenance.On Electronic Vehicle Information Center (EVIC)
equipped vehicles, “Oil Change Required” will be dis-
played in the EVIC and a single chime will sound,
indicating that an oil change is necessary.
Based on engine operation conditions, the oil change
indicator message will illuminate. This means that ser-
vice is required for your vehicle. Have your vehicle
serviced as soon as possible, within the next 500 miles
(805 km).
8
M
A I
N T
E
N
A
N
C E
S
C
H E
D
U L
E
S528 MAINTENANCE SCHEDULES
Page 531 of 580
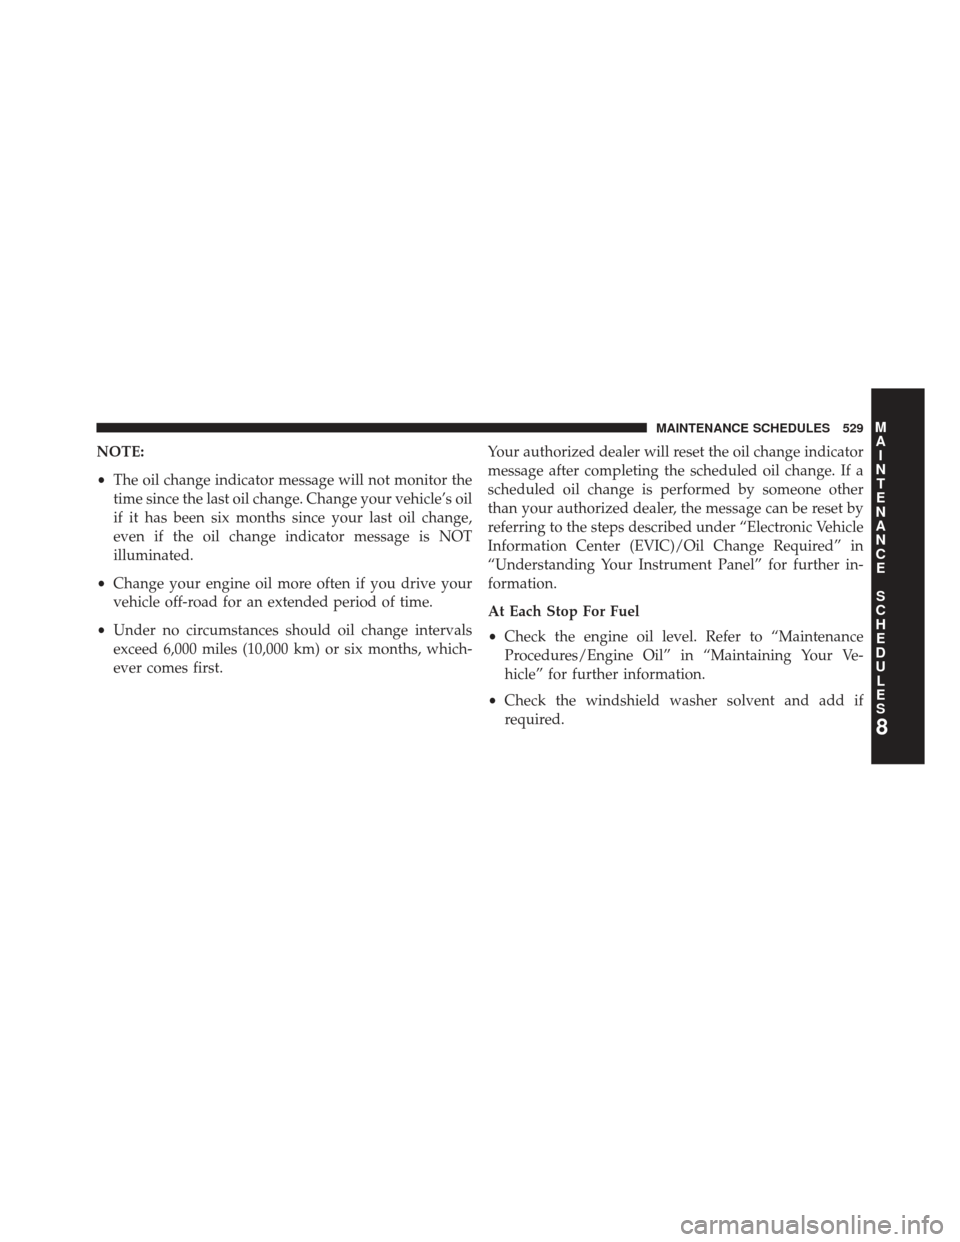
NOTE:
•The oil change indicator message will not monitor the
time since the last oil change. Change your vehicle’s oil
if it has been six months since your last oil change,
even if the oil change indicator message is NOT
illuminated.
• Change your engine oil more often if you drive your
vehicle off-road for an extended period of time.
• Under no circumstances should oil change intervals
exceed 6,000 miles (10,000 km) or six months, which-
ever comes first. Your authorized dealer will reset the oil change indicator
message after completing the scheduled oil change. If a
scheduled oil change is performed by someone other
than your authorized dealer, the message can be reset by
referring to the steps described under “Electronic Vehicle
Information Center (EVIC)/Oil Change Required” in
“Understanding Your Instrument Panel” for further in-
formation.
At Each Stop For Fuel
•
Check the engine oil level. Refer to “Maintenance
Procedures/Engine Oil” in “Maintaining Your Ve-
hicle” for further information.
• Check the windshield washer solvent and add if
required.
8
M A I
N T
E
N
A
N
C E
S
C
H E
D
U L
E
SMAINTENANCE SCHEDULES 529
Page 532 of 580
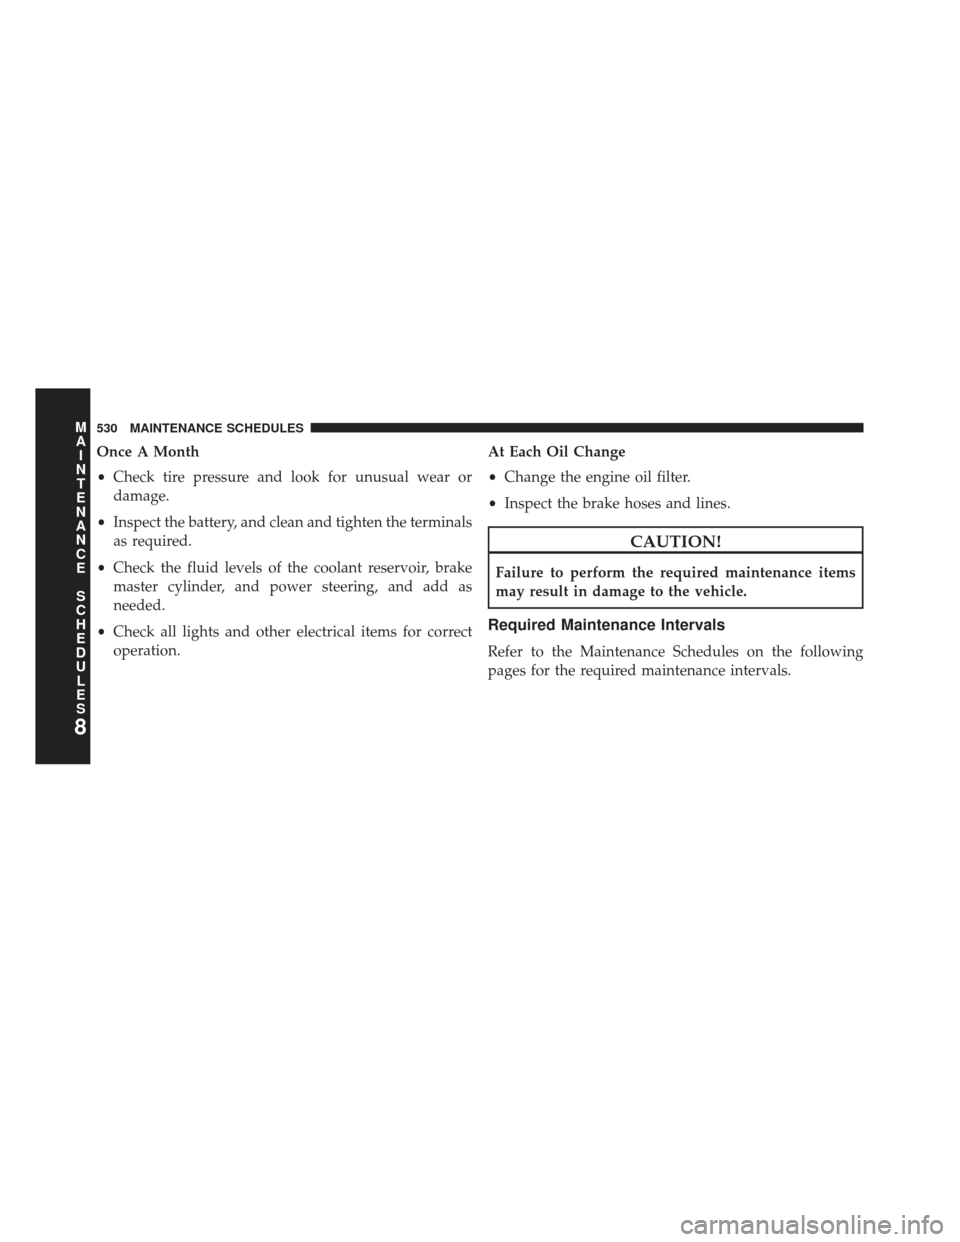
Once A Month
•Check tire pressure and look for unusual wear or
damage.
• Inspect the battery, and clean and tighten the terminals
as required.
• Check the fluid levels of the coolant reservoir, brake
master cylinder, and power steering, and add as
needed.
• Check all lights and other electrical items for correct
operation. At Each Oil Change
•
Change the engine oil filter.
• Inspect the brake hoses and lines.
CAUTION!
Failure to perform the required maintenance items
may result in damage to the vehicle.
Required Maintenance Intervals
Refer to the Maintenance Schedules on the following
pages for the required maintenance intervals.
8
M
A I
N T
E
N
A
N
C E
S
C
H E
D
U L
E
S530 MAINTENANCE SCHEDULES
Page 533 of 580
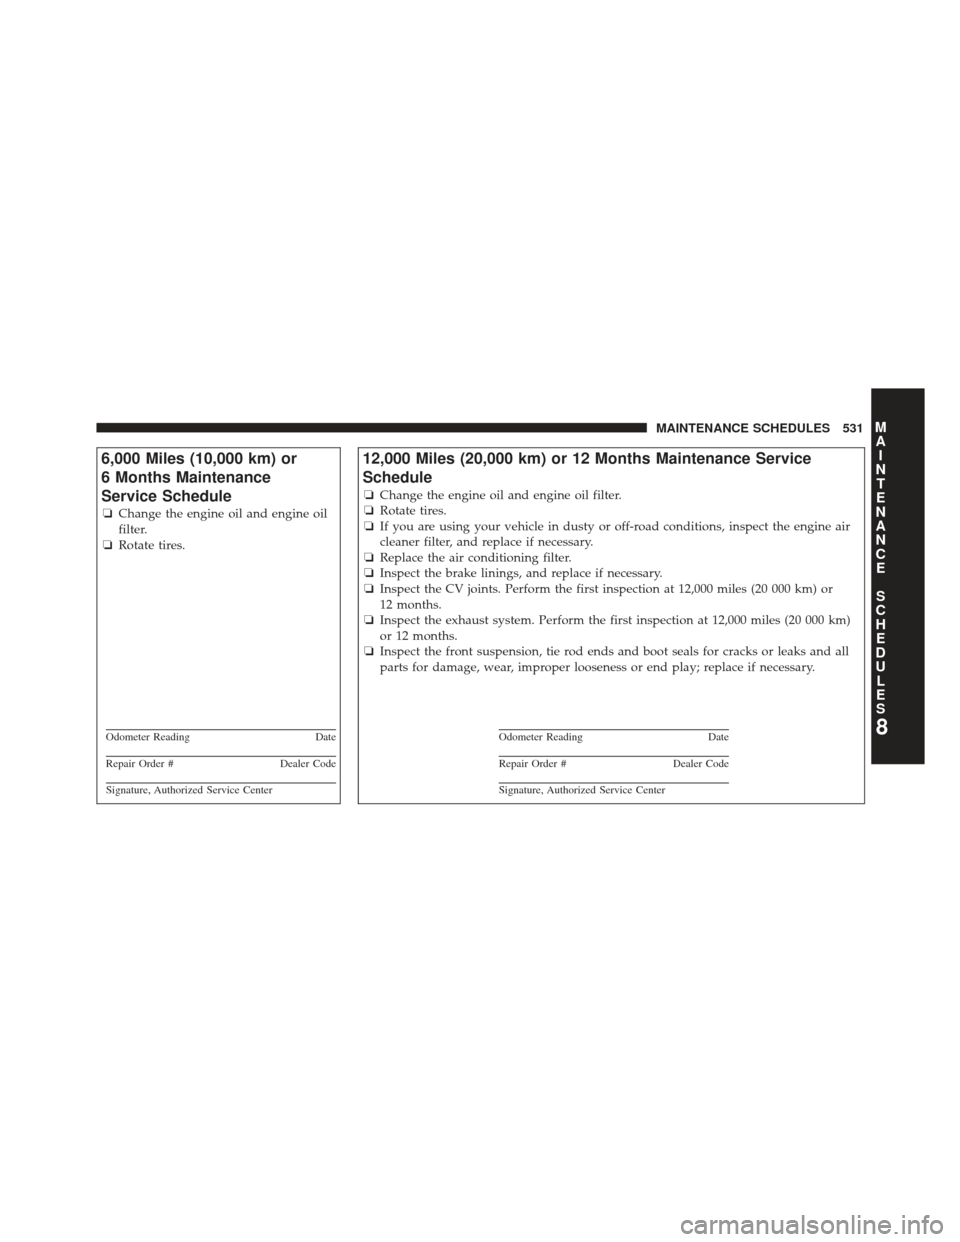
6,000 Miles (10,000 km) or
6 Months Maintenance
Service Schedule
❏Change the engine oil and engine oil
filter.
❏ Rotate tires.
Odometer Reading Date
Repair Order #Dealer Code
Signature, Authorized Service Center
12,000 Miles (20,000 km) or 12 Months Maintenance Service
Schedule
❏Change the engine oil and engine oil filter.
❏ Rotate tires.
❏ If you are using your vehicle in dusty or off-road conditions, inspect the engine air
cleaner filter, and replace if necessary.
❏ Replace the air conditioning filter.
❏ Inspect the brake linings, and replace if necessary.
❏ Inspect the CV joints. Perform the first inspection at 12,000 miles (20 000 km) or
12 months.
❏ Inspect the exhaust system. Perform the first inspection at 12,000 miles (20 000 km)
or 12 months.
❏ Inspect the front suspension, tie rod ends and boot seals for cracks or leaks and all
parts for damage, wear, improper looseness or end play; replace if necessary.
Odometer Reading Date
Repair Order #Dealer Code
Signature, Authorized Service Center
8
M
A I
N T
E
N
A
N
C E
S
C
H E
D
U L
E
SMAINTENANCE SCHEDULES 531