ECO mode CHRYSLER ASPEN 2008 2.G Owners Manual
[x] Cancel search | Manufacturer: CHRYSLER, Model Year: 2008, Model line: ASPEN, Model: CHRYSLER ASPEN 2008 2.GPages: 479, PDF Size: 4.3 MB
Page 11 of 479
NGeneral Information....................25
NProgramming Additional Transmitters........25
NBattery Replacement....................27
mRemote Starting System Ð If Equipped........28
mDoor Locks............................29
NManual Door Locks.....................29
NPower Door Locks.....................30
NChild Protection Door Lock...............33
mWindows.............................34
NPower Windows.......................34
NAuto Down..........................35
NAuto Up Feature With Anti-Pinch Protection
(Driver's And Front Passenger Door Only)....35NWindow Lockout Switch.................36
mLiftgate...............................37
NPower Liftgate Ð If Equipped.............38
mOccupant Restraints......................41
NLap/Shoulder Belts.....................42
NAdjustable Upper Shoulder Belt Anchorage....46
NSecond Row Center Seat Belt..............47
NAutomatic Locking Retractors (ALR) Mode ± If
Equipped............................47
NRear 60/40 Seat Third Row Center Three Point
Belt Ð If Equipped.....................48
NSeat Belt Pretensioners...................50
NEnhanced Driver Seat Belt Reminder System
(BeltAlertt) ..........................51
10 THINGS TO KNOW BEFORE STARTING YOUR VEHICLE
Page 20 of 479
To Set the Alarm:
The Security Alarm System will set when you use the
power door locks or use the Remote Keyless Entry
Transmitter to lock the doors. After all the doors are
closed and locked, the security light in the instrument
cluster will flash rapidly to signal that the system is
arming. The Security light in the instrument panel cluster
will flash rapidly for about 15 seconds to indicate that the
alarm is being set. After the alarm is set, the Security light
will flash at a slower rate to indicate that the system is
armed.
NOTE:If the Security light stays on continuously dur-
ing vehicle operation, have the system checked by your
authorized dealer.
To Disarm the System:
Use the Remote Keyless Entry Transmitter to unlock the
doors. If something has triggered the system in your
absence, the horn will sound three times when you
unlock the doors. Check the vehicle for tampering.
The Security Alarm System will also disarm if the vehicle
is started with a programmed Sentry Keyt. If an unpro-
grammed Sentry Keytis used to start a vehicle, the
engine will start and run for two seconds and then shut
down. After six unsuccessul attempts at starting the
engine, the system will shut down until the correct key is
used. To exit alarming mode, press the RKE UNLOCK
button or start the vehicle with a programmed Sentry
Keyt.
The Security Alarm System is designed to protect your
vehicle; however, you can create conditions where the
system will arm unexpectedly. If you remain in the
THINGS TO KNOW BEFORE STARTING YOUR VEHICLE 19
2
Page 25 of 479
²For vehicles not equipped with the EVIC, perform the
following procedure:
1. Press and hold the UNLOCK button on the key fob.
2. After holding the UNLOCK button for four seconds,
also press the LOCK button within six seconds.
3. Release both buttons at the same time.
4. Test the flash lights with LOCK feature while outside
of the vehicle, by pressing the LOCK button on the key
fob with the ignition in the OFF position and the key
removed.
NOTE:Pressing the LOCK button on the key fob while
you are inside the vehicle will activate the Security
Alarm. Opening a door with the Security Alarm activated
will cause the alarm to sound. Press the UNLOCK button
to deactivate the Security Alarm.5. If the desired programming was not achieved or to
reactivate this feature, repeat the above steps.
Using the Panic Alarm
To activate the PANIC mode, while the ignition is OFF,
press and release the PANIC button on the transmitter
once. When the PANIC mode is activated, the interior
lights will illuminate, the head lights and parking lights
will flash and the horn will sound.
To cancel the PANIC mode, press and release the PANIC
button on the transmitter a second time. PANIC mode
will automatically cancel after three minutes or if the
vehicle is started or exceeds 15 mph (24 km/h). During
the PANIC mode, the door locks and Remote Keyless
Entry systems will function normally. PANIC mode will
not disarm the Security Alarm System on vehicles so
equipped.
24 THINGS TO KNOW BEFORE STARTING YOUR VEHICLE
Page 27 of 479
2. Fasten your seat belt. Fastening the seat belt will
cancel any chiming that may confuse you during this
programming procedure.
3. Place the key into the ignition.
4. Turn the ignition to the ON position.Do not start the
engine.
5. Press and hold the UNLOCK button on the key fob.
6. After holding the UNLOCK button for four seconds,
also press the PANIC button within six seconds.
7. When a single chime is heard, release both buttons.
The chime is an indication that you have successfully
entered program mode. All key fobs that are to be
programmed must be done so within 60 seconds of when
the chime was heard.8. Using the key fob to be programmed, press and
release both the LOCK and UNLOCK buttons simulta-
neously.
9. A single chime will be heard.
10. Within four seconds of hearing the chime, press and
release the UNLOCK button on the key fob.
11. A single chime will be heard.
12. Repeat steps 8 through 10 to program up to six
additional key fobs.
13. Turn the ignition to the OFF position.
14. Your vehicle will remain in program mode up to 60
seconds from when the original chime was heard. After
60 seconds, all programmed key fobs function normally.
NOTE:If you do not have a programmed transmitter,
contact your authorized dealer for details.
26 THINGS TO KNOW BEFORE STARTING YOUR VEHICLE
Page 32 of 479
Automatic Door Locks
If this feature is enabled, your door locks will lock
automatically when the vehicle's speed exceeds 15 mph
(24 km/h).
Automatic Door Lock Programming
This feature is enabled when your vehicle is shipped
from the assembly plant and can be disabled by follow-
ing these procedures:
²For vehicles equipped with the Electronic Vehicle
Information Center (EVIC), refer to ªPersonal Settings
(Customer Programmable Features)º under ªOver-
head Console with Electronic Vehicle Information
Center (EVIC) ± If Equippedº in Section 3.
²For vehicles not equipped with the EVIC:
1. Enter your vehicle and close all doors.2. Fasten your seat belt. Fastening the seat belt will
cancel any chiming that may confuse you during this
programming procedure.
3. Place the key into the ignition.
4. Within 10 seconds, cycle the key from the LOCK
position to the ON position a minimum of four times,
ending in the LOCK position(do not start the engine).
5. Within 30 seconds, press the driver's door lock switch
in the LOCK direction.
6. A single chime will be heard to indicate the feature has
been disabled.
7. To reactivate this feature, repeat the above steps.
8. If a chime is not heard, the program mode was
canceled before the feature could be disabled. If neces-
sary, repeat the above procedure.
THINGS TO KNOW BEFORE STARTING YOUR VEHICLE 31
2
Page 48 of 479
As a guide, if you are shorter than average you will
prefer a lower position, and if you are taller than average
you'll prefer a higher position. When you release the
anchorage, try to move it up or down to make sure that
it is locked in the desired position. Pull the seatback
forward to ensure that it is locked in the upright position.
WARNING!
A 20% seatback that is not fully latched in the
upright position will not protect you properly.
Second Row Center Seat Belt
The center seating position in the second row has a seat
belt assembly that can be converted from the normal
emergency locking mode to the automatic locking mode.
The seat belt should only be used in the automatic
locking mode when a child seat is installed at this seating
location.When sitting in this seating location, ensure the seatback
is fully engaged with the seatback latch by pushing
rearward on the center seatback until you hear a click
that signals latch engagement.
Automatic Locking Retractors (ALR) Mode ± If
Equipped
In this mode, the shoulder belt is automatically pre-
locked. The belt will still retract to remove any slack in
the shoulder belt. The automatic locking mode is avail-
able on all passenger seating positions with a combina-
tion lap/shoulder belt.
When To Use The Automatic Locking Mode
Use the automatic locking mode any time a child safety
seat is installed in a passenger seating position. Children
12 years old and under should be properly restrained in
the rear seat whenever possible.
THINGS TO KNOW BEFORE STARTING YOUR VEHICLE 47
2
Page 53 of 479

or START position. DaimlerChrysler does not recom-
mend deactivating the Enhanced Warning System
(BeltAlertt).
1. Turn the ignition switch to the OFF position and
buckle the driver's seat belt.DO NOTstart the engine or
press the TRIP RESET button.
2. Turn the ignition switch to the ON position and wait
for the seat belt Warning Light to turn off. If during this
time, the seat belt becomes unbuckled or the engine is
cranked or started, programming will be cancelled.
3. Unbuckle and then re-buckle the driver's seat belt
three times within 10 seconds, ending with the seat belt
buckled. A chime will sound immediately (once the
feature has toggled). If during this time the ignition
switch is turned out of the ON position or the timer
expires, programming mode will be cancelled.4. Programming mode will be cancelled after the feature
has toggled with the seat belt still buckled or if the
ignition switch is turned to the LOCK position or 10
seconds after the feature has toggled.
The Enhanced Warning System (BeltAlertt) can be reac-
tivated by repeating this procedure.
NOTE:Although the Enhanced Warning System
(BeltAlertt) has been deactivated, the Seat Belt Warning
Light will continue to illuminate while the driver's seat
belt remains unbuckled.
Seat Belts and Pregnant Women
We recommend that pregnant women use seat belts
throughout their pregnancies. Keeping the mother safe is
the best way to keep the baby safe.
Pregnant women should wear the lap part of the belt
across the thighs and as snug against the hips as possible.
52 THINGS TO KNOW BEFORE STARTING YOUR VEHICLE
Page 60 of 479
²TheSide Impact SRS Window Bagsare designed to
activate only in certain side collisions or in a roll over
event. When the ORC (with side impact option) de-
tects a collision or roll over requiring the window bags
to inflate, it signals the inflators on the crash side of the
vehicle. Both window bags will inflate in a roll over
event. A quantity of nontoxic gas is generated to inflate
the window bag. The inflating window bag pushes the
outside edge of the headliner out of the way and
covers the window. The airbag inflates in about 30
milliseconds (about one quarter of the time it takes to
blink your eyes) with enough force to injure you if you
are not belted and seated properly, or if items are
positioned in the area where the window bag inflates.
This especially applies to children. The window bag is
only about 3-1/2 in (9 cm) thick when it is inflated.NOTE:At no time should any Supplemental Restraint
System (SRS) component or SRS-related component or
fastener be modified or replaced with any part except
those which are approved by DaimlerChrysler/Mopart.
²TheKnee Impact Bolstershelp protect the knees of
the driver and the front passenger, and position every-
one for the best interaction with the front airbag.
If A Deployment Occurs
The airbag system is designed to deploy the airbags
when the impact sensors detect a moderate-to-severe
frontal collision, to help restrain the driver and front
passenger, and then immediately deflate.
NOTE:A frontal collision that is not severe enough to
need airbag protection will not activate the system. This
does not mean something is wrong with the airbag
system.
THINGS TO KNOW BEFORE STARTING YOUR VEHICLE 59
2
Page 68 of 479
Here are some tips for getting the most out of your child
restraint:
²Before buying any restraint system, make sure that it
has a label certifying that it meets all applicable Safety
Standards. The manufacturer recommends that you
try a child restraint in the vehicle seats where you will
use it before you buy it.
²The restraint must be appropriate for your child's
weight and height. Check the label on the restraint for
weight and height limits.
²Carefully follow the instructions that come with the
restraint. If you install the restraint improperly, it may
not work when you need it.
²The second row outside seating positions and all third
row seats have cinching latch plates. The second row
center position has an Automatic Locking Retractor.
These are designed to keep the lap portion tightaround the child restraint so that it is not necessary to
use a locking clip. If the seat belt has a cinching latch
plate, pulling up on the shoulder portion of the
lap/shoulder belt will tighten the belt. The cinching
latch plate will keep the belt tight; however, any seat
belt system will loosen with time, so check the belt
occasionally and pull it tight if necessary. If the seat
belt has an Automatic Locking Retractor, it will have a
distinctive label. Pull the belt from the retractor until
there is enough to allow you to pass through the child
restraint and slide the latch plate into the buckle. Then,
pull the belt until it is completely extended from the
retractor. Allow the belt to return to the retractor,
pulling on the excess webbing to tighten the lap
portion about the child restraint. Refer to9Automatic
Locking Mode9in this section.
²Buckle the child into the restraint exactly as the
manufacturer's instructions tell you.
THINGS TO KNOW BEFORE STARTING YOUR VEHICLE 67
2
Page 73 of 479
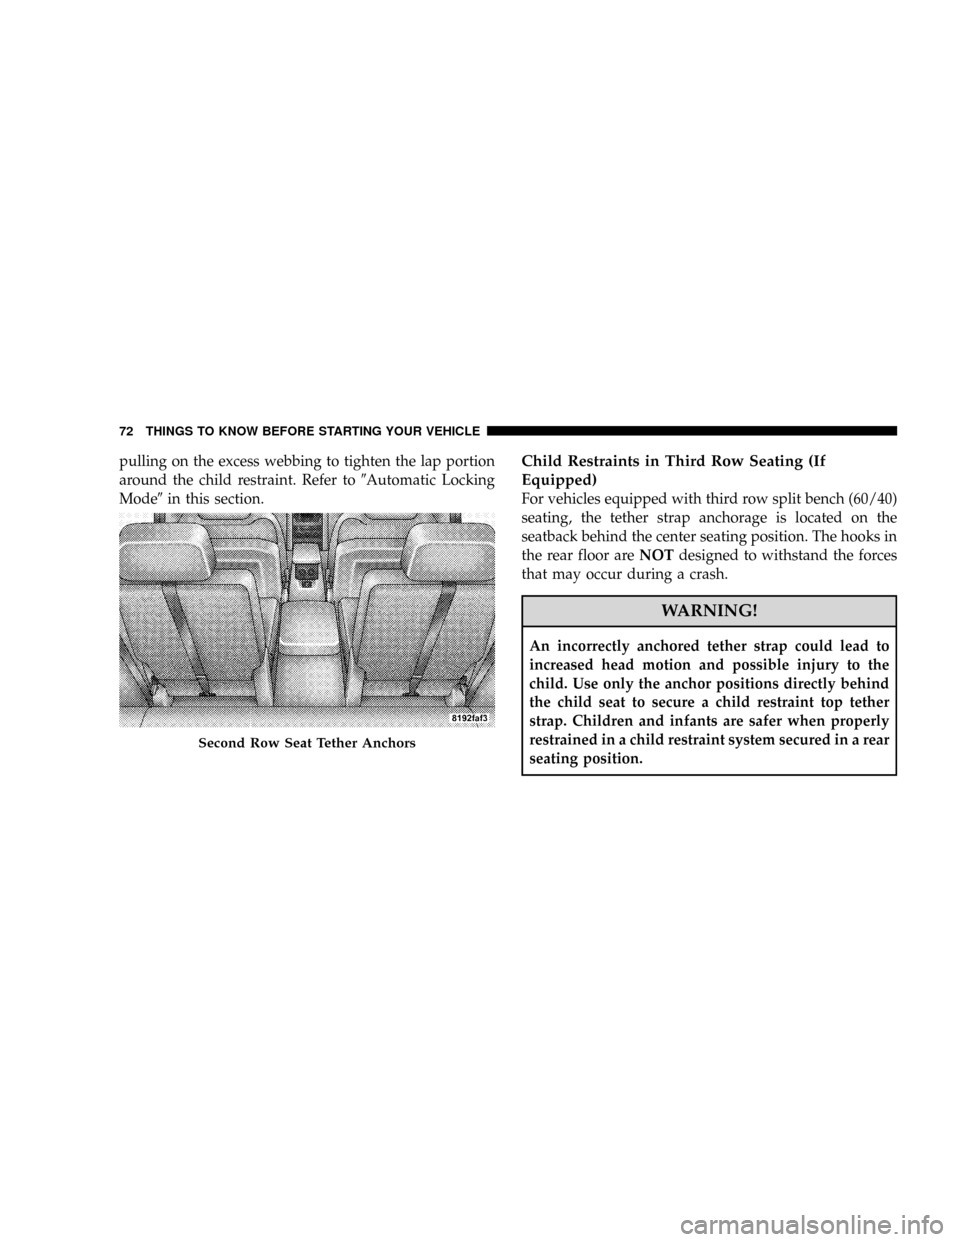
pulling on the excess webbing to tighten the lap portion
around the child restraint. Refer to9Automatic Locking
Mode9in this section.Child Restraints in Third Row Seating (If
Equipped)
For vehicles equipped with third row split bench (60/40)
seating, the tether strap anchorage is located on the
seatback behind the center seating position. The hooks in
the rear floor areNOTdesigned to withstand the forces
that may occur during a crash.
WARNING!
An incorrectly anchored tether strap could lead to
increased head motion and possible injury to the
child. Use only the anchor positions directly behind
the child seat to secure a child restraint top tether
strap. Children and infants are safer when properly
restrained in a child restraint system secured in a rear
seating position.
Second Row Seat Tether Anchors
72 THINGS TO KNOW BEFORE STARTING YOUR VEHICLE