CHRYSLER ASPEN 2009 2.G Owners Manual
Manufacturer: CHRYSLER, Model Year: 2009, Model line: ASPEN, Model: CHRYSLER ASPEN 2009 2.GPages: 481, PDF Size: 9.28 MB
Page 261 of 481
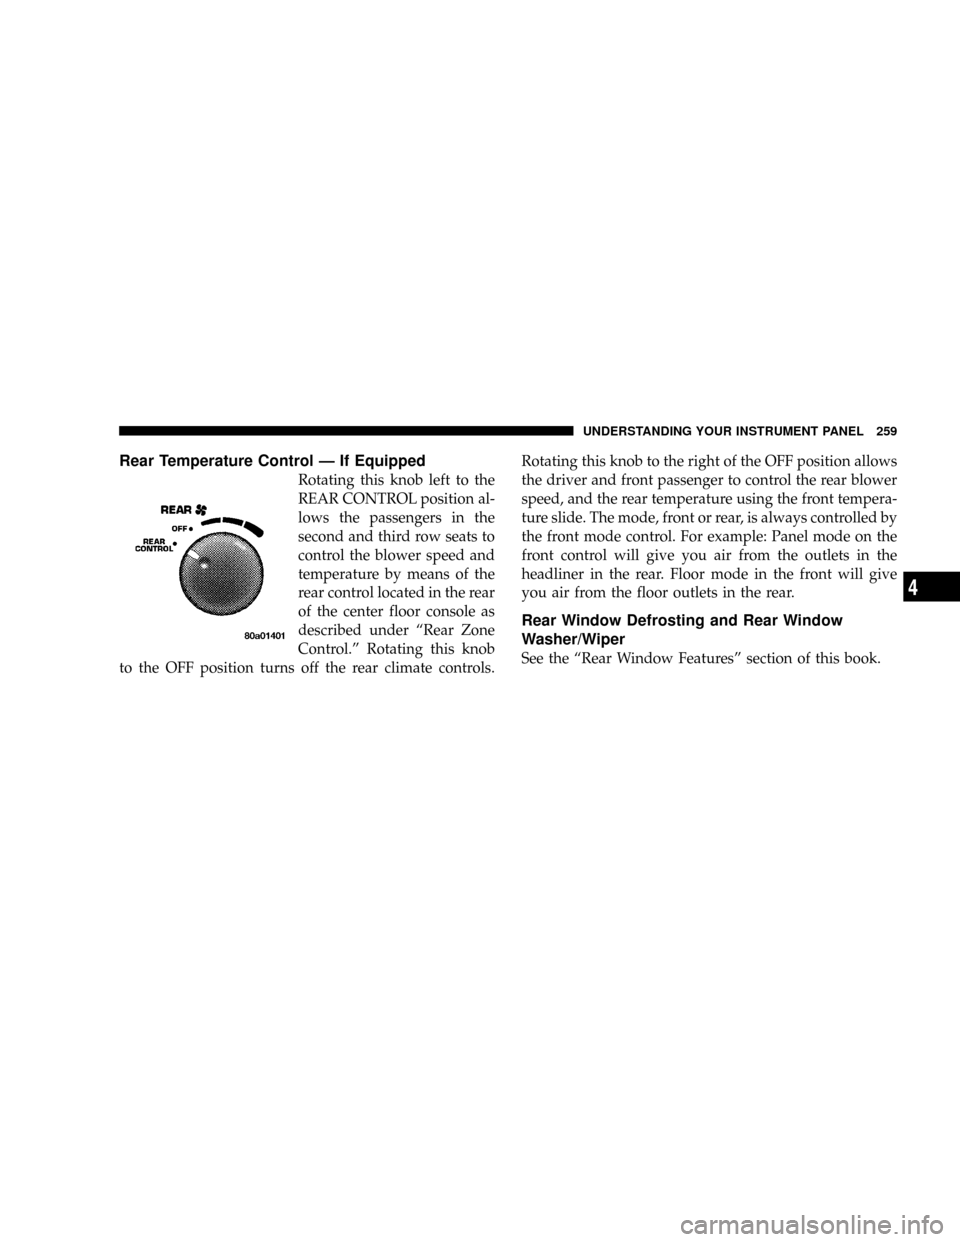
Rear Temperature Control Ð If Equipped
Rotating this knob left to the
REAR CONTROL position al-
lows the passengers in the
second and third row seats to
control the blower speed and
temperature by means of the
rear control located in the rear
of the center floor console as
described under ªRear Zone
Control.º Rotating this knob
to the OFF position turns off the rear climate controls.Rotating this knob to the right of the OFF position allows
the driver and front passenger to control the rear blower
speed, and the rear temperature using the front tempera-
ture slide. The mode, front or rear, is always controlled by
the front mode control. For example: Panel mode on the
front control will give you air from the outlets in the
headliner in the rear. Floor mode in the front will give
you air from the floor outlets in the rear.
Rear Window Defrosting and Rear Window
Washer/Wiper
See the ªRear Window Featuresº section of this book.
UNDERSTANDING YOUR INSTRUMENT PANEL 259
4
Page 262 of 481

Automatic Temperature Control (ATC) Ð If Equipped
The control can be turned on by pressing the Power knob.
When the control is turned on, it will be in the last mode
prior to being turned off. Pressing the Power knob again
will turn off the control. The control can also be turned on
by pressing any button and it will display the corre-
sponding operation mode for that button.
Automatic Control
The ATC system can maintain a steady comfort level in
various weather conditions with a simple operation:
²Select your desired temperature setting by pressing
the + or - side of the Temp rocker switches. A digital
temperature setting for driver and passenger will be
displayed. The ATC system uses an infrared sensor
located in the overhead console to measure the tem-
perature of the driver and passengers. Based on the
sensor input, the system will automatically control
comfort by varying the temperature, fan speed, and
mode. This maintains a comfortable temperature, even
under changing conditions. It is important that objects
are not blocking the infrared sensor. It is also impor-
tant that objects are not used that may scratch or
damage it in any way.
Automatic Temperature Control
260 UNDERSTANDING YOUR INSTRUMENT PANEL
Page 263 of 481
Level Of Automatic Control
72ÉF (22ÉC) is the recommended setting for maximum
comfort for the average person, however, this may vary.
NOTE:The temperature setting can be adjusted at any
time without affecting automatic control operation. It is
not necessary to move the temperature setting for cold or
hot vehicles. The system automatically adjusts the tem-
perature, mode and fan speed to provide comfort as
quickly as possible.
NOTE:In cold weather, the fan will not turn on in Auto
mode until the engine coolant has warmed up suffi-
ciently. This is indicated by the ªWARM UP DELAYº
message on the display.
NOTE:The temperature can be displayed in U.S. or
Metric by selecting the U.S./METRIC Customer-
Programmable feature. Refer to9Overhead ConsoleCustomer-Programmable Features9in Section 3. The
mode will also be shown in the display and will change
as required during automatic operation.
NOTE:The system can be put into recirculate mode
without affecting ATC operation. This will prevent out-
side air from entering the vehicle. Use this mode to
temporarily block out any outside odors, smoke, or dust.
Manual Control (ATC)
You may also choose to customize your comfort by
selecting the fan speed and mode manually. Turning the
fan speed knob or any mode button places the system
into manual operation.
While in manual operation there are six fan speeds
available and the choice of any mode. The airflow
temperature is adjusted automatically to maintain the
desired comfort level. You can adjust the temperature by
pressing the + or - Temp rocker switches.
UNDERSTANDING YOUR INSTRUMENT PANEL 261
4
Page 264 of 481
FAN Control
Use this knob to regulate the amount of air delivered
through the system in any mode you select. Rotation
of the knob to increase (clockwise) or decrease (counter-
clockwise) fan speed.
Air Conditioning Operation
Press this button to enable the air conditioning
system. Compressor operation is automatic when
you press the AUTO button and no snowflake is
shown. A snowflake indicates that the A/C system is
enabled. The snowflake will not be displayed in AUTO
mode even though the A/C system is enabled.
The compressor may operate at any temperature above
32ÉF (0ÉC).
NOTE:The compressor will not engage until the engine
has been running for several seconds. Slight changes inengine speed or power may be noticed when the com-
pressor cycles. This is a normal occurrence since the
compressor will cycle on and off to maintain comfort and
improve fuel economy.
Recirculate Button
Press this button to recirculate the air inside the
vehicle. Outside air is prevented from entering
the vehicle. Use this mode to temporarily block
out any outside odors, smoke, dust or when
rapid cooling of the interior is required.
Manual control of recirculation is possible only in Panel,
Floor, and Bi-Level modes. It will not operate in Mix, or
Defrost modes. The recirculation symbol will flash three
times indicating recirculation is not available in these
modes.
262 UNDERSTANDING YOUR INSTRUMENT PANEL
Page 265 of 481
NOTE:If the interior of the windows begin to fog, press
the Recirculate button to return to outside air. Some
conditions will cause captured interior air to fog win-
dows when in recirculate mode.
Panel
Air flows through the outlets located in the instru-
ment panel. These outlets can be adjusted to direct
the airflow.
Floor (Heat)
Air flows primarily through the floor outlets lo-
cated under the instrument panel. A small amount
of air is directed through the defrost and side window
demister outlets.
Mix
Outside air flows in equal proportions through the
floor and defroster outlets.
Bi-Level
Air flows through the outlets located in the instru-
ment panel and those located on the floor.
NOTE:There is a difference in temperature between the
upper and lower outlets for added comfort. The warmer
air goes to the floor outlets. This feature gives improved
comfort during sunny but cool conditions.
Defrost
Outside air is directed to the windshield through
the defroster outlet located at the base of the
windshield and side window demist outlets.
NOTE:The air conditioning compressor operates in
both Mix and Defrost or a blend of these modes, even if
the A/C snowflake button has not been pressed. This
dehumidifies the air to help dry the windshield.
UNDERSTANDING YOUR INSTRUMENT PANEL 263
4
Page 266 of 481
Rear Temperature Control (ATC)
The REAR button cycles through the following modes:
Rear Control From Front
This allows the driver or passenger to control the rear
blower speeds rotating the Power/Fan knob and the rear
temperature using the PASS/REAR Temp +/- rocker
switch. While in this mode, pressing the POWER/FAN
knob will turn the rear system off. Pressing the Power/
Fan knob will turn the rear system back on.
NOTE:The display will show a9REAR9fan speed graph
and a9REAR9digital temp setting.
CONTROL IN REAR
This allows the passengers in the second row seats to
control the blower speed and temperature by means of the
rear control located in the rear of the center floor console as
described under the9Rear Zone Climate Control.9
NOTE:The front display will show ªCONTROL IN
REAR.º
REAR OFF
This turns the rear system off. The control will return to
the front system display after approximately five seconds
if no buttons are pushed while in one of the rear system
displays. You may also return to the front system display
sooner by pushing any button except the Power/Fan
knob, the REAR button, or the driver/passenger Temp
rocker buttons.
NOTE:The display will show ªREAR OFF.º
REAR AUTO
This mode places the rear system in automatic tempera-
ture control. Rear temperature can be set as desired (72ÉF
[22ÉC] recommended for average person) and will be
displayed digitally on the front control when in rear
mode.
Rear Window Defrosting and Rear Window
Washer/Wiper
Refer to ªRear Window Featuresº in Section 4.
264 UNDERSTANDING YOUR INSTRUMENT PANEL
Page 267 of 481
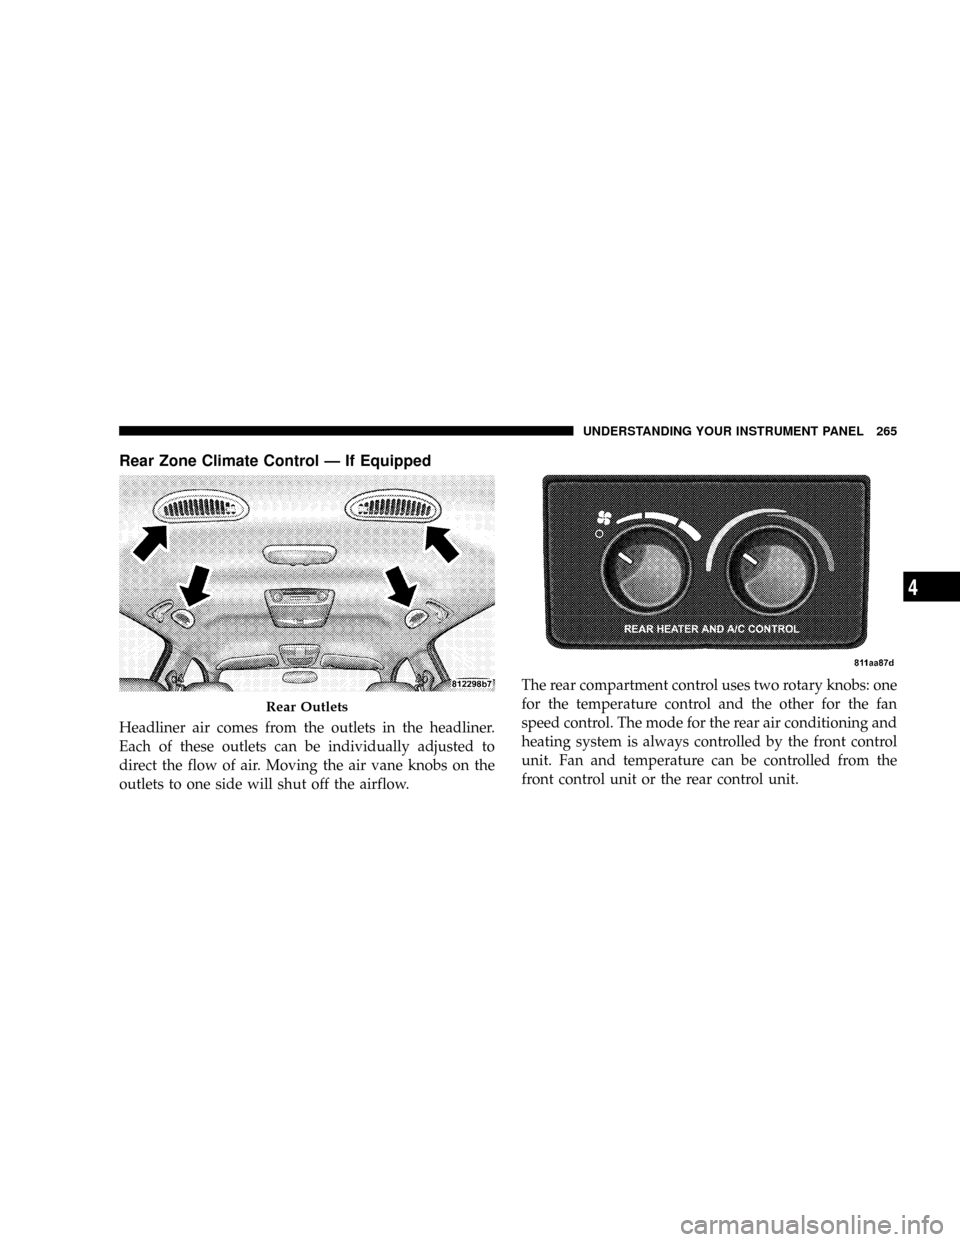
Rear Zone Climate Control Ð If Equipped
Headliner air comes from the outlets in the headliner.
Each of these outlets can be individually adjusted to
direct the flow of air. Moving the air vane knobs on the
outlets to one side will shut off the airflow.The rear compartment control uses two rotary knobs: one
for the temperature control and the other for the fan
speed control. The mode for the rear air conditioning and
heating system is always controlled by the front control
unit. Fan and temperature can be controlled from the
front control unit or the rear control unit.
Rear Outlets
UNDERSTANDING YOUR INSTRUMENT PANEL 265
4
Page 268 of 481
Rear Rotary Blower Control
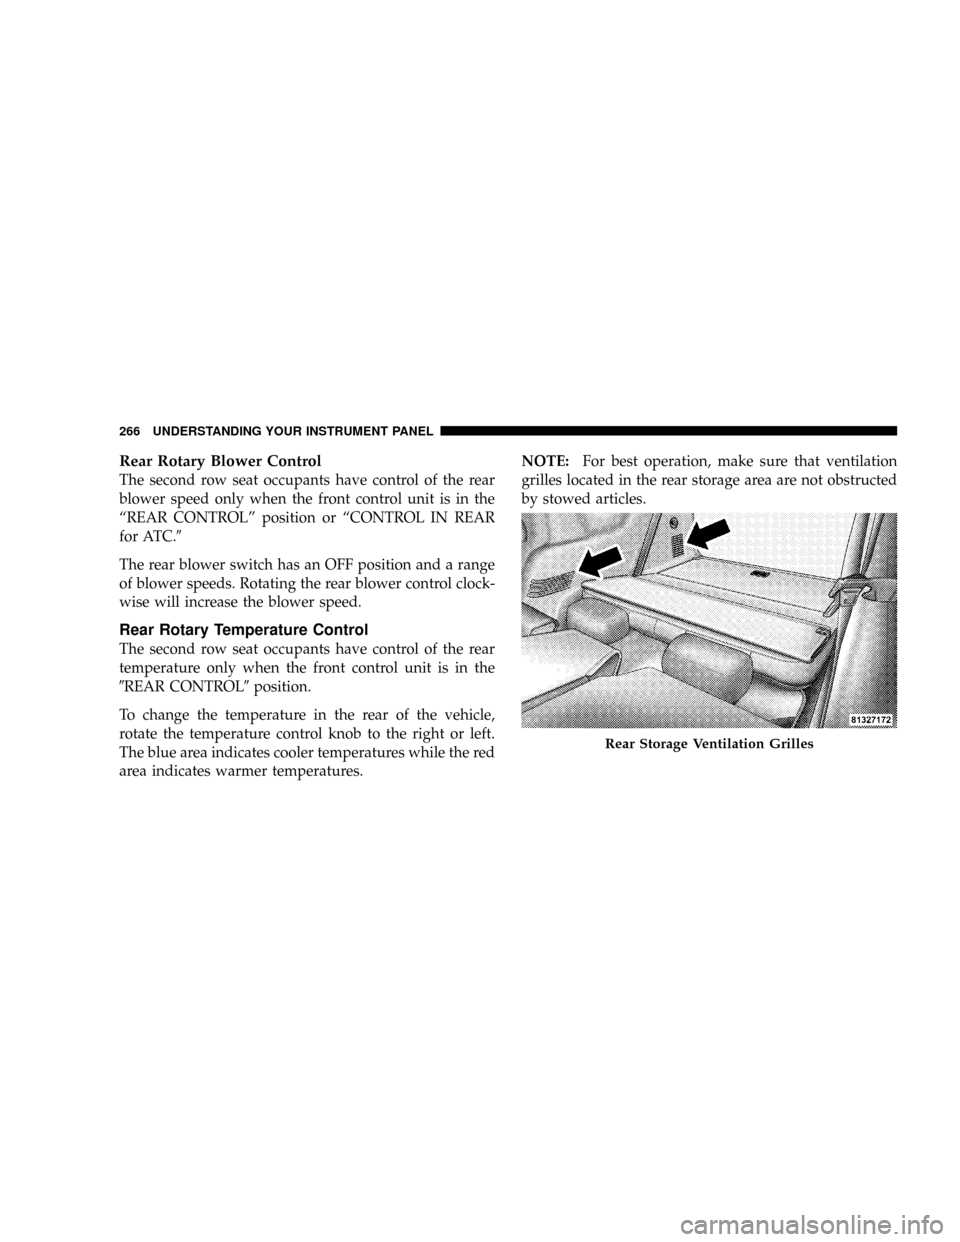
The second row seat occupants have control of the rear
blower speed only when the front control unit is in the
ªREAR CONTROLº position or ªCONTROL IN REAR
for ATC.9
The rear blower switch has an OFF position and a range
of blower speeds. Rotating the rear blower control clock-
wise will increase the blower speed.
Rear Rotary Temperature Control
The second row seat occupants have control of the rear
temperature only when the front control unit is in the
9REAR CONTROL9position.
To change the temperature in the rear of the vehicle,
rotate the temperature control knob to the right or left.
The blue area indicates cooler temperatures while the red
area indicates warmer temperatures.NOTE:For best operation, make sure that ventilation
grilles located in the rear storage area are not obstructed
by stowed articles.
Rear Storage Ventilation Grilles
266 UNDERSTANDING YOUR INSTRUMENT PANEL
Page 269 of 481
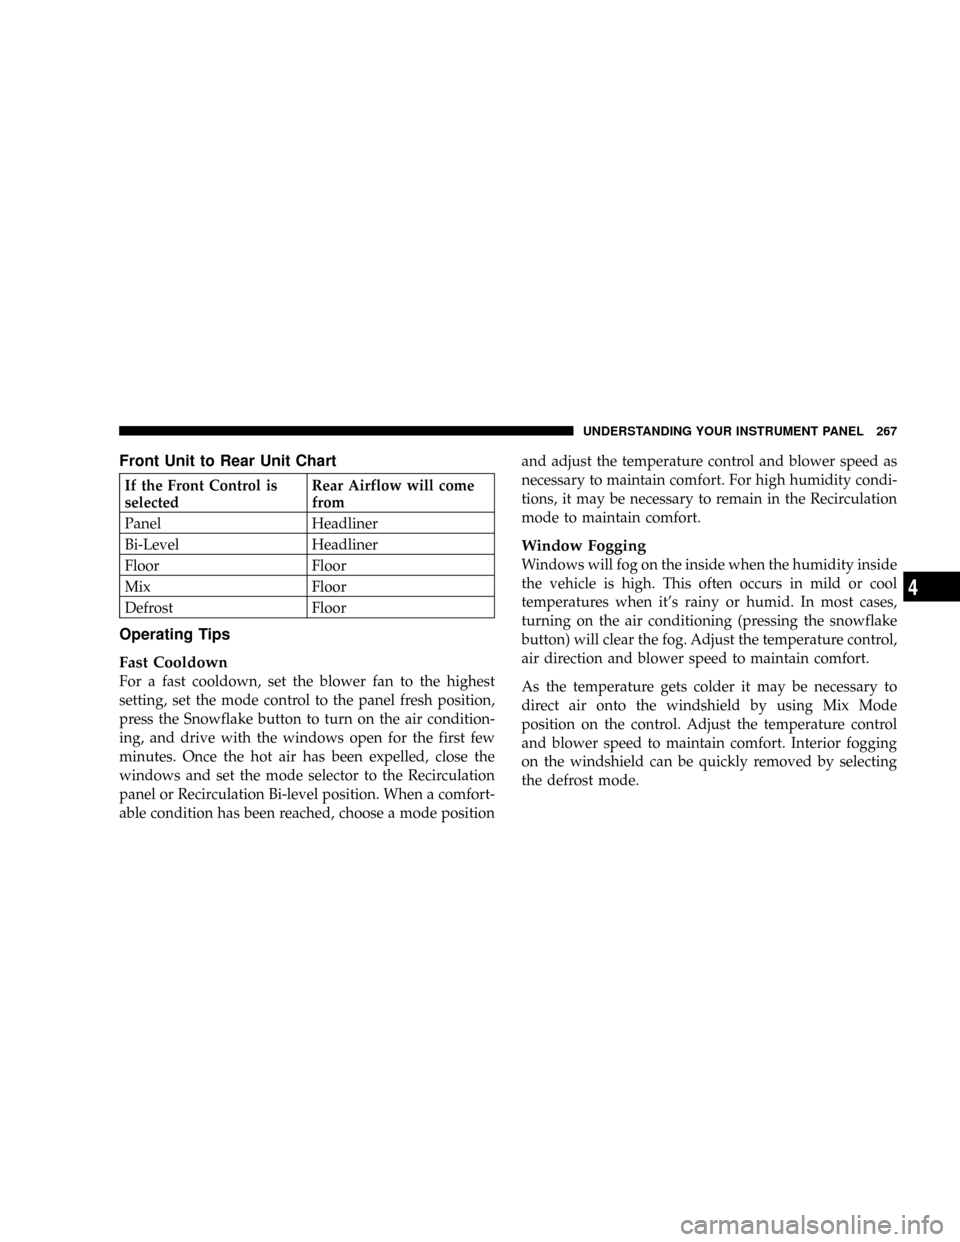
Front Unit to Rear Unit Chart
If the Front Control is
selectedRear Airflow will come
from
Panel Headliner
Bi-Level Headliner
Floor Floor
Mix Floor
Defrost Floor
Operating Tips
Fast Cooldown
For a fast cooldown, set the blower fan to the highest
setting, set the mode control to the panel fresh position,
press the Snowflake button to turn on the air condition-
ing, and drive with the windows open for the first few
minutes. Once the hot air has been expelled, close the
windows and set the mode selector to the Recirculation
panel or Recirculation Bi-level position. When a comfort-
able condition has been reached, choose a mode positionand adjust the temperature control and blower speed as
necessary to maintain comfort. For high humidity condi-
tions, it may be necessary to remain in the Recirculation
mode to maintain comfort.
Window Fogging
Windows will fog on the inside when the humidity inside
the vehicle is high. This often occurs in mild or cool
temperatures when it's rainy or humid. In most cases,
turning on the air conditioning (pressing the snowflake
button) will clear the fog. Adjust the temperature control,
air direction and blower speed to maintain comfort.
As the temperature gets colder it may be necessary to
direct air onto the windshield by using Mix Mode
position on the control. Adjust the temperature control
and blower speed to maintain comfort. Interior fogging
on the windshield can be quickly removed by selecting
the defrost mode.
UNDERSTANDING YOUR INSTRUMENT PANEL 267
4
Page 270 of 481
Regular cleaning of the inside of the windows with a
non-filming cleaning solution (vinegar and water works
very well) will help prevent contaminants (cigarette
smoke, perfumes, etc.) from sticking to the windows.
Contaminants increase the rate of window fogging.
Summer Operation
Air conditioned vehicles must be protected with a high
quality antifreeze coolant during summer to provide
proper corrosion protection and to raise the boiling point
of the coolant for protection against overheating. A 50 %
concentration is recommended.
Winter Operation
When operating the system during the winter months,
make sure the air intake, located directly in front of the
windshield, is free of ice, slush, snow, or other obstruc-
tions. This will also prevent snow ingestion into the
ducts.
268 UNDERSTANDING YOUR INSTRUMENT PANEL