window CHRYSLER ASPEN 2009 2.G Owner's Manual
[x] Cancel search | Manufacturer: CHRYSLER, Model Year: 2009, Model line: ASPEN, Model: CHRYSLER ASPEN 2009 2.GPages: 481, PDF Size: 9.28 MB
Page 121 of 481
þPREVIOUS (to play the previous memo)
þDELETE (to delete a memo)
²DELETE ALL (to delete all memos)
NOTE:Keep in mind that you have to press the VR
hard-key first and wait for the beep, before speaking the
ªbarge inº commands.
Voice Training
For users experiencing difficulty with the system recog-
nizing their voice commands or numbers, the UConnectt
system Voice Training feature may be used.1. Press the VR hard-key, speak ªSystem Setupº and once
you are in that menu then speak ªVoice Training.º This
will train your own voice to the system and will improve
recognition.
2. Repeat the words and phrases when prompted by the
UConnecttSystem. For best results, the Voice Training
session should be completed when the vehicle is parked,
engine running, all windows closed, and the blower fan
switched OFF. This procedure may be repeated with a
new user. The system will adapt to the last trained voice
only.
UNDERSTANDING THE FEATURES OF YOUR VEHICLE 119
3
Page 174 of 481
²ªFLASH LAMPS W/LOCK >ONº ± When ON is
selected, the front and rear turn signals will flash when
the doors are locked or unlocked with the RKE Trans-
mitter. This feature may be selected with or without
the sound horn on lock feature selected. To make your
selection, press and release the RESET button until
ªONº or ªOFFº appears.
²ªHEADLAMP OFF DELAY > 0 SECº ± When this
feature is selected, the driver can choose to have the
headlamps remain on for 0, 30, 60, or 90 seconds when
exiting the vehicle. To make your selection, press and
release the RESET button until ª0,º ª30,º ª60,º or ª90º
appears.
NOTE:The headlamp switch must be in the ªAº auto
mode before this feature will work.
²HEADLAMPS W/WIPERS > ON ± When ON is
selected, the headlamps will automatically turn on
when the wiper switch is activated.
²EASY EXIT SEAT > ON ± When ON is selected, and
the key is removed from the ignition, the driver's seat
will automatically move rearward to allow easy exit.
²TILT MIRRORS IN ªRº > ON ± When ON is selected,
and the transmission is put in REVERSE, the outside
mirrors will tilt downward.
²ªKEY OFF POWER DELAY> OFFº ± When this feature
is selected, the power window switches, radio, hands±
free system (if equipped), and power outlets will
remain active for up to 10 minutes after the ignition
switch is turned off. Opening a vehicle door will
cancel this feature. To make your selection, press and
release the RESET button until ªOff,º ª45 sec.,º ª5
min.,º ª10 min.º appears.
²ªILLUMINATED APRCH > OFFº ± When this feature
is selected, the headlights will activate and remain on
for up to 90 seconds when the doors are unlocked with
172 UNDERSTANDING THE FEATURES OF YOUR VEHICLE
Page 186 of 481
To close the sunroof, hold the switch in the forward
position. Again, any release of the switch will stop the
movement and the sunroof will remain in a partial open
condition until the switch is pushed forward again. To
close fully, hold the switch in the forward position until
the glass movement has stopped.
The sunshade can be opened manually. It will also open
as the sunroof opens. The sunshade cannot be closed if
the sunroof is open.
WARNING!
Never leave children alone in a vehicle. Leaving
unattended children in a vehicle is dangerous for a
number of reasons. A child or others could be seri-
ously or fatally injured. Don't leave the key in the
ignition. A child could operate power windows,
other controls, or move the vehicle.
WARNING!
In an accident, there is a greater risk of being thrown
from a vehicle with an open sunroof. You could also
be seriously injured or killed. Always fasten your
seat belt properly and make sure all passengers are
properly secured too.
Do not allow small children to operate the sunroof.
Never allow fingers or other body parts, or any object
to project through the sunroof opening. Injury may
result.
Wind Buffeting
Wind buffeting can be described as the perception of
pressure on the ears or a helicopter type sound in the
ears. Your vehicle may exhibit wind buffeting with the
windows down, or the sunroof (if equipped) in certain
open or partially open positions. This is a normal occur-
rence and can be minimized. If the buffeting occurs with
184 UNDERSTANDING THE FEATURES OF YOUR VEHICLE
Page 187 of 481
the rear windows open, open the front and rear windows
together to minimize the buffeting. If the buffeting occurs
with the sunroof open, adjust the sunroof opening to
minimize the buffeting, or open any window.
Sunroof Maintenance
Use only a nonabrasive cleaner and a soft cloth to clean
the glass panel.
ELECTRICAL POWER OUTLETS
This vehicle has three 12 Volt auxiliary power outlets that
can provide up to 20 Amps of current for accessories
designed for use with the standard power outlet adapt-
ers. The outlet located in the lower portion of the
instrument panel has a snap on plastic cap so that it can
be covered when not in use. As a safety precaution, the
outlet in the instrument panel only operates with the
ignition switch ON. When the optional Cigar Lighter
heating element is used, it heats when pushed in andpops out automatically when ready for use.To preserve
the heating element, do not hold the lighter in the
heating position.
There are two additional 12 Volt (20 total Amps for both
outlets) power outlets, one located in the storage bin of
the center console and another located in the right rear
cargo area. These outlets can be configured by the
customer to operate only when the ignition is ON
(switched battery fed) or with the ignition ON or OFF
(battery fed) to allow for cellular telephone charging and
operation while the ignition is OFF.
NOTE:All accessories connected to these outlets should
be removed or turned OFF when the vehicle is not in use
to protect the battery against discharge (unless the cus-
tomer has configured the fuse block to switched battery
feed). (See page 186 for more information.)
UNDERSTANDING THE FEATURES OF YOUR VEHICLE 185
3
Page 197 of 481
To remove the cargo management system from the ve-
hicle, pull the right-hand side of the organizer toward
you so that the right pin slides out of the slot in the
vehicle. Push the organizer to the right and lift out of the
vehicle.
REAR WINDOW FEATURES
Rear Window Wiper/Washer
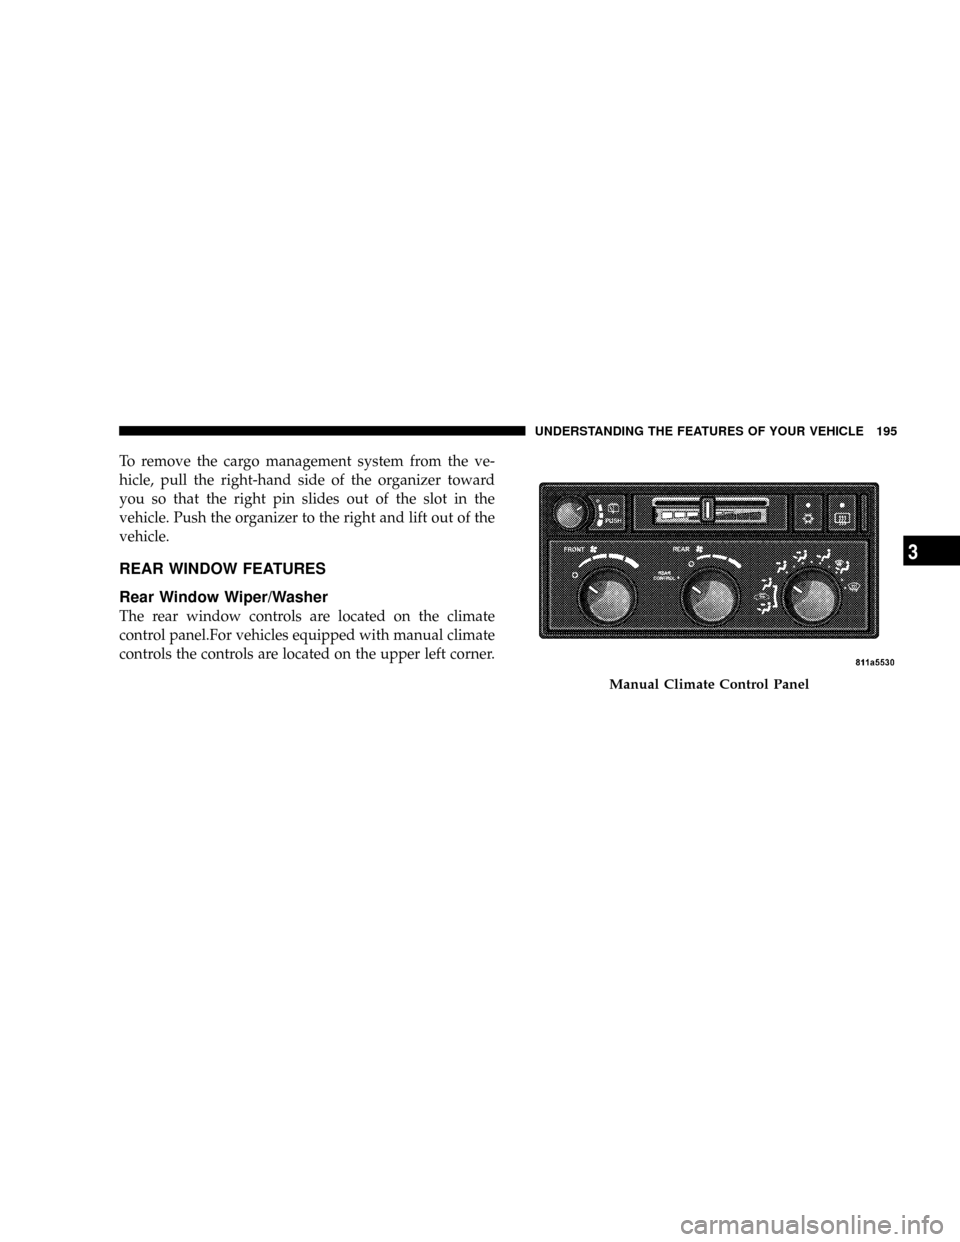
The rear window controls are located on the climate
control panel.For vehicles equipped with manual climate
controls the controls are located on the upper left corner.
Manual Climate Control Panel
UNDERSTANDING THE FEATURES OF YOUR VEHICLE 195
3
Page 198 of 481
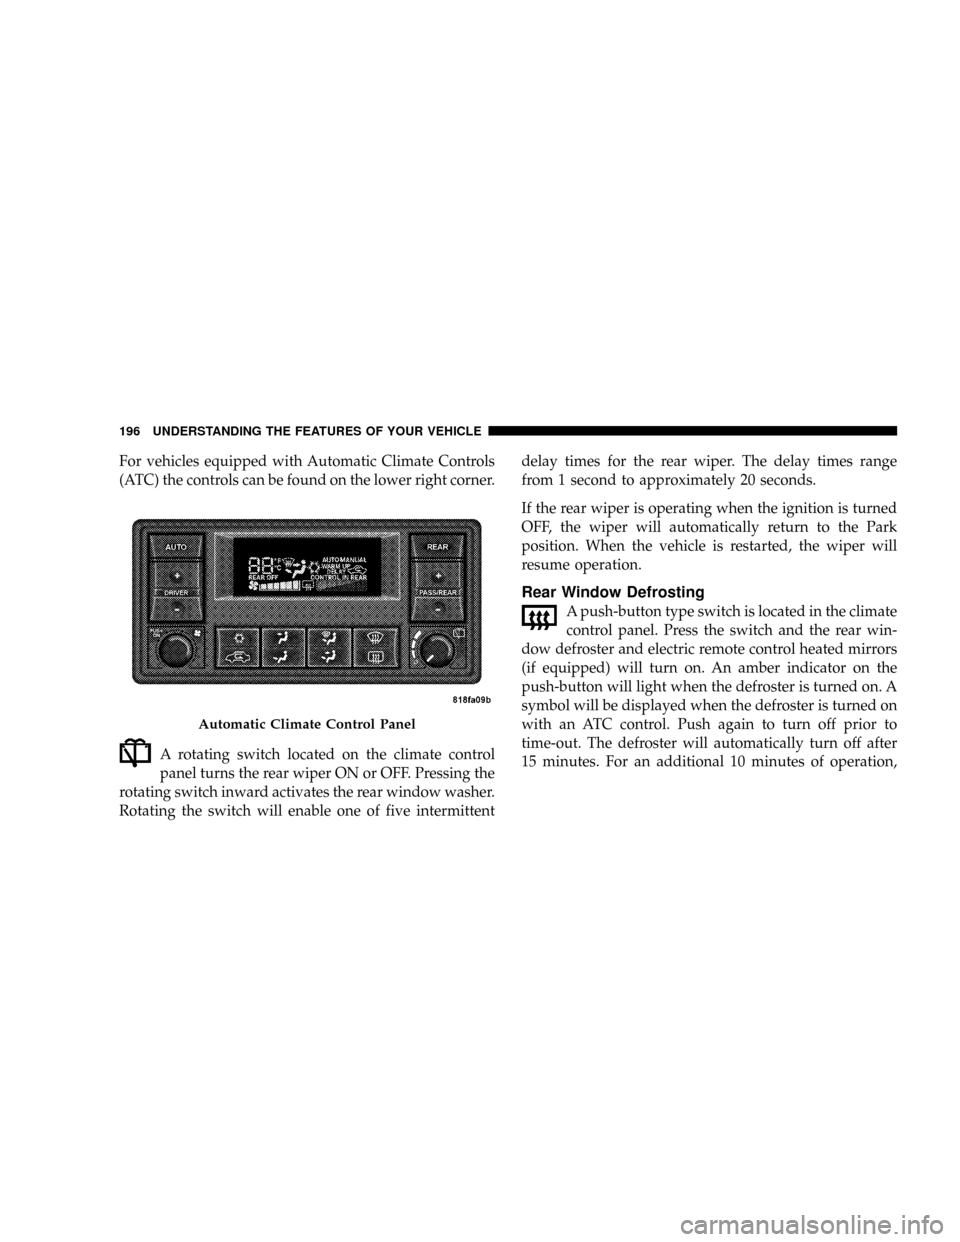
For vehicles equipped with Automatic Climate Controls
(ATC) the controls can be found on the lower right corner.
A rotating switch located on the climate control
panel turns the rear wiper ON or OFF. Pressing the
rotating switch inward activates the rear window washer.
Rotating the switch will enable one of five intermittentdelay times for the rear wiper. The delay times range
from 1 second to approximately 20 seconds.
If the rear wiper is operating when the ignition is turned
OFF, the wiper will automatically return to the Park
position. When the vehicle is restarted, the wiper will
resume operation.
Rear Window Defrosting
A push-button type switch is located in the climate
control panel. Press the switch and the rear win-
dow defroster and electric remote control heated mirrors
(if equipped) will turn on. An amber indicator on the
push-button will light when the defroster is turned on. A
symbol will be displayed when the defroster is turned on
with an ATC control. Push again to turn off prior to
time-out. The defroster will automatically turn off after
15 minutes. For an additional 10 minutes of operation,
Automatic Climate Control Panel
196 UNDERSTANDING THE FEATURES OF YOUR VEHICLE
Page 199 of 481
push the button a second time. To prevent excessive
battery drain, use the defroster only when the engine is
operating.
CAUTION!
Use care when washing the inside of the rear window
to prevent damage to heating elements. Use a soft
cloth and a mild washing solution, wiping parallel to
the heating elements. Also, keep all objects a safe
distance from the window to prevent damaging the
heating elements.
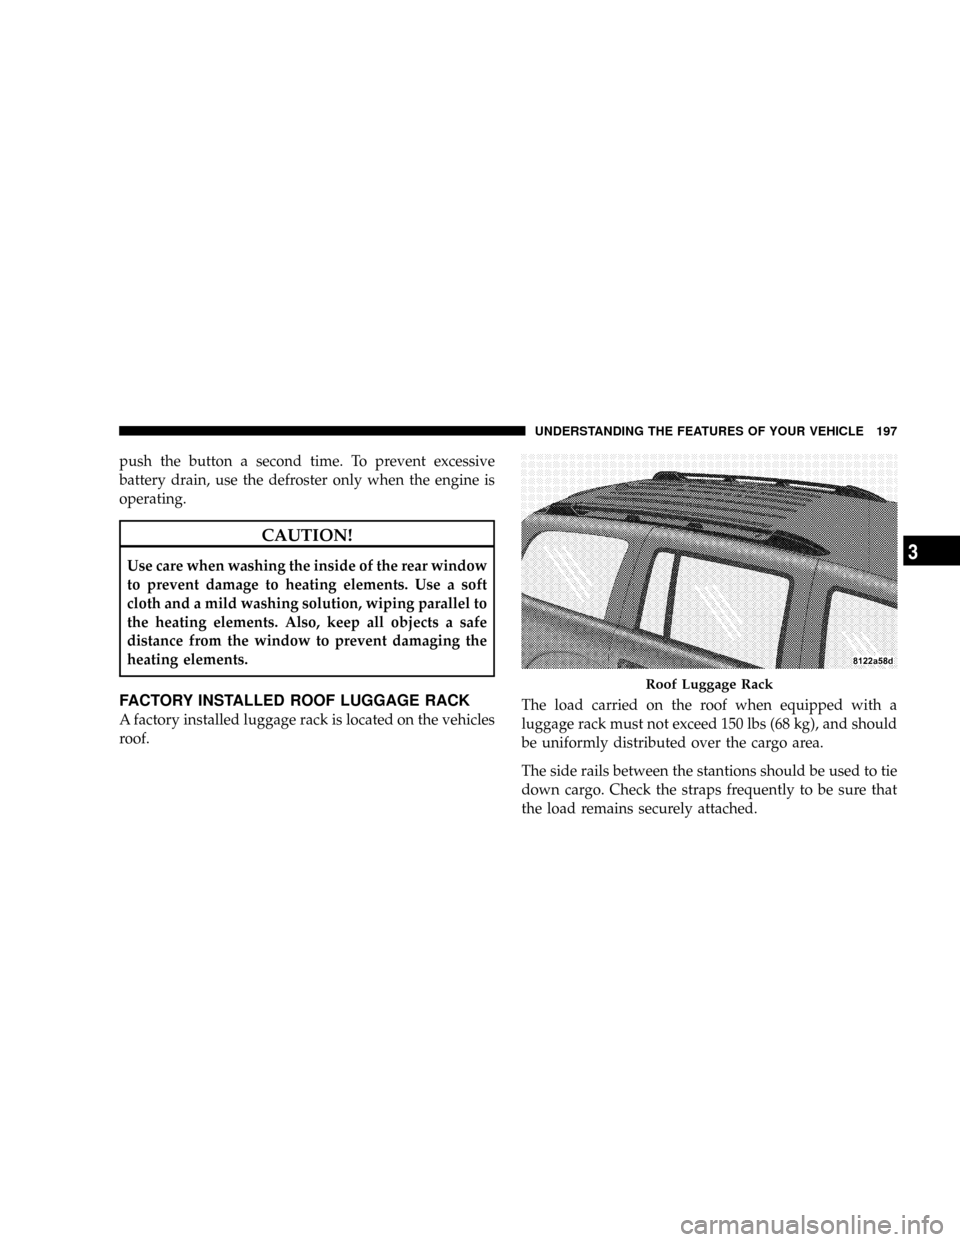
FACTORY INSTALLED ROOF LUGGAGE RACK
A factory installed luggage rack is located on the vehicles
roof.The load carried on the roof when equipped with a
luggage rack must not exceed 150 lbs (68 kg), and should
be uniformly distributed over the cargo area.
The side rails between the stantions should be used to tie
down cargo. Check the straps frequently to be sure that
the load remains securely attached.
Roof Luggage Rack
UNDERSTANDING THE FEATURES OF YOUR VEHICLE 197
3
Page 203 of 481
NOperating Instructions - Video Entertainment
System (VESt) (If Equipped)............. 251
mSirius Backseat TVŸÐ If Equipped......... 251
mVideo Entertainment System (Sales Code XRV)
Ð If Equipped......................... 252
m
Remote Sound System Controls Ð If Equipped. . 252
NRadio Operation..................... 253
NCD Player.......................... 253
mCD/DVD Maintenance.................. 253
mRadio Operation And Cellular Phones....... 254
mClimate Controls...................... 255
NManual Control...................... 255
NAir Conditioning Operation............. 255
NFront Blower Control.................. 256NFront Mode Control................... 256
NRear Temperature Control Ð If Equipped . . . 259
NRear Window Defrosting And Rear Window
Washer/Wiper....................... 259
NAutomatic Temperature Control (ATC)
Ð If Equipped....................... 260
NAutomatic Control.................... 260
NLevel Of Automatic Control............. 261
NManual Control (ATC)................. 261
NRear Zone Climate Control Ð If Equipped . . . 265
NRear Rotary Temperature Control......... 266
NFront Unit To Rear Unit Chart........... 267
NOperating Tips...................... 267
NOperating Tips Chart.................. 269
UNDERSTANDING YOUR INSTRUMENT PANEL 201
4
Page 225 of 481
SET/RND Button Ð To Set the Pushbutton
Memory
When you are receiving a station that you wish to
commit to pushbutton memory, press the SET/RND
button. The symbol SET 1 will now show in the display
window. Select the button (1 to 6) you wish to lock onto
this station and press and release that button. If a button
is not selected within five seconds after pressing the
SET/RND button, the station will continue to play but
will not be stored into pushbutton memory.
You may add a second station to each pushbutton by
repeating the above procedure with this exception: Press
the SET/RND button twice and SET 2 will show in the
display window. Each button can be set for SET 1 and
SET 2 in both AM and FM. This allows a total of 12 AM
and 12 FM stations to be stored into pushbutton memory.
The stations stored in SET 2 memory can be selected by
pressing the pushbutton twice.Every time a preset button is used, a corresponding
button number will display.Buttons1-6
These buttons tune the radio to the stations that you
commit to pushbutton memory (12 AM and 12 FM
stations).
DISC Button
Pressing the DISC button will allow you to switch from
AM/FM modes to Disc modes.
Operation Instructions - CD MODE for CD and
MP3 Audio Play
NOTE:The ignition switch must be in the ON or ACC
position to operate the radio.
NOTE:This radio is capable of playing compact discs
(CD), recordable compact discs (CD-R), rewritable com-
pact discs (CD-RW), compact discs with MP3 tracks and
multisession compact discs with CD and MP3 tracks.
UNDERSTANDING YOUR INSTRUMENT PANEL 223
4
Page 236 of 481
Program Type16-Digit Character Dis-
play
Sports Sports
Talk Talk
Top 40 Top 40
Weather Weather
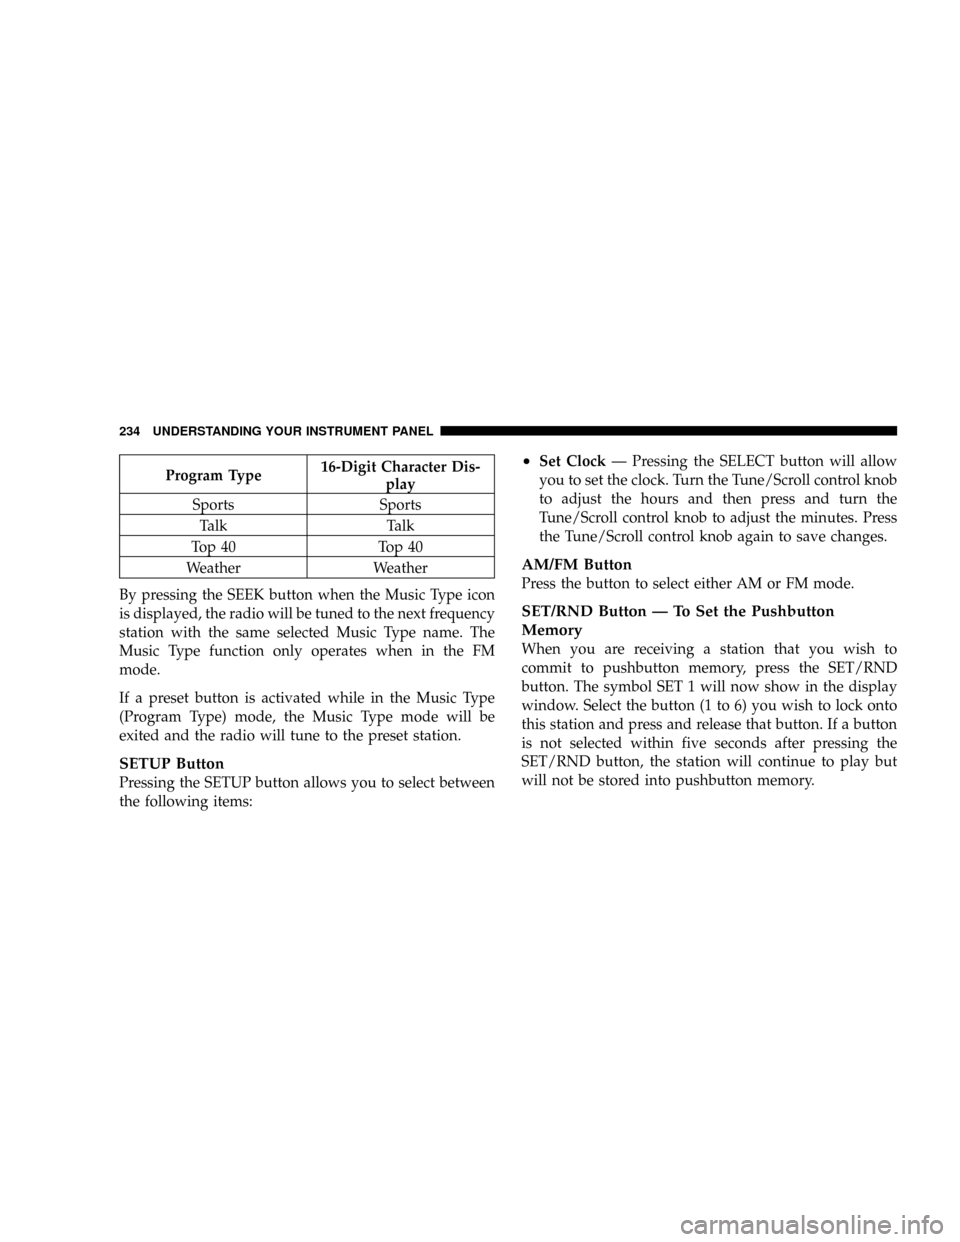
By pressing the SEEK button when the Music Type icon
is displayed, the radio will be tuned to the next frequency
station with the same selected Music Type name. The
Music Type function only operates when in the FM
mode.
If a preset button is activated while in the Music Type
(Program Type) mode, the Music Type mode will be
exited and the radio will tune to the preset station.
SETUP Button
Pressing the SETUP button allows you to select between
the following items:
²Set ClockÐ Pressing the SELECT button will allow
you to set the clock. Turn the Tune/Scroll control knob
to adjust the hours and then press and turn the
Tune/Scroll control knob to adjust the minutes. Press
the Tune/Scroll control knob again to save changes.
AM/FM Button
Press the button to select either AM or FM mode.
SET/RND Button Ð To Set the Pushbutton
Memory
When you are receiving a station that you wish to
commit to pushbutton memory, press the SET/RND
button. The symbol SET 1 will now show in the display
window. Select the button (1 to 6) you wish to lock onto
this station and press and release that button. If a button
is not selected within five seconds after pressing the
SET/RND button, the station will continue to play but
will not be stored into pushbutton memory.
234 UNDERSTANDING YOUR INSTRUMENT PANEL