change time CHRYSLER CARAVAN 2005 Owner's Manual
[x] Cancel search | Manufacturer: CHRYSLER, Model Year: 2005, Model line: CARAVAN, Model: CHRYSLER CARAVAN 2005Pages: 2339, PDF Size: 59.69 MB
Page 431 of 2339

STANDARD PROCEDURE
LIFTGATE ADJUSTMENT
In order for the power liftgate system to function
properly the liftgate must move freely and smoothly.
The power liftgate system can accommodate for some
minor changes in the effort required to move the lift-
gate. However, in extreme conditions the liftgate may
need to be mechanically adjusted for proper fit and
finish. (Refer to 23 - BODY/DECKLID/HATCH/LIFT-
GATE/TAILGATE/LIFTGATE - INSTALLATION) for
detailed instructions.
If a problem exists with the power liftgate and it is
suspected to be extreme effort, check the liftgate prop
rods and hinges for free movement.
NOTE: Routine application of Mopar MP-50Tor
equivalent on the chrome prop rod shafts and lift-
gate latch and hinges will help keep the liftgate in
good working order.
POWER LIFTGATE LEARN CYCLE
Any time a power liftgate component is removed,
replaced or a liftgate adjustment is performed a learn
cycle must be performed. This learn cycle enables the
power liftgate control module to learn or relearn
information (travel limits, resistance to door travel,
etc.) which allows it to perform properly and safely.
Perform the following to complete a power liftgate
learn cycle:
(1) Obtain a DRBIIIt, or equivalent scan tool.
(2) Connect the scan tool to the vehicle and check
for any power liftgate system stored Diagnostic Trou-
ble Codes (DTCs), correct and erase any stored
DTCs.
(3) Using the scan tool, Go into Test Routine Menu
and select the power open command.
(4) Select the power close command.
(5) The liftgate learn cycle is complete.
If a DRBIIItor equivalent scan tool is not avail-
able, the learn cycle can be performed by actuating
the liftgate using any of the normal command
switches. Be certain to cycle the liftgate through a
complete open and close cycle before returning the
vehicle to service.
NOTE: If the power liftgate will not complete a full
cycle a problem exists with the power liftgate sys-
tem. (Refer to 8 - ELECTRICAL/POWER DOORS -
DIAGNOSIS AND TESTING).
CHIME/THERMISTOR
DESCRIPTION
The chime/thermistor assembly is a small capacitor
shaped electrical component mounted to the rear
license plate lamp housing assembly (Fig. 2) , located
just above the license plate. The chime portion of the
assembly controls the audible chime sound heard at
the rear of the vehicle when the power liftgate is in
motion. The thermistor portion of the assembly is a
temperature sensor, used by the power liftgate con-
trol module. The chime/thermistor assembly is a ser-
viceable component.
OPERATION
The chime/thermistor assembly performs two dif-
ferent functions for the power liftgate system. First,
the chime portion provides an audible chime sound
which is controlled by the power liftgate control mod-
ule. The chime/thermistor assembly is hardwired to
the power liftgate control module. Second the ther-
mistor provides a outside temperature reading by
way of a resistance reading supplied to the power
liftgate control module. As temperature increases the
resistance reading increases, as temperature
decreases the resistance reading decreases.
REMOVAL
(1) Disconnect and isolate the battery negative
cable.
Fig. 2 REAR LIGHT BAR
1 - CHIME / THERMISTOR
2 - ELECTRIC RELEASE HANDLE SWITCH
3 - LICENSE PLATE LAMPS
8N - 8 POWER LIFTGATE SYSTEMRS
POWER LIFTGATE SYSTEM (Continued)
Page 444 of 2339
a second time. Pressing the Panic button also acti-
vates the courtesy lamps. Pressing the Panic button
again stops the exterior lamps from flashing and the
horn from sounding. However, the courtesy lamps
will remain illuminated until either the BCM times
out lamp operation or until the turning of the igni-
tion. The panic feature will operate if the ignition is
ON, but only if the Panic button is pressed prior to
starting the vehicle. A vehicle speed of about 25.7
km/h (15 miles-per-hour) will also cancel the panic
event.
The RKE system can also perform other functions
on this vehicle. If the vehicle is equipped with the
optional Vehicle Theft Security System (VTSS), the
RKE transmitter will arm the VTSS when the Lock
button is depressed, and disarm the VTSS when the
Unlock button is depressed.
The RKE system includes two transmitters when
the vehicle is shipped from the factory, but the sys-
tem can retain the vehicle access codes of up to a
total of eight transmitters. If an RKE transmitter is
inoperative or lost, new transmitter vehicle access
codes can be programmed into the system using a
DRB IIItscan tool.
This vehicle also offers several customer program-
mable features, which allows the selection of several
optional electronic features to suit individual prefer-
ences. Customer programmable feature options
affecting the RKE system include:
²Automatic Door Lock- Customer programma-
ble feature that allows the BCM to perform an auto-
matic door lock if the vehicle speed is above 25.7
km/h (15 miles-per-hour).
²Automatic Door Unlock On Exit- Customer
programmable feature that allows the BCM to per-
form an automatic door unlock if the vehicle speed is
0, vehicle in park and driver door is opened.
²Flash Lights with Lock and Unlock- Allows
the option of having the park lamps flash as an opti-
cal verification that the RKE system received a valid
Lock request or Unlock request from the RKE trans-
mitter, or having no optical verification.
²Programming Additional Transmitters-
Allows up to a total of four transmitter vehicle access
codes to be stored.
²Remote Unlock Sequence- Allows the option
of having only the driver side front door unlock when
the RKE transmitter Unlock button is depressed the
first time. The remaining doors unlock when the but-
ton is depressed a second time within 5 seconds of
the first unlock press. Another option is having all
doors unlock upon the first depression of the RKE
transmitter Unlock button.
²Sound Horn on Lock- Allows the option of
having the horn sound a short chirp as an audible
verification that the RKE system received a validLock request from the RKE transmitter, or having no
audible verification.
OPERATION
POWER LOCKS
The Body Control Module (BCM) locks or unlocks
the doors when an actuation input signal from a door
lock switch, Central Lock key cylinder or Remote
Keyless Entry (RKE) is received. The BCM turns on
the output drivers and provides a voltage level to the
door lock motor for a specified time.
REMOTE KEYLESS ENTRY
The RKE transmitter uses radio frequency signals
to communicate with the SKREEM module. The
SKREEM is on the PCI bus. When the operator
presses a button on the transmitter, it sends a spe-
cific request to the SKREEM. In turn, the SKREEM
sends the appropriate request over the PCI bus to
the following:
²Integrated Power Module (IPM)- to activate
the park lamps, the headlamps and the horn for the
horn chirp.
²Power Liftgate Module (PLGM)- to control
the liftgate lock and unlock functions.
After pressing the lock button on the RKE trans-
mitter, all of the door locks will lock, the illuminated
entry will turn off (if all doors are closed) and the
vehicle theft security system (if equipped) will arm.
Pressing the unlock button one time will unlock
the driver door, or all doors based on the customer
programmable feature enabled, the illuminated entry
will turn on the courtesy lamps and the vehicle theft
security system (if equipped) will disarm. Pressing
the unlock button a second time, the remaining door
locks will unlock.
If the vehicle is equipped with the memory system,
the memory message will identify which transmitter
(1 or 2) sent the signal.
ROLLING CODE
The rolling code feature changes part of the trans-
mitter message each time that it is used. The trans-
mitter message and the receiver message increment
together. Under certain conditions with a rolling code
system, such as pressing a button on the RKE trans-
mitter over 255 times outside of receiver range or
replacing the battery, the receiver and transmitter
can fall out of synchronization. To re-synchronize,
press and release the UNLOCK button on the RKE
transmitter repeatedly (it may take up to eight
cycles) while listening carefully for the power door
locks in the vehicle to cycle, indicating that resyn-
chronization has occurred.
RSPOWER LOCKS8N-21
POWER LOCKS (Continued)
Page 449 of 2339

POWER MIRRORS
TABLE OF CONTENTS
page page
POWER MIRRORS
DESCRIPTION.........................26
OPERATION...........................26
DIAGNOSIS AND TESTING
POWER MIRRORS....................27
AUTOMATIC DAY / NIGHT MIRROR
DESCRIPTION.........................28
OPERATION...........................28
DIAGNOSIS AND TESTING
AUTOMATIC DAY / NIGHT MIRROR.......28
POWER FOLDAWAY MIRROR SWITCH -
EXPORT
DESCRIPTION.........................29OPERATION...........................29
REMOVAL.............................29
INSTALLATION.........................30
REMOTE SWITCH
DIAGNOSIS AND TESTING
REMOTE SWITCH.....................30
REMOVAL.............................30
INSTALLATION.........................30
SIDEVIEW MIRROR
REMOVAL.............................30
POWER MIRRORS
DESCRIPTION
If equipped with power mirrors, the control switch
is located on the instrument panel to the left of the
headlamp switch.
OPERATION
The power mirrors are connected to battery feed at
all times. Each mirror head contains two electric
motors, two drive mechanisms, an electric heating
element, and the mirror glass. If the vehicle is
equipped with the optional memory system, the
driver side mirror head also contains both a horizon-
tal and a vertical motor position sensor. One motor
and drive controls mirror up-and-down movement,
and the other controls right-and-left movement.An optional driver side outside electrochromic mir-
ror is able to automatically change its reflectance
level. This mirror is controlled by the circuitry of the
automatic day/night inside rear view mirror. A thin
layer of electrochromic material between two pieces
of conductive glass make up the face of the mirror.
Two photocell sensors on the inside rear view mirror
are used to monitor light levels and adjust the reflec-
tance of both the inside and driver side outside mir-
rors. This change in reflectance helps to reduce the
glare of headlamps approaching the vehicle from the
rear. (Refer to 8 - ELECTRICAL/POWER MIRRORS/
AUTOMATIC DAY / NIGHT MIRROR - DESCRIP-
TION) for more information on this system.
The motors which operate the mirrors are part of
the mirror assembly and cannot be serviced sepa-
rately.
8N - 26 POWER MIRRORSRS
Page 451 of 2339
AUTOMATIC DAY / NIGHT
MIRROR
DESCRIPTION
An automatic dimming inside day/night rear view
mirror and an automatic dimming driver side outside
rear view mirror are available factory-installed
options on this model. Following is a general descrip-
tion of this optional equipment.
The automatic day/night mirror is able to automat-
ically change its reflectance. A thin layer of electro-
chromic material between two pieces of conductive
glass make up the face of the mirror. Two photocell
sensors are used to monitor light levels and adjust
the reflectance of the mirror to reduce the glare of
headlamps approaching the vehicle from the rear.
For removal procedures, (Refer to 23 - BODY/IN-
TERIOR/REAR VIEW MIRROR - REMOVAL).
OPERATION
The ambient photocell sensor faces forward, to
detect the outside light levels. A second sensor faces
rearward to detect the light level received through
the vehicles back window. When the difference
between the two light levels becomes too great (the
light level received at the rear of the mirror is much
higher than that at the front of the mirror), the mir-
ror begins to darken.
The mirror switch allows the driver a manual con-
trol of whether the automatic dimming feature is
operational. When AUTO is selected a small Light-
Emitting Diode (LED), to the right of the mirror
switch, is illuminated. The automatic dimming fea-
ture will only operate when the ignition switch is in
the On position. The mirror also senses the backup
lamp circuit, and will automatically disable its self-
dimming feature whenever the transmission gear
selector is in the Reverse position.
NOTE: The mirror always defaults to an ON state
upon ignition.
The driver side automatic dimming mirror is stan-
dard with the automatic dimming inside mirror. The
signal to control the dimming of that mirror is gen-
erated by the automatic day/night inside rear view
mirror circuitry. That signal is then delivered to the
driver side outside rear view mirror on a hard wired
circuit.
The automatic day/night mirror cannot be
repaired. If faulty or damaged, the entire inside rear
view mirror assembly must be replaced.
DIAGNOSIS AND TESTING
AUTOMATIC DAY / NIGHT MIRROR
For circuit descriptions and diagrams, refer to the
appropriate wiring information. The wiring informa-
tion includes wiring diagrams, proper wire and con-
nector repair procedures, details of wire harness
routing and retention, connector pin-out information
and location views for the various wire harness con-
nectors, splices and grounds.
(1) Check the fuse in the intelligent power module.
If OK, go to Step 2. If not OK, repair the shorted cir-
cuit or component as required and replace the faulty
fuse.
(2) Turn the ignition switch to the On position.
Check for battery voltage at the fuse in the intelli-
gent power module. If OK, go to Step 3. If not OK,
repair the open circuit to the ignition switch as
required.
(3) Unplug the wire harness connector from the
automatic day/night mirror. Check for battery voltage
at the fused ignition switch output circuit cavity of
the automatic day/night mirror wire harness connec-
tor. If OK, go to Step 4. If not OK, repair the open
circuit to the junction block as required.
(4) Turn the ignition switch to the Off position.
Check for continuity between the ground circuit cav-
ity of the automatic day/night mirror wire harness
connector and a good ground. There should be conti-
nuity. If OK, go to Step 5. If not OK, repair the cir-
cuit to ground as required.
(5) Turn the ignition switch to the On position. Set
the parking brake. Place the transmission gear selec-
tor lever in the Reverse position. Check for battery
voltage at the backup lamp switch output circuit cav-
ity of the automatic day/night mirror wire harness
connector. If voltage is present, reinstall the auto-
matic day/night mirror wire harness connector and
go to Step 6. If not OK, repair the open circuit as
required.
(6) Place the transmission gear selector lever in
the Neutral position. Place the automatic day/night
mirror switch in the On (LED in the switch is
lighted) position. Cover the forward facing ambient
photocell sensor to keep out any ambient light.
NOTE: The ambient photocell sensor must be cov-
ered completely, so that no light reaches the sen-
sor. Use a finger pressed tightly against the sensor,
or cover the sensor completely with electrical tape.
(7) Shine a light into the rearward facing head-
lamp photocell sensor. The automatic day/night mir-
ror should darken. The automatic day/night mirror
should darken within 2 minutes if testing for the
first time. For immediate response, turn the vehicle
8N - 28 POWER MIRRORSRS
Page 492 of 2339
driver and the front seat passenger to the structure
of the instrument panel (Refer to 8 - ELECTRICAL/
RESTRAINTS/KNEE BLOCKER AIRBAG -
DESCRIPTION). The seat belt tensioners remove the
slack from the front seat belts to provide further
assurance that the driver and front seat passenger
are properly positioned and restrained for an airbag
deployment.
When the ORC monitors a problem in any of the
dual front airbag system circuits or components,
including the seat belt tensioners, it stores a Diag-
nostic Trouble Code (DTC) in its memory and sends
an electronic message to the EMIC to turn on the
airbag indicator. Proper testing of the supplemental
restraint system components, the Programmable
Communications Interface (PCI) data bus, the elec-
tronic message inputs to and outputs from the EMIC
or the ORC, as well as the retrieval or erasure of a
DTC from the ORC or the EMIC requires the use of
a scan tool. Refer to the appropriate diagnostic infor-
mation.
OCCUPANT CLASSIFICATION SYSTEM
The Occupant Classification System (OCS) auto-
matically suppresses or enables passenger airbag and
seat belt tensioner operation based upon whether or
not the passenger side front seat is occupied and, if
the seat is occupied, classifies the size of the occu-
pant and whether the seat is occupied by a child
seat.
The OCS has an Occupant Classification Module
(OCM) that monitors inputs from the seat weight
bladder pressure sensor under the passenger side
front seat cushion and from the belt tension sensor
on the passenger side front seat belt lower anchor.
Based upon those inputs the microprocessor within
the OCM classifies the occupant of the passenger
side front seat. The OCM then sends electronic occu-
pant classification messages to the ORC. The micro-
processor and programming of the ORC uses these
occupant classification messages to determine
whether to enable or disable the deployment circuits
for the passenger airbag and seat belt tensioner.
The OCS electrical circuits and components are
continuously monitored by the OCM, and the OCM is
continuously monitored by the ORC. A passenger air-
bag ON/OFF indicator is located in the instrument
panel center stack area. This indicator receives bat-
tery current whenever the ignition switch is in the
ON or START positions, and illuminates only when
the ORC pulls the indicator control circuit to ground.
The indicator illuminates for about seven seconds as
a bulb test each time the ignition switch is turned to
the ON or START positions. Following the bulb test,
the indicator is turned ON or OFF by the ORC based
upon the electronic occupant classification messagesreceived from the OCM. This indicator is illuminated
whenever the passenger airbag and seat belt ten-
sioner operation has been suppressed, and is turned
OFF whenever they are enabled or when the passen-
ger seat is classified as empty.
When the OCM monitors a problem in any of the
OCS circuits or components, it stores a fault code or
DTC in its memory circuit and sends an electronic
message to the ORC. The ORC then sends an elec-
tronic message to the EMIC to turn ON the airbag
indicator. If for any reason the OCM is unable to
classify the occupant it sends an electronic message
to the ORC, and the ORC suppresses passenger air-
bag and seat belt tensioner operation. Proper testing
of the OCS components, the Programmable Commu-
nications Interface (PCI) data bus, the electronic
message inputs to and outputs from the OCM, the
EMIC or the ORC, as well as the retrieval or erasure
of a DTC's, requires the use of a scan tool. Refer to
the appropriate diagnostic information.
WARNING
WARNINGS
Disconnect and isolate the battery negative
cable before beginning any airbag system com-
ponent diagnosis, testing, removal, or installa-
tion procedures. Allow system capacitor to
discharge for two minutes before beginning any
component testing or service. This will disable
the airbag system. Failure to disconnect the
battery negative cable may result in accidental
airbag deployment, personal injury, or death.
Do not place an intact undeployed airbag
face down on a solid surface. The airbag will
propel into the air if accidentally deployed and
may result in personal injury or death.
When carrying or handling an undeployed
airbag, the trim side (face) of the airbag should
be pointing towards the body to minimize pos-
sibility of injury if accidental deployment
occurs. Failure to do this may result in per-
sonal injury or death.
Replace airbag system components with
Mopartreplacement parts. Substitute parts
may appear interchangeable, but internal dif-
ferences may result in inferior occupant protec-
tion. Failure to do so may result in occupant
personal injury or death.
Wear safety glasses, rubber gloves, and long
sleeved clothing when cleaning powder residue
from vehicle after airbag deployment. Sodium
hydroxide powder residue emitted from a
deployed airbag can cause skin irritation.
Flush affected area with cool water if irritation
is experienced. If nasal or throat irritation is
RSRESTRAINTS8O-5
RESTRAINTS (Continued)
Page 521 of 2339

²The ORC receives an occupant classification
message indicating that the passenger front seat is
empty.
²The seat is occupied by a load equal to or
greater than a fifth percentile female.
²OR, until the ignition switch is turned to the
OFF position, whichever of these three occurs first.
²Load Undetermined Occupant Classifica-
tion Message- Each time the ORC receives a mes-
sage from the OCM indicating that a load cannot be
determined in the passenger front seat, the passen-
ger airbag and seat belt tensioner deployment cir-
cuits are deactivated and the PAD indicator will be
illuminated. The indicator remains illuminated until:
²The ORC receives an occupant classification
message indicating that the passenger front seat is
empty.
²The seat is occupied by a load equal to or
greater than a fifth percentile female.
²OR, until the ignition switch is turned to the
OFF position, whichever of these three occurs first.
²Communication Error- If the ORC receives
invalid occupant classification messages or no mes-
sages from the OCM, the PAD indicator is illumi-
nated. The indicator remains illuminated until:
²The ORC receives an occupant classification
message indicating that the passenger front seat is
empty.
²The seat is occupied by a load equal to or
greater than a fifth percentile female.
²OR, until the ignition switch is turned to the
OFF position, whichever of these three occurs first.
The ORC continually monitors the occupant classi-
fication messages from the OCM to decide whether
the passenger airbag and seat belt tensioner deploy-
ment circuits should be activated or deactivated.
Note that there may be several seconds of delay
between changes in the detected occupant status and
PAD indications. This is a programmed feature of the
OCM used to prevent a flashing indicator condition
resulting from the normal shifting of occupant weight
on the passenger seat cushion. The ORC then pro-
vides the proper control output to turn the PAD indi-
cator ON or OFF.
The ORC will store a Diagnostic Trouble Code
(DTC) for any malfunction it detects. For proper
diagnosis of the OCM, the ORC, the PCI data bus, or
the electronic message inputs to the ORC that con-
trol the PAD indicator, use a scan tool and the appro-
priate diagnostic information.REMOVAL
(1) Open hood.
(2) Disconnect and isolate the battery negative
cable.
(3)
WARNING: Wait two minutes for the airbag system
reserve capacitor to discharge before beginning
any airbag system or component service. Failure to
do so may result in accidental airbag deployment,
personal injury or death.
(4) Remove instrument panel center bezel (Refer to
23 - BODY/INSTRUMENT PANEL/INSTRUMENT
PANEL CENTER BEZEL - REMOVAL).
(5) From the back of the center bezel, depress the
two latches toward the indicator housing and push
the indicator out through the face of the center bezel.
INSTALLATION
(1) From the face of the instrument panel center
bezel, align the Passenger Airbag Disabled (PAD)
indicator housing with the mounting hole.
(2) Firmly push the indicator into the center bezel
until the two latches are fully engaged on the back of
the cap and are snapped in.
(3) Install the instrument panel center bezel (Refer
to 23 - BODY/INSTRUMENT PANEL/INSTRUMENT
PANEL CENTER BEZEL - INSTALLATION).
WARNING: Do not connect the battery negative
cable (Refer to 8 - ELECTRICAL/RESTRAINTS -
DIAGNOSIS AND TESTING - AIRBAG SYSTEM). Per-
sonal injury or death may result if the system test
is not performed first.
WARNING: Following successful completion of the
Airbag System test procedure, the Occupant Classi-
fication System Verification Test must be done
using a scan tool and the appropriate diagnostic
information.
(4) Close hood.
(5) Verify system and vehicle operation.
8O - 34 RESTRAINTSRS
PASSENGER AIRBAG DISABLED INDICATOR (Continued)
Page 547 of 2339
OPERATION
FRONT WIPER/WASHER SYSTEM
The windshield washer circuit is protected by a 15
amp Cartridge Fuse located in the IPM. The wiper
motor has permanent magnetic fields. The speeds are
determined by current flow to the appropriate set of
brushes inside the motor. The current flow is con-
trolled by the multi-function switch. The high speed/
low speed relays are located in the IPM. The speed
sensitive intermittent wiper is controlled by the Body
Control Module (BCM). The intermittent mode, with
the vehicle traveling greater than 10.4 mph, has a
range of 0.5 to 18 seconds. With the vehicle traveling
less than 10.4 mph, the time delay doubles to a
range of 1 to 36 seconds. The wiper arms will park at
the base of the windshield just above the cowl cover
after the wiper switch is turned OFF.
The windshield wiper motor and linkage is located
in an integral wiper unit at the rear of the engine
compartment. The wiper unit must be removed to
gain access to the wiper motor.
The front and rear washer systems share the same
washer pump motor.
REAR WIPER/WASHER SYSTEM
When rear wiper operation is required, the BCM
will provide ignition ON voltage to the rear wiper
motor (Export and ATC equipped vehicles only).
When the wiper switch is turned OFF, the BCM pro-
vides circuit ground to operate the motor until the
wipe cycle is complete and the wiper arm returns to
the base of the rear window.
Switch only offers an intermittent rear wiper
mode. The wiper motor will cycle every 7 seconds.
The intermittent delay time is also adjusted based
upon vehicle speed. With the vehicle traveling
greater than 50 mph, the cycle changes to every 5
seconds.
When rear washer is requested by depressing and
holding down the switch, the BCM then provides a
ground for the washer motor. Until the switch is
released, the motor will be in a continuous wipe
mode, then return to an intermittent wipe mode.
DIAGNOSIS AND TESTING
DIAGNOSIS AND TESTING - FRONT WIPER
SYSTEM
The windshield wiper system operates in several
modes:
²Low and high speed normal wipe
²Speed sensitive intermittent wipe
²Wipe after wash
²Park (switch OFF)The windshield wiper circuits are continuously
monitored and controlled by the Body Control Mod-
ule (BCM). If a problem occurs in the electronic com-
ponents, wiring, switch (except integral motor park
switch) and wiper motor a Diagnostic Trouble Code
(DTC) will be stored in the BCM memory. DTC's can
be retrieved using a DRB IIItscan tool. Refer to the
proper Body Diagnostic Procedures manual for DTC
descriptions and retrieval information.
The windshield wiper park switch and circuit is
monitored by the BCM. The park switch and circuit
can be tested using the Wiper System Diagnosis
table.
DIAGNOSIS AND TESTING - FRONT
WIPER/WASHER SWITCH
(1) Remove the multi-function switch (Refer to 8 -
ELECTRICAL/LAMPS/LIGHTING - EXTERIOR/
MULTI-FUNCTION SWITCH - REMOVAL).
(2) Using an ohmmeter check resistance readings
between switch pins. Refer to the WIPER/WASHER
SWITCH RESISTANCE table.
WIPER/WASHER SWITCH RESISTANCE
SWITCH POSITION RESISTANCE BETWEEN
OFF 1 AND 2 = 23.9KV 5%
DELAY POSITION
1ST 1 AND 2 = 7.9KV 5%
2ND 1 AND 2 = 4.6KV 5%
3RD 1 AND 2 = 2.9KV 5%
4TH 1 AND 2 = 1.9KV 5%
5TH 1 AND 2 = 1.3KV 5%
LOW 1 AND 2 = 670V 5%
HIGH 1 AND2=240V 5%
WASH 1 AND 4 = 5.9KV 5%
DIAGNOSIS AND TESTING - FAILED PARK
SWITCH
If the wiper park switch has failed, the windshield
wipers will operate as follows:
²SWITCH OFF- Wipers stop in current location
regardless of the park signal.
²INTERMITTENT MODE- Wipers operate con-
tinuously or at low speed for one or more extra
wipes.
²LOW SPEED- Wipers operate at low speed.
²HIGH SPEED- Wipers operate at high speed.
8R - 2 WIPERS/WASHERSRS
WIPERS/WASHERS (Continued)
Page 556 of 2339
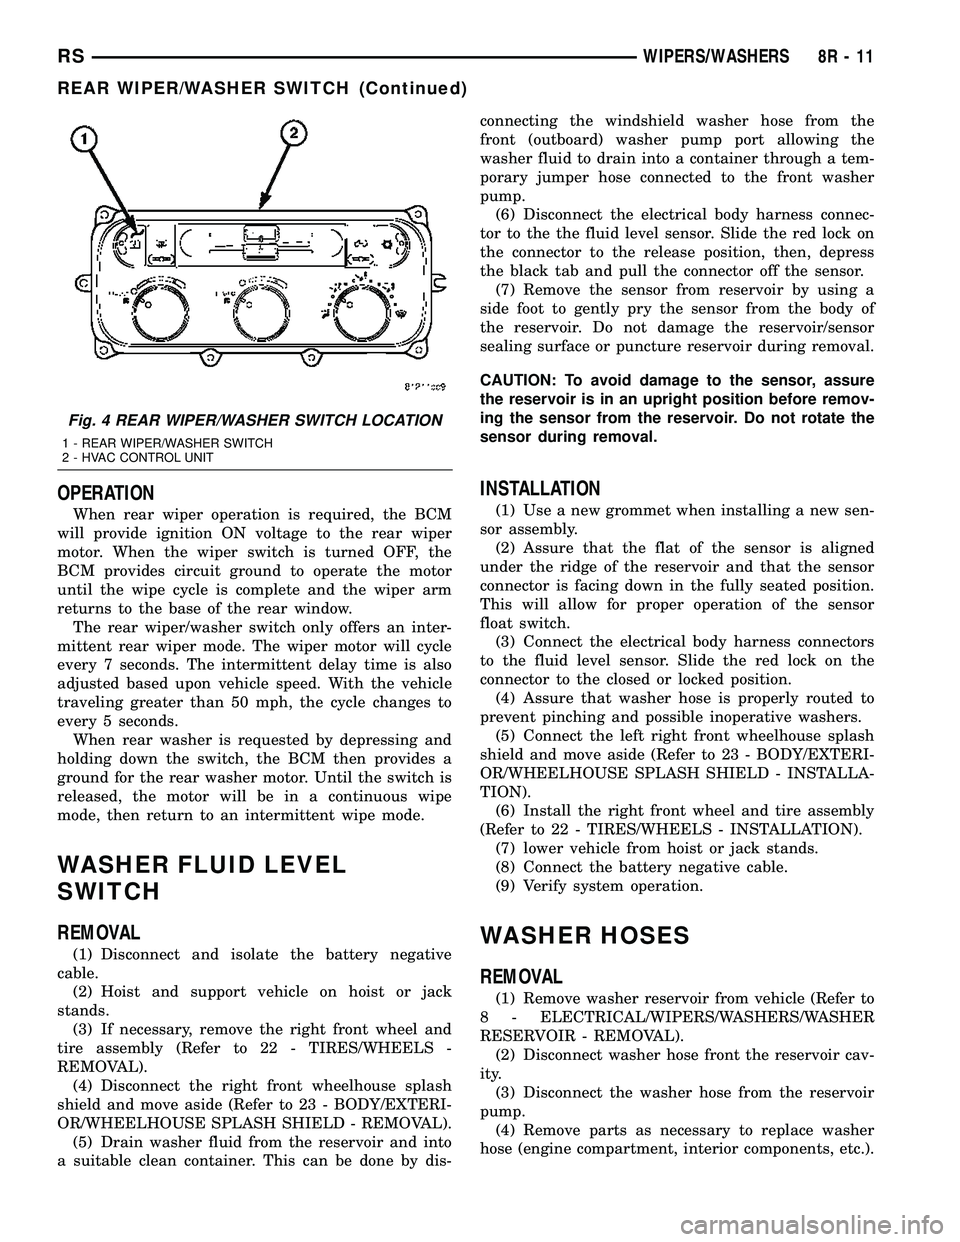
OPERATION
When rear wiper operation is required, the BCM
will provide ignition ON voltage to the rear wiper
motor. When the wiper switch is turned OFF, the
BCM provides circuit ground to operate the motor
until the wipe cycle is complete and the wiper arm
returns to the base of the rear window.
The rear wiper/washer switch only offers an inter-
mittent rear wiper mode. The wiper motor will cycle
every 7 seconds. The intermittent delay time is also
adjusted based upon vehicle speed. With the vehicle
traveling greater than 50 mph, the cycle changes to
every 5 seconds.
When rear washer is requested by depressing and
holding down the switch, the BCM then provides a
ground for the rear washer motor. Until the switch is
released, the motor will be in a continuous wipe
mode, then return to an intermittent wipe mode.
WASHER FLUID LEVEL
SWITCH
REMOVAL
(1) Disconnect and isolate the battery negative
cable.
(2) Hoist and support vehicle on hoist or jack
stands.
(3) If necessary, remove the right front wheel and
tire assembly (Refer to 22 - TIRES/WHEELS -
REMOVAL).
(4) Disconnect the right front wheelhouse splash
shield and move aside (Refer to 23 - BODY/EXTERI-
OR/WHEELHOUSE SPLASH SHIELD - REMOVAL).
(5) Drain washer fluid from the reservoir and into
a suitable clean container. This can be done by dis-connecting the windshield washer hose from the
front (outboard) washer pump port allowing the
washer fluid to drain into a container through a tem-
porary jumper hose connected to the front washer
pump.
(6) Disconnect the electrical body harness connec-
tor to the the fluid level sensor. Slide the red lock on
the connector to the release position, then, depress
the black tab and pull the connector off the sensor.
(7) Remove the sensor from reservoir by using a
side foot to gently pry the sensor from the body of
the reservoir. Do not damage the reservoir/sensor
sealing surface or puncture reservoir during removal.
CAUTION: To avoid damage to the sensor, assure
the reservoir is in an upright position before remov-
ing the sensor from the reservoir. Do not rotate the
sensor during removal.
INSTALLATION
(1) Use a new grommet when installing a new sen-
sor assembly.
(2) Assure that the flat of the sensor is aligned
under the ridge of the reservoir and that the sensor
connector is facing down in the fully seated position.
This will allow for proper operation of the sensor
float switch.
(3) Connect the electrical body harness connectors
to the fluid level sensor. Slide the red lock on the
connector to the closed or locked position.
(4) Assure that washer hose is properly routed to
prevent pinching and possible inoperative washers.
(5) Connect the left right front wheelhouse splash
shield and move aside (Refer to 23 - BODY/EXTERI-
OR/WHEELHOUSE SPLASH SHIELD - INSTALLA-
TION).
(6) Install the right front wheel and tire assembly
(Refer to 22 - TIRES/WHEELS - INSTALLATION).
(7) lower vehicle from hoist or jack stands.
(8) Connect the battery negative cable.
(9) Verify system operation.
WASHER HOSES
REMOVAL
(1) Remove washer reservoir from vehicle (Refer to
8 - ELECTRICAL/WIPERS/WASHERS/WASHER
RESERVOIR - REMOVAL).
(2) Disconnect washer hose front the reservoir cav-
ity.
(3) Disconnect the washer hose from the reservoir
pump.
(4) Remove parts as necessary to replace washer
hose (engine compartment, interior components, etc.).
Fig. 4 REAR WIPER/WASHER SWITCH LOCATION
1 - REAR WIPER/WASHER SWITCH
2 - HVAC CONTROL UNIT
RSWIPERS/WASHERS8R-11
REAR WIPER/WASHER SWITCH (Continued)
Page 1207 of 2339
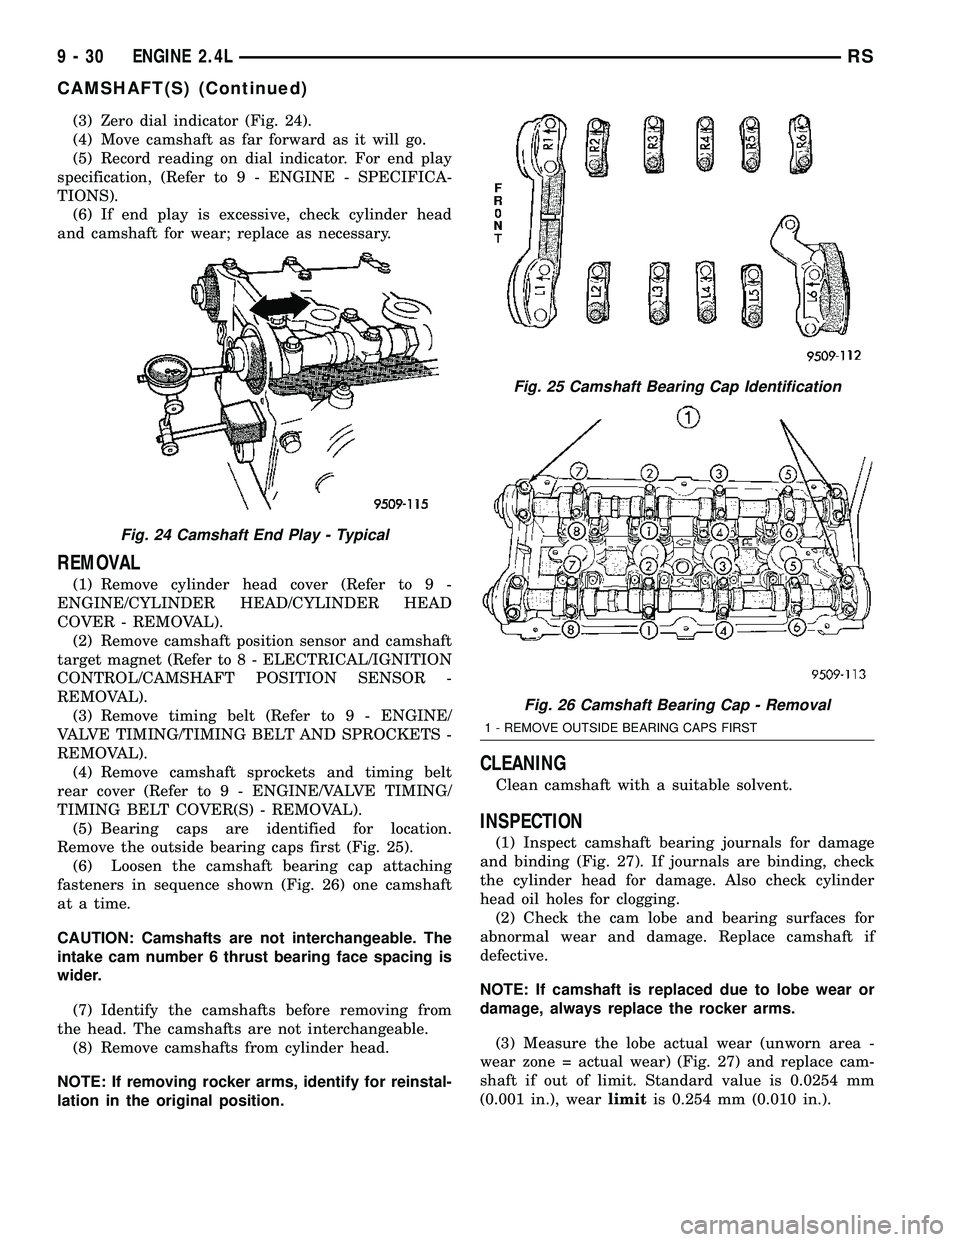
(3) Zero dial indicator (Fig. 24).
(4) Move camshaft as far forward as it will go.
(5) Record reading on dial indicator. For end play
specification, (Refer to 9 - ENGINE - SPECIFICA-
TIONS).
(6) If end play is excessive, check cylinder head
and camshaft for wear; replace as necessary.
REMOVAL
(1) Remove cylinder head cover (Refer to 9 -
ENGINE/CYLINDER HEAD/CYLINDER HEAD
COVER - REMOVAL).
(2) Remove camshaft position sensor and camshaft
target magnet (Refer to 8 - ELECTRICAL/IGNITION
CONTROL/CAMSHAFT POSITION SENSOR -
REMOVAL).
(3) Remove timing belt (Refer to 9 - ENGINE/
VALVE TIMING/TIMING BELT AND SPROCKETS -
REMOVAL).
(4) Remove camshaft sprockets and timing belt
rear cover (Refer to 9 - ENGINE/VALVE TIMING/
TIMING BELT COVER(S) - REMOVAL).
(5) Bearing caps are identified for location.
Remove the outside bearing caps first (Fig. 25).
(6) Loosen the camshaft bearing cap attaching
fasteners in sequence shown (Fig. 26) one camshaft
at a time.
CAUTION: Camshafts are not interchangeable. The
intake cam number 6 thrust bearing face spacing is
wider.
(7) Identify the camshafts before removing from
the head. The camshafts are not interchangeable.
(8) Remove camshafts from cylinder head.
NOTE: If removing rocker arms, identify for reinstal-
lation in the original position.
CLEANING
Clean camshaft with a suitable solvent.
INSPECTION
(1) Inspect camshaft bearing journals for damage
and binding (Fig. 27). If journals are binding, check
the cylinder head for damage. Also check cylinder
head oil holes for clogging.
(2) Check the cam lobe and bearing surfaces for
abnormal wear and damage. Replace camshaft if
defective.
NOTE: If camshaft is replaced due to lobe wear or
damage, always replace the rocker arms.
(3) Measure the lobe actual wear (unworn area -
wear zone = actual wear) (Fig. 27) and replace cam-
shaft if out of limit. Standard value is 0.0254 mm
(0.001 in.), wearlimitis 0.254 mm (0.010 in.).
Fig. 24 Camshaft End Play - Typical
Fig. 25 Camshaft Bearing Cap Identification
Fig. 26 Camshaft Bearing Cap - Removal
1 - REMOVE OUTSIDE BEARING CAPS FIRST
9 - 30 ENGINE 2.4LRS
CAMSHAFT(S) (Continued)
Page 1231 of 2339
(6) Install oil pressure switch and connector. (Refer
to 9 - ENGINE/LUBRICATION/OIL PRESSURE
SENSOR/SWITCH - INSTALLATION)
OIL
STANDARD PROCEDURE
ENGINE OIL LEVEL CHECK
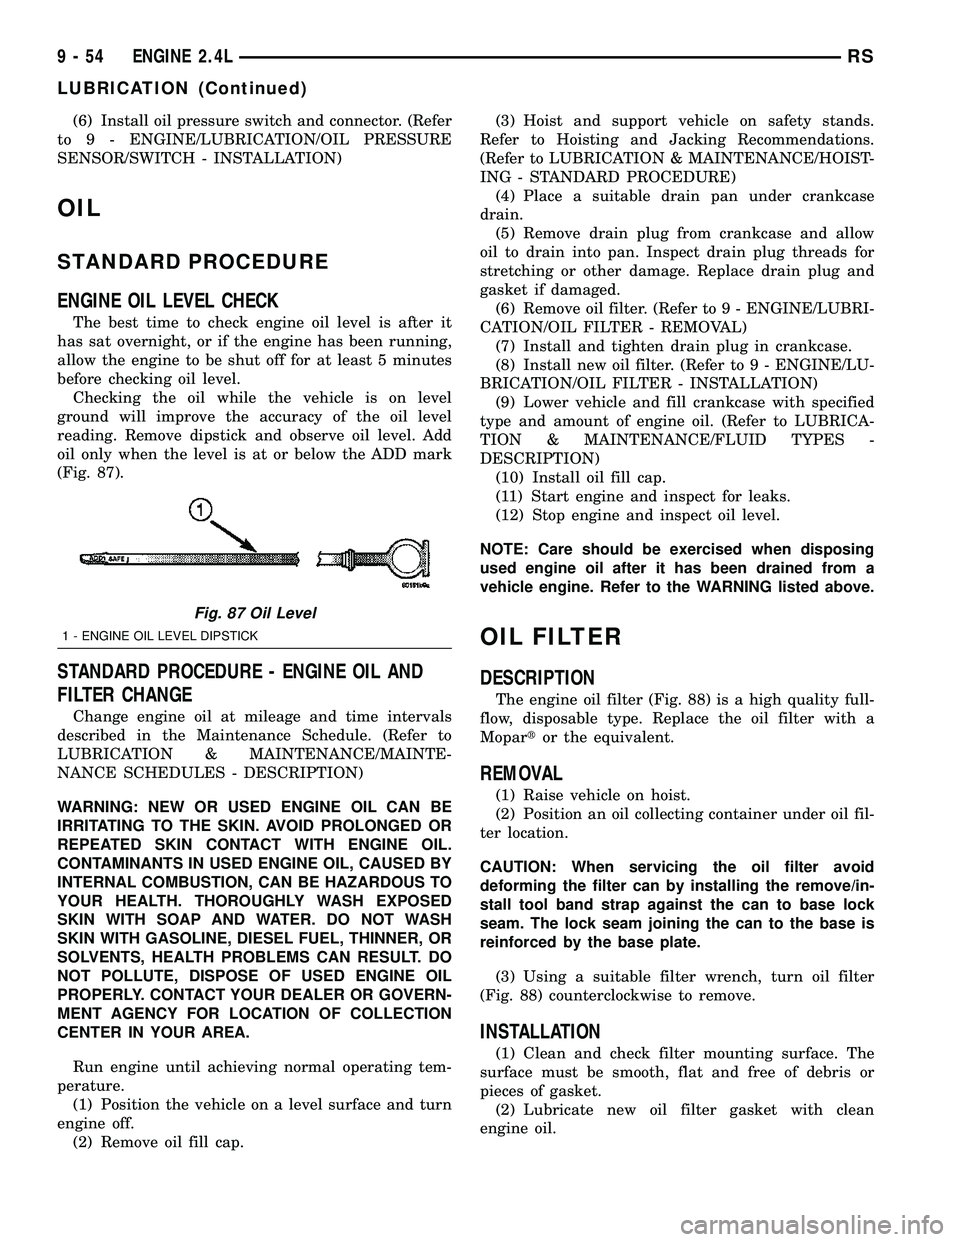
The best time to check engine oil level is after it
has sat overnight, or if the engine has been running,
allow the engine to be shut off for at least 5 minutes
before checking oil level.
Checking the oil while the vehicle is on level
ground will improve the accuracy of the oil level
reading. Remove dipstick and observe oil level. Add
oil only when the level is at or below the ADD mark
(Fig. 87).
STANDARD PROCEDURE - ENGINE OIL AND
FILTER CHANGE
Change engine oil at mileage and time intervals
described in the Maintenance Schedule. (Refer to
LUBRICATION & MAINTENANCE/MAINTE-
NANCE SCHEDULES - DESCRIPTION)
WARNING: NEW OR USED ENGINE OIL CAN BE
IRRITATING TO THE SKIN. AVOID PROLONGED OR
REPEATED SKIN CONTACT WITH ENGINE OIL.
CONTAMINANTS IN USED ENGINE OIL, CAUSED BY
INTERNAL COMBUSTION, CAN BE HAZARDOUS TO
YOUR HEALTH. THOROUGHLY WASH EXPOSED
SKIN WITH SOAP AND WATER. DO NOT WASH
SKIN WITH GASOLINE, DIESEL FUEL, THINNER, OR
SOLVENTS, HEALTH PROBLEMS CAN RESULT. DO
NOT POLLUTE, DISPOSE OF USED ENGINE OIL
PROPERLY. CONTACT YOUR DEALER OR GOVERN-
MENT AGENCY FOR LOCATION OF COLLECTION
CENTER IN YOUR AREA.
Run engine until achieving normal operating tem-
perature.
(1) Position the vehicle on a level surface and turn
engine off.
(2) Remove oil fill cap.(3) Hoist and support vehicle on safety stands.
Refer to Hoisting and Jacking Recommendations.
(Refer to LUBRICATION & MAINTENANCE/HOIST-
ING - STANDARD PROCEDURE)
(4) Place a suitable drain pan under crankcase
drain.
(5) Remove drain plug from crankcase and allow
oil to drain into pan. Inspect drain plug threads for
stretching or other damage. Replace drain plug and
gasket if damaged.
(6) Remove oil filter. (Refer to 9 - ENGINE/LUBRI-
CATION/OIL FILTER - REMOVAL)
(7) Install and tighten drain plug in crankcase.
(8) Install new oil filter. (Refer to 9 - ENGINE/LU-
BRICATION/OIL FILTER - INSTALLATION)
(9) Lower vehicle and fill crankcase with specified
type and amount of engine oil. (Refer to LUBRICA-
TION & MAINTENANCE/FLUID TYPES -
DESCRIPTION)
(10) Install oil fill cap.
(11) Start engine and inspect for leaks.
(12) Stop engine and inspect oil level.
NOTE: Care should be exercised when disposing
used engine oil after it has been drained from a
vehicle engine. Refer to the WARNING listed above.
OIL FILTER
DESCRIPTION
The engine oil filter (Fig. 88) is a high quality full-
flow, disposable type. Replace the oil filter with a
Mopartor the equivalent.
REMOVAL
(1) Raise vehicle on hoist.
(2) Position an oil collecting container under oil fil-
ter location.
CAUTION: When servicing the oil filter avoid
deforming the filter can by installing the remove/in-
stall tool band strap against the can to base lock
seam. The lock seam joining the can to the base is
reinforced by the base plate.
(3) Using a suitable filter wrench, turn oil filter
(Fig. 88) counterclockwise to remove.
INSTALLATION
(1) Clean and check filter mounting surface. The
surface must be smooth, flat and free of debris or
pieces of gasket.
(2) Lubricate new oil filter gasket with clean
engine oil.
Fig. 87 Oil Level
1 - ENGINE OIL LEVEL DIPSTICK
9 - 54 ENGINE 2.4LRS
LUBRICATION (Continued)