jacking CHRYSLER CROSSFIRE 2007 1.G Owners Manual
[x] Cancel search | Manufacturer: CHRYSLER, Model Year: 2007, Model line: CROSSFIRE, Model: CHRYSLER CROSSFIRE 2007 1.GPages: 299, PDF Size: 8.26 MB
Page 19 of 299

approximately 30 seconds, insert the key in the ignition
and turn it to the ON/RUN position. The remote control
should once again be operational.
SECURITY ALARM SYSTEM
The system monitors the doors, rear liftgate/decklid,
hood, and ignition for unauthorized operation. The se-
curity alarm system is automatically armed or disarmed
with the remote control or any of your vehicle's keys by
locking or unlocking the vehicle.
The antitheft alarm is armed within approximately 10
seconds after locking the vehicle. A blinking light in the
tow away alarm switch indicates that the alarm is armed.
Once the alarm system has been armed, the exterior
vehicle lights will flash and an alarm will sound when a
door, the rear liftgate/decklid, the hood, or glove com-
partment is opened, or if someone attempts to raise the
vehicle for towing. The alarm will flash the exterior
lamps for approximately three minutes and sound an
audible alarm for 30 seconds. The alarm will stay on even
if the activating element is immediately closed.
Tow-Away Alarm
The tow-away alarm switch is located on the console. To
deactivate for towing or jacking up the vehicle, press and
release the upper portion of the switch. Press and release
the upper portion to activate it again.
After the alarm system has been armed, the exterior
vehicle lights will flash and an alarm will sound when
someone attempts to raise the vehicle. The alarm will
flash the exterior lamps for approximately three minutes
and sound an audible alarm for 30 seconds. The alarm
will stay on even if the vehicle is immediately lowered.
To cancel the alarm, insert the key into the ignition switch
or press a transmit button on the key fob.
To prevent triggering the tow-away alarm feature when
parking on a surface subject to movement (such as a
ferry), switch off the tow-away alarm. To do so, turn the
key in the ignition switch to the OFF/LOCK or ACC
position, or remove the key from the ignition switch.
Press the tow-away alarm switch and the indicator light
will illuminate briefly. Exit the vehicle, and lock the
vehicle with the key or the remote control.
THINGS TO KNOW BEFORE STARTING YOUR VEHICLE 19
2
Page 182 of 299

cannot be expected to function as a tire pressure gauge.
There can be a delay between the instant you adjust the
air pressure in a tire and when the system updates the
display. The TPMS is not intended to provide you with
notification of rapid air loss.
The TPMS will cause the Telltale lamp in the instrument
cluster to illuminate whenever the pressure in one tire
falls 25% below the recommended pressure shown on the
tire label.NOTE:A TPMS does not replace normal tire mainte-
nance.
CAUTION!
The TPMS has been optimized for the original
equipment tires and wheels. TPMS pressures have
been established for the tire size equipped on your
vehicle. Undesirable operation or sensor damage
may result when using replacement equipment that
is not of the same size, type, and/or style. Aftermar-
ket wheels can cause sensor damage. Do not use
aftermarket tire sealant or balance beads as damage
to the sensors may result. The standard TIREFIT
system (see Tirefit Tire Repair and Jacking Instruc-
tions in the What To Do In Emergencies section) is
specifically designed to operate in conjunction with
the TPMS, and will not damage the sensors.
182 STARTING AND OPERATING
Page 193 of 299

WHAT TO DO IN EMERGENCIES
CONTENTS
mHazard Warning Flasher.................194
mIf Your Engine Overheats................194
mTIREFIT Tire Repair And Jacking..........195
NTIREFIT............................195
NPreparations For Jacking................198
NJack Location And Instructions............200
mJump-Starting The Battery...............203
mDriving On Slippery Surfaces.............205NTraction............................205
mFreeing A Stuck Vehicle.................206
mTowing A Disabled Vehicle...............206
NTowing Eyes.........................208
NTow-Away Alarm.....................210
mConvertible Top Emergency Operation......211
NRelieving Hydraulic Pressure.............212
NOpening a Locked Decklid...............217
6
Page 195 of 299

NOTE:There are steps that you can take to slow down
an impending overheat condition. If your air conditioner
is on, turn it off. The air conditioning system adds heat to
the cooling system and turning off the A/C removes this
heat. You can also turn the temperature control to maxi-
mum heat, the mode control to floor, and the fan control
to high. This allows the heater core to act as a supplement
to the radiator and aids in removing heat from the
cooling system.
CAUTION!
Driving with a hot cooling system could damage
your vehicle. If temperature gauge reads ªH,º pull
over and stop the vehicle. Idle the vehicle with the air
conditioner turned off until the pointer drops back
into the normal range. If the pointer remains on the
ªH,º turn the engine off immediately, and call for
service.
WARNING!
A hot cooling system is dangerous. You or others
could be badly burned by steam or boiling coolant. If
your temperature gauge pointer is in the red area,
turn off the engine immediately. You may want to call
an authorized dealer for service. If you decide to look
under the hood yourself, see Section 7 of this manual.
Follow the warnings under the Cooling System Pres-
sure Cap paragraph.
TIREFIT TIRE REPAIR AND JACKING
TIREFIT
Small punctures, particularly those in the tread, can be
sealed with TIREFIT. Foreign objects (e.g., screws or
nails) should not be removed from the tire. TIREFIT can
be used in outside temperatures down to approximately
-4ÉF (-20ÉC).
WHAT TO DO IN EMERGENCIES 195
6
Page 198 of 299

16. If a tire pressure of 26 psi (180 kPa) is obtained, press
the air pump switch to 0, turn the ignition switch to the
OFF/LOCK position, and disconnect the TIREFIT sys-
tem.
17. Drive the vehicle for about 10 minutes to ensure
optimum distribution of the tire sealant within the tire.
18. Check the pressure in the tire. If the pressure is above
19 psi (130 kPa), inflate the tire to the pressure indicated
on the tire pressure label on the driver side latch pillar.
19. Have the tire inspected at the earliest opportunity at
an authorized dealer or tire service center.
NOTE:Do not exceed 50 mph (80 km/h) until the tire
has been inspected.
NOTE:If a pressure of at least 19 psi (130 kPa) cannot
be maintained in the tire, the tire is too badly damaged.
Do not attempt to drive the vehicle further, and call for
assistance.
NOTE:Do not operate the electric air pump for more
than eight minutes to avoid overheating. The air pump
may be used again once it has cooled down.
NOTE:Replace the TIREFIT sealant bottle once every
four years to assure optimum operation of the system.
NOTE:If TIREFIT is liquid, clean water and a damp
cloth will remove the material from the vehicle or tire and
wheel components. Once TIREFIT sealing material has
dried, it can easily be peeled off and properly discarded.
Preparations for Jacking
WARNING!
Getting under a jacked-up vehicle is dangerous. The
vehicle could slip off the jack and fall on you. You
could be crushed. Never get any part of your body
under a vehicle that is on a jack. Never start or run
the engine while the vehicle is on a jack. If you need
to get under a raised vehicle, take it to a service
facility where it can be raised on a lift.
198 WHAT TO DO IN EMERGENCIES
Page 199 of 299

WARNING!
Do not attempt to repair a tire on the side of the
vehicle close to traffic. Pull far enough off the road to
avoid the danger of being hit when operating the
jack or repairing a tire.
Jacking the vehicle should only be necessary in the event
that a tire has been severely damaged, and must be
replaced. (See TIREFIT Tire Repair section for a descrip-
tion of cuts and punctures that may be repairable with
TIREFIT.)
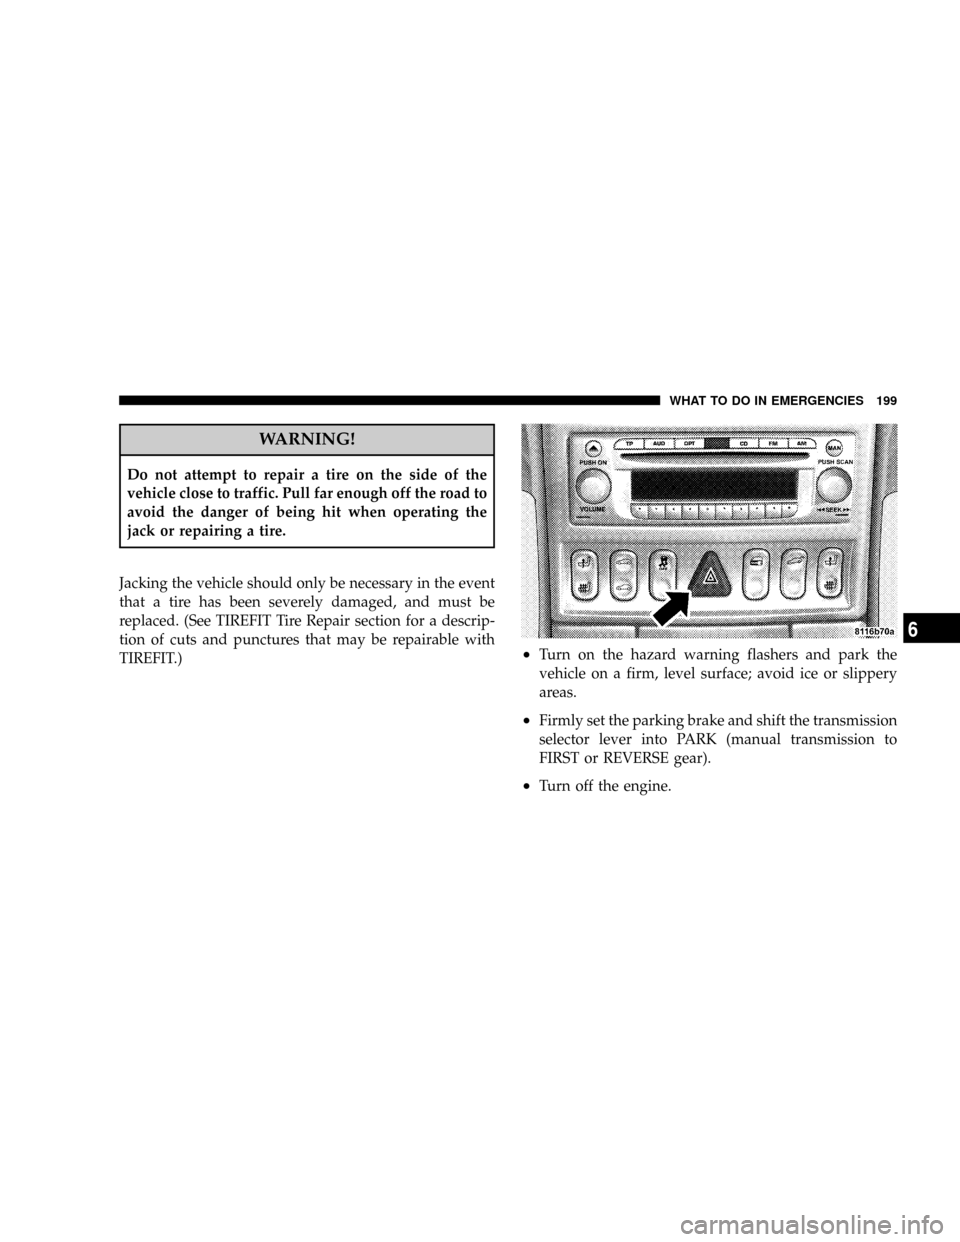
²Turn on the hazard warning flashers and park the
vehicle on a firm, level surface; avoid ice or slippery
areas.
²Firmly set the parking brake and shift the transmission
selector lever into PARK (manual transmission to
FIRST or REVERSE gear).
²Turn off the engine.
WHAT TO DO IN EMERGENCIES 199
6
Page 200 of 299

²Block the wheel diagonally opposite the flat tire.
²Passengers must not remain in the vehicle when the
vehicle is jacked.
NOTE:The jack is designed exclusively for jacking up
the vehicle at the specified jack location points built
beneath either side of the vehicle.
Jack Location and Instructions
1. Remove the jack and jack handle from stowage be-
neath the cargo compartment carpet.
2. The lifting points for the jack are located beneath the
outer edge of the body side, directly behind the front
wheel housings, and in front of the rear wheel housings.
200 WHAT TO DO IN EMERGENCIES
Page 299 of 299

INTRODUCTION INTRODUCTION HOW TO USE THIS MANUAL WARNINGS AND CAUTIONS VEHICLE IDENTIFICATION NUMBER THINGS TO KNOW BEFORE STARTING YOUR VEHICLE A WORD ABOUT YOUR KEYS KeysObtaining Replacement KeysIgnition
Key RemovalKey-In-Ignition ReminderGLOVE COMPARTMENT LOCK DOOR LOCKS Central Locking SwitchAutomatic Central LockingGeneral Notes On the Central Locking SystemEmergency Unlocking FeatureStart LockoutREMOTE KEYLESS ENTRY To Unlock the
DoorsTo Lock The DoorsPanic AlarmTo Use the Panic AlarmGeneral InformationTransmitter Battery ServiceSECURITY ALARM SYSTEM Tow-Away AlarmDECKLID INTERNAL EMERGENCY RELEASE - ROADSTER POWER WINDOWS Power Window Operation With
The Convertible Top Switch (Roadster Only)REAR LIFTGATE/DECKLID RELEASE OCCUPANT RESTRAINTS Lap/Shoulder BeltsSeat Belts and Pregnant WomenSeat Belt ExtenderSupplemental Restraint System (SRS) - Airbag Child RestraintENGINE BREAK-IN
RECOMMENDATIONS SAFETY TIPS Exhaust GasSafety Checks You Should Make Inside the VehiclePeriodic Safety Checks You Should Make Outside the VehicleUNDERSTANDING THE FEATURES OF YOUR VEHICLE CONVERTIBLE TOP OPERATION To Lower
The TopTo Raise The TopConvertible Top Lamp and Audible Signal ChartCONSOLE FEATURES Storage Compartments (If Equipped)AshtrayCoin HolderPower Outlet/Cigar LighterGlove CompartmentCUPHOLDER (If Equipped) MIRRORS Inside Day/Night MirrorExterior
Mirrors Folding FeatureHeated Remote Control Mirrors (If Equipped)Outside MirrorsPower Remote Control Outside MirrorsVanity Mirrors SEATS Manual Seat Adjustments (If Equipped)Driver Eight-Way Power Seat (If Equipped)Passenger Four-Way Power Seat (If Equipped)
Heated Seats (If Equipped)TO OPEN AND CLOSE THE HOOD INTERIOR LIGHTS Front Map/Reading LightsBattery Saver FeatureInstrument Panel LightingNightSecurity IlluminationEXTERIOR LIGHTS Headlights and Parking LightsDaytime Running Lights (Where
Applicable)Fog Lights (If Equipped)Standing LightsMULTIFUNCTION CONTROL LEVER Turn SignalsHeadlight Dimmer SwitchPassing LightWindshield Wipers And WasherMist FunctionTELESCOPING STEERING COLUMN TIRE PRESSURE MONITOR SYSTEM (if
equipped) REAR SPOILER BRAKE ASSIST SYSTEM (BAS) ELECTRONIC STABILITY PROGRAM (ESP) Synchronizing ESPELECTRONIC SPEED CONTROL To Vary The Speed SettingTo DeactivateTo Resume SpeedUsing Speed Control On HillsGARAGE DOOR
OPENER (If Equipped) Programming The Universal TransceiverGate Operator/Canadian ProgrammingUsing the Universal TransceiverErasing Universal Transceiver ButtonsReprogramming a Single ButtonSecurityUMBRELLA HOOK UNDERSTANDING YOUR
INSTRUMENT PANEL INSTRUMENTS AND CONTROLS INSTRUMENT CLUSTER INSTRUMENT CLUSTER DESCRIPTION INFINITY MODULUS AM/FM STEREO RADIO WITH SINGLE-DISC CD PLAYER AND GPS NAVIGATION AM/FM STEREO RADIO WITH
SINGLE-DISC CD PLAYER INFINITY MODULUS Entertainment SystemsCD Player OperationUser MenuUser Memory (USER - 1, 2, 3)Mono/StereoDriver - L/RTelephone mute characteristicsCOMPACT DISC MAINTENANCE RADIO ANTENNA RADIO OPERATION AND
CELLULAR PHONES CLIMATE CONTROLS Temperature ControlFan ControlBasic Setting - HeaterBasic Setting - Air ConditionerDust Filter (If Equipped)Operating Tips STARTING AND OPERATING STARTING PROCEDURES Normal StartingExtremely Cold Weather
(below -20 degrees F or -29 degrees C)If Engine Fails to StartAfter StartingTRANSMISSION SHIFTING Manual Transmission Recommended Shift SpeedsAutomatic Transmission StoppingManeuveringPark PositionReverseNeutralDriveAutoStick Gear selectionGear Ranges
Program mode selector switchEmergency Operation (Limp Home Mode)PARKING BRAKE BRAKE SYSTEM Brake Assist System (BAS)Electronic Stability Program (ESP)Synchronizing ESPESP Control switchAnti-Lock Brake System (ABS)Brake Pad Break-InPOWER
STEERING TIRE SAFETY INFORMATION Tire Markings Tire Identification Number (TIN)Tire Loading and Tire PressureTIRES-GENERAL INFORMATION Tire PressureTire Inflation PressuresRadial-Ply TiresTire SpinningTread Wear IndicatorsReplacement TiresAlignment
And BalanceTIRE PRESSURE MONITOR SYSTEM (If Equipped) General InformationTIRE CHAINS ORIGINAL EQUIPMENT TIRES SNOW TIRES TIRE ROTATION RECOMMENDATIONS FUEL REQUIREMENTS Reformulated GasolineGasoline/Oxygenate BlendsMMT
in GasolineMaterials Added to FuelSulfur in GasolineADDING FUEL Fuel Filler Cap (Gas Cap)VEHICLE LOADING Roof Luggage RackTRAILER TOWING WHAT TO DOIN EMERGENCIES HAZARD WARNING FLASHER IF YOUR ENGINE OVERHEATS TIREFIT TIRE
REPAIR AND JACKING TIREFITPreparations for JackingJack Location and Instructions JUMP-STARTING THE BATTERY DRIVING ON SLIPPERY SURFACES Traction FREEING A STUCK VEHICLE TOWING A DISABLED VEHICLE Towing EyesTow-Away Alarm
CONVERTIBLE TOP EMERGENCY OPERATION Relieving Hydraulic PressureOpening a Locked DecklidMAINTAINING YOUR VEHICLE 3.2L ENGINE ONBOARD DIAGNOSTIC SYSTEM (OBD II) EMISSIONS INSPECTION AND MAINTENANCE PROGRAMS
REPLACEMENT PARTS DEALER SERVICE MAINTENANCE PROCEDURES Engine OilIgnition Wiring SystemCrankcase Emission Control SystemMaintenance-Free BatteryAir ConditionerPower Steering FluidChassis LubricationBody LubricationWindshield Wiper Blades
Windshield Wiper Blade ReplacementWindshield Washer ReservoirExhaust SystemCooling SystemHoses And Vacuum/Vapor HarnessesBrakesAutomatic TransmissionManual TransmissionAppearance Care and Protection from CorrosionCONVERTIBLE TOP CARE
WashingGeneral CleaningWeather Strip CareFUSES Underhood Accessory Fuse Block FusesRelay Control Module Fuses Interior Fuses REPLACEMENT BULBSInterior Light BulbsExterior Light BulbsEXTERIOR LIGHT BULB SERVICE HeadlightsFront Turn Signal and
Parking/Standing LightsFront and Rear Sidemarker LightsTail, Stop, Back Up and Turn Signal LightsLicense Plate LightHeadlight AimingVEHICLE STORAGE SPECIFICATIONS FLUID CAPACITIES RECOMMENDED FLUIDS, LUBRICANTS AND GENUINE PARTS Engine
ChassisBodyMAINTENANCE SCHEDULES INTRODUCTION WARRANTY EMISSION CONTROL SYSTEM MAINTENANCE MAINTENANCE SCHEDULES SCOPE OF WORK FOR A SCHEDULE MAINTENANCE SERVICESCOPE OF WORK FOR B SCHEDULE
MAINTENANCE SERVICEFSS SYSTEM REGULAR CHECK-UPS Additional Periodic MaintenanceSPECIAL MAINTENANCE REQUIREMENTS CoolantDust Filter for Heating/Ventilation Replacement (If Equipped)ENGINE OIL CHANGE AND FILTER REPLACEMENT IF
YOU NEED CONSUMER ASSISTANCE SUGGESTIONS FOR OBTAINING SERVICE FOR YOUR VEHICLE Prepare For The AppointmentPrepare A ListBe Reasonable With RequestsIF YOU NEED ASSISTANCE WARRANTY INFORMATION MOPAR PARTS REPORTING
SAFETY DEFECTS In CanadaPUBLICATION ORDER FORMS DEPARTMENT OF TRANSPORTATION UNIFORM TIRE QUALITY GRADES TreadwearTraction GradesTemperature GradesINDEX