key CHRYSLER CROSSFIRE 2008 1.G User Guide
[x] Cancel search | Manufacturer: CHRYSLER, Model Year: 2008, Model line: CROSSFIRE, Model: CHRYSLER CROSSFIRE 2008 1.GPages: 358, PDF Size: 4.7 MB
Page 20 of 358
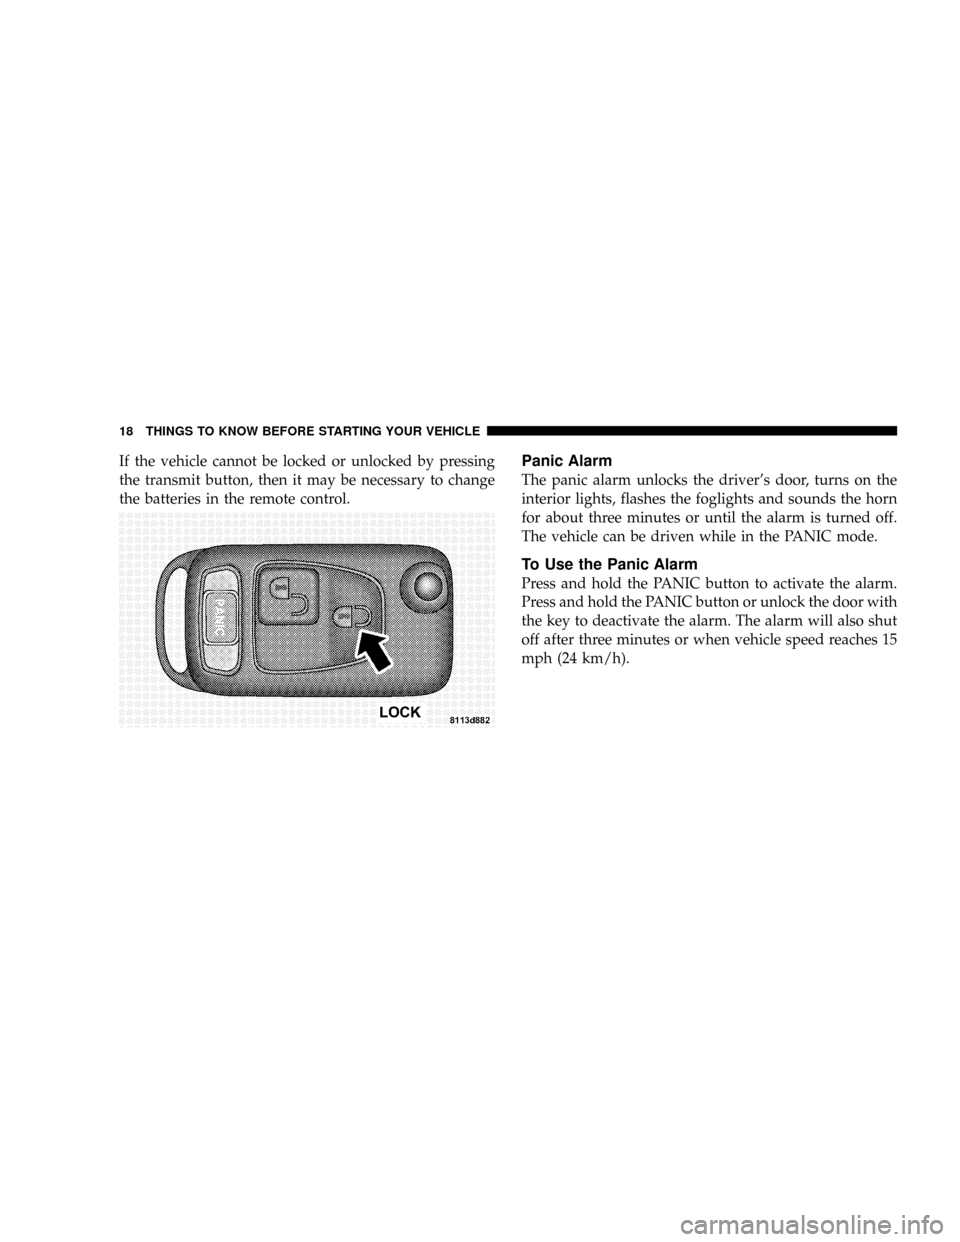
If the vehicle cannot be locked or unlocked by pressing
the transmit button, then it may be necessary to change
the batteries in the remote control.Panic Alarm
The panic alarm unlocks the driver's door, turns on the
interior lights, flashes the foglights and sounds the horn
for about three minutes or until the alarm is turned off.
The vehicle can be driven while in the PANIC mode.
To Use the Panic Alarm
Press and hold the PANIC button to activate the alarm.
Press and hold the PANIC button or unlock the door with
the key to deactivate the alarm. The alarm will also shut
off after three minutes or when vehicle speed reaches 15
mph (24 km/h).
18 THINGS TO KNOW BEFORE STARTING YOUR VEHICLE
Page 22 of 358
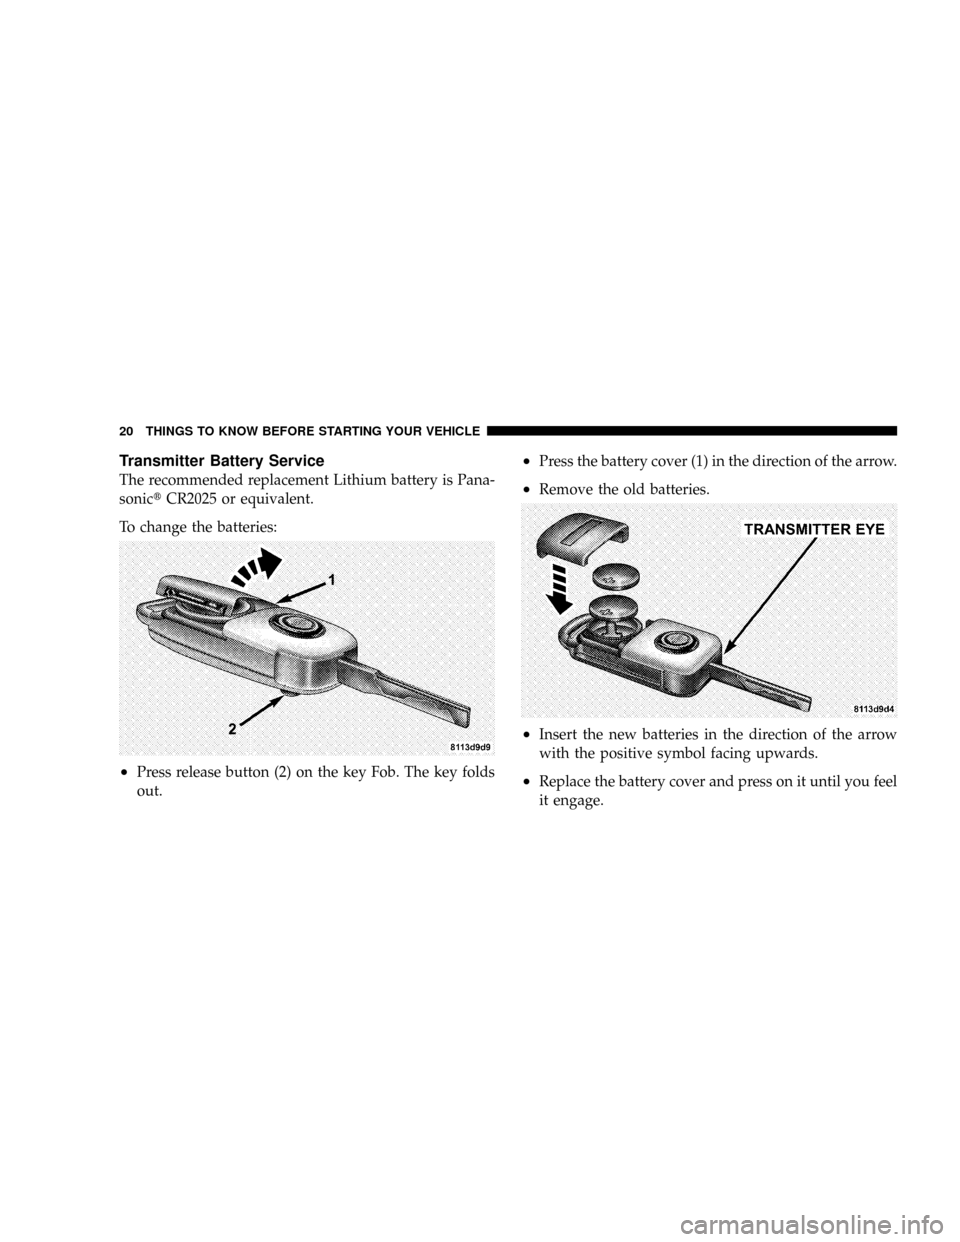
Transmitter Battery Service
The recommended replacement Lithium battery is Pana-
sonictCR2025 or equivalent.
To change the batteries:
²Press release button (2) on the key Fob. The key folds
out.
²Press the battery cover (1) in the direction of the arrow.
²Remove the old batteries.
²Insert the new batteries in the direction of the arrow
with the positive symbol facing upwards.
²Replace the battery cover and press on it until you feel
it engage.
20 THINGS TO KNOW BEFORE STARTING YOUR VEHICLE
Page 23 of 358
NOTE:Only replace the batteries in pairs.
The system may have to be re-synchronized if the trans-
mitter is without voltage for several minutes. To synchro-
nize, aim the transmitter eye at the vehicle and briefly
press either the LOCK or the UNLOCK button twice.
Within approximately 30 seconds, insert the key in the
ignition and turn it to the ON/RUN position. The remote
control should once again be operational.
SECURITY ALARM SYSTEM
The Security Alarm system monitors the doors, rear
liftgate/decklid, hood, and ignition for unauthorized
operation. The Security Alarm system is automatically
armed or disarmed with the remote control or any of
your vehicle's keys by locking or unlocking the vehicle.
The antitheft alarm is armed within approximately 10
seconds after locking the vehicle. A blinking light in the
tow away alarm switch indicates that the alarm is armed.
Once the Security Alarm system has been armed, theexterior vehicle lights will flash and an alarm will sound
when a door, the rear liftgate/decklid, the hood, or glove
compartment is opened, or if someone attempts to raise
the vehicle for towing. The Security Alarm will flash the
exterior lamps for approximately three minutes and
sound an audible alarm for 30 seconds. The Security
Alarm will stay on even if the activating element is
immediately closed.
Tow-Away Alarm
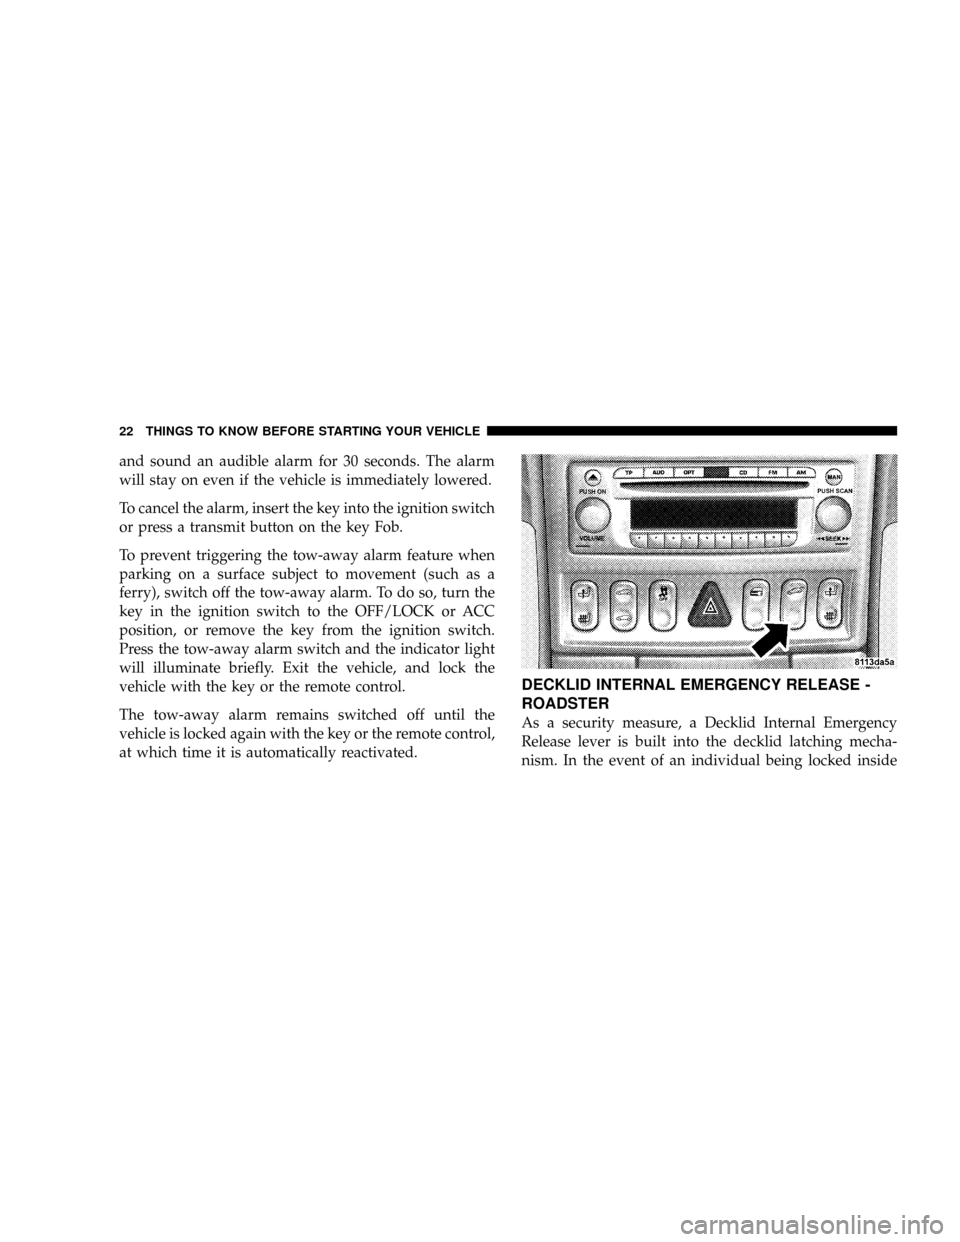
The tow-away alarm switch is located on the console. To
deactivate for towing or jacking up the vehicle, press and
release the upper portion of the switch. Press and release
the upper portion to activate it again.
After the alarm system has been armed, the exterior
vehicle lights will flash and an alarm will sound when
someone attempts to raise the vehicle. The alarm will
flash the exterior lamps for approximately three minutes
THINGS TO KNOW BEFORE STARTING YOUR VEHICLE 21
2
Page 24 of 358
and sound an audible alarm for 30 seconds. The alarm
will stay on even if the vehicle is immediately lowered.
To cancel the alarm, insert the key into the ignition switch
or press a transmit button on the key Fob.
To prevent triggering the tow-away alarm feature when
parking on a surface subject to movement (such as a
ferry), switch off the tow-away alarm. To do so, turn the
key in the ignition switch to the OFF/LOCK or ACC
position, or remove the key from the ignition switch.
Press the tow-away alarm switch and the indicator light
will illuminate briefly. Exit the vehicle, and lock the
vehicle with the key or the remote control.
The tow-away alarm remains switched off until the
vehicle is locked again with the key or the remote control,
at which time it is automatically reactivated.
DECKLID INTERNAL EMERGENCY RELEASE -
ROADSTER
As a security measure, a Decklid Internal Emergency
Release lever is built into the decklid latching mecha-
nism. In the event of an individual being locked inside
22 THINGS TO KNOW BEFORE STARTING YOUR VEHICLE
Page 26 of 358
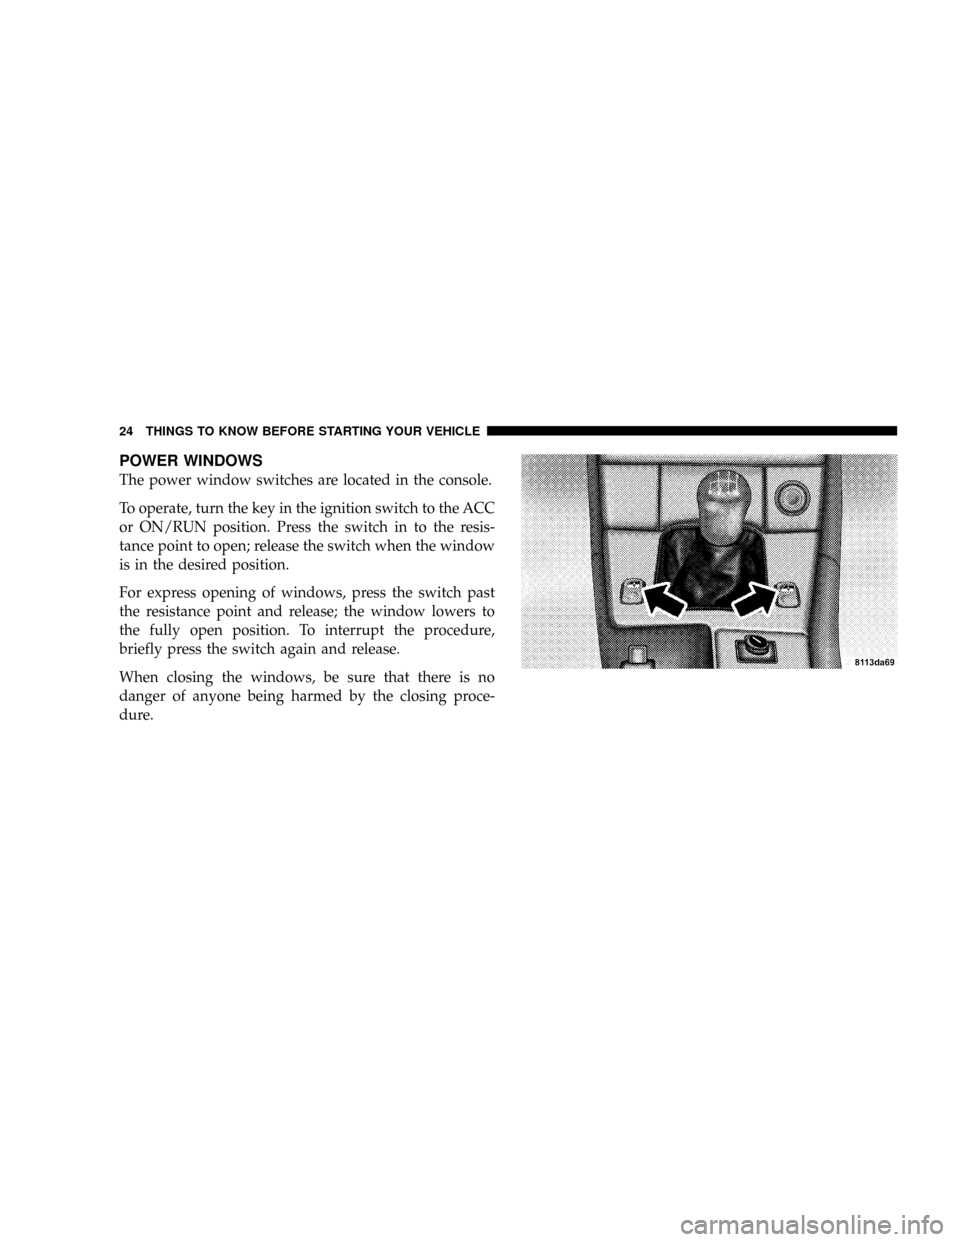
POWER WINDOWS
The power window switches are located in the console.
To operate, turn the key in the ignition switch to the ACC
or ON/RUN position. Press the switch in to the resis-
tance point to open; release the switch when the window
is in the desired position.
For express opening of windows, press the switch past
the resistance point and release; the window lowers to
the fully open position. To interrupt the procedure,
briefly press the switch again and release.
When closing the windows, be sure that there is no
danger of anyone being harmed by the closing proce-
dure.
24 THINGS TO KNOW BEFORE STARTING YOUR VEHICLE
Page 27 of 358
WARNING!
When leaving the vehicle, always remove the key
from the ignition switch, and lock the vehicle. Do not
leave children unattended in the vehicle, or with
access to an unlocked vehicle. Unsupervised use of
vehicle equipment can cause serious personal injury.
Power Window Operation With The Convertible
Top Switch (Roadster Only)
The power windows can also be operated by using the
convertible top switch.
To operate, turn the key in the ignition switch to the
ON/RUN position. Press down on the rear of the con-
vertible top switch twice to open the windows.
Press down on the front of the convertible top switch
twice to close the windows.
REAR LIFTGATE/DECKLID RELEASE
You can open the rear liftgate/decklid by using the
handle located on the liftgate/decklid just above the rear
license plate pocket.
WARNING!
Do not allow children to have access to the rear cargo
area by climbing into the rear cargo area from out-
side. Always close the liftgate/decklid when your
vehicle is unattended. Once in the cargo area, young
children may have difficulty leaving the vehicle. If
trapped in the cargo area, children can die from
suffocation or heat stroke.
THINGS TO KNOW BEFORE STARTING YOUR VEHICLE 25
2
Page 29 of 358
and they reduce the risk of injury caused by striking the
inside of the vehicle.Everyonein a motor vehicle needs
to be buckled up all the time.
Lap/Shoulder Belts
Each seating position is equipped with a combined
lap/shoulder belt system.
The belt webbing retractor will lock only during very
sudden stops or impacts. This feature allows the shoulder
part of the belt to move freely with you under normal
conditions. In a collision, the belt locks and reduces the
risk of your striking the inside of the vehicle or being
thrown out. The seat belts are also equipped with emer-
gency tensioning retractors. These tensioning retractors
are located in each belt's inertia reel and become opera-
tionally ready with the key in the ignition switch turnedto the ACC or ON/RUN positions. The emergency
tensioning retractors are designed to activate during
frontal and rear impacts. They remove slack from the
belts in such a way that the seat belts fit more snugly
against the body, restricting its forward movement as
much as possible.
In cases of other frontal impacts, roll overs, certain side
impacts, rear collisions or other accidents without suffi-
cient frontal or rear impact forces, the emergency tension-
ing retractors will not be activated. The driver and
passenger will then be protected by the fastened seat
belts and inertia reel in the usual manner.
THINGS TO KNOW BEFORE STARTING YOUR VEHICLE 27
2
Page 30 of 358
WARNING!
²Wearing a seat belt incorrectly is dangerous. Seat
belts are designed to go around the large bones of
your body. These are the strongest parts of your
body and can take the forces of a collision the best.
Wearing your belt in the wrong place could make
your injuries in a collision much worse. You might
suffer internal injuries, or you could even slide out
of part of the belt. Follow these instructions to
wear your seat belt safely and to keep your pas-
sengers safe, too.
²Two people should never be belted into a single
seat belt. People belted together can crash into one
another in an accident, hurting one another badly.
Never use a lap/shoulder belt or a lap belt for more
than one person, no matter what their size.
Lap/Shoulder Belt Operating Instructions
1. Enter the vehicle and close the door. Unless the key is
in the ACC or ON position, seat will not move. Sit back
and adjust the seat.
2. The seat belt latch plate is above the back of your seat.
Grasp the latch plate and pull out the belt. Slide the latch
plate up the webbing as far as necessary to make the belt
go around your lap.
28 THINGS TO KNOW BEFORE STARTING YOUR VEHICLE
Page 40 of 358
airbags to inflate. Based on the level of collision
severity, the front control module determines the
proper rate of inflation. The front airbag inflators are
designed to provide different rates of airbag inflation
from direction provided by the ORC. The ORC may
modify the rate of inflation based on the occupant size
provided by the Occupant Classification Module. The
ORC will not detect roll overs. The ORC monitors the
readiness of the electronic parts of the system when-
ever the ignition switch is in the START or RUN
positions. If the key is in the OFF position, in the ACC
position, or not in the ignition, the airbags are not on
and will not inflate.
Also, the ORC turns on the AIRBAG warning light
(located in the instrument cluster) and Passenger
Airbag Disable (PAD) indicator light (located in the
center console) for 4 seconds for a self-check when theignition is first turned on. After the self-check, the
AIRBAG warning light will turn off. The PAD indica-
tor light will function normally (Refer to ªPassenger
Airbag Disable (PAD) Indicator Lightº in this section).
If the ORC detects a malfunction in any part of the
system, it turns on the AIRBAG warning light either
momentarily or continuously.
WARNING!
Ignoring the AIRBAG light in your instrument panel
could mean you won't have the airbags to protect you
in a collision. If the light does not come on, stays on
after you start the vehicle, or if it comes on as you
drive, have the airbag system checked right away.
38 THINGS TO KNOW BEFORE STARTING YOUR VEHICLE
Page 45 of 358
²The operational readiness of the side airbag system is
verified by the airbag indicator light in the instrument
cluster when turning the key in the ignition switch to
the ON/RUN position. If no fault is detected, the light
will go out after approximately four seconds. After the
light goes out, the system continues to monitor the
components and circuitry of the airbag system and
will indicate a malfunction by coming on again. If the
light does not come on at all, or if it fails to go out after
the four seconds, or if it comes on thereafter, a mal-
function in the system has been detected. See your
authorized dealer for service.WARNING!
²The door mounted side airbag deploys with consid-
erable force. Being too close to the door panel during
airbag deployment could cause serious injury or
death.
²All occupants must be in the appropriate restraint for
their size and age, especially children 12 and under.
²To help avoid the potential for serious injury and
death should the side airbag be activated, please
follow these guidelines:
1. Occupants, especially children, should never lean
against the door in the area where the side airbag
inflates;
2. Occupants need to sit upright in the center of the seat
to give the side airbag room to inflate;
3. Always use the appropriate restraint for the occupant
and ensure it is properly used.
THINGS TO KNOW BEFORE STARTING YOUR VEHICLE 43
2