tire repair CHRYSLER PACIFICA 2018 Owners Manual
[x] Cancel search | Manufacturer: CHRYSLER, Model Year: 2018, Model line: PACIFICA, Model: CHRYSLER PACIFICA 2018Pages: 696, PDF Size: 8.48 MB
Page 207 of 696
— Service Stop/Start System Warning Light — If
Equipped
This warning light will illuminate when the Stop/Start
system is not functioning properly and service is required.
Contact an authorized dealer for service.
— Tire Pressure Monitoring System (TPMS)
Warning Light
The warning light switches on and a message is displayed
to indicate that the tire pressure is lower than the recom-
mended value and/or that slow pressure loss is occurring.
In these cases, optimal tire duration and fuel consumption
may not be guaranteed.
Should one or more tires be in the condition mentioned
above, the display will show the indications corresponding
to each tire.
CAUTION!
Do not continue driving with one or more flat tires as
handling may be compromised. Stop the vehicle, avoid-
ing sharp braking and steering. If a tire puncture occurs,
repair immediately using the dedicated tire repair kit
and contact your authorized dealer as soon as possible.
Each tire, including the spare (if provided), should be
checked monthly when cold and inflated to the inflation
pressure recommended by the vehicle manufacturer on the
vehicle placard or tire inflation pressure label. (If your
vehicle has tires of a different size than the size indicated
on the vehicle placard or tire inflation pressure label, you
should determine the proper tire inflation pressure for
those tires.)
As an added safety feature, your vehicle has been
equipped with a Tire Pressure Monitoring System (TPMS)
that illuminates a low tire pressure telltale when one or
more of your tires is significantly under-inflated. Accord-
ingly, when the low tire pressure telltale illuminates, you
should stop and check your tires as soon as possible, and
inflate them to the proper pressure. Driving on a signifi-
cantly under-inflated tire causes the tire to overheat and
can lead to tire failure. Under-inflation also reduces fuel
efficiency and tire tread life, and may affect the vehicle’s
handling and stopping ability.
Please note that the TPMS is not a substitute for proper tire
maintenance, and it is the driver ’s responsibility to main-
tain correct tire pressure, even if under-inflation has not
reached the level to trigger illumination of the TPMS low
tire pressure telltale.
4
GETTING TO KNOW YOUR INSTRUMENT PANEL 205
Page 217 of 696
WARNING!(Continued)
•The capabilities of an ABS equipped vehicle must
never be exploited in a reckless or dangerous manner
that could jeopardize the user ’s safety or the safety of
others.
ABS is designed to function with the OEM tires. Modifica-
tion may result in degraded ABS performance.
Anti-Lock Brake Warning Light
The yellow “Anti-Lock Brake Warning Light” will turn on
when the ignition is turned to the ON/RUN mode and
may stay on for as long as four seconds.
If the “Anti-Lock Brake Warning Light” remains on or
comes on while driving, it indicates that the anti-lock
portion of the brake system is not functioning and that
service is required. However, the conventional brake sys-
tem will continue to operate normally if the “Anti-Lock
Brake Warning Light” is on.
If the “Anti-Lock Brake Warning Light” is on, the brake
system should be serviced as soon as possible to restore the
benefits of anti-lock brakes. If the “Anti-Lock Brake Warning
Light” does not come on when the ignition is turned to the
ON/RUN mode, have the light repaired as soon as possible.
Electronic Brake Control System
Your vehicle is equipped with an advanced Electronic
Brake Control system (EBC). This system includes Elec-
tronic Brake Force Distribution (EBD), Anti-Lock Brake
System (ABS), Brake Assist System (BAS), Hill Start Assist
(HSA), Traction Control System (TCS), Electronic Stability
Control (ESC), and Electronic Roll Mitigation (ERM). These
systems work together to enhance both vehicle stability
and control in various driving conditions.
Your vehicle may also be equipped with Ready Alert
Braking (RAB), Rain Brake Support (RBS), Trailer Sway
Control (TSC), and Dynamic Steering Torque (DST).
Traction Control System (TCS)
This system monitors the amount of wheel spin of each of
the driven wheels. If wheel spin is detected, the TCS may
apply brake pressure to the spinning wheel(s) and/or
reduce vehicle power to provide enhanced acceleration
and stability. A feature of the TCS, Brake Limited Differen-
tial (BLD), functions similar to a limited slip differential
and controls the wheel spin across a driven axle. If one
wheel on a driven axle is spinning faster than the other, the
system will apply the brake of the spinning wheel. This
5
SAFETY 215
Page 240 of 696

Vehicles With Compact Spare — If Equipped
1. The compact spare tire does not have a tire pressuremonitoring sensor. Therefore, the TPMS will not moni-
tor the pressure in the compact spare tire.
2. If you install the compact spare tire in place of a road tire that has a pressure below the low-pressure warning
limit, upon the next ignition cycle, the TPMS Warning
Light will remain on and a chime will sound. In
addition, the graphic in the instrument cluster will still
display a different color pressure value.
3. After driving the vehicle for up to 20 minutes above 15 mph (24 km/h), the TPMS Warning Light will flash
on and off for 75 seconds and then remain on solid. In
addition, the instrument cluster will display a “SER-
VICE TPM SYSTEM” message for five seconds and then
display dashes (- -) in place of the pressure value.
4. For each subsequent ignition cycle, a chime will sound, the TPMS Warning Light will flash on and off for 75
seconds and then remain on solid, and the instrument
cluster will display a “SERVICE TPM SYSTEM” mes-
sage for five seconds and then display dashes (- -) in
place of the pressure value. 5. Once you repair or replace the original road tire and
reinstall it on the vehicle in place of the compact spare,
the TPMS will update automatically. In addition, the
TPMS Warning Light will turn off and the graphic in the
instrument cluster will display a new pressure value
instead of dashes (- -), as long as no tire pressure is
below the low-pressure warning limit in any of the four
active road tires. The vehicle may need to be driven for
up to 20 minutes above 15 mph (24 km/h) in order for
the TPMS to receive this information.
TPMS Deactivation — If Equipped
The Tire Pressure Monitoring System (TPMS) can be deac-
tivated if replacing all four wheel and tire assemblies (road
tires) with wheel and tire assemblies that do not have
TPMS Sensors, such as when installing winter wheel and
tire assemblies on your vehicle.
To deactivate the TPMS, first, replace all four wheel and
tire assemblies (road tires) with tires not equipped with
Tire Pressure Monitoring (TPM) Sensors. Then, drive the
vehicle for 20 minutes above 15 mph (24 km/h). The TPMS
will chime, the TPMS Warning Light will flash on and off
for 75 seconds and then remain on. The instrument cluster
will display the “SERVICE TPM SYSTEM” message and
then display dashes (- -) in place of the pressure values.
238 SAFETY
Page 456 of 696
10. Finish tightening the lug nuts. Push down on thewrench while at the end of the handle for increased
leverage. Tighten the lug nuts in a star pattern until
each nut has been tightened twice. Refer to “Torque
Specifications” in “Technical Specifications” for proper
wheel lug nut torque. If in doubt about the correct
tightness, have them checked with a torque wrench by
your authorized dealer or at a service station.
11. Lower the jack to its fully-closed position.
WARNING!
A loose tire or jack thrown forward in a collision or
hard stop could endanger the occupants of the vehicle.
Always stow the jack parts and the spare tire in the
places provided. Have the deflated (flat) tire repaired
or replaced immediately.
12. Place the deflated (flat) tire and foam tray cover assembly in the rear cargo area. Do not stow the
deflated tire in the inflatable spare tire location. Have
the full-sized tire repaired or replaced, as soon as
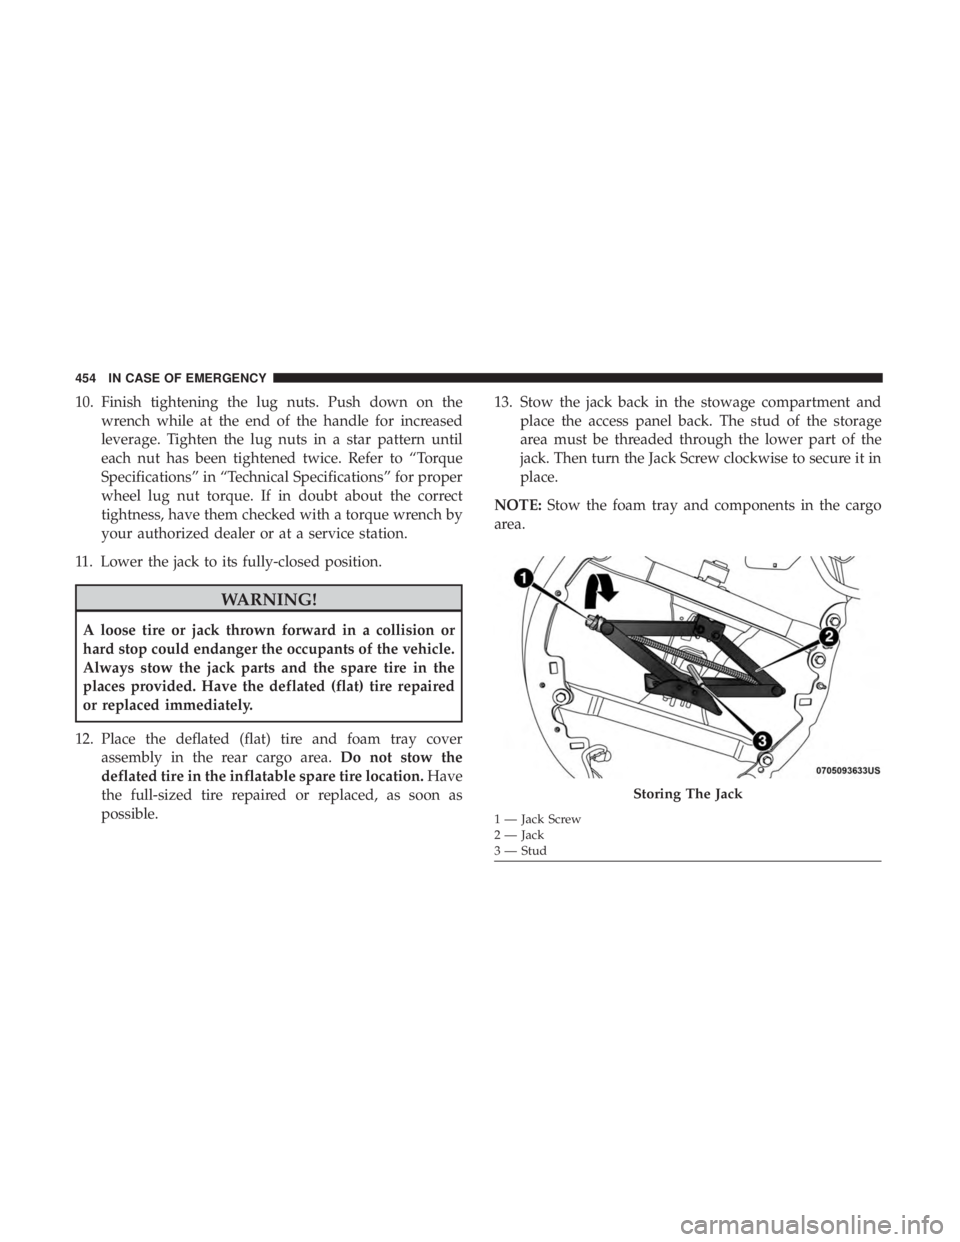
possible. 13. Stow the jack back in the stowage compartment and
place the access panel back. The stud of the storage
area must be threaded through the lower part of the
jack. Then turn the Jack Screw clockwise to secure it in
place.
NOTE: Stow the foam tray and components in the cargo
area.
Storing The Jack
1 — Jack Screw
2 — Jack
3 — Stud
454 IN CASE OF EMERGENCY
Page 464 of 696

3. Uncoil the Power Plug and insert the plug into thevehicle’s 12 Volt power outlet.
4. Place the Tire Service Kit on the ground next to the deflated tire.
5. Engage parking brake before turning the engine ON.
6. Always start the engine before turning ON the Tire Service Kit. 7. Turn the Mode Select Knob to Air Mode position.
NOTE:Do not fill inflatable spare tire
with sealant. Refer to “Tire Service Kit”
in this chapter for repairing tires.
8. Switch the power button ON.
462 IN CASE OF EMERGENCY
Page 473 of 696
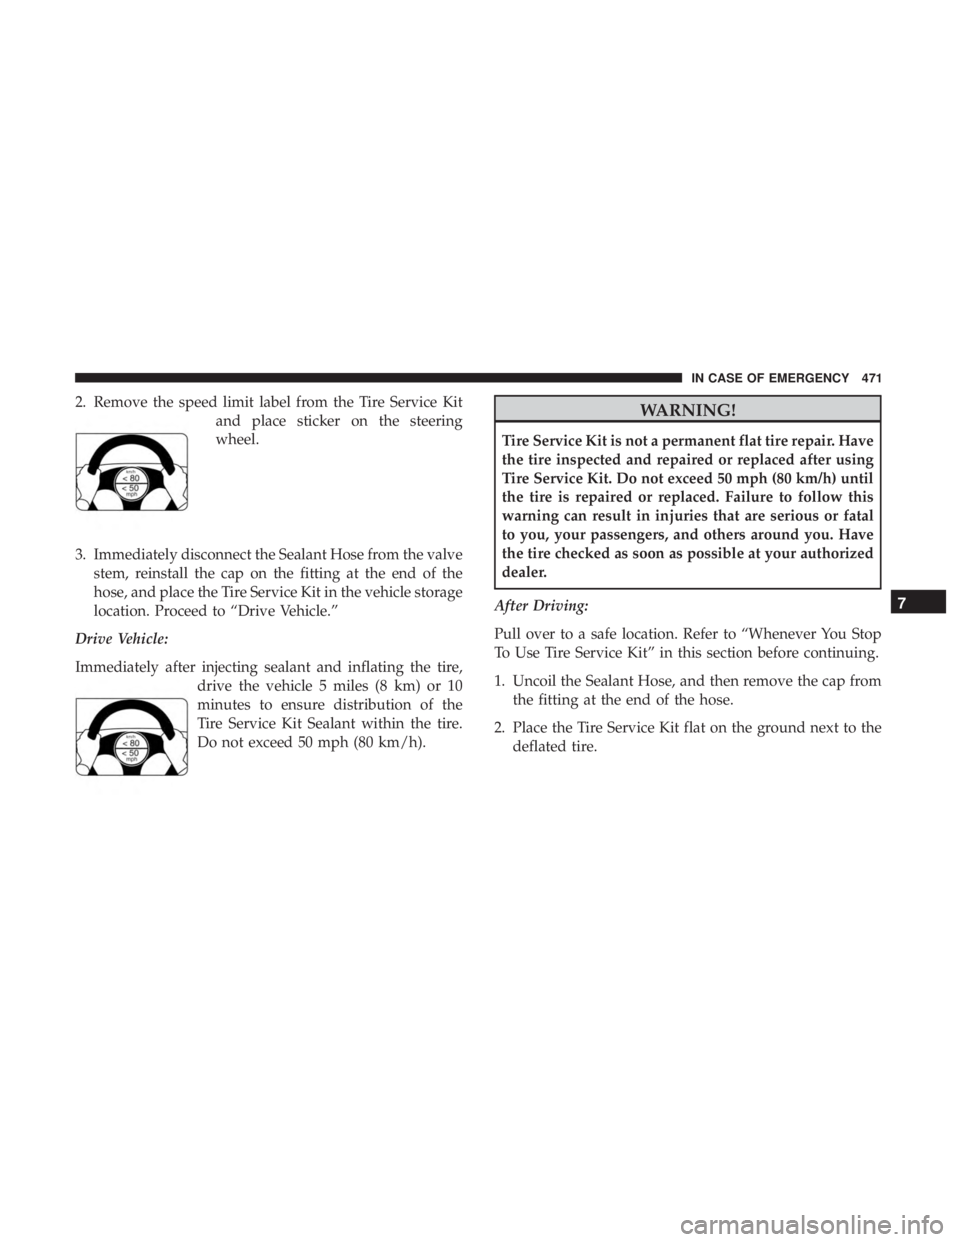
2. Remove the speed limit label from the Tire Service Kitand place sticker on the steering
wheel.
3. Immediately disconnect the Sealant Hose from the valve stem, reinstall the cap on the fitting at the end of the
hose, and place the Tire Service Kit in the vehicle storage
location. Proceed to “Drive Vehicle.”
Drive Vehicle:
Immediately after injecting sealant and inflating the tire, drive the vehicle 5 miles (8 km) or 10
minutes to ensure distribution of the
Tire Service Kit Sealant within the tire.
Do not exceed 50 mph (80 km/h).WARNING!
Tire Service Kit is not a permanent flat tire repair. Have
the tire inspected and repaired or replaced after using
Tire Service Kit. Do not exceed 50 mph (80 km/h) until
the tire is repaired or replaced. Failure to follow this
warning can result in injuries that are serious or fatal
to you, your passengers, and others around you. Have
the tire checked as soon as possible at your authorized
dealer.
After Driving:
Pull over to a safe location. Refer to “Whenever You Stop
To Use Tire Service Kit” in this section before continuing.
1. Uncoil the Sealant Hose, and then remove the cap from the fitting at the end of the hose.
2. Place the Tire Service Kit flat on the ground next to the deflated tire.
7
IN CASE OF EMERGENCY 471
Page 475 of 696
2. Disconnect the Tire Service Kit from the valve stem,reinstall the cap on the valve stem and unplug from 12
Volt outlet.
3. Place the Tire Service Kit in its proper storage area in the vehicle.
4. Have the tire inspected and repaired or replaced at the earliest opportunity at an authorized dealer or tire
service center.
5. Remove the Speed Limit sticker from the steering wheel after the tire has been repaired.
6. Replace the Sealant Bottle at an authorized dealer as soon as possible. Refer to “Sealant Bottle Replacement”.
NOTE: When having the tire serviced, advise the autho-
rized dealer or service center that the tire has been sealed
using the Tire Service Kit. Sealant Bottle Replacement:
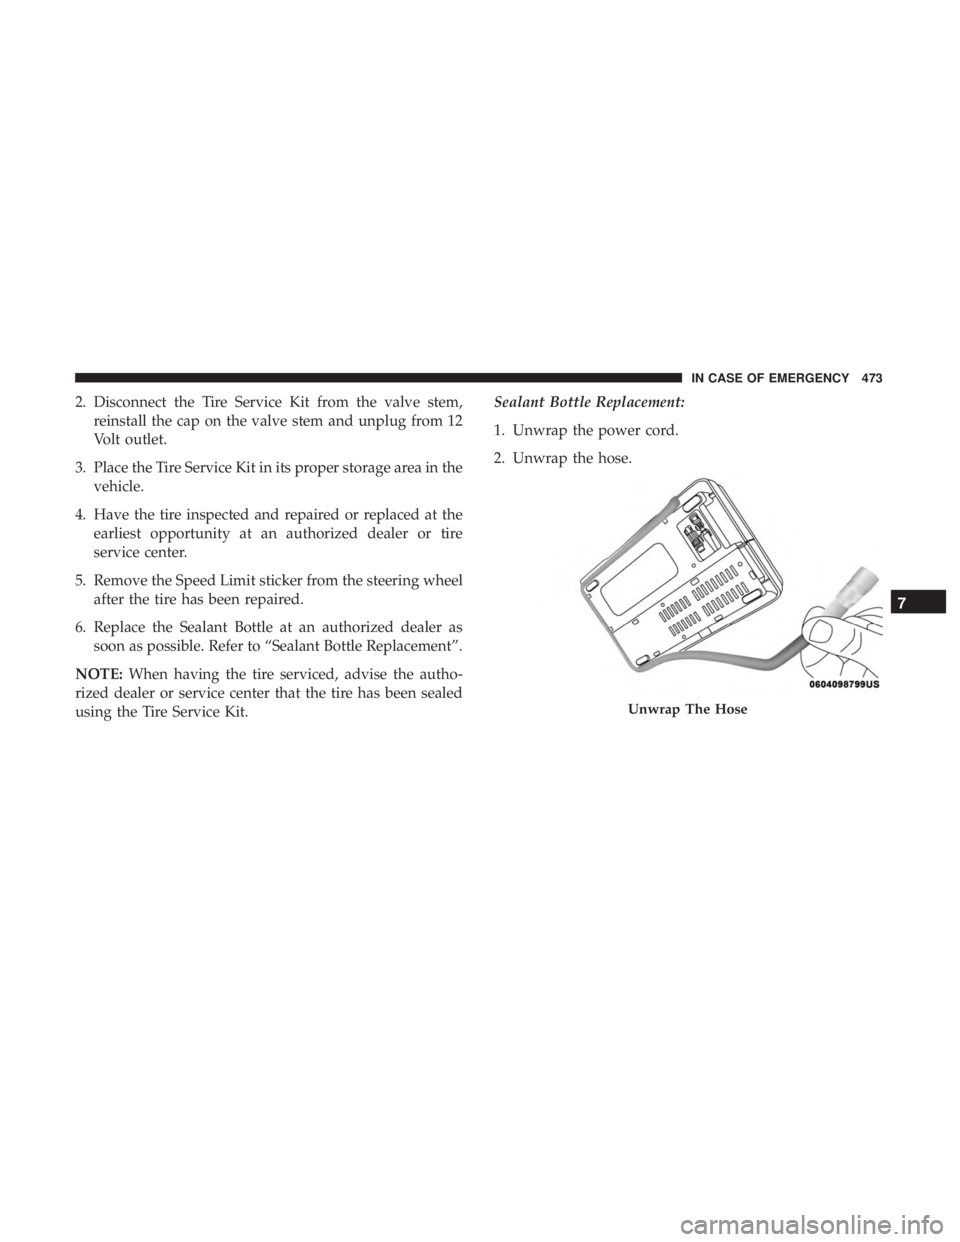
1. Unwrap the power cord.
2. Unwrap the hose.
Unwrap The Hose
7
IN CASE OF EMERGENCY 473
Page 531 of 696
pressure should be increased by 3 psi (21 kPa), which
equals 1 psi (7 kPa) for every 12°F (7°C) for this outside
temperature condition.
Tire pressure may increase from 2 to 6 psi (13 to 40 kPa)
during operation. DO NOT reduce this normal pressure
build up or your tire pressure will be too low.
Tire Pressures For High Speed Operation
The manufacturer advocates driving at safe speeds and
within posted speed limits. Where speed limits or condi-
tions are such that the vehicle can be driven at high speeds,
maintaining correct tire inflation pressure is very impor-
tant. Increased tire pressure and reduced vehicle loading
may be required for high-speed vehicle operation. Refer to
an authorized tire dealer or original equipment vehicle
dealer for recommended safe operating speeds, loading
and cold tire inflation pressures.
WARNING!
High speed driving with your vehicle under maximum
load is dangerous. The added strain on your tires could
cause them to fail. You could have a serious collision.
Do not drive a vehicle loaded to the maximum capacity
at continuous speeds above 75 mph (120 km/h).
Radial Ply Tires
WARNING!
Combining radial ply tires with other types of tires on
your vehicle will cause your vehicle to handle poorly.
The instability could cause a collision. Always use
radial ply tires in sets of four. Never combine them
with other types of tires.
Tire Repair
If your tire becomes damaged, it may be repaired if it meets
the following criteria:
• The tire has not been driven on when flat.
• The damage is only on the tread section of your tire
(sidewall damage is not repairable).
• The puncture is no greater thana¼ofaninch (6 mm).
Consult an authorized tire dealer for tire repairs and
additional information.
Damaged Run Flat tires, or Run Flat tires that have
experienced a loss of pressure should be replaced immedi-
ately with another Run Flat tire of identical size and service
description (Load Index and Speed Symbol).
8
SERVICING AND MAINTENANCE 529
Page 532 of 696
Run Flat Tires — If Equipped
Run Flat tires allow you the capability to drive 50 miles
(80 km) at 50 mph (80 km/h) after a rapid loss of inflation
pressure. This rapid loss of inflation is referred to as the
Run Flat mode. A Run Flat mode occurs when the tire
inflation pressure is of/or below 14 psi (96 kPa). Once a
Run Flat tire reaches the run flat mode it has limited
driving capabilities and needs to be replaced immediately.
A Run Flat tire is not repairable.
It is not recommended driving a vehicle loaded at full
capacity or to tow a trailer while a tire is in the run flat
mode.
See the tire pressure monitoring section for more informa-
tion.
Tire Spinning
When stuck in mud, sand, snow, or ice conditions, do not
spin your vehicle’s wheels above 30 mph (48 km/h) or for
longer than 30 seconds continuously without stopping.
Refer to “Freeing A Stuck Vehicle” in “In Case Of Emer-
gency” for further information.
WARNING!
Fast spinning tires can be dangerous. Forces generated
by excessive wheel speeds may cause tire damage or
failure. A tire could explode and injure someone. Do
not spin your vehicle’s wheels faster than 30 mph
(48 km/h) for more than 30 seconds continuously when
you are stuck, and do not let anyone near a spinning
wheel, no matter what the speed.
530 SERVICING AND MAINTENANCE
Page 537 of 696
Compact Spare Tire — If Equipped
The compact spare is for temporary emergency use only.
You can identify if your vehicle is equipped with a compact
spare by looking at the spare tire description on the Tire
and Loading Information Placard located on the driver ’s
side door opening or on the sidewall of the tire. Compact
spare tire descriptions begin with the letter “T” or “S”
preceding the size designation. Example: T145/80D18
103M.
T, S = Temporary Spare Tire
Since this tire has limited tread life, the original equipment
tire should be repaired (or replaced) and reinstalled on
your vehicle at the first opportunity.
Do not install a wheel cover or attempt to mount a
conventional tire on the compact spare wheel, since the
wheel is designed specifically for the compact spare tire.
Do not install more than one compact spare tire and wheel
on the vehicle at any given time.
WARNING!
Compact and collapsible spares are for temporary
emergency use only. With these spares, do not drive
more than 50 mph (80 km/h). Temporary use spares
have limited tread life. When the tread is worn to the
tread wear indicators, the temporary use spare tire
needs to be replaced. Be sure to follow the warnings,
which apply to your spare. Failure to do so could result
in spare tire failure and loss of vehicle control.
Collapsible Spare Tire — If Equipped
The collapsible spare is for temporary emergency use only.
You can identify if your vehicle is equipped with a collaps-
ible spare by looking at the spare tire description on the
Tire and Loading Information Placard located on the
driver ’s side door opening or on the sidewall of the tire.
Collapsible spare tire description example: 165/80-17 101P.
Since this tire has limited tread life, the original equipment
tire should be repaired (or replaced) and reinstalled on
your vehicle at the first opportunity.
Inflate collapsible tire only after the wheel is properly
installed to the vehicle. Inflate the collapsible tire using the
electric air pump before lowering the vehicle.8
SERVICING AND MAINTENANCE 535