climate control CHRYSLER PACIFICA 2021 Owner's Manual
[x] Cancel search | Manufacturer: CHRYSLER, Model Year: 2021, Model line: PACIFICA, Model: CHRYSLER PACIFICA 2021Pages: 401, PDF Size: 26.88 MB
Page 94 of 401
92GETTING TO KNOW YOUR VEHICLE
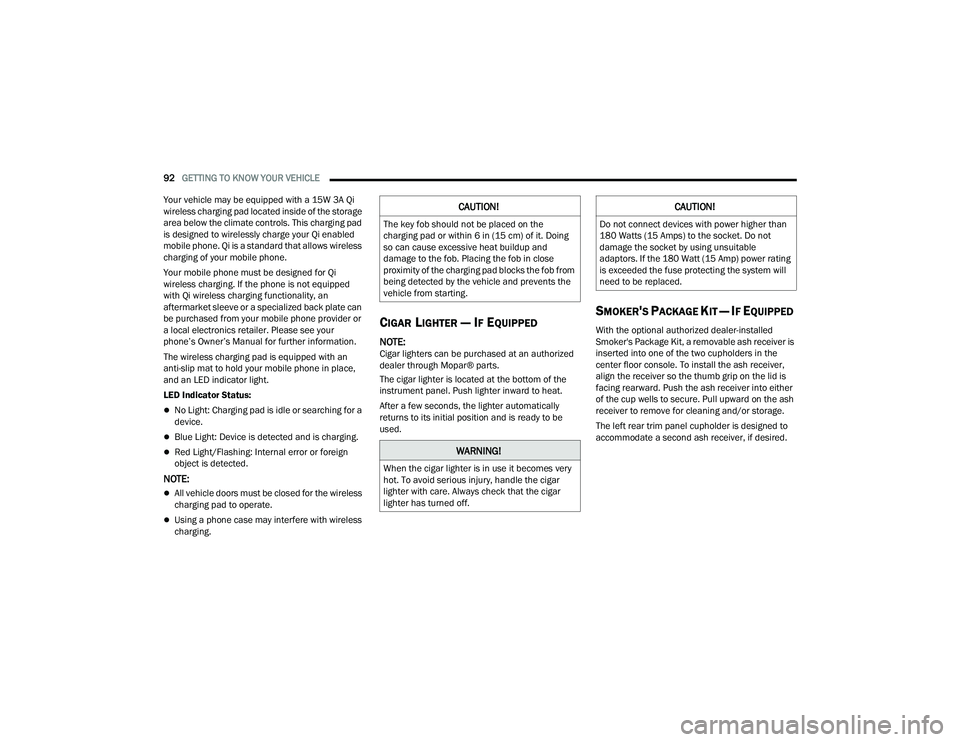
Your vehicle may be equipped with a 15W 3A Qi
wireless charging pad located inside of the storage
area below the climate controls. This charging pad
is designed to wirelessly charge your Qi enabled
mobile phone. Qi is a standard that allows wireless
charging of your mobile phone.
Your mobile phone must be designed for Qi
wireless charging. If the phone is not equipped
with Qi wireless charging functionality, an
aftermarket sleeve or a specialized back plate can
be purchased from your mobile phone provider or
a local electronics retailer. Please see your
phone’s Owner’s Manual for further information.
The wireless charging pad is equipped with an
anti-slip mat to hold your mobile phone in place,
and an LED indicator light.
LED Indicator Status:
No Light: Charging pad is idle or searching for a
device.
Blue Light: Device is detected and is charging.
Red Light/Flashing: Internal error or foreign
object is detected.
NOTE:
All vehicle doors must be closed for the wireless
charging pad to operate.
Using a phone case may interfere with wireless
charging.
CIGAR LIGHTER — IF EQUIPPED
NOTE:Cigar lighters can be purchased at an authorized
dealer through Mopar® parts.
The cigar lighter is located at the bottom of the
instrument panel. Push lighter inward to heat.
After a few seconds, the lighter automatically
returns to its initial position and is ready to be
used.
SMOKER'S PACKAGE KIT — IF EQUIPPED
With the optional authorized dealer-installed
Smoker's Package Kit, a removable ash receiver is
inserted into one of the two cupholders in the
center floor console. To install the ash receiver,
align the receiver so the thumb grip on the lid is
facing rearward. Push the ash receiver into either
of the cup wells to secure. Pull upward on the ash
receiver to remove for cleaning and/or storage.
The left rear trim panel cupholder is designed to
accommodate a second ash receiver, if desired.
CAUTION!
The key fob should not be placed on the
charging pad or within 6 in (15 cm) of it. Doing
so can cause excessive heat buildup and
damage to the fob. Placing the fob in close
proximity of the charging pad blocks the fob from
being detected by the vehicle and prevents the
vehicle from starting.
WARNING!
When the cigar lighter is in use it becomes very
hot. To avoid serious injury, handle the cigar
lighter with care. Always check that the cigar
lighter has turned off.
CAUTION!
Do not connect devices with power higher than
180 Watts (15 Amps) to the socket. Do not
damage the socket by using unsuitable
adaptors. If the 180 Watt (15 Amp) power rating
is exceeded the fuse protecting the system will
need to be replaced.
21_RUP_OM_EN_USC_t.book Page 92
Page 100 of 401
98GETTING TO KNOW YOUR VEHICLE
LIFTGATE
TO UNLOCK/OPEN THE LIFTGATE
The liftgate may be released in several ways:
Key fob
Outside handle
Button on overhead console
Push the liftgate button on the key fob twice within
five seconds to release the liftgate.
The key fob and the overhead console button will
release the liftgate when the liftgate is locked. The
outside handle requires the liftgate to be unlocked.
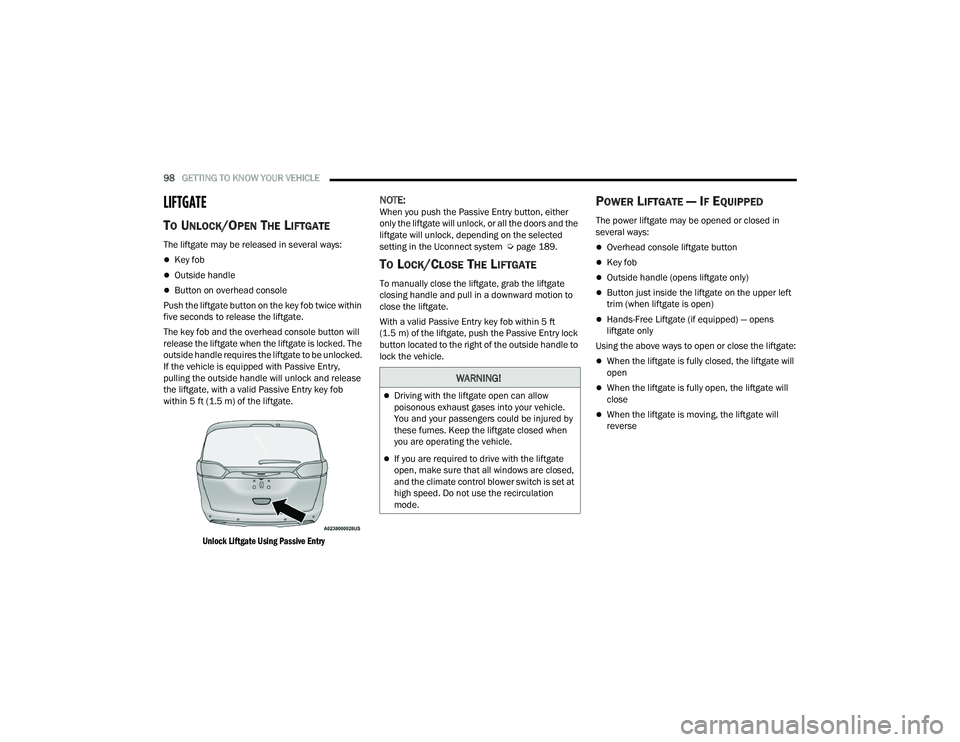
If the vehicle is equipped with Passive Entry,
pulling the outside handle will unlock and release
the liftgate, with a valid Passive Entry key fob
within 5 ft (1.5 m) of the liftgate.
Unlock Liftgate Using Passive Entry
NOTE:When you push the Passive Entry button, either
only the liftgate will unlock, or all the doors and the
liftgate will unlock, depending on the selected
setting in the Uconnect system Ú page 189.
TO LOCK/CLOSE THE LIFTGATE
To manually close the liftgate, grab the liftgate
closing handle and pull in a downward motion to
close the liftgate.
With a valid Passive Entry key fob within 5 ft
(1.5 m) of the liftgate, push the Passive Entry lock
button located to the right of the outside handle to
lock the vehicle.
POWER LIFTGATE — IF EQUIPPED
The power liftgate may be opened or closed in
several ways:
Overhead console liftgate button
Key fob
Outside handle (opens liftgate only)
Button just inside the liftgate on the upper left
trim (when liftgate is open)
Hands-Free Liftgate (if equipped) — opens
liftgate only
Using the above ways to open or close the liftgate:
When the liftgate is fully closed, the liftgate will
open
When the liftgate is fully open, the liftgate will
close
When the liftgate is moving, the liftgate will
reverse
WARNING!
Driving with the liftgate open can allow
poisonous exhaust gases into your vehicle.
You and your passengers could be injured by
these fumes. Keep the liftgate closed when
you are operating the vehicle.
If you are required to drive with the liftgate
open, make sure that all windows are closed,
and the climate control blower switch is set at
high speed. Do not use the recirculation
mode.
21_RUP_OM_EN_USC_t.book Page 98
Page 103 of 401
GETTING TO KNOW YOUR VEHICLE101
Gas props support the liftgate in the open position.
However, because the gas pressure drops with
temperature, it may be necessary to assist the
props when opening the liftgate in cold weather.
NOTE:Allow the power system to open the liftgate.
Manually pushing or pulling the liftgate may
activate the liftgate obstacle detection feature and
stop the power operation or reverse its direction.
CARGO AREA FEATURES
Cargo Area Storage
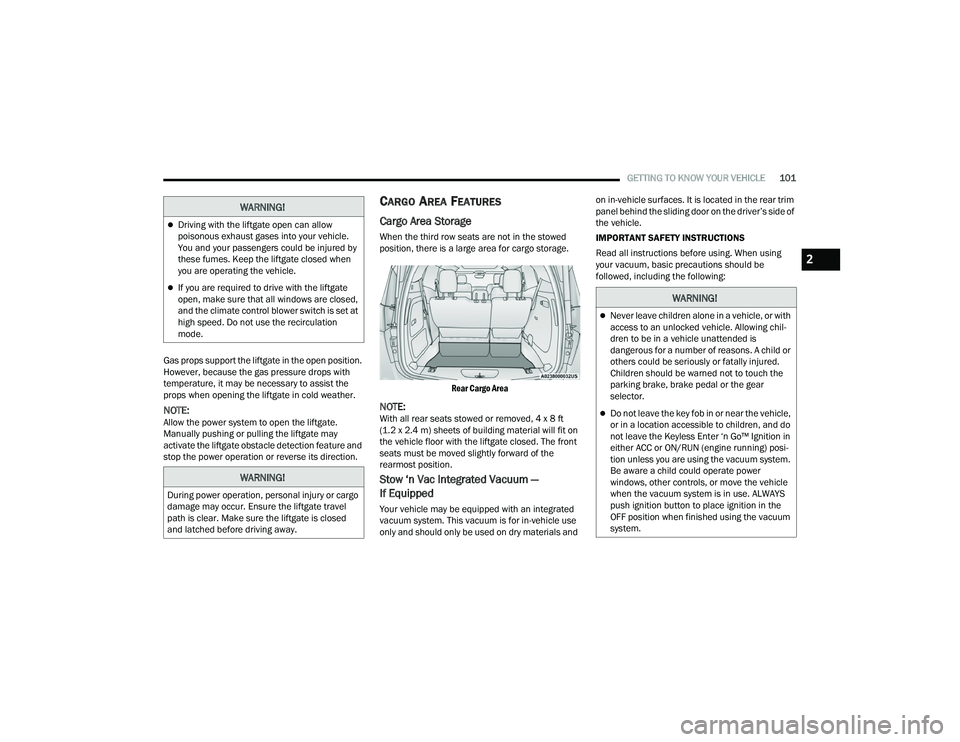
When the third row seats are not in the stowed
position, there is a large area for cargo storage.
Rear Cargo Area
NOTE:With all rear seats stowed or removed, 4 x 8 ft
(1.2 x 2.4 m) sheets of building material will fit on
the vehicle floor with the liftgate closed. The front
seats must be moved slightly forward of the
rearmost position.
Stow ‘n Vac Integrated Vacuum —
If Equipped
Your vehicle may be equipped with an integrated
vacuum system. This vacuum is for in-vehicle use
only and should only be used on dry materials and on in-vehicle surfaces. It is located in the rear trim
panel behind the sliding door on the driver’s side of
the vehicle.
IMPORTANT SAFETY INSTRUCTIONS
Read all instructions before using. When using
your vacuum, basic precautions should be
followed, including the following:
WARNING!
Driving with the liftgate open can allow
poisonous exhaust gases into your vehicle.
You and your passengers could be injured by
these fumes. Keep the liftgate closed when
you are operating the vehicle.
If you are required to drive with the liftgate
open, make sure that all windows are closed,
and the climate control blower switch is set at
high speed. Do not use the recirculation
mode.
WARNING!
During power operation, personal injury or cargo
damage may occur. Ensure the liftgate travel
path is clear. Make sure the liftgate is closed
and latched before driving away.
WARNING!
Never leave children alone in a vehicle, or with
access to an unlocked vehicle. Allowing chil
-
dren to be in a vehicle unattended is
dangerous for a number of reasons. A child or
others could be seriously or fatally injured.
Children should be warned not to touch the
parking brake, brake pedal or the gear
selector.
Do not leave the key fob in or near the vehicle,
or in a location accessible to children, and do
not leave the Keyless Enter ‘n Go™ Ignition in
either ACC or ON/RUN (engine running) posi -
tion unless you are using the vacuum system.
Be aware a child could operate power
windows, other controls, or move the vehicle
when the vacuum system is in use. ALWAYS
push ignition button to place ignition in the
OFF position when finished using the vacuum
system.
2
21_RUP_OM_EN_USC_t.book Page 101
Page 220 of 401
218MULTIMEDIA
10. Arrow Buttons — Push the Arrow
buttons to highlight an item or scroll through
menus.
11. Fast Forward Button — Push and hold
to fast forward through the current audio track
or video chapter. Push once to skip to the next
track.
12. Play/Pause Button — Begin/resume or pause
disc play.
Replacing The Remote Control Batteries
Each remote control requires two AAA batteries for
operation.
To replace the batteries:
1. Locate the battery compartment on the back of the remote, then slide the battery cover
downward.
2. Remove the old batteries and follow battery recycling procedures for your area.
3. Install new batteries, making sure to orient them according to the polarity diagram shown
inside the battery compartment.
4. Replace the battery compartment cover.
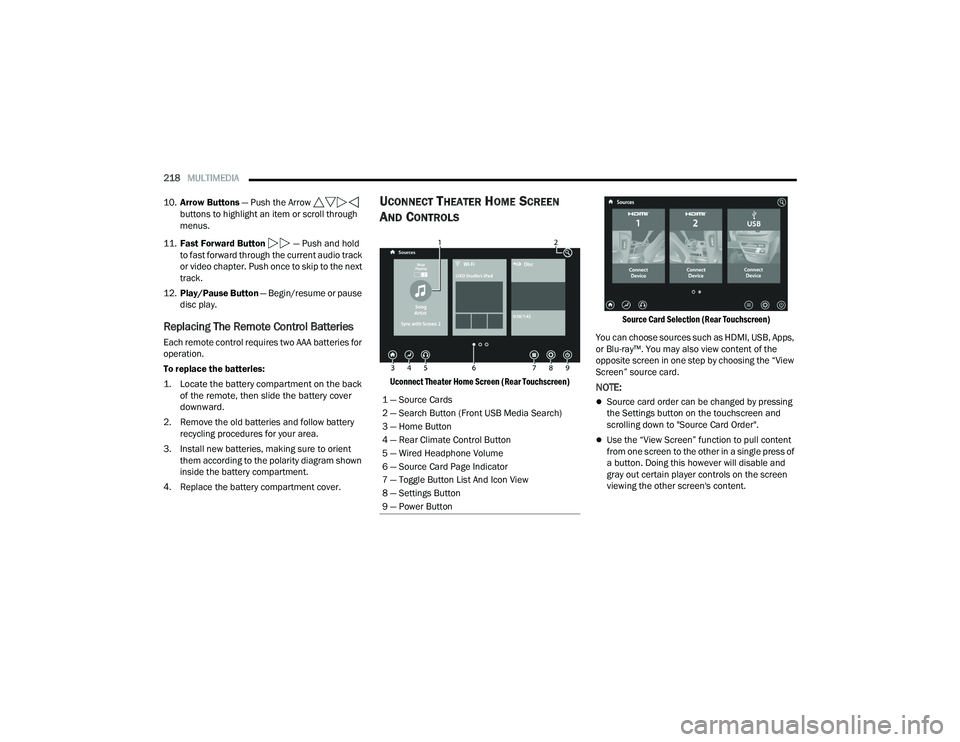
UCONNECT THEATER HOME SCREEN
A
ND CONTROLS
Uconnect Theater Home Screen (Rear Touchscreen) Source Card Selection (Rear Touchscreen)
You can choose sources such as HDMI, USB, Apps,
or Blu-ray™. You may also view content of the
opposite screen in one step by choosing the “View
Screen” source card.NOTE:
Source card order can be changed by pressing
the Settings button on the touchscreen and
scrolling down to "Source Card Order".
Use the “View Screen” function to pull content
from one screen to the other in a single press of
a button. Doing this however will disable and
gray out certain player controls on the screen
viewing the other screen's content.
1 — Source Cards
2 — Search Button (Front USB Media Search)
3 — Home Button
4 — Rear Climate Control Button
5 — Wired Headphone Volume
6 — Source Card Page Indicator
7 — Toggle Button List And Icon View
8 — Settings Button
9 — Power Button
21_RUP_OM_EN_USC_t.book Page 218
Page 227 of 401
MULTIMEDIA225
What Does This Warranty Not Cover? This
warranty does not cover any damage or defect that
results from misuse, abuse or modification of the
Product other than by Aptiv. Foam earpieces,
which will wear over time through normal use, are
specifically not covered (replacement foam is
available for a nominal charge). APTIV IS NOT
LIABLE FOR ANY INJURIES OR DAMAGES TO
PERSONS OR PROPERTY RESULTING FROM THE
USE OF, OR ANY FAILURE OR DEFECT IN, THE
PRODUCT, NOR IS APTIV LIABLE FOR ANY
GENERAL, SPECIAL, DIRECT, INDIRECT,
INCIDENTAL, CONSEQUENTIAL, EXEMPLARY,
PUNITIVE OR OTHER DAMAGES OF ANY KIND OR
NATURE WHATSOEVER. Some states and
jurisdictions may not allow the exclusion or
limitation of incidental or consequential damages,
so the above limitation may not apply to you. This
warranty gives you specific legal rights. You may
also have other rights, which vary from jurisdiction
to jurisdiction.
What Will Aptiv Do? Aptiv, at its option, will repair
or replace any defective Product. Aptiv reserves
the right to replace any discontinued Product with
a comparable model. THIS WARRANTY IS THE
SOLE WARRANTY FOR THIS PRODUCT, SETS
FORTH YOUR EXCLUSIVE REMEDY REGARDING
DEFECTIVE PRODUCTS, AND IS IN LIEU OF ALL
OTHER WARRANTIES (EXPRESS OR IMPLIED), INCLUDING ANY WARRANTY FOR
MERCHANTABILITY OR FITNESS FOR A
PARTICULAR PURPOSE.
If you have any questions or comments regarding
your Aptiv wireless headphones, please email
[email protected] or phone: 888-293-3332.
DISPLAY SETTINGS
When watching a video source, pressing the
Settings icon on the touchscreen activates the
Settings menu. These settings control the
appearance of the video on the screen. The factory
default settings are already set for optimum
viewing, so there is no need to change these
settings under normal circumstances.
To change the settings, use one of the
touchscreens or remote. To reset all values back to
the original settings, select “Reset to Defaults”,
then select “YES.”
LISTENING TO AUDIO WITH THE SCREEN
C
LOSED
To listen to only the audio portion of the channel
with the screen closed:
Set the audio to the desired source and
channel.
Close the video screen.
When the screen is reopened, the video screen
will automatically turn back on and show the
appropriate display menu or media.
If the screen is closed and there is no audio heard,
verify that the headphones are turned on (the ON
indicator is illuminated) and the headphone
selector switch is on the desired channel. If the
headphones are turned on, push the remote
control’s power button to turn audio on. If audio is
still not heard, check that fully charged batteries
are installed in the headphones.
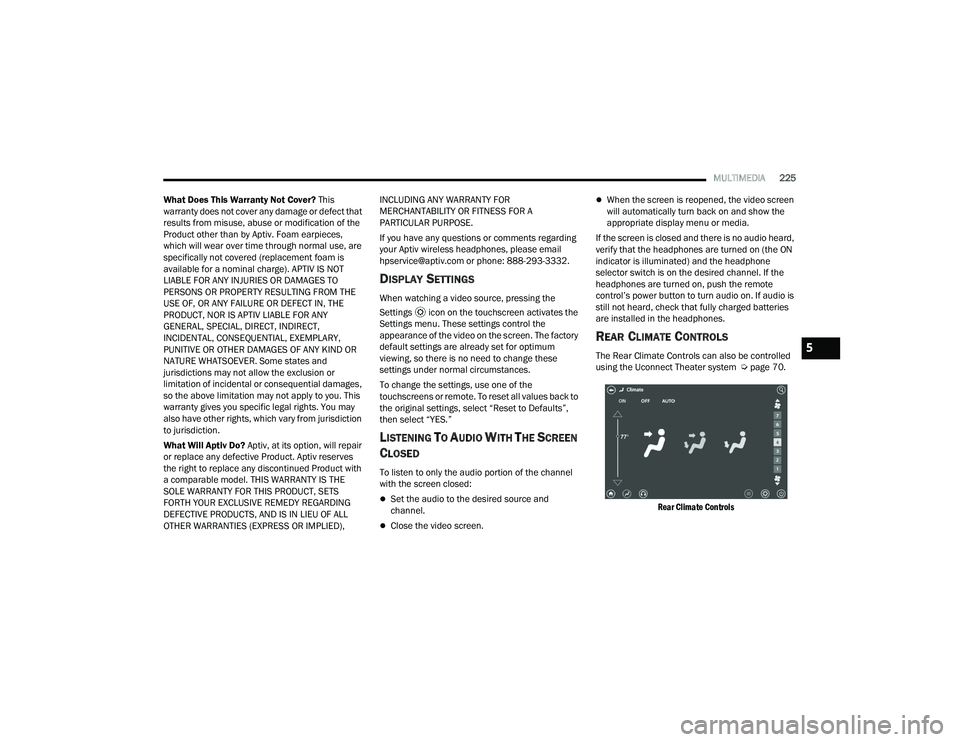
REAR CLIMATE CONTROLS
The Rear Climate Controls can also be controlled
using the Uconnect Theater system Ú page 70.
Rear Climate Controls
5
21_RUP_OM_EN_USC_t.book Page 225
Page 228 of 401
226MULTIMEDIA
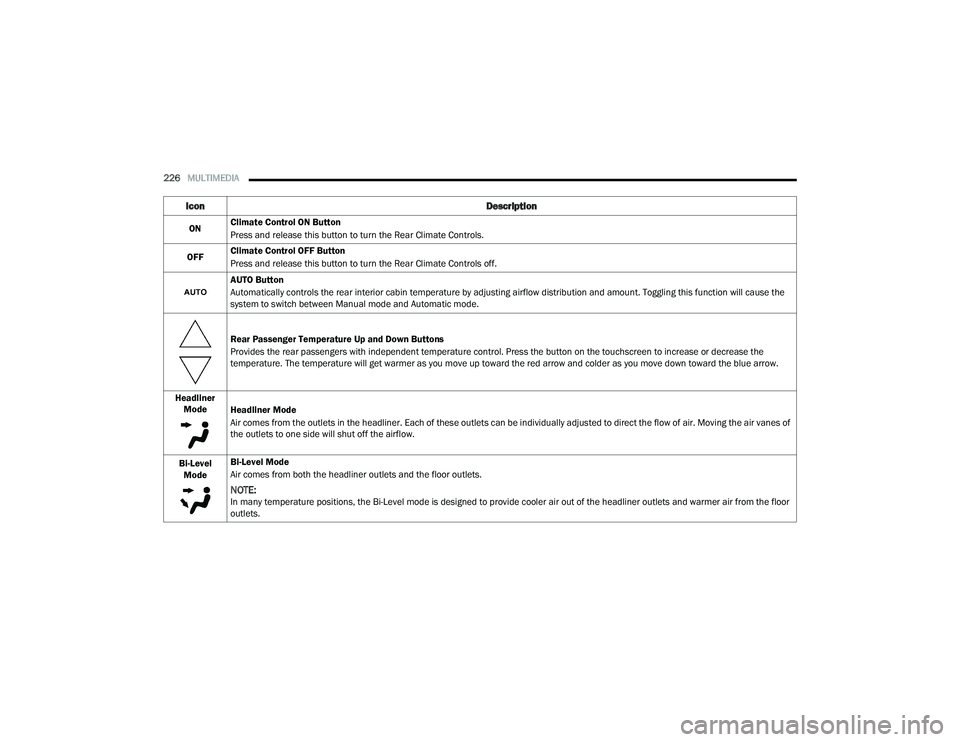
Icon Description
ONClimate Control ON Button
Press and release this button to turn the Rear Climate Controls.
OFF Climate Control OFF Button
Press and release this button to turn the Rear Climate Controls off.
AUTO Button
Automatically controls the rear interior cabin temperature by adjusting airflow distribution and amount. Toggling this function will cause the
system to switch between Manual mode and Automatic mode.
Rear Passenger Temperature Up and Down Buttons
Provides the rear passengers with independent temperature control. Press the button on the touchscreen to increase or decrease the
temperature. The temperature will get warmer as you move up toward the red arrow and colder as you move down toward the blue arrow.
Headliner Mode Headliner Mode
Air comes from the outlets in the headliner. Each of these outlets can be individually adjusted to direct the flow of air. Moving the air vanes of
the outlets to one side will shut off the airflow.
Bi-Level Mode Bi-Level Mode
Air comes from both the headliner outlets and the floor outlets.
NOTE:In many temperature positions, the Bi-Level mode is designed to provide cooler air out of the headliner outlets and warmer air from the floor
outlets.
21_RUP_OM_EN_USC_t.book Page 226
Page 229 of 401
MULTIMEDIA227
ACCESSIBILITY — IF EQUIPPED
Accessibility is a feature of the DVD/Blu-ray™/USB
Video system that announces a function prior to
performing the action.
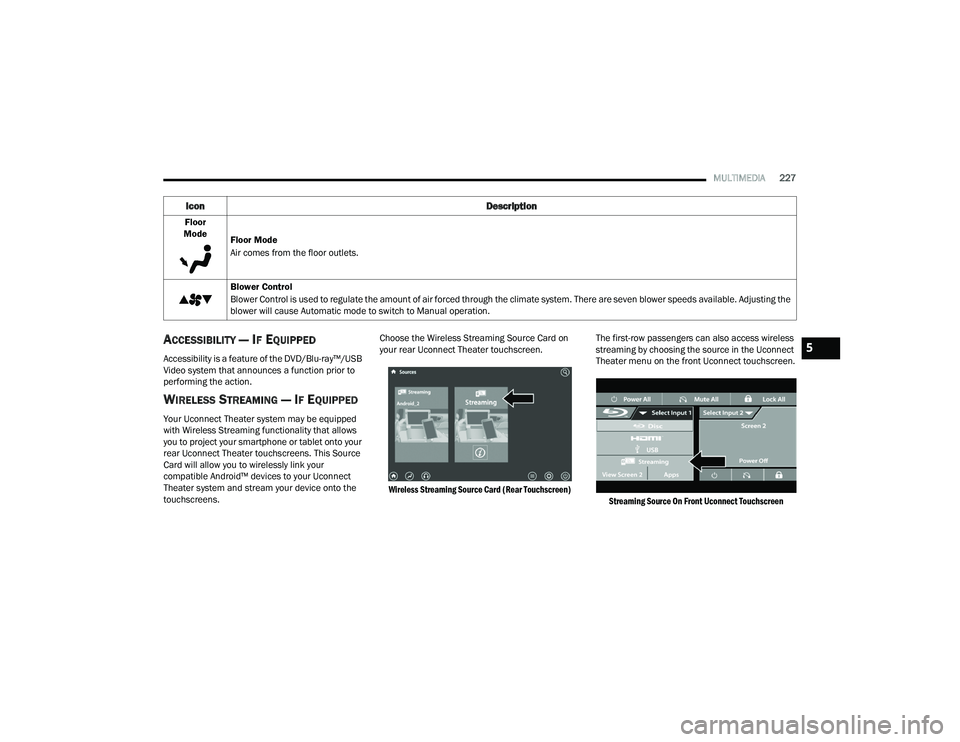
WIRELESS STREAMING — IF EQUIPPED
Your Uconnect Theater system may be equipped
with Wireless Streaming functionality that allows
you to project your smartphone or tablet onto your
rear Uconnect Theater touchscreens. This Source
Card will allow you to wirelessly link your
compatible Android™ devices to your Uconnect
Theater system and stream your device onto the
touchscreens. Choose the Wireless Streaming Source Card on
your rear Uconnect Theater touchscreen.
Wireless Streaming Source Card (Rear Touchscreen)
The first-row passengers can also access wireless
streaming by choosing the source in the Uconnect
Theater menu on the front Uconnect touchscreen.
Streaming Source On Front Uconnect Touchscreen
Floor
Mode Floor Mode
Air comes from the floor outlets.
Blower Control
Blower Control is used to regulate the amount of air forced through the climate system. There are seven blower speeds available. Adjusting the
blower will cause Automatic mode to switch to Manual operation.
Icon Description
5
21_RUP_OM_EN_USC_t.book Page 227
Page 296 of 401
294SAFETY
EXHAUST GAS The best protection against carbon monoxide entry
into the vehicle body is a properly maintained
engine exhaust system.
Whenever a change is noticed in the sound of the
exhaust system, when exhaust fumes can be
detected inside the vehicle, or when the underside
or rear of the vehicle is damaged, have an
authorized dealer inspect the complete exhaust
system and adjacent body areas for broken,
damaged, deteriorated, or mispositioned parts.
Open seams or loose connections could permit
exhaust fumes to seep into the passenger
compartment. In addition, inspect the exhaust
system each time the vehicle is raised for
lubrication or oil change. Replace as required.CARBON MONOXIDE WARNINGS
WARNING!
Exhaust gases can injure or kill. They contain
carbon monoxide (CO), which is colorless and
odorless. Breathing it can make you
unconscious and can eventually poison you. To
avoid breathing (CO), follow these safety tips:
Do not run the engine in a closed garage or in
confined areas any longer than needed to
move your vehicle in or out of the area.
If you are required to drive with the trunk/lift -
gate/rear doors open, make sure that all
windows are closed and the climate control
BLOWER switch is set at high speed. DO NOT
use the recirculation mode.
If it is necessary to sit in a parked vehicle with
the engine running, adjust your heating or
cooling controls to force outside air into the
vehicle. Set the blower at high speed.
WARNING!
Carbon monoxide (CO) in exhaust gases is
deadly. Follow the precautions below to prevent
carbon monoxide poisoning:
Do not inhale exhaust gases. They contain
carbon monoxide, a colorless and odorless
gas, which can kill. Never run the engine in a
closed area, such as a garage, and never sit in
a parked vehicle with the engine running for
an extended period. If the vehicle is stopped in
an open area with the engine running for more
than a short period, adjust the ventilation
system to force fresh, outside air into the
vehicle.
Guard against carbon monoxide with proper
maintenance. Have the exhaust system
inspected every time the vehicle is raised.
Have any abnormal conditions repaired
promptly. Until repaired, drive with all side
windows fully open.
21_RUP_OM_EN_USC_t.book Page 294
Page 375 of 401
SERVICING AND MAINTENANCE373
TREADWEAR
The Treadwear grade is a comparative
rating, based on the wear rate of the tire
when tested under controlled conditions
on a specified government test course.
For example, a tire graded 150 would
wear one and one-half times as well on
the government course as a tire graded
100. The relative performance of tires
depends upon the actual conditions of
their use, however, and may depart
significantly from the norm due to
variations in driving habits, service
practices, and differences in road
characteristics and climate.
TRACTION GRADES
The Traction grades, from highest to
lowest, are AA, A, B, and C. These grades
represent the tire's ability to stop on wet
pavement, as measured under
controlled conditions on specified
government test surfaces of asphalt and
concrete. A tire marked C may have poor
traction performance.
TEMPERATURE GRADES
The Temperature grades are A (the
highest), B, and C, representing the tire's
resistance to the generation of heat and
its ability to dissipate heat, when tested
under controlled conditions on a
specified indoor laboratory test wheel.
Sustained high temperature can cause
the material of the tire to degenerate
and reduce tire life, and excessive
temperature can lead to sudden tire
failure. The grade C corresponds to a
level of performance, which all
passenger vehicle tires must meet
under the Federal Motor Vehicle Safety
Standard No. 109. Grades B and A
represent higher levels of performance
on the laboratory test wheel, than the
minimum required by law.STORING THE VEHICLE
If you are storing your vehicle for more than three
weeks, we recommend that you take the following
steps to minimize the drain on your vehicle's
battery:
Disconnect the negative cable from battery.
Any time you store your vehicle or keep it out of
service (i.e., vacation) for two weeks or more,
run the air conditioning system at idle for about
five minutes in the fresh air and high blower
setting. This will ensure adequate system lubri-
cation to minimize the possibility of compressor
damage when the system is started again.
WARNING!
The traction grade assigned to this tire is based
on straight-ahead braking traction tests, and
does not include acceleration, cornering,
hydroplaning, or peak traction characteristics.
WARNING!
The temperature grade for this tire is
established for a tire that is properly inflated and
not overloaded. Excessive speed, underinflation,
or excessive loading, either separately or in
combination, can cause heat buildup and
possible tire failure.
8
21_RUP_OM_EN_USC_t.book Page 373
Page 391 of 401
389
Battery Saver Feature
...................................... 66Belts, Seat..................................................... 292Blind Spot Monitoring.................................... 240Body Mechanism Lubrication........................ 337B-Pillar Location............................................. 360Brake Assist System...................................... 235Brake Control System, Electronic.................. 235Brake Fluid.................................................... 383Brake System...................................... 344, 377Anti-Lock (ABS).......................................... 377Fluid Check..................................... 345, 383Master Cylinder......................................... 345Parking...................................................... 137Warning Light............................................ 123Brake/Transmission Interlock....................... 141Brightness, Interior Lights................................ 67Bulb Replacement............................... 354, 355Bulbs, Light................................. 293, 354, 355
C
Camera.......................................................... 171Camera, Rear...................................... 171, 172Capacities, Fluid............................................ 381Caps, Filler Fuel........................................................... 175Oil (Engine)................................................ 331Radiator (Coolant Pressure)...................... 343Car Washes................................................... 374Carbon Monoxide Warning............................ 294
CargoVehicle Loading........................................ 101Cargo Area Cover.......................................... 101Cargo CompartmentLuggage Carrier........................................ 106Cargo Load Floor........................................... 101Cargo Tie-Downs........................................... 101Cellular Phone.............................................. 233Certification Label......................................... 176Chains, Tire................................................... 370Change Oil Indicator..................................... 114Changing A Flat Tire...................................... 298Chart, Tire Sizing........................................... 357Check Engine Light
(Malfunction Indicator Light)......................... 131Checking Your Vehicle For Safety................. 291Checks, Safety.............................................. 291Child Restraint.............................................. 275Child RestraintsBooster Seats........................................... 278Center Seat LATCH................................... 284Child Seat Installation..................... 286, 288How To Stow An unused ALR Seat Belt.... 285Infant And Child Restraints....................... 276Lower Anchors And Tethers ForChildren................................................ 279Older Children And Child Restraints......... 277
Seating Positions...................................... 279Using The Top Tether Anchorage.............. 289Cigar Lighter.....................................................92Clean Air Gasoline......................................... 378CleaningWheels...................................................... 369Climate Control................................................70Automatic....................................................70Manual........................................................76Rear......................................................74, 80Coat Hook........................................................87Cold Weather Operation................................ 135Compact Spare Tire...................................... 368Computer, Trip/Travel................................... 122Contract, Service........................................... 385Cooling Pressure Cap (Radiator Cap)............ 343Cooling System............................................. 342Adding Coolant (Antifreeze)...................... 343Coolant Level............................................ 344Cooling Capacity....................................... 381Disposal Of Used Coolant......................... 344Drain, Flush, And Refill............................. 342Inspection........................................ 342, 344Points To Remember................................ 344Pressure Cap............................................ 343Radiator Cap............................................. 343Selection Of Coolant (Antifreeze)......................... 342, 381, 38211
21_RUP_OM_EN_USC_t.book Page 389