Car seat CHRYSLER PACIFICA 2021 Owners Manual
[x] Cancel search | Manufacturer: CHRYSLER, Model Year: 2021, Model line: PACIFICA, Model: CHRYSLER PACIFICA 2021Pages: 401, PDF Size: 26.88 MB
Page 8 of 401
6
Accessing The System From The
Uconnect Theater Rear Screens .................. 215
Pairing The Remote ....................................... 216
Unpairing The Remote .................................. 216
Media Sources............................................... 216
Uconnect Theater Remote Control............... 217
Uconnect Theater Home Screen And
Controls .......................................................... 218
Play A DVD/Blu-ray™ Or USB Media
File From Uconnect System .......................... 219
Disc Menu ...................................................... 220 Blu-ray™ Controls – Disc-Specific
Functions ....................................................... 221
Uconnect Theater Apps................................. 221Using The Rear Video USB Port .................... 223Play Video Games.......................................... 223
Headphones Operation ................................. 223Display Settings ............................................. 225
Listening To Audio With The Screen
Closed ............................................................ 225
Rear Climate Controls ................................... 225Accessibility — If Equipped............................ 227
Wireless Streaming — If Equipped ............... 227
BD And DVD Region Codes ........................... 229
Product Agreement ....................................... 231
FCC/IC Regulatory Notices ........................... 233 RADIO OPERATION AND MOBILE PHONES ..... 233
Regulatory And Safety Information .............. 233
SAFETY
SAFETY FEATURES .............................................. 234 Anti-Lock Brake System (ABS) ..................... 234
Electronic Brake Control (EBC) System ...... 235
AUXILIARY DRIVING SYSTEMS.......................... 240
Blind Spot Monitoring (BSM) —
If Equipped..................................................... 240Forward Collision Warning (FCW) With
Mitigation — If Equipped ............................... 244
Tire Pressure Monitoring System
(TPMS)............................................................ 247
OCCUPANT RESTRAINT SYSTEMS ................... 250
Occupant Restraint Systems Features ........ 250
Important Safety Precautions ...................... 250Seat Belt Systems ........................................ 251Supplemental Restraint Systems (SRS) ...... 261Child Restraints ............................................ 275 SAFETY TIPS ........................................................ 291
Transporting Passengers.............................. 291
Transporting Pets ....................................... 292
Safety Checks You Should Make
Inside The Vehicle ........................................ 292
Periodic Safety Checks You Should
Make Outside The Vehicle ............................ 293
Exhaust Gas ............................................... 294Carbon Monoxide Warnings ...................... 294
IN CASE OF EMERGENCY
HAZARD WARNING FLASHERS ......................... 295
ASSIST AND SOS MIRROR — IF EQUIPPED ..... 295
JACKING AND TIRE CHANGING —
IF EQUIPPED ......................................................... 298 Preparations For Jacking ............................. 299Jack And Spare Tire Location ....................... 299
Equipment Removal ..................................... 299Jacking Instructions ..................................... 301Road Tire Installation .................................... 304
Portable Air Compressor —
If Equipped .................................................... 305
Return Inflatable Spare Tire ........................ 306
21_RUP_OM_EN_USC_t.book Page 6
Page 9 of 401
7
TIRE SERVICE KIT WITH A SUBWOOFER —
IF EQUIPPED ......................................................... 306
TIRE SERVICE KIT WITHOUT A
SUBWOOFER — IF EQUIPPED............................. 312
JUMP STARTING................................................... 318 Preparations For Jump Start......................... 318Jump Starting Procedure .............................. 319
REFUELING IN EMERGENCY –
IF EQUIPPED ......................................................... 320
IF YOUR ENGINE OVERHEATS ............................ 321
MANUAL PARK RELEASE ................................... 321
FREEING A STUCK VEHICLE ............................... 323
TOWING A DISABLED VEHICLE .......................... 324
All Wheel Drive (AWD) Models ...................... 326
ENHANCED ACCIDENT RESPONSE SYSTEM
(EARS) .................................................................. 326
EVENT DATA RECORDER (EDR) ......................... 326
SERVICING AND MAINTENANCE
SCHEDULED SERVICING ................................... 327
Maintenance Plan ......................................... 328
ENGINE COMPARTMENT .................................. 331
3.6L Engine ................................................... 331
Checking Oil Level ......................................... 332
Adding Washer Fluid .................................... 332
Maintenance-Free Battery ........................... 332Pressure Washing ......................................... 333
VEHICLE MAINTENANCE..................................... 333
Engine Oil ...................................................... 333
Engine Oil Filter ............................................. 334Engine Air Cleaner Filter ............................ 334
Accessory Drive Belt Inspection ................... 334Air Conditioner Maintenance........................ 335
Body Lubrication ........................................... 337Windshield Wiper Blades ............................. 337
Exhaust System ............................................ 341
Cooling System .............................................. 342
Brake System ............................................... 344
Automatic Transmission ............................... 345
Fuses.............................................................. 346
Bulb Replacement......................................... 354 TIRES .................................................................... 355
Tire Safety Information ................................. 355
Tires — General Information ........................ 363Tire Types....................................................... 367Spare Tires — If Equipped............................. 367Wheel And Wheel Trim Care ........................ 369Snow Traction Devices ................................. 370
Tire Rotation Recommendations ................. 372
DEPARTMENT OF TRANSPORTATION
UNIFORM TIRE QUALITY GRADES ..................... 372
Treadwear...................................................... 373
Traction Grades ............................................. 373Temperature Grades..................................... 373
STORING THE VEHICLE ....................................... 373
BODYWORK .......................................................... 374
Protection From Atmospheric Agents .......... 374
Body And Underbody Maintenance ............. 374
Preserving The Bodywork ............................. 374
INTERIORS ........................................................... 375
Seats And Fabric Parts ................................. 375
Plastic And Coated Parts .............................. 376
Leather Surfaces........................................... 376
Glass Surfaces ............................................. 376
21_RUP_OM_EN_USC_t.book Page 7
Page 17 of 401
GETTING TO KNOW YOUR VEHICLE15
In case the ignition switch does not change with
the push of a button, the key fob may have a low or
fully depleted battery. A low key fob battery can be
verified by referring to the instrument cluster,
which will display directions to follow.
NOTE:
A low key fob battery condition may be indicated
by a message in the instrument cluster display,
or by the LED light on the key fob. If the LED key
fob light no longer illuminates from key fob
button pushes, then the key fob battery requires
replacement.
The key fob LED light brightness is designed for
indoor light viewing, so the LED light may not be
visible in direct sunlight Ú page 387.
To Lock/Unlock The Doors And Liftgate
Push and release the unlock button on the key fob
once to unlock the driver’s front door and sliding
door or twice within five seconds to unlock all
doors and the liftgate. Push and release the lock
button on the key fob to lock all doors and the
liftgate.
When the doors are unlocked, the turn signals will
flash and the illuminated entry system will be
activated. When the doors are locked, the turn
signals will flash and the horn will chirp. Settings in
the Uconnect system can change to lights only,
chirp only, or both. Vehicles Equipped With Keyless Enter ‘n Go™ —
Passive Entry
If one or more doors are open, or the liftgate is
open, the doors can be locked. The doors will
unlock again only if the key fob is inside the
passenger compartment.
All doors can be programmed to unlock on the first
push of the unlock button within Uconnect Settings
Ú
page 189.
Replacing The Battery In The Key Fob
The recommended replacement battery is one
CR2032 battery.
NOTE:
Customers are recommended to use a battery
obtained from Mopar®. Aftermarket coin
battery dimensions may not meet the original
OEM coin battery dimensions.
Batteries contain harmful chemicals. Dispose
old batteries by placing them in correct
containers according to the law or by taking
them to a dealership, where they will be handled
appropriately.
Perchlorate Material — special handling may
apply. See www.dtsc.ca.gov/hazard -
ouswaste/perchlorate for further information.
Do not touch the battery terminals that are on
the back housing or the printed circuit board.
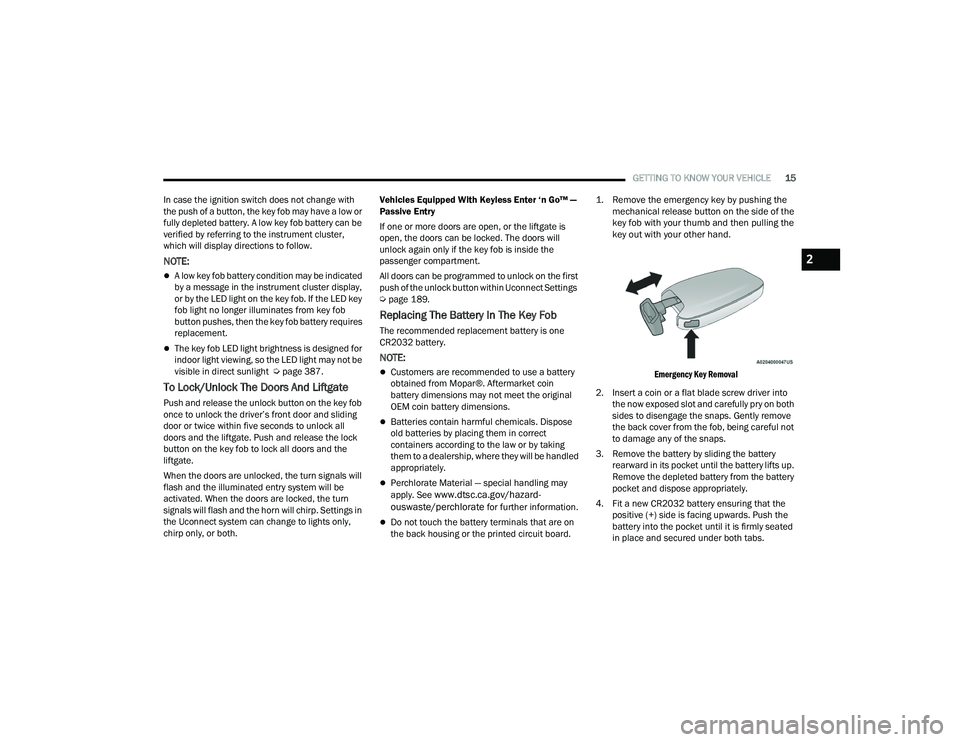
1. Remove the emergency key by pushing the
mechanical release button on the side of the
key fob with your thumb and then pulling the
key out with your other hand.
Emergency Key Removal
2. Insert a coin or a flat blade screw driver into the now exposed slot and carefully pry on both
sides to disengage the snaps. Gently remove
the back cover from the fob, being careful not
to damage any of the snaps.
3. Remove the battery by sliding the battery rearward in its pocket until the battery lifts up.
Remove the depleted battery from the battery
pocket and dispose appropriately.
4. Fit a new CR2032 battery ensuring that the positive (+) side is facing upwards. Push the
battery into the pocket until it is firmly seated
in place and secured under both tabs.
2
21_RUP_OM_EN_USC_t.book Page 15
Page 33 of 401
GETTING TO KNOW YOUR VEHICLE31
The heated steering wheel control button is
located within the Uconnect system.
Press the heated steering wheel button once
to turn the heating element on.
Press the heated steering wheel button a
second time to turn the heating element off.
NOTE:The engine must be running for the heated
steering wheel to operate.
For information on use with the Remote Start
system, see Ú page 21.
DRIVER MEMORY SETTINGS — IF EQUIPPED
This feature allows the driver to save up to two
different memory profiles for easy recall through a
memory switch. Each memory profile saves
desired position settings for the following features:
Driver’s seat
Easy Entry/Exit seat operation (if equipped)
Power steering wheel position (if equipped)
Side mirrors (if equipped)
A set of desired radio station presets
NOTE:
Your vehicle is equipped with two key fobs, each
can be linked to either memory position 1 or 2.
If your vehicle is equipped with a Uconnect 5
radio, memory settings will be linked to the
driver profiles in the radio, in addition to several
other features (radio presets, home screens,
settings, navigation, phone, etc.) Ú page 189.
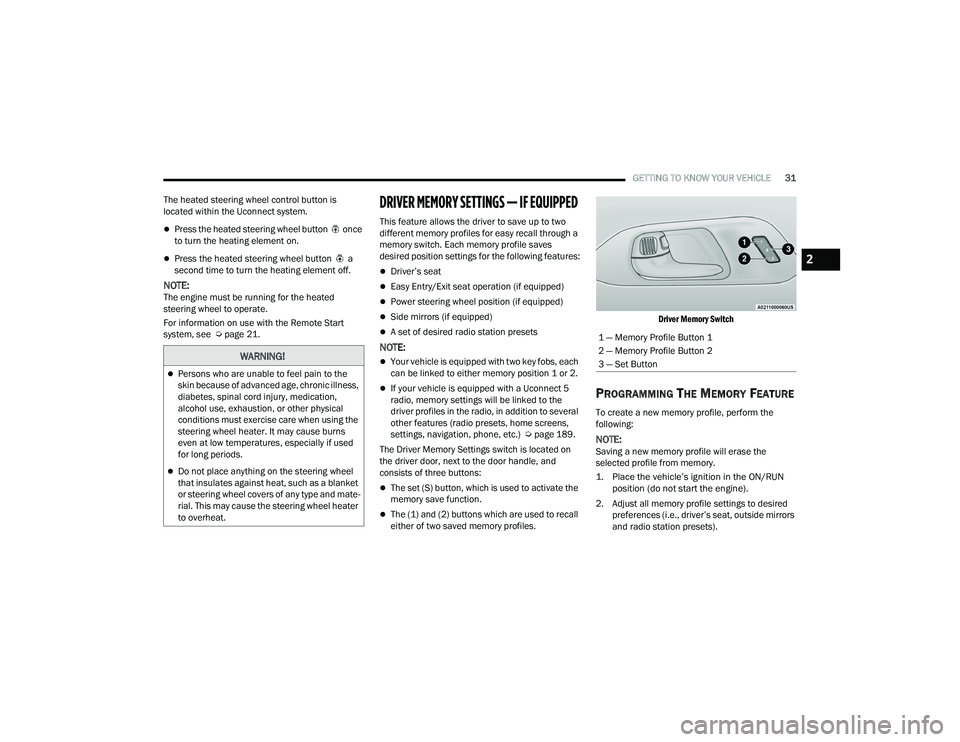
The Driver Memory Settings switch is located on
the driver door, next to the door handle, and
consists of three buttons:
The set (S) button, which is used to activate the
memory save function.
The (1) and (2) buttons which are used to recall
either of two saved memory profiles.
Driver Memory Switch
PROGRAMMING THE MEMORY FEATURE
To create a new memory profile, perform the
following:
NOTE:Saving a new memory profile will erase the
selected profile from memory.
1. Place the vehicle’s ignition in the ON/RUN
position (do not start the engine).
2. Adjust all memory profile settings to desired preferences (i.e., driver’s seat, outside mirrors
and radio station presets).
WARNING!
Persons who are unable to feel pain to the
skin because of advanced age, chronic illness,
diabetes, spinal cord injury, medication,
alcohol use, exhaustion, or other physical
conditions must exercise care when using the
steering wheel heater. It may cause burns
even at low temperatures, especially if used
for long periods.
Do not place anything on the steering wheel
that insulates against heat, such as a blanket
or steering wheel covers of any type and mate -
rial. This may cause the steering wheel heater
to overheat.
1 — Memory Profile Button 1
2 — Memory Profile Button 2
3 — Set Button
2
21_RUP_OM_EN_USC_t.book Page 31
Page 34 of 401
32GETTING TO KNOW YOUR VEHICLE
3. Push the set (S) button on the memory switch, and then push the desired memory button (1
or 2) within five seconds. The instrument
cluster display will show which memory
position has been set.
NOTE:Memory profiles can be set without the vehicle in
PARK.
LINKING AND UNLINKING THE KEY FOB
T
O MEMORY
Your key fob can be programmed to recall one of
two saved memory profiles.
NOTE:
Before programming your key fob you must select
the “Personal Settings Linked to Key Fob” feature
through the Uconnect Settings Ú page 189.
To program your key fob, perform the following:
1. Place the vehicle’s ignition in the OFF position.
2. Select a desired memory profile 1 or 2.
3. Once the profile has been recalled, push and release the set (S) button on the memory
switch.
4. Push and release button (1) or (2) accordingly. “Memory Profile Set” (1 or 2) will display in the
instrument cluster. 5. Push and release the lock button on the key
fob within 10 seconds.
NOTE:Your key fob can be unlinked from your memory
settings by pushing the set (S) button, and then,
within 10 seconds, pushing the unlock button on
the key fob.
MEMORY POSITION RECALL
NOTE:
The vehicle speed must be less than or equal to
5 mph (8 km/h) to recall memory positions. If a
recall is attempted when the vehicle speed is
greater than 5 mph (8 km/h), a message will be
displayed in the instrument cluster display.
If your vehicle is equipped with a Uconnect 5
radio, the memory settings can be linked to
driver profiles on the radio. Changing driver
profiles will also recall the linked memory
settings if the conditions are met Ú page 189.
To recall the memory settings for driver one or two,
push the desired memory button (1 or 2) on the
driver's door or the unlock button on the key fob
linked to the desired memory position.
A recall can be cancelled by pushing any of the
memory buttons on the driver's door during a recall
(S, 1, or 2). When a recall is cancelled, the driver's
seat stops moving. A delay of one second will occur
before another recall can be selected.
NOTE:Pushing the mirror adjust switch will cancel the
memory mirror recall.
SEATS
Seats are a part of the Occupant Restraint system
of the vehicle.
WARNING!
It is dangerous to ride in a cargo area, inside
or outside of a vehicle. In a collision, people
riding in these areas are more likely to be seri -
ously injured or killed.
Do not allow people to ride in any area of your
vehicle that is not equipped with seats and
seat belts. In a collision, people riding in these
areas are more likely to be seriously injured or
killed.
Be sure everyone in your vehicle is in a seat
and using a seat belt properly.
21_RUP_OM_EN_USC_t.book Page 32
Page 37 of 401

GETTING TO KNOW YOUR VEHICLE35
Manual Recline — Quad Seats
Recline Lever
To recline, lean forward slightly, lift the lever, and
push back to the desired position and release the
lever. Lean forward and lift the lever to return the
seatback to its normal position. Using body
pressure, lean forward and rearward on the seat to
be sure the seatback has latched.
Second Row Bench Seat — If Equipped
The second row bench seat can accommodate two
passengers, while providing easy access to the
third row seats without any folding of the second
row seats.
To recline the seatback, lean forward slightly, lift
the recline lever located on the outboard side of
the seat cushion, and push back to the desired
position and release the lever. Lean forward and
lift the lever to return the seatback to its normal
position. Using body pressure, lean forward and
rearward on the seat to be sure the seatback has
latched.
Recline Lever
The bench seat does not stow in the floor, but is
removable for added cargo space.
Removing The Bench Seat
1. Adjust the driver and passenger seats
forward to allow room for the bench seat
removal.
2. Raise the armrest completely, then lift the recline lever located on the outboard side of
the seat to fold the seatback flat against the
seat cushion.
Folded Position
WARNING!
Do not ride with the seatback reclined so that
the shoulder belt is no longer resting against
your chest. In a collision you could slide under
the seat belt, which could result in serious injury
or death.
2
21_RUP_OM_EN_USC_t.book Page 35
Page 38 of 401

36GETTING TO KNOW YOUR VEHICLE
3. Pull the release strap located behind the seat, in the center near the floor to release the
latches.
Release Strap Location
4. Once the latches are released, tilt the entire seat toward the front of the vehicle. The seat
can now be removed through either sliding
side door, or through the liftgate.
Tilt Bench Seat Forward
NOTE:
Due to the weight of the bench seat, it is recom
-
mended that two people are utilized for its
removal.
When storing the removed bench seat, it is
important to keep the seatback in the folded
position.
Reinstalling The Bench Seat
1. To reinstall the bench seat, align the seats front attachments into the detent positions
on the floor.
2. Tilt seat rearward to lock the seatback into its original position.
NOTE:Push downward to ensure the rear latches are in
the locked position.
3. Lift the recline handle and return the seatback to the seating position.
Second Row Removable 8th Seat —
If Equipped
While the 8th seat does not stow in the floor, it is
foldable and removable for added cargo space.
Second Row 8th Seat Fold Flat Strap
WARNING!
If not properly latched, the seat could become
loose. Personal injuries could result.
21_RUP_OM_EN_USC_t.book Page 36
Page 41 of 401
GETTING TO KNOW YOUR VEHICLE39
4. To put the seat back into original position, just pull back on the seatback and lock the seat
into position.
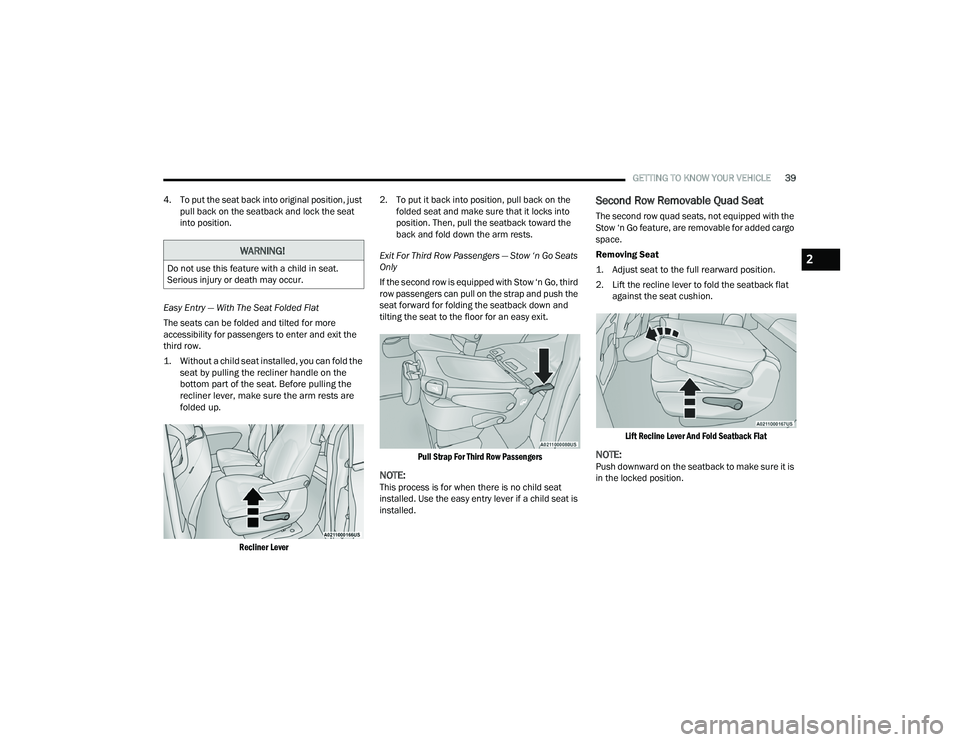
Easy Entry — With The Seat Folded Flat
The seats can be folded and tilted for more
accessibility for passengers to enter and exit the
third row.
1. Without a child seat installed, you can fold the seat by pulling the recliner handle on the
bottom part of the seat. Before pulling the
recliner lever, make sure the arm rests are
folded up.
Recliner Lever
2. To put it back into position, pull back on the
folded seat and make sure that it locks into
position. Then, pull the seatback toward the
back and fold down the arm rests.
Exit For Third Row Passengers — Stow ‘n Go Seats
Only
If the second row is equipped with Stow ‘n Go, third
row passengers can pull on the strap and push the
seat forward for folding the seatback down and
tilting the seat to the floor for an easy exit.
Pull Strap For Third Row Passengers
NOTE:This process is for when there is no child seat
installed. Use the easy entry lever if a child seat is
installed.
Second Row Removable Quad Seat
The second row quad seats, not equipped with the
Stow ‘n Go feature, are removable for added cargo
space.
Removing Seat
1. Adjust seat to the full rearward position.
2. Lift the recline lever to fold the seatback flat against the seat cushion.
Lift Recline Lever And Fold Seatback Flat
NOTE:Push downward on the seatback to make sure it is
in the locked position.
WARNING!
Do not use this feature with a child in seat.
Serious injury or death may occur.2
21_RUP_OM_EN_USC_t.book Page 39
Page 44 of 401
42GETTING TO KNOW YOUR VEHICLE
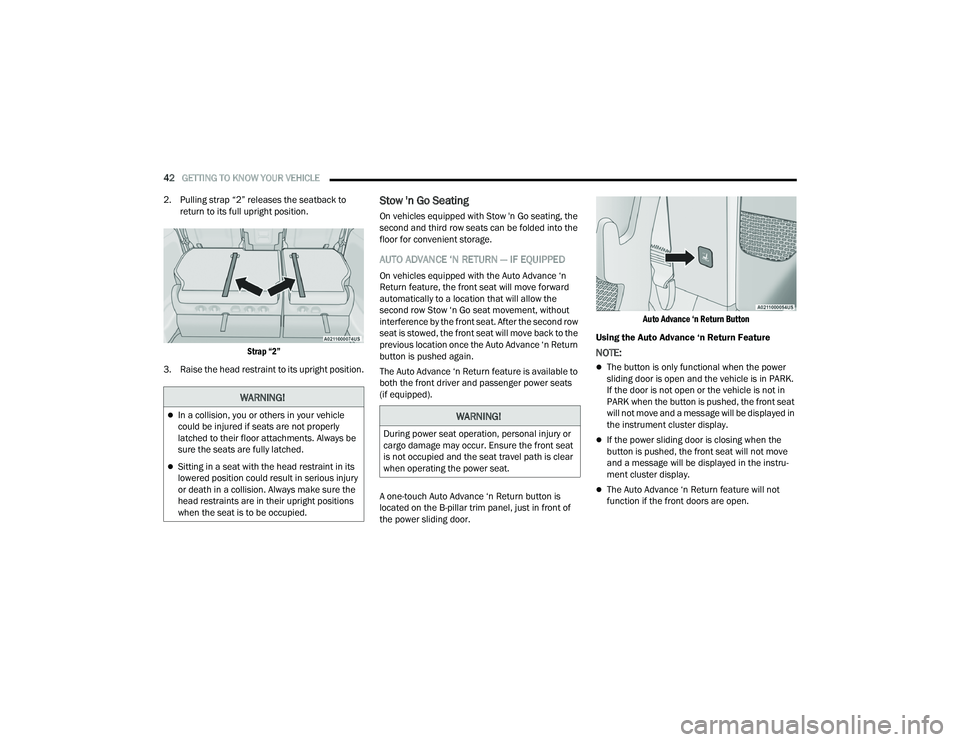
2. Pulling strap “2” releases the seatback to return to its full upright position.
Strap “2”
3. Raise the head restraint to its upright position.
Stow 'n Go Seating
On vehicles equipped with Stow 'n Go seating, the
second and third row seats can be folded into the
floor for convenient storage.
AUTO ADVANCE ‘N RETURN — IF EQUIPPED
On vehicles equipped with the Auto Advance ‘n
Return feature, the front seat will move forward
automatically to a location that will allow the
second row Stow ‘n Go seat movement, without
interference by the front seat. After the second row
seat is stowed, the front seat will move back to the
previous location once the Auto Advance ‘n Return
button is pushed again.
The Auto Advance ‘n Return feature is available to
both the front driver and passenger power seats
(if equipped).
A one-touch Auto Advance ‘n Return button is
located on the B-pillar trim panel, just in front of
the power sliding door.
Auto Advance ‘n Return Button
Using the Auto Advance ‘n Return Feature
NOTE:
The button is only functional when the power
sliding door is open and the vehicle is in PARK.
If the door is not open or the vehicle is not in
PARK when the button is pushed, the front seat
will not move and a message will be displayed in
the instrument cluster display.
If the power sliding door is closing when the
button is pushed, the front seat will not move
and a message will be displayed in the instru -
ment cluster display.
The Auto Advance ‘n Return feature will not
function if the front doors are open.
WARNING!
In a collision, you or others in your vehicle
could be injured if seats are not properly
latched to their floor attachments. Always be
sure the seats are fully latched.
Sitting in a seat with the head restraint in its
lowered position could result in serious injury
or death in a collision. Always make sure the
head restraints are in their upright positions
when the seat is to be occupied.
WARNING!
During power seat operation, personal injury or
cargo damage may occur. Ensure the front seat
is not occupied and the seat travel path is clear
when operating the power seat.
21_RUP_OM_EN_USC_t.book Page 42
Page 53 of 401
GETTING TO KNOW YOUR VEHICLE51
3. To abort seat operation while seat is in motion, push a different seat position selector switch
to stop the seat. Once the seat stops moving,
then the desired position can be selected.
4. The third row power seat system includes obstacle detection. When the system detects
an obstacle, the motors will stop and reverse
direction. Should this occur, remove the
obstacle before pushing the button again.
HEATED SEATS
Front Heated Seats — If Equipped
The front heated seats control buttons are located
in the touchscreen.
You can choose from HI, LO or off heat settings.
The indicator lights in each switch indicate the
level of heat in use. Two indicator lights will
illuminate for HI, one for LO and none for off.
Press the heated seat button once to turn
the HI setting on.
Press the heated seat button a second time
to turn the LO setting on.
Press the heated seat button a third time to
turn the heating elements off.
The level of heat selected will stay on until the
operator changes it.
NOTE:
Once a heat setting is selected, heat will be felt
within two to five minutes.
The engine must be running for the heated
seats to operate.
For information on use with the Remote Start
system, see Ú page 21.
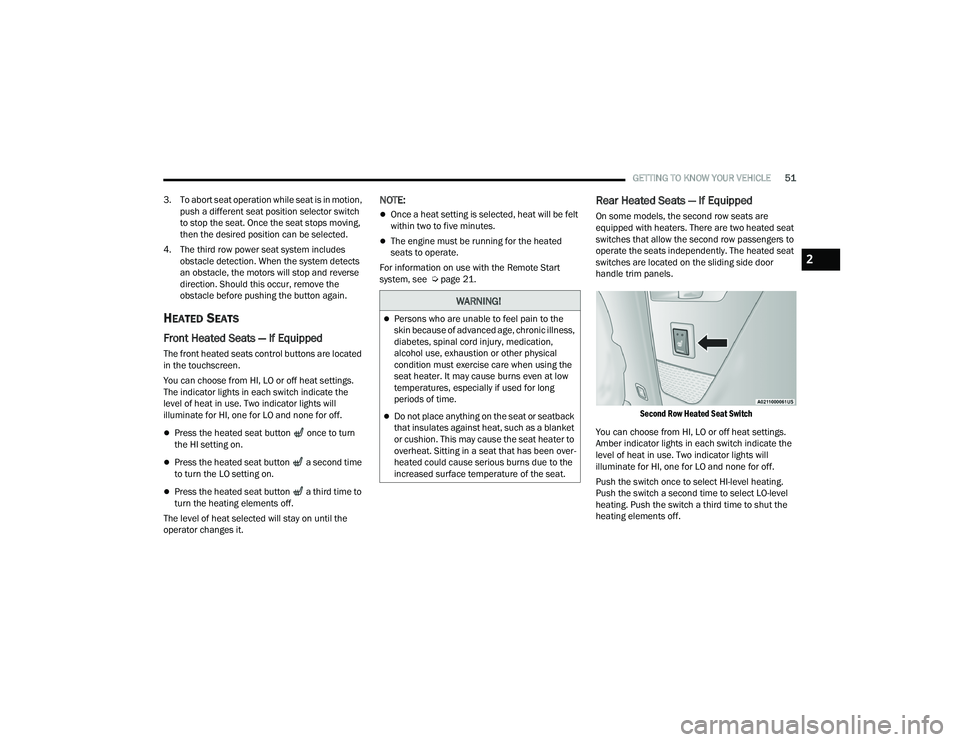
Rear Heated Seats — If Equipped
On some models, the second row seats are
equipped with heaters. There are two heated seat
switches that allow the second row passengers to
operate the seats independently. The heated seat
switches are located on the sliding side door
handle trim panels.
Second Row Heated Seat Switch
You can choose from HI, LO or off heat settings.
Amber indicator lights in each switch indicate the
level of heat in use. Two indicator lights will
illuminate for HI, one for LO and none for off.
Push the switch once to select HI-level heating.
Push the switch a second time to select LO-level
heating. Push the switch a third time to shut the
heating elements off.
WARNING!
Persons who are unable to feel pain to the
skin because of advanced age, chronic illness,
diabetes, spinal cord injury, medication,
alcohol use, exhaustion or other physical
condition must exercise care when using the
seat heater. It may cause burns even at low
temperatures, especially if used for long
periods of time.
Do not place anything on the seat or seatback
that insulates against heat, such as a blanket
or cushion. This may cause the seat heater to
overheat. Sitting in a seat that has been over -
heated could cause serious burns due to the
increased surface temperature of the seat.
2
21_RUP_OM_EN_USC_t.book Page 51