fuel pressure CHRYSLER PACIFICA 2021 Owners Manual
[x] Cancel search | Manufacturer: CHRYSLER, Model Year: 2021, Model line: PACIFICA, Model: CHRYSLER PACIFICA 2021Pages: 401, PDF Size: 26.88 MB
Page 9 of 401
7
TIRE SERVICE KIT WITH A SUBWOOFER —
IF EQUIPPED ......................................................... 306
TIRE SERVICE KIT WITHOUT A
SUBWOOFER — IF EQUIPPED............................. 312
JUMP STARTING................................................... 318 Preparations For Jump Start......................... 318Jump Starting Procedure .............................. 319
REFUELING IN EMERGENCY –
IF EQUIPPED ......................................................... 320
IF YOUR ENGINE OVERHEATS ............................ 321
MANUAL PARK RELEASE ................................... 321
FREEING A STUCK VEHICLE ............................... 323
TOWING A DISABLED VEHICLE .......................... 324
All Wheel Drive (AWD) Models ...................... 326
ENHANCED ACCIDENT RESPONSE SYSTEM
(EARS) .................................................................. 326
EVENT DATA RECORDER (EDR) ......................... 326
SERVICING AND MAINTENANCE
SCHEDULED SERVICING ................................... 327
Maintenance Plan ......................................... 328
ENGINE COMPARTMENT .................................. 331
3.6L Engine ................................................... 331
Checking Oil Level ......................................... 332
Adding Washer Fluid .................................... 332
Maintenance-Free Battery ........................... 332Pressure Washing ......................................... 333
VEHICLE MAINTENANCE..................................... 333
Engine Oil ...................................................... 333
Engine Oil Filter ............................................. 334Engine Air Cleaner Filter ............................ 334
Accessory Drive Belt Inspection ................... 334Air Conditioner Maintenance........................ 335
Body Lubrication ........................................... 337Windshield Wiper Blades ............................. 337
Exhaust System ............................................ 341
Cooling System .............................................. 342
Brake System ............................................... 344
Automatic Transmission ............................... 345
Fuses.............................................................. 346
Bulb Replacement......................................... 354 TIRES .................................................................... 355
Tire Safety Information ................................. 355
Tires — General Information ........................ 363Tire Types....................................................... 367Spare Tires — If Equipped............................. 367Wheel And Wheel Trim Care ........................ 369Snow Traction Devices ................................. 370
Tire Rotation Recommendations ................. 372
DEPARTMENT OF TRANSPORTATION
UNIFORM TIRE QUALITY GRADES ..................... 372
Treadwear...................................................... 373
Traction Grades ............................................. 373Temperature Grades..................................... 373
STORING THE VEHICLE ....................................... 373
BODYWORK .......................................................... 374
Protection From Atmospheric Agents .......... 374
Body And Underbody Maintenance ............. 374
Preserving The Bodywork ............................. 374
INTERIORS ........................................................... 375
Seats And Fabric Parts ................................. 375
Plastic And Coated Parts .............................. 376
Leather Surfaces........................................... 376
Glass Surfaces ............................................. 376
21_RUP_OM_EN_USC_t.book Page 7
Page 14 of 401
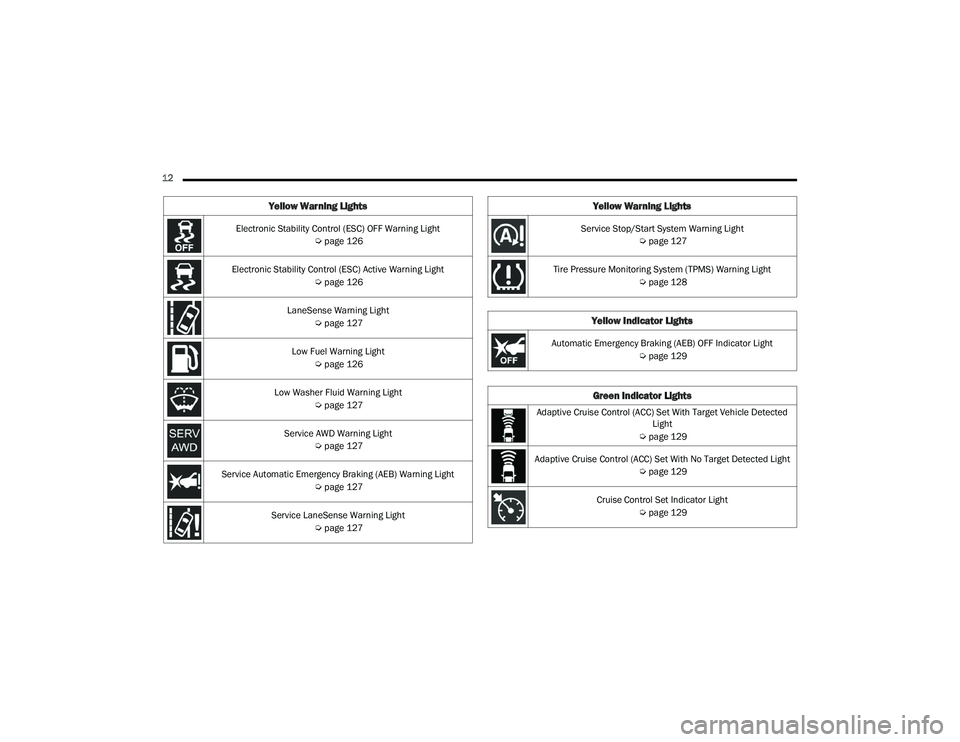
12 Electronic Stability Control (ESC) OFF Warning Light Úpage 126
Electronic Stability Control (ESC) Active Warning Light Úpage 126
LaneSense Warning Light Úpage 127
Low Fuel Warning Light Úpage 126
Low Washer Fluid Warning Light Úpage 127
Service AWD Warning Light Úpage 127
Service Automatic Emergency Braking (AEB) Warning Light Úpage 127
Service LaneSense Warning Light Úpage 127
Yellow Warning Lights
Service Stop/Start System Warning Light
Úpage 127
Tire Pressure Monitoring System (TPMS) Warning Light Úpage 128
Yellow Indicator Lights
Automatic Emergency Braking (AEB) OFF Indicator Light
Úpage 129
Green Indicator Lights
Adaptive Cruise Control (ACC) Set With Target Vehicle Detected
Light
Ú page 129
Adaptive Cruise Control (ACC) Set With No Target Detected Light Úpage 129
Cruise Control Set Indicator Light Úpage 129
Yellow Warning Lights
21_RUP_OM_EN_USC_t.book Page 12
Page 130 of 401
128GETTING TO KNOW YOUR INSTRUMENT PANEL
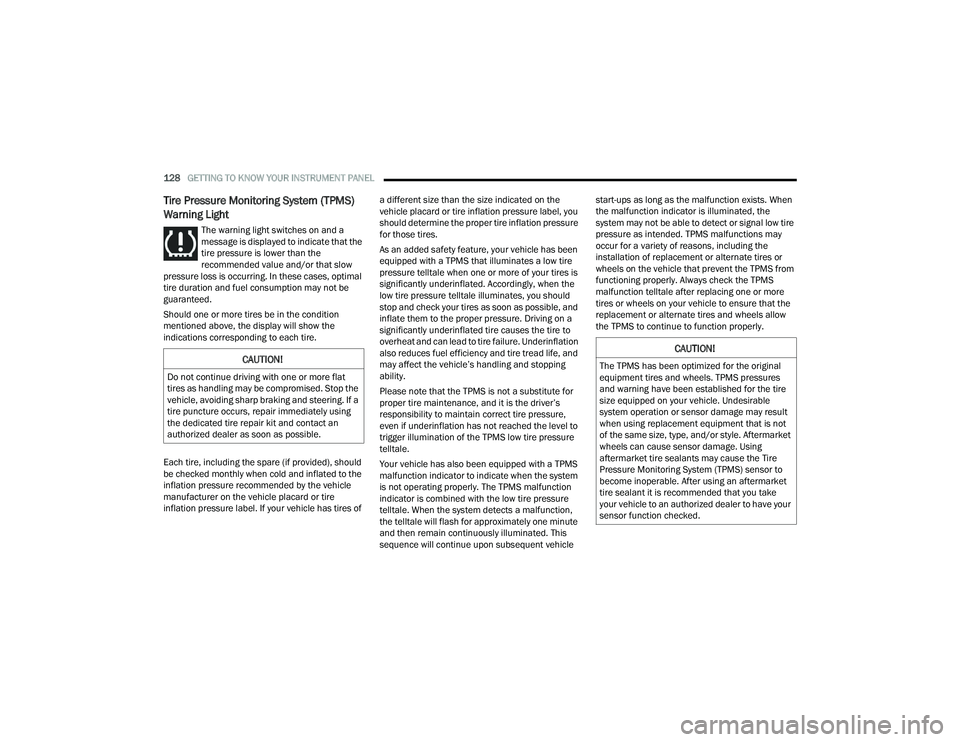
Tire Pressure Monitoring System (TPMS)
Warning Light
The warning light switches on and a
message is displayed to indicate that the
tire pressure is lower than the
recommended value and/or that slow
pressure loss is occurring. In these cases, optimal
tire duration and fuel consumption may not be
guaranteed.
Should one or more tires be in the condition
mentioned above, the display will show the
indications corresponding to each tire.
Each tire, including the spare (if provided), should
be checked monthly when cold and inflated to the
inflation pressure recommended by the vehicle
manufacturer on the vehicle placard or tire
inflation pressure label. If your vehicle has tires of a different size than the size indicated on the
vehicle placard or tire inflation pressure label, you
should determine the proper tire inflation pressure
for those tires.
As an added safety feature, your vehicle has been
equipped with a TPMS that illuminates a low tire
pressure telltale when one or more of your tires is
significantly underinflated. Accordingly, when the
low tire pressure telltale illuminates, you should
stop and check your tires as soon as possible, and
inflate them to the proper pressure. Driving on a
significantly underinflated tire causes the tire to
overheat and can lead to tire failure. Underinflation
also reduces fuel efficiency and tire tread life, and
may affect the vehicle’s handling and stopping
ability.
Please note that the TPMS is not a substitute for
proper tire maintenance, and it is the driver’s
responsibility to maintain correct tire pressure,
even if underinflation has not reached the level to
trigger illumination of the TPMS low tire pressure
telltale.
Your vehicle has also been equipped with a TPMS
malfunction indicator to indicate when the system
is not operating properly. The TPMS malfunction
indicator is combined with the low tire pressure
telltale. When the system detects a malfunction,
the telltale will flash for approximately one minute
and then remain continuously illuminated. This
sequence will continue upon subsequent vehicle start-ups as long as the malfunction exists. When
the malfunction indicator is illuminated, the
system may not be able to detect or signal low tire
pressure as intended. TPMS malfunctions may
occur for a variety of reasons, including the
installation of replacement or alternate tires or
wheels on the vehicle that prevent the TPMS from
functioning properly. Always check the TPMS
malfunction telltale after replacing one or more
tires or wheels on your vehicle to ensure that the
replacement or alternate tires and wheels allow
the TPMS to continue to function properly.
CAUTION!
Do not continue driving with one or more flat
tires as handling may be compromised. Stop the
vehicle, avoiding sharp braking and steering. If a
tire puncture occurs, repair immediately using
the dedicated tire repair kit and contact an
authorized dealer as soon as possible.
CAUTION!
The TPMS has been optimized for the original
equipment tires and wheels. TPMS pressures
and warning have been established for the tire
size equipped on your vehicle. Undesirable
system operation or sensor damage may result
when using replacement equipment that is not
of the same size, type, and/or style. Aftermarket
wheels can cause sensor damage. Using
aftermarket tire sealants may cause the Tire
Pressure Monitoring System (TPMS) sensor to
become inoperable. After using an aftermarket
tire sealant it is recommended that you take
your vehicle to an authorized dealer to have your
sensor function checked.
21_RUP_OM_EN_USC_t.book Page 128
Page 178 of 401
176STARTING AND OPERATING
NOTE:In certain cold conditions, ice may prevent the fuel
filler door from opening. If this occurs, lightly push
on the fuel filler door around the perimeter to
break the ice build-up.
VEHICLE LOADING
CERTIFICATION LABEL
As required by National Highway Traffic Safety
Administration regulations, your vehicle has a
certification label affixed to the driver's side door or
pillar.
This label contains the month and year of
manufacture, Gross Vehicle Weight Rating
(GVWR), front and rear Gross Axle Weight Rating
(GAWR), and Vehicle Identification Number (VIN). A
Month-Day-Hour (MDH) number is included on this
label and indicates the Month, Day and Hour of
manufacture. The bar code that appears on the
bottom of the label is your VIN.
Gross Vehicle Weight Rating (GVWR)
The GVWR is the total permissible weight of your
vehicle including driver, passengers, vehicle,
options and cargo. The label also specifies
maximum capacities of front and rear GAWR. Total
load must be limited so GVWR and front and rear
GAWR are not exceeded.
Payload
The payload of a vehicle is defined as the allowable
load weight a truck can carry, including the weight
of the driver, all passengers, options and cargo.
Gross Axle Weight Rating (GAWR)
The GAWR is the maximum permissible load on the
front and rear axles. The load must be distributed
in the cargo area so that the GAWR of each axle is
not exceeded.
Each axle GAWR is determined by the components
in the system with the lowest load carrying capacity
(axle, springs, tires or wheels). Heavier axles or
suspension components sometimes specified by
purchasers for increased durability does not
necessarily increase the vehicle's GVWR.
Tire Size
The tire size on the Vehicle Certification Label
represents the actual tire size on your vehicle.
Replacement tires must be equal to the load
capacity of this tire size.
Rim Size
This is the rim size that is appropriate for the tire
size listed.
Inflation Pressure
This is the cold tire inflation pressure for your
vehicle for all loading conditions up to full GAWR.
Curb Weight
The curb weight of a vehicle is defined as the total
weight of the vehicle with all fluids, including
vehicle fuel, at full capacity conditions, and with no
occupants or cargo loaded into the vehicle. The
front and rear curb weight values are determined
by weighing your vehicle on a commercial scale
before any occupants or cargo are added.
21_RUP_OM_EN_USC_t.book Page 176
Page 193 of 401
MULTIMEDIA191
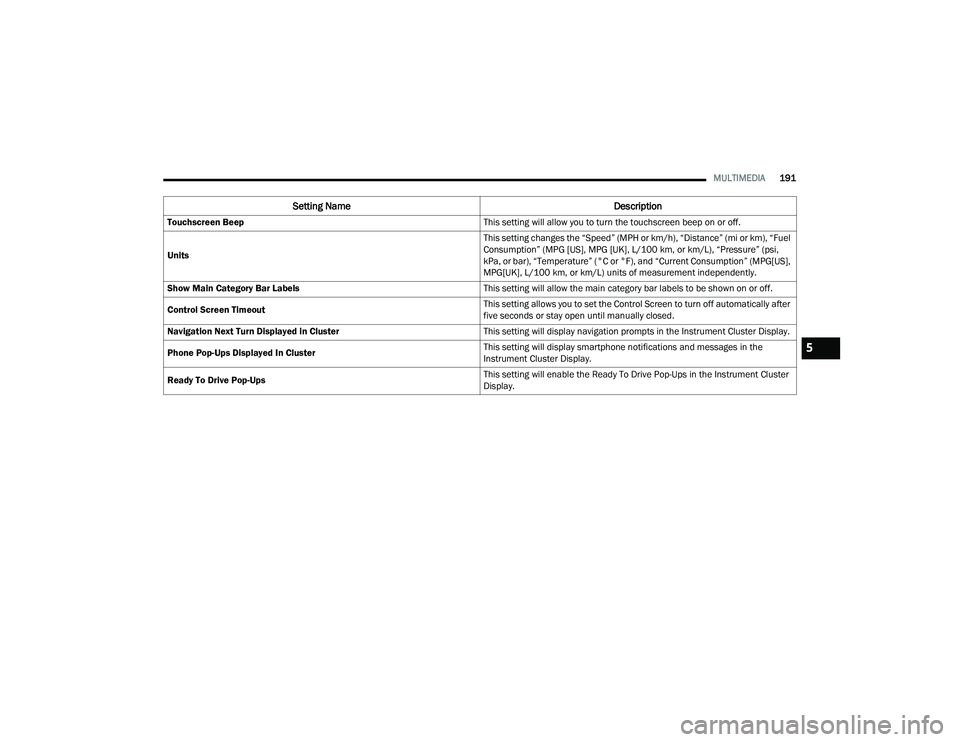
Touchscreen Beep This setting will allow you to turn the touchscreen beep on or off.
Units This setting changes the “Speed” (MPH or km/h), “Distance” (mi or km), “Fuel
Consumption” (MPG [US], MPG [UK], L/100 km, or km/L), “Pressure” (psi,
kPa, or bar), “Temperature” (°C or °F), and “Current Consumption” (MPG[US],
MPG[UK], L/100 km, or km/L) units of measurement independently.
Show Main Category Bar Labels This setting will allow the main category bar labels to be shown on or off.
Control Screen Timeout This setting allows you to set the Control Screen to turn off automatically after
five seconds or stay open until manually closed.
Navigation Next Turn Displayed in Cluster This setting will display navigation prompts in the Instrument Cluster Display.
Phone Pop-Ups Displayed In Cluster This setting will display smartphone notifications and messages in the
Instrument Cluster Display.
Ready To Drive Pop-Ups This setting will enable the Ready To Drive Pop-Ups in the Instrument Cluster
Display.
Setting Name
Description
5
21_RUP_OM_EN_USC_t.book Page 191
Page 196 of 401
194MULTIMEDIA
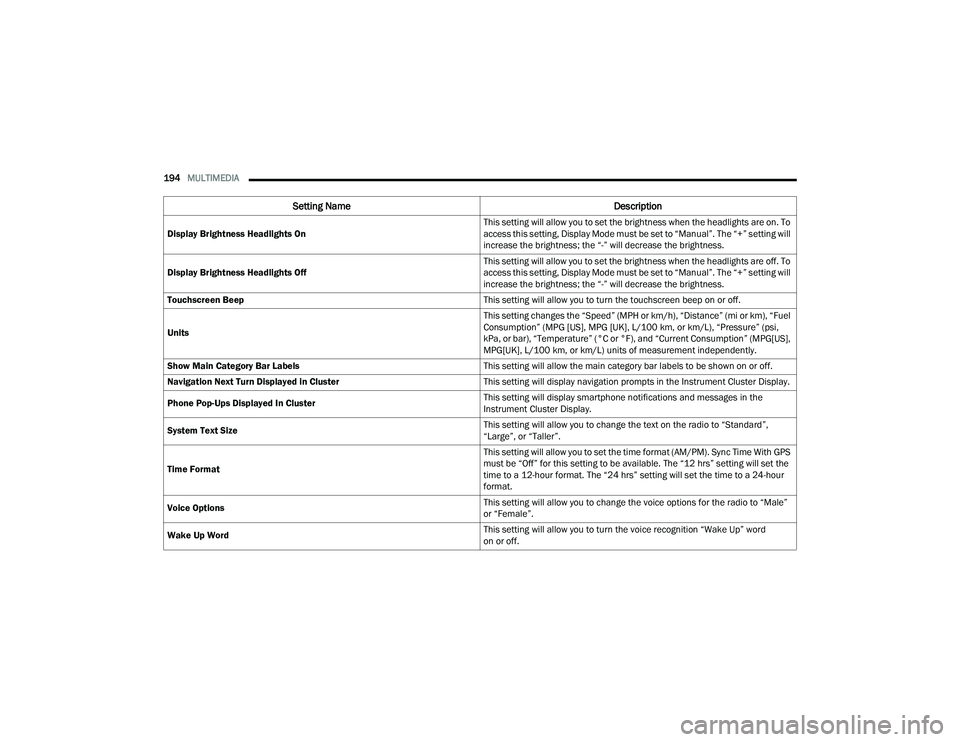
Display Brightness Headlights On This setting will allow you to set the brightness when the headlights are on. To
access this setting, Display Mode must be set to “Manual”. The “+” setting will
increase the brightness; the “-” will decrease the brightness.
Display Brightness Headlights Off This setting will allow you to set the brightness when the headlights are off. To
access this setting, Display Mode must be set to “Manual”. The “+” setting will
increase the brightness; the “-” will decrease the brightness.
Touchscreen Beep This setting will allow you to turn the touchscreen beep on or off.
Units This setting changes the “Speed” (MPH or km/h), “Distance” (mi or km), “Fuel
Consumption” (MPG [US], MPG [UK], L/100 km, or km/L), “Pressure” (psi,
kPa, or bar), “Temperature” (°C or °F), and “Current Consumption” (MPG[US],
MPG[UK], L/100 km, or km/L) units of measurement independently.
Show Main Category Bar Labels This setting will allow the main category bar labels to be shown on or off.
Navigation Next Turn Displayed in Cluster This setting will display navigation prompts in the Instrument Cluster Display.
Phone Pop-Ups Displayed In Cluster This setting will display smartphone notifications and messages in the
Instrument Cluster Display.
System Text Size This setting will allow you to change the text on the radio to “Standard”,
“Large”, or “Taller”.
Time Format This setting will allow you to set the time format (AM/PM). Sync Time With GPS
must be “Off” for this setting to be available. The “12 hrs” setting will set the
time to a 12-hour format. The “24 hrs” setting will set the time to a 24-hour
format.
Voice Options This setting will allow you to change the voice options for the radio to “Male”
or “Female”.
Wake Up Word This setting will allow you to turn the voice recognition “Wake Up” word
on or off.
Setting Name
Description
21_RUP_OM_EN_USC_t.book Page 194
Page 250 of 401
248SAFETY
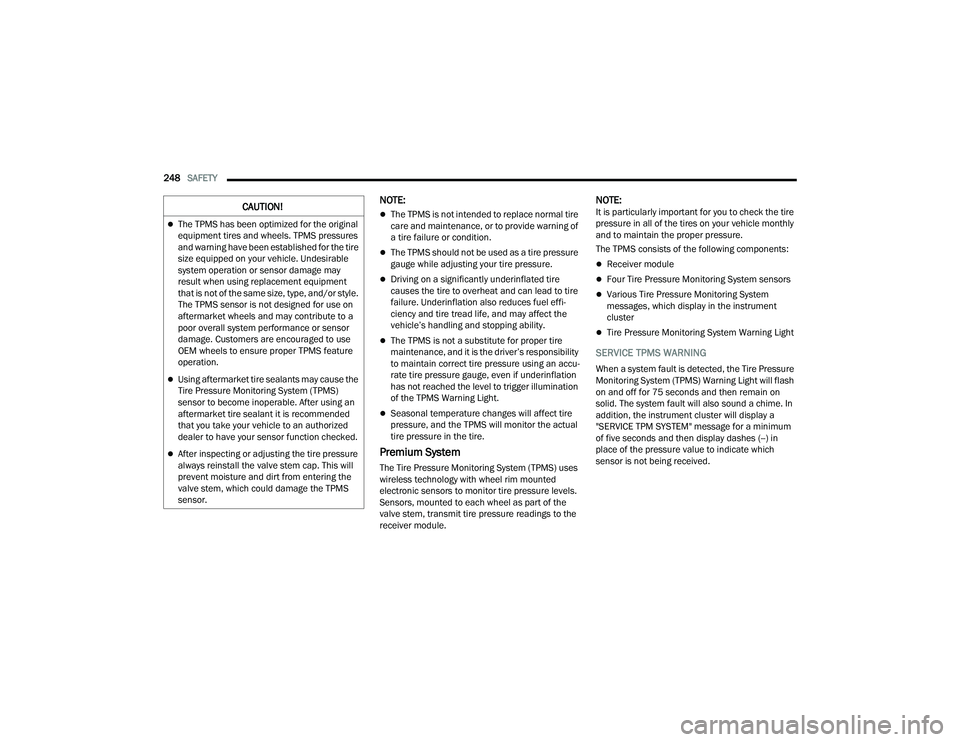
NOTE:
The TPMS is not intended to replace normal tire
care and maintenance, or to provide warning of
a tire failure or condition.
The TPMS should not be used as a tire pressure
gauge while adjusting your tire pressure.
Driving on a significantly underinflated tire
causes the tire to overheat and can lead to tire
failure. Underinflation also reduces fuel effi -
ciency and tire tread life, and may affect the
vehicle’s handling and stopping ability.
The TPMS is not a substitute for proper tire
maintenance, and it is the driver’s responsibility
to maintain correct tire pressure using an accu -
rate tire pressure gauge, even if underinflation
has not reached the level to trigger illumination
of the TPMS Warning Light.
Seasonal temperature changes will affect tire
pressure, and the TPMS will monitor the actual
tire pressure in the tire.
Premium System
The Tire Pressure Monitoring System (TPMS) uses
wireless technology with wheel rim mounted
electronic sensors to monitor tire pressure levels.
Sensors, mounted to each wheel as part of the
valve stem, transmit tire pressure readings to the
receiver module.
NOTE:It is particularly important for you to check the tire
pressure in all of the tires on your vehicle monthly
and to maintain the proper pressure.
The TPMS consists of the following components:
Receiver module
Four Tire Pressure Monitoring System sensors
Various Tire Pressure Monitoring System
messages, which display in the instrument
cluster
Tire Pressure Monitoring System Warning Light
SERVICE TPMS WARNING
When a system fault is detected, the Tire Pressure
Monitoring System (TPMS) Warning Light will flash
on and off for 75 seconds and then remain on
solid. The system fault will also sound a chime. In
addition, the instrument cluster will display a
"SERVICE TPM SYSTEM" message for a minimum
of five seconds and then display dashes (--) in
place of the pressure value to indicate which
sensor is not being received.
CAUTION!
The TPMS has been optimized for the original
equipment tires and wheels. TPMS pressures
and warning have been established for the tire
size equipped on your vehicle. Undesirable
system operation or sensor damage may
result when using replacement equipment
that is not of the same size, type, and/or style.
The TPMS sensor is not designed for use on
aftermarket wheels and may contribute to a
poor overall system performance or sensor
damage. Customers are encouraged to use
OEM wheels to ensure proper TPMS feature
operation.
Using aftermarket tire sealants may cause the
Tire Pressure Monitoring System (TPMS)
sensor to become inoperable. After using an
aftermarket tire sealant it is recommended
that you take your vehicle to an authorized
dealer to have your sensor function checked.
After inspecting or adjusting the tire pressure
always reinstall the valve stem cap. This will
prevent moisture and dirt from entering the
valve stem, which could damage the TPMS
sensor.
21_RUP_OM_EN_USC_t.book Page 248
Page 295 of 401
SAFETY293
(Continued)
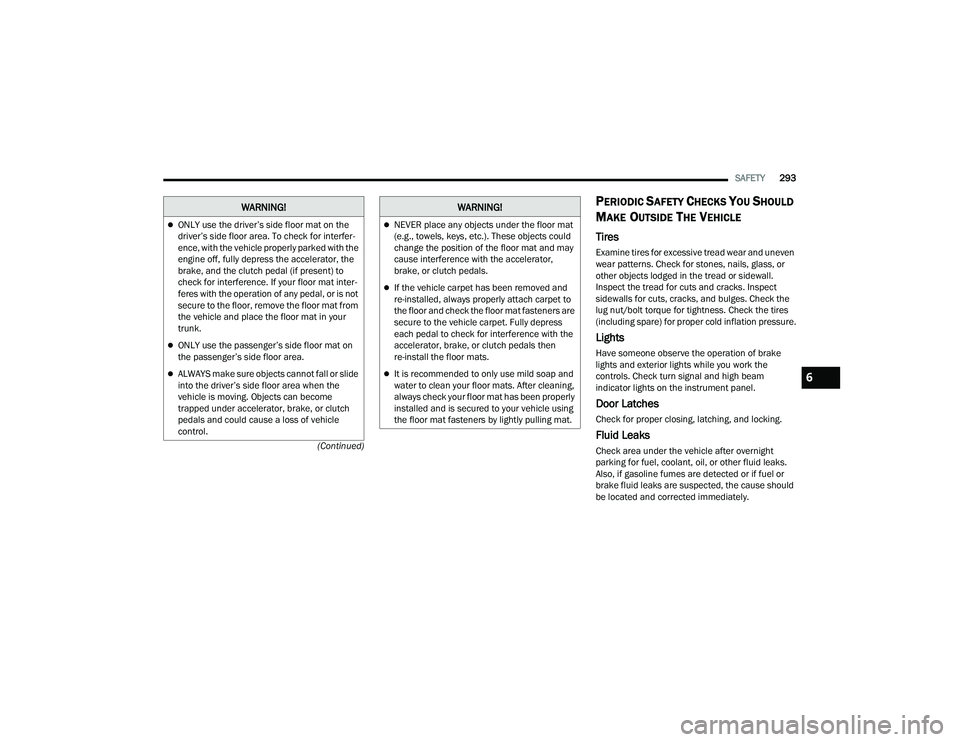
PERIODIC SAFETY CHECKS YOU SHOULD
M
AKE OUTSIDE THE VEHICLE
Tires
Examine tires for excessive tread wear and uneven
wear patterns. Check for stones, nails, glass, or
other objects lodged in the tread or sidewall.
Inspect the tread for cuts and cracks. Inspect
sidewalls for cuts, cracks, and bulges. Check the
lug nut/bolt torque for tightness. Check the tires
(including spare) for proper cold inflation pressure.
Lights
Have someone observe the operation of brake
lights and exterior lights while you work the
controls. Check turn signal and high beam
indicator lights on the instrument panel.
Door Latches
Check for proper closing, latching, and locking.
Fluid Leaks
Check area under the vehicle after overnight
parking for fuel, coolant, oil, or other fluid leaks.
Also, if gasoline fumes are detected or if fuel or
brake fluid leaks are suspected, the cause should
be located and corrected immediately.
ONLY use the driver’s side floor mat on the
driver’s side floor area. To check for interfer -
ence, with the vehicle properly parked with the
engine off, fully depress the accelerator, the
brake, and the clutch pedal (if present) to
check for interference. If your floor mat inter -
feres with the operation of any pedal, or is not
secure to the floor, remove the floor mat from
the vehicle and place the floor mat in your
trunk.
ONLY use the passenger’s side floor mat on
the passenger’s side floor area.
ALWAYS make sure objects cannot fall or slide
into the driver’s side floor area when the
vehicle is moving. Objects can become
trapped under accelerator, brake, or clutch
pedals and could cause a loss of vehicle
control.
WARNING!
NEVER place any objects under the floor mat
(e.g., towels, keys, etc.). These objects could
change the position of the floor mat and may
cause interference with the accelerator,
brake, or clutch pedals.
If the vehicle carpet has been removed and
re-installed, always properly attach carpet to
the floor and check the floor mat fasteners are
secure to the vehicle carpet. Fully depress
each pedal to check for interference with the
accelerator, brake, or clutch pedals then
re-install the floor mats.
It is recommended to only use mild soap and
water to clean your floor mats. After cleaning,
always check your floor mat has been properly
installed and is secured to your vehicle using
the floor mat fasteners by lightly pulling mat.
WARNING!
6
21_RUP_OM_EN_USC_t.book Page 293
Page 323 of 401
IN CASE OF EMERGENCY321
IF YOUR ENGINE OVERHEATS
If the vehicle is overheating, it will need to be
serviced by an authorized dealer.
In any of the following situations, you can reduce
the potential for overheating by taking the
appropriate action.
On the highway — slow down.
In city traffic — while stopped, place the trans -
mission in NEUTRAL (N), but do not increase
engine idle speed.
NOTE:There are steps that you can take to slow down an
impending overheat condition:
If your Air Conditioner (A/C) is on, turn it off. The
A/C system adds heat to the engine cooling
system and turning the A/C off can help remove
this heat.
You can also turn the temperature control to
maximum heat, the mode control to floor and
the blower control to high. This allows the heater
core to act as a supplement to the radiator and
aids in removing heat from the engine cooling
system.
MANUAL PARK RELEASE
WARNING!
Never have any smoking materials lit in or
near the vehicle when the fuel door is open or
the tank is being filled.
Never add fuel when the engine is running.
This is in violation of most state and federal
fire regulations and may cause the Malfunc -
tion Indicator Light to turn on.
A fire may result if fuel is pumped into a
portable container that is inside of a vehicle.
You could be burned. Always place fuel
containers on the ground while filling.
WARNING!
You or others can be badly burned by hot engine
coolant (antifreeze) or steam from your radiator.
If you see or hear steam coming from under the
hood, do not open the hood until the radiator
has had time to cool. Never try to open a cooling
system pressure cap when the radiator or
coolant bottle is hot.
CAUTION!
Driving with a hot cooling system could damage
your vehicle. If temperature gauge reads “H”,
pull over and stop the vehicle. Idle the vehicle
with the air conditioner turned off until the
pointer drops back into the normal range. If the
pointer remains on the “H”, turn the engine off
immediately, and call for service.
WARNING!
You should be seated in the driver’s seat with
your foot firmly placed on the brake pedal to
maintain control of the vehicle before activating
the Manual Park Release. If possible, you should
apply the parking brake. Activating the Manual
Park Release will allow your vehicle to roll away if
it is not secured or properly connected to a tow
vehicle. Activating the Manual Park Release on
an unsecured vehicle could lead to serious
injury or death for those in or around the vehicle.
7
21_RUP_OM_EN_USC_t.book Page 321
Page 334 of 401
332SERVICING AND MAINTENANCE
(Continued)
CHECKING OIL LEVEL
To ensure proper engine lubrication, the engine oil
must be maintained at the correct level. Check the
oil level at regular intervals, such as every fuel
stop. The best time to check the engine oil level is
about five minutes after a fully warmed up engine
is shut off.
Checking the oil while the vehicle is on level ground
will improve the accuracy of the oil level readings.
There are four possible dipstick types:
Crosshatched zone.
Crosshatched zone marked SAFE.
Crosshatched zone marked with MIN at the low
end of the range and MAX at the high end of the
range.
Crosshatched zone marked with dimples at the
MIN and the MAX ends of the range.
NOTE:Always maintain the oil level within the crosshatch
markings on the dipstick.
Adding 1 quart (1.0 liter) of oil when the reading is
at the low end of the dipstick range will raise the oil
level to the high end of the range marking.
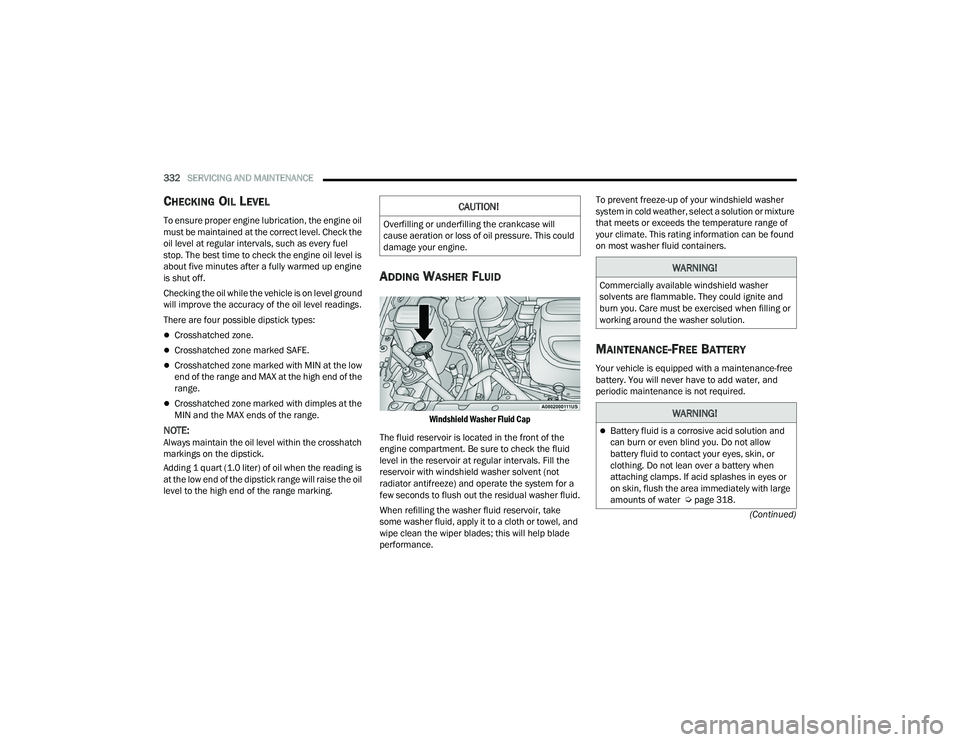
ADDING WASHER FLUID
Windshield Washer Fluid Cap
The fluid reservoir is located in the front of the
engine compartment. Be sure to check the fluid
level in the reservoir at regular intervals. Fill the
reservoir with windshield washer solvent (not
radiator antifreeze) and operate the system for a
few seconds to flush out the residual washer fluid.
When refilling the washer fluid reservoir, take
some washer fluid, apply it to a cloth or towel, and
wipe clean the wiper blades; this will help blade
performance. To prevent freeze-up of your windshield washer
system in cold weather, select a solution or mixture
that meets or exceeds the temperature range of
your climate. This rating information can be found
on most washer fluid containers.
MAINTENANCE-FREE BATTERY
Your vehicle is equipped with a maintenance-free
battery. You will never have to add water, and
periodic maintenance is not required.
CAUTION!
Overfilling or underfilling the crankcase will
cause aeration or loss of oil pressure. This could
damage your engine.
WARNING!
Commercially available windshield washer
solvents are flammable. They could ignite and
burn you. Care must be exercised when filling or
working around the washer solution.
WARNING!
Battery fluid is a corrosive acid solution and
can burn or even blind you. Do not allow
battery fluid to contact your eyes, skin, or
clothing. Do not lean over a battery when
attaching clamps. If acid splashes in eyes or
on skin, flush the area immediately with large
amounts of water Ú
page 318.
21_RUP_OM_EN_USC_t.book Page 332