stop start CHRYSLER PACIFICA HYBRID 2023 User Guide
[x] Cancel search | Manufacturer: CHRYSLER, Model Year: 2023, Model line: PACIFICA HYBRID, Model: CHRYSLER PACIFICA HYBRID 2023Pages: 328, PDF Size: 16.37 MB
Page 49 of 328
GETTING TO KNOW YOUR VEHICLE47
POWER FOLDING THIRD ROW HEAD
RESTRAINTS — IF EQUIPPED
For improved visibility, the third row outboard head
restraints can be folded using the Uconnect system.
Press Vehicle, then Controls located on the bottom of the
Uconnect display.
Press the Head Restraint Fold button to power
fold the third row head restraints.
NOTE:
The head restraints can be folded downward using the
Head Restraint button or using the manual release
strap. The head restraints must be raised manually
when occupying the third row.
Do not fold if there are passengers seated in the third
row seats.
UCONNECT VOICE RECOGNITION —
IF EQUIPPED
INTRODUCING VOICE RECOGNITION
Start using Uconnect Voice Recognition (VR) with these
helpful quick tips. It provides the key Voice Commands
and tips you need to know to control your system.
BASIC VOICE COMMANDS
The following basic Voice Commands can be given at any
point while using your Uconnect system.
Push the VR button on the steering wheel. After the beep,
say:
“Cancel ” to stop a current voice session.
“Help ” to hear a list of suggested Voice Commands.
“Repeat ” to listen to the system prompts again.
Notice the visual cues that inform you of your Voice
Recognition system’s status.
GET STARTED
The VR button is used to activate/deactivate your
Voice Recognition system.
Helpful hints for using Voice Recognition:
Reduce background noise. Wind noise and passenger
conversations are examples of noise that may impact
recognition.
Speak clearly at a normal pace and volume while facing
straight ahead.
Each time you give a Voice Command, first push the VR
button, wait until after the beep, then say your Voice
Command. You can also say the vehicle “Wake Up”
word and state your command.
NOTE:The factory default Wake Up word is set to “Hey Uconnect”
and can be reprogrammed through the Uconnect Settings.
After the beep, say:
A passenger can press the VR button shortcut on the
radio status bar to also issue a command.
You can interrupt the help message or system prompts
by pushing the VR button and saying a Voice Command
or saying the vehicle’s “Wake Up” word and saying a
command from the current category.
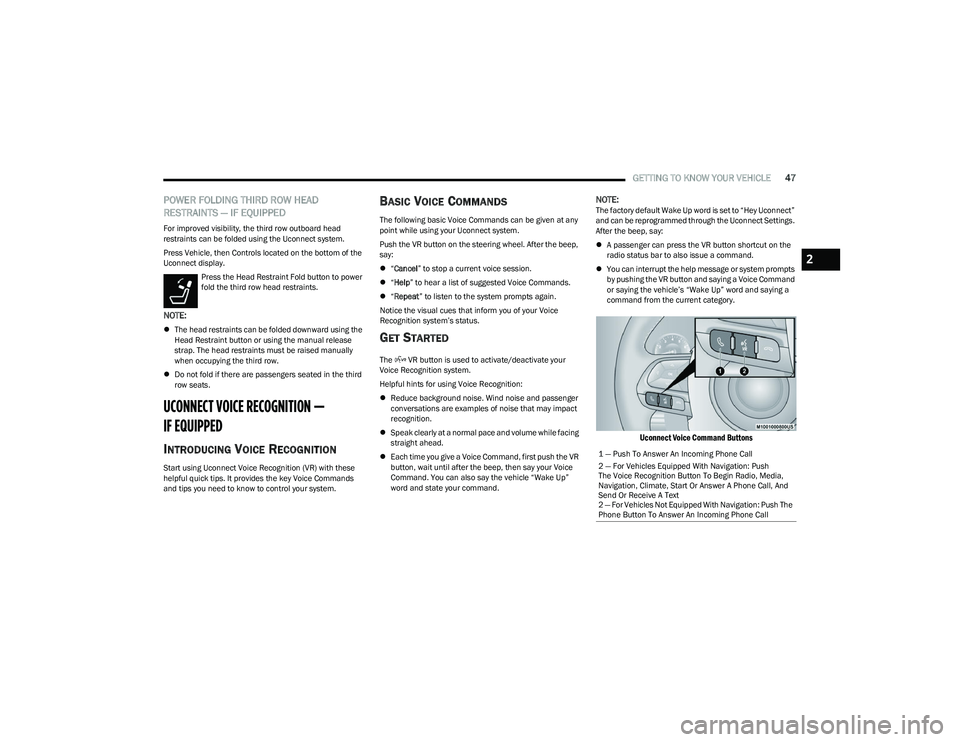
Uconnect Voice Command Buttons
1 — Push To Answer An Incoming Phone Call
2 — For Vehicles Equipped With Navigation: Push
The Voice Recognition Button To Begin Radio, Media,
Navigation, Climate, Start Or Answer A Phone Call, And
Send Or Receive A Text
2 — For Vehicles Not Equipped With Navigation: Push The
Phone Button To Answer An Incoming Phone Call
2
23_RUP_OM_EN_USC_t.book Page 47
Page 73 of 328
GETTING TO KNOW YOUR VEHICLE71
Outside Air Intake
Make sure the air intake, located directly in front of the
windshield, is free of obstructions, such as leaves. Leaves
collected in the air intake may reduce airflow, and if they
enter the air distribution box, they could plug the water
drains. In Winter months, make sure the air intake is clear
of ice, slush, and snow.
Cabin Air Filter
The Climate Control system filters out dust and pollen
from the air. Contact an authorized dealer to service your
cabin air filter, and to have it replaced when needed.
Stop/Start System — If Equipped
While in an Autostop, the Climate Control system may
automatically adjust airflow to maintain cabin comfort.
Customer settings will be maintained upon return to an
engine running condition.
Operating Tips Chart
INTERIOR STORAGE AND EQUIPMENT
STORAGE
Glove Compartment
The glove compartment is located on the passenger side
of the instrument panel.
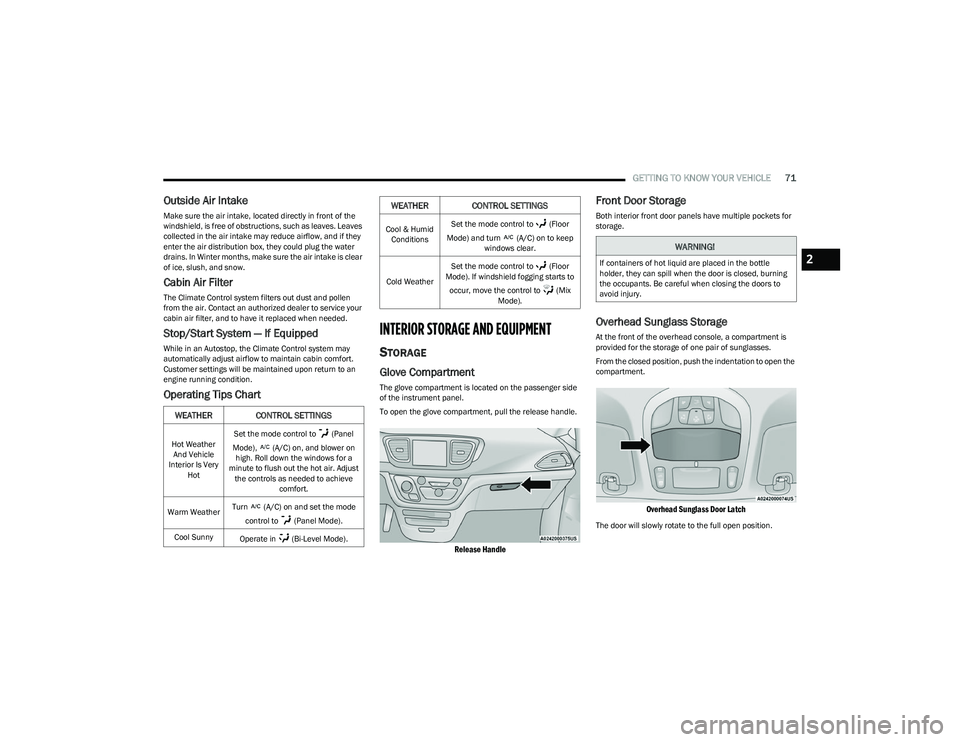
To open the glove compartment, pull the release handle.
Release Handle
Front Door Storage
Both interior front door panels have multiple pockets for
storage.
Overhead Sunglass Storage
At the front of the overhead console, a compartment is
provided for the storage of one pair of sunglasses.
From the closed position, push the indentation to open the
compartment.
Overhead Sunglass Door Latch
The door will slowly rotate to the full open position.
WEATHER CONTROL SETTINGS
Hot Weather
And Vehicle
Interior Is Very Hot Set the mode control to (Panel
Mode), (A/C) on, and blower on high. Roll down the windows for a
minute to flush out the hot air. Adjust the controls as needed to achieve comfort.
Warm Weather Turn (A/C) on and set the mode
control to (Panel Mode).
Cool Sunny Operate in (Bi-Level Mode).
Cool & Humid
Conditions Set the mode control to (Floor
Mode) and turn (A/C) on to keep windows clear.
Cold Weather Set the mode control to (Floor
Mode). If windshield fogging starts to
occur, move the control to (Mix Mode).
WEATHER CONTROL SETTINGS
WARNING!
If containers of hot liquid are placed in the bottle
holder, they can spill when the door is closed, burning
the occupants. Be careful when closing the doors to
avoid injury.2
23_RUP_OM_EN_USC_t.book Page 71
Page 91 of 328
GETTING TO KNOW YOUR VEHICLE89
5. When finished, push power button to turn vacuum off
and store vacuum hose and any attachments.
6. Before exiting the vehicle: If the ignition is in the ACC position, push the
START/STOP ignition button to place ignition in the
OFF position, remove key fob from the vehicle, and
lock the vehicle.
If the engine is running, raise all of the windows,
push the START/STOP ignition button to place igni -
tion in the OFF position, remove key fob from the
vehicle, close all of the doors and the liftgate and
lock the vehicle.
Vacuum Troubleshooting
DO NOT use with any opening blocked. If an object
becomes lodged in the hose, attempt to fully extend
the hose in a straight line while the vacuum motor is
running. If this does not dislodge the object, turn the
vacuum OFF and remove the hose from the vehicle
using the subsequent removal instructions. If the filter
is clogged, follow the emptying debris bin procedure
and lightly tap the filter on the collection bin to remove any collected debris from the filter. Both the bin and
the filter can be rinsed with water if needed. To avoid
mold and stale odors, allow both to dry completely
before reinstalling in your vehicle. If the filter has tears,
holes or other damage and needs to be replaced,
please contact an authorized dealer.
If there are any other issues with your vacuum, contact
an authorized dealer. Your vacuum has no user
serviceable parts.
Debris Bin
The debris bin is located behind the access panel behind
the third row seat on the driver’s side.
To Empty
1. Push power button to turn vacuum OFF.
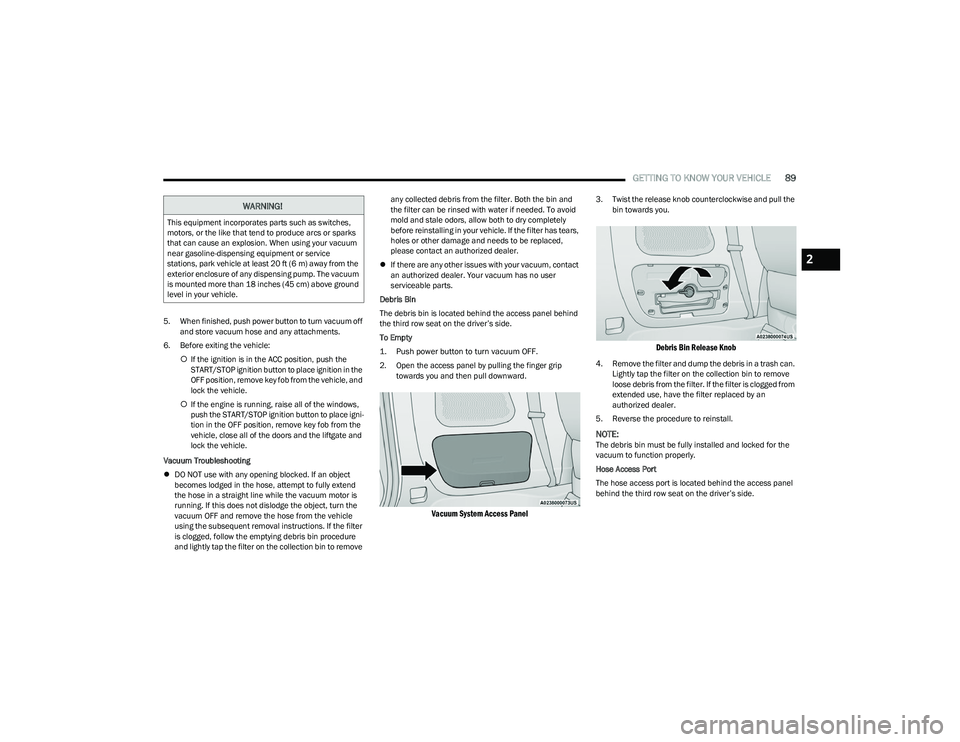
2. Open the access panel by pulling the finger grip towards you and then pull downward.
Vacuum System Access Panel
3. Twist the release knob counterclockwise and pull the bin towards you.
Debris Bin Release Knob
4. Remove the filter and dump the debris in a trash can. Lightly tap the filter on the collection bin to remove
loose debris from the filter. If the filter is clogged from
extended use, have the filter replaced by an
authorized dealer.
5. Reverse the procedure to reinstall.
NOTE:The debris bin must be fully installed and locked for the
vacuum to function properly.
Hose Access Port
The hose access port is located behind the access panel
behind the third row seat on the driver’s side.
WARNING!
This equipment incorporates parts such as switches,
motors, or the like that tend to produce arcs or sparks
that can cause an explosion. When using your vacuum
near gasoline-dispensing equipment or service
stations, park vehicle at least 20 ft (6 m) away from the
exterior enclosure of any dispensing pump. The vacuum
is mounted more than 18 inches (45 cm) above ground
level in your vehicle.
2
23_RUP_OM_EN_USC_t.book Page 89
Page 100 of 328
98GETTING TO KNOW YOUR INSTRUMENT PANEL
Back / Left Arrow Button
Push and release the left arrow button to access
the information screens or submenu screens of a main
menu item.
Up Arrow Button
Push and release the up arrow button to scroll
upward through the Main Menu items.
Right Arrow Button
Push and release the right arrow button to access
the information screens or submenu screens of a main
menu item.
Down Arrow Button
Push and release the down arrow button to scroll
downward through the Main Menu items.
OK Button
Push the OK button to access/select the information
screens or submenu screens of a Main Menu item.
Push and hold the OK button for two seconds to reset
displayed/selected features that can be reset.
ENGINE OIL LIFE
Use this QR code to access your digital
experience.
Your vehicle is equipped with an
engine oil change indicator system.
The “Oil Change Required”
message will display for approxi -
mately five seconds after a single
chime has sounded, to indicate it is
time to change the engine oil. The engine oil change indicator system is duty cycle based, which means the
engine oil change interval may fluctuate, dependent
upon your personal driving style.
Unless reset, this message will continue to display
each time the ignition is cycled to the ON/RUN position.
To reset the oil change indicator after performing the
scheduled maintenance, refer to the following proce -
dure.
NOTE:This procedure should only be performed after scheduled
maintenance is completed. Resetting oil life other than
when associated with a scheduled maintenance may
result in damage due to not properly maintaining the
engine oil.
Oil Life Reset
1. Without pressing the brake pedal, push the ENGINE START/STOP button and place the ignition in the
ON/RUN position (do not start the vehicle.)
2. Push the OK button to enter the instrument cluster
display menu screen.
3. Push and release the down arrow button to
access the ”Vehicle Info” menu screen.
4. Push the left arrow button or right arrow button
to access the “Oil Life” submenu.
5. Hold the OK button to reset the “Oil Life” to 100%.
6. Push the up arrow button to exit the instrument
cluster display menu screen. Secondary Method For Oil Life Reset Procedure
1. Without pushing the brake pedal, place the ignition
in the ON/RUN position (do not start the engine).
2. Fully press the accelerator pedal, slowly, three times within 10 seconds.
3. Without pushing the brake pedal, place the ignition in the OFF position.
NOTE:If the indicator message illuminates when you start the
vehicle, the oil change indicator system did not reset. If
necessary, repeat this procedure.
KEYSENSE CLUSTER MESSAGES —
I
F EQUIPPED
When the KeySense key is in use there will be:
Continuous, dedicated telltale
Unique Display Splash Screen
With KeySense in use there will be multiple associated
messages shown in the following table:
Setting Instrument Cluster Display
Message
None – With vehicle ignition ON “KeySense in use. Max
vehicle speed set to xx MPH/or km/h”
23_RUP_OM_EN_USC_t.book Page 98
Page 102 of 328
100GETTING TO KNOW YOUR INSTRUMENT PANEL
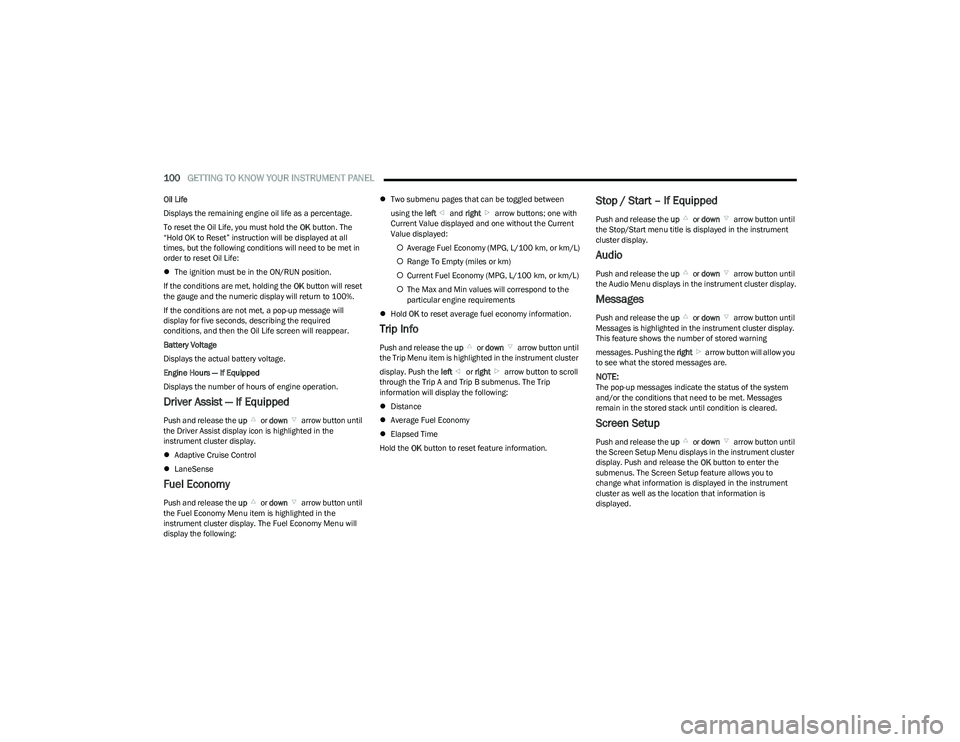
Oil Life
Displays the remaining engine oil life as a percentage.
To reset the Oil Life, you must hold the OK button. The
“Hold OK to Reset” instruction will be displayed at all
times, but the following conditions will need to be met in
order to reset Oil Life:
The ignition must be in the ON/RUN position.
If the conditions are met, holding the OK button will reset
the gauge and the numeric display will return to 100%.
If the conditions are not met, a pop-up message will
display for five seconds, describing the required
conditions, and then the Oil Life screen will reappear.
Battery Voltage
Displays the actual battery voltage.
Engine Hours — If Equipped
Displays the number of hours of engine operation.
Driver Assist — If Equipped
Push and release the up or down arrow button until
the Driver Assist display icon is highlighted in the
instrument cluster display.
Adaptive Cruise Control
LaneSense
Fuel Economy
Push and release the up or down arrow button until
the Fuel Economy Menu item is highlighted in the
instrument cluster display. The Fuel Economy Menu will
display the following:
Two submenu pages that can be toggled between
using the left and right arrow buttons; one with
Current Value displayed and one without the Current
Value displayed:
Average Fuel Economy (MPG, L/100 km, or km/L)
Range To Empty (miles or km)
Current Fuel Economy (MPG, L/100 km, or km/L)
The Max and Min values will correspond to the
particular engine requirements
Hold OK to reset average fuel economy information.
Trip Info
Push and release the up or down arrow button until
the Trip Menu item is highlighted in the instrument cluster
display. Push the left or right arrow button to scroll
through the Trip A and Trip B submenus. The Trip
information will display the following:
Distance
Average Fuel Economy
Elapsed Time
Hold the OK button to reset feature information.
Stop / Start – If Equipped
Push and release the up or down arrow button until
the Stop/Start menu title is displayed in the instrument
cluster display.
Audio
Push and release the up or down arrow button until
the Audio Menu displays in the instrument cluster display.
Messages
Push and release the up or down arrow button until
Messages is highlighted in the instrument cluster display.
This feature shows the number of stored warning
messages. Pushing the right arrow button will allow you
to see what the stored messages are.
NOTE:The pop-up messages indicate the status of the system
and/or the conditions that need to be met. Messages
remain in the stored stack until condition is cleared.
Screen Setup
Push and release the up or down arrow button until
the Screen Setup Menu displays in the instrument cluster
display. Push and release the OK button to enter the
submenus. The Screen Setup feature allows you to
change what information is displayed in the instrument
cluster as well as the location that information is
displayed.
23_RUP_OM_EN_USC_t.book Page 100
Page 104 of 328
102GETTING TO KNOW YOUR INSTRUMENT PANEL
NOTE:
The charging system is independent from load reduc -
tion. The charging system performs a diagnostic on the
charging system continuously.
If the Battery Charge Warning Light is on it may indicate
a problem with the charging system
Úpage 103.
The electrical loads that may be switched off (if equipped),
and vehicle functions which can be effected by load
reduction:
Heated Seat/Vented Seats/Heated Wheel
Heated/Cooled Cup Holders — If Equipped
Rear Defroster And Heated Mirrors
HVAC System
115 Volts AC Power Inverter System
Audio and Telematics System
Loss of the battery charge may indicate one or more of the
following conditions:
The charging system cannot deliver enough electrical
power to the vehicle system because the electrical
loads are larger than the capability of charging system.
The charging system is still functioning properly.
Turning on all possible vehicle electrical loads (e.g.
HVAC to max settings, exterior and interior lights, over -
loaded power outlets +12 Volts, 150W, USB ports)
during certain driving conditions (city driving, towing,
frequent stopping).
Installing options like additional lights, upfitter elec -
trical accessories, audio systems, alarms and similar
devices.
Unusual driving cycles (short trips separated by long
parking periods).
The vehicle was parked for an extended period of time
(weeks, months).
The battery was recently replaced and was not charged
completely.
The battery was discharged by an electrical load left on
when the vehicle was parked.
The battery was used for an extended period with the
engine not running to supply radio, lights, chargers,
+12 Volt portable appliances like vacuum cleaners,
game consoles and similar devices.
What to do when an electrical load reduction action
message is present (“Battery Saver On” or “Battery Saver
Mode”)
During a trip:
Reduce power to unnecessary loads if possible:
Turn off redundant lights (interior or exterior)
Check what may be plugged in to power outlets
+12 Volts, 150W, USB ports
Check HVAC settings (blower, temperature)
Check the audio settings (volume)
After a trip:
Check if any aftermarket equipment was installed
(additional lights, upfitter electrical accessories, audio
systems, alarms) and review specifications if any (load
and Ignition Off Draw currents).
Evaluate the latest driving cycles (distance, driving
time and parking time).
The vehicle should have service performed if the
message is still present during consecutive trips and
the evaluation of the vehicle and driving pattern did not
help to identify the cause.
WARNING LIGHTS AND MESSAGES
The warning/indicator lights will illuminate in the
instrument panel together with a dedicated message and/
or acoustic signal when applicable. These indications are
indicative and precautionary and as such must not be
considered as exhaustive and/or alternative to the
information contained in the Owner’s Manual, which you
are advised to read carefully in all cases. Always refer to
the information in this chapter in the event of a failure
indication. All active telltales will display first if applicable.
The system check menu may appear different based upon
equipment options and current vehicle status. Some
telltales are optional and may not appear.
RED WARNING LIGHTS
Air Bag Warning Light
This warning light will illuminate to indicate a
fault with the air bag, and will turn on for four to
eight seconds as a bulb check when the ignition
is placed in the ON/RUN or ACC/ON/RUN
position. This light will illuminate with a single chime when a
fault with the air bag has been detected, it will stay on until
the fault is cleared. If the light is either not on during startup,
stays on, or turns on while driving, have the system
inspected at an authorized dealer as soon as possible.
23_RUP_OM_EN_USC_t.book Page 102
Page 106 of 328
104GETTING TO KNOW YOUR INSTRUMENT PANEL
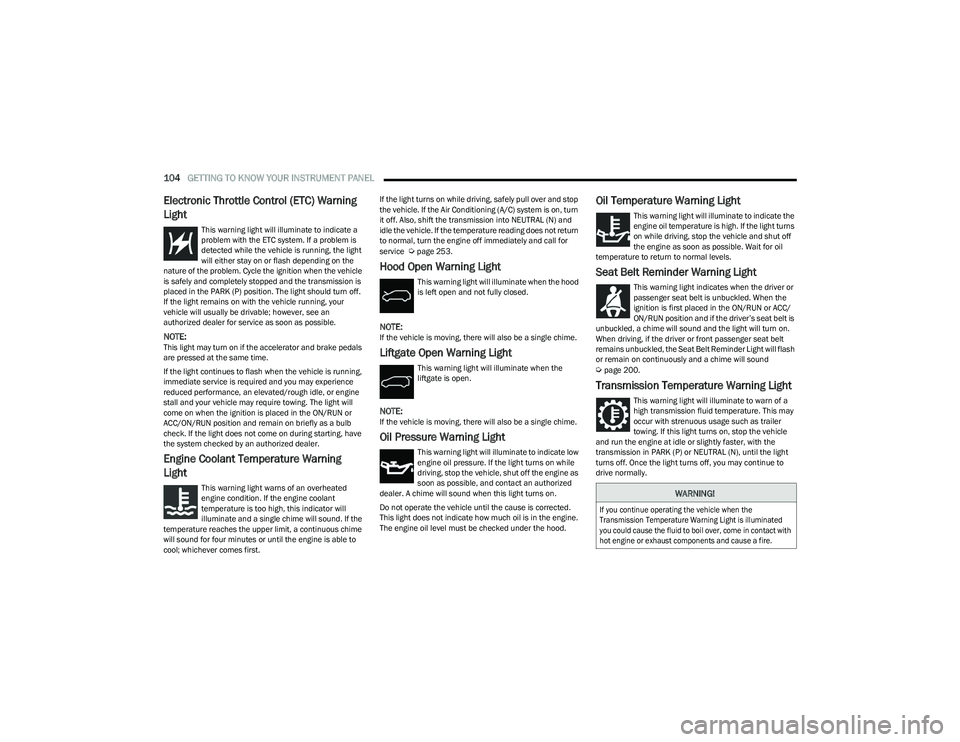
Electronic Throttle Control (ETC) Warning
Light
This warning light will illuminate to indicate a
problem with the ETC system. If a problem is
detected while the vehicle is running, the light
will either stay on or flash depending on the
nature of the problem. Cycle the ignition when the vehicle
is safely and completely stopped and the transmission is
placed in the PARK (P) position. The light should turn off.
If the light remains on with the vehicle running, your
vehicle will usually be drivable; however, see an
authorized dealer for service as soon as possible.
NOTE:This light may turn on if the accelerator and brake pedals
are pressed at the same time.
If the light continues to flash when the vehicle is running,
immediate service is required and you may experience
reduced performance, an elevated/rough idle, or engine
stall and your vehicle may require towing. The light will
come on when the ignition is placed in the ON/RUN or
ACC/ON/RUN position and remain on briefly as a bulb
check. If the light does not come on during starting, have
the system checked by an authorized dealer.
Engine Coolant Temperature Warning
Light
This warning light warns of an overheated
engine condition. If the engine coolant
temperature is too high, this indicator will
illuminate and a single chime will sound. If the
temperature reaches the upper limit, a continuous chime
will sound for four minutes or until the engine is able to
cool; whichever comes first. If the light turns on while driving, safely pull over and stop
the vehicle. If the Air Conditioning (A/C) system is on, turn
it off. Also, shift the transmission into NEUTRAL (N) and
idle the vehicle. If the temperature reading does not return
to normal, turn the engine off immediately and call for
service
Úpage 253.
Hood Open Warning Light
This warning light will illuminate when the hood
is left open and not fully closed.
NOTE:If the vehicle is moving, there will also be a single chime.
Liftgate Open Warning Light
This warning light will illuminate when the
liftgate is open.
NOTE:If the vehicle is moving, there will also be a single chime.
Oil Pressure Warning Light
This warning light will illuminate to indicate low
engine oil pressure. If the light turns on while
driving, stop the vehicle, shut off the engine as
soon as possible, and contact an authorized
dealer. A chime will sound when this light turns on.
Do not operate the vehicle until the cause is corrected.
This light does not indicate how much oil is in the engine.
The engine oil level must be checked under the hood.
Oil Temperature Warning Light
This warning light will illuminate to indicate the
engine oil temperature is high. If the light turns
on while driving, stop the vehicle and shut off
the engine as soon as possible. Wait for oil
temperature to return to normal levels.
Seat Belt Reminder Warning Light
This warning light indicates when the driver or
passenger seat belt is unbuckled. When the
ignition is first placed in the ON/RUN or ACC/
ON/RUN position and if the driver’s seat belt is
unbuckled, a chime will sound and the light will turn on.
When driving, if the driver or front passenger seat belt
remains unbuckled, the Seat Belt Reminder Light will flash
or remain on continuously and a chime will sound
Úpage 200.
Transmission Temperature Warning Light
This warning light will illuminate to warn of a
high transmission fluid temperature. This may
occur with strenuous usage such as trailer
towing. If this light turns on, stop the vehicle
and run the engine at idle or slightly faster, with the
transmission in PARK (P) or NEUTRAL (N), until the light
turns off. Once the light turns off, you may continue to
drive normally.
WARNING!
If you continue operating the vehicle when the
Transmission Temperature Warning Light is illuminated
you could cause the fluid to boil over, come in contact with
hot engine or exhaust components and cause a fire.
23_RUP_OM_EN_USC_t.book Page 104
Page 108 of 328
106GETTING TO KNOW YOUR INSTRUMENT PANEL
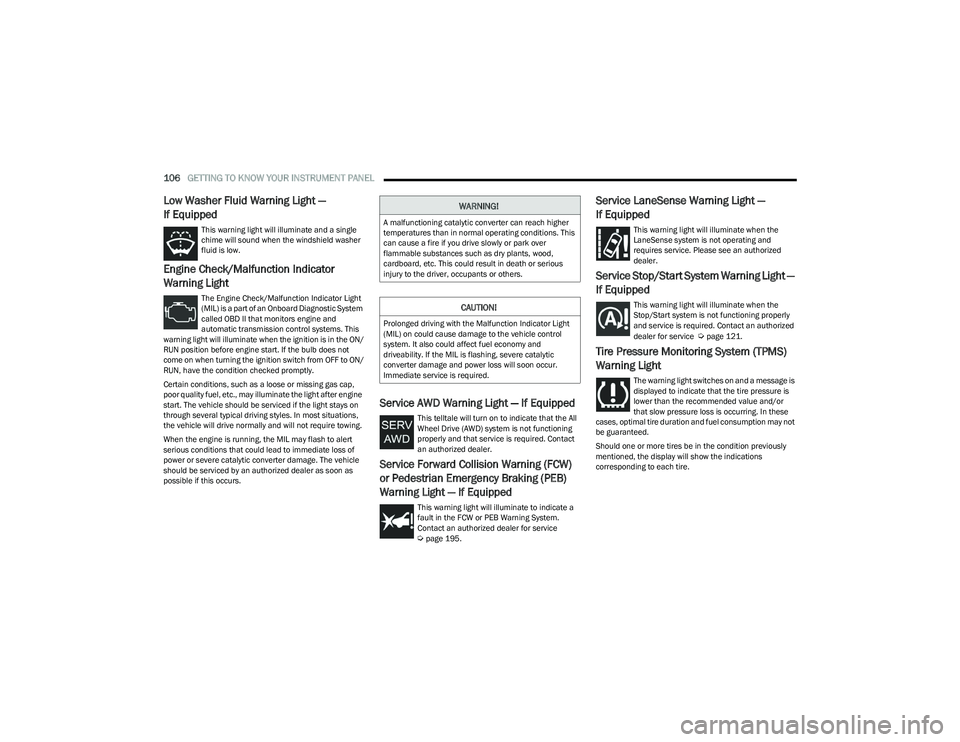
Low Washer Fluid Warning Light —
If Equipped
This warning light will illuminate and a single
chime will sound when the windshield washer
fluid is low.
Engine Check/Malfunction Indicator
Warning Light
The Engine Check/Malfunction Indicator Light
(MIL) is a part of an Onboard Diagnostic System
called OBD II that monitors engine and
automatic transmission control systems. This
warning light will illuminate when the ignition is in the ON/
RUN position before engine start. If the bulb does not
come on when turning the ignition switch from OFF to ON/
RUN, have the condition checked promptly.
Certain conditions, such as a loose or missing gas cap,
poor quality fuel, etc., may illuminate the light after engine
start. The vehicle should be serviced if the light stays on
through several typical driving styles. In most situations,
the vehicle will drive normally and will not require towing.
When the engine is running, the MIL may flash to alert
serious conditions that could lead to immediate loss of
power or severe catalytic converter damage. The vehicle
should be serviced by an authorized dealer as soon as
possible if this occurs.
Service AWD Warning Light — If Equipped
This telltale will turn on to indicate that the All
Wheel Drive (AWD) system is not functioning
properly and that service is required. Contact
an authorized dealer.
Service Forward Collision Warning (FCW)
or Pedestrian Emergency Braking (PEB)
Warning Light — If Equipped
This warning light will illuminate to indicate a
fault in the FCW or PEB Warning System.
Contact an authorized dealer for service
Úpage 195.
Service LaneSense Warning Light —
If Equipped
This warning light will illuminate when the
LaneSense system is not operating and
requires service. Please see an authorized
dealer.
Service Stop/Start System Warning Light —
If Equipped
This warning light will illuminate when the
Stop/Start system is not functioning properly
and service is required. Contact an authorized
dealer for service
Úpage 121.
Tire Pressure Monitoring System (TPMS)
Warning Light
The warning light switches on and a message is
displayed to indicate that the tire pressure is
lower than the recommended value and/or
that slow pressure loss is occurring. In these
cases, optimal tire duration and fuel consumption may not
be guaranteed.
Should one or more tires be in the condition previously
mentioned, the display will show the indications
corresponding to each tire.
WARNING!
A malfunctioning catalytic converter can reach higher
temperatures than in normal operating conditions. This
can cause a fire if you drive slowly or park over
flammable substances such as dry plants, wood,
cardboard, etc. This could result in death or serious
injury to the driver, occupants or others.
CAUTION!
Prolonged driving with the Malfunction Indicator Light
(MIL) on could cause damage to the vehicle control
system. It also could affect fuel economy and
driveability. If the MIL is flashing, severe catalytic
converter damage and power loss will soon occur.
Immediate service is required.
23_RUP_OM_EN_USC_t.book Page 106
Page 109 of 328
GETTING TO KNOW YOUR INSTRUMENT PANEL107
Each tire, including the spare (if provided), should be
checked monthly when cold and inflated to the inflation
pressure recommended by the vehicle manufacturer on
the vehicle placard or tire inflation pressure label. If your
vehicle has tires of a different size than the size indicated
on the vehicle placard or tire inflation pressure label, you
should determine the proper tire inflation pressure for
those tires.
As an added safety feature, your vehicle has been
equipped with a TPMS that illuminates a low tire pressure
telltale when one or more of your tires is significantly
underinflated. Accordingly, when the low tire pressure
telltale illuminates, you should stop and check your tires
as soon as possible, and inflate them to the proper
pressure. Driving on a significantly underinflated tire
causes the tire to overheat and can lead to tire failure.
Underinflation also reduces fuel efficiency and tire tread
life, and may affect the vehicle’s handling and stopping
ability.
Please note that the TPMS is not a substitute for proper
tire maintenance, and it is the driver’s responsibility to
maintain correct tire pressure, even if underinflation has
not reached the level to trigger illumination of the TPMS
low tire pressure telltale. Your vehicle has also been equipped with a TPMS
malfunction indicator to indicate when the system is not
operating properly. The TPMS malfunction indicator is
combined with the low tire pressure telltale. When the
system detects a malfunction, the telltale will flash for
approximately one minute and then remain continuously
illuminated. This sequence will continue upon subsequent
vehicle start-ups as long as the malfunction exists. When
the malfunction indicator is illuminated, the system may
not be able to detect or signal low tire pressure as
intended. TPMS malfunctions may occur for a variety of
reasons, including the installation of replacement or
alternate tires or wheels on the vehicle that prevent the
TPMS from functioning properly. Always check the TPMS
malfunction telltale after replacing one or more tires or
wheels on your vehicle to ensure that the replacement or
alternate tires and wheels allow the TPMS to continue to
function properly.
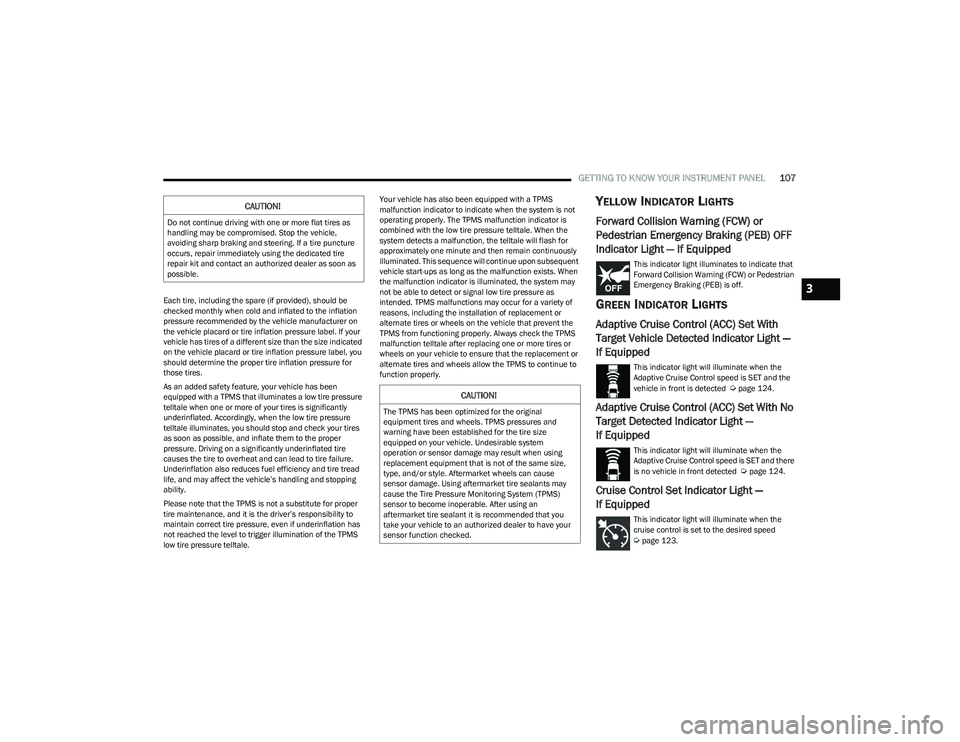
YELLOW INDICATOR LIGHTS
Forward Collision Warning (FCW) or
Pedestrian Emergency Braking (PEB) OFF
Indicator Light — If Equipped
This indicator light illuminates to indicate that
Forward Collision Warning (FCW) or Pedestrian
Emergency Braking (PEB) is off.
GREEN INDICATOR LIGHTS
Adaptive Cruise Control (ACC) Set With
Target Vehicle Detected Indicator Light —
If Equipped
This indicator light will illuminate when the
Adaptive Cruise Control speed is SET and the
vehicle in front is detected
Úpage 124.
Adaptive Cruise Control (ACC) Set With No
Target Detected Indicator Light —
If Equipped
This indicator light will illuminate when the
Adaptive Cruise Control speed is SET and there
is no vehicle in front detected
Úpage 124.
Cruise Control Set Indicator Light —
If Equipped
This indicator light will illuminate when the
cruise control is set to the desired speed
Úpage 123.
CAUTION!
Do not continue driving with one or more flat tires as
handling may be compromised. Stop the vehicle,
avoiding sharp braking and steering. If a tire puncture
occurs, repair immediately using the dedicated tire
repair kit and contact an authorized dealer as soon as
possible.
CAUTION!
The TPMS has been optimized for the original
equipment tires and wheels. TPMS pressures and
warning have been established for the tire size
equipped on your vehicle. Undesirable system
operation or sensor damage may result when using
replacement equipment that is not of the same size,
type, and/or style. Aftermarket wheels can cause
sensor damage. Using aftermarket tire sealants may
cause the Tire Pressure Monitoring System (TPMS)
sensor to become inoperable. After using an
aftermarket tire sealant it is recommended that you
take your vehicle to an authorized dealer to have your
sensor function checked.
3
23_RUP_OM_EN_USC_t.book Page 107
Page 110 of 328
108GETTING TO KNOW YOUR INSTRUMENT PANEL
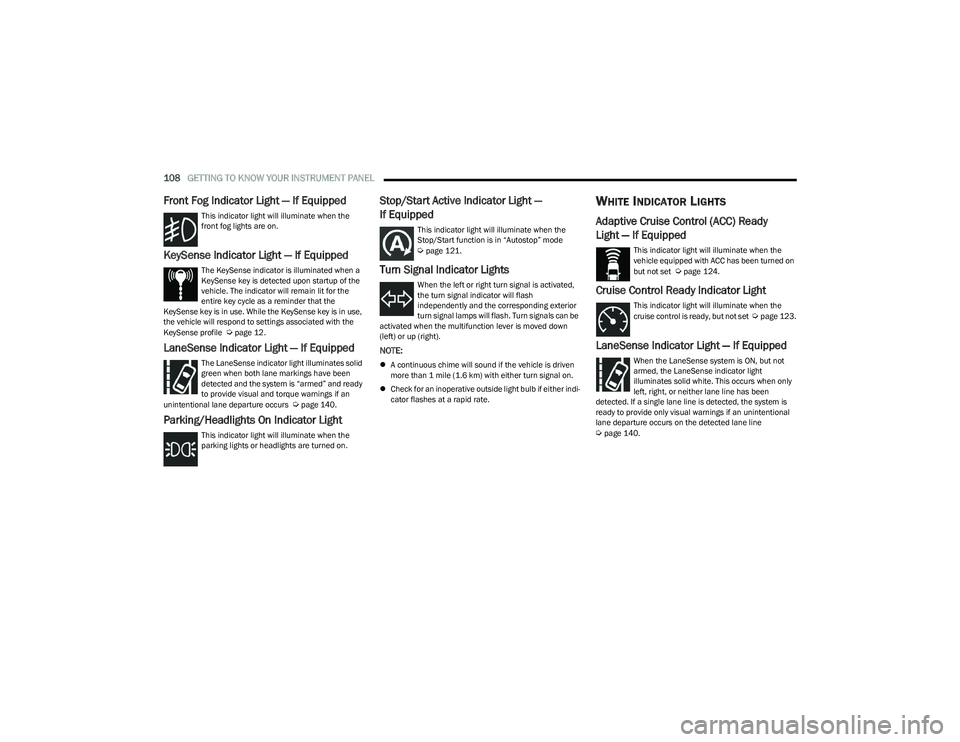
Front Fog Indicator Light — If Equipped
This indicator light will illuminate when the
front fog lights are on.
KeySense Indicator Light — If Equipped
The KeySense indicator is illuminated when a
KeySense key is detected upon startup of the
vehicle. The indicator will remain lit for the
entire key cycle as a reminder that the
KeySense key is in use. While the KeySense key is in use,
the vehicle will respond to settings associated with the
KeySense profile
Úpage 12.
LaneSense Indicator Light — If Equipped
The LaneSense indicator light illuminates solid
green when both lane markings have been
detected and the system is “armed” and ready
to provide visual and torque warnings if an
unintentional lane departure occurs
Úpage 140.
Parking/Headlights On Indicator Light
This indicator light will illuminate when the
parking lights or headlights are turned on.
Stop/Start Active Indicator Light —
If Equipped
This indicator light will illuminate when the
Stop/Start function is in “Autostop” mode
Úpage 121.
Turn Signal Indicator Lights
When the left or right turn signal is activated,
the turn signal indicator will flash
independently and the corresponding exterior
turn signal lamps will flash. Turn signals can be
activated when the multifunction lever is moved down
(left) or up (right).
NOTE:
A continuous chime will sound if the vehicle is driven
more than 1 mile (1.6 km) with either turn signal on.
Check for an inoperative outside light bulb if either indi -
cator flashes at a rapid rate.
WHITE INDICATOR LIGHTS
Adaptive Cruise Control (ACC) Ready
Light — If Equipped
This indicator light will illuminate when the
vehicle equipped with ACC has been turned on
but not set
Úpage 124.
Cruise Control Ready Indicator Light
This indicator light will illuminate when the
cruise control is ready, but not set Úpage 123.
LaneSense Indicator Light — If Equipped
When the LaneSense system is ON, but not
armed, the LaneSense indicator light
illuminates solid white. This occurs when only
left, right, or neither lane line has been
detected. If a single lane line is detected, the system is
ready to provide only visual warnings if an unintentional
lane departure occurs on the detected lane line
Úpage 140.
23_RUP_OM_EN_USC_t.book Page 108