ad blue CHRYSLER PACIFICA HYBRID 2023 Owners Manual
[x] Cancel search | Manufacturer: CHRYSLER, Model Year: 2023, Model line: PACIFICA HYBRID, Model: CHRYSLER PACIFICA HYBRID 2023Pages: 328, PDF Size: 16.37 MB
Page 5 of 328
3
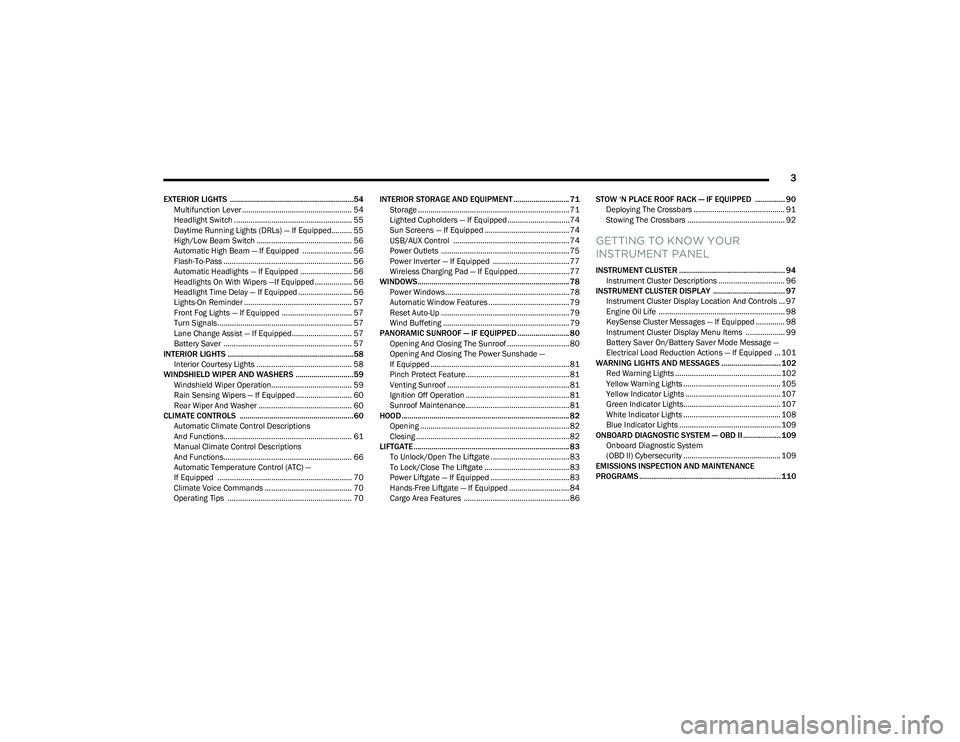
EXTERIOR LIGHTS ..............................................................54Multifunction Lever ..................................................... 54
Headlight Switch ......................................................... 55
Daytime Running Lights (DRLs) — If Equipped.......... 55
High/Low Beam Switch .............................................. 56
Automatic High Beam — If Equipped ........................ 56
Flash-To-Pass .............................................................. 56
Automatic Headlights — If Equipped ......................... 56
Headlights On With Wipers —If Equipped .................. 56
Headlight Time Delay — If Equipped .......................... 56
Lights-On Reminder .................................................... 57
Front Fog Lights — If Equipped .................................. 57
Turn Signals................................................................. 57
Lane Change Assist — If Equipped............................. 57
Battery Saver .............................................................. 57
INTERIOR LIGHTS ...............................................................58 Interior Courtesy Lights .............................................. 58
WINDSHIELD WIPER AND WASHERS .............................59 Windshield Wiper Operation....................................... 59
Rain Sensing Wipers — If Equipped ........................... 60
Rear Wiper And Washer ............................................. 60
CLIMATE CONTROLS .........................................................60 Automatic Climate Control Descriptions
And Functions.............................................................. 61
Manual Climate Control Descriptions
And Functions.............................................................. 66
Automatic Temperature Control (ATC) —
If Equipped ................................................................. 70
Climate Voice Commands .......................................... 70
Operating Tips ............................................................ 70 INTERIOR STORAGE AND EQUIPMENT ............................ 71
Storage ......................................................................... 71
Lighted Cupholders — If Equipped..............................74
Sun Screens — If Equipped ......................................... 74
USB/AUX Control ........................................................ 74
Power Outlets .............................................................. 75
Power Inverter — If Equipped ..................................... 77
Wireless Charging Pad — If Equipped......................... 77
WINDOWS............................................................................ 78 Power Windows............................................................ 78
Automatic Window Features ....................................... 79
Reset Auto-Up .............................................................. 79
Wind Buffeting ............................................................. 79
PANORAMIC SUNROOF — IF EQUIPPED .......................... 80 Opening And Closing The Sunroof ..............................80
Opening And Closing The Power Sunshade —
If Equipped ................................................................... 81
Pinch Protect Feature.................................................. 81
Venting Sunroof ........................................................... 81
Ignition Off Operation .................................................. 81
Sunroof Maintenance.................................................. 81
HOOD.................................................................................... 82 Opening ........................................................................ 82
Closing .......................................................................... 82
LIFTGATE .............................................................................. 83 To Unlock/Open The Liftgate ......................................83
To Lock/Close The Liftgate ......................................... 83
Power Liftgate — If Equipped ......................................83
Hands-Free Liftgate — If Equipped ............................. 84
Cargo Area Features ................................................... 86 STOW ‘N PLACE ROOF RACK — IF EQUIPPED ............... 90
Deploying The Crossbars ............................................ 91
Stowing The Crossbars ............................................... 92
GETTING TO KNOW YOUR
INSTRUMENT PANEL
INSTRUMENT CLUSTER ..................................................... 94 Instrument Cluster Descriptions ................................ 96
INSTRUMENT CLUSTER DISPLAY .................................... 97 Instrument Cluster Display Location And Controls ... 97
Engine Oil Life ............................................................. 98
KeySense Cluster Messages — If Equipped .............. 98
Instrument Cluster Display Menu Items ................... 99
Battery Saver On/Battery Saver Mode Message —
Electrical Load Reduction Actions — If Equipped ... 101
WARNING LIGHTS AND MESSAGES ..............................102 Red Warning Lights ................................................... 102
Yellow Warning Lights ............................................... 105Yellow Indicator Lights .............................................. 107Green Indicator Lights............................................... 107White Indicator Lights ............................................... 108Blue Indicator Lights ................................................. 109
ONBOARD DIAGNOSTIC SYSTEM — OBD II ................... 109 Onboard Diagnostic System
(OBD II) Cybersecurity ............................................... 109
EMISSIONS INSPECTION AND MAINTENANCE
PROGRAMS ....................................................................... 110
23_RUP_OM_EN_USC_t.book Page 3
Page 13 of 328
11
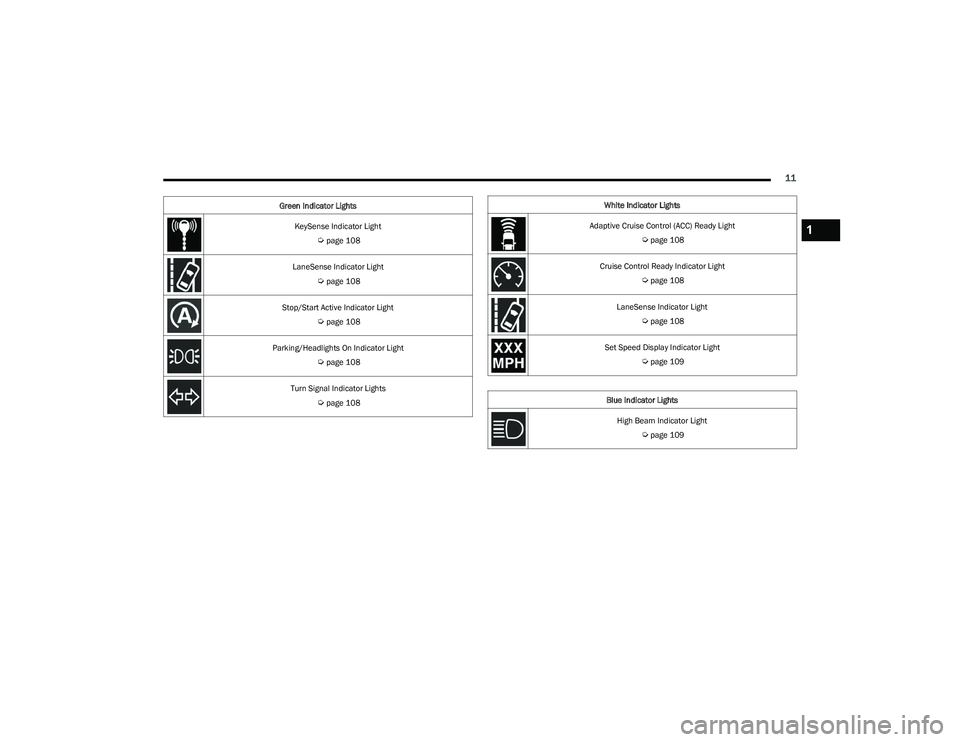
KeySense Indicator Light
Úpage 108
LaneSense Indicator Light
Úpage 108
Stop/Start Active Indicator Light
Úpage 108
Parking/Headlights On Indicator Light
Úpage 108
Turn Signal Indicator Lights
Úpage 108
Green Indicator Lights
White Indicator Lights
Adaptive Cruise Control (ACC) Ready Light
Úpage 108
Cruise Control Ready Indicator Light
Úpage 108
LaneSense Indicator Light
Úpage 108
Set Speed Display Indicator Light
Úpage 109
Blue Indicator Lights High Beam Indicator Light
Úpage 109
1
23_RUP_OM_EN_USC_t.book Page 11
Page 64 of 328
62GETTING TO KNOW YOUR VEHICLE
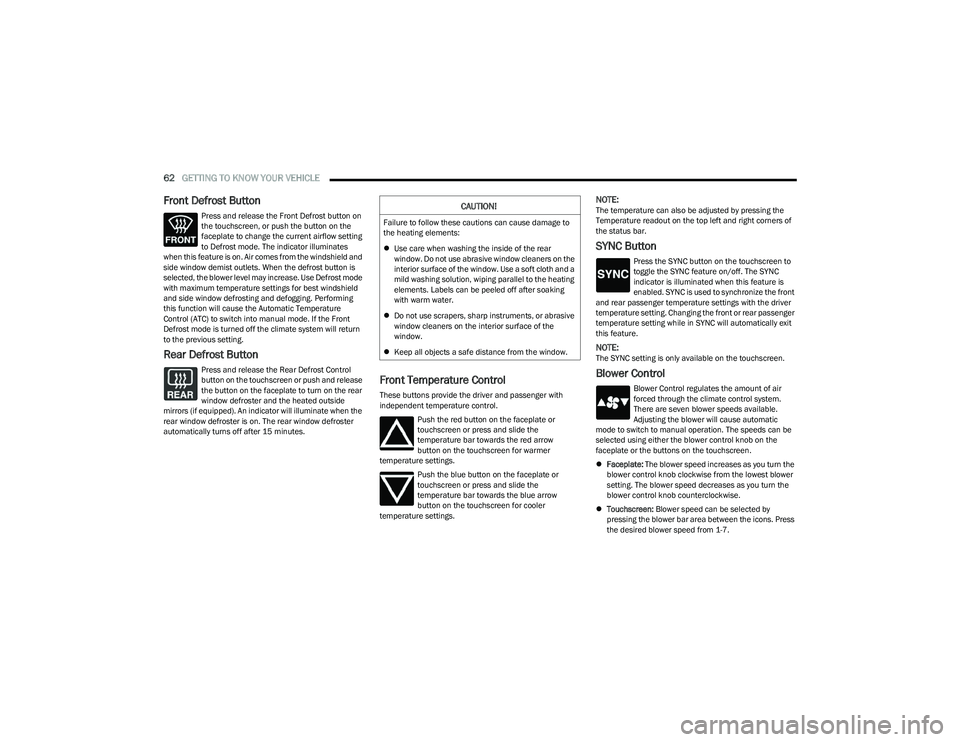
Front Defrost Button
Press and release the Front Defrost button on
the touchscreen, or push the button on the
faceplate to change the current airflow setting
to Defrost mode. The indicator illuminates
when this feature is on. Air comes from the windshield and
side window demist outlets. When the defrost button is
selected, the blower level may increase. Use Defrost mode
with maximum temperature settings for best windshield
and side window defrosting and defogging. Performing
this function will cause the Automatic Temperature
Control (ATC) to switch into manual mode. If the Front
Defrost mode is turned off the climate system will return
to the previous setting.
Rear Defrost Button
Press and release the Rear Defrost Control
button on the touchscreen or push and release
the button on the faceplate to turn on the rear
window defroster and the heated outside
mirrors (if equipped). An indicator will illuminate when the
rear window defroster is on. The rear window defroster
automatically turns off after 15 minutes.Front Temperature Control
These buttons provide the driver and passenger with
independent temperature control.
Push the red button on the faceplate or
touchscreen or press and slide the
temperature bar towards the red arrow
button on the touchscreen for warmer
temperature settings.
Push the blue button on the faceplate or
touchscreen or press and slide the
temperature bar towards the blue arrow
button on the touchscreen for cooler
temperature settings.
NOTE:The temperature can also be adjusted by pressing the
Temperature readout on the top left and right corners of
the status bar.
SYNC Button
Press the SYNC button on the touchscreen to
toggle the SYNC feature on/off. The SYNC
indicator is illuminated when this feature is
enabled. SYNC is used to synchronize the front
and rear passenger temperature settings with the driver
temperature setting. Changing the front or rear passenger
temperature setting while in SYNC will automatically exit
this feature.
NOTE:The SYNC setting is only available on the touchscreen.
Blower Control
Blower Control regulates the amount of air
forced through the climate control system.
There are seven blower speeds available.
Adjusting the blower will cause automatic
mode to switch to manual operation. The speeds can be
selected using either the blower control knob on the
faceplate or the buttons on the touchscreen.
Faceplate: The blower speed increases as you turn the
blower control knob clockwise from the lowest blower
setting. The blower speed decreases as you turn the
blower control knob counterclockwise.
Touchscreen: Blower speed can be selected by
pressing the blower bar area between the icons. Press
the desired blower speed from 1-7.
CAUTION!
Failure to follow these cautions can cause damage to
the heating elements:
Use care when washing the inside of the rear
window. Do not use abrasive window cleaners on the
interior surface of the window. Use a soft cloth and a
mild washing solution, wiping parallel to the heating
elements. Labels can be peeled off after soaking
with warm water.
Do not use scrapers, sharp instruments, or abrasive
window cleaners on the interior surface of the
window.
Keep all objects a safe distance from the window.
23_RUP_OM_EN_USC_t.book Page 62
Page 69 of 328
GETTING TO KNOW YOUR VEHICLE67
Front Temperature Control
These buttons provide the driver and passenger with
independent temperature control.
Push the red button on the faceplate or
touchscreen or press and slide the
temperature bar towards the red arrow
button on the touchscreen for warmer
temperature settings.
Push the blue button on the faceplate or
touchscreen or press and slide the
temperature bar towards the blue arrow
button on the touchscreen for cooler
temperature settings.
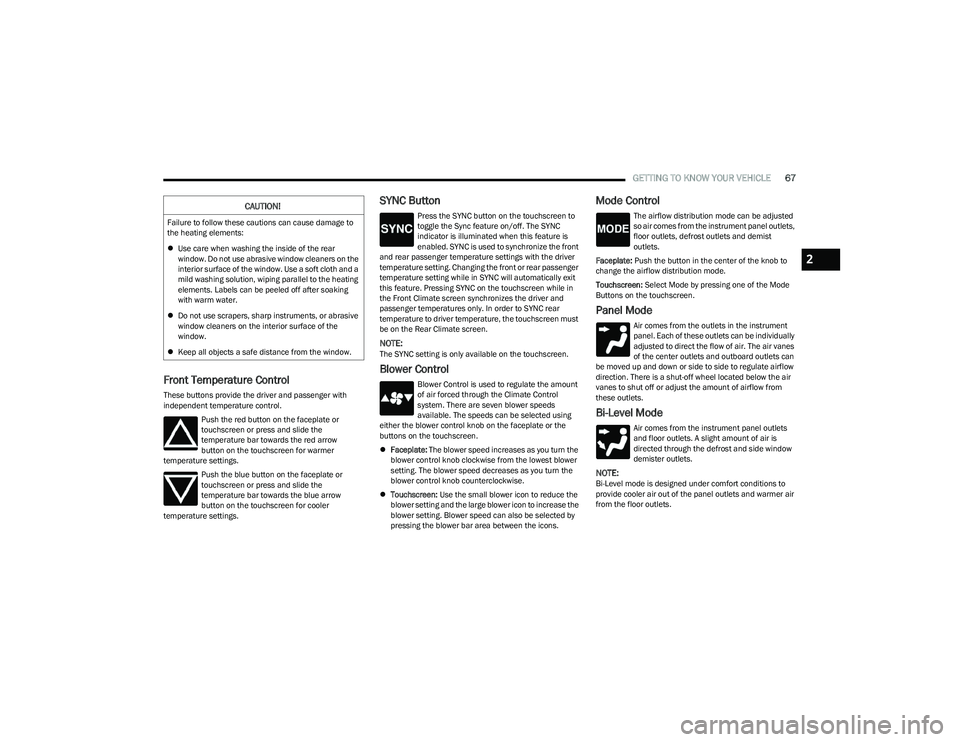
SYNC Button
Press the SYNC button on the touchscreen to
toggle the Sync feature on/off. The SYNC
indicator is illuminated when this feature is
enabled. SYNC is used to synchronize the front
and rear passenger temperature settings with the driver
temperature setting. Changing the front or rear passenger
temperature setting while in SYNC will automatically exit
this feature. Pressing SYNC on the touchscreen while in
the Front Climate screen synchronizes the driver and
passenger temperatures only. In order to SYNC rear
temperature to driver temperature, the touchscreen must
be on the Rear Climate screen.
NOTE:The SYNC setting is only available on the touchscreen.
Blower Control
Blower Control is used to regulate the amount
of air forced through the Climate Control
system. There are seven blower speeds
available. The speeds can be selected using
either the blower control knob on the faceplate or the
buttons on the touchscreen.
Faceplate: The blower speed increases as you turn the
blower control knob clockwise from the lowest blower
setting. The blower speed decreases as you turn the
blower control knob counterclockwise.
Touchscreen: Use the small blower icon to reduce the
blower setting and the large blower icon to increase the
blower setting. Blower speed can also be selected by
pressing the blower bar area between the icons.
Mode Control
The airflow distribution mode can be adjusted
so air comes from the instrument panel outlets,
floor outlets, defrost outlets and demist
outlets.
Faceplate: Push the button in the center of the knob to
change the airflow distribution mode.
Touchscreen: Select Mode by pressing one of the Mode
Buttons on the touchscreen.
Panel Mode
Air comes from the outlets in the instrument
panel. Each of these outlets can be individually
adjusted to direct the flow of air. The air vanes
of the center outlets and outboard outlets can
be moved up and down or side to side to regulate airflow
direction. There is a shut-off wheel located below the air
vanes to shut off or adjust the amount of airflow from
these outlets.
Bi-Level Mode
Air comes from the instrument panel outlets
and floor outlets. A slight amount of air is
directed through the defrost and side window
demister outlets.
NOTE:Bi-Level mode is designed under comfort conditions to
provide cooler air out of the panel outlets and warmer air
from the floor outlets.
CAUTION!
Failure to follow these cautions can cause damage to
the heating elements:
Use care when washing the inside of the rear
window. Do not use abrasive window cleaners on the
interior surface of the window. Use a soft cloth and a
mild washing solution, wiping parallel to the heating
elements. Labels can be peeled off after soaking
with warm water.
Do not use scrapers, sharp instruments, or abrasive
window cleaners on the interior surface of the
window.
Keep all objects a safe distance from the window.
2
23_RUP_OM_EN_USC_t.book Page 67
Page 80 of 328
78GETTING TO KNOW YOUR VEHICLE
LED Indicator Status:
No Light: Charging pad is idle or searching for a device.
Blue Light: Device is detected and is charging.
Red Light/Flashing: Internal error or foreign object is
detected.
Important Notes Regarding This Vehicle’s Wireless
Charging Pad:
The wireless charging pad will not work if any of the
four doors or the liftgate are open, even if the engine is
running.
Wireless charging is not as fast as when the phone is
connected to a wired charger.
The phone’s protective case must be removed when
placed on the wireless charging pad.
iPhone® 12 (including iPod®) is equipped with soft -
ware to protect the device from overheating. When the
software is active, the rate of charge is slowed down to
protect the device.
Phones must always be placed on the wireless
charging pad within the outline shown on the pad so
that its charging parts connect with the charging coils
of the system. Movement of the phone during charging
may prevent or slow the rate of charge.
Having multiple applications open on the phone while
charging will reduce the charging efficiency, and may
even shut down an application that is actively running
(i.e. Apple CarPlay®). This may also cause the phone to
overheat.
Wireless chargers may implement certain methods to
prevent the phone from overheating during charging
such as slowing down the rate of charge. In certain instances, the device may shut down for a brief period
of time (when the device reaches a certain tempera
-
ture). If this happens, it does not mean there is a fault
with the wireless charing pad. This may just be a
protective measure to prevent damage to the phone.
WINDOWS
POWER WINDOWS
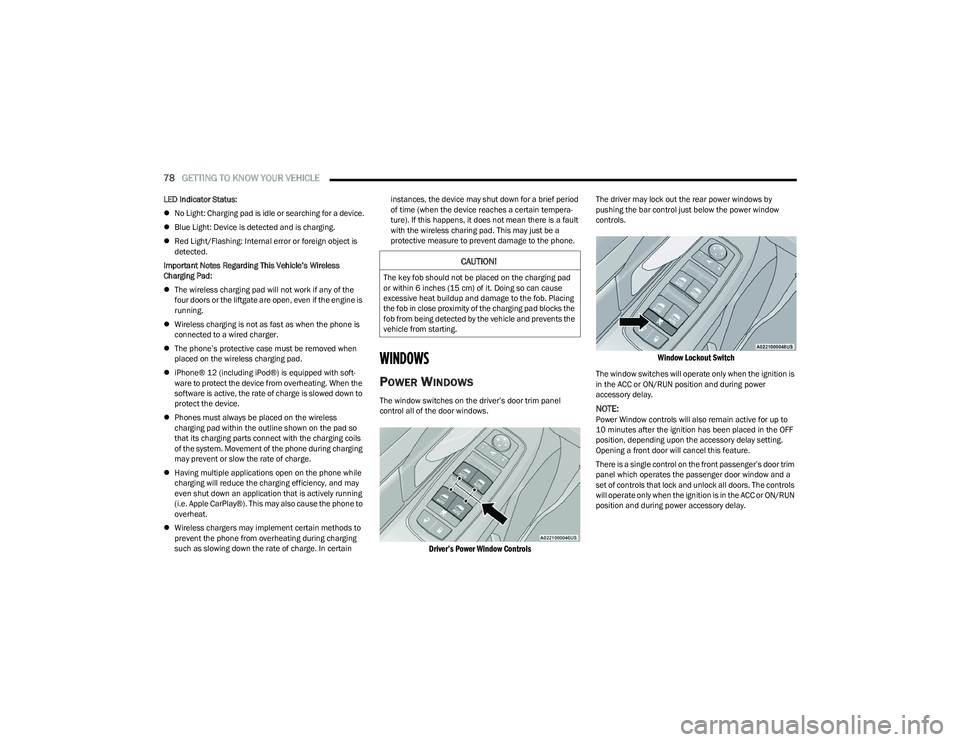
The window switches on the driver’s door trim panel
control all of the door windows.
Driver’s Power Window Controls
The driver may lock out the rear power windows by
pushing the bar control just below the power window
controls.
Window Lockout Switch
The window switches will operate only when the ignition is
in the ACC or ON/RUN position and during power
accessory delay.
NOTE:Power Window controls will also remain active for up to
10 minutes after the ignition has been placed in the OFF
position, depending upon the accessory delay setting.
Opening a front door will cancel this feature.
There is a single control on the front passenger’s door trim
panel which operates the passenger door window and a
set of controls that lock and unlock all doors. The controls
will operate only when the ignition is in the ACC or ON/RUN
position and during power accessory delay.
CAUTION!
The key fob should not be placed on the charging pad
or within 6 inches (15 cm) of it. Doing so can cause
excessive heat buildup and damage to the fob. Placing
the fob in close proximity of the charging pad blocks the
fob from being detected by the vehicle and prevents the
vehicle from starting.
23_RUP_OM_EN_USC_t.book Page 78
Page 111 of 328
GETTING TO KNOW YOUR INSTRUMENT PANEL109
Set Speed Display Indicator Light
The Set Speed Display indicator light indicates
the set speed for the Cruise Control and
Adaptive Cruise Control (ACC) settings.
BLUE INDICATOR LIGHTS
High Beam Indicator Light
This indicator light will illuminate to indicate
that the high beam headlights are on. With the
low beams activated, push the multifunction
lever forward (toward the front of the vehicle) to
turn on the high beams. Pull the multifunction lever
rearward (toward the rear of the vehicle) to turn off the
high beams. If the high beams are off, pull the lever toward
you for a temporary high beam on, “flash to pass”
scenario.
ONBOARD DIAGNOSTIC SYSTEM — OBD II
Your vehicle is equipped with a sophisticated Onboard
Diagnostic system called OBD II. This system monitors the
performance of the emissions, engine, and automatic
transmission control systems. When these systems are
operating properly, your vehicle will provide excellent
performance and fuel economy, as well as emissions well
within current government regulations.
If any of these systems require service, the OBD II system
will turn on the Malfunction Indicator Light (MIL). It will
also store diagnostic codes and other information to
assist your service technician in making repairs. Although
your vehicle will usually be drivable and not need towing,
see an authorized dealer for service as soon as possible.
ONBOARD DIAGNOSTIC SYSTEM
(OBD II) C
YBERSECURITY
Your vehicle is required to have OBD II and a connection
port to allow access to information related to the
performance of your emissions controls. Authorized
service technicians may need to access this information to
assist with the diagnosis and service of your vehicle and
emissions system
Úpage 157.
CAUTION!
Prolonged driving with the MIL on could cause further
damage to the emission control system. It could also
affect fuel economy and driveability. The vehicle
must be serviced before any emissions tests can be
performed.
If the MIL is flashing while the vehicle is running,
severe catalytic converter damage and power loss
will soon occur. Immediate service is required.
WARNING!
ONLY an authorized service technician should
connect equipment to the OBD II connection port in
order to read the VIN, diagnose, or service your
vehicle.
If unauthorized equipment is connected to the OBD II
connection port, such as a driver-behavior tracking
device, it may:
Be possible that vehicle systems, including
safety related systems, could be impaired or a
loss of vehicle control could occur that may
result in an accident involving serious injury or
death.
Access, or allow others to access, information
stored in your vehicle systems, including
personal information.
3
23_RUP_OM_EN_USC_t.book Page 109
Page 168 of 328
166MULTIMEDIA
Phone/Bluetooth®
Set Time Hours This setting will allow you to set the hours. Sync Time With GPS must be off for this setting
to be available. The “+” setting will increase the hours. The “-” setting will decrease the
hours.
Set Time Minutes This setting will allow you to set the minutes. Sync Time With GPS must be off for this
setting to be available. The “+” setting will increase the minutes. The “-” setting will
decrease the minutes.
Show Time in Status Bar This setting will place the time in the radio’s status bar.
Setting NameDescription
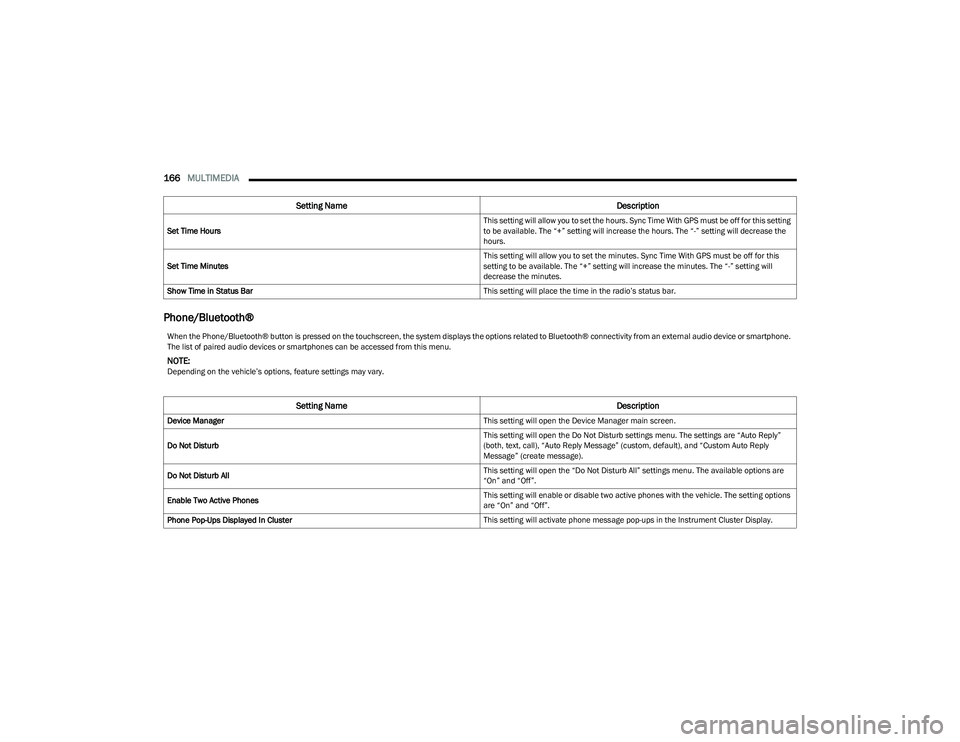
When the Phone/Bluetooth® button is pressed on the touchscreen, the system displays the options related to Bluetooth® connectivity from an external audio device or smartphone.
The list of paired audio devices or smartphones can be accessed from this menu.
NOTE:Depending on the vehicle’s options, feature settings may vary.
Setting NameDescription
Device Manager This setting will open the Device Manager main screen.
Do Not Disturb This setting will open the Do Not Disturb settings menu. The settings are “Auto Reply”
(both, text, call), “Auto Reply Message” (custom, default), and “Custom Auto Reply
Message” (create message).
Do Not Disturb All This setting will open the “Do Not Disturb All” settings menu. The available options are
“On” and “Off”.
Enable Two Active Phones This setting will enable or disable two active phones with the vehicle. The setting options
are “On” and “Off”.
Phone Pop-Ups Displayed In Cluster This setting will activate phone message pop-ups in the Instrument Cluster Display.
23_RUP_OM_EN_USC_t.book Page 166
Page 178 of 328
176MULTIMEDIA
System Information
Reset
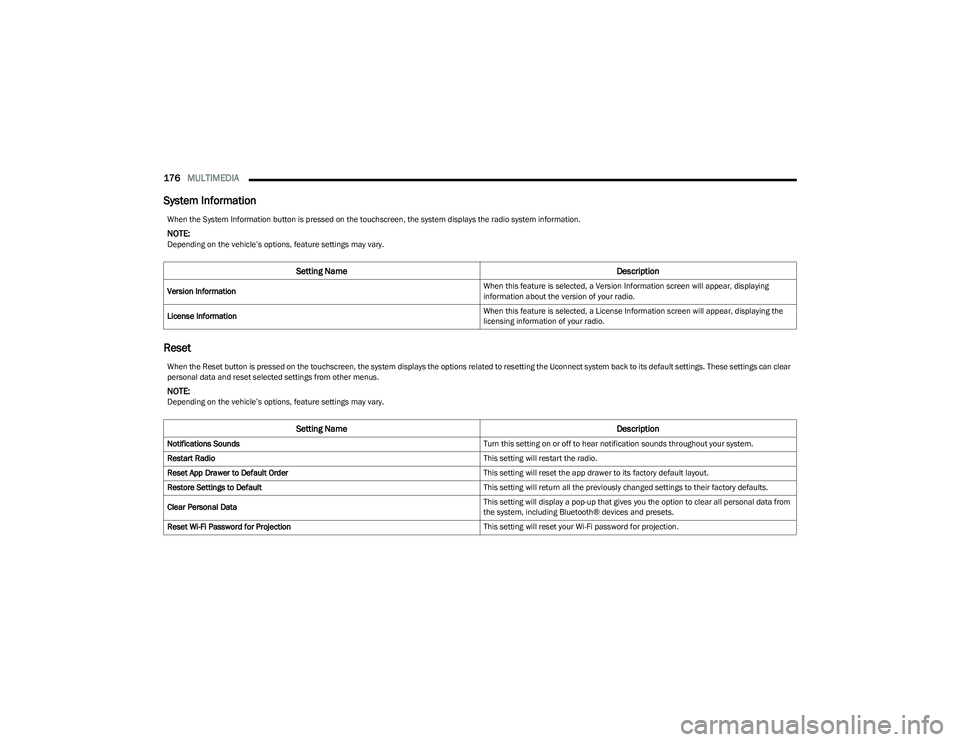
When the System Information button is pressed on the touchscreen, the system displays the radio system information.
NOTE:Depending on the vehicle’s options, feature settings may vary.
Setting Name Description
Version Information When this feature is selected, a Version Information screen will appear, displaying
information about the version of your radio.
License Information When this feature is selected, a License Information screen will appear, displaying the
licensing information of your radio.
When the Reset button is pressed on the touchscreen, the system displays the options related to resetting the Uconnect system back to its default settings. These settings can clear
personal data and reset selected settings from other menus.
NOTE:Depending on the vehicle’s options, feature settings may vary.
Setting Name
Description
Notifications Sounds Turn this setting on or off to hear notification sounds throughout your system.
Restart Radio This setting will restart the radio.
Reset App Drawer to Default Order This setting will reset the app drawer to its factory default layout.
Restore Settings to Default This setting will return all the previously changed settings to their factory defaults.
Clear Personal Data This setting will display a pop-up that gives you the option to clear all personal data from
the system, including Bluetooth® devices and presets.
Reset Wi-Fi Password for Projection This setting will reset your Wi-Fi password for projection.
23_RUP_OM_EN_USC_t.book Page 176
Page 181 of 328
MULTIMEDIA179
Account Sign-in
The next step will be the option to sign in to your Amazon
account.
There are two options to sign into the system:
I already have an Amazon account: Sign in with an
already existing Amazon account
I am new to Amazon: Create a new Amazon Account
If “I am new to Amazon” is selected, follow the on-screen
steps to set up an Amazon account with the system.
Parental Controls
Another feature that will appear during this first time set
up is parental controls.
When the parental controls page appears, it will give the
options “Enable Parental Controls” and “No Parental
Controls”. If “Enable Parental Controls” is selected, follow
the on-screen steps to set up parental controls for the
system.
ALEXA VOICE CONTROL
A feature with Rear Seat Entertainment with Fire TV
built-in that enhances your experience is Alexa. It is simple
to get started using this feature. Push the Microphone
button at the top of the Voice Remote with Alexa to
activate Alexa and get started.
LISTEN VIA VEHICLE SPEAKERS
A feature within Rear Seat Entertainment with Fire TV
built-in is the front radio Listen feature. On the front radio
Home screen for Fire TV, select the Listen button in the top
right corner on either card for Screen 1 or 2. This will allow
you to have either rear screen play audio through all the
speakers in the vehicle.
QUICK MENU
Accessing the quick menu will give you more options for
Fire TV.
To access the quick menu, tap the screen and it will
appear. The quick menu is also accessible by pushing the
Gear/Settings button on the Voice Remote with Alexa.
Some options of the quick menu are:
Power — This will power the screen off.
On-Screen Remote — This will bring up the on-screen
remote to use with the system.
Back — This will let you go back a page.
Home — This will take you to the Home screen.
Gear/Settings — This will let you access certain settings
in the system. For more setting options, select
“Settings” within the on-screen Gear/Settings menu.
Vehicle — This will bring up the Vehicle menu. From
here you can adjust rear climate controls and the Are
We There Yet? app.
PARENTAL CONTROLS (USING THE REAR
S
CREENS)
If parental controls were not set during the first time start
up of the system, they can be set by following these steps:
1. Push the Gear/Settings button on the Voice Remote
with Alexa or tap the screen to access Settings in the
“quick menu”.
2. Select the Gear/Settings icon on the screen.
3. Select “Settings” on the screen.
4. While in Settings, select “Preferences”.
5. Select “Parental Controls”; from here you can turn Parental Controls on or off and set up a PIN for the
controls using the Voice Remote with Alexa.
VOICE REMOTE WITH ALEXA PAIRING
(U
SING THE REAR SCREENS)
If the Voice Remote with Alexa needs to be paired again or
a new remote is being paired, follow these procedures:
1. Install batteries into the remote.
2. Tap the screen and Select the Gear/Settings icon on
the screen.
3. Select “Settings” on the screen.
4. In Settings, select “Controllers & Bluetooth® Devices”.
5. From this menu, select “Add New Remote”.
6. Follow the on-screen steps for Voice Remote with Alexa pairing.
5
23_RUP_OM_EN_USC_t.book Page 179
Page 185 of 328
MULTIMEDIA183
FIRE TV APPS/GAMES (USING THE
R
EAR SCREENS)
Apps and games can be accessed using Rear Seat
Entertainment with Fire TV built-in.
To access Apps on the rear screen, turn on the system and
select “Find” in the top menu. On the Find page, select
“App store®”. Within the App store® you can purchase
apps and games. From here you can also select from all
the apps and games that have been purchased.
USING THE VIDEO USB PORT
Plug in a USB drive or mass storage device and play your
favorite music or movies.
NOTE:To view USB media on the rear screens, insert a USB drive
into the port next to the DVD/Blu-ray™ Disc player. The
USB drive port is located under the radio controls in the
instrument panel.
On the rear screen you can browse the content of the USB
device by going to the USB source in the inputs. Use the
search feature to find your media faster.
PLAY VIDEO GAMES
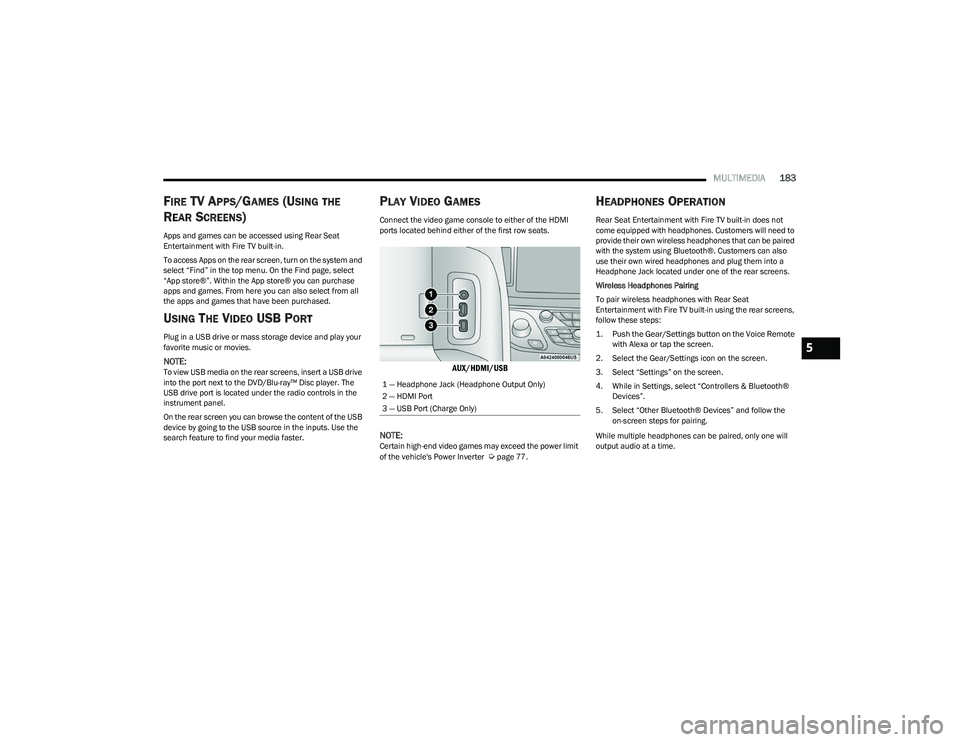
Connect the video game console to either of the HDMI
ports located behind either of the first row seats.
AUX/HDMI/USB
NOTE:
Certain high-end video games may exceed the power limit
of the vehicle's Power Inverter Úpage 77.
HEADPHONES OPERATION
Rear Seat Entertainment with Fire TV built-in does not
come equipped with headphones. Customers will need to
provide their own wireless headphones that can be paired
with the system using Bluetooth®. Customers can also
use their own wired headphones and plug them into a
Headphone Jack located under one of the rear screens.
Wireless Headphones Pairing
To pair wireless headphones with Rear Seat
Entertainment with Fire TV built-in using the rear screens,
follow these steps:
1. Push the Gear/Settings button on the Voice Remote with Alexa or tap the screen.
2. Select the Gear/Settings icon on the screen.
3. Select “Settings” on the screen.
4. While in Settings, select “Controllers & Bluetooth® Devices”.
5. Select “Other Bluetooth® Devices” and follow the on-screen steps for pairing.
While multiple headphones can be paired, only one will
output audio at a time.
1 — Headphone Jack (Headphone Output Only)
2 — HDMI Port
3 — USB Port (Charge Only)
5
23_RUP_OM_EN_USC_t.book Page 183