steering wheel CHRYSLER SEBRING CONVERTIBLE 2010 3.G Owners Manual
[x] Cancel search | Manufacturer: CHRYSLER, Model Year: 2010, Model line: SEBRING CONVERTIBLE, Model: CHRYSLER SEBRING CONVERTIBLE 2010 3.GPages: 457, PDF Size: 8.76 MB
Page 36 of 457
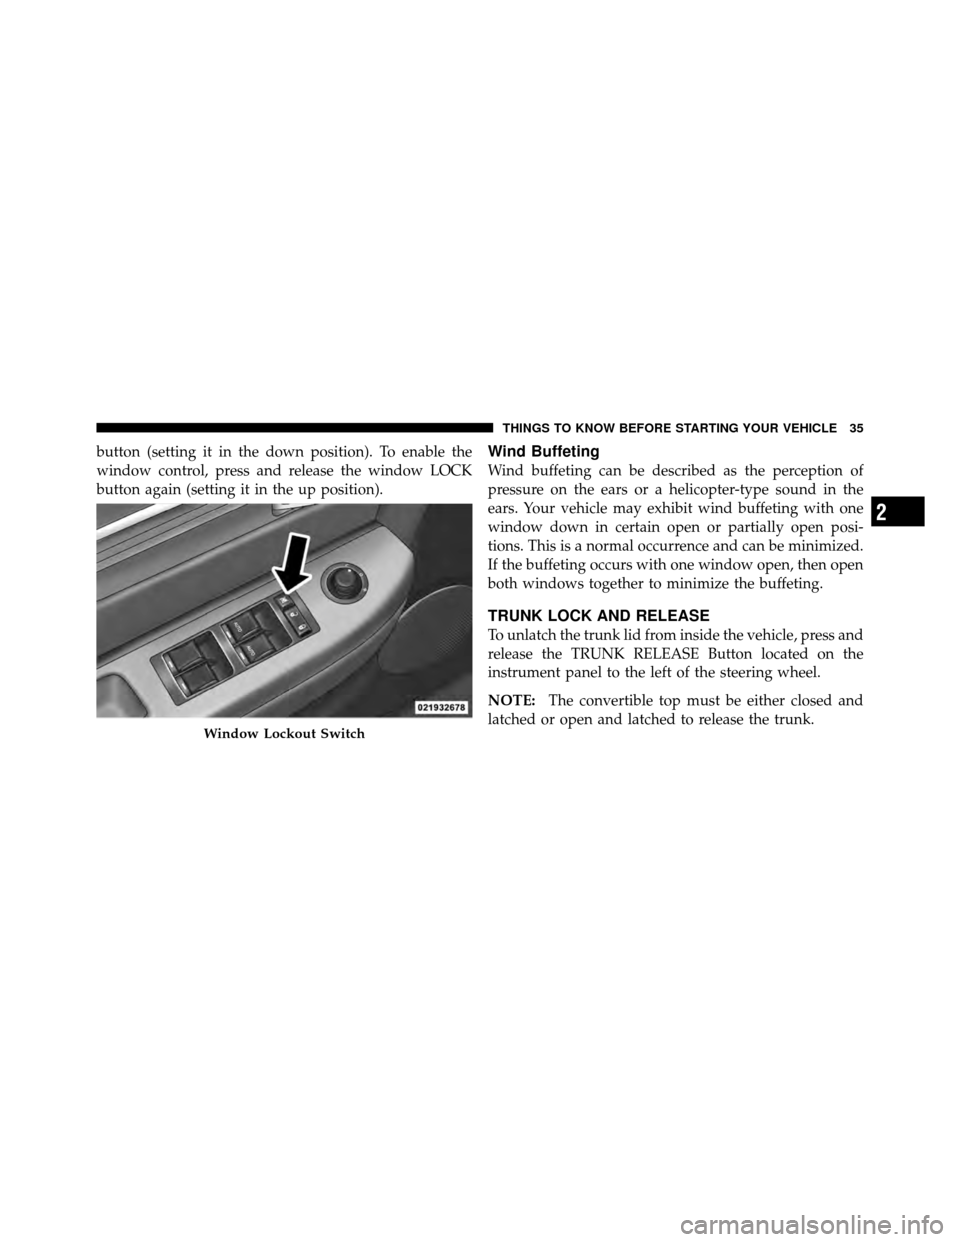
button (setting it in the down position). To enable the
window control, press and release the window LOCK
button again (setting it in the up position).Wind Buffeting
Wind buffeting can be described as the perception of
pressure on the ears or a helicopter-type sound in the
ears. Your vehicle may exhibit wind buffeting with one
window down in certain open or partially open posi-
tions. This is a normal occurrence and can be minimized.
If the buffeting occurs with one window open, then open
both windows together to minimize the buffeting.
TRUNK LOCK AND RELEASE
To unlatch the trunk lid from inside the vehicle, press and
release the TRUNK RELEASE Button located on the
instrument panel to the left of the steering wheel.
NOTE:The convertible top must be either closed and
latched or open and latched to release the trunk.
Window Lockout Switch
2
THINGS TO KNOW BEFORE STARTING YOUR VEHICLE 35
Page 39 of 457
•Advanced Front Airbags for driver and front passen-
ger
•Supplemental Active Head Restraints (AHR) located
on top of the front seats (integrated into the head
restraint)
•Supplemental Seat-Mounted Side Airbags (SAB) — if
equipped
•An energy-absorbing steering column and steering
wheel
•Knee bolsters/blockers for front seat occupants
•Front seat belts incorporate pretensioners to enhance
occupant protection by managing occupant energy
during an impact event — if equipped
•All seat belt systems (except the driver’s) include
Automatic Locking Retractors (ALRs), which lock the
seat belt webbing into position by extending the beltall the way out and then adjusting the belt to the
desired length to restrain a child seat or secure a large
item in a seat — if equipped
If you will be carrying children too small for adult-sized
seat belts, the seat belts or the Lower Anchors and Tether
for CHildren (LATCH) feature also can be used to hold
infant and child restraint systems. Refer to “LATCH —
Child Seat Anchorage System (Lower Anchors and Tether
for CHildren).
NOTE: The Advanced Front Airbags have a multistage
inflator design. This allows the airbag to have different
rates of inflation based on the severity and type of
collision.
Please pay close attention to the information in this
section. It tells you how to use your restraint system
properly, to keep you and your passengers as safe as
possible.
38 THINGS TO KNOW BEFORE STARTING YOUR VEHICLE
Page 53 of 457
Supplemental Restraint System (SRS) - Airbags
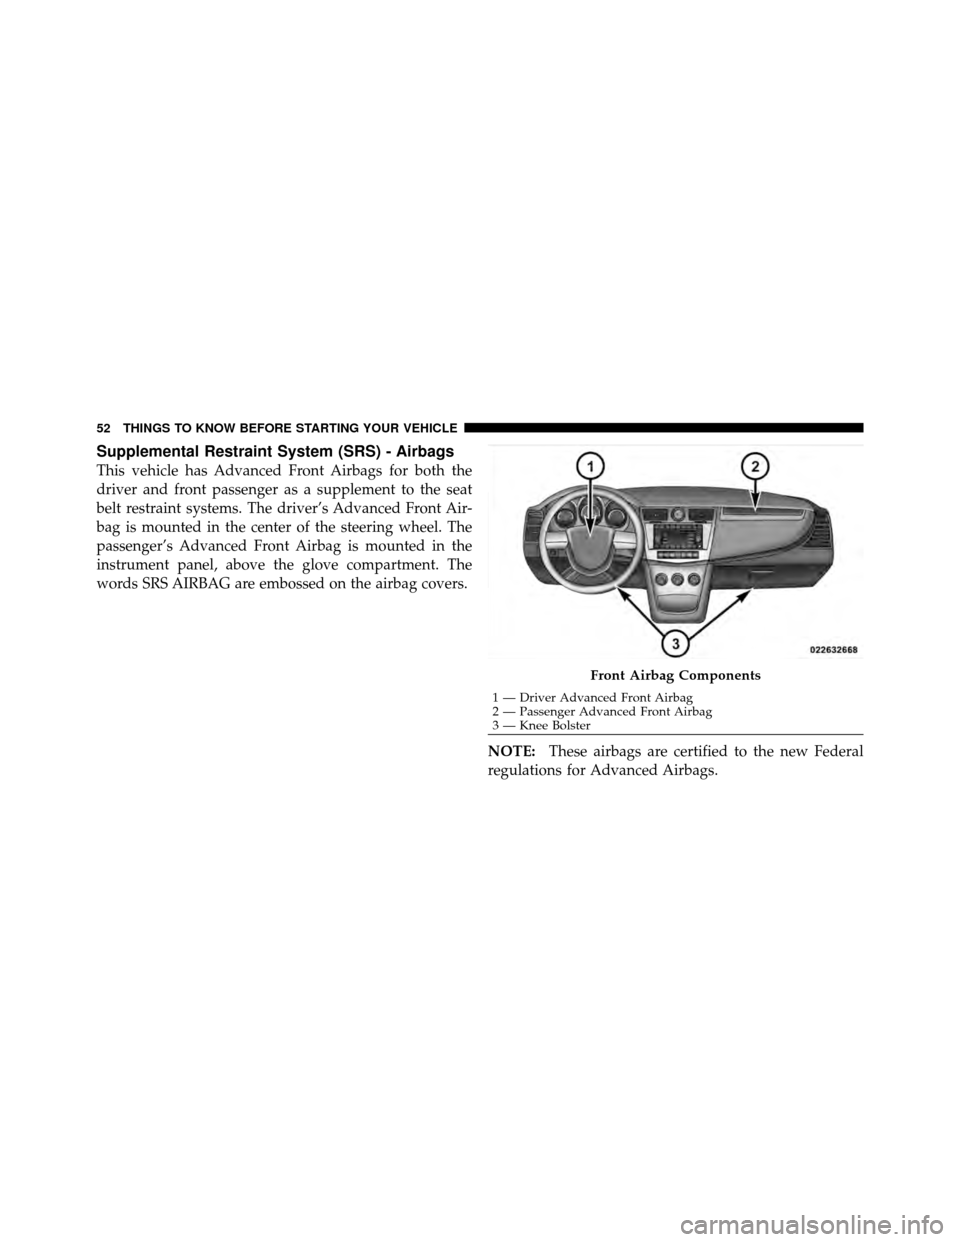
This vehicle has Advanced Front Airbags for both the
driver and front passenger as a supplement to the seat
belt restraint systems. The driver’s Advanced Front Air-
bag is mounted in the center of the steering wheel. The
passenger’s Advanced Front Airbag is mounted in the
instrument panel, above the glove compartment. The
words SRS AIRBAG are embossed on the airbag covers.NOTE:These airbags are certified to the new Federal
regulations for Advanced Airbags.
Front Airbag Components
1 — Driver Advanced Front Airbag
2 — Passenger Advanced Front Airbag
3 — Knee Bolster
52 THINGS TO KNOW BEFORE STARTING YOUR VEHICLE
Page 54 of 457
The Advanced Front Airbags have a multistage inflator
design. This allows the airbag to have different rates of
inflation that are based on the severity and type of
collision.
This vehicle may be equipped with driver and/or front
passenger seat track position sensors that may adjust the
inflation rate of the Advanced Front Airbags based upon
seat position.
This vehicle may be equipped with a driver and/or front
passenger seat belt buckle switch that detects whether
the driver or front passenger seat belt is fastened. The
seat belt buckle switch may adjust the inflation rate of the
Advanced Front Airbags.
NOTE:
•Airbag covers may not be obvious in the interior trim;
but they will open during airbag deployment.
•After any collision, the vehicle should be taken to an
authorized dealer immediately.
Airbag System Components
Your vehicle may be equipped with the following airbag
system components:
•Occupant Restraint Controller (ORC)
•Airbag Warning Light
•Steering Wheel and Column
•Instrument Panel
•Knee Impact Bolster
•Driver Advanced Front Airbag
•Passenger Advanced Front Airbag
•Supplemental Seat-Mounted Side Airbags (SAB)
•Front and Side Impact Sensors
2
THINGS TO KNOW BEFORE STARTING YOUR VEHICLE 53
Page 59 of 457

WARNING! (Continued)
•Being too close to the steering wheel or instrument
panel during Advanced Front Airbag deployment
could cause serious injury, including death. Air-
bags need room to inflate. Sit back, comfortably
extending your arms to reach the steering wheel or
instrument panel.
•Side airbags also need room to inflate. Do not lean
against the door or window. Sit upright in the
center of the seat.
Airbag Deployment Sensors and Controls
Occupant Restraint Controller (ORC)
TheORC is part of a Federally regulated safety system
required for this vehicle.
The ORC determines if deployment of the front and/or
side airbags in a frontal or side collision is required.
Based on the impact sensors signals, a central electronic ORC deploys the Advanced Front Airbags, Supplemental
Seat-Mounted Side Airbags — if equipped, and front seat
belt pretensioners — if equipped, as required, depending
on the severity and type of impact.
Advanced Front Airbags are designed to provide addi-
tional protection by supplementing the seat belts in
certain frontal collisions depending on the severity and
type of collision. Advanced Front Airbags are not ex-
pected to reduce the risk of injury in rear, side, or rollover
collisions.
The Advanced Front Airbags will not deploy in all frontal
collisions, including some that may produce substantial
vehicle damage — for example, some pole collisions,
truck underrides, and angle offset collisions. On the other
hand, depending on the type and location of impact,
Advanced Front Airbags may deploy in crashes with
little vehicle front-end damage but that produce a severe
initial deceleration.
58 THINGS TO KNOW BEFORE STARTING YOUR VEHICLE
Page 61 of 457
WARNING!
Ignoring the Airbag Warning Light in your instru-
ment panel could mean you won’t have the airbags to
protect you in a collision. If the light does not come
on, stays on after you start the vehicle, or if it comes
on as you drive, have an authorized dealer service the
airbag system immediately.
Driver and Passenger Airbag Inflator Units
The Driver and Passenger Airbag Inflator Units are
located in the center of the steering wheel and the right
side of the instrument panel. When the ORC detects a
collision requiring the Advanced Front Airbags, it signals
the inflator units. A large quantity of non-toxic gas is
generated to inflate the Advanced Front Airbags. Differ-
ent airbag inflation rates are possible, based on the
collision type and severity. The steering wheel hub trim
cover and the upper right side of the instrument panel
separate and fold out of the way as the airbags inflate totheir full size. The airbags fully inflate in about 50 to 70
milliseconds. This is about half of the time it takes to
blink your eyes. The airbags then quickly deflate while
helping to restrain the driver and front passenger.
The Advanced Front Airbag gas is vented through the
vent holes in the sides of the airbag. In this way, the
airbags do not interfere with your control of the vehicle.
Supplemental Seat-Mounted Side Airbag Inflator
Units — If Equipped
The Side Impact (SRS) Seat-Mounted Side Airbags are
designed to activate only in certain side collisions.
The ORC determines if a side collision requires the side
airbags to inflate based on the severity and type of
collision.
The ORC monitors the readiness of the electronic parts of
the airbag system whenever the ignition switch is in the
START or ON positions. These include all of the items
previously mentioned.
60 THINGS TO KNOW BEFORE STARTING YOUR VEHICLE
Page 64 of 457
Maintaining Your Airbag System
WARNING!
•Modifications to any part of the airbag system
could cause it to fail when you need it. You could
be injured if the airbag system is not there to
protect you. Do not modify the components or
wiring, including adding any kind of badges or
stickers to the steering wheel hub trim cover or the
upper right side of the instrument panel. Do not
modify the front bumper, vehicle body structure,
or add aftermarket side steps or running boards.
•It is dangerous to try to repair any part of the
airbag system yourself. Be sure to tell anyone who
works on your vehicle that it has an airbag system.(Continued)
WARNING! (Continued)
•Do not attempt to modify any part of your ad-
vanced airbag system. The airbag may inflate
accidentally or may not function properly if modi-
fications are made. Take your vehicle to an autho-
rized dealer for any advanced airbag system ser-
vice. If your seat including your trim cover and
cushion needs to be serviced in any way (includ-
ing removal or loosening/tightening of seat attach-
ment bolts), take the vehicle to your authorized
dealer. Only manufacturer approved seat accesso-
ries may be used. If it is necessary to modify the
airbag system for persons with disabilities, contact
your authorized dealer.
2
THINGS TO KNOW BEFORE STARTING YOUR VEHICLE 63
Page 113 of 457
Vanity Mirror — If Equipped
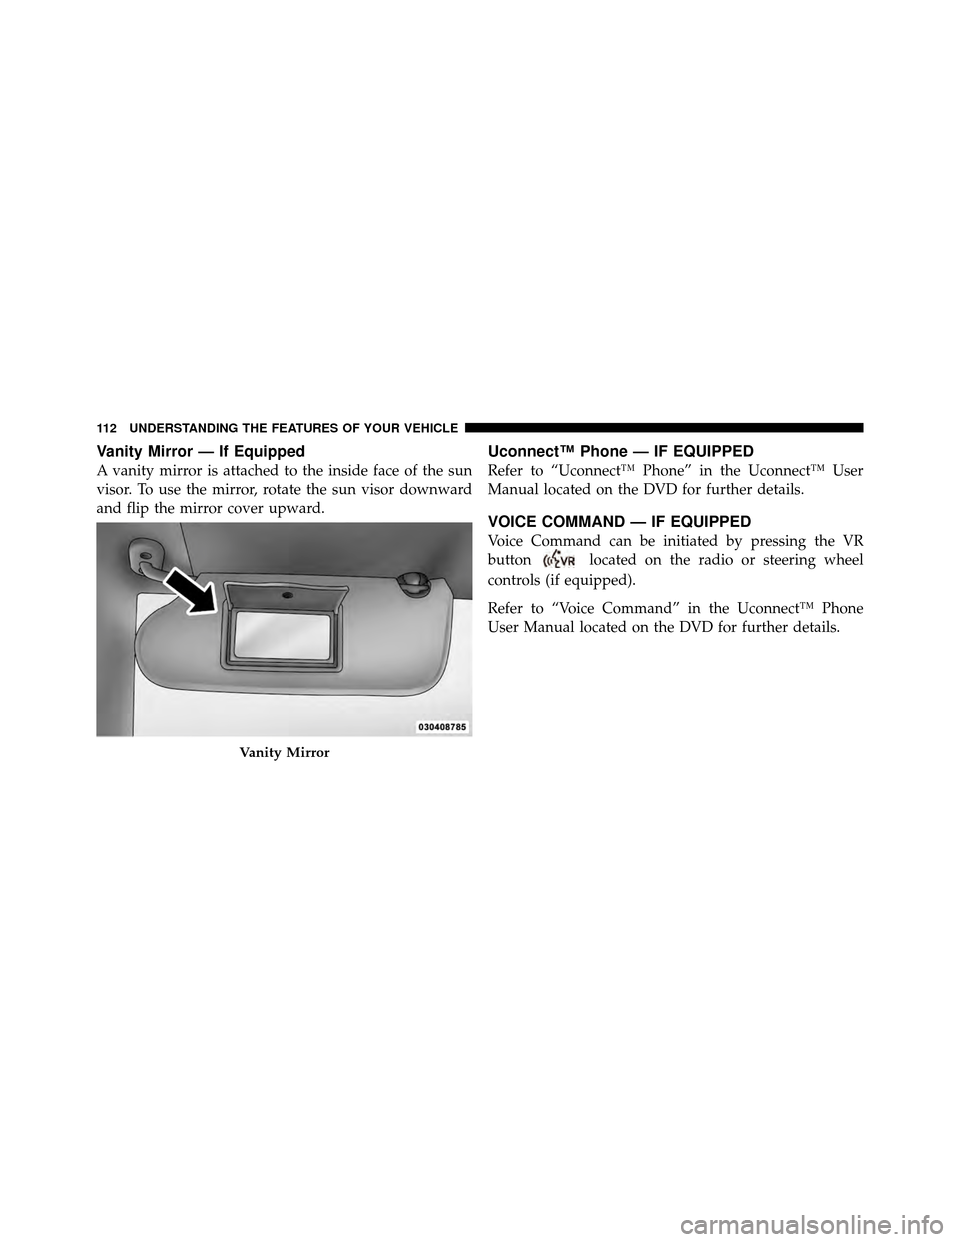
A vanity mirror is attached to the inside face of the sun
visor. To use the mirror, rotate the sun visor downward
and flip the mirror cover upward.
Uconnect™ Phone — IF EQUIPPED
Refer to “Uconnect™ Phone” in the Uconnect™ User
Manual located on the DVD for further details.
VOICE COMMAND — IF EQUIPPED
Voice Command can be initiated by pressing the VR
button
located on the radio or steering wheel
controls (if equipped).
Refer to “Voice Command” in the Uconnect™ Phone
User Manual located on the DVD for further details.
Vanity Mirror
112 UNDERSTANDING THE FEATURES OF YOUR VEHICLE
Page 135 of 457
TILT/TELESCOPING STEERING COLUMN
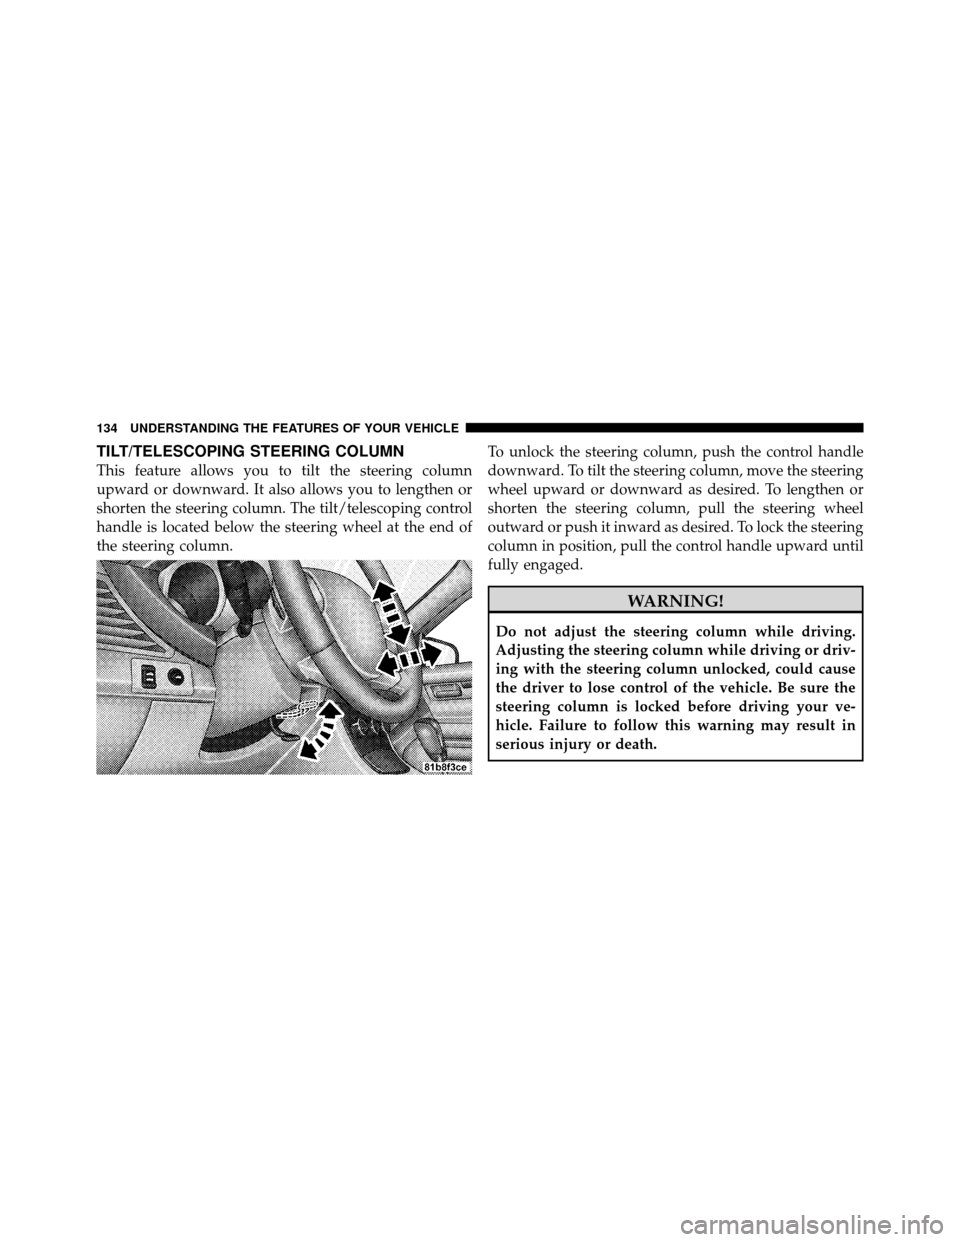
This feature allows you to tilt the steering column
upward or downward. It also allows you to lengthen or
shorten the steering column. The tilt/telescoping control
handle is located below the steering wheel at the end of
the steering column.To unlock the steering column, push the control handle
downward. To tilt the steering column, move the steering
wheel upward or downward as desired. To lengthen or
shorten the steering column, pull the steering wheel
outward or push it inward as desired. To lock the steering
column in position, pull the control handle upward until
fully engaged.
WARNING!
Do not adjust the steering column while driving.
Adjusting the steering column while driving or driv-
ing with the steering column unlocked, could cause
the driver to lose control of the vehicle. Be sure the
steering column is locked before driving your ve-
hicle. Failure to follow this warning may result in
serious injury or death.
134 UNDERSTANDING THE FEATURES OF YOUR VEHICLE
Page 136 of 457
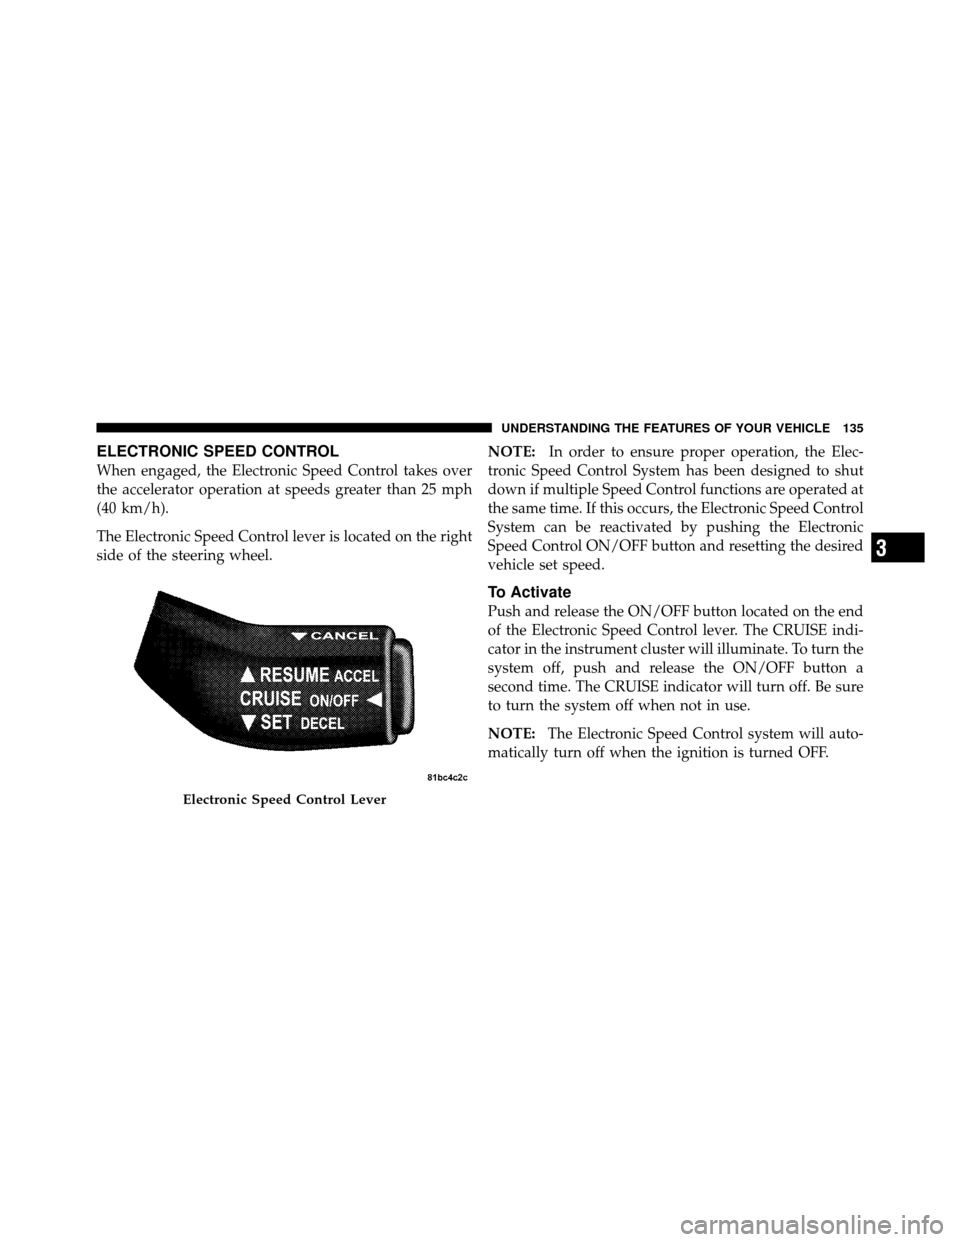
ELECTRONIC SPEED CONTROL
When engaged, the Electronic Speed Control takes over
the accelerator operation at speeds greater than 25 mph
(40 km/h).
The Electronic Speed Control lever is located on the right
side of the steering wheel.NOTE:
In order to ensure proper operation, the Elec-
tronic Speed Control System has been designed to shut
down if multiple Speed Control functions are operated at
the same time. If this occurs, the Electronic Speed Control
System can be reactivated by pushing the Electronic
Speed Control ON/OFF button and resetting the desired
vehicle set speed.
To Activate
Push and release the ON/OFF button located on the end
of the Electronic Speed Control lever. The CRUISE indi-
cator in the instrument cluster will illuminate. To turn the
system off, push and release the ON/OFF button a
second time. The CRUISE indicator will turn off. Be sure
to turn the system off when not in use.
NOTE: The Electronic Speed Control system will auto-
matically turn off when the ignition is turned OFF.
Electronic Speed Control Lever
3
UNDERSTANDING THE FEATURES OF YOUR VEHICLE 135