warning lights CHRYSLER SEBRING CONVERTIBLE 2010 3.G Owners Manual
[x] Cancel search | Manufacturer: CHRYSLER, Model Year: 2010, Model line: SEBRING CONVERTIBLE, Model: CHRYSLER SEBRING CONVERTIBLE 2010 3.GPages: 457, PDF Size: 8.76 MB
Page 21 of 457
If the Vehicle Security Alarm is armed and the battery
becomes disconnected the Vehicle Security Alarm will
remain armed when the battery is reconnected. The
exterior lights will flash, and the horn will sound. If this
occurs, disarm the Vehicle Security Alarm.
Tamper Alert
If the alarm was triggered, but the warning signals have
timed out, the park and taillights flash three times
(instead of the normal twice), and the horn will chirp
three times, when unlocking the vehicle with a valid RKE
transmitter to alert the driver.
ILLUMINATED ENTRY — IF EQUIPPED
The courtesy/reading lights will turn on when you use
the Remote Keyless Entry (RKE) transmitter or open
either door.This feature also turns on the approach lighting (if
equipped). Refer to “Electronic Vehicle Information Cen-
ter (EVIC)/Personal Settings (Customer-Programmable
Features)” in “Understanding Your Instrument Panel” for
further information.
The interior lights will fade to off after approximately
30 seconds or they will immediately fade to off once the
ignition switch is turned ON.
NOTE:
The illuminated entry system will not operate
the interior lights if the dimmer control is in the “defeat”
position (extreme downward position).
20 THINGS TO KNOW BEFORE STARTING YOUR VEHICLE
Page 29 of 457
•Hood closed
•Trunk closed
•Hazard switch off
•Brake switch inactive (brake pedal not pressed)
•Ignition key removed from ignition switch
•Battery at an acceptable charge level, and
•RKE PANIC button not pressed
WARNING!
•Do not start or run an engine in a closed garage or
confined area. Exhaust gas contains Carbon Mon-
oxide (CO) which is odorless and colorless. Car-
bon Monoxide is poisonous and can cause serious
injury or death when inhaled.(Continued)
WARNING! (Continued)
•Keep Remote Keyless Entry (RKE) transmitters
away from children. Operation of the Remote Start
System, windows, door locks or other controls
could cause serious injury or death.
To Enter Remote Start Mode
Press and release the REMOTE START button
on the RKE transmitter twice, within five sec-
onds. The parking lights will flash and the horn
will chirp twice (if programmed). Then, the
engine will start and the vehicle will remain in the
Remote Start mode for a 15-minute cycle.
NOTE:
•For security, power window operation is disabled
when the vehicle is in the Remote Start mode.
•The engine can be started two consecutive times (two
15 minute cycles) with the RKE transmitter. However,
28 THINGS TO KNOW BEFORE STARTING YOUR VEHICLE
Page 56 of 457
WARNING! (Continued)
•Do not mount any accessories to the knee bolster
such as alarm lights, stereos, citizen band radios,
etc.
Supplemental Seat-Mounted Side Airbags (SAB)
Supplemental Seat-Mounted Side Airbags provide en-
hanced protection to help protect an occupant during a
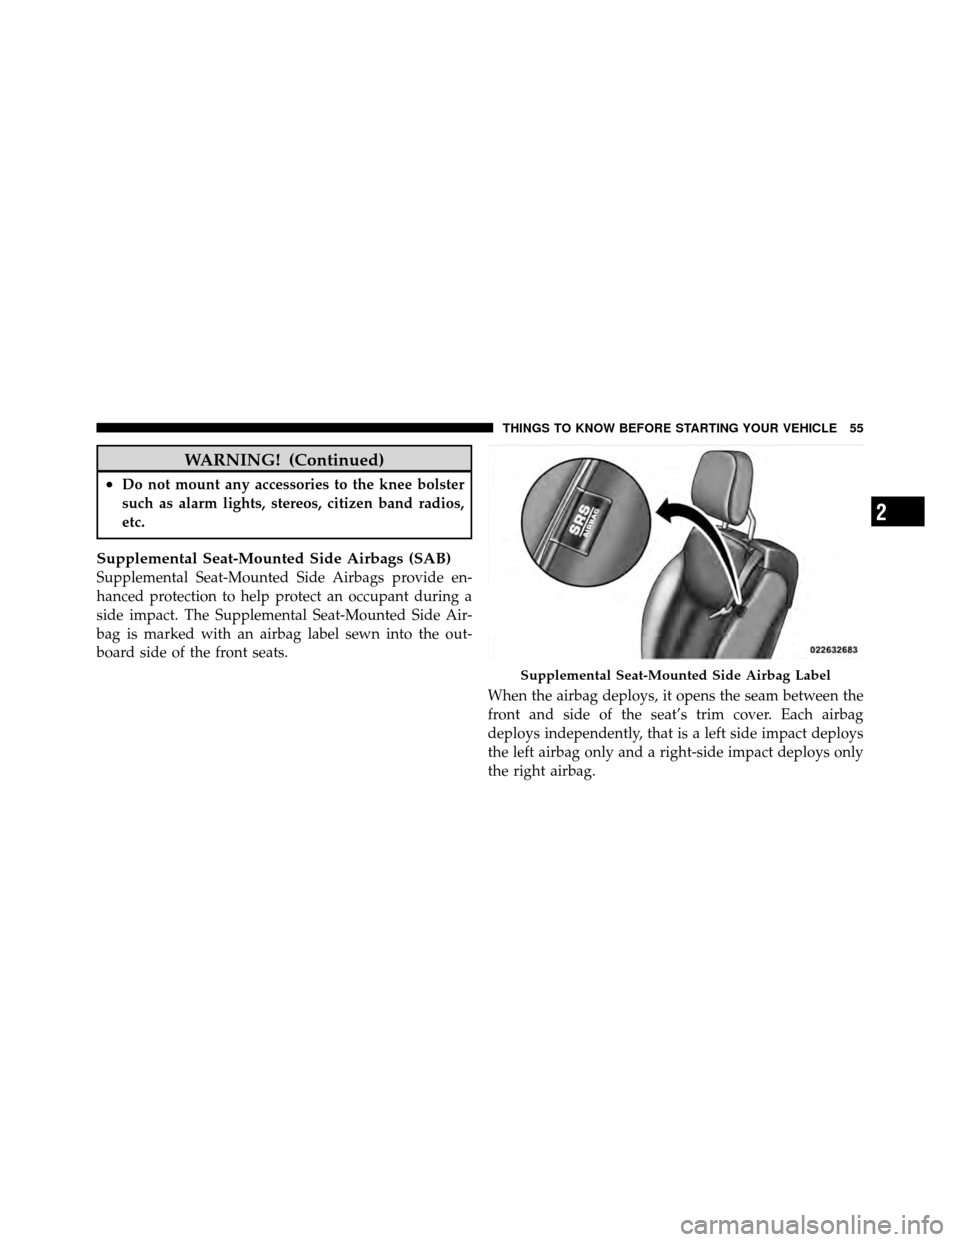
side impact. The Supplemental Seat-Mounted Side Air-
bag is marked with an airbag label sewn into the out-
board side of the front seats.When the airbag deploys, it opens the seam between the
front and side of the seat’s trim cover. Each airbag
deploys independently, that is a left side impact deploys
the left airbag only and a right-side impact deploys only
the right airbag.
Supplemental Seat-Mounted Side Airbag Label
2
THINGS TO KNOW BEFORE STARTING YOUR VEHICLE 55
Page 82 of 457
WARNING! (Continued)
•Check mounting of mats on a regular basis. Al-
ways properly reinstall and secure floor mats that
have been removed for cleaning.
•Always make sure that objects cannot fall into the
driver foot well while the vehicle is moving.
Objects can become trapped under the brake pedal
and accelerator pedal causing a loss of vehicle
control.
•If required, mounting posts must be properly
installed, if not equipped from the factory.
Failure to properly follow floor mat installation or
mounting can cause interference with the brake
pedal and accelerator pedal operation causing loss
of control of the vehicle.
Periodic Safety Checks You Should Make Outside
the Vehicle
Tires
Examine tires for excessive tread wear and uneven wear
patterns. Check for stones, nails, glass, or other objects
lodged in the tread. Inspect the tread and sidewall for
cuts and cracks. Check the wheel nuts for tightness.
Check the tires (including spare) for proper pressure.
Lights
Have someone observe the operation of exterior lights
while you work the controls. Check turn signal and high
beam indicator lights on the instrument panel.
2
THINGS TO KNOW BEFORE STARTING YOUR VEHICLE 81
Page 115 of 457
WARNING!
•Adjusting a seat while the vehicle is moving is
dangerous. The sudden movement of the seat
could cause you to lose control. The seat belt might
not be properly adjusted and you could be injured.
Adjust the seat only while the vehicle is parked.
•Do not ride with the seatback reclined so that the
shoulder belt is no longer resting against your
chest. In a collision you could slide under the seat
belt and be seriously or even fatally injured. Use
the recliner only when the vehicle is parked.
CAUTION!
Do not place any article under any seat as it may
cause damage to the seat controls.
Heated Seats — If Equipped
The driver and front passenger seats are heated. The
controls for each heater are located in the instrument
panel switch bank above the climate controls.
After turning the ignition ON, you can choose from High,
Low, or Off heat settings. Amber indicator lights in each
switch indicate the level of heat in use. Two indicator
lights will illuminate for High, one for Low and none for
Off.Press the switch once to select High-level heat-
ing. Press the switch a second time to select
Low-level heating. Press the switch a third time
to shut the heating elements Off.
114 UNDERSTANDING THE FEATURES OF YOUR VEHICLE
Page 124 of 457

CAUTION!
To prevent possible damage, do not slam the hood to
close it. Use a firm downward push at the center of
the hood to ensure that both latches engage.
WARNING!
Be sure the hood is fully latched before driving your
vehicle. If the hood is not fully latched, it could open
when the vehicle is in motion and block your vision.
Failure to follow this warning could result in serious
injury or death.
LIGHTS
Multifunction Lever
The multifunction lever on the left side of the steering
column controls the operation of the headlights, parking
lights, turn signal lights, instrument panel lights, instru-
ment panel light dimming, interior lights and fog lights
(if equipped).
Multifunction Lever
3
UNDERSTANDING THE FEATURES OF YOUR VEHICLE 123
Page 147 of 457
WARNING! (Continued)
•Do not touch with wet hands.
•Close the lid when not in use and while driving
the vehicle.
•If this outlet is mishandled, it may cause an
electric shock and failure.
CAUTION!
•Many accessories that can be plugged in draw
power from the vehicle’s battery, even when not in
use (i.e., cellular phones, etc.). Eventually, if
plugged in long enough, the vehicle’s battery will
discharge sufficiently to degrade battery life
and/or prevent the engine from starting.(Continued)
CAUTION! (Continued)
•Accessories that draw higher power (i.e., coolers,
vacuum cleaners, lights, etc.) will degrade the
battery even more quickly. Only use these inter-
mittently and with greater caution.
•After the use of high power draw accessories, or
long periods of the vehicle not being started (with
accessories still plugged in), the vehicle must be
driven a sufficient length of time to allow the
generator to recharge the vehicle’s battery.
146 UNDERSTANDING THE FEATURES OF YOUR VEHICLE
Page 160 of 457
5. Low Fuel LightWhen the fuel level drops to approximately 2.0 gal-
lons (7.6 Liters), the fuel symbol will light and a
single chime will sound.
NOTE: This light will remain on until a minimum of
approximately 3.0 gallons (11.3 Liters) of fuel is added.
6. Charging System Light This light shows the status of the electrical charg-
ing system. The light should come on briefly when
the ignition is first turned on and remain on briefly as a
bulb check. If the light stays on or comes on while
driving, turn off some of the vehicle’s electrical devices,
such as the Front Fog Lights or Rear Window Defroster.
If the Charging System Light remains on, it means that
the vehicle is experiencing a problem with the charging
system. Obtain SERVICE IMMEDIATELY. See your local
authorized dealer. If jump starting is required, refer to “Jump Starting
Procedures” in “What To Do In Emergencies”.
7. Airbag Warning Light
The light comes on and remains on for six to
eight seconds as a bulb check when the ignition
switch is first turned ON. If the light does not
turn on during starting, stays on, or turns on
while driving, have the system inspected by an autho-
rized dealer. Refer to “Occupant Restraints” in “Things
To Know Before Starting Your Vehicle” for further infor-
mation.
8. Seat Belt Reminder Light When the ignition switch is first turned ON, this
light will come on for about six seconds. A chime
will sound if you have not pulled the shoulder belt
out of the retractor. This is a reminder to “buckle up”. If
4
UNDERSTANDING YOUR INSTRUMENT PANEL 159
Page 172 of 457
27. Transmission Temperature Warning Light — If
EquippedThis light indicates that the transmission fluid
temperature is running hot. This may occur
with severe usage, such as trailer towing. If this
light turns on, safely pull over and stop the
vehicle. Then, shift the transmission into NEUTRAL and
run the engine at idle or faster until the light turns off.
CAUTION!
Continuous driving with the Transmission Tempera-
ture Warning Light illuminated will eventually cause
severe transmission damage or transmission failure.
WARNING!
Continued operation with the Transmission Tem-
perature Warning Light illuminated could cause the
fluid to boil over, come in contact with hot engine or
exhaust components causing a fire that may result in
personal injury.
28. High Beam Indicator This light indicates that the headlights are on high
beam. Pull the turn signal lever toward the steer-
ing wheel to switch the headlights to low beam.
29. Electronic Vehicle Information Center (EVIC)
Display — If Equipped
This display shows the EVIC messages when the appro-
priate conditions exist. Refer to “Electronic Vehicle Infor-
mation Center (EVIC)” for further information.
4
UNDERSTANDING YOUR INSTRUMENT PANEL 171
Page 327 of 457
•An electronically actuated trailer brake controller is
required when towing a trailer with electronically
actuated brakes. When towing a trailer equipped with
a hydraulic surge actuated brake system, an electronic
brake controller is not required.
•Trailer brakes are recommended for trailers over
1,000 lbs (450 kg) and required for trailers in excess of
2,000 lbs (907 kg).
CAUTION!
If the trailer weighs more than 1,000 lbs (450 kg)
loaded, it should have its own brakes with adequate
braking capacity. Failure to do this could lead to
accelerated brake lining wear, higher brake pedal
effort, and longer stopping distances.
WARNING!
•Do not connect trailer brakes to your vehicle’s
hydraulic brake lines. It can overload your brake
system and cause it to fail. You might not have
brakes when you need them and could have an
accident.
•Towing any trailer will increase your stopping
distance. When towing, you should allow for ad-
ditional space between your vehicle and the ve-
hicle in front of you. Failure to do so could result
in an accident.
Towing Requirements – Trailer Lights and Wiring
Whenever you pull a trailer, regardless of the trailer size,
stop lights and turn signals on the trailer are required for
motoring safety.
326 STARTING AND OPERATING