remove seats CHRYSLER TOWN AND COUNTRY 2015 5.G Owners Manual
[x] Cancel search | Manufacturer: CHRYSLER, Model Year: 2015, Model line: TOWN AND COUNTRY, Model: CHRYSLER TOWN AND COUNTRY 2015 5.GPages: 726, PDF Size: 20.14 MB
Page 109 of 726
WARNING!(Continued)
•After a child restraint is installed in the vehicle, do
not move the vehicle seat forward or rearward
because it can loosen the child restraint attach-
ments. Remove the child restraint before adjusting
the vehicle seat position. When the vehicle seat has
been adjusted, reinstall the child restraint.
•When your child restraint is not in use, secure it in
the vehicle with the seat belt or LATCH anchor-
ages, or remove it from the vehicle. Do not leave it
loose in the vehicle. In a sudden stop or accident, it
could strike the occupants or seatbacks and cause
serious personal injury.
Children Too Large For Booster Seats
Children who are large enough to wear the shoulder belt
comfortably, and whose legs are long enough to bend
over the front of the seat when their back is against the
seatback, should use the seat belt in a rear seat. Use this
simple 5-step test to decide whether the child can use the
vehicle’s seat belt alone:
1. Can the child sit all the way back against the back of
the vehicle seat?
2. Do the child’s knees bend comfortably over the front
of the vehicle seat – while they are still sitting all the
way back?
3. Does the shoulder belt cross the child’s shoulder
between their neck and arm?
2
THINGS TO KNOW BEFORE STARTING YOUR VEHICLE 107
Page 115 of 726
Child Restraint LATCH Positions
Can the rear-facing child restraint touch
the back of the front passenger seat?
Yes The child seat may touch the back of the
front passenger seat if the child restraint
manufacturer also allows contact. See your
child restraint owner ’s manual for more
information.
Can the head restraints be removed?YesThe 2nd row head restraints on bench and
fixed quad seats are removable. 2nd row
stow ’n go head restraints are not remov-
able. The 3rd row center head restraint is
removable in all vehicles.
2
THINGS TO KNOW BEFORE STARTING YOUR VEHICLE 113
Page 122 of 726

Lap/Shoulder Belt Systems
What is the weight limit (child’s weight +
weight of the child restraint) for using the
Tether Anchor with the seat belt to attach a
forward facing child restraint?
Weight limit of the
Child Restraint
Always use the tether anchor when using
the seat belt to install a forward facing
child restraint, up to the recommended
weight limit of the child restraint.
Can the rear-facing child restraint touch
the back of the front passenger seat?
Ye sContact between the front passenger seat and
the child restraint is allowed, if the child re-
straint manufacturer also allows contact.
Can the head restraints be removed?YesThe 2nd row head restraints on bench and
fixed quad seats are removable. 2nd row
stow ’n go head restraints are not remov-
able. The 3rd row center head restraint is
removable in all vehicles.
Can the buckle stalk be twisted to tighten
the seat belt against the seat belt path of
the child restraint?
YesIn positions with cinching latch plates
(CINCH), the buckle stalk may be twisted
up to 3 full turns. Do not twist the buckle
stalk in a seating position with an ALR
retractor.
120 THINGS TO KNOW BEFORE STARTING YOUR VEHICLE
Page 204 of 726
WARNING!
The head restraints for all occupants must be prop-
erly adjusted prior to operating the vehicle or occu-
pying a seat. Head restraints should never be ad-
justed while the vehicle is in motion. Driving a
vehicle with the head restraints improperly adjusted
or removed could cause serious injury or death in the
event of a collision.
Active Head Restraints — Front Seats
Active Head Restraints are passive, deployable compo-
nents, and vehicles with this equipment cannot be readily
identified by any markings, only through visual inspec-
tion of the head restraint. The Active Head Restraints
(AHR) will be split in two halves, with the front half
being soft foam and trim, the back half being decorative
plastic.
When AHRs deploy during a rear impact, the front half
of the head restraint extends forward to reduce the gap
between the back of the occupant’s head and the AHR.
This system is design to reduce the risk of injury to the
driver or front passenger in certain types of rear impacts.
Refer to “Occupant Restraints” in “Things To Know
Before Starting Your Vehicle” for further information.
To raise the head restraint, pull upward on the head
restraint. To lower the head restraint, press the push
button, located at the base of the head restraint, and push
downward on the head restraint.
202 UNDERSTANDING THE FEATURES OF YOUR VEHICLE
Page 218 of 726
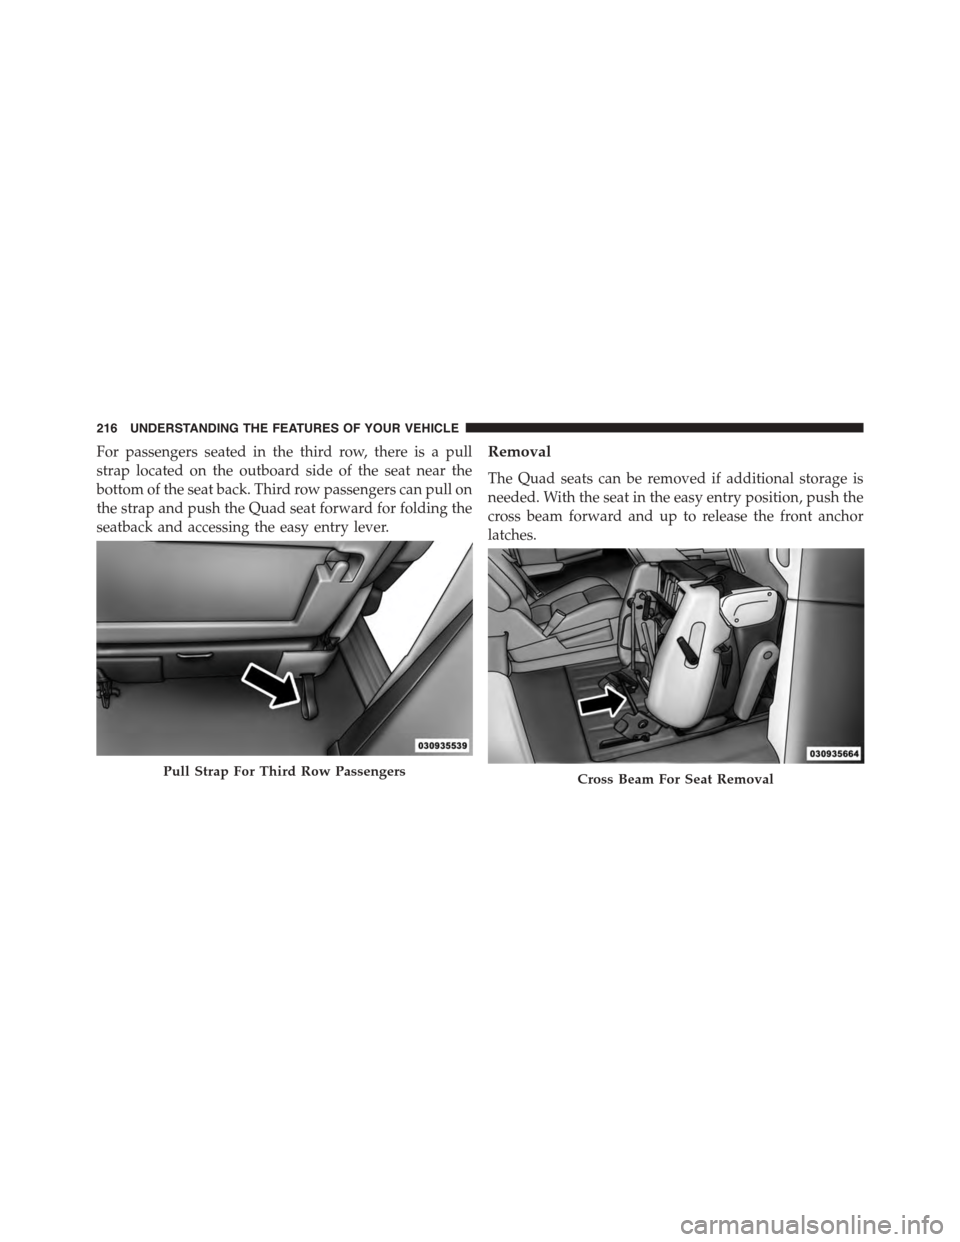
For passengers seated in the third row, there is a pull
strap located on the outboard side of the seat near the
bottom of the seat back. Third row passengers can pull on
the strap and push the Quad seat forward for folding the
seatback and accessing the easy entry lever.
Removal
The Quad seats can be removed if additional storage is
needed. With the seat in the easy entry position, push the
cross beam forward and up to release the front anchor
latches.
Pull Strap For Third Row PassengersCross Beam For Seat Removal
216 UNDERSTANDING THE FEATURES OF YOUR VEHICLE
Page 222 of 726
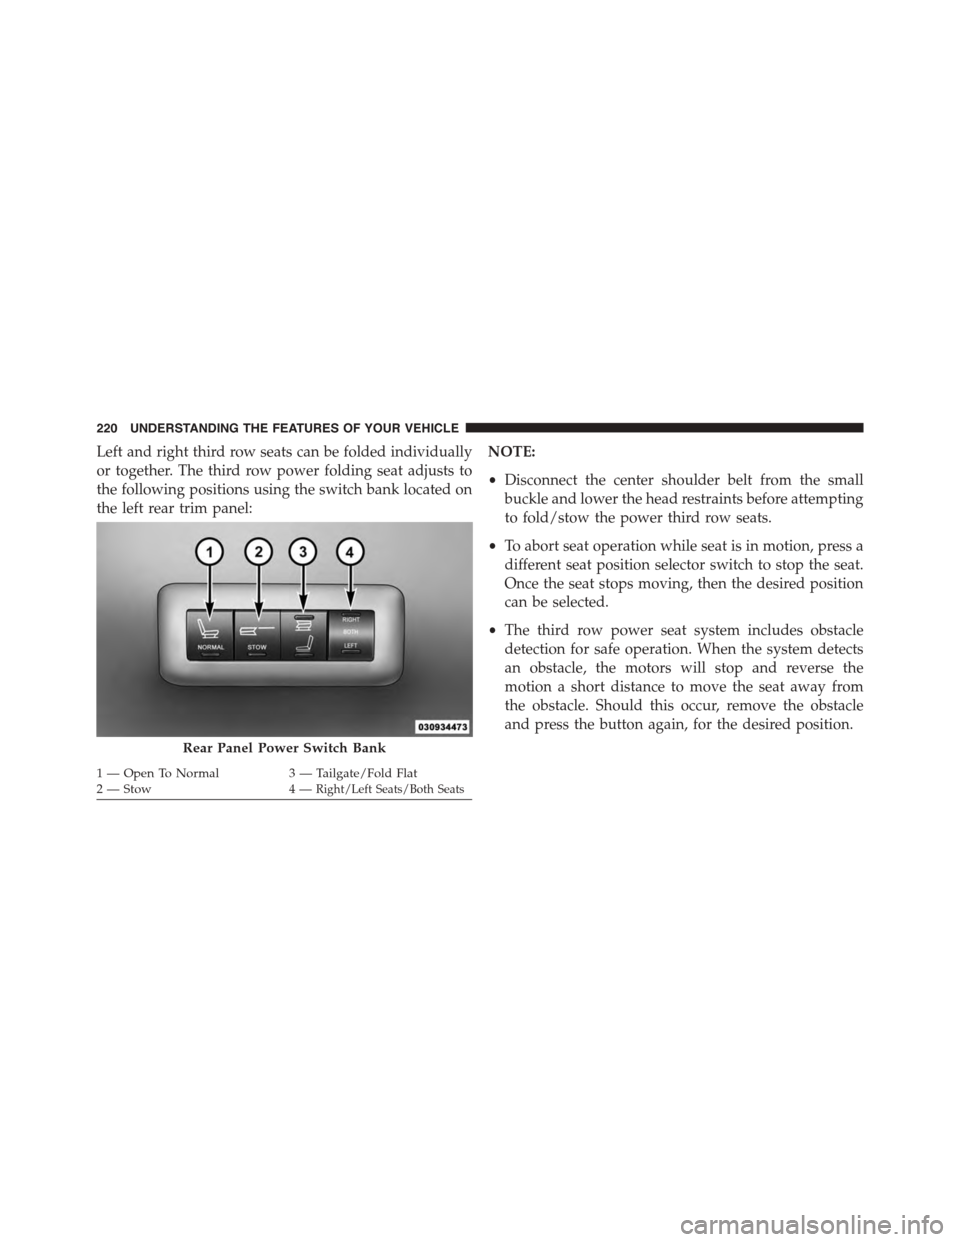
Left and right third row seats can be folded individually
or together. The third row power folding seat adjusts to
the following positions using the switch bank located on
the left rear trim panel:
NOTE:
•Disconnect the center shoulder belt from the small
buckle and lower the head restraints before attempting
to fold/stow the power third row seats.
•To abort seat operation while seat is in motion, press a
different seat position selector switch to stop the seat.
Once the seat stops moving, then the desired position
can be selected.
•The third row power seat system includes obstacle
detection for safe operation. When the system detects
an obstacle, the motors will stop and reverse the
motion a short distance to move the seat away from
the obstacle. Should this occur, remove the obstacle
and press the button again, for the desired position.
Rear Panel Power Switch Bank
1 — Open To Normal3 — Tailgate/Fold Flat2—Stow4—Right/Left Seats/Both Seats
220 UNDERSTANDING THE FEATURES OF YOUR VEHICLE
Page 300 of 726
Coat Hooks
Coat hooks are located along the headliner for the second
and third row seating positions. The coat hook load limit
is 10 lbs (4.5 kg). Exceeding the recommended load limit
can cause the coat hooks to break or disengage from the
vehicle.
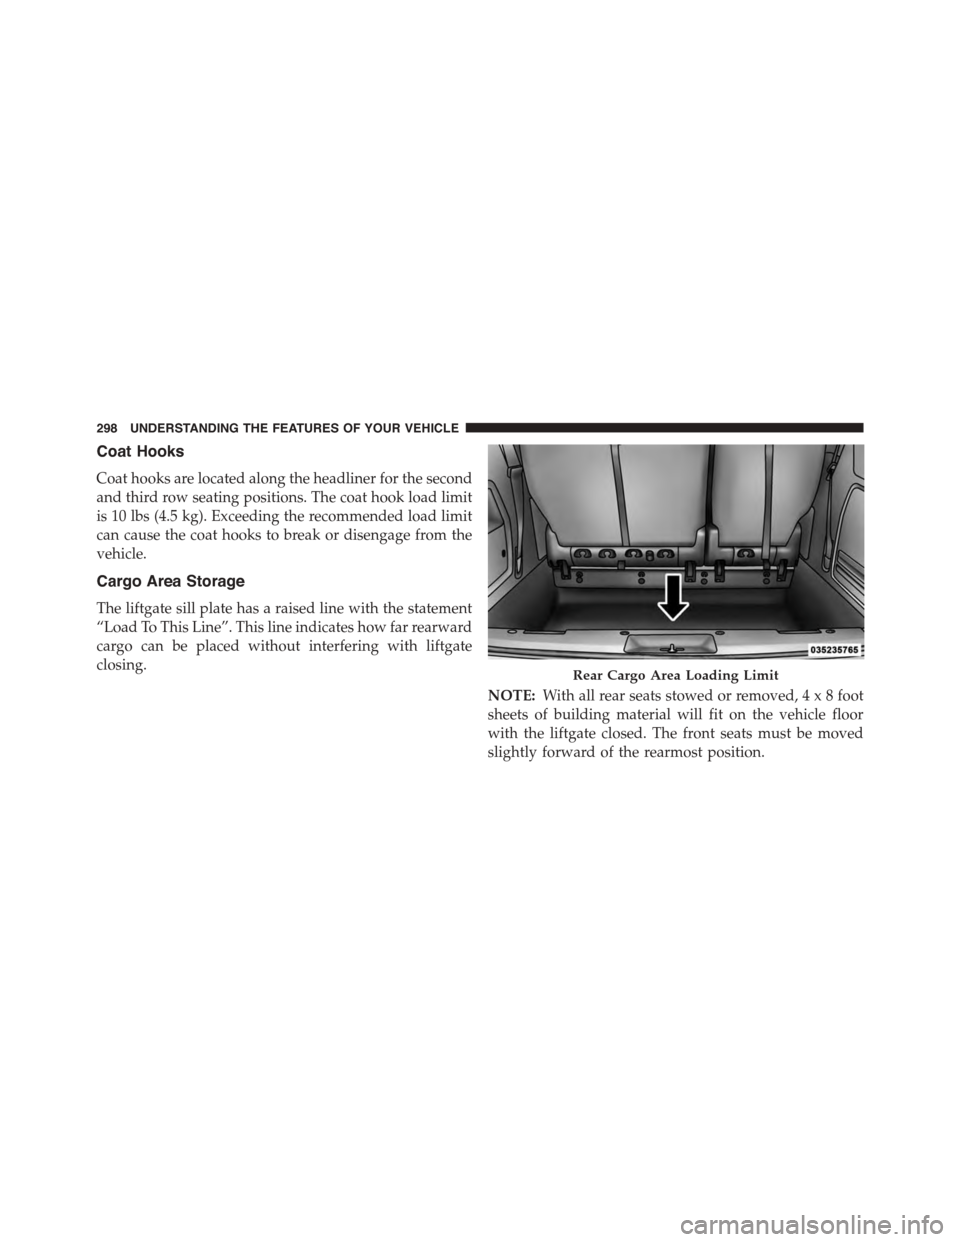
Cargo Area Storage
The liftgate sill plate has a raised line with the statement
“Load To This Line”. This line indicates how far rearward
cargo can be placed without interfering with liftgate
closing.
NOTE:With all rear seats stowed or removed,4x8foot
sheets of building material will fit on the vehicle floor
with the liftgate closed. The front seats must be moved
slightly forward of the rearmost position.
Rear Cargo Area Loading Limit
298 UNDERSTANDING THE FEATURES OF YOUR VEHICLE
Page 564 of 726
properly tightened. Refer to “Onboard Diagnostic Sys-
tem” in “Maintaining Your Vehicle” for further informa-
tion.
If the problem continues, the message will appear the
next time the vehicle is started. See your authorized
dealer as soon as possible.
VEHICLE LOADING
As required by National Highway Traffic Safety Admin-
istration regulations, your vehicle has a certification label
affixed to the driver’s side door or B-Pillar.
If seats are removed for carrying cargo, do not exceed the
specified GVWR and GAWR.
Vehicle Certification Label
Your vehicle has a Vehicle Certification Label affixed to
the drivers side B-Pillar or the rear of the driver ’s door.
The label contains the following information:
•Name of manufacturer
•Month and year of manufacture
•Gross Vehicle Weight Rating (GVWR)
•Gross Axle Weight Rating (GAWR) front
•Gross Axle Weight Rating (GAWR) rear
•Vehicle Identification Number (VIN)
•Type of Vehicle
•Month Day and Hour of Manufacture (MDH)
The bar code allows a computer scanner to read the VIN.
Gross Vehicle Weight Rating (GVWR)
The GVWR is the total allowable weight of your vehicle.
This includes driver, passengers, and cargo. The total
load must be limited so that you do not exceed the
GVWR.
562 STARTING AND OPERATING
Page 659 of 726
•If you carry special cargo such as chemicals, fertilizers,
de-icer salt, etc., be sure that such materials are well
packaged and sealed.
•If a lot of driving is done on gravel roads, consider
mud or stone shields behind each wheel.
•Use MOPAR® Touch Up Paint on scratches as soon as
possible. Your authorized dealer has touch up paint to
match the color of your vehicle.
Wheel And Wheel Trim Care
All wheels and wheel trim, especially aluminum and
chrome plated wheels, should be cleaned regularly with
a mild soap and water to prevent corrosion.
To remove heavy soil and/or excessive brake dust, use
MOPAR® Wheel Cleaner or equivalent or select a non-
abrasive, non-acidic cleaner.
•For chrome wheels, use MOPAR® Chrome Cleaner
(Part#04318013) or equivalent.
•For aluminum wheels, use MOPAR® Wheel Cleaner
(Part# 04796239AB) or equivalent.
CAUTION!
Do not use scouring pads, steel wool, a bristle brush,
or metal polishes. Do not use oven cleaner. These
products may damage the wheel’s protective finish.
Avoid automatic car washes that use acidic solutions
or harsh brushes that may damage the wheel’s pro-
tective finish. Only MOPAR® Wheel Cleaner or
equivalent is recommended.
Stain Repel Fabric Cleaning Procedure — If
Equipped
Stain Repel seats may be cleaned in the following man-
ner:
•Remove as much of the stain as possible by blotting
with a clean, dry towel.
7
MAINTAINING YOUR VEHICLE 657