fuse CHRYSLER VOYAGER 2000 Diagnostic Manual
[x] Cancel search | Manufacturer: CHRYSLER, Model Year: 2000, Model line: VOYAGER, Model: CHRYSLER VOYAGER 2000Pages: 364, PDF Size: 2.17 MB
Page 5 of 364

TABLE OF CONTENTS - Continued
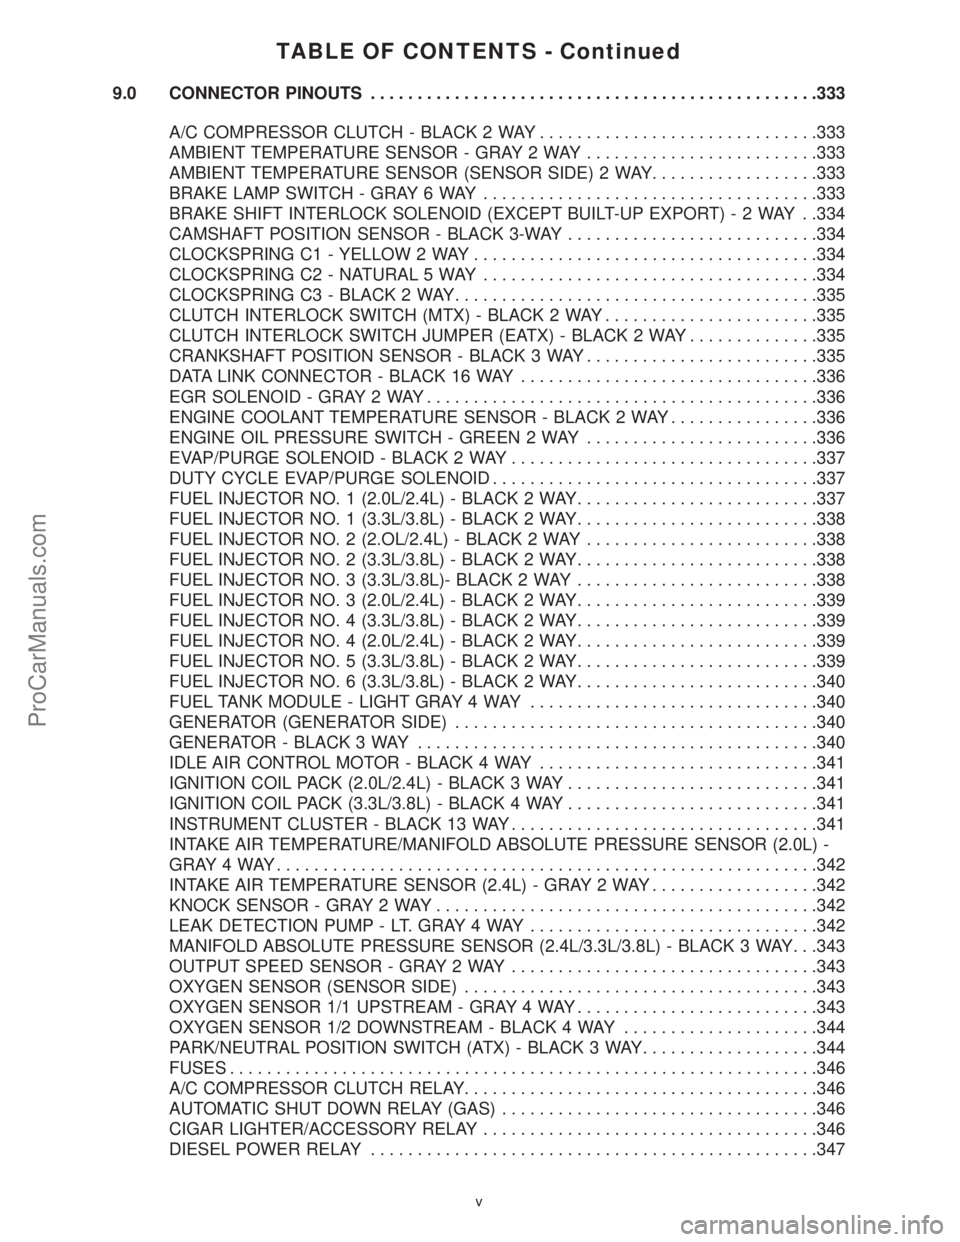
9.0 CONNECTOR PINOUTS................................................333
A/C COMPRESSOR CLUTCH - BLACK 2 WAY..............................333
AMBIENT TEMPERATURE SENSOR - GRAY 2 WAY.........................333
AMBIENT TEMPERATURE SENSOR (SENSOR SIDE) 2 WAY..................333
BRAKE LAMP SWITCH - GRAY 6 WAY....................................333
BRAKE SHIFT INTERLOCK SOLENOID (EXCEPT BUILT-UP EXPORT)-2WAY ..334
CAMSHAFT POSITION SENSOR - BLACK 3-WAY...........................334
CLOCKSPRING C1 - YELLOW 2 WAY.....................................334
CLOCKSPRING C2 - NATURAL 5 WAY....................................334
CLOCKSPRING C3 - BLACK 2 WAY.......................................335
CLUTCH INTERLOCK SWITCH (MTX) - BLACK 2 WAY.......................335
CLUTCH INTERLOCK SWITCH JUMPER (EATX) - BLACK 2 WAY..............335
CRANKSHAFT POSITION SENSOR - BLACK 3 WAY.........................335
DATA LINK CONNECTOR - BLACK 16 WAY................................336
EGR SOLENOID - GRAY 2 WAY..........................................336
ENGINE COOLANT TEMPERATURE SENSOR - BLACK 2 WAY................336
ENGINE OIL PRESSURE SWITCH - GREEN 2 WAY.........................336
EVAP/PURGE SOLENOID - BLACK 2 WAY.................................337
DUTY CYCLE EVAP/PURGE SOLENOID...................................337
FUEL INJECTOR NO. 1 (2.0L/2.4L) - BLACK 2 WAY..........................337
FUEL INJECTOR NO. 1 (3.3L/3.8L) - BLACK 2 WAY..........................338
FUEL INJECTOR NO. 2 (2.OL/2.4L) - BLACK 2 WAY.........................338
FUEL INJECTOR NO. 2 (3.3L/3.8L) - BLACK 2 WAY..........................338
FUEL INJECTOR NO. 3 (3.3L/3.8L)- BLACK 2 WAY..........................338
FUEL INJECTOR NO. 3 (2.0L/2.4L) - BLACK 2 WAY..........................339
FUEL INJECTOR NO. 4 (3.3L/3.8L) - BLACK 2 WAY..........................339
FUEL INJECTOR NO. 4 (2.0L/2.4L) - BLACK 2 WAY..........................339
FUEL INJECTOR NO. 5 (3.3L/3.8L) - BLACK 2 WAY..........................339
FUEL INJECTOR NO. 6 (3.3L/3.8L) - BLACK 2 WAY..........................340
FUEL TANK MODULE - LIGHT GRAY 4 WAY...............................340
GENERATOR (GENERATOR SIDE).......................................340
GENERATOR - BLACK 3 WAY...........................................340
IDLE AIR CONTROL MOTOR - BLACK 4 WAY..............................341
IGNITION COIL PACK (2.0L/2.4L) - BLACK 3 WAY...........................341
IGNITION COIL PACK (3.3L/3.8L) - BLACK 4 WAY...........................341
INSTRUMENT CLUSTER - BLACK 13 WAY.................................341
INTAKE AIR TEMPERATURE/MANIFOLD ABSOLUTE PRESSURE SENSOR (2.0L) -
GRAY4 WAY..........................................................342
INTAKE AIR TEMPERATURE SENSOR (2.4L) - GRAY 2 WAY..................342
KNOCK SENSOR - GRAY 2 WAY.........................................342
LEAK DETECTION PUMP - LT. GRAY 4 WAY...............................342
MANIFOLD ABSOLUTE PRESSURE SENSOR (2.4L/3.3L/3.8L) - BLACK 3 WAY. . .343
OUTPUT SPEED SENSOR - GRAY 2 WAY.................................343
OXYGEN SENSOR (SENSOR SIDE)......................................343
OXYGEN SENSOR 1/1 UPSTREAM - GRAY 4 WAY..........................343
OXYGEN SENSOR 1/2 DOWNSTREAM - BLACK 4 WAY.....................344
PARK/NEUTRAL POSITION SWITCH (ATX) - BLACK 3 WAY...................344
FUSES...............................................................346
A/C COMPRESSOR CLUTCH RELAY......................................346
AUTOMATIC SHUT DOWN RELAY (GAS)..................................346
CIGAR LIGHTER/ACCESSORY RELAY....................................346
DIESEL POWER RELAY................................................347
v
ProCarManuals.com
Page 18 of 364

applicable. These procedures can be found in ser-
vice manual procedures. Following these proce-
dures is very important to the safety of individuals
performing diagnostic tests.
4.2.2 VEHICLE PREPARATION FOR
TESTING
Make sure the vehicle being tested has a fully
charged battery. If it does not, false diagnostic codes
or error messages may occur.
4.2.3 SERVICING SUB-ASSEMBLIES
Some components of the powertrain system are
intended to be serviced in assembly only. Attempt-
ing to remove or repair certain system sub-
components may result in personal injury and/or
improper system operation. Only those components
with approved repair and installation procedures in
the service manual should be serviced.
4.2.4 DRBIIITSAFETY INFORMATION
WARNING: EXCEEDING THE LIMITS OF THE
DRB MULTIMETER IS DANGEROUS. IT CAN
EXPOSE YOU TO SERIOUS INJURY.
CAREFULLY READ AND UNDERSTAND THE
CAUTIONS AND THE SPECIFICATION
LIMITS.
Follow the vehicle manufacturer 's service specifi-
cations at all times.
²Do not use the DRBIIItif it has been damaged.
²Do not use the test leads if the insulation is
damaged or if metal is exposed.
²To avoid electrical shock, do not touch the test
leads, tips or the circuit being tested.
²Choose the proper range and function for the
measurement. Do not try voltage or current mea-
surements that may exceed the rated capacity.
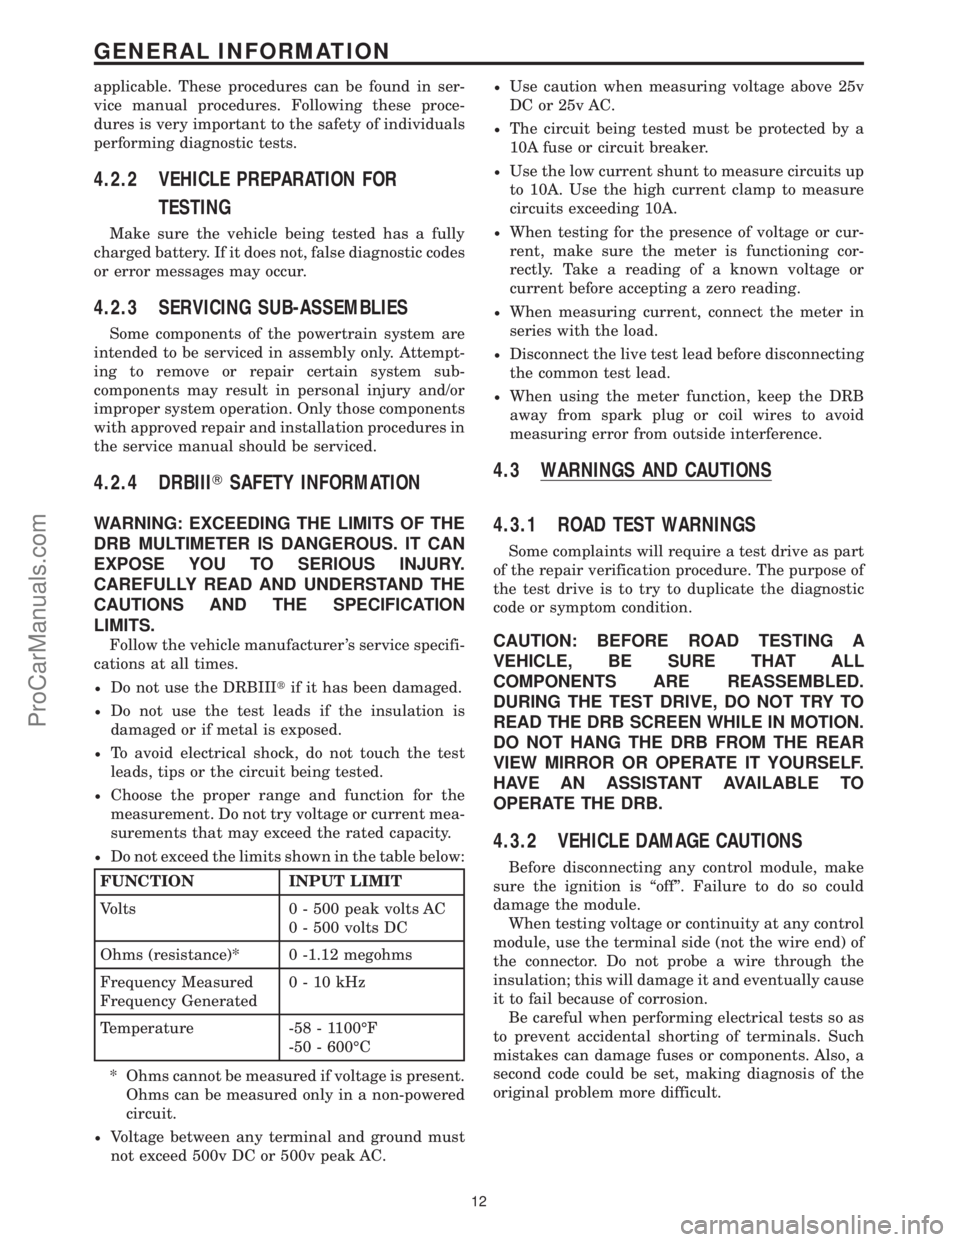
²Do not exceed the limits shown in the table below:
FUNCTION INPUT LIMIT
Volts 0 - 500 peak volts AC
0 - 500 volts DC
Ohms (resistance)* 0 -1.12 megohms
Frequency Measured
Frequency Generated0-10kHz
Temperature -58 - 1100ÉF
-50 - 600ÉC
* Ohms cannot be measured if voltage is present.
Ohms can be measured only in a non-powered
circuit.
²Voltage between any terminal and ground must
not exceed 500v DC or 500v peak AC.
²Use caution when measuring voltage above 25v
DC or 25v AC.
²The circuit being tested must be protected by a
10A fuse or circuit breaker.
²Use the low current shunt to measure circuits up
to 10A. Use the high current clamp to measure
circuits exceeding 10A.
²When testing for the presence of voltage or cur-
rent, make sure the meter is functioning cor-
rectly. Take a reading of a known voltage or
current before accepting a zero reading.
²When measuring current, connect the meter in
series with the load.
²Disconnect the live test lead before disconnecting
the common test lead.
²When using the meter function, keep the DRB
away from spark plug or coil wires to avoid
measuring error from outside interference.
4.3 WARNINGS AND CAUTIONS
4.3.1 ROAD TEST WARNINGS
Some complaints will require a test drive as part
of the repair verification procedure. The purpose of
the test drive is to try to duplicate the diagnostic
code or symptom condition.
CAUTION: BEFORE ROAD TESTING A
VEHICLE, BE SURE THAT ALL
COMPONENTS ARE REASSEMBLED.
DURING THE TEST DRIVE, DO NOT TRY TO
READ THE DRB SCREEN WHILE IN MOTION.
DO NOT HANG THE DRB FROM THE REAR
VIEW MIRROR OR OPERATE IT YOURSELF.
HAVE AN ASSISTANT AVAILABLE TO
OPERATE THE DRB.
4.3.2 VEHICLE DAMAGE CAUTIONS
Before disconnecting any control module, make
sure the ignition is ªoffº. Failure to do so could
damage the module.
When testing voltage or continuity at any control
module, use the terminal side (not the wire end) of
the connector. Do not probe a wire through the
insulation; this will damage it and eventually cause
it to fail because of corrosion.
Be careful when performing electrical tests so as
to prevent accidental shorting of terminals. Such
mistakes can damage fuses or components. Also, a
second code could be set, making diagnosis of the
original problem more difficult.
12
GENERAL INFORMATION
ProCarManuals.com
Page 31 of 364

TEST ACTION APPLICABILITY
4 Engine Running
With the DRB, read trouble codes.
Are there any Charging System trouble codes?All
Ye s®Refer to Symptom List for problems related to Charging.
Perform Powertrain Verification Test VER-3A.
No®Go To 5
5 Ignition Off
Using a Voltmeter, measure the voltage between the Generator Case and Battery (-)
side.
Caution: Ensure all Wires are clear of the engine's moving parts.
Start the engine.
Is the voltage above 0.4 volt?All
Ye s®Repair Generator Ground high resistance Generator Case to
Battery (-) side.
Perform Powertrain Verification Test VER-3A.
No®Go To 6
6 Ignition Off
Connect Voltmeter between the Generator (12V) B+ Terminal and the Battery (+)
side.
Caution: Ensure all Wires are clear of the engine's moving parts.
Start the engine.
Is the voltage above 0.4 volt?All
Ye s®Repair the B(+) Circuit for high resistance between the Generator
and Battery.
Perform Powertrain Verification Test VER-3A.
No®Go To 7
7 Turn engine off, ignition key on.
With the DRB, read Battery voltage and record.
Using a Voltmeter, measure Battery voltage B(+) to B(-) Terminal.
Record second voltage reading.
Compare the two voltage readings.
Is the voltage difference less than one volt?All
Ye s®Test Complete.
Perform Powertrain Verification Test VER-3A.
No®Go To 8
8 Ignition Off
Disconnect the PCM Connector.
Note: Check connectors - Clean/repair as necessary.
Using a voltmeter, measure the fused B(+) at PCM.
Is the voltage within one volt of the DRB recorded reading?All
Ye s®Repair the B(+) Circuit for high resistance between the PCM and
the Battery.
Perform Powertrain Verification Test VER-3A.
No®Go To 9
25
CHARGING
* CHECKING CHARGING SYSTEM OPERATION WITH NO DTC'S Ð
Continued
ProCarManuals.com
Page 139 of 364

Symptom:
P-0403 EGR SOLENOID CIRCUIT
When Monitored and Set Condition:
P-0403 EGR SOLENOID CIRCUIT
When Monitored: With the ignition key on and engine running and battery voltage > 10
volts.
Set Condition: The EGR solenoid control circuit is not in the expected state when
requested to operate by the PCM.
POSSIBLE CAUSES
EGR SOLENOID DEFECTIVE
FUSED IGNITION SWITCH OUTPUT CIRCUIT OPEN
EGR SOLENOID CIRCUIT WIRING HARNESS INTER DEFECT
EGR SOLENOID CIRCUIT WIRING HARNESS OBSERVABLE DEF
EGR SOLENOID CONTROL CIRCUIT OPEN
EGR SOLENOID CONTROL CIRCUIT SHORT TO GROUND
PCM DEFECTIVE (EGR SOL CKT)
TEST ACTION APPLICABILITY
1 Ignition On, Engine Not Running
With the DRB, read the codes.
Is the Global Good Trip displayed and equal to 0?All
Ye s®Go To 2
No®Go To 7
2 Ignition Off
Disconnect the EGR Solenoid Connector.
Note: Check connectors - Clean/repair as necessary.
Turn ignition on with engine not running.
Using the DRB, actuate the EGR Solenoid.
Using a Voltmeter, probe the Fused Ignition Switch Output Circuit at the EGR
Solenoid Connector.
Is the voltage above 10.0 volts?All
Ye s®Go To 3
No®Repair the open Fused Ignition Switch Output Circuit.
Perform Powertrain Verification Test VER-2A.
133
DRIVEABILITY
ProCarManuals.com
Page 149 of 364

Symptom:
P-0443 EVAP PURGE SOLENOID CIRCUIT
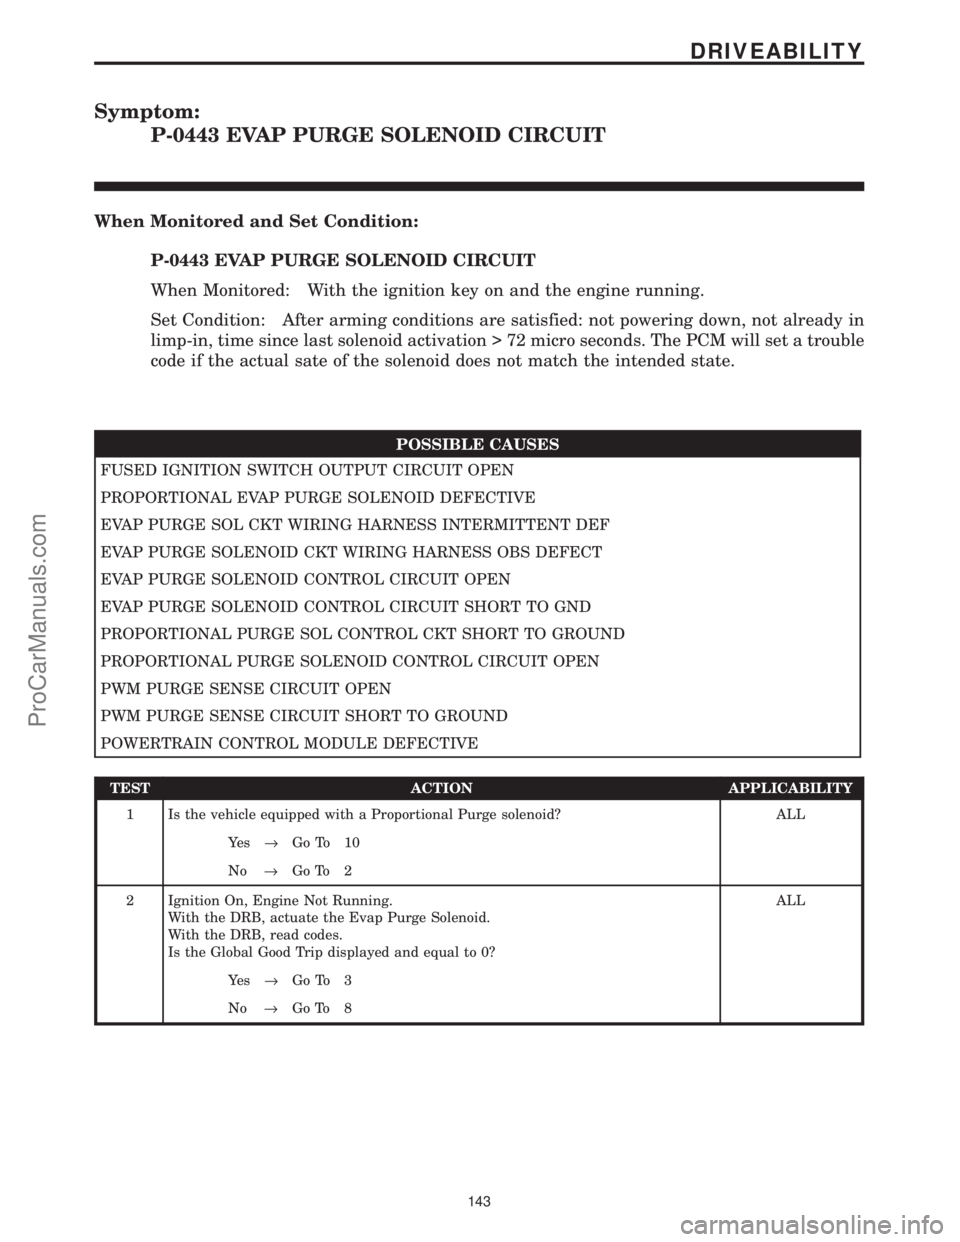
When Monitored and Set Condition:
P-0443 EVAP PURGE SOLENOID CIRCUIT
When Monitored: With the ignition key on and the engine running.
Set Condition: After arming conditions are satisfied: not powering down, not already in
limp-in, time since last solenoid activation > 72 micro seconds. The PCM will set a trouble
code if the actual sate of the solenoid does not match the intended state.
POSSIBLE CAUSES
FUSED IGNITION SWITCH OUTPUT CIRCUIT OPEN
PROPORTIONAL EVAP PURGE SOLENOID DEFECTIVE
EVAP PURGE SOL CKT WIRING HARNESS INTERMITTENT DEF
EVAP PURGE SOLENOID CKT WIRING HARNESS OBS DEFECT
EVAP PURGE SOLENOID CONTROL CIRCUIT OPEN
EVAP PURGE SOLENOID CONTROL CIRCUIT SHORT TO GND
PROPORTIONAL PURGE SOL CONTROL CKT SHORT TO GROUND
PROPORTIONAL PURGE SOLENOID CONTROL CIRCUIT OPEN
PWM PURGE SENSE CIRCUIT OPEN
PWM PURGE SENSE CIRCUIT SHORT TO GROUND
POWERTRAIN CONTROL MODULE DEFECTIVE
TEST ACTION APPLICABILITY
1 Is the vehicle equipped with a Proportional Purge solenoid? ALL
Ye s®Go To 10
No®Go To 2
2 Ignition On, Engine Not Running.
With the DRB, actuate the Evap Purge Solenoid.
With the DRB, read codes.
Is the Global Good Trip displayed and equal to 0?ALL
Ye s®Go To 3
No®Go To 8
143
DRIVEABILITY
ProCarManuals.com
Page 150 of 364

TEST ACTION APPLICABILITY
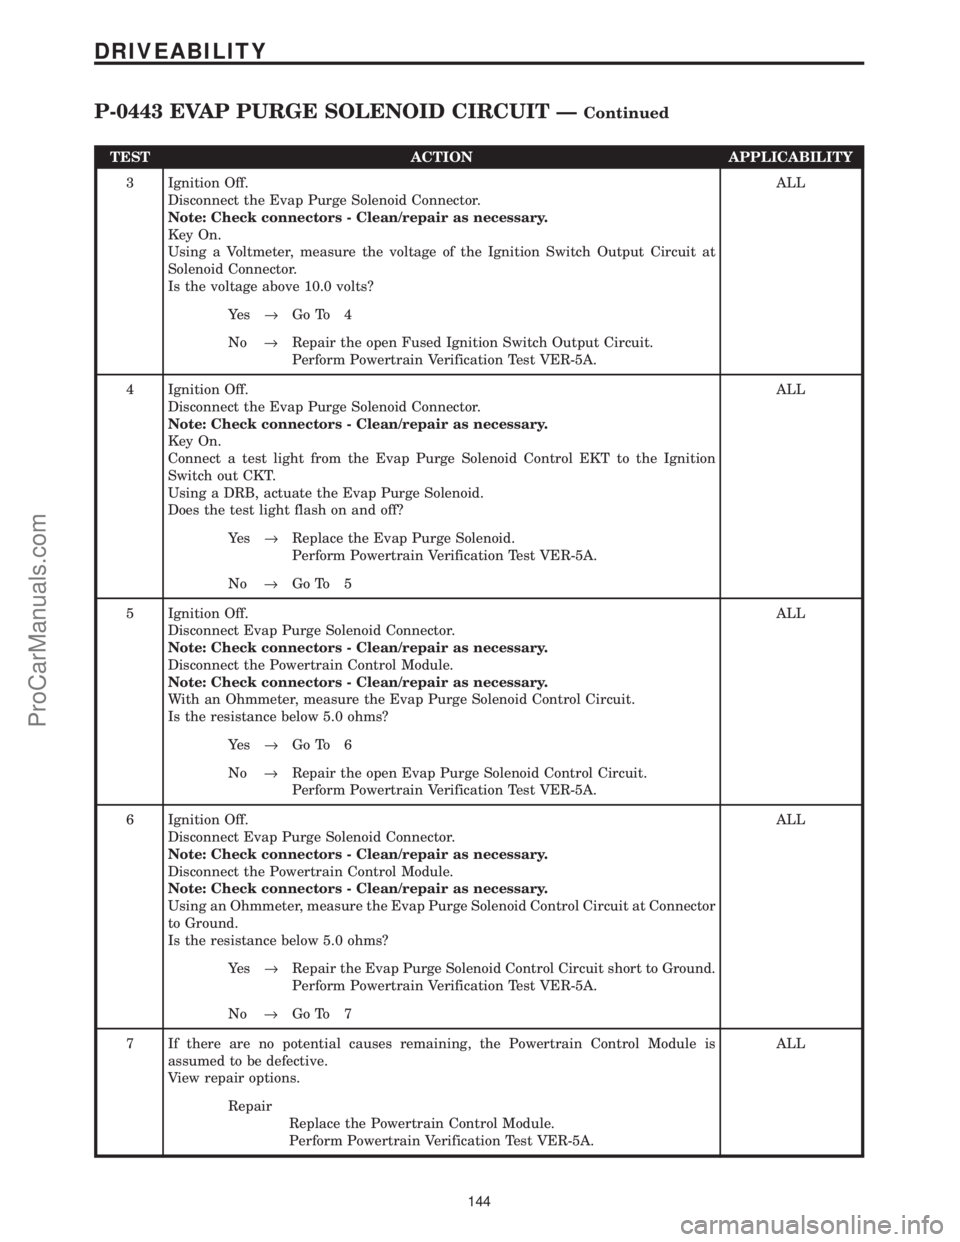
3 Ignition Off.
Disconnect the Evap Purge Solenoid Connector.
Note: Check connectors - Clean/repair as necessary.
Key On.
Using a Voltmeter, measure the voltage of the Ignition Switch Output Circuit at
Solenoid Connector.
Is the voltage above 10.0 volts?ALL
Ye s®Go To 4
No®Repair the open Fused Ignition Switch Output Circuit.
Perform Powertrain Verification Test VER-5A.
4 Ignition Off.
Disconnect the Evap Purge Solenoid Connector.
Note: Check connectors - Clean/repair as necessary.
Key On.
Connect a test light from the Evap Purge Solenoid Control EKT to the Ignition
Switch out CKT.
Using a DRB, actuate the Evap Purge Solenoid.
Does the test light flash on and off?ALL
Ye s®Replace the Evap Purge Solenoid.
Perform Powertrain Verification Test VER-5A.
No®Go To 5
5 Ignition Off.
Disconnect Evap Purge Solenoid Connector.
Note: Check connectors - Clean/repair as necessary.
Disconnect the Powertrain Control Module.
Note: Check connectors - Clean/repair as necessary.
With an Ohmmeter, measure the Evap Purge Solenoid Control Circuit.
Is the resistance below 5.0 ohms?ALL
Ye s®Go To 6
No®Repair the open Evap Purge Solenoid Control Circuit.
Perform Powertrain Verification Test VER-5A.
6 Ignition Off.
Disconnect Evap Purge Solenoid Connector.
Note: Check connectors - Clean/repair as necessary.
Disconnect the Powertrain Control Module.
Note: Check connectors - Clean/repair as necessary.
Using an Ohmmeter, measure the Evap Purge Solenoid Control Circuit at Connector
to Ground.
Is the resistance below 5.0 ohms?ALL
Ye s®Repair the Evap Purge Solenoid Control Circuit short to Ground.
Perform Powertrain Verification Test VER-5A.
No®Go To 7
7 If there are no potential causes remaining, the Powertrain Control Module is
assumed to be defective.
View repair options.ALL
Repair
Replace the Powertrain Control Module.
Perform Powertrain Verification Test VER-5A.
144
DRIVEABILITY
P-0443 EVAP PURGE SOLENOID CIRCUIT ÐContinued
ProCarManuals.com
Page 176 of 364

Symptom:
P-0645 A/C CLUTCH RELAY CIRCUIT
When Monitored and Set Condition:
P-0645 A/C CLUTCH RELAY CIRCUIT
When Monitored: With the ignition key on and battery voltage greater than 10 volts.
Set Condition: An open or shorted condition is detected in the A/C clutch relay control
circuit.
POSSIBLE CAUSES
FUSED IGNITION SWITCH OUTPUT CIRCUIT OPEN
AIR CONDITIONING CLUTCH RELAY DEFECTIVE
A/C CLUTCH RELAY CIRCUIT WITHOUT INTER DEFECT
A/C CLUTCH RELAY CIRCUIT WITHOUT OBSER DEFECT
A/C CLUTCH RELAY CONTROL CIRCUIT SHORT TO GROUND
AIR CONDITIONING CLUTCH RELAY CONTROL CIRCUIT OPEN
PCM DEF (A/C CLUTCH RELAY)
TEST ACTION APPLICABILITY
1 Ignition On, Engine Not Running
Actuate the Air Conditioning Clutch Relay.
Is the Air Conditioning Clutch Relay clicking?All
Ye s®Go To 2
No®Go To 4
2 Ignition On, Engine Not Running
Actuate the Air Conditioning Clutch Relay.
Wiggle the Wiring Harness from the Relay to the PCM.
Did the wiggling interrupt the clicking?All
Ye s®Repair as necessary where wiggling caused the clicking to be
interrupted.
Perform Powertrain Verification Test VER-2A.
No®Go To 3
3 Ignition Off
Using the schematic as a guide, inspect the Wiring and Connectors.
Were any problems found?All
Ye s®Repair as necessary.
Perform Powertrain Verification Test VER-2A.
No®Test Complete.
170
DRIVEABILITY
ProCarManuals.com
Page 177 of 364

TEST ACTION APPLICABILITY
4 Ignition Off
Remove the Air Conditioning Clutch Relay.
Note: Check connectors - Clean/repair as necessary.
Using a Voltmeter, measure the Fused Ignition Switch Output Circuit.
Is the voltage above 10.0 volts?All
Ye s®Go To 5
No®Repair the open Fused Ignition Switch Output Circuit.
Perform Powertrain Verification Test VER-2A.
5 Ignition Off
Remove the Air Conditioning Clutch Relay.
Note: Check connectors - Clean/repair as necessary.
Using an ohmmeter, measure the resistance between terminals C (85) and A (86) of
the Air Conditioning Clutch Relay.
Is the resistance below between 50 to 90 ohms?All
Ye s®Go To 6
No®Replace the Air Conditioning Clutch Relay.
Perform Powertrain Verification Test VER-2A.
6 Ignition Off
Disconnect the PCM grey connector.
Note: Check connectors - Clean/repair as necessary.
Using an Ohmmeter, measure the A/C Clutch Control Circuit from the PCM
connector to ground.
Is the resistance below 5.0 ohms?All
Ye s®Repair the Air Conditioning Clutch Relay Control Circuit for a
short to ground.
Perform Powertrain Verification Test VER-2A.
No®Go To 7
7 Ignition Off
Disconnect the PCM grey connector.
Remove the Air Conditioning Clutch Relay.
Note: Check connectors - Clean/repair as necessary.
Using an ohmmeter, measure the resistance of the Air Conditioning Clutch Relay
Control Circuit from the relay to the PCM.
Is the resistance below 5.0 ohms?All
Ye s®Go To 8
No®Repair open Air Conditioning Clutch Relay Control Circuit.
Perform Powertrain Verification Test VER-2A.
8 Ignition Off
If there are no potential causes remaining, the PCM is assumed to be defective.
View repair options.All
Repair
Replace the PCM.
Perform Powertrain Verification Test VER-2A.
171
DRIVEABILITY
P-0645 A/C CLUTCH RELAY CIRCUIT ÐContinued
ProCarManuals.com
Page 184 of 364

Symptom:
P1282 FUEL PUMP RELAY CONTROL CIRCUIT
When Monitored and Set Condition:
P±1282 FUEL PUMP RELAY CONTROL CIRCUIT
When Monitored: With the ignition key on and battery voltage greater than 10 volts.
Set Condition: An open or shorted condition is detected in the fuel pump relay control
circuit.
POSSIBLE CAUSES
FUSED IGNITION SWITCH OUTPUT CIRCUIT OPEN
FUEL PUMP RELAY DEFECTIVE
FUEL PUMP RELAY CONTROL CIRCUIT OPEN
FUEL PUMP RELAY CONTROL CIRCUIT SHORT TO GROUND
FUEL PUMP RELAY WIRING HARNESS INTER DEF
FUEL PUMP RELAY WIRING HARNESS OBS DEF
PCM DEFECTIVE
TEST ACTION APPLICABILITY
1 Ignition On, Engine Not Running
With the DRB, actuate the Fuel Pump Relay.
Is the Fuel Pump Relay clicking?All
Ye s®Go To 2
No®Go To 4
2 Ignition On, Engine Not Running
With the DRB actuate the Fuel Pump Relay.
Wiggle the Wiring Harness from the Relay to the PCM.
Did the Fuel Pump Relay clicking stop or become erratic while wiggling the wires?All
Ye s®Repair Circuit as necessary where wiggling caused the clicking to
become erratic.
Perform Powertrain Verification Test VER-2A.
No®Go To 3
3 Ignition Off
Using the schematic as a guide, inspect the Wiring and Connectors.
Were any problems found?All
Ye s®Repair as necessary.
Perform Powertrain Verification Test VER-2A.
No®Test Complete.
178
DRIVEABILITY
ProCarManuals.com
Page 185 of 364

TEST ACTION APPLICABILITY
4 Ignition Off
Disconnect the Fuel Pump Relay.
Note: Check connectors - Clean/repair as necessary.
Ignition On, Engine Not Running
Using a Voltmeter, measure the Fused Ignition Switch Output Circuit.
Is the voltage above 10.0 volts?All
Ye s®Go To 5
No®Repair the open Fused Ignition Switch Output Circuit.
Perform Powertrain Verification Test VER-2A.
5 Ignition Off
Disconnect the Fuel Pump Relay.
Note: Check connectors - Clean/repair as necessary.
Using an Ohmmeter, measure across Terminals 85 and 86 of the Fuel Pump Relay for
resistance.
Is the resistance between 50 and 90 ohms?All
Ye s®Go To 6
No®Replace Fuel Pump Relay.
Perform Powertrain Verification Test VER-2A.
6 Ignition Off
Disconnect the Powertrain Control Module Connector.
Note: Check connectors - Clean/repair as necessary.
Disconnect the Fuel Pump Relay.
Note: Check connectors - Clean/repair as necessary
Using an Ohmmeter, measure the Fuel Pump Relay Control Circuit for resistance.
Is the resistance below 5.0 ohms?All
Ye s®Go To 7
No®Repair the open Fuel Pump Relay Control Circuit.
Perform Powertrain Verification Test VER-2A.
7 Ignition Off
Disconnect the PCM Connector.
Note: Check connectors - Clean/repair as necessary.
Disconnect the Fuel Pump Relay.
Note: Check connectors - Clean/repair as necessary.
Using an Ohmmeter, measure the Fuel Pump Relay Control Circuit to ground.
Is the resistance below 5.0 ohms?All
Ye s®Repair the Fuel Pump Relay Control Circuit for a short to ground.
Perform Powertrain Verification Test VER-2A.
No®Go To 8
8 Ignition off.
If there are no potential causes remaining, the PCM is assumed to be defective.
View repair options.All
Repair
Replace the PCM.
Perform Powertrain Verification Test VER-2A.
179
DRIVEABILITY
P1282 FUEL PUMP RELAY CONTROL CIRCUIT ÐContinued
ProCarManuals.com