display CHRYSLER VOYAGER 2001 Service Manual
[x] Cancel search | Manufacturer: CHRYSLER, Model Year: 2001, Model line: VOYAGER, Model: CHRYSLER VOYAGER 2001Pages: 4284, PDF Size: 83.53 MB
Page 949 of 4284
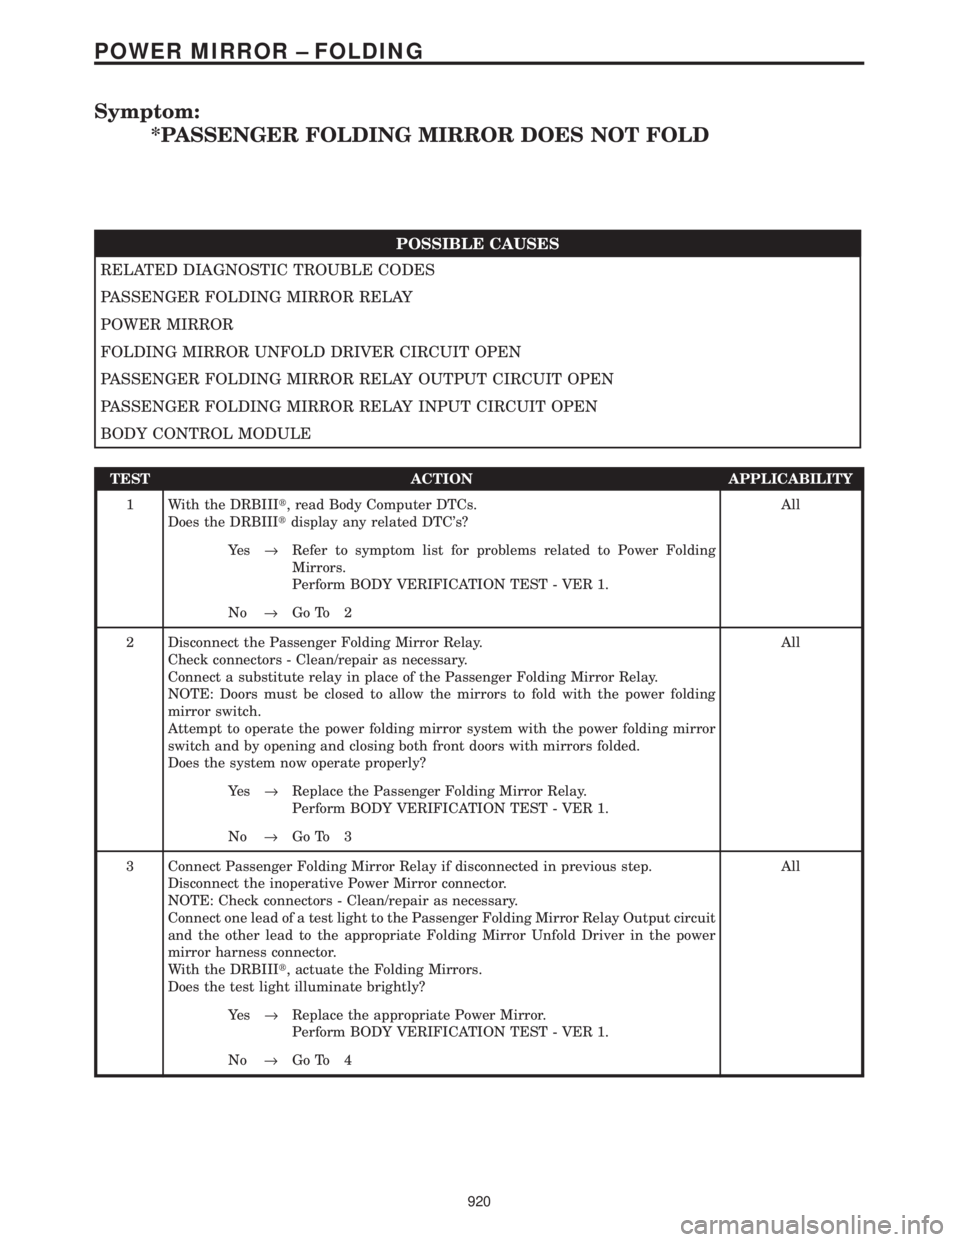
Symptom:
*PASSENGER FOLDING MIRROR DOES NOT FOLD
POSSIBLE CAUSES
RELATED DIAGNOSTIC TROUBLE CODES
PASSENGER FOLDING MIRROR RELAY
POWER MIRROR
FOLDING MIRROR UNFOLD DRIVER CIRCUIT OPEN
PASSENGER FOLDING MIRROR RELAY OUTPUT CIRCUIT OPEN
PASSENGER FOLDING MIRROR RELAY INPUT CIRCUIT OPEN
BODY CONTROL MODULE
TEST ACTION APPLICABILITY
1 With the DRBIIIt, read Body Computer DTCs.
Does the DRBIIItdisplay any related DTC's?All
Ye s®Refer to symptom list for problems related to Power Folding
Mirrors.
Perform BODY VERIFICATION TEST - VER 1.
No®Go To 2
2 Disconnect the Passenger Folding Mirror Relay.
Check connectors - Clean/repair as necessary.
Connect a substitute relay in place of the Passenger Folding Mirror Relay.
NOTE: Doors must be closed to allow the mirrors to fold with the power folding
mirror switch.
Attempt to operate the power folding mirror system with the power folding mirror
switch and by opening and closing both front doors with mirrors folded.
Does the system now operate properly?All
Ye s®Replace the Passenger Folding Mirror Relay.
Perform BODY VERIFICATION TEST - VER 1.
No®Go To 3
3 Connect Passenger Folding Mirror Relay if disconnected in previous step.
Disconnect the inoperative Power Mirror connector.
NOTE: Check connectors - Clean/repair as necessary.
Connect one lead of a test light to the Passenger Folding Mirror Relay Output circuit
and the other lead to the appropriate Folding Mirror Unfold Driver in the power
mirror harness connector.
With the DRBIIIt, actuate the Folding Mirrors.
Does the test light illuminate brightly?All
Ye s®Replace the appropriate Power Mirror.
Perform BODY VERIFICATION TEST - VER 1.
No®Go To 4
920
POWER MIRROR ± FOLDING
Page 952 of 4284
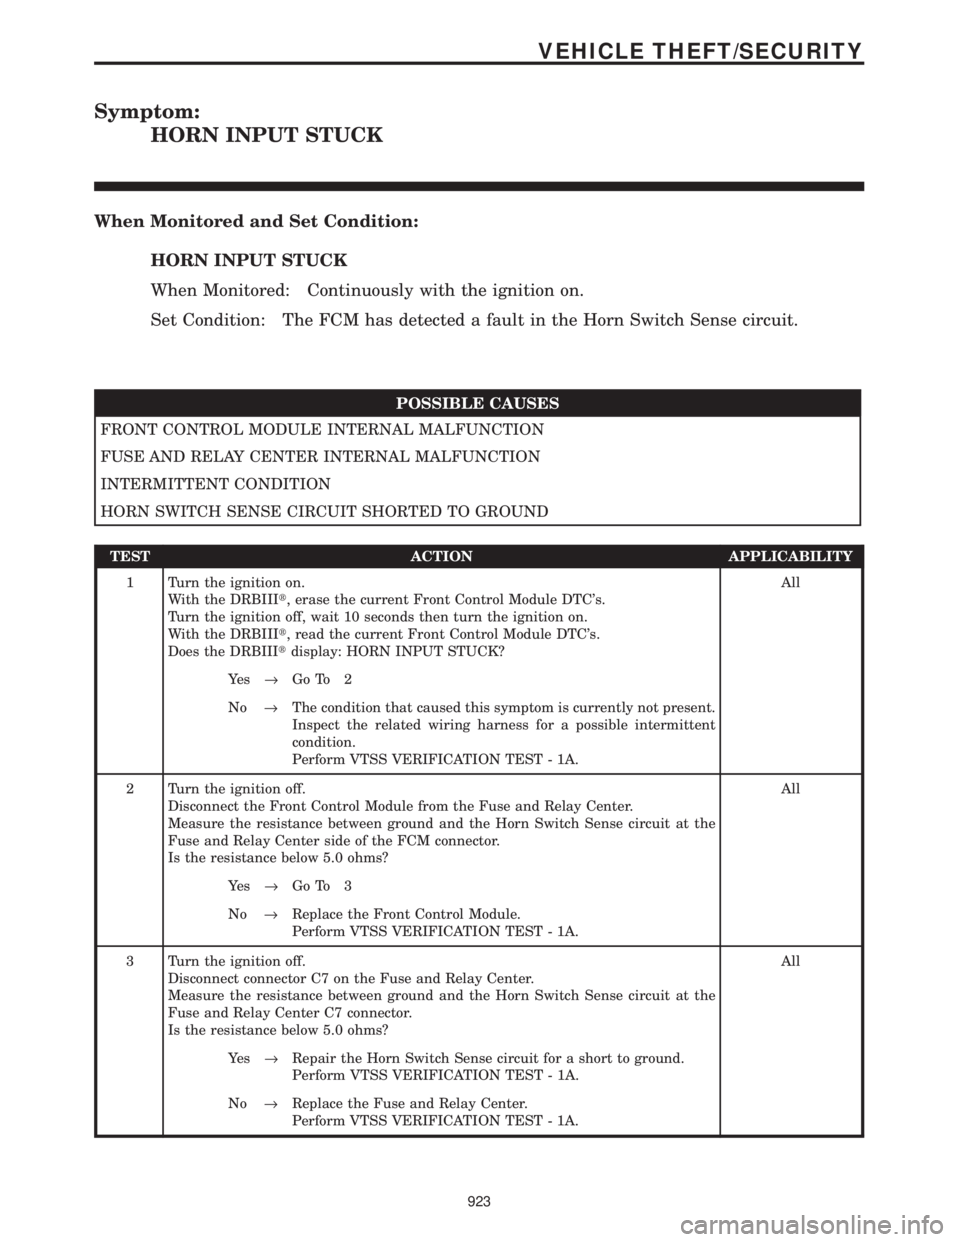
Symptom:
HORN INPUT STUCK
When Monitored and Set Condition:
HORN INPUT STUCK
When Monitored: Continuously with the ignition on.
Set Condition: The FCM has detected a fault in the Horn Switch Sense circuit.
POSSIBLE CAUSES
FRONT CONTROL MODULE INTERNAL MALFUNCTION
FUSE AND RELAY CENTER INTERNAL MALFUNCTION
INTERMITTENT CONDITION
HORN SWITCH SENSE CIRCUIT SHORTED TO GROUND
TEST ACTION APPLICABILITY
1 Turn the ignition on.
With the DRBIIIt, erase the current Front Control Module DTC's.
Turn the ignition off, wait 10 seconds then turn the ignition on.
With the DRBIIIt, read the current Front Control Module DTC's.
Does the DRBIIItdisplay: HORN INPUT STUCK?All
Ye s®Go To 2
No®The condition that caused this symptom is currently not present.
Inspect the related wiring harness for a possible intermittent
condition.
Perform VTSS VERIFICATION TEST - 1A.
2 Turn the ignition off.
Disconnect the Front Control Module from the Fuse and Relay Center.
Measure the resistance between ground and the Horn Switch Sense circuit at the
Fuse and Relay Center side of the FCM connector.
Is the resistance below 5.0 ohms?All
Ye s®Go To 3
No®Replace the Front Control Module.
Perform VTSS VERIFICATION TEST - 1A.
3 Turn the ignition off.
Disconnect connector C7 on the Fuse and Relay Center.
Measure the resistance between ground and the Horn Switch Sense circuit at the
Fuse and Relay Center C7 connector.
Is the resistance below 5.0 ohms?All
Ye s®Repair the Horn Switch Sense circuit for a short to ground.
Perform VTSS VERIFICATION TEST - 1A.
No®Replace the Fuse and Relay Center.
Perform VTSS VERIFICATION TEST - 1A.
923
VEHICLE THEFT/SECURITY
Page 953 of 4284
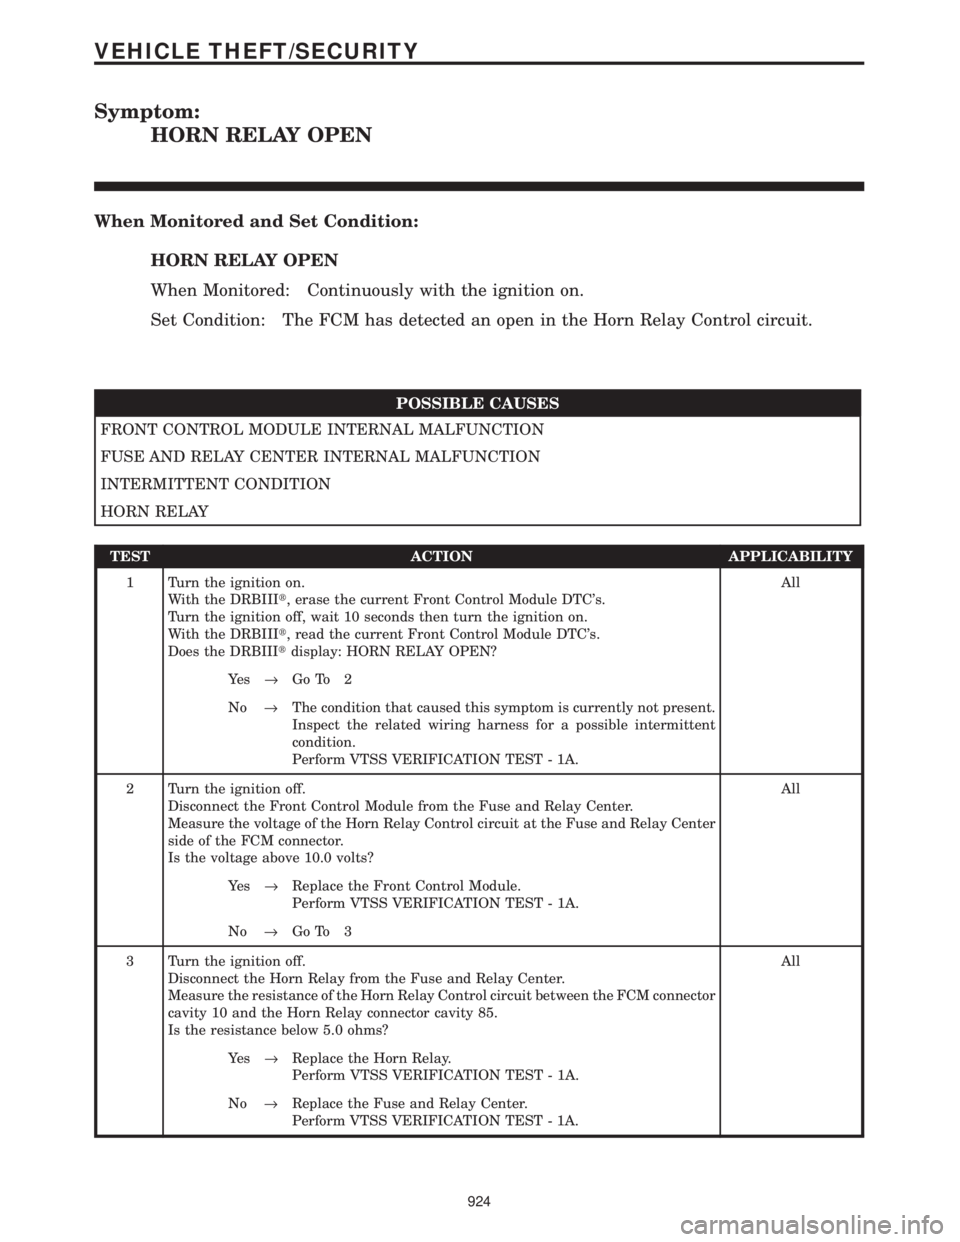
Symptom:
HORN RELAY OPEN
When Monitored and Set Condition:
HORN RELAY OPEN
When Monitored: Continuously with the ignition on.
Set Condition: The FCM has detected an open in the Horn Relay Control circuit.
POSSIBLE CAUSES
FRONT CONTROL MODULE INTERNAL MALFUNCTION
FUSE AND RELAY CENTER INTERNAL MALFUNCTION
INTERMITTENT CONDITION
HORN RELAY
TEST ACTION APPLICABILITY
1 Turn the ignition on.
With the DRBIIIt, erase the current Front Control Module DTC's.
Turn the ignition off, wait 10 seconds then turn the ignition on.
With the DRBIIIt, read the current Front Control Module DTC's.
Does the DRBIIItdisplay: HORN RELAY OPEN?All
Ye s®Go To 2
No®The condition that caused this symptom is currently not present.
Inspect the related wiring harness for a possible intermittent
condition.
Perform VTSS VERIFICATION TEST - 1A.
2 Turn the ignition off.
Disconnect the Front Control Module from the Fuse and Relay Center.
Measure the voltage of the Horn Relay Control circuit at the Fuse and Relay Center
side of the FCM connector.
Is the voltage above 10.0 volts?All
Ye s®Replace the Front Control Module.
Perform VTSS VERIFICATION TEST - 1A.
No®Go To 3
3 Turn the ignition off.
Disconnect the Horn Relay from the Fuse and Relay Center.
Measure the resistance of the Horn Relay Control circuit between the FCM connector
cavity 10 and the Horn Relay connector cavity 85.
Is the resistance below 5.0 ohms?All
Ye s®Replace the Horn Relay.
Perform VTSS VERIFICATION TEST - 1A.
No®Replace the Fuse and Relay Center.
Perform VTSS VERIFICATION TEST - 1A.
924
VEHICLE THEFT/SECURITY
Page 954 of 4284
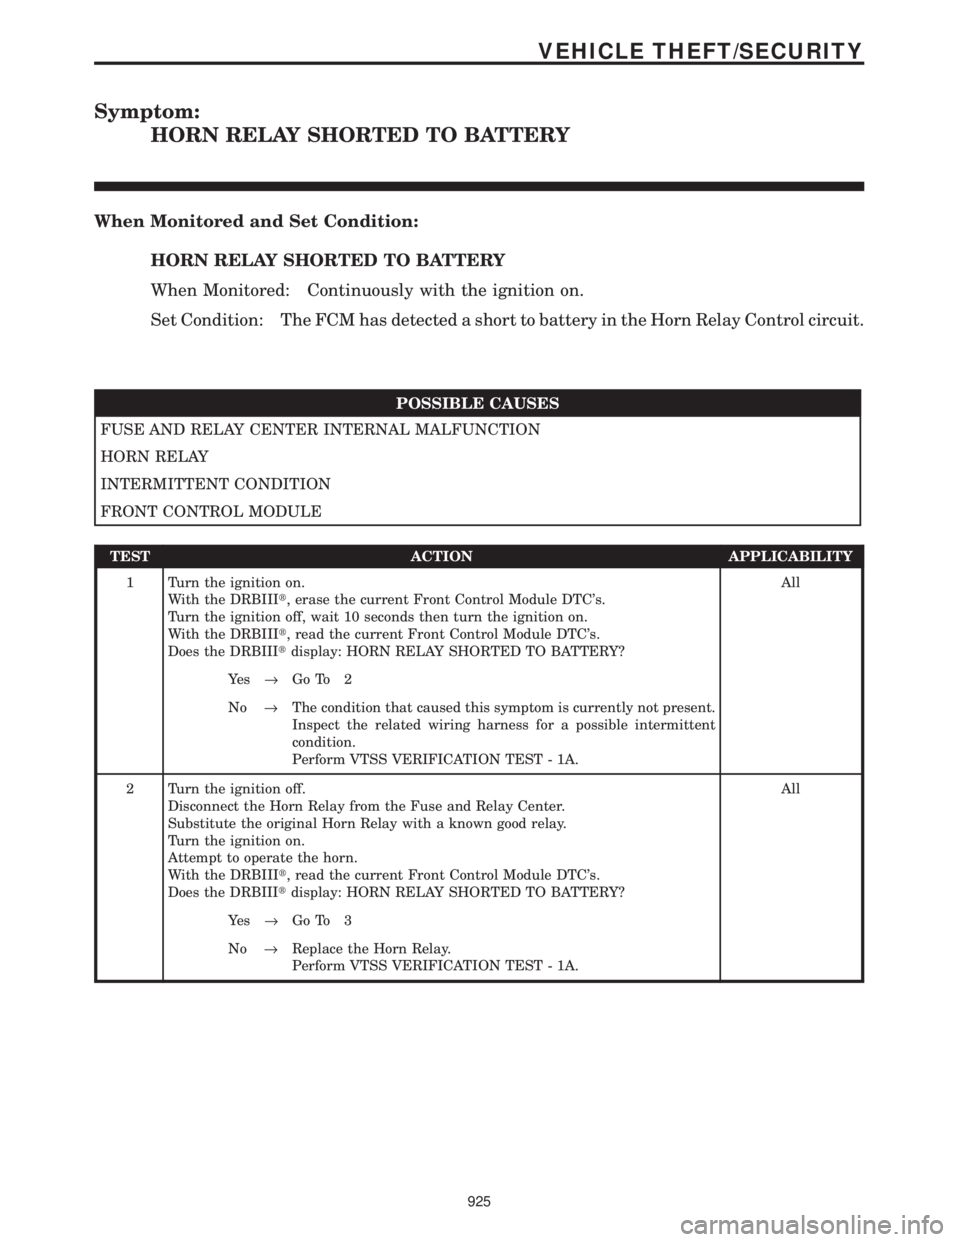
Symptom:
HORN RELAY SHORTED TO BATTERY
When Monitored and Set Condition:
HORN RELAY SHORTED TO BATTERY
When Monitored: Continuously with the ignition on.
Set Condition: The FCM has detected a short to battery in the Horn Relay Control circuit.
POSSIBLE CAUSES
FUSE AND RELAY CENTER INTERNAL MALFUNCTION
HORN RELAY
INTERMITTENT CONDITION
FRONT CONTROL MODULE
TEST ACTION APPLICABILITY
1 Turn the ignition on.
With the DRBIIIt, erase the current Front Control Module DTC's.
Turn the ignition off, wait 10 seconds then turn the ignition on.
With the DRBIIIt, read the current Front Control Module DTC's.
Does the DRBIIItdisplay: HORN RELAY SHORTED TO BATTERY?All
Ye s®Go To 2
No®The condition that caused this symptom is currently not present.
Inspect the related wiring harness for a possible intermittent
condition.
Perform VTSS VERIFICATION TEST - 1A.
2 Turn the ignition off.
Disconnect the Horn Relay from the Fuse and Relay Center.
Substitute the original Horn Relay with a known good relay.
Turn the ignition on.
Attempt to operate the horn.
With the DRBIIIt, read the current Front Control Module DTC's.
Does the DRBIIItdisplay: HORN RELAY SHORTED TO BATTERY?All
Ye s®Go To 3
No®Replace the Horn Relay.
Perform VTSS VERIFICATION TEST - 1A.
925
VEHICLE THEFT/SECURITY
Page 956 of 4284
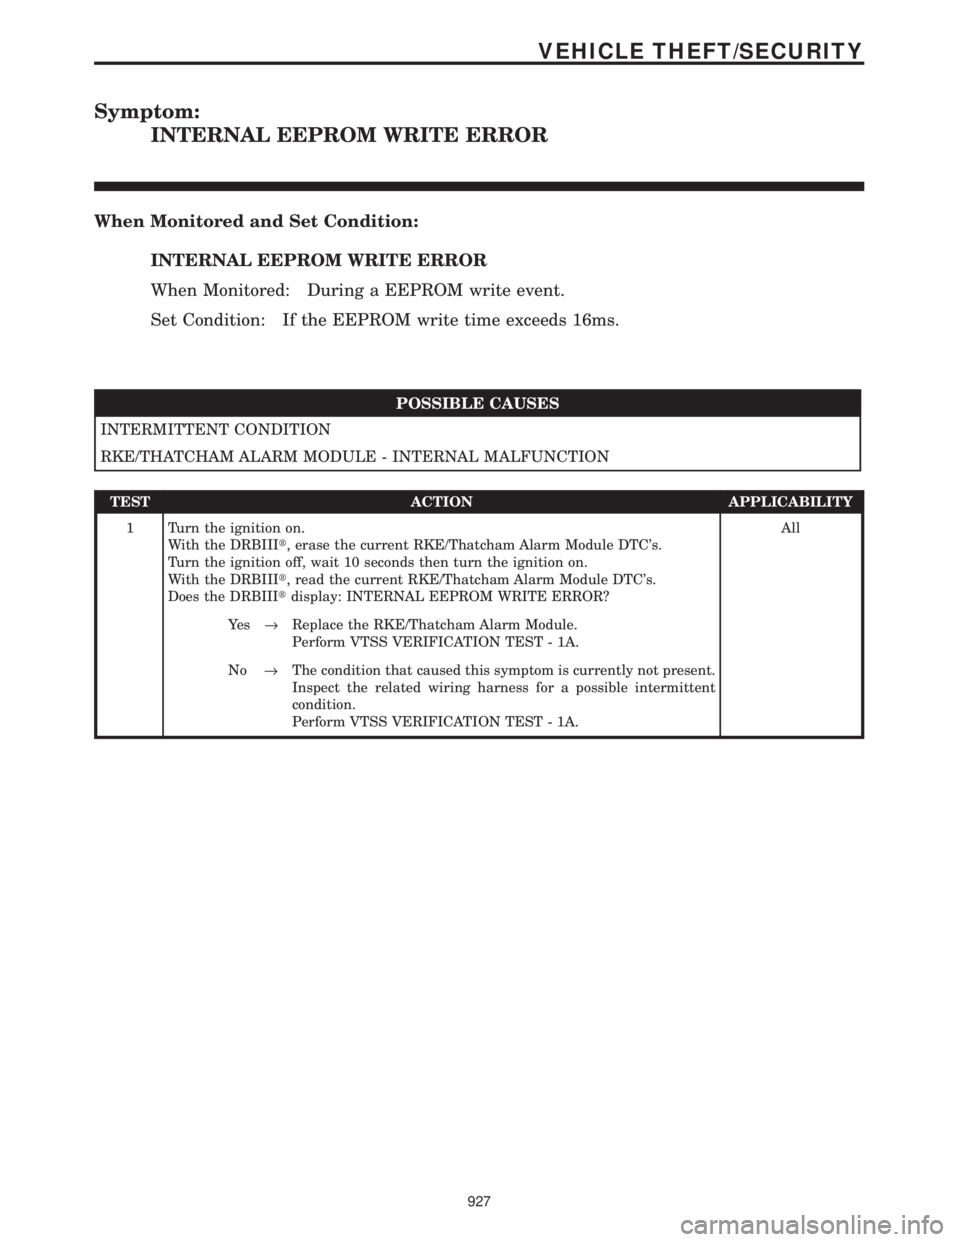
Symptom:
INTERNAL EEPROM WRITE ERROR
When Monitored and Set Condition:
INTERNAL EEPROM WRITE ERROR
When Monitored: During a EEPROM write event.
Set Condition: If the EEPROM write time exceeds 16ms.
POSSIBLE CAUSES
INTERMITTENT CONDITION
RKE/THATCHAM ALARM MODULE - INTERNAL MALFUNCTION
TEST ACTION APPLICABILITY
1 Turn the ignition on.
With the DRBIIIt, erase the current RKE/Thatcham Alarm Module DTC's.
Turn the ignition off, wait 10 seconds then turn the ignition on.
With the DRBIIIt, read the current RKE/Thatcham Alarm Module DTC's.
Does the DRBIIItdisplay: INTERNAL EEPROM WRITE ERROR?All
Ye s®Replace the RKE/Thatcham Alarm Module.
Perform VTSS VERIFICATION TEST - 1A.
No®The condition that caused this symptom is currently not present.
Inspect the related wiring harness for a possible intermittent
condition.
Perform VTSS VERIFICATION TEST - 1A.
927
VEHICLE THEFT/SECURITY
Page 957 of 4284
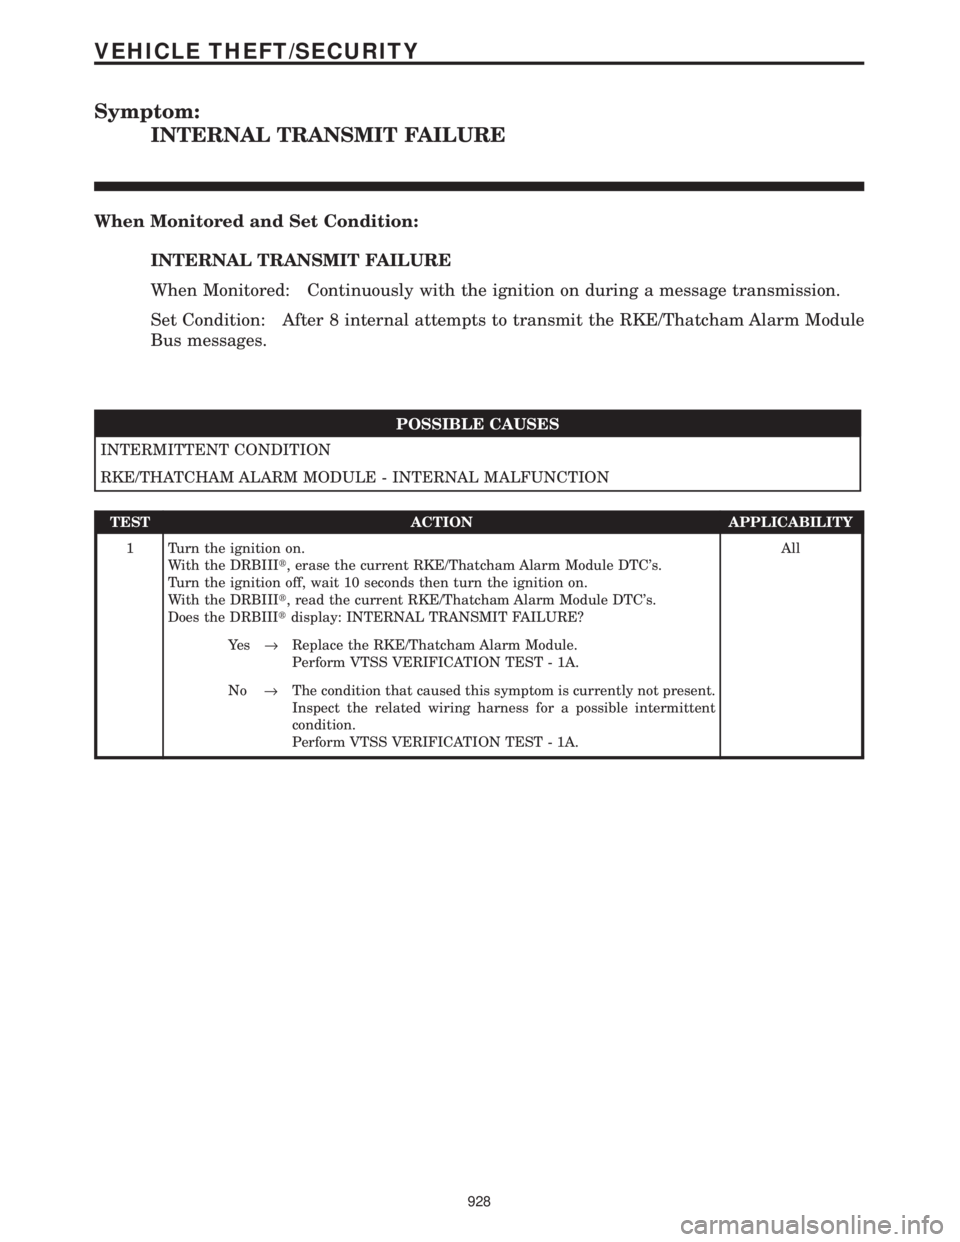
Symptom:
INTERNAL TRANSMIT FAILURE
When Monitored and Set Condition:
INTERNAL TRANSMIT FAILURE
When Monitored: Continuously with the ignition on during a message transmission.
Set Condition: After 8 internal attempts to transmit the RKE/Thatcham Alarm Module
Bus messages.
POSSIBLE CAUSES
INTERMITTENT CONDITION
RKE/THATCHAM ALARM MODULE - INTERNAL MALFUNCTION
TEST ACTION APPLICABILITY
1 Turn the ignition on.
With the DRBIIIt, erase the current RKE/Thatcham Alarm Module DTC's.
Turn the ignition off, wait 10 seconds then turn the ignition on.
With the DRBIIIt, read the current RKE/Thatcham Alarm Module DTC's.
Does the DRBIIItdisplay: INTERNAL TRANSMIT FAILURE?All
Ye s®Replace the RKE/Thatcham Alarm Module.
Perform VTSS VERIFICATION TEST - 1A.
No®The condition that caused this symptom is currently not present.
Inspect the related wiring harness for a possible intermittent
condition.
Perform VTSS VERIFICATION TEST - 1A.
928
VEHICLE THEFT/SECURITY
Page 959 of 4284
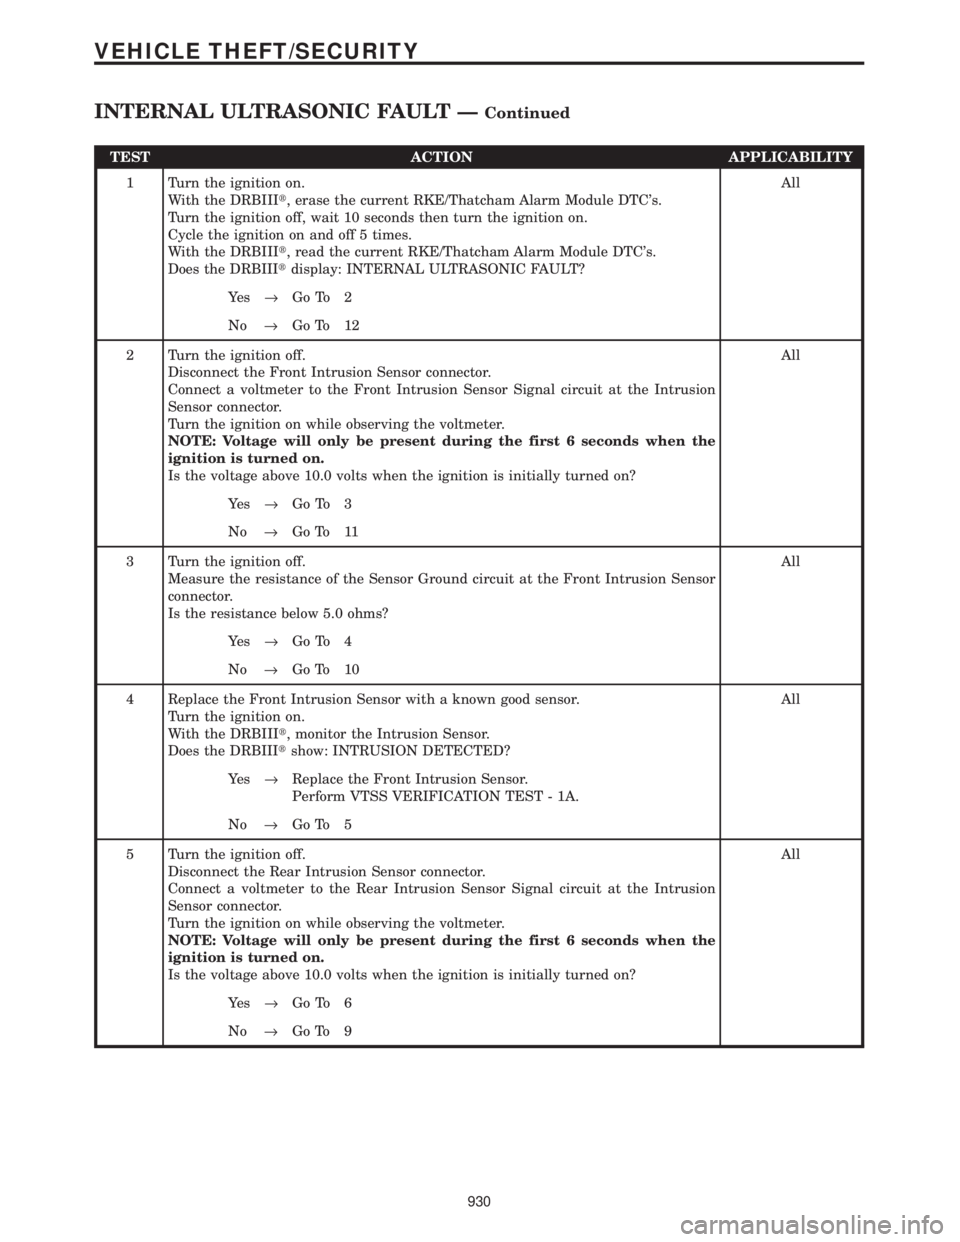
TEST ACTION APPLICABILITY
1 Turn the ignition on.
With the DRBIIIt, erase the current RKE/Thatcham Alarm Module DTC's.
Turn the ignition off, wait 10 seconds then turn the ignition on.
Cycle the ignition on and off 5 times.
With the DRBIIIt, read the current RKE/Thatcham Alarm Module DTC's.
Does the DRBIIItdisplay: INTERNAL ULTRASONIC FAULT?All
Ye s®Go To 2
No®Go To 12
2 Turn the ignition off.
Disconnect the Front Intrusion Sensor connector.
Connect a voltmeter to the Front Intrusion Sensor Signal circuit at the Intrusion
Sensor connector.
Turn the ignition on while observing the voltmeter.
NOTE: Voltage will only be present during the first 6 seconds when the
ignition is turned on.
Is the voltage above 10.0 volts when the ignition is initially turned on?All
Ye s®Go To 3
No®Go To 11
3 Turn the ignition off.
Measure the resistance of the Sensor Ground circuit at the Front Intrusion Sensor
connector.
Is the resistance below 5.0 ohms?All
Ye s®Go To 4
No®Go To 10
4 Replace the Front Intrusion Sensor with a known good sensor.
Turn the ignition on.
With the DRBIIIt, monitor the Intrusion Sensor.
Does the DRBIIItshow: INTRUSION DETECTED?All
Ye s®Replace the Front Intrusion Sensor.
Perform VTSS VERIFICATION TEST - 1A.
No®Go To 5
5 Turn the ignition off.
Disconnect the Rear Intrusion Sensor connector.
Connect a voltmeter to the Rear Intrusion Sensor Signal circuit at the Intrusion
Sensor connector.
Turn the ignition on while observing the voltmeter.
NOTE: Voltage will only be present during the first 6 seconds when the
ignition is turned on.
Is the voltage above 10.0 volts when the ignition is initially turned on?All
Ye s®Go To 6
No®Go To 9
930
VEHICLE THEFT/SECURITY
INTERNAL ULTRASONIC FAULT ÐContinued
Page 964 of 4284
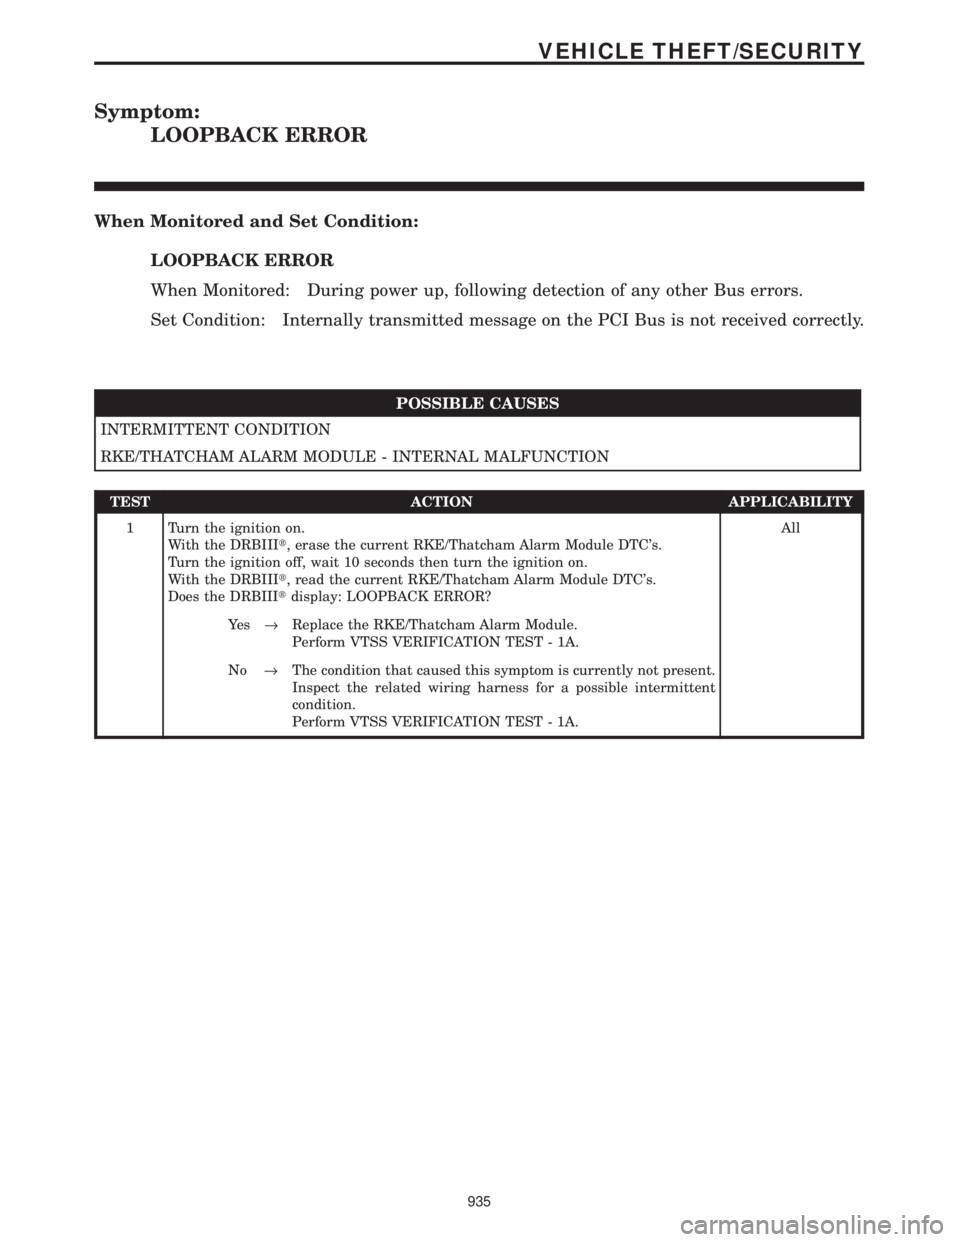
Symptom:
LOOPBACK ERROR
When Monitored and Set Condition:
LOOPBACK ERROR
When Monitored: During power up, following detection of any other Bus errors.
Set Condition: Internally transmitted message on the PCI Bus is not received correctly.
POSSIBLE CAUSES
INTERMITTENT CONDITION
RKE/THATCHAM ALARM MODULE - INTERNAL MALFUNCTION
TEST ACTION APPLICABILITY
1 Turn the ignition on.
With the DRBIIIt, erase the current RKE/Thatcham Alarm Module DTC's.
Turn the ignition off, wait 10 seconds then turn the ignition on.
With the DRBIIIt, read the current RKE/Thatcham Alarm Module DTC's.
Does the DRBIIItdisplay: LOOPBACK ERROR?All
Ye s®Replace the RKE/Thatcham Alarm Module.
Perform VTSS VERIFICATION TEST - 1A.
No®The condition that caused this symptom is currently not present.
Inspect the related wiring harness for a possible intermittent
condition.
Perform VTSS VERIFICATION TEST - 1A.
935
VEHICLE THEFT/SECURITY
Page 965 of 4284
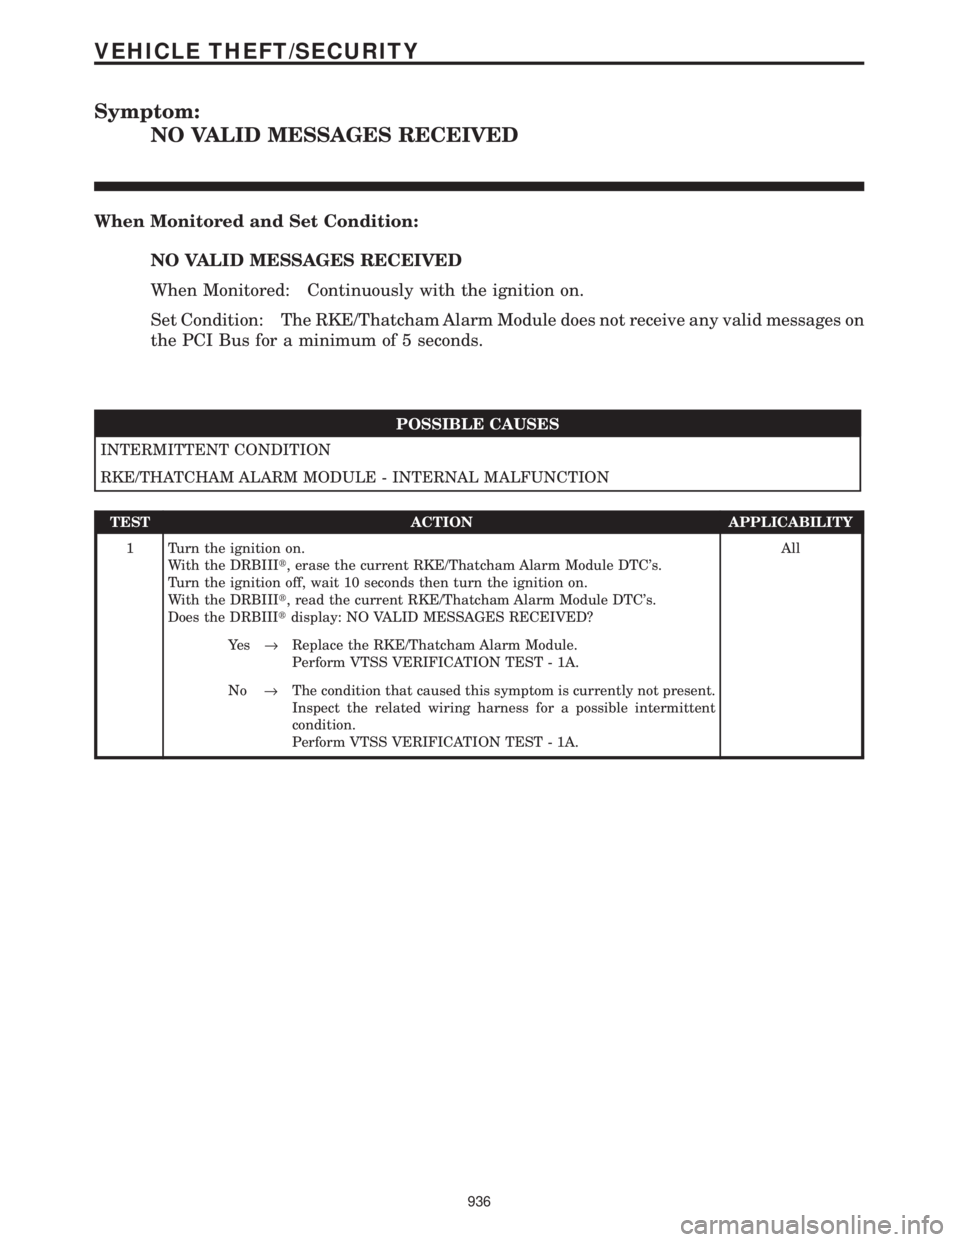
Symptom:
NO VALID MESSAGES RECEIVED
When Monitored and Set Condition:
NO VALID MESSAGES RECEIVED
When Monitored: Continuously with the ignition on.
Set Condition: The RKE/Thatcham Alarm Module does not receive any valid messages on
the PCI Bus for a minimum of 5 seconds.
POSSIBLE CAUSES
INTERMITTENT CONDITION
RKE/THATCHAM ALARM MODULE - INTERNAL MALFUNCTION
TEST ACTION APPLICABILITY
1 Turn the ignition on.
With the DRBIIIt, erase the current RKE/Thatcham Alarm Module DTC's.
Turn the ignition off, wait 10 seconds then turn the ignition on.
With the DRBIIIt, read the current RKE/Thatcham Alarm Module DTC's.
Does the DRBIIItdisplay: NO VALID MESSAGES RECEIVED?All
Ye s®Replace the RKE/Thatcham Alarm Module.
Perform VTSS VERIFICATION TEST - 1A.
No®The condition that caused this symptom is currently not present.
Inspect the related wiring harness for a possible intermittent
condition.
Perform VTSS VERIFICATION TEST - 1A.
936
VEHICLE THEFT/SECURITY
Page 969 of 4284
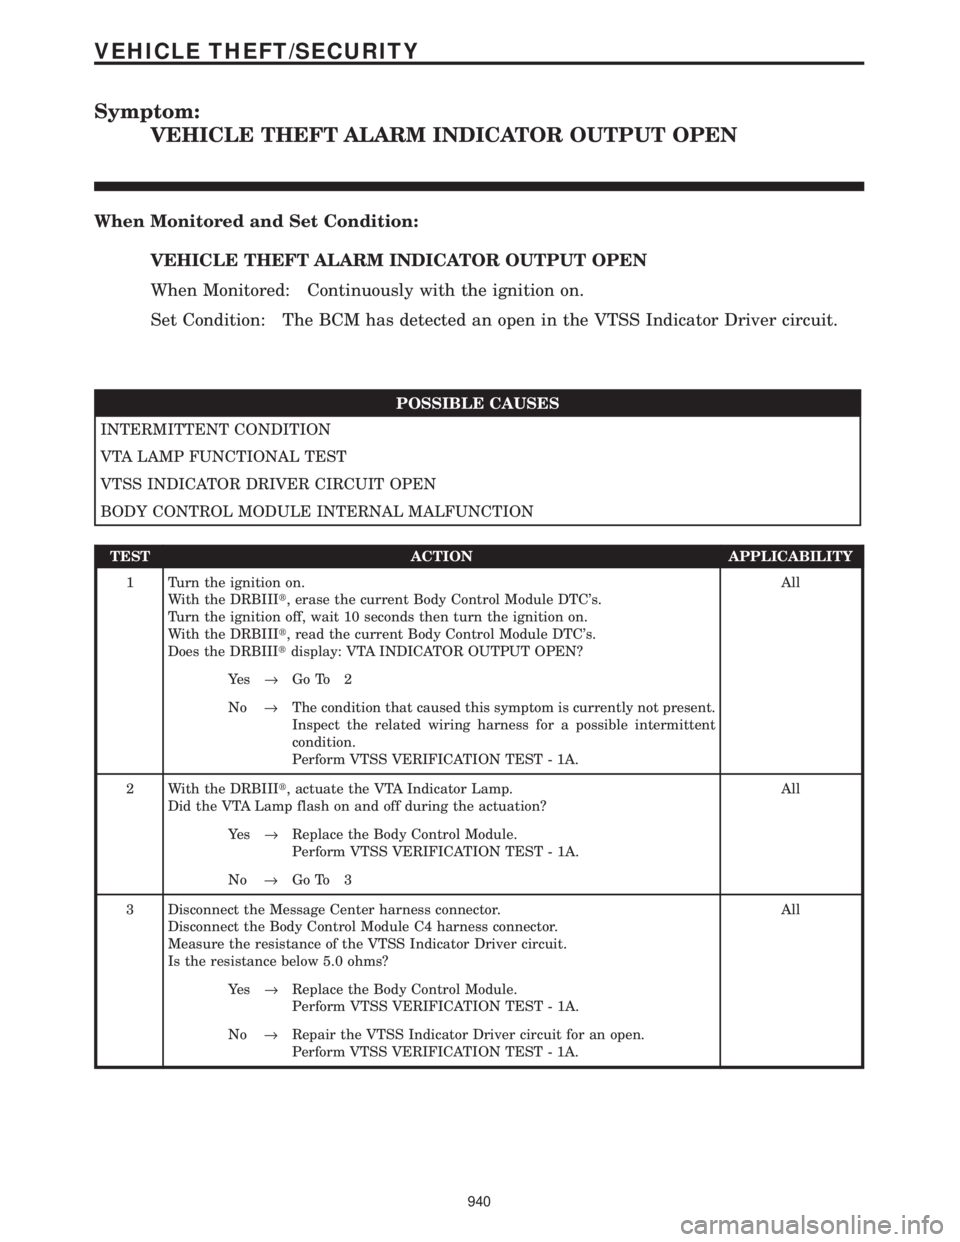
Symptom:
VEHICLE THEFT ALARM INDICATOR OUTPUT OPEN
When Monitored and Set Condition:
VEHICLE THEFT ALARM INDICATOR OUTPUT OPEN
When Monitored: Continuously with the ignition on.
Set Condition: The BCM has detected an open in the VTSS Indicator Driver circuit.
POSSIBLE CAUSES
INTERMITTENT CONDITION
VTA LAMP FUNCTIONAL TEST
VTSS INDICATOR DRIVER CIRCUIT OPEN
BODY CONTROL MODULE INTERNAL MALFUNCTION
TEST ACTION APPLICABILITY
1 Turn the ignition on.
With the DRBIIIt, erase the current Body Control Module DTC's.
Turn the ignition off, wait 10 seconds then turn the ignition on.
With the DRBIIIt, read the current Body Control Module DTC's.
Does the DRBIIItdisplay: VTA INDICATOR OUTPUT OPEN?All
Ye s®Go To 2
No®The condition that caused this symptom is currently not present.
Inspect the related wiring harness for a possible intermittent
condition.
Perform VTSS VERIFICATION TEST - 1A.
2 With the DRBIIIt, actuate the VTA Indicator Lamp.
Did the VTA Lamp flash on and off during the actuation?All
Ye s®Replace the Body Control Module.
Perform VTSS VERIFICATION TEST - 1A.
No®Go To 3
3 Disconnect the Message Center harness connector.
Disconnect the Body Control Module C4 harness connector.
Measure the resistance of the VTSS Indicator Driver circuit.
Is the resistance below 5.0 ohms?All
Ye s®Replace the Body Control Module.
Perform VTSS VERIFICATION TEST - 1A.
No®Repair the VTSS Indicator Driver circuit for an open.
Perform VTSS VERIFICATION TEST - 1A.
940
VEHICLE THEFT/SECURITY