reset CHRYSLER VOYAGER 2005 Owner's Manual
[x] Cancel search | Manufacturer: CHRYSLER, Model Year: 2005, Model line: VOYAGER, Model: CHRYSLER VOYAGER 2005Pages: 2339, PDF Size: 59.69 MB
Page 416 of 2339
(2) Connect the EVIC, CMTC or CT electronic
module and the reading/courtesy lamps electrical
connector.
(3) Using your fingertips, grasp the sides of the
overhead console and push straight up evenly to
engage the two snap clips at the rear of the unit.
CAUTION: DO NOT PRESS ON THE SUNGLASS
STORAGE BIN DOOR. DAMAGE TO THE DOOR MAY
RESULT.
(4) Install the overhead console retaining screw,
located in the front of console. Torque the screw to
1.2 N´m (10 in. lbs.).
(5) Connect the remote negative battery cable.
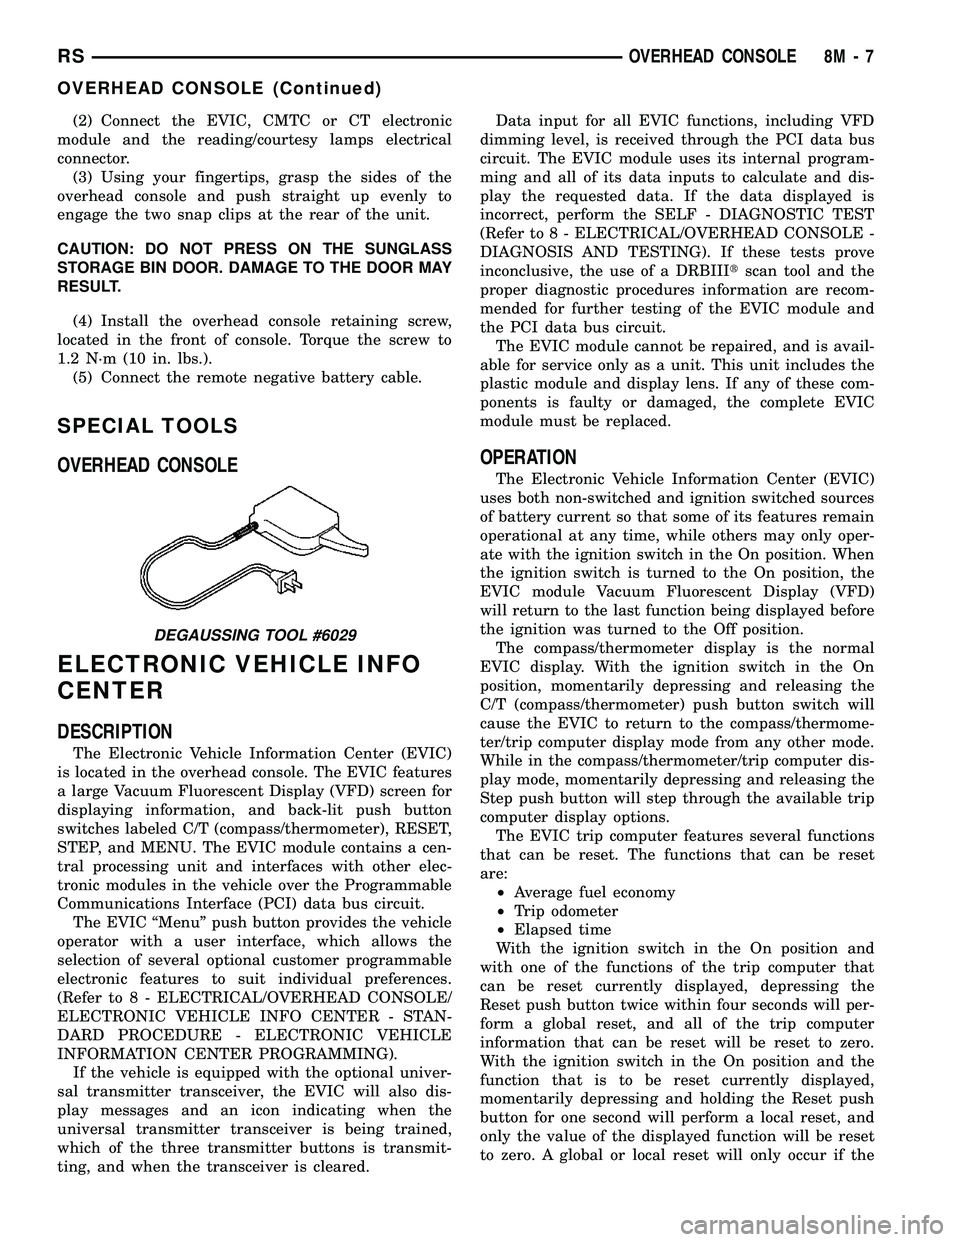
SPECIAL TOOLS
OVERHEAD CONSOLE
ELECTRONIC VEHICLE INFO
CENTER
DESCRIPTION
The Electronic Vehicle Information Center (EVIC)
is located in the overhead console. The EVIC features
a large Vacuum Fluorescent Display (VFD) screen for
displaying information, and back-lit push button
switches labeled C/T (compass/thermometer), RESET,
STEP, and MENU. The EVIC module contains a cen-
tral processing unit and interfaces with other elec-
tronic modules in the vehicle over the Programmable
Communications Interface (PCI) data bus circuit.
The EVIC ªMenuº push button provides the vehicle
operator with a user interface, which allows the
selection of several optional customer programmable
electronic features to suit individual preferences.
(Refer to 8 - ELECTRICAL/OVERHEAD CONSOLE/
ELECTRONIC VEHICLE INFO CENTER - STAN-
DARD PROCEDURE - ELECTRONIC VEHICLE
INFORMATION CENTER PROGRAMMING).
If the vehicle is equipped with the optional univer-
sal transmitter transceiver, the EVIC will also dis-
play messages and an icon indicating when the
universal transmitter transceiver is being trained,
which of the three transmitter buttons is transmit-
ting, and when the transceiver is cleared.Data input for all EVIC functions, including VFD
dimming level, is received through the PCI data bus
circuit. The EVIC module uses its internal program-
ming and all of its data inputs to calculate and dis-
play the requested data. If the data displayed is
incorrect, perform the SELF - DIAGNOSTIC TEST
(Refer to 8 - ELECTRICAL/OVERHEAD CONSOLE -
DIAGNOSIS AND TESTING). If these tests prove
inconclusive, the use of a DRBIIItscan tool and the
proper diagnostic procedures information are recom-
mended for further testing of the EVIC module and
the PCI data bus circuit.
The EVIC module cannot be repaired, and is avail-
able for service only as a unit. This unit includes the
plastic module and display lens. If any of these com-
ponents is faulty or damaged, the complete EVIC
module must be replaced.
OPERATION
The Electronic Vehicle Information Center (EVIC)
uses both non-switched and ignition switched sources
of battery current so that some of its features remain
operational at any time, while others may only oper-
ate with the ignition switch in the On position. When
the ignition switch is turned to the On position, the
EVIC module Vacuum Fluorescent Display (VFD)
will return to the last function being displayed before
the ignition was turned to the Off position.
The compass/thermometer display is the normal
EVIC display. With the ignition switch in the On
position, momentarily depressing and releasing the
C/T (compass/thermometer) push button switch will
cause the EVIC to return to the compass/thermome-
ter/trip computer display mode from any other mode.
While in the compass/thermometer/trip computer dis-
play mode, momentarily depressing and releasing the
Step push button will step through the available trip
computer display options.
The EVIC trip computer features several functions
that can be reset. The functions that can be reset
are:
²Average fuel economy
²Trip odometer
²Elapsed time
With the ignition switch in the On position and
with one of the functions of the trip computer that
can be reset currently displayed, depressing the
Reset push button twice within four seconds will per-
form a global reset, and all of the trip computer
information that can be reset will be reset to zero.
With the ignition switch in the On position and the
function that is to be reset currently displayed,
momentarily depressing and holding the Reset push
button for one second will perform a local reset, and
only the value of the displayed function will be reset
to zero. A global or local reset will only occur if the
DEGAUSSING TOOL #6029
RSOVERHEAD CONSOLE8M-7
OVERHEAD CONSOLE (Continued)
Page 417 of 2339
function currently displayed is a function that can be
reset. The distance to service function can also be
reset using the local reset method, but it will reset
back to the Service Interval distance that is set in
the EVIC programmable features mode. (Refer to 8 -
ELECTRICAL/OVERHEAD CONSOLE/ELEC-
TRONIC VEHICLE INFO CENTER - STANDARD
PROCEDURE).
DIAGNOSIS AND TESTING
ELECTRONIC VEHICLE INFORMATION CENTER
Electronic Vehicle Information Center (EVIC) data
is obtained from the Body Control Module (BCM) on
the Programmable Communications Interface (PCI)
Data Bus circuit. The EVIC will display dashes (- -)
for any of the screens it did not receive the bus mes-
sages. The label corresponding to the missing infor-
mation will be lit. If no EVIC data is displayed,
check the PCI Data Bus circuit communications and
the BCM. If the dimming level is improper check the
PCI Data Bus circuit.
The use of a DRBIIItscan tool and the proper
diagnostic procedures information are recommended
for further testing of the EVIC module and the PCI
data bus circuit. Perform the SELF-DIAGNOSTIC
TEST before replacing the EVIC module (Refer to 8 -
ELECTRICAL/OVERHEAD CONSOLE - DIAGNO-
SIS AND TESTING).
STANDARD PROCEDURE
ELECTRONIC VEHICLE INFORMATION CENTER
PROGRAMMING
EVIC PROGRAMMING MODE
Some vehicles are equipped with a Electronic Vehi-
cle Information Center (EVIC) equipped overhead
console. The Electronic Vehicle Information Center
(EVIC) provides the vehicle operator with a user
interface, which allows the selection of several
optional customer programmable electronic features
to suit individual preferences. The EVIC must be
placed into its programming mode in order to view or
change the programmable features. To enter the
EVIC programming mode and to view or change the
selected programmable features options, proceed as
follows:
(1) Turn the ignition switch to the On position.
(2) Depress and release the Menu push button.
The first item in the programmable features menu
list will appear in the EVIC display.(3) Momentarily depress and release the Menu
push button to step through the programmable fea-
tures list. Each programmable feature and its cur-
rently selected option will appear on the EVIC
display in the sequence shown in the Programmable
Features list that follows.
(4) Momentarily depress and release the Step push
button to step through the available options for the
programmable feature being displayed.
(5) The option that last appears in the display
with a programmable feature before exiting the pro-
gramming mode, becomes the newly selected pro-
grammable feature option.
(6) The EVIC exits the programming mode and
returns to its normal operating mode when the C/T
push button is depressed or when the end of the pro-
grammable features menu list is reached, whichever
occurs first.
PROGRAMMABLE FEATURES
NOTE: Tire pressure monitoring (TPM) system infor-
mation is not covered in this section of the service
manual. Refer to the tires/wheels section of this
manual for detailed tire pressure monitoring system
information.
²LANGUAGE?- The options include English,
Francaise, Deutsch, Italiana, or Espanol. The default
is English. All EVIC display nomenclature, including
the trip computer functions, warning messages and
the programmable features appear in the selected
language.
²DISPLAY U.S. OR METRIC?- The options
include U.S. and M. The default is U.S. This feature
toggles the trip computer temperature, fuel economy
and odometer display readings between U.S. and
metric units of measure. It also changes the odome-
ter display in the instrument cluster.
²SERVICE INTV. =- The options include from
3200 to 12000 kilometers in 800 kilometer incre-
ments (2000 to 7500 miles in 500 mile increments).
The default is 12000 kilometers (7500 miles). The
selected distance becomes the interval at which the
Perform Service warning message will be displayed
by the EVIC. If a new distance is selected, a second
programmable feature appears,RESET SERVICE
DISTANCE?- The options include No and Yes. The
default is Yes. When Yes is selected, the accumulated
distance since the last previous Perform Service
warning message will be reset to zero because the
service interval has been changed. When No is
selected, the distance until the next Perform Service
warning message is reduced by the accumulated dis-
tance since the last previous message.
8M - 8 OVERHEAD CONSOLERS
ELECTRONIC VEHICLE INFO CENTER (Continued)
Page 427 of 2339

LIFTGATE SYSTEM DIAGNOSIS
CONDITION POSSIBLE CAUSES CORRECTION
Liftgate opens unexpectedly Inoperative Power Liftgate Module or
Body Control Module (BCM)Disconnect then reconnect the battery
negative cable to reset module. Cycle the
power liftgate, if the power liftgate is still
not operating properly check for loose wire
connections, refer to the appropriate
diagnostic information
Inoperative latch assembly Check for blown fuse and loose wiring
connections
Check for Diagnostic Trouble Codes
(DTCs), replace latch as necessary
Inoperative open/close command
switchCheck for shorted or inoperative switch.
Replace switch as necessary
Liftgate will not open from
outside of vehicle manuallyInoperative key cylinder assembly Check for inoperative key cylinder
assembly. Replace key cylinder as
necessary
Check link rod connections at the latch and
key cylinder assembly
Check for binds or kinks in link rod
Check for foreign matter preventing the
operation of key cylinder assembly
Replace the components as necessary
Inoperative latch assembly Check for blown fuse and loose wiring
connections
Check for foreign matter preventing the
operation of latch assembly
Replace latch assembly as necessary
Binding or sticking of components Check for foreign matter preventing the
operation of door
Establish location of binding
Replace the components as necessary
Liftgate will not open/close
under powerInoperative Power Liftgate Module or
BCMDisconnect then reconnect the battery
negative cable to reset module. Cycle the
power liftgate, if the power liftgate is still
not operating properly check for loose wire
connections, refer to the appropriate
diagnostic information
Inoperative latch assembly Check for blown fuse and loose wiring
connections
Check for foreign matter preventing the
operation of latch assembly
Refer to the appropriate diagnostic
information. Replace latch assembly as
necessary
8N - 4 POWER LIFTGATE SYSTEMRS
POWER LIFTGATE SYSTEM (Continued)
Page 428 of 2339

CONDITION POSSIBLE CAUSES CORRECTION
Inoperative motor assembly Refer to the appropriate diagnostic
information.
Inoperative full open switch Refer to the appropriate diagnostic
information.
Binding or sticking of components Establish location of binding and replace
components as necessary
Power loss during Liftgate
operationLow battery voltage Charge battery
Inoperative Power Liftgate Module or
BCMDisconnect then reconnect the battery
negative cable to reset module. Cycle the
power liftgate, if the power liftgate is still
not operating properly check for loose wire
connections, refer to the appropriate
diagnostic information
Inoperative motor assembly Check for no drive condition
No power latching in
primary and/or secondary
positionsInoperative latch assembly Check for blown fuse and loose wiring
connections
Check for foreign matter preventing the
operation of latch assembly
Refer to the appropriate diagnostic
information. Replace latch assembly as
necessary
Binding or sticking of components Establish location of binding and replace
components as necessary
Inoperative Power Liftgate or BCM Disconnect then reconnect the battery
negative cable to reset module. Cycle the
power liftgate, if the power liftgate is still
not operating properly check for loose wire
connections, refer to the appropriate
diagnostic information
Door seal force too high Inspect seals for damage, mis-assembly,
foreign matter or other possible obstruction
Inoperative motor assembly Check for no drive condition
Latch will not fully release
from primary positionInoperative latch assembly Check for blown fuse and loose wiring
connections
Check for foreign matter or damaged
components preventing the operation of
latch assembly
Refer to the appropriate diagnostic
information. Replace latch assembly as
necessary
Inoperative outside handle switch Refer to the appropriate diagnostic
information. Replace switch as necessary
RSPOWER LIFTGATE SYSTEM8N-5
POWER LIFTGATE SYSTEM (Continued)
Page 429 of 2339
CONDITION POSSIBLE CAUSES CORRECTION
Inoperative Power Liftgate Module or
BCMDisconnect then reconnect the battery
negative cable to reset module. Cycle the
power liftgate, if the power liftgate is still
not operating properly check for loose wire
connections, refer to the appropriate
diagnostic information
Binding or sticking of components Establish location of binding and replace
components as necessary
Key fob, Outside Handle or
overhead console switches
do not power operate
liftgateBlown Fuse Check fuse and replace
Battery voltage low Charge or replace battery in key fob or
vehicle
Inoperative latch assembly Check for foreign matter preventing the
operation of latch assembly
Check wire connection
Pawl and/or ratchet switch inoperative.
Replace latch as necessary
Inoperative BCM Check electrical connections
Refer to the appropriate diagnostic
information for additional checks
Replace BCM as necessary
Inoperative key fob Verify inoperative key fob by trying other
key fob functions
Replace key fob battery
Reprogram key fob
Replace key fob as necessary
Inoperative Power Liftgate Module Disconnect then reconnect the battery
negative cable to reset module. Cycle the
power liftgate, if the power liftgate is still
not operating properly check for loose wire
connections, refer to the appropriate
diagnostic information
Inoperative liftgate motor assembly Check for foreign matter preventing the
operation of gear motor assembly
Check wire connections
Motor clutch does not engage. Replace
liftgate motor assembly
Full open switch inoperative, replace switch
as necessary
Liftgate does not stay open Inoperative liftgate prop rods Check for broken attachments. Replace
prop rods as necessary
High inside/outside opening
effortInoperative liftgate prop rods Check for broken attachments. Replace
prop rods as necessary
8N - 6 POWER LIFTGATE SYSTEMRS
POWER LIFTGATE SYSTEM (Continued)
Page 430 of 2339

CONDITION POSSIBLE CAUSES CORRECTION
Gear motor did not disengage Refer to the appropriate diagnostic
information. Replace components as
necessary
Binding or sticking of components Establish location of binding and replace
components as necessary
Liftgate continues to cinch
closed during power modeInoperative latch assembly Check for blown fuse and loose wiring
connections
Check for foreign matter preventing the
operation of latch assembly
Refer to the appropriate diagnostic
information. Replace components as
necessary
Inoperative Power Liftgate Module or
BCMDisconnect then reconnect battery to reset
module, function liftgate, if no function
exists check for loose wire connections,
see Body Diagnostic Manual for detailed
procedures
Liftgate continues to open
during power mode
(runaway motor)Inoperative Power Liftgate Module or
BCMDisconnect then reconnect the battery
negative cable to reset module. Cycle the
power liftgate, if the power liftgate is still
not operating properly check for loose wire
connections, refer to the appropriate
diagnostic information
Inoperative full open switch Check wire connections
Replace switch, if necessary
Inoperative motor assembly Check for continuous drive condition
Liftgate opens very slowly Inoperative liftgate motor assembly Check wire connections
Replace motor assembly as necessary
Inoperative liftgate prop rods Replace prop rods as necessary
Binding or sticking of components Establish location of binding and replace
components as necessary
Grade of vehicle too steep for power
operationOperate liftgate manually
Squeaks, Noises and rattles Foreign material in door
compartmentRemove foreign material
Loose components Check and tighten loose components as
necessary
RSPOWER LIFTGATE SYSTEM8N-7
POWER LIFTGATE SYSTEM (Continued)
Page 455 of 2339
(Refer to 8 - ELECTRICAL/HEATED SEATS -
DESCRIPTION) for more information on the heated
seat option. (Refer to 8 - ELECTRICAL/POWER
SEATS - DESCRIPTION - MEMORY SEAT SYS-
TEM) for more information on the memory seat sys-
tem.
The power seat system includes the following com-
ponents:
²Power seat recliners
²Power seat switches
²Power seat tracks
²Circuit breaker
The power seat system with memory and heated
seat options includes the following components:
²Power seat recliner
²Power seat switch
²Power seat track.
²Memory Seat Mirror Module (MSMM)
²Memory set switch
²Heated Seat Module (HSM)
²Heated seat switch
²Electronic Vehicle Information Center (EVIC)
MEMORY SYSTEM
The memory system is able to store and recall the
driver side power seat positions (including the power
recliner position), power adjustable pedal positions
and the driver outside mirror position for two driv-
ers. On vehicles equipped with a factory radio, the
memory system is also able to store and recall radio
station presets for two drivers. The memory system
also will store and recall the last station listened to
for each driver, even if it is not one of the preset sta-
tions.
The memory system will automatically return to
its preset settings when the corresponding numbered
button of the memory switch is depressed, or when
the doors are unlocked using the corresponding
Remote Keyless Entry (RKE) transmitter. A customer
programmable feature of the memory system allows
the RKE recall of memory features to be disabled, if
desired. This programmable feature is internal in the
Electronic Vehicle Information Center (EVIC) mod-
ule, which is located in the overhead console.
A Memory Seat Mirror Module (MSMM) is used to
control and integrate the many electronic functions
and features included in the memory seat and mirror
systems.
The memory system includes the following compo-
nents:
²Memory Seat Mirror Module (MSMM)
²Memory set switch
²Position potentiometers on the driver outside
side view mirror
²Position potentiometers on the power adjustable
pedal motor²Position potentiometers on the driver side power
seat track and power seat recliner motors
²Electronic Vehicle Information Center (EVIC)
²Radio receiver (if PCI data bus capable)
Certain functions of the memory system rely upon
resources shared with other electronic modules in the
vehicle over the Programmable Communications
Interface (PCI) data bus network. Initial diagnosis of
these electronic modules or the PCI data bus network
requires the use of a DRBIIItor equivalent scan tool
and the proper Diagnostic Procedures information. If
this method does not prove conclusive, the proper
wiring schematics and the service manual diagnostic
information are required.
The other electronic modules that may affect mem-
ory system operation are:
²Body Control Module (BCM)- (Refer to 8 -
ELECTRICAL/ELECTRONIC CONTROL MOD-
ULES/BODY CONTROL/CENTRAL TIMER MODUL
- DESCRIPTION) for additional information.
²Powertrain Control Module (PCM)- (Refer
to 8 - ELECTRICAL/ELECTRONIC CONTROL
MODULES/POWERTRAIN CONTROL MODULE -
DESCRIPTION) for additional information.
²Transmission Control Module (TCM)- (Refer
to 8 - ELECTRICAL/ELECTRONIC CONTROL
MODULES/TRANSMISSION CONTROL MODULE -
DESCRIPTION) for additional information.
(Refer to 8 - ELECTRICAL/HEATED SEATS -
DESCRIPTION) for additional information on the
heated seat system. (Refer to 8 - ELECTRICAL/
POWER LOCKS - DESCRIPTION) for additional
information on the RKE system.
OPERATION
POWER SEAT SYSTEM
The power seat system receives battery current
through fuse #22 in the Integrated Power Module
(IPM) and a circuit breaker under the front seats,
regardless of the ignition switch position.
When a power seat switch control knob or knobs
are actuated, a battery feed and a ground path are
applied through the switch contacts to the appropri-
ate power seat track adjuster motor. The selected
adjuster motor operates to move the seat track
through its drive unit in the selected direction until
the switch is released, or until the travel limit of the
seat track is reached. When the switch is moved in
the opposite direction, the battery feed and ground
path to the motor are reversed through the switch
contacts. This causes the adjuster motor to run in the
opposite direction.
No power seat switch should be held applied in any
direction after the seat track has reached its travel
limit. The power seat adjuster motor each contain a
8N - 32 POWER SEAT SYSTEMRS
POWER SEAT SYSTEM (Continued)
Page 456 of 2339
self-resetting circuit breaker to protect them from
overload. However, consecutive or frequent resetting
of the circuit breaker must not be allowed to con-
tinue, or the motor may be damaged.
MEMORY SYSTEM
The Memory Seat Mirror Module (MSMM) receives
battery current through fuse #22 in the Integrated
Power Module (IPM) and the power seat system cir-
cuit breaker, located under the driver side front seat
near the rear edge of the seat cushion pan. The mem-
ory system does not operate with the Ignition-Off
Draw (IOD) fuse removed. The MSMM will drive a
maximum of 2 motors at a time in a given direction.
If conflicting directions are requested, the priority for
response will be approximately as follows:
²Seat Track Rearward or Forward
²Seat Front Down or Up
²Seat Rear Down or Up
²Recliner Rearward or Forward
The inputs from these switches to the MSMM is a
current limited battery source fed by the MSMM.
This protects the MSMM printed circuit board traces
from acting as fuses. All of these switch contact
inputs to the MSMM are normally closed to ground,
except when actuated.
For diagnosis of the MSMM, the Programmable
Communication Interface (PCI) data bus, or the other
electronic modules on the PCI data bus that provide
inputs and outputs for the memory system, the use of
a DRBIIItor equivalent scan tool and the proper
Diagnostic Procedures information is recommended.
ELECTRONIC VEHICLE INFORMATION CENTER
The Electronic Vehicle Information Center (EVIC)
serves as the user interface for the memory system.
It displays memory system status messages and pro-
vides the user with the means for enabling and dis-
abling the many customer programmable features
available on the vehicle, including those for the mem-
ory system.
(Refer to 8 - ELECTRICAL/OVERHEAD CON-
SOLE/ELECTRONIC VEHICLE INFO CENTER -
DESCRIPTION) for additional information on the
EVIC.
DIAGNOSIS AND TESTING
POWER SEAT SYSTEM
Following are tests that will help to diagnose the
hard wired components and circuits of the power seat
system. However, if the vehicle is also equipped with
the optional memory system, these tests may not
prove conclusive in the diagnosis of the driver side
power seat. In order to obtain conclusive testing ofthe driver side power seat with the memory system
option, the Programmable Communications Interface
(PCI) data bus network and all of the electronic mod-
ules that provide inputs to, or receive outputs from
the memory system components must be checked,
(Refer to 8 - ELECTRICAL/POWER SEATS - DIAG-
NOSIS AND TESTING).
WARNING: SOME VEHICLES ARE EQUIPPED WITH
SEATBACK MOUNTED AIRBAGS. BEFORE
ATTEMPTING TO DIAGNOSE OR SERVICE ANY
SEAT OR POWER SEAT SYSTEM COMPONENT
YOU MUST FIRST DISCONNECT AND ISOLATE THE
BATTERY NEGATIVE CABLE. THEN WAIT TWO MIN-
UTES FOR THE SYSTEM CAPACITOR TO DIS-
CHARGE BEFORE FURTHER SYSTEM SERVICE.
THIS IS THE ONLY SURE WAY TO DISABLE THE
AIRBAG SYSTEM. FAILURE TO DO SO COULD
RESULT IN ACCIDENTAL AIRBAG DEPLOYMENT
AND POSSIBLE PERSONAL INJURY.
(1) If either power seat is completely inoperable,
check the power seat circuit breaker, located under
the trailing edge of the driver side power seat. If the
power seat circuit breaker is OK, continue to the
next step.
(2) Check for proper battery and ground connec-
tions at the power seat switch and/or memory seat
module. Repair any wiring as necessary.
(3) Check the power seat system wire harness con-
nections and pins to ensure proper circuit continuity
and ground paths.
MEMORY SYSTEM
In order to obtain conclusive testing of the memory
system, the Programmable Communications Interface
(PCI) data bus network and all of the electronic mod-
ules that provide inputs to, or receive outputs from
the memory system components must be checked.
The most reliable, efficient, and accurate means to
diagnose the driver side power seat with the memory
system option requires the use of a DRBIIItor
equivalent scan tool and the proper Diagnostic Proce-
dures information. The DRBIIItscan tool can pro-
vide confirmation that the PCI data bus is functional,
that all of the electronic modules are sending and
receiving the proper messages on the PCI data bus,
and that the memory system is receiving the proper
hard wired inputs and relaying the proper hard
wired outputs to perform its driver side power seat
functions.
(1) If the driver power seat exhibits an interrupted
or jerky motion, ensure the wire harness is connected
correctly. To verify the concern, obtain a DRB IIItor
equivalent scan tool and energize each axis one at a
time. If any axis stops in approximately 2 seconds
(without hitting the end of travel), the feedback for
RSPOWER SEAT SYSTEM8N-33
POWER SEAT SYSTEM (Continued)
Page 457 of 2339
that axis may have an open, short or be incorrectly
connected. Check the wiring to that axis (module to
motor). Repair any wiring problems and retry that
axis. Refer to the appropriate wiring information for
complete circuit schematic or connector pin-out infor-
mation.
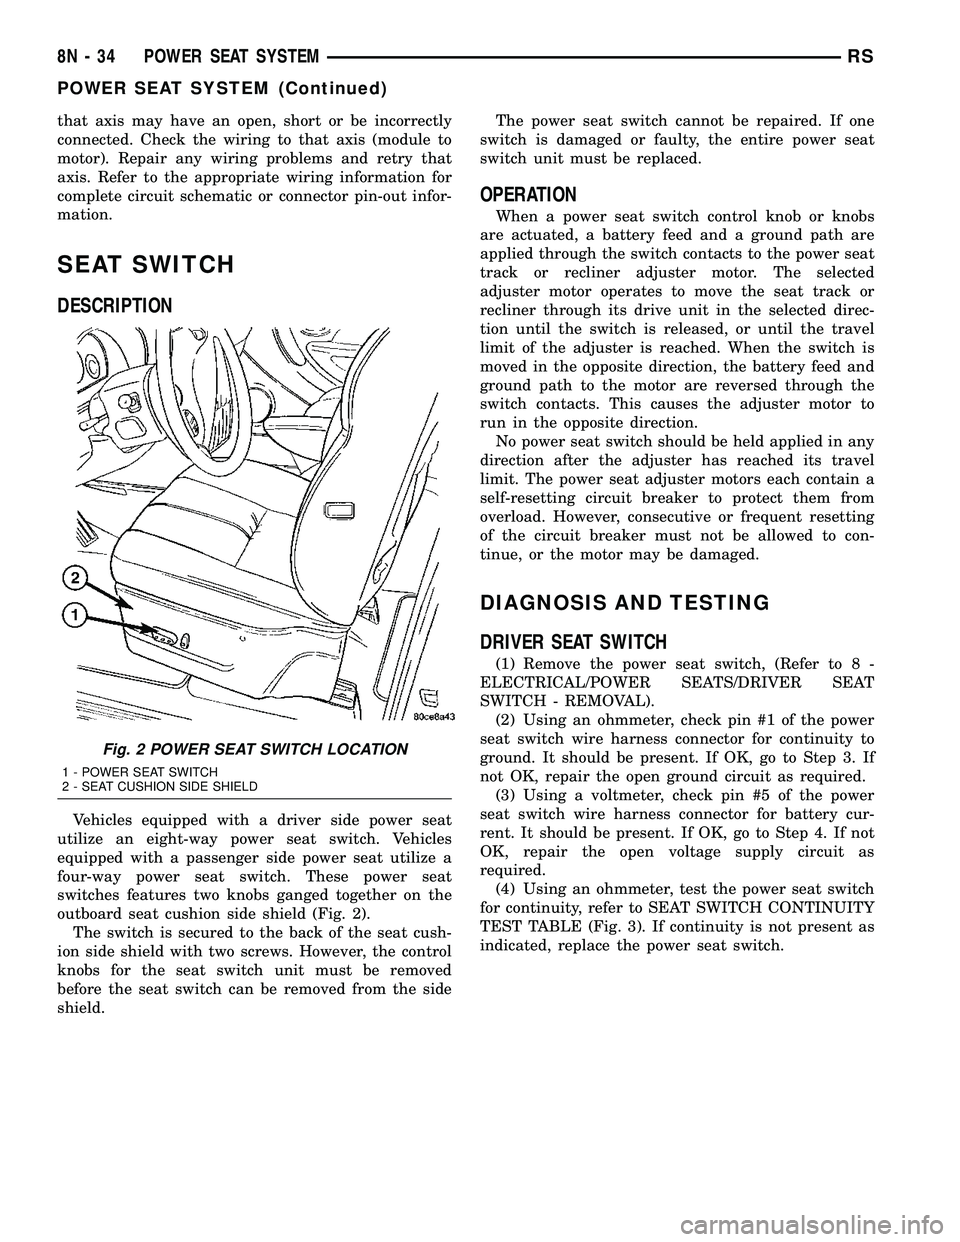
SEAT SWITCH
DESCRIPTION
Vehicles equipped with a driver side power seat
utilize an eight-way power seat switch. Vehicles
equipped with a passenger side power seat utilize a
four-way power seat switch. These power seat
switches features two knobs ganged together on the
outboard seat cushion side shield (Fig. 2).
The switch is secured to the back of the seat cush-
ion side shield with two screws. However, the control
knobs for the seat switch unit must be removed
before the seat switch can be removed from the side
shield.The power seat switch cannot be repaired. If one
switch is damaged or faulty, the entire power seat
switch unit must be replaced.
OPERATION
When a power seat switch control knob or knobs
are actuated, a battery feed and a ground path are
applied through the switch contacts to the power seat
track or recliner adjuster motor. The selected
adjuster motor operates to move the seat track or
recliner through its drive unit in the selected direc-
tion until the switch is released, or until the travel
limit of the adjuster is reached. When the switch is
moved in the opposite direction, the battery feed and
ground path to the motor are reversed through the
switch contacts. This causes the adjuster motor to
run in the opposite direction.
No power seat switch should be held applied in any
direction after the adjuster has reached its travel
limit. The power seat adjuster motors each contain a
self-resetting circuit breaker to protect them from
overload. However, consecutive or frequent resetting
of the circuit breaker must not be allowed to con-
tinue, or the motor may be damaged.
DIAGNOSIS AND TESTING
DRIVER SEAT SWITCH
(1) Remove the power seat switch, (Refer to 8 -
ELECTRICAL/POWER SEATS/DRIVER SEAT
SWITCH - REMOVAL).
(2) Using an ohmmeter, check pin #1 of the power
seat switch wire harness connector for continuity to
ground. It should be present. If OK, go to Step 3. If
not OK, repair the open ground circuit as required.
(3) Using a voltmeter, check pin #5 of the power
seat switch wire harness connector for battery cur-
rent. It should be present. If OK, go to Step 4. If not
OK, repair the open voltage supply circuit as
required.
(4) Using an ohmmeter, test the power seat switch
for continuity, refer to SEAT SWITCH CONTINUITY
TEST TABLE (Fig. 3). If continuity is not present as
indicated, replace the power seat switch.
Fig. 2 POWER SEAT SWITCH LOCATION
1 - POWER SEAT SWITCH
2 - SEAT CUSHION SIDE SHIELD
8N - 34 POWER SEAT SYSTEMRS
POWER SEAT SYSTEM (Continued)
Page 461 of 2339
upper half of the track unit. Each motor moves the
seat adjuster through a combination of worm-drive
gearboxes and screw-type drive units. The horizontal
adjustment motor moves the seat track in the for-
ward and aft directions. The recliner adjustment
motor moves the seat back in the forward and rear-
ward directions.
The power seat track unit cannot be repaired, and
is serviced only as a complete unit. If any component
in this unit is faulty or damaged, the entire power
seat track unit must be replaced.
OPERATION
When the power seat switch control knob or knobs
are actuated, a battery feed and a ground path are
applied through the switch contacts to the power seat
track or recliner adjuster motor. The selected
adjuster motor operates to move the seat track or
recliner through its drive unit in the selected direc-
tion until the switch is released, or until the travel
limit of the adjuster is reached. When the switch is
moved in the opposite direction, the battery feed and
ground path to the motor are reversed through the
switch contacts. This causes the adjuster motor to
run in the opposite direction.
No power seat switch should be held applied in any
direction after the adjuster has reached its travel
limit. The power seat adjuster motors each contain a
self-resetting circuit breaker to protect them from
overload. However, consecutive or frequent resetting
of the circuit breaker must not be allowed to con-
tinue, or the motor may be damaged.
DIAGNOSIS AND TESTING
POWER SEAT TRACK
WARNING: SOME VEHICLES ARE EQUIPPED WITH
SEATBACK MOUNTED AIRBAGS. BEFORE
ATTEMPTING TO DIAGNOSE OR SERVICE ANY
SEAT OR POWER SEAT SYSTEM COMPONENT
YOU MUST FIRST DISCONNECT AND ISOLATE THE
BATTERY NEGATIVE CABLE. THEN WAIT TWO MIN-
UTES FOR THE SYSTEM CAPACITOR TO DIS-
CHARGE BEFORE FURTHER SYSTEM SERVICE.
THIS IS THE ONLY SURE WAY TO DISABLE THE
AIRBAG SYSTEM. FAILURE TO DO SO COULD
RESULT IN ACCIDENTAL AIRBAG DEPLOYMENT
AND POSSIBLE PERSONAL INJURY.
Actuate the power seat switch to move the power
seat track adjusters in each direction. The power seat
track adjusters should move in each of the selected
directions. If a power seat track adjuster operates in
one direction only, move the adjuster a short distance
in the opposite direction and test again to be certainthat the adjuster is not at its travel limit. If the
power seat track adjuster still operates in one direc-
tion only, (Refer to 8 - ELECTRICAL/POWER
SEATS/DRIVER SEAT SWITCH - DIAGNOSIS AND
TESTING). If the power seat track adjuster does not
operate in more than one direction, perform the fol-
lowing tests.
TESTING POWER SEAT TRACK MOTORS
(1) Check the power seat circuit breaker under the
seat. If OK, go to Step 2. If not OK, replace the
faulty power seat circuit breaker.
(2) Check for battery voltage at the power seat cir-
cuit breaker under the seat. If OK, go to Step 3. If
not OK, repair the open fused B(+) circuit to the fuse
in the Integrated Power Module (IPM) as required.
(3) Remove the outboard seat cushion side cover,
(Refer to 23 - BODY/SEATS/SEAT CUSHION SIDE
COVERS - REMOVAL). Disconnect the wire harness
connector from the power seat switch. Check for bat-
tery voltage at the fused B(+) circuit cavity of the
power seat switch wire harness connector. If OK, go
to Step 4. If not OK, repair the open fused B(+) cir-
cuit to the power seat circuit breaker under the seat
as required.
(4) Check for continuity between the ground cir-
cuit cavity of the power seat switch wire harness con-
nector and a known good ground. There should be
continuity. If OK, go to Step 5. If not OK, repair the
open ground circuit as required.
(5) Test the power seat switch, (Refer to 8 - ELEC-
TRICAL/POWER SEATS/DRIVER SEAT SWITCH -
DIAGNOSIS AND TESTING). If the switch tests OK,
test the circuits of the power seat wire harness
between the inoperative power seat track adjuster
motor and the power seat switch for shorts or opens.
If the circuits check OK, replace the faulty power
seat track unit. If the circuits are not OK, repair the
power seat wire harness as required.
REMOVAL
WARNING: SOME VEHICLES ARE EQUIPPED WITH
SEATBACK MOUNTED AIRBAGS. BEFORE
ATTEMPTING TO DIAGNOSE OR SERVICE ANY
SEAT OR POWER SEAT SYSTEM COMPONENT
YOU MUST FIRST DISCONNECT AND ISOLATE THE
BATTERY NEGATIVE CABLE. THEN WAIT TWO MIN-
UTES FOR THE SYSTEM CAPACITOR TO DIS-
CHARGE BEFORE FURTHER SYSTEM SERVICE.
THIS IS THE ONLY SURE WAY TO DISABLE THE
AIRBAG SYSTEM. FAILURE TO DO SO COULD
RESULT IN ACCIDENTAL AIRBAG DEPLOYMENT
AND POSSIBLE PERSONAL INJURY.
(1) Disconnect and isolate the battery negative
cable.
8N - 38 POWER SEAT SYSTEMRS
POWER SEAT TRACK (Continued)