Defrost CHRYSLER VOYAGER 2022 Owners Manual
[x] Cancel search | Manufacturer: CHRYSLER, Model Year: 2022, Model line: VOYAGER, Model: CHRYSLER VOYAGER 2022Pages: 316, PDF Size: 17.41 MB
Page 4 of 316
2
INTRODUCTION
SYMBOLS KEY ...........................................................8
VEHICLE MODIFICATIONS/ALTERATIONS .............8
SYMBOL GLOSSARY.................................................8
GETTING TO KNOW YOUR VEHICLE
KEYS ........................................................................ 12 Key Fob .............................................................12
SENTRY KEY ........................................................... 15
IGNITION SWITCH .................................................. 15
Keyless Enter ‘n Go™ Ignition .........................15
REMOTE START — IF EQUIPPED .......................... 17
How To Use Remote Start ................................17
To Exit Remote Start Mode ..............................18
Remote Start Front Defrost Activation —
If Equipped........................................................18
Remote Start Comfort Systems —
If Equipped........................................................18
Remote Start Windshield Wiper De-Icer
Activation — If Equipped ..................................19
Remote Start Cancel Message ........................19
VEHICLE SECURITY SYSTEM — IF EQUIPPED ..... 19
To Arm The System .........................................19
To Disarm The System .....................................19
Rearming Of The System .................................20 DOORS .....................................................................20
Manual Door Locks — If Equipped ..................20
Power Door Locks — If Equipped.....................21
Keyless Enter ‘n Go™ — Passive Entry............21
Automatic Unlock Doors On Exit —
If Equipped........................................................24
Manual Sliding Side Door ................................24
Power Sliding Side Door —
If Equipped........................................................24
Child Protection Door Lock System —
Rear Doors ........................................................25
STEERING WHEEL ..................................................26
Tilt/Telescoping Steering Column ...................26
Heated Steering Wheel —
If Equipped........................................................27
SEATS ......................................................................27
Manual Adjustment (Front Seats) —
If Equipped........................................................28
Manual Adjustment (Rear Seats) ....................29
Power Adjustment (Front Seats) —
If Equipped........................................................41
Heated Seats ...................................................43
Adjustable Armrest (Front Seats) —
If Equipped........................................................43
Head Restraints ...............................................44
UCONNECT VOICE RECOGNITION .........................47
Introducing Voice Recognition.........................47
Basic Voice Commands ...................................47
Get Started .......................................................47
Additional Information .....................................48 MIRRORS ................................................................ 48
Inside Rearview Mirror..................................... 48
Illuminated Vanity Mirrors —
If Equipped ...................................................... 48
Outside Mirrors ................................................ 49
Conversation Mirror ......................................... 49
Power Mirrors — If Equipped .......................... 49
Outside Mirrors Folding Feature ..................... 50
UNIVERSAL GARAGE DOOR OPENER
(HOMELINK®) — IF EQUIPPED ............................. 50
Before You Begin Programming
HomeLink® ...................................................... 50
Erasing All The HomeLink® Channels ............ 50
Identifying Whether You Have A Rolling
Code Or Non-Rolling Code Device ................... 51
Programming HomeLink® To A Garage
Door Opener ..................................................... 51
Programming HomeLink® To A
Miscellaneous Device ...................................... 52
Reprogramming A Single HomeLink®
Button ............................................................... 52
Canadian/Gate Operator Programming ......... 52
Security ............................................................. 53
Troubleshooting Tips........................................ 53
22_RUVG_OM_EN_USC_t.book Page 2
Page 19 of 316
GETTING TO KNOW YOUR VEHICLE17
REMOTE START — IF EQUIPPED
This system uses the key fob to start the
engine conveniently from outside the
vehicle while still maintaining security.
The system has a range of 328 ft
(100 m).
Remote Start is used to defrost windows in cold
weather and to reach a comfortable climate in all
ambient conditions before the customer enters the
vehicle.
NOTE:Obstructions between the vehicle and key fob may
reduce this range Úpage 304.
HOW TO USE REMOTE START
Push and release the Remote Start button on the
key fob twice within five seconds. The vehicle
doors will lock, the parking lights will flash, and the
horn will chirp twice (if programmed). Then, the
engine will start, and the vehicle will remain in the
Remote Start mode for a 15 minute cycle.
Pushing the Remote Start button a third time shuts
the engine off.
To drive the vehicle, push the unlock button and
place the ignition in the ON/RUN position.
NOTE:
With Remote Start, the engine will only run for
15 minutes.
Remote Start can only be used twice.
If an engine fault is present or fuel level is
low, the vehicle will start and then shut down in
10 seconds.
The parking lights will turn on and remain on
during Remote Start mode.
For security, power window operations are
disabled when the vehicle is in the Remote Start
mode.
The ignition must be placed in the ON/RUN posi -
tion before the Remote Start sequence can be
repeated for a third cycle. All of the following conditions must be met before
the engine will Remote Start:
Gear selector in PARK
Doors closed
Hood closed
Liftgate closed
Hazard switch off
Brake switch inactive (brake pedal not pressed)
Battery at an acceptable charge level
PANIC button not pushed
System not disabled from previous Remote
Start event
Vehicle Security system indicator flashing
Ignition in OFF position
Fuel level meets minimum requirement
Vehicle Security system is not signaling an intru
-
sion
Malfunction Indicator Light (MIL) is not
illuminated
WARNING!
Do not start or run an engine in a closed
garage or confined area. Exhaust gas contains
Carbon Monoxide (CO) which is odorless and
colorless. Carbon Monoxide is poisonous and
can cause serious injury or death when
inhaled.
Keep key fobs away from children. Operation
of the Remote Start system, windows, door
locks or other controls could cause serious
injury or death.
2
22_RUVG_OM_EN_USC_t.book Page 17
Page 20 of 316
18GETTING TO KNOW YOUR VEHICLE
TO EXIT REMOTE START MODE
To drive the vehicle after starting the Remote Start
system, either push and release the unlock button
on the key fob to unlock the doors, or unlock the
vehicle using Keyless Enter ‘n Go™ — Passive Entry
via the door handles, and disarm the Vehicle
Security system (if equipped). Then, prior to the
end of the 15 minute cycle, push and release the
START/STOP ignition button.
The Remote Start system will turn the engine off if
the Remote Start button on the key fob is pushed
again, or if the engine is allowed to run for the
entire 15 minute cycle. Once the ignition is placed
in the ON/RUN position, the climate controls will
resume previously set operations (temperature,
blower control, etc.).
NOTE:
For vehicles equipped with the Keyless Enter ‘n
Go™ — Passive Entry feature, the message
“Remote Start Active — Push Start Button” will
show in the instrument cluster display until you
push the START/STOP ignition button.
To avoid unintentional shutdowns, the system
will disable for two seconds after receiving a
valid Remote Start request.
REMOTE START FRONT DEFROST
A
CTIVATION — IF EQUIPPED
When Remote Start is active, and the outside
ambient temperature is 40°F (4.5°C) or below, the
system will automatically activate front defrost for
15 minutes or less. The time is dependent on the
ambient temperature. Once the timer expires, the
system will automatically adjust the settings
depending on ambient conditions. See “Remote
Start Comfort Systems — If Equipped” in the next
section for detailed operation.
REMOTE START COMFORT SYSTEMS —
I
F EQUIPPED
When Remote Start is activated, the front and rear
defrost will automatically turn on in cold weather.
The heated steering wheel and driver heated seat
feature will also turn on if programmed in the
comfort menu screen within Uconnect Settings
Úpage 141. In warm weather, the driver vented
seat feature will automatically turn on when the
Remote Start is activated, if programmed via the
comfort menu screen. The vehicle will adjust the
climate control settings depending on the outside
ambient temperature.
Automatic Temperature Control (ATC) —
If Equipped
The climate controls automatically adjust to an
optimal temperature and mode, dependent upon
the outside ambient temperature. When the
ignition is placed in the ON/RUN position, the
climate controls will resume their previous
settings.
Manual Temperature Control (MTC) — If Equipped
In ambient temperatures of 40°F (4.5°C) or
below, the climate settings will default to
maximum heat, with fresh air entering the
cabin. If the front defrost timer expires, the
vehicle will enter Mix Mode.
In ambient temperatures from 40°F (4.5°C) to
78°F (26°C), the climate settings will be based
on the last settings selected by the driver.
In ambient temperatures of 78°F (26°C) or
above, the climate settings will default to MAX
A/C, Bi-Level mode, and Recirculation on.
For more information on ATC, MTC, and climate
control settings, see
Úpage 60.
WARNING!
Do not start or run an engine in a closed
garage or confined area. Exhaust gas contains
Carbon Monoxide (CO) which is odorless and
colorless. Carbon Monoxide is poisonous and
can cause serious injury or death when
inhaled.
Keep key fobs away from children. Operation
of the Remote Start system, windows, door
locks or other controls could cause serious
injury or death.
22_RUVG_OM_EN_USC_t.book Page 18
Page 61 of 316
GETTING TO KNOW YOUR VEHICLE59
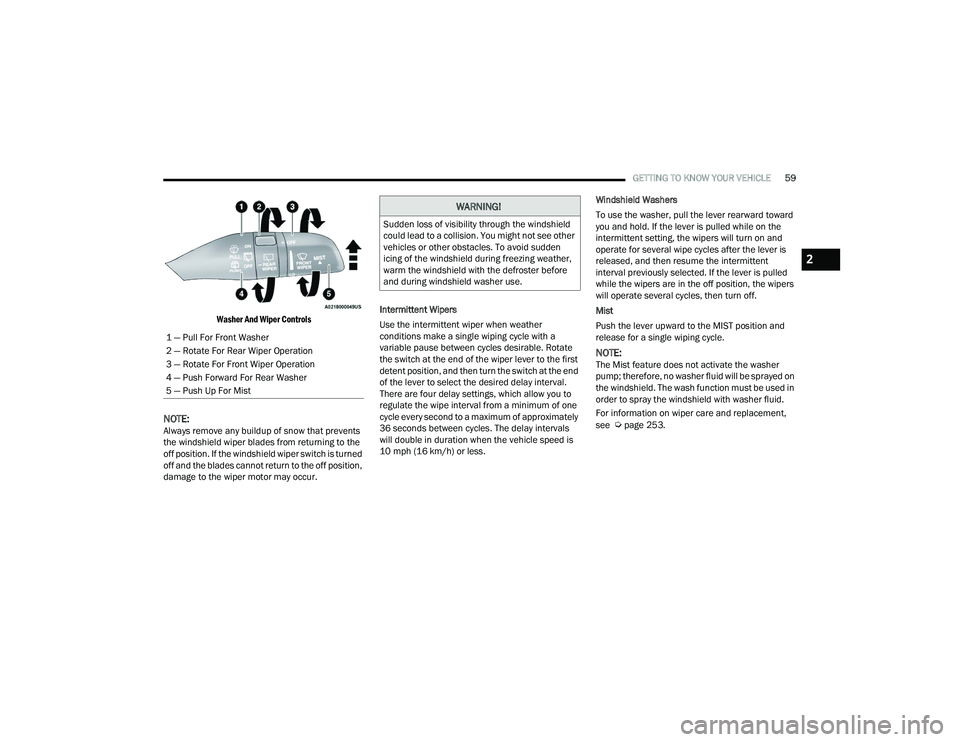
Washer And Wiper Controls
NOTE:Always remove any buildup of snow that prevents
the windshield wiper blades from returning to the
off position. If the windshield wiper switch is turned
off and the blades cannot return to the off position,
damage to the wiper motor may occur. Intermittent Wipers
Use the intermittent wiper when weather
conditions make a single wiping cycle with a
variable pause between cycles desirable. Rotate
the switch at the end of the wiper lever to the first
detent position, and then turn the switch at the end
of the lever to select the desired delay interval.
There are four delay settings, which allow you to
regulate the wipe interval from a minimum of one
cycle every second to a maximum of approximately
36 seconds between cycles. The delay intervals
will double in duration when the vehicle speed is
10 mph (16 km/h) or less.Windshield Washers
To use the washer, pull the lever rearward toward
you and hold. If the lever is pulled while on the
intermittent setting, the wipers will turn on and
operate for several wipe cycles after the lever is
released, and then resume the intermittent
interval previously selected. If the lever is pulled
while the wipers are in the off position, the wipers
will operate several cycles, then turn off.
Mist
Push the lever upward to the MIST position and
release for a single wiping cycle.
NOTE:The Mist feature does not activate the washer
pump; therefore, no washer fluid will be sprayed on
the windshield. The wash function must be used in
order to spray the windshield with washer fluid.
For information on wiper care and replacement,
see
Úpage 253.
1 — Pull For Front Washer
2 — Rotate For Rear Wiper Operation
3 — Rotate For Front Wiper Operation
4 — Push Forward For Rear Washer
5 — Push Up For Mist
WARNING!
Sudden loss of visibility through the windshield
could lead to a collision. You might not see other
vehicles or other obstacles. To avoid sudden
icing of the windshield during freezing weather,
warm the windshield with the defroster before
and during windshield washer use.
2
22_RUVG_OM_EN_USC_t.book Page 59
Page 62 of 316
60GETTING TO KNOW YOUR VEHICLE
REAR WIPER AND WASHER
The rear wiper/washer is operated by rotating a
switch, located at the middle of the lever.
Rotate the center portion of the lever
upward to the first detent for intermittent
operation and to the second detent for
continuous rear wiper operation.
Rear Window Washer Operation Pushing the windshield wiper lever
forward activates the rear window
washer. If the lever is pushed while on
the intermittent setting, the wipers will
turn on and operate for several wipe cycles after
the lever is released, and then resume the
intermittent interval previously selected. If the
lever is pushed while the wipers are in the off
position, the wipers will operate several wipe
cycles, then turn off.
CLIMATE CONTROLS
MANUAL CLIMATE CONTROL
D
ESCRIPTIONS AND FUNCTIONS
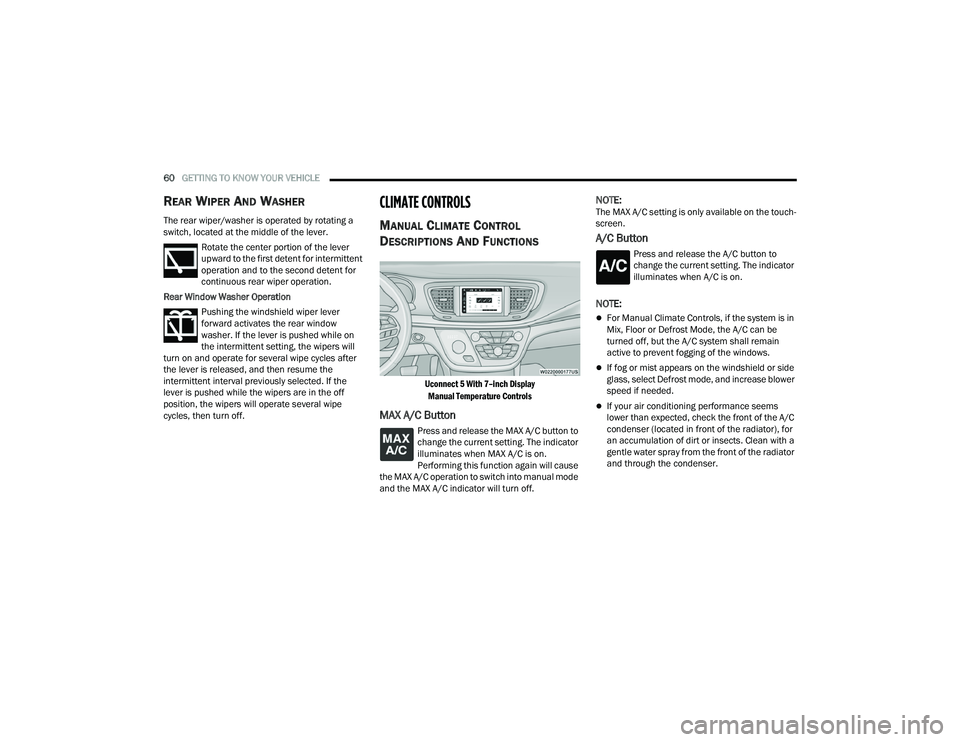
Uconnect 5 With 7–inch Display
Manual Temperature Controls
MAX A/C Button
Press and release the MAX A/C button to
change the current setting. The indicator
illuminates when MAX A/C is on.
Performing this function again will cause
the MAX A/C operation to switch into manual mode
and the MAX A/C indicator will turn off.
NOTE:The MAX A/C setting is only available on the touch -
screen.
A/C Button
Press and release the A/C button to
change the current setting. The indicator
illuminates when A/C is on.
NOTE:
For Manual Climate Controls, if the system is in
Mix, Floor or Defrost Mode, the A/C can be
turned off, but the A/C system shall remain
active to prevent fogging of the windows.
If fog or mist appears on the windshield or side
glass, select Defrost mode, and increase blower
speed if needed.
If your air conditioning performance seems
lower than expected, check the front of the A/C
condenser (located in front of the radiator), for
an accumulation of dirt or insects. Clean with a
gentle water spray from the front of the radiator
and through the condenser.
22_RUVG_OM_EN_USC_t.book Page 60
Page 63 of 316
GETTING TO KNOW YOUR VEHICLE61
Recirculation Button
Press and release this button to change
the system between recirculation mode
and outside air mode. The Recirculation
indicator and the A/C indicator illuminate
when the Recirculation button is pressed.
Recirculation can be used when outside conditions
such as smoke, odors, dust, or high humidity are
present. Recirculation can be used in all modes
except for Defrost. Recirculation may be
unavailable (button on the touchscreen greyed
out) if conditions exist that could create fogging on
the inside of the windshield. The A/C (Air
Conditioning) can be deselected manually without
disturbing the mode control selection. Continuous
use of the Recirculation mode may make the
inside air stuffy and window fogging may occur.
Extended use of this mode is not recommended.
Recirculation mode may automatically adjust to
optimize customer experience for warming,
cooling, dehumidification, etc.
On systems with Manual Climate Controls (if
equipped), the Recirculation mode is not allowed
in Defrost mode to improve window clearing
operation. Recirculation is disabled automatically
if this mode is selected. Attempting to use
Recirculation while in this mode causes the LED in
the control button to blink, and then turn off.
Front Defrost Button
Press and release the Front Defrost
button to change the current airflow
setting to Defrost mode. The indicator
illuminates when this feature is on. Air
comes from the windshield and side window
demist outlets. When the defrost button is
selected, the blower level may increase. Use
Defrost mode with maximum temperature settings
for best windshield and side window defrosting
and defogging.
Performing this function will cause the Automatic
Temperature Control (ATC) to switch into manual
mode. If the Front Defrost mode is turned off the
climate system will return the previous setting.
Rear Defrost Button
Push and release the Rear Defrost
Control button to turn on the rear window
defroster and the heated outside mirrors
(if equipped). An indicator will illuminate
when the rear window defroster is on. The rear
window defroster automatically turns off after
15 minutes.
CAUTION!
Failure to follow these cautions can cause
damage to the heating elements:
Use care when washing the inside of the rear
window. Do not use abrasive window cleaners
on the interior surface of the window. Use a
soft cloth and a mild washing solution, wiping
parallel to the heating elements. Labels can
be peeled off after soaking with warm water.
Do not use scrapers, sharp instruments, or
abrasive window cleaners on the interior
surface of the window.
Keep all objects a safe distance from the
window.
2
22_RUVG_OM_EN_USC_t.book Page 61
Page 64 of 316
62GETTING TO KNOW YOUR VEHICLE
Front Temperature Control
These buttons provide the driver and passenger
with independent temperature control.
Push the red button on the faceplate or
touchscreen or press and slide the
temperature bar towards the red arrow
button on the touchscreen for warmer
temperature settings.
Push the blue button on the faceplate or
touchscreen or press and slide the
temperature bar towards the blue arrow
button on the touchscreen for cooler
temperature settings.
SYNC Button
Press the SYNC button on the
touchscreen to toggle the Sync feature
on/off. The SYNC indicator is illuminated
when this feature is enabled. SYNC is
used to synchronize the front and rear passenger
temperature settings with the driver temperature
setting. Changing the front or rear passenger
temperature setting while in SYNC will
automatically exit this feature. Pressing SYNC on
the touchscreen while in the Front Climate screen
synchronizes the driver and passenger
temperatures only. In order to SYNC rear
temperature to driver temperature, the
touchscreen must be on the Rear Climate screen.
NOTE:The SYNC setting is only available on the touch -
screen.
Blower Control
Blower Control is used to regulate the
amount of air forced through the Climate
Control system. There are seven blower
speeds available.
The speeds can be selected using either the
blower control knob on the faceplate or the
buttons on the touchscreen.
Faceplate: The blower speed increases as you
turn the blower control knob clockwise from the
lowest blower setting. The blower speed
decreases as you turn the blower control knob
counterclockwise.
Touchscreen: Use the small blower icon to
reduce the blower setting and the large blower
icon to increase the blower setting. Blower
speed can also be selected by pressing the
blower bar area between the icons.
Mode Control
The airflow distribution mode can be
adjusted so air comes from the
instrument panel outlets, floor outlets,
defrost outlets and demist outlets. Faceplate:
Push the button in the center of the
knob to change the airflow distribution mode.
Touchscreen: Select Mode by pressing one of the
Mode Buttons on the touchscreen.
Panel Mode
Air comes from the outlets in the
instrument panel. Each of these outlets
can be individually adjusted to direct the
flow of air. The air vanes of the center
outlets and outboard outlets can be moved up and
down or side to side to regulate airflow direction.
There is a shut-off wheel located below the air
vanes to shut off or adjust the amount of airflow
from these outlets.
Bi-Level Mode
Air comes from the instrument panel
outlets and floor outlets. A slight amount
of air is directed through the defrost and
side window demister outlets.
NOTE:Bi-Level mode is designed under comfort condi -
tions to provide cooler air out of the panel outlets
and warmer air from the floor outlets.
22_RUVG_OM_EN_USC_t.book Page 62
Page 65 of 316
GETTING TO KNOW YOUR VEHICLE63
Floor Mode
Air comes from the floor outlets. A slight
amount of air is directed through the
defrost and side window demister
outlets.
Mix Mode
Air is directed through the floor, defrost,
and side window demister outlets. This
setting works best in cold or snowy
conditions that require extra heat to the
windshield. This setting is good for maintaining
comfort while reducing moisture on the
windshield.
Climate Control OFF Button
Press and release this button to turn the
Climate Control ON/OFF.
Controlling The Rear Climate Controls
From The Front MTC Display/Touchscreen
The Three-Zone Manual Temperature Control
(MTC) system allows for adjustment of the rear
climate controls from the front MTC display/
touchscreen. To change the rear system settings:
Press the "Rear Climate" button on the touch
-
screen to display the rear climate controls. The
control functions now operate the rear system.
Press the "Front Climate" button on the touch -
screen to return to the front climate controls.
REAR CLIMATE CONTROL BUTTON
Press and release this button to access
the rear climate controls. The indicator
will illuminate when the rear climate
controls are on.
REAR LOCK BUTTON
Press and release this button to lock out
the rear manual temperature controls
from adjusting the rear temperature and
blower settings.
FRONT CLIMATE BUTTON
Press and release this button to change
the display on the Uconnect system back
to the Front Climate Controls.
REAR TEMPERATURE CONTROL
These buttons provide the rear passengers with
independent temperature control.
Push the up arrow button on the
touchscreen to increase the
temperature.
Push the down arrow button on the
touchscreen to decrease the
temperature.
NOTE:When the SYNC feature is active, the passenger’s
temperature moves up and down with the driver’s
temperature.
SYNC BUTTON
Press the SYNC button on the
touchscreen to toggle the SYNC feature
on/off. The SYNC indicator is illuminated
when this feature is enabled. SYNC is
used to synchronize the front and rear passenger
temperature settings with the driver temperature
setting. Changing the front or rear passenger
temperature setting while in SYNC exits this
feature.
NOTE:The SYNC setting is only available on the touch -
screen.
2
22_RUVG_OM_EN_USC_t.book Page 63
Page 67 of 316
GETTING TO KNOW YOUR VEHICLE65
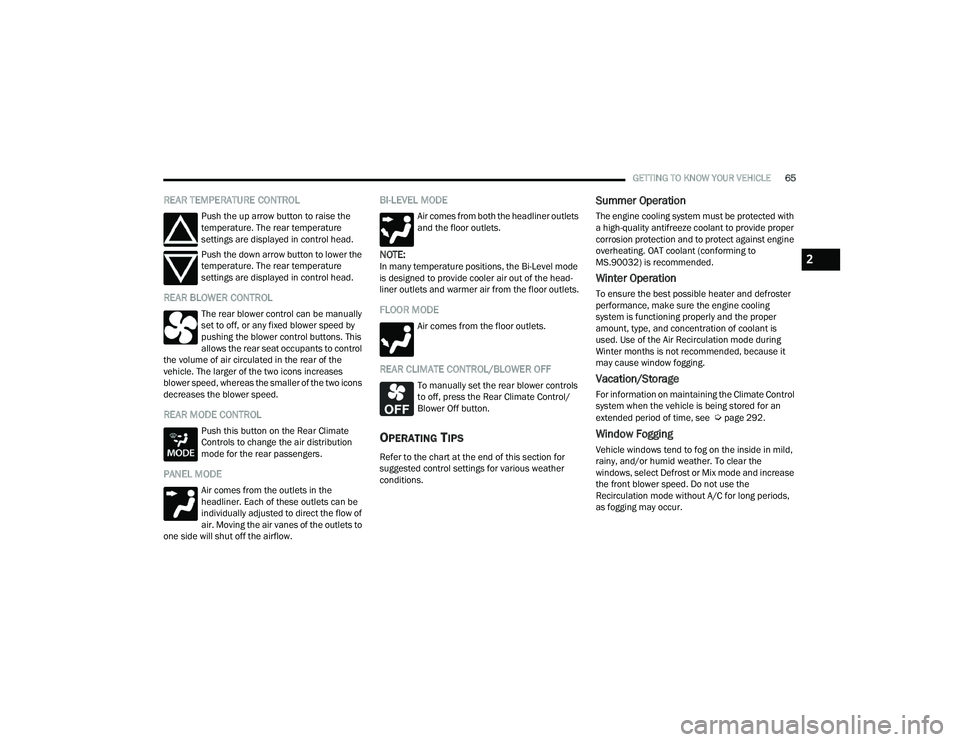
REAR TEMPERATURE CONTROL
Push the up arrow button to raise the
temperature. The rear temperature
settings are displayed in control head.
Push the down arrow button to lower the
temperature. The rear temperature
settings are displayed in control head.
REAR BLOWER CONTROL
The rear blower control can be manually
set to off, or any fixed blower speed by
pushing the blower control buttons. This
allows the rear seat occupants to control
the volume of air circulated in the rear of the
vehicle. The larger of the two icons increases
blower speed, whereas the smaller of the two icons
decreases the blower speed.
REAR MODE CONTROL
Push this button on the Rear Climate
Controls to change the air distribution
mode for the rear passengers.
PANEL MODE
Air comes from the outlets in the
headliner. Each of these outlets can be
individually adjusted to direct the flow of
air. Moving the air vanes of the outlets to
one side will shut off the airflow.
BI-LEVEL MODE
Air comes from both the headliner outlets
and the floor outlets.
NOTE:In many temperature positions, the Bi-Level mode
is designed to provide cooler air out of the head -
liner outlets and warmer air from the floor outlets.
FLOOR MODE
Air comes from the floor outlets.
REAR CLIMATE CONTROL/BLOWER OFF
To manually set the rear blower controls
to off, press the Rear Climate Control/
Blower Off button.
OPERATING TIPS
Refer to the chart at the end of this section for
suggested control settings for various weather
conditions.
Summer Operation
The engine cooling system must be protected with
a high-quality antifreeze coolant to provide proper
corrosion protection and to protect against engine
overheating. OAT coolant (conforming to
MS.90032) is recommended.
Winter Operation
To ensure the best possible heater and defroster
performance, make sure the engine cooling
system is functioning properly and the proper
amount, type, and concentration of coolant is
used. Use of the Air Recirculation mode during
Winter months is not recommended, because it
may cause window fogging.
Vacation/Storage
For information on maintaining the Climate Control
system when the vehicle is being stored for an
extended period of time, see
Úpage 292.
Window Fogging
Vehicle windows tend to fog on the inside in mild,
rainy, and/or humid weather. To clear the
windows, select Defrost or Mix mode and increase
the front blower speed. Do not use the
Recirculation mode without A/C for long periods,
as fogging may occur.
2
22_RUVG_OM_EN_USC_t.book Page 65
Page 95 of 316
GETTING TO KNOW YOUR INSTRUMENT PANEL93
Speed Warning — If Equipped
Push and release the up or down arrow
button until Speed Warning is highlighted in the
instrument cluster display. Push and release the
OK button to enter Speed Warning. Use the up
or down arrow button to turn the Speed Warning
ON or OFF, then push and release the OK button to
confirm the selection. If the ON status is selected,
use the up or down arrow button to set the
desired speed, then push the OK button to set the
speed for the Speed Warning. A Speed Warning
telltale will illuminate in the instrument cluster,
with a number matching the set speed, with a
pop-up message to inform the driver that the
Speed Warning has been set to the desired speed.
Each time the set speed is exceeded, a single
chime will sound and a pop-up warning message
will display. If the set speed is exceeded more than
2 mph (3 km/h), a continuous chime will sound for
up to 10 seconds, or until the speed is no longer
exceeded. The telltale in the instrument cluster will
also change from white to yellow, and a pop-up
warning message will pop-up on the instrument
cluster display.
NOTE:Speed Warning is unavailable while KeySense is in
use.
BATTERY SAVER ON/BATTERY SAVER
M
ODE MESSAGE — ELECTRICAL LOAD
R
EDUCTION ACTIONS — IF EQUIPPED
This vehicle is equipped with an Intelligent Battery
Sensor (IBS) to perform additional monitoring of
the electrical system and status of the vehicle
battery.
In cases when the IBS detects charging system
failure, or the 12 Volt vehicle battery conditions are
deteriorating, electrical load reduction actions will
take place to extend the driving time and distance
of the vehicle. This is done by reducing power to or
turning off non-essential 12 Volt electrical loads.
Load reduction will be functional when the vehicle
propulsion system is active.
The vehicle may not be running depending on the
High Voltage (HV) battery State Of Charge (SOC) or
temperature. It will display a message if there is a
risk of battery depletion to the point where the
vehicle may stall due to lack of electrical supply, or
will not restart after the current drive cycle.
When 12 Volt load reduction is activated, the
message “Battery Saver On” or “Battery Saver
Mode” will appear in the instrument cluster
display. These messages indicate the vehicle battery has a
low state of charge and continues to lose electrical
charge at a rate that the charging system cannot
sustain.NOTE:
The charging system is independent from load
reduction. The charging system performs a diag
-
nostic on the charging system continuously.
If the Battery Charge Warning Light is on it may
indicate a problem with the charging system
Úpage 95.
The electrical loads that may be switched off (if
equipped), and vehicle functions which can be
effected by load reduction:
Heated Seat/Vented Seats/Heated Wheel
Heated/Cooled Cup Holders — If Equipped
Rear Defroster And Heated Mirrors
HVAC System
115 Volts AC Power Inverter System
Audio and Telematics System
3
22_RUVG_OM_EN_USC_t.book Page 93