display CHRYSLER VOYAGER 2022 Workshop Manual
[x] Cancel search | Manufacturer: CHRYSLER, Model Year: 2022, Model line: VOYAGER, Model: CHRYSLER VOYAGER 2022Pages: 316, PDF Size: 17.41 MB
Page 149 of 316
MULTIMEDIA147
Phone/Bluetooth®
Set Time Hours — If Equipped This setting will allow you to set the hours. Sync Time With GPS must be off for
this setting to be available. The “+” setting will increase the hours. The “-”
setting will decrease the hours.
Set Time Minutes — If Equipped This setting will allow you to set the minutes. Sync Time With GPS must be off
for this setting to be available. The “+” setting will increase the minutes. The
“-” setting will decrease the minutes.
Show Time in Status Bar — If Equipped This setting will place the time in the radio’s status bar.
Setting NameDescription
When the Phone/Bluetooth® button is pressed on the touchscreen, the system displays the options related to Bluetooth® connectivity from an external audio
device or smartphone. The list of paired audio devices or smartphones can be accessed from this menu.
Setting NameDescription
Phone Pop-Ups Displayed In Cluster This setting will activate phone message pop-ups in the Instrument Cluster
Display.
Do Not Disturb — If Equipped This setting will open the Do Not Disturb settings menu. The settings are “Auto
Reply” (both, text, call), “Auto Reply Message” (custom, default), and “Custom
Auto Reply Message” (create message).
Device Manager This setting will open the Device Manager main screen.
Do Not Disturb All This setting will open the “Do Not Disturb All” settings menu. The available
options are “On” and “Off”.
Enable Two Active Phones — If Equipped This setting will enable or disable two active phones with the vehicle. The
setting options are “On” and “Off”.
5
22_RUVG_OM_EN_USC_t.book Page 147
Page 150 of 316
148MULTIMEDIA
Voice — If Equipped
Navigation — If Equipped
After pressing the Voice button on the touchscreen, the following settings will be available:
Setting Name Description
Voice Options This setting will allow you to change the voice options for the radio to “Male”
or “Female”.
Show Command List This setting will allow you to turn the Command List on or off. The “Always”
setting will always show the Command List. The “With Help” setting will show
the Command List and provide a brief description of what the command does.
The “Never” setting will turn the Command List off.
Wake Up Word This setting will allow you to turn the voice recognition “Wake Up” word on or
off. The available options are “Off”, “Hey Uconnect”, and “Hey Chrysler”.
Voice Barge-In This setting will allow you to turn the voice recognition barge-in feature
on or off.
When the Navigation button is pressed on the touchscreen, the system displays options related to the vehicle’s built-in Navigation system. These settings can
change which icons display on the map, how “time to arrival is calculated”, and route types.
For more information on Navigation and settings, refer to the Uconnect Owner’s Manual Supplement.
22_RUVG_OM_EN_USC_t.book Page 148
Page 151 of 316

MULTIMEDIA149
Camera
Mirrors & Wipers
When the Camera button is pressed on the touchscreen, the system displays the options related to the vehicle’s camera features.
Setting Name Description
ParkView Backup Camera Delay This setting will add a timed delay to the ParkView Backup Camera when
shifting out of REVERSE.
ParkView Backup Camera Active Guidelines This setting will turn the ParkView Backup Camera Active Guidelines on or off.
ParkView Backup Camera Fixed Guidelines This setting will turn the ParkView Backup Camera Fixed Guidelines on or off.
When the Mirrors & Wipers button is pressed on the touchscreen, the system displays the options related to the vehicle’s mirrors and wipers.
Setting NameDescription
Rain Sensing Auto Wipers This setting will turn the Rain Sensing Auto Wipers on or off.
Headlights With Wipers This setting will turn the headlights on when the wipers are activated.
5
22_RUVG_OM_EN_USC_t.book Page 149
Page 152 of 316
150MULTIMEDIA
Lights
When the Lights button is pressed on the touchscreen, the system displays the options related to the vehicle’s exterior and interior lights.
NOTE:When the “Daytime Running Lights” feature is selected, the daytime running lights can be turned on or off. This feature is only allowed by law in the country of
the vehicle purchased.
Setting Name Description
Headlight Off Delay This setting will allow you to set the amount of time it takes for the headlights
to shut off after the vehicle is turned off. The available settings are “0 sec”,
“30 sec”, “60 sec”, and “90 sec”.
Headlight Illumination On Approach This setting will allow you to set the amount of time it takes for the headlights
to shut off after the vehicle is unlocked. The available settings are “0 sec”,
“30 sec”, “60 sec”, and “90 sec”.
Headlights with Wipers This setting will turn the headlights on when the wipers are activated.
Daytime Running Lights This setting will allow you to turn the Daytime Running Lights on or off.
Flash Lights With Lock This setting will allow you to turn the flashing of the lights when the Lock
button is pushed on the key fob on or off.
Auto Dim High Beams This setting will allow you to turn the Auto Dim High Beams on or off.
Flash Lights With Sliding Door This setting will flash the lights when the sliding door reverses. The available
options are “On” and “Off”.
22_RUVG_OM_EN_USC_t.book Page 150
Page 155 of 316
MULTIMEDIA153
Seats & Comfort
Key Off Options
When the Seats & Comfort button is pressed on the touchscreen, the system displays the options related to the vehicle’s comfort systems when remote start
has been activated or the vehicle has been started.
Setting Name Description
Auto-On Driver Heated/Ventilated Seat & Heated Steering Wheel With Vehicle
Start — If Equipped This setting will activate the vehicle’s comfort systems and heated seats or
heated steering wheel when the vehicle is remote started or ignition is
started. The “Off” setting will not activate the comfort systems. The “Remote
Start” setting will only activate the comfort systems when using Remote Start.
The “All Start” setting will activate the comfort systems whenever the vehicle
is started.
When the Key Off Options button is pressed on the touchscreen, the system displays the options related to vehicle shutoff. These settings will only activate
when the ignition is set to OFF.
Setting Name
Description
Key Off Power Delay This setting will keep certain electrical features running after the engine is
turned off. When any door is opened, the electronics will deactivate. The
available settings are “0 sec”, “45 sec”, “5 min”, and “10 min”.
Headlight Off Delay This setting will allow you to set the amount of time the headlights remain on
after the vehicle has been turned off. The “+” will increase the amount of
time. The “-” will decrease the amount of time.
Radio Off With Door This setting will turn the radio off when the driver or passenger door is
opened. The available settings are “On” and “Off”.
5
22_RUVG_OM_EN_USC_t.book Page 153
Page 156 of 316
154MULTIMEDIA
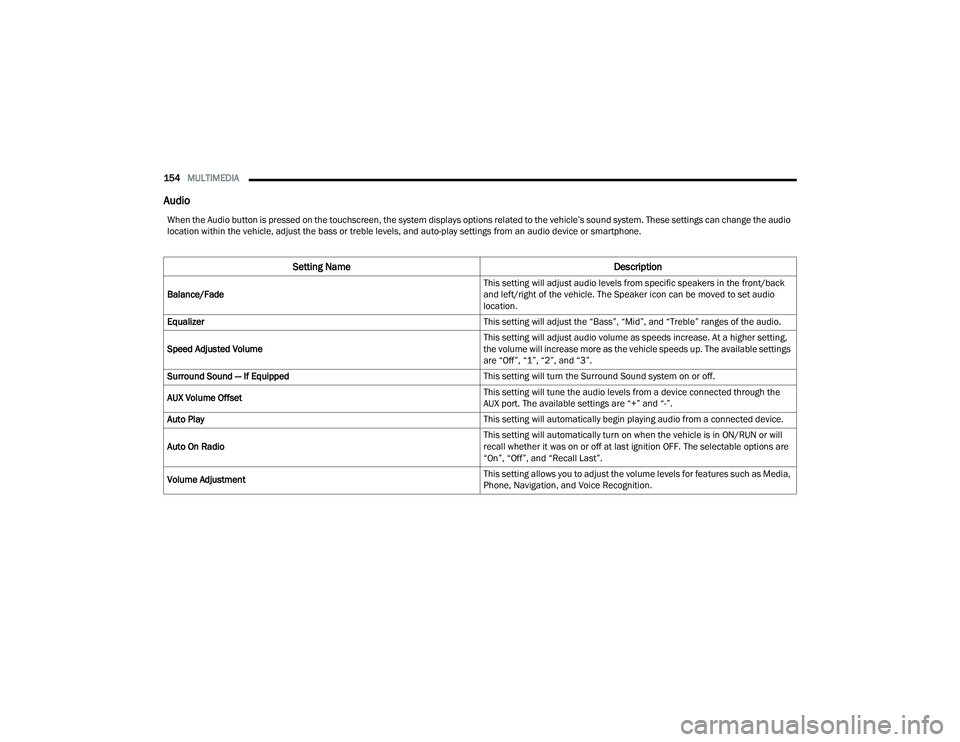
Audio
When the Audio button is pressed on the touchscreen, the system displays options related to the vehicle’s sound system. These settings can change the audio
location within the vehicle, adjust the bass or treble levels, and auto-play settings from an audio device or smartphone.
Setting Name Description
Balance/Fade This setting will adjust audio levels from specific speakers in the front/back
and left/right of the vehicle. The Speaker icon can be moved to set audio
location.
Equalizer This setting will adjust the “Bass”, “Mid”, and “Treble” ranges of the audio.
Speed Adjusted Volume This setting will adjust audio volume as speeds increase. At a higher setting,
the volume will increase more as the vehicle speeds up. The available settings
are “Off”, “1”, “2”, and “3”.
Surround Sound — If Equipped This setting will turn the Surround Sound system on or off.
AUX Volume Offset This setting will tune the audio levels from a device connected through the
AUX port. The available settings are “+” and “-”.
Auto Play This setting will automatically begin playing audio from a connected device.
Auto On Radio This setting will automatically turn on when the vehicle is in ON/RUN or will
recall whether it was on or off at last ignition OFF. The selectable options are
“On”, “Off”, and “Recall Last”.
Volume Adjustment This setting allows you to adjust the volume levels for features such as Media,
Phone, Navigation, and Voice Recognition.
22_RUVG_OM_EN_USC_t.book Page 154
Page 157 of 316
MULTIMEDIA155
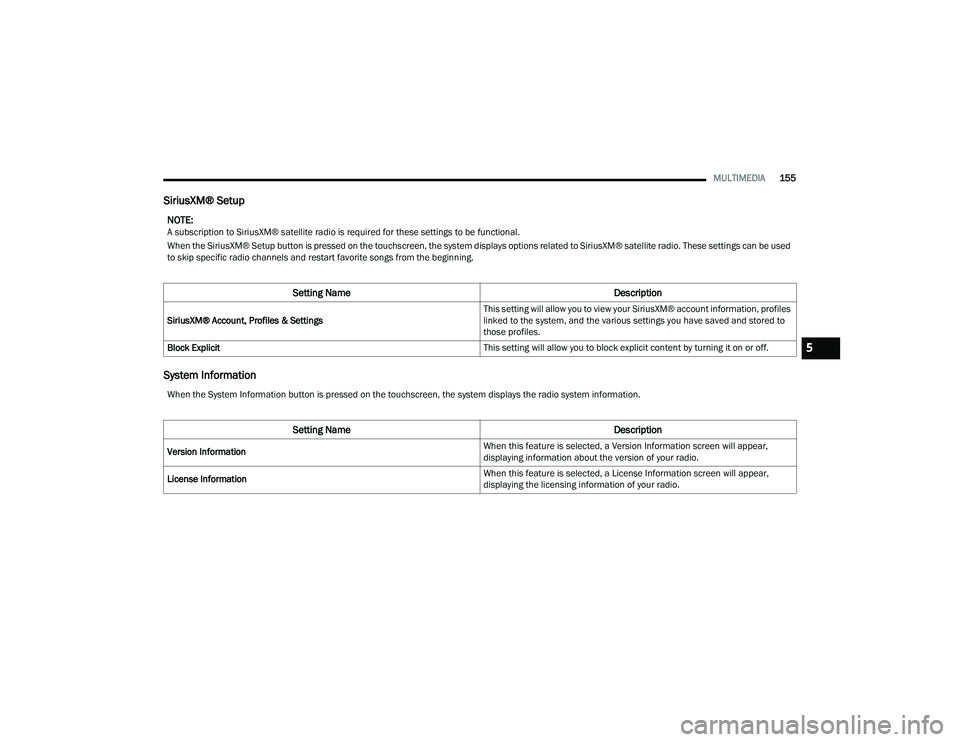
SiriusXM® Setup
System Information
NOTE:A subscription to SiriusXM® satellite radio is required for these settings to be functional.
When the SiriusXM® Setup button is pressed on the touchscreen, the system displays options related to SiriusXM® satellite radio. These settings can be used
to skip specific radio channels and restart favorite songs from the beginning.
Setting Name Description
SiriusXM® Account, Profiles & Settings This setting will allow you to view your SiriusXM® account information, profiles
linked to the system, and the various settings you have saved and stored to
those profiles.
Block Explicit This setting will allow you to block explicit content by turning it on or off.
When the System Information button is pressed on the touchscreen, the system displays the radio system information.
Setting NameDescription
Version Information When this feature is selected, a Version Information screen will appear,
displaying information about the version of your radio.
License Information When this feature is selected, a License Information screen will appear,
displaying the licensing information of your radio.
5
22_RUVG_OM_EN_USC_t.book Page 155
Page 158 of 316
156MULTIMEDIA
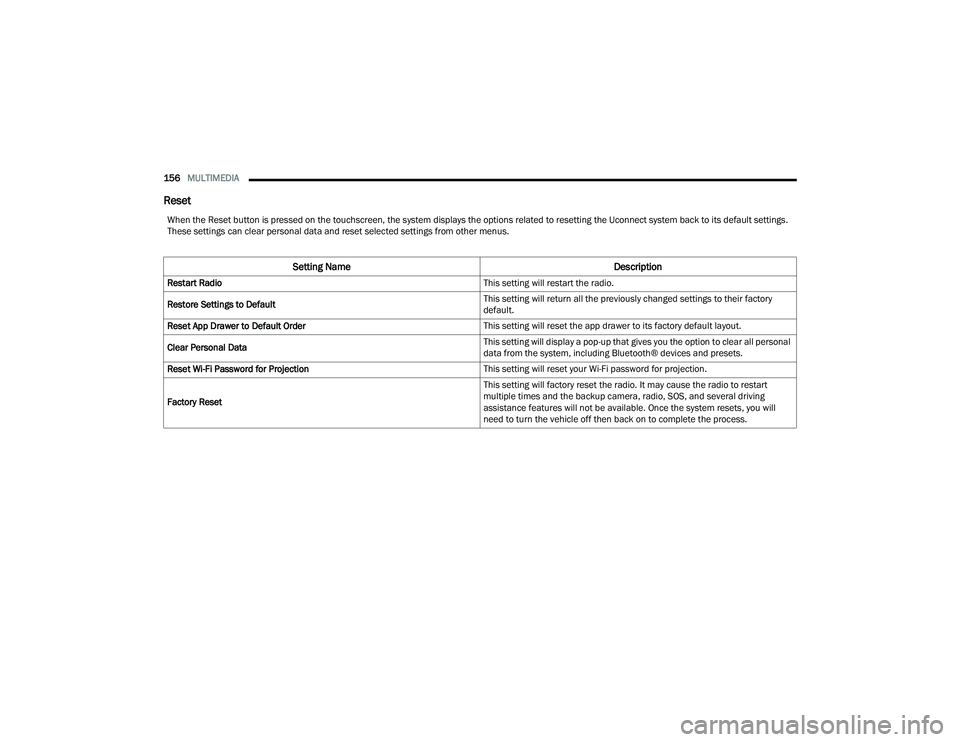
Reset
When the Reset button is pressed on the touchscreen, the system displays the options related to resetting the Uconnect system back to its default settings.
These settings can clear personal data and reset selected settings from other menus.
Setting Name Description
Restart Radio This setting will restart the radio.
Restore Settings to Default This setting will return all the previously changed settings to their factory
default.
Reset App Drawer to Default Order This setting will reset the app drawer to its factory default layout.
Clear Personal Data This setting will display a pop-up that gives you the option to clear all personal
data from the system, including Bluetooth® devices and presets.
Reset Wi-Fi Password for Projection This setting will reset your Wi-Fi password for projection.
Factory Reset This setting will factory reset the radio. It may cause the radio to restart
multiple times and the backup camera, radio, SOS, and several driving
assistance features will not be available. Once the system resets, you will
need to turn the vehicle off then back on to complete the process.
22_RUVG_OM_EN_USC_t.book Page 156
Page 161 of 316
SAFETY159
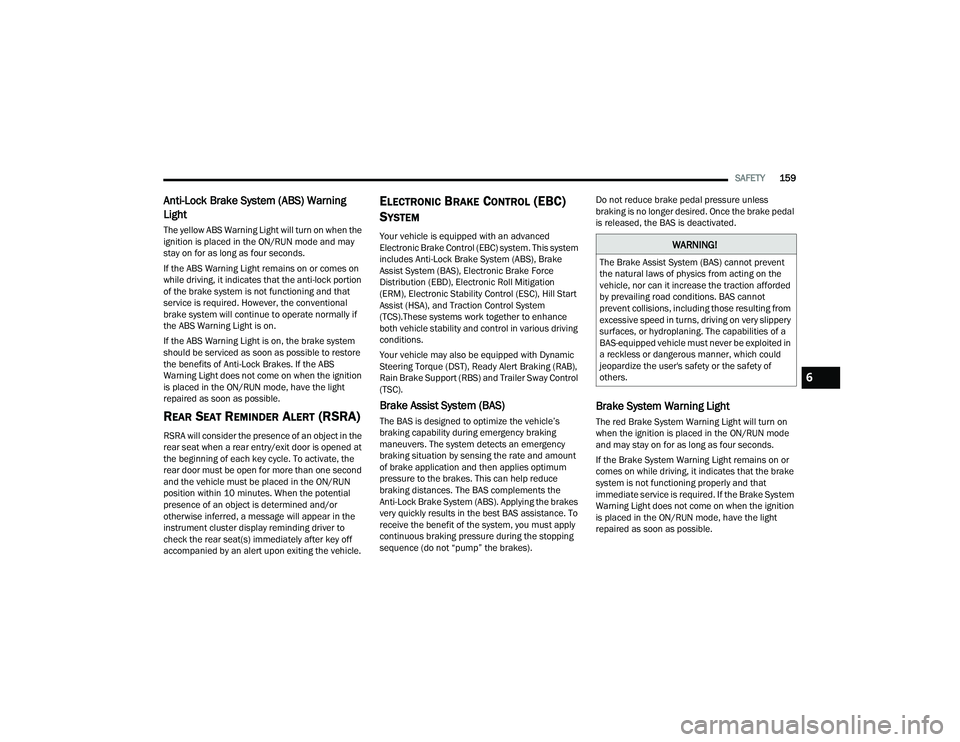
Anti-Lock Brake System (ABS) Warning
Light
The yellow ABS Warning Light will turn on when the
ignition is placed in the ON/RUN mode and may
stay on for as long as four seconds.
If the ABS Warning Light remains on or comes on
while driving, it indicates that the anti-lock portion
of the brake system is not functioning and that
service is required. However, the conventional
brake system will continue to operate normally if
the ABS Warning Light is on.
If the ABS Warning Light is on, the brake system
should be serviced as soon as possible to restore
the benefits of Anti-Lock Brakes. If the ABS
Warning Light does not come on when the ignition
is placed in the ON/RUN mode, have the light
repaired as soon as possible.
REAR SEAT REMINDER ALERT (RSRA)
RSRA will consider the presence of an object in the
rear seat when a rear entry/exit door is opened at
the beginning of each key cycle. To activate, the
rear door must be open for more than one second
and the vehicle must be placed in the ON/RUN
position within 10 minutes. When the potential
presence of an object is determined and/or
otherwise inferred, a message will appear in the
instrument cluster display reminding driver to
check the rear seat(s) immediately after key off
accompanied by an alert upon exiting the vehicle.
ELECTRONIC BRAKE CONTROL (EBC)
S
YSTEM
Your vehicle is equipped with an advanced
Electronic Brake Control (EBC) system. This system
includes Anti-Lock Brake System (ABS), Brake
Assist System (BAS), Electronic Brake Force
Distribution (EBD), Electronic Roll Mitigation
(ERM), Electronic Stability Control (ESC), Hill Start
Assist (HSA), and Traction Control System
(TCS).These systems work together to enhance
both vehicle stability and control in various driving
conditions.
Your vehicle may also be equipped with Dynamic
Steering Torque (DST), Ready Alert Braking (RAB),
Rain Brake Support (RBS) and Trailer Sway Control
(TSC).
Brake Assist System (BAS)
The BAS is designed to optimize the vehicle’s
braking capability during emergency braking
maneuvers. The system detects an emergency
braking situation by sensing the rate and amount
of brake application and then applies optimum
pressure to the brakes. This can help reduce
braking distances. The BAS complements the
Anti-Lock Brake System (ABS). Applying the brakes
very quickly results in the best BAS assistance. To
receive the benefit of the system, you must apply
continuous braking pressure during the stopping
sequence (do not “pump” the brakes). Do not reduce brake pedal pressure unless
braking is no longer desired. Once the brake pedal
is released, the BAS is deactivated.
Brake System Warning Light
The red Brake System Warning Light will turn on
when the ignition is placed in the ON/RUN mode
and may stay on for as long as four seconds.
If the Brake System Warning Light remains on or
comes on while driving, it indicates that the brake
system is not functioning properly and that
immediate service is required. If the Brake System
Warning Light does not come on when the ignition
is placed in the ON/RUN mode, have the light
repaired as soon as possible.
WARNING!
The Brake Assist System (BAS) cannot prevent
the natural laws of physics from acting on the
vehicle, nor can it increase the traction afforded
by prevailing road conditions. BAS cannot
prevent collisions, including those resulting from
excessive speed in turns, driving on very slippery
surfaces, or hydroplaning. The capabilities of a
BAS-equipped vehicle must never be exploited in
a reckless or dangerous manner, which could
jeopardize the user's safety or the safety of
others.
6
22_RUVG_OM_EN_USC_t.book Page 159
Page 167 of 316
SAFETY165
The Blind Spot Monitoring (BSM) system may
experience dropouts (blinking on and off) of the
side mirror warning indicator lamps when a
motorcycle or any small object remains at the
side of the vehicle for extended periods of time
(more than a couple of seconds).
The BSM system can become blocked if snow, ice,
mud, or other road contaminations accumulate on
the rear fascia/bumper where the radar sensors
are located. The system may also detect blockage
if the vehicle is operated in areas with extremely
low radar returns such as a desert or parallel to a
large elevation drop. If blockage is detected, a
“Blind Spot Temporarily Unavailable, Wipe Rear
Corners” message will display in the cluster, both
mirror lights will illuminate, and BSM and RCP
alerts will not occur. This is normal operation. The
system will automatically recover and resume
function when the condition clears. To minimize
system blockage, do not block the area of the rear
fascia/bumper where the radar sensors are
located with foreign objects (bumper stickers,
bicycle racks, etc.) and keep it clear of road
contaminations.
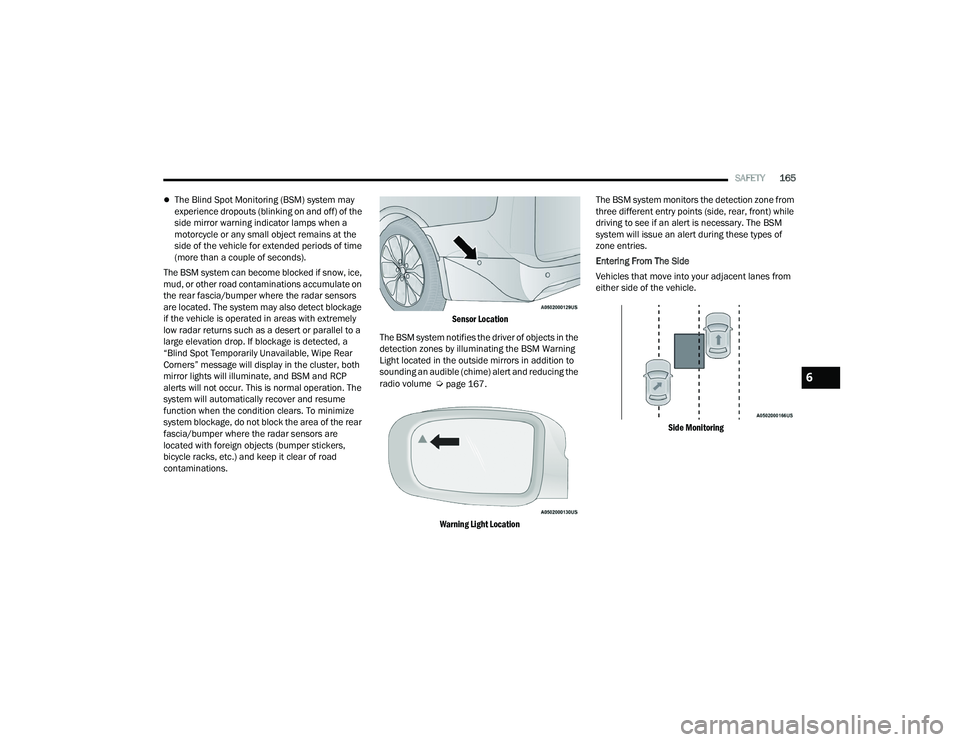
Sensor Location
The BSM system notifies the driver of objects in the
detection zones by illuminating the BSM Warning
Light located in the outside mirrors in addition to
sounding an audible (chime) alert and reducing the
radio volume
Úpage 167.
Warning Light Location
The BSM system monitors the detection zone from
three different entry points (side, rear, front) while
driving to see if an alert is necessary. The BSM
system will issue an alert during these types of
zone entries.
Entering From The Side
Vehicles that move into your adjacent lanes from
either side of the vehicle.
Side Monitoring
6
22_RUVG_OM_EN_USC_t.book Page 165