ESP CHRYSLER VOYAGER 2023 Owner's Manual
[x] Cancel search | Manufacturer: CHRYSLER, Model Year: 2023, Model line: VOYAGER, Model: CHRYSLER VOYAGER 2023Pages: 256, PDF Size: 13.97 MB
Page 131 of 256

SAFETY129
Blind Spot Alert Lights/Chime
When operating in Blind Spot Alert Lights/Chime mode, the
BSM system will provide a visual alert in the appropriate side
view mirror based on a detected object. If the turn signal is then
activated, and it corresponds to an alert present on that side of
the vehicle, an audible chime will also be sounded. Whenever a
turn signal and detected object are present on the same side at
the same time, both the visual and audible alerts will be issued.
In addition to the audible alert the radio (if on) will also be
muted.
NOTE:Whenever an audible alert is requested by the BSM
system, the radio is also muted.
When the system is in RCP, the system shall respond with
both visual and audible alerts when a detected object is
present. Whenever an audible alert is requested, the radio
is also muted. Turn/hazard signal status is ignored; the
RCP state always requests the chime.
Blind Spot Alert Off
When the BSM system is turned off there will be no visual
or audible alerts from either the BSM or RCP systems.
NOTE:
The BSM system will store the current operating mode
when the vehicle is shut off. Each time the vehicle is
started the previously stored mode will be recalled and
used.
The BSM system can work in conjunction with the
KeySense function of the vehicle (if equipped)
Úpage 64.
FORWARD COLLISION WARNING (FCW)
W
ITH MITIGATION — IF EQUIPPED
FCW with Mitigation provides the driver with audible
warnings, visual warnings (within the instrument cluster
display), and may apply a brake jerk to warn the driver
when it detects a potential frontal collision. The warnings
and limited braking are intended to provide the driver with
enough time to react, avoid or mitigate the potential
collision.
NOTE:FCW monitors the information from the forward looking
sensors as well as the Electronic Brake Controller (EBC), to
calculate the probability of a forward collision. When the
system determines that a forward collision is probable, the
driver will be provided with audible and visual warnings
and may provide a brake jerk warning.
If the driver does not take action based upon these progressive
warnings, then the system will provide a limited level of active
braking to help slow the vehicle and mitigate the potential
forward collision. If the driver reacts to the warnings by braking
and the system determines that the driver intends to avoid the
collision by braking but has not applied sufficient brake force,
the system will compensate and provide additional brake force
as required.
If an FCW with Mitigation event begins at a speed below
37 mph (60 km/h), the system may provide the maximum
braking possible to mitigate the potential forward collision. If
the Forward Collision Warning with Mitigation event stops the
vehicle completely, the system will hold the vehicle at standstill
for two seconds and then release the brakes. If a pedestrian is
encountered in the path at the same speed threshold, the
system will also attempt to bring the vehicle to a stop.
FCW Message
When the system determines a collision with the vehicle in
front of you is no longer probable, the warning message
will be deactivated
Úpage 244.
NOTE:
The minimum speed for FCW activation is 1 mph
(2 km/h).
The FCW alerts may be triggered on objects other than
vehicles such as guardrails or sign posts based on the
course prediction. This is expected and is a part of
normal FCW activation and functionality.
It is unsafe to test the FCW system. To prevent such
misuse of the system, after four Active Braking events
within a key cycle, the Active Braking portion of FCW will
be deactivated until the next key cycle.
The FCW system is intended for on-road use only. If the
vehicle is taken off-road, the FCW system should be
deactivated to prevent unnecessary warnings to the
surroundings.6
23_RUV_OM_EN_US_t.book Page 129
Page 132 of 256
130SAFETY
Turning FCW On Or Off
The Forward Collision menu setting is located in the
Uconnect Settings.
NOTE:The default status of FCW is “On”, this allows the system
to warn you of a possible collision with the vehicle in front
of you.
Changing the FCW status to “Off” deactivates the system,
so no warning or active braking will be available in case of
a possible collision.
NOTE:
The FCW system state is kept in memory from one key
cycle to the next. If the system is turned off, it will
remain off when the vehicle is restarted.
FCW can work in conjunction with the KeySense func -
tion of the vehicle (if equipped)
Úpage 64.
FCW Braking Status And Sensitivity
The FCW Sensitivity and Active Braking status are
programmable through the Uconnect system
Úpage 105.
The default sensitivity of FCW is the “Medium” setting and
the system status is “Warning & Braking”. This allows the
system to warn the driver of a possible collision with the
vehicle in front using audible/visual warnings and it
applies autonomous braking.
Changing the FCW status to the “Far” setting allows the
system to warn the driver of a possible collision with the
vehicle in front using audible/visual warning when the
latter is at a farther distance than the “Medium” setting.
This provides the most reaction time to avoid a possible
collision.
NOTE:The “Far” setting may result in a greater number of FCW
possible collision warnings experienced.
Changing the FCW status to the “Near” setting allows the
system to warn the driver of a possible collision with the
vehicle in front when the distance between the vehicle in
the front is much closer. This setting provides less reaction
time than the “Far” and “Medium” settings, which allows
for a more dynamic driving experience.
NOTE:The “Near” setting may result in a lesser number of FCW
possible collision warnings experienced.
NOTE:
Changing the FCW status to “Only Warning” prevents
the system from providing limited active braking, or
additional brake support if the driver is not braking
adequately in the event of a potential frontal collision,
but maintains the audible and visual warnings.
Changing the FCW status to “Off” prevents the system
from providing autonomous braking, or additional
brake support if the driver is not braking adequately in
the event of a potential frontal collision.
The system will retain the last setting selected by the
driver after ignition shut down.
FCW may not react to irrelevant objects such as over -
head objects, ground reflections, objects not in the
path of the vehicle, stationary objects that are far away,
oncoming traffic, or leading vehicles with the same or
higher rates of speed.
FCW will be disabled with the unavailable screens.
FCW Limited Warning
If the instrument cluster displays “FCW Limited
Functionality” or “FCW Limited Functionality Clean Front
Windshield” momentarily, there may be a condition that
limits FCW functionality. Although the vehicle is still
drivable under normal conditions, the active braking may
not be fully available. Once the condition that limited the
system performance is no longer present, the system will
return to its full performance state. If the problem persists,
see an authorized dealer.
WARNING!
Forward Collision Warning (FCW) is not intended
to avoid a collision on its own, nor can FCW detect
every type of potential collision. The driver has the
responsibility to avoid a collision by controlling the
vehicle via braking and steering. Failure to follow this
warning could lead to serious injury or death.
23_RUV_OM_EN_US_t.book Page 130
Page 133 of 256
SAFETY131
Service FCW Warning
If the system turns off, and the instrument cluster
displays:
FCW Unavailable Service Required
Cruise/FCW Unavailable Service Required
This indicates there is an internal system fault. Although
the vehicle is still drivable under normal conditions, have
the system checked by an authorized dealer.
Pedestrian Emergency Braking (PEB) —
If Equipped
The Pedestrian Emergency Braking (PEB) is a subsystem
of the FCW system that provides the driver with audible
and visual warnings in the instrument cluster display, and
may apply automatic braking when it detects a potential
frontal collision with a pedestrian/cyclist.
If a PEB event begins at a speed below 37 mph (60 km/h),
the system may provide braking to mitigate the potential
collision with a pedestrian/cyclist. If the PEB event stops
the vehicle completely, the system will hold the vehicle at
a standstill for two seconds and then release the brakes.
When the system determines a collision with the
pedestrian in front of you is no longer probable, the
warning message will be deactivated.
The minimum speed for PEB activation is 3 mph (5 km/h). Turning PEB On Or Off
NOTE:
The default status of PEB is “On.” This allows the system to
warn you of a possible frontal collision with the pedestrian.
The PEB button is located in the Uconnect display in the
Controls settings
Úpage 105.
To turn the PEB system off, push the Pedestrian
Emergency Braking OFF button.
To turn the PEB system back on, push the Warning Active
Braking button.
Changing the PEB status to “Off” deactivates the system,
so no warning or active braking will be available in case of
a possible frontal collision with the pedestrian.
NOTE:The PEB system will NOT retain the last setting selected by
the driver after ignition shut down. The system will reset to
the default setting when the vehicle is restarted.
TIRE PRESSURE MONITORING
S
YSTEM (TPMS)
The Tire Pressure Monitoring System (TPMS) will warn
the driver of a low tire pressure based on the vehicle
recommended cold placard pressure.
NOTE:
The TPMS Warning Light will illuminate in the instrument
cluster and a chime will sound when tire pressure is low in one
or more of the four active road tires. In addition, the instrument
cluster will display a graphic showing the pressure values of
each tire with the low tire pressure values in a different color,
or the Uconnect radio will display a TPMS message. When this
occurs you must increase the tire pressure to the recom -
mended cold placard pressure in order for the TPMS Warning
Light to turn off.
The tire pressure will vary with temperature by
approximately 1 psi (7 kPa) for every 12°F (6.5°C). This
means that when the outside temperature decreases, the
tire pressure will decrease. Tire pressure should always be
set based on cold inflation tire pressure. This is defined as
the tire pressure after the vehicle has not been driven for
at least three hours, or driven less than 1 mile (1.6 km)
after a three hour period. The cold tire inflation pressure
must not exceed the maximum inflation pressure molded
into the tire sidewall. The tire pressure will also increase
as the vehicle is driven. This is normal and there should be
no adjustment for this increased pressure.
See
Úpage 224 for information on how to properly inflate
the vehicle’s tires.
WARNING!
Pedestrian Emergency Braking (PEB) is not intended to
avoid a collision on its own, nor can PEB detect every
type of potential collision with a pedestrian. The driver
has the responsibility to avoid a collision by controlling
the vehicle via braking and steering. Failure to follow
this warning could lead to serious injury or death.
6
23_RUV_OM_EN_US_t.book Page 131
Page 134 of 256
132SAFETY
The TPMS will warn the driver of a low tire pressure if the
tire pressure falls below the low-pressure warning limit for
any reason, including low temperature effects and natural
pressure loss through the tire.
The TPMS will continue to warn the driver of low tire
pressure as long as the condition exists, and will not turn
off until the tire pressure is at or above the recommended
cold placard pressure. Once the low tire pressure warning
(TPMS Warning Light) illuminates, you must increase the
tire pressure to the recommended cold placard pressure
in order for the TPMS Warning Light to turn off.
The system will automatically update and the TPMS
Warning Light will turn off once the system receives the
updated tire pressures. The vehicle may need to be driven
for up to 20 minutes above 15 mph (24 km/h) in order for
the TPMS to receive this information.
For example, your vehicle may have a recommended cold
(parked for more than three hours) placard pressure of
33 psi (227 kPa). If the ambient temperature is 68°F
(20°C) and the measured tire pressure is 28 psi
(193 kPa), a temperature drop to 20°F (-7°C) will
decrease the tire pressure to approximately 24 psi
(165 kPa). This tire pressure is low enough to turn on the
TPMS Warning Light. Driving the vehicle may cause the tire
pressure to rise to approximately 28 psi (193 kPa), but the
TPMS Warning Light will still be on. In this situation, the
TPMS Warning Light will turn off only after the tires are
inflated to the vehicle’s recommended cold placard
pressure value
Úpage 244.
NOTE:When filling warm tires, the tire pressure may need to be
increased up to an additional 4 psi (28 kPa) above the
recommended cold placard pressure in order to turn the
TPMS Warning Light off.NOTE:
The TPMS is not intended to replace normal tire care
and maintenance, or to provide warning of a tire failure
or condition.
The TPMS should not be used as a tire pressure gauge
while adjusting your tire pressure.
Driving on a significantly underinflated tire causes the
tire to overheat and can lead to tire failure. Underinfla -
tion also reduces fuel efficiency and tire tread life, and
may affect the vehicle’s handling and stopping ability.
The TPMS is not a substitute for proper tire mainte -
nance, and it is the driver’s responsibility to maintain
correct tire pressure using an accurate tire pressure
gauge, even if underinflation has not reached the level
to trigger illumination of the TPMS Warning Light.
Seasonal temperature changes will affect tire pres -
sure, and the TPMS will monitor the actual tire pres -
sure in the tire.
Premium System
The Tire Pressure Monitoring System (TPMS) uses wireless
technology with wheel rim mounted electronic sensors to
monitor tire pressure levels. Sensors, mounted to each
wheel as part of the valve stem, transmit tire pressure
readings to the receiver module.
NOTE:It is particularly important for you to check the tire
pressure in all of the tires on your vehicle monthly and to
maintain the proper pressure.
CAUTION!
The TPMS has been optimized for the original equip -
ment tires and wheels. TPMS pressures and warning
have been established for the tire size equipped on
your vehicle. Undesirable system operation or sensor
damage may result when using replacement equip -
ment that is not of the same size, type, and/or style.
The TPMS sensor is not designed for use on after -
market wheels and may contribute to a poor overall
system performance or sensor damage. Customers
are encouraged to use Original Equipment Manufac -
turer (OEM) wheels to ensure proper TPMS feature
operation.
Using aftermarket tire sealants may cause the
Tire Pressure Monitoring System (TPMS) sensor to
become inoperable. After using an aftermarket tire
sealant it is recommended that you take your vehicle
to an authorized dealer to have your sensor function
checked.
After inspecting or adjusting the tire pressure always
reinstall the valve stem cap. This will prevent mois -
ture and dirt from entering the valve stem, which
could damage the TPMS sensor.
23_RUV_OM_EN_US_t.book Page 132
Page 152 of 256
150SAFETY
Supplemental Side Air Bag Inflatable Curtains (SABICs)
This vehicle is equipped with Supplemental Side Air Bag
Inflatable Curtains (SABICs).
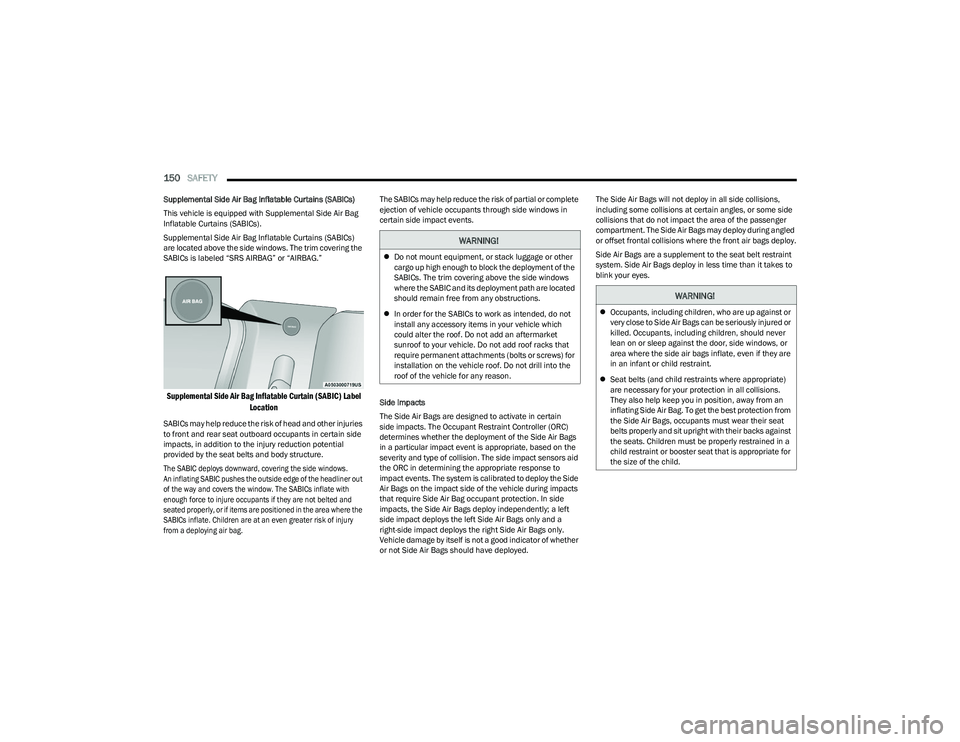
Supplemental Side Air Bag Inflatable Curtains (SABICs)
are located above the side windows. The trim covering the
SABICs is labeled “SRS AIRBAG” or “AIRBAG.”
Supplemental Side Air Bag Inflatable Curtain (SABIC) Label
Location
SABICs may help reduce the risk of head and other injuries
to front and rear seat outboard occupants in certain side
impacts, in addition to the injury reduction potential
provided by the seat belts and body structure.
The SABIC deploys downward, covering the side windows.
An inflating SABIC pushes the outside edge of the headliner out
of the way and covers the window. The SABICs inflate with
enough force to injure occupants if they are not belted and
seated properly, or if items are positioned in the area where the
SABICs inflate. Children are at an even greater risk of injury
from a deploying air bag.
The SABICs may help reduce the risk of partial or complete
ejection of vehicle occupants through side windows in
certain side impact events.
Side Impacts
The Side Air Bags are designed to activate in certain
side impacts. The Occupant Restraint Controller (ORC)
determines whether the deployment of the Side Air Bags
in a particular impact event is appropriate, based on the
severity and type of collision. The side impact sensors aid
the ORC in determining the appropriate response to
impact events. The system is calibrated to deploy the Side
Air Bags on the impact side of the vehicle during impacts
that require Side Air Bag occupant protection. In side
impacts, the Side Air Bags deploy independently; a left
side impact deploys the left Side Air Bags only and a
right-side impact deploys the right Side Air Bags only.
Vehicle damage by itself is not a good indicator of whether
or not Side Air Bags should have deployed.The Side Air Bags will not deploy in all side collisions,
including some collisions at certain angles, or some side
collisions that do not impact the area of the passenger
compartment. The Side Air Bags may deploy during angled
or offset frontal collisions where the front air bags deploy.
Side Air Bags are a supplement to the seat belt restraint
system. Side Air Bags deploy in less time than it takes to
blink your eyes.
WARNING!
Do not mount equipment, or stack luggage or other
cargo up high enough to block the deployment of the
SABICs. The trim covering above the side windows
where the SABIC and its deployment path are located
should remain free from any obstructions.
In order for the SABICs to work as intended, do not
install any accessory items in your vehicle which
could alter the roof. Do not add an aftermarket
sunroof to your vehicle. Do not add roof racks that
require permanent attachments (bolts or screws) for
installation on the vehicle roof. Do not drill into the
roof of the vehicle for any reason.
WARNING!
Occupants, including children, who are up against or
very close to Side Air Bags can be seriously injured or
killed. Occupants, including children, should never
lean on or sleep against the door, side windows, or
area where the side air bags inflate, even if they are
in an infant or child restraint.
Seat belts (and child restraints where appropriate)
are necessary for your protection in all collisions.
They also help keep you in position, away from an
inflating Side Air Bag. To get the best protection from
the Side Air Bags, occupants must wear their seat
belts properly and sit upright with their backs against
the seats. Children must be properly restrained in a
child restraint or booster seat that is appropriate for
the size of the child.
23_RUV_OM_EN_US_t.book Page 150
Page 154 of 256
152SAFETY
(Continued)
Do not drive your vehicle after the air bags have deployed.
If you are involved in another collision, the air bags will not
be in place to protect you.
NOTE:
Air bag covers may not be obvious in the interior trim,
but they will open during air bag deployment.
After any collision, the vehicle should be taken to an
authorized dealer immediately.
Enhanced Accident Response System
In the event of an impact, if the communication network
remains intact, and the power remains intact, depending
on the nature of the event, the ORC will determine whether
to have the Enhanced Accident Response System perform
the following functions:
Cut off fuel to the engine (if equipped).
Cut off battery power to the electric motor (if equipped).
Flash hazard lights as long as the battery has power.
Turn on the interior lights, which remain on as long as
the battery has power or for 15 minutes from the inter -
vention of the Enhanced Accident Response System.
Unlock the power door locks. Your vehicle may also be designed to perform any of these
other functions in response to the Enhanced Accident
Response System:
Turn off the Fuel Filter Heater, Turn off the HVAC Blower
Motor, Close the HVAC Circulation Door
Cut off battery power to the:
Engine
Electric Motor (if equipped)
Electric power steering
Brake booster
Electric park brake
Automatic transmission gear selector
Horn
Front wiper
NOTE:After an accident, remember to cycle the ignition to the
STOP (OFF/LOCK) position and remove the key from the
ignition switch to avoid draining the battery. Carefully
check the vehicle for fuel leaks in the engine compartment
and on the ground near the engine compartment and fuel
tank before resetting the system and starting the engine.
If there are no fuel leaks or damage to the vehicle elec -
trical devices (e.g. headlights) after an accident, reset the
system by following the procedure described below. If you
have any doubt, contact an authorized dealer.
Enhanced Accident Response System
Reset Procedure
In order to reset the Enhanced Accident Response System
functions after an event, the ignition switch must be changed
from ignition START or ON/RUN to ignition OFF. Carefully check
the vehicle for fuel leaks in the engine compartment and on the
ground near the engine compartment and fuel tank before
resetting the system and starting the engine.
After an accident, if the vehicle will not start after
performing the reset procedure, the vehicle must be
towed to an authorized dealer to be inspected and to
have the Enhanced Accident Response System reset.
Maintaining Your Air Bag System
WARNING!
Deployed air bags and seat belt pretensioners cannot
protect you in another collision. Have the air bags, seat
belt pretensioners, and the seat belt retractor assemblies
replaced by an authorized dealer immediately. Also, have the
Occupant Restraint Controller System serviced as well.
WARNING!
Modifications to any part of the air bag system could
cause it to fail when you need it. You could be injured
if the air bag system is not there to protect you.
Do not modify the components or wiring, including
adding any kind of badges or stickers to the steering
wheel hub trim cover or the upper passenger side of
the instrument panel. Do not modify the front fascia/
bumper, vehicle body structure, or add aftermarket
side steps or running boards.
It is dangerous to try to repair any part of the air bag
system yourself. Be sure to tell anyone who works on
your vehicle that it has an air bag system.
23_RUV_OM_EN_US_t.book Page 152
Page 172 of 256
170
IN CASE OF EMERGENCY
HAZARD WARNING FLASHERS
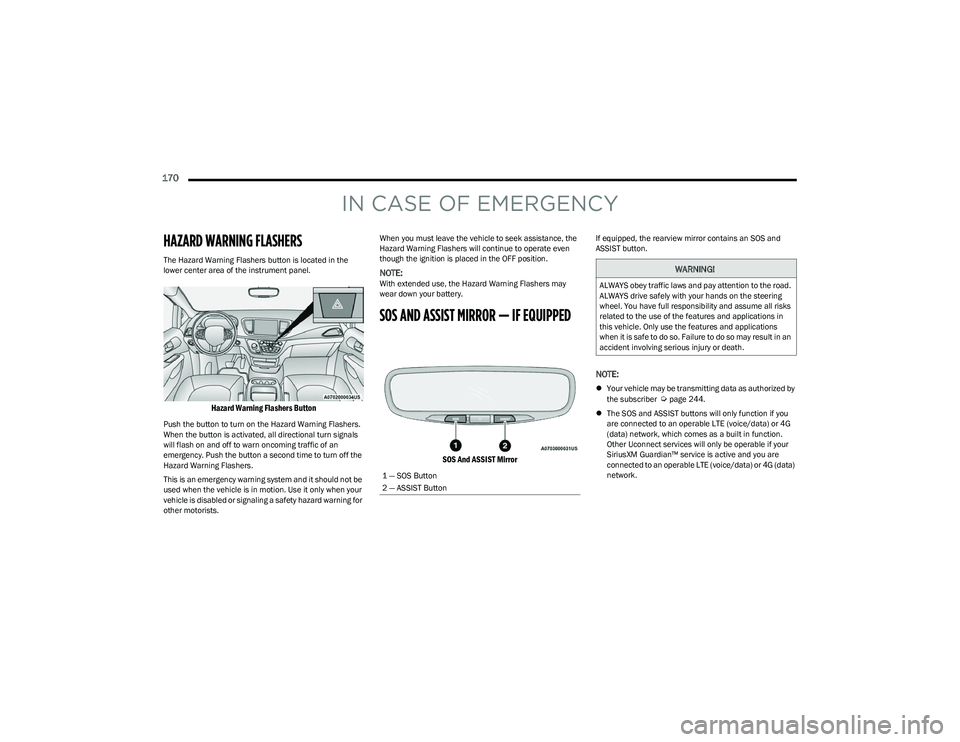
The Hazard Warning Flashers button is located in the
lower center area of the instrument panel.
Hazard Warning Flashers Button
Push the button to turn on the Hazard Warning Flashers.
When the button is activated, all directional turn signals
will flash on and off to warn oncoming traffic of an
emergency. Push the button a second time to turn off the
Hazard Warning Flashers.
This is an emergency warning system and it should not be
used when the vehicle is in motion. Use it only when your
vehicle is disabled or signaling a safety hazard warning for
other motorists.When you must leave the vehicle to seek assistance, the
Hazard Warning Flashers will continue to operate even
though the ignition is placed in the OFF position.
NOTE:With extended use, the Hazard Warning Flashers may
wear down your battery.
SOS AND ASSIST MIRROR — IF EQUIPPED
SOS And ASSIST Mirror
If equipped, the rearview mirror contains an SOS and
ASSIST button.
NOTE:
Your vehicle may be transmitting data as authorized by
the subscriber Úpage 244.
The SOS and ASSIST buttons will only function if you
are connected to an operable LTE (voice/data) or 4G
(data) network, which comes as a built in function.
Other Uconnect services will only be operable if your
SiriusXM Guardian™ service is active and you are
connected to an operable LTE (voice/data) or 4G (data)
network.
1 — SOS Button
2 — ASSIST Button
WARNING!
ALWAYS obey traffic laws and pay attention to the road.
ALWAYS drive safely with your hands on the steering
wheel. You have full responsibility and assume all risks
related to the use of the features and applications in
this vehicle. Only use the features and applications
when it is safe to do so. Failure to do so may result in an
accident involving serious injury or death.
23_RUV_OM_EN_US_t.book Page 170
Page 173 of 256
IN CASE OF EMERGENCY171
SOS Call
1. Push the SOS Call button on the Rearview Mirror.
NOTE:In case the SOS Call button is pushed in error, there will be
a 10 second delay before the SOS Call system initiates a
call to a SOS operator. To cancel the SOS Call connection,
push the SOS call button on the Rearview Mirror or press
the cancellation button on the Device Screen. Termination
of the SOS Call will turn off the green LED light on the
Rearview Mirror.
2. The LED light located between the SOS and Assist
buttons on the Rearview Mirror will turn green once a
connection to a SOS operator has been made.
3. Once a connection between the vehicle and a SOS operator is made, the SOS Call system may transmit
the following important vehicle information to a SOS
operator:
Indication that the occupant placed a SOS Call
The vehicle brand
The last known GPS coordinates of the vehicle
4. You should be able to speak with the SOS operator through the vehicle audio system to determine if
additional assistance is needed.
NOTE:
Your vehicle may be transmitting data as autho -
rized by the subscriber.
Once a connection is made between the vehicle’s
SOS Call system and the SOS operator, the SOS
operator may be able to open a voice connection
with the vehicle to determine if additional assis -
tance is needed. Once the SOS operator opens a
voice connection with the vehicle’s SOS Call system,
the operator should be able to speak with you or
other vehicle occupants and hear sounds occurring
in the vehicle. The vehicle’s SOS Call system will
attempt to remain connected with the SOS operator
until the SOS operator terminates the connection.
5. The SOS operator may attempt to contact appropriate emergency responders and provide them with
important vehicle information and GPS coordinates.
WARNING!
ALWAYS obey traffic laws and pay attention to the road.
ALWAYS drive safely with your hands on the steering
wheel. You have full responsibility and assume all risks
related to the use of the features and applications in
this vehicle. Only use the features and applications
when it is safe to do so. Failure to do so may result in
an accident involving serious injury or death.
WARNING!
If anyone in the vehicle could be in danger (e.g., fire
or smoke is visible, dangerous road conditions or
location), do not wait for voice contact from an Emer -
gency Services Agent. All occupants should exit the
vehicle immediately and move to a safe location.
Never place anything on or near the vehicle’s oper -
able network and GPS antennas. You could prevent
operable network and GPS signal reception, which
can prevent your vehicle from placing an emergency
call. An operable network and GPS signal reception is
required for the SOS Call system to function properly.
The SOS Call system is embedded into the vehicle’s
electrical system. Do not add aftermarket electrical
equipment to the vehicle’s electrical system. This
may prevent your vehicle from sending a signal to
initiate an emergency call. To avoid interference that
can cause the SOS Call system to fail, never add
aftermarket equipment (e.g., two-way mobile radio,
CB radio, data recorder, etc.) to your vehicle’s elec -
trical system or modify the antennas on your vehicle.
IF YOUR VEHICLE LOSES BATTERY POWER FOR ANY
REASON (INCLUDING DURING OR AFTER AN ACCI -
DENT), THE UCONNECT FEATURES, APPS AND
SERVICES, AMONG OTHERS, WILL NOT OPERATE.
Modifications to any part of the SOS Call system
could cause the air bag system to fail when you need
it. You could be injured if the air bag system is not
there to help protect you.
7
23_RUV_OM_EN_US_t.book Page 171
Page 174 of 256
172IN CASE OF EMERGENCY
SOS Call System Limitations
Vehicles sold in Mexico DO NOT have SOS Call system
capabilities.
SOS or other emergency line operators in Mexico may not
answer or respond to SOS system calls.
If the SOS Call system detects a malfunction, any of
the following may occur at the time the malfunction is
detected, and at the beginning of each ignition cycle:
The Rearview Mirror light located between the SOS and
Assist buttons will continuously illuminate red.
The Device Screen will display the following message
“Vehicle device requires service. Please contact an
authorized dealer.”
An In-Vehicle Audio message will state “Vehicle device
requires service. Please contact an authorized dealer.” Even if the SOS Call system is fully functional, factors
beyond FCA US LLC’s control may prevent or stop the SOS
Call system operation. These include, but are not limited
to, the following factors:
The ignition is in the OFF position
The vehicle’s electrical systems are not intact
The SOS Call system software and/or hardware are
damaged during a crash
The vehicle battery loses power or becomes discon -
nected during a vehicle crash
LTE (voice/data) or 4G (data) network and/or Global
Positioning Satellite signals are unavailable or
obstructed
Equipment malfunction at the SOS operator facility
Operator error by the SOS operator
LTE (voice/data) or 4G (data) network congestion
Weather
Buildings, structures, geographic terrain, or tunnelsNOTE:
Your vehicle may be transmitting data as authorized by
the subscriber.
Never place anything on or near the vehicle’s LTE
(voice/data) or 4G (data) and GPS antennas. You could
prevent LTE (voice/data) or 4G (data) and GPS signal
reception, which can prevent your vehicle from placing
an emergency call. An operable LTE (voice/data) or 4G
(data) network connection and a GPS signal is required
for the SOS Call system to function properly.
NOTE:Changes or modifications not expressly approved by the
party responsible for compliance could void the user's
authority to operate the equipment.
Automatic SOS — If Equipped
Automatic SOS is a hands-free safety service that can
immediately connect you with help in the event that your
vehicle’s airbags deploy. Please refer to your provided
radio supplement for complete information.
ASSIST Call
The ASSIST Button is used to automatically connect you to
any one of the following support centers:
Roadside Assistance – If you get a flat tire, or need a tow,
just push the ASSIST button and you will be connected to a
representative for assistance. Roadside Assistance will
know what vehicle is being driven and its location. Addi -
tional fees may apply for roadside assistance.
SiriusXM Guardian™ Customer Care – In-vehicle
support for SiriusXM Guardian™.
WARNING!
Ignoring the Rearview Mirror light could mean you
will not have SOS Call services. If the Rearview Mirror
light is illuminated, have an authorized dealer
service the SOS Call system immediately.
The Occupant Restraint Control module turns on the
air bag Warning Light on the instrument panel if a
malfunction in any part of the system is detected.
If the Air Bag Warning Light is illuminated, have an
authorized dealer service the Occupant Restraint
Control system immediately.
WARNING!
ALWAYS obey traffic laws and pay attention to the road.
ALWAYS drive safely with your hands on the steering
wheel. You have full responsibility and assume all risks
related to the use of the features and applications in
this vehicle. Only use the features and applications
when it is safe to do so. Failure to do so may result in an
accident involving serious injury or death.
23_RUV_OM_EN_US_t.book Page 172
Page 184 of 256
182IN CASE OF EMERGENCY
Sealing A Tire With Tire Service Kit
Whenever You Stop To Use Tire Service Kit:
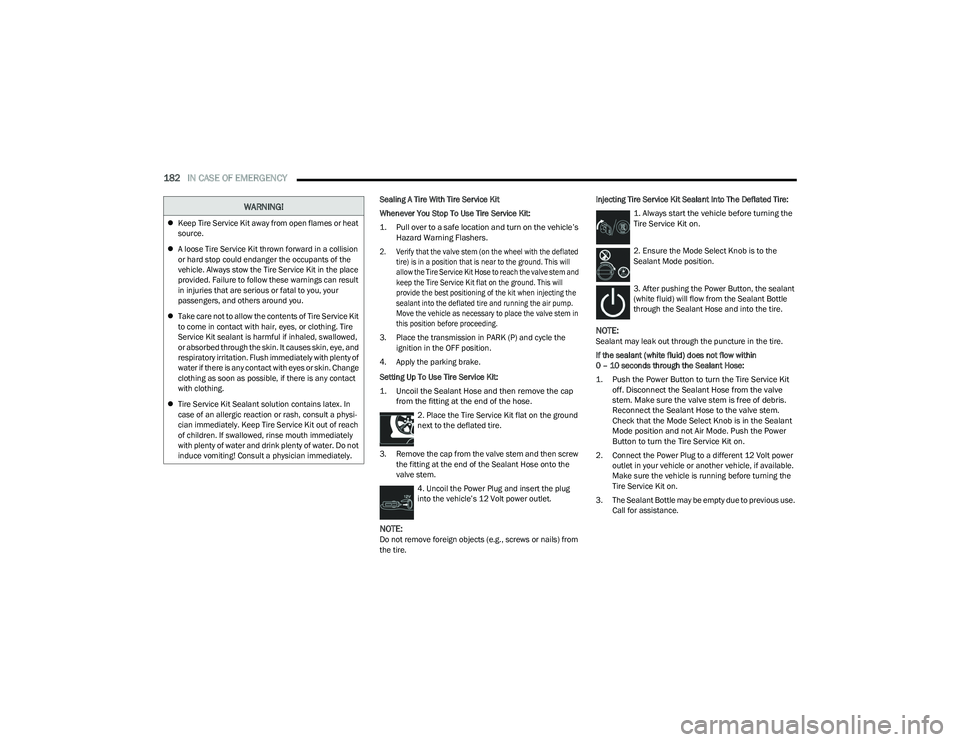
1. Pull over to a safe location and turn on the vehicle’s
Hazard Warning Flashers.
2. Verify that the valve stem (on the wheel with the deflated tire) is in a position that is near to the ground. This will
allow the Tire Service Kit Hose to reach the valve stem and
keep the Tire Service Kit flat on the ground. This will
provide the best positioning of the kit when injecting the
sealant into the deflated tire and running the air pump.
Move the vehicle as necessary to place the valve stem in
this position before proceeding.
3. Place the transmission in PARK (P) and cycle the ignition in the OFF position.
4. Apply the parking brake.
Setting Up To Use Tire Service Kit:
1. Uncoil the Sealant Hose and then remove the cap from the fitting at the end of the hose.
2. Place the Tire Service Kit flat on the ground
next to the deflated tire.
3. Remove the cap from the valve stem and then screw the fitting at the end of the Sealant Hose onto the
valve stem.
4. Uncoil the Power Plug and insert the plug
into the vehicle’s 12 Volt power outlet.
NOTE:Do not remove foreign objects (e.g., screws or nails) from
the tire. Injecting Tire Service Kit Sealant Into The Deflated Tire:
1. Always start the vehicle before turning the
Tire Service Kit on.
2. Ensure the Mode Select Knob is to the
Sealant Mode position.
3. After pushing the Power Button, the sealant
(white fluid) will flow from the Sealant Bottle
through the Sealant Hose and into the tire.
NOTE:Sealant may leak out through the puncture in the tire.
If the sealant (white fluid) does not flow within
0 – 10 seconds through the Sealant Hose:
1. Push the Power Button to turn the Tire Service Kit off. Disconnect the Sealant Hose from the valve
stem. Make sure the valve stem is free of debris.
Reconnect the Sealant Hose to the valve stem.
Check that the Mode Select Knob is in the Sealant
Mode position and not Air Mode. Push the Power
Button to turn the Tire Service Kit on.
2. Connect the Power Plug to a different 12 Volt power outlet in your vehicle or another vehicle, if available.
Make sure the vehicle is running before turning the
Tire Service Kit on.
3. The Sealant Bottle may be empty due to previous use. Call for assistance.
Keep Tire Service Kit away from open flames or heat
source.
A loose Tire Service Kit thrown forward in a collision
or hard stop could endanger the occupants of the
vehicle. Always stow the Tire Service Kit in the place
provided. Failure to follow these warnings can result
in injuries that are serious or fatal to you, your
passengers, and others around you.
Take care not to allow the contents of Tire Service Kit
to come in contact with hair, eyes, or clothing. Tire
Service Kit sealant is harmful if inhaled, swallowed,
or absorbed through the skin. It causes skin, eye, and
respiratory irritation. Flush immediately with plenty of
water if there is any contact with eyes or skin. Change
clothing as soon as possible, if there is any contact
with clothing.
Tire Service Kit Sealant solution contains latex. In
case of an allergic reaction or rash, consult a physi -
cian immediately. Keep Tire Service Kit out of reach
of children. If swallowed, rinse mouth immediately
with plenty of water and drink plenty of water. Do not
induce vomiting! Consult a physician immediately.
WARNING!
23_RUV_OM_EN_US_t.book Page 182