ECU CITROEN BERLINGO 2023 Owners Manual
[x] Cancel search | Manufacturer: CITROEN, Model Year: 2023, Model line: BERLINGO, Model: CITROEN BERLINGO 2023Pages: 324, PDF Size: 9.41 MB
Page 18 of 324
16
Instruments
If this procedure does not work, secure the
vehicle:
►
Park on a level surface.
►
With a manual gearbox, engage a gear
.
►
With an automatic gearbox or drive selector
,
select
P, then place the supplied chock against
one of the wheels.
Then carry out (2).
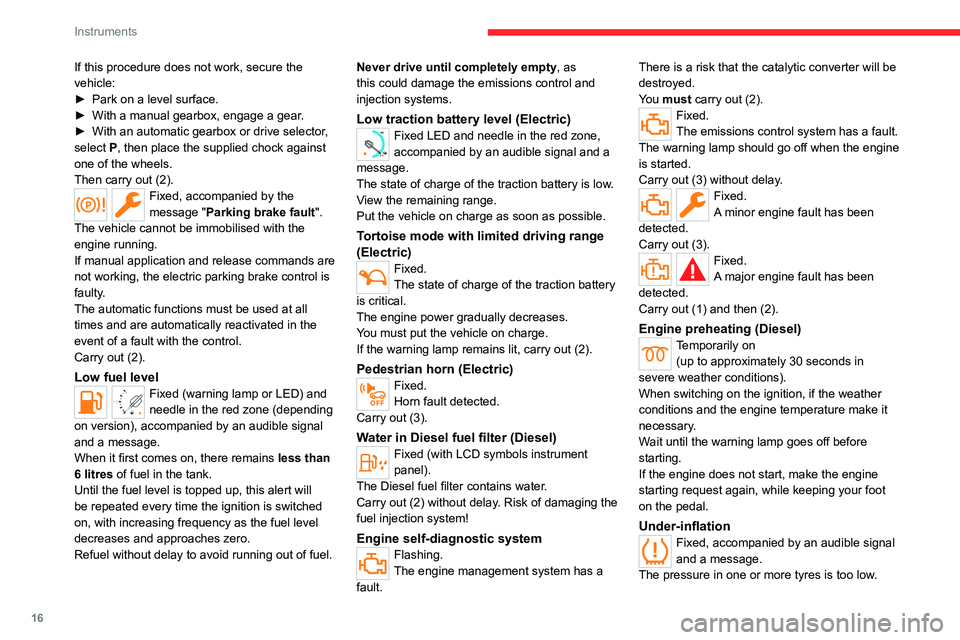
Fixed, accompanied by the
message "Parking brake fault".
The vehicle cannot be immobilised with the
engine running.
If manual application and release commands are
not working, the electric parking brake control is
faulty.
The automatic functions must be used at all
times and are automatically reactivated in the
event of a fault with the control.
Carry out (2).
Low fuel levelFixed (warning lamp or LED) and
needle in the red zone (depending
on version), accompanied by an audible signal
and a message.
When it first comes on, there remains less than
6 litres of fuel in the tank.
Until the fuel level is topped up, this alert will
be repeated every time the ignition is switched
on, with increasing frequency as the fuel level
decreases and approaches zero.
Refuel without delay to avoid running out of fuel. Never drive until completely empty, as
this could damage the emissions control and
injection systems.
Low traction battery level (Electric)
0 %
100
Fixed LED and needle in the red zone,
accompanied by an audible signal and a
message.
The state of charge of the traction battery is low.
View the remaining range.
Put the vehicle on charge as soon as possible.
Tortoise mode with limited driving range
(Electric)
Fixed.
The state of charge of the traction battery
is critical.
The engine power gradually decreases.
You must put the vehicle on charge.
If the warning lamp remains lit, carry out
(2).
Pedestrian horn (Electric)Fixed.
Horn fault detected.
Carry out (3).
Water in Diesel fuel filter (Diesel)Fixed (with LCD symbols instrument
panel).
The Diesel fuel filter contains water.
Carry out (2) without delay. Risk of damaging the
fuel injection system!
Engine self-diagnostic systemFlashing.
The engine management system has a
fault. There is a risk that the catalytic converter will be
destroyed.
You must carry out (2).
Fixed.
The emissions control system has a fault.
The warning lamp should go off when the engine
is started.
Carry out (3) without delay.
Fixed.
A minor engine fault has been
detected.
Carry out (3).
Fixed.
A major engine fault has been
detected.
Carry out (1) and then (2).
Engine preheating (Diesel)Temporarily on (up to approximately 30 seconds in
severe weather conditions).
When switching on the ignition, if the weather
conditions and the engine temperature make it
necessary.
Wait until the warning lamp goes off before
starting.
If the engine does not start, make the engine
starting request again, while keeping your foot
on the pedal.
Under-inflationFixed, accompanied by an audible signal
and a message.
The pressure in one or more tyres is too low.
Page 36 of 324
34
Access
Purchasing a second-hand vehicle
Have the key codes memorised by a
CITROËN dealer, to ensure that the keys in
your possession are the only ones able to
start the vehicle.
Accumulations (water, dust, grime, salt, etc.) on the inner surface of the door
handle may affect detection.
If cleaning the inner surface of the door
handle using a cloth does not restore
detection, contact a CITROËN dealer or a
qualified workshop.
A sudden splash of water (stream of water,
high pressure jet washer, etc.) may be
identified by the system as the desire to open
the vehicle.
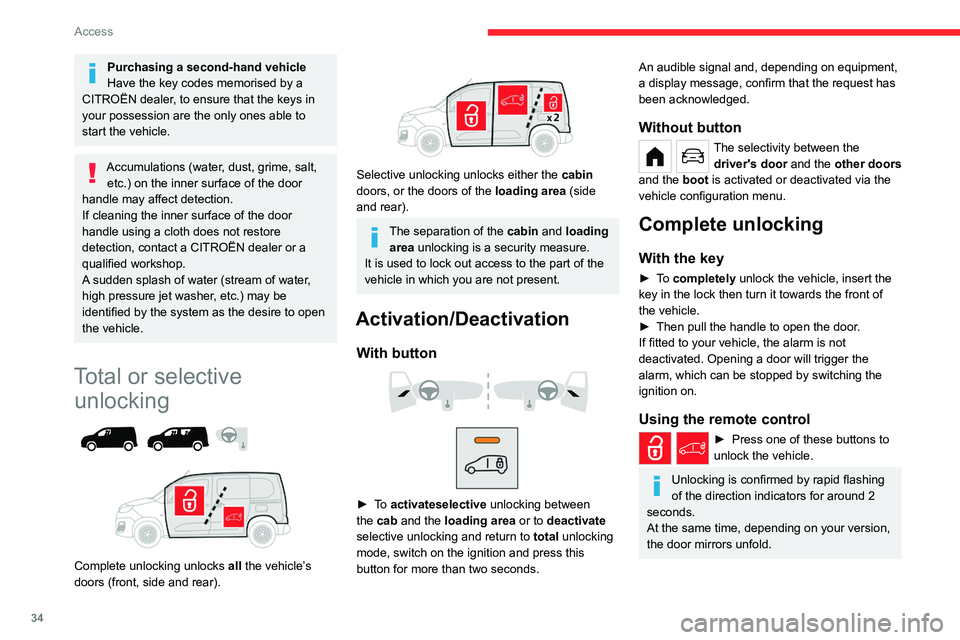
Total or selective unlocking
Complete unlocking unlocks all the vehicle’s
doors (front, side and rear).
Selective unlocking unlocks either the cabin
doors, or the doors of the loading area (side
and rear).
The separation of the cabin and loading area unlocking is a security measure.
It is used to lock out access to the part of the
vehicle in which you are not present.
Activation/Deactivation
With button
► To activateselective unlocking between
the cab and the loading area or to deactivate
selective unlocking and return to total unlocking
mode, switch on the ignition and press this
button for more than two seconds.
An audible signal and, depending on equipment,
a display message, confirm that the request has
been acknowledged.
Without button
The selectivity between the driver's door and the other doors
and the boot is activated or deactivated via the
vehicle configuration menu.
Complete unlocking
With the key
► To completely unlock the vehicle, insert the
key in the lock then turn it towards the front of
the vehicle.
►
Then pull the handle to open the door
.
If fitted to your vehicle, the alarm is not
deactivated. Opening a door will trigger the
alarm, which can be stopped by switching the
ignition on.
Using the remote control
► Press one of these buttons to
unlock the vehicle.
Unlocking is confirmed by rapid flashing
of the direction indicators for around 2
seconds.
At the same time, depending on your version,
the door mirrors unfold.
Page 44 of 324
42
Access
If one of the doors is open, the central
locking from the inside does not function.
This is signalled by a mechanical noise from
the locks.
If the boot is open, only the locking of the
other doors is carried out. The indicator lamp
in the button remains off.
When locking from inside, the door
mirrors do not fold.
The indicator lamp also goes off when unlocking one or more accesses.
Automatic mode
This is the automatic central locking of the
vehicle when driving, also called anti-intrusion
security.
For more information on Anti-intrusion
security, refer to the corresponding section.
Locking/unlocking the
loading area
This button is unavailable if the vehicle has been locked or deadlocked from
outside (using the key, remote control or
Keyless Entry and Start, depending on
equipment) or if any of the doors are still
open.
For more information on the Key, and, in
particular, on programming selective
locking for the loading area, refer to the
corresponding section.
Manual mode
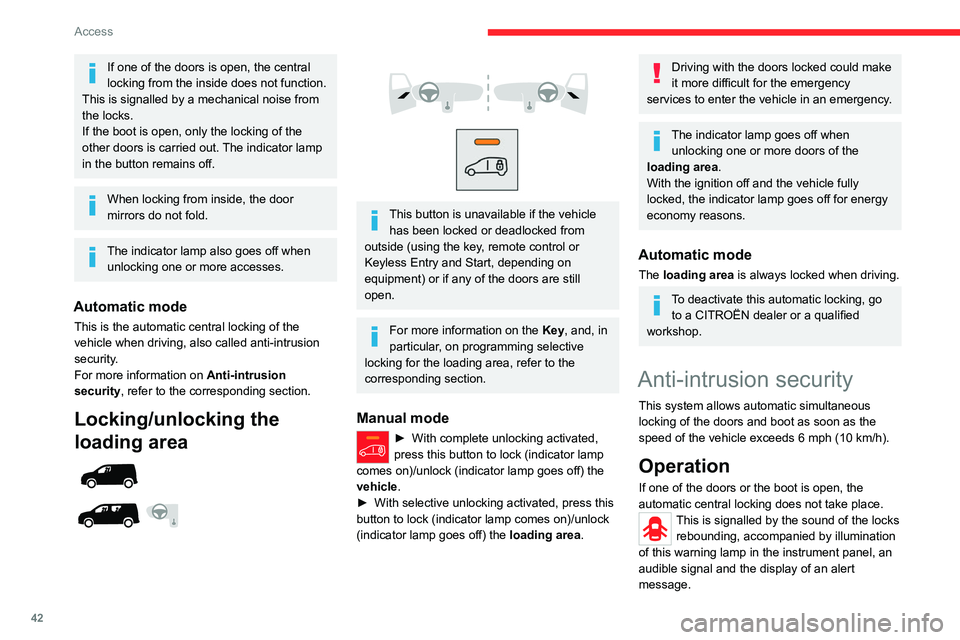
► With complete unlocking activated,
press this button to lock (indicator lamp
comes on)/unlock (indicator lamp goes off) the
vehicle
.
►
With selective unlocking activated, press this
button to lock (indicator lamp comes on)/unlock
(indicator lamp goes off) the loading area
.
Driving with the doors locked could make
it more difficult for the emergency
services to enter the vehicle in an emergency.
The indicator lamp goes off when unlocking one or more doors of the
loading area.
With the ignition off and the vehicle fully
locked, the indicator lamp goes off for energy
economy reasons.
Automatic mode
The loading area is always locked when driving.
To deactivate this automatic locking, go to a CITROËN dealer or a qualified
workshop.
Anti-intrusion security
This system allows automatic simultaneous
locking of the doors and boot as soon as the
speed of the vehicle exceeds 6 mph (10 km/h).
Operation
If one of the doors or the boot is open, the
automatic central locking does not take place.
This is signalled by the sound of the locks rebounding, accompanied by illumination
of this warning lamp in the instrument panel, an
audible signal and the display of an alert
message.
Page 47 of 324
45
Access
2This roof flap at the rear is compatible only with
side-hinged doors.
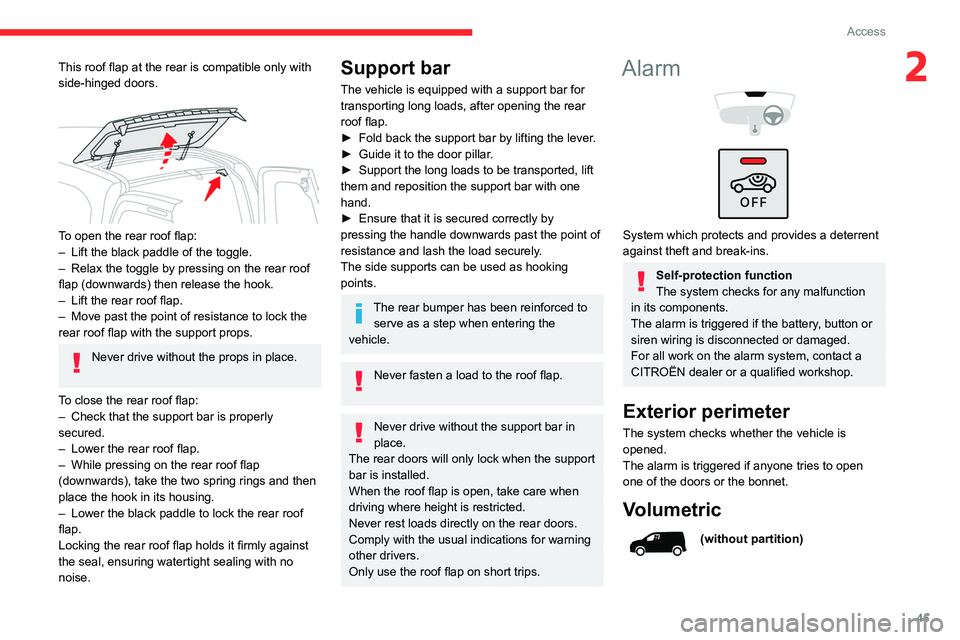
To open the rear roof flap:
– Lift the black paddle of the toggle.
–
Relax the toggle by pressing on the rear roof
flap (downwards) then release the hook.
–
Lift the rear roof flap.
–
Move past the point of resistance to lock the
rear roof flap with the support props.
Never drive without the props in place.
To close the rear roof flap:
–
Check that the support bar is properly
secured.
–
Lower the rear roof flap.
–
While pressing on the rear roof flap
(downwards), take the two spring rings and then
place the hook in its housing.
–
Lower the black paddle to lock the rear roof
flap.
Locking the rear roof flap holds it firmly against
the seal, ensuring watertight sealing with no
noise.
Support bar
The vehicle is equipped with a support bar for
transporting long loads, after opening the rear
roof flap.
►
Fold back the support bar by lifting the lever
.
►
Guide it to the door pillar
.
►
Support the long loads to be transported, lift
them and reposition the support bar with one
hand.
►
Ensure that it is secured correctly by
pressing the handle downwards past the point of
resistance and lash the load securely
.
The side supports can be used as hooking
points.
The rear bumper has been reinforced to serve as a step when entering the
vehicle.
Never fasten a load to the roof flap.
Never drive without the support bar in
place.
The rear doors will only lock when the support
bar is installed.
When the roof flap is open, take care when
driving where height is restricted.
Never rest loads directly on the rear doors.
Comply with the usual indications for warning
other drivers.
Only use the roof flap on short trips.
Alarm
System which protects and provides a deterrent
against theft and break-ins.
Self-protection function
The system checks for any malfunction
in its components.
The alarm is triggered if the battery, button or
siren wiring is disconnected or damaged.
For all work on the alarm system, contact a
CITROËN dealer or a qualified workshop.
Exterior perimeter
The system checks whether the vehicle is
opened.
The alarm is triggered if anyone tries to open
one of the doors or the bonnet.
Volumetric
(without partition)
Page 49 of 324
47
Access
2► Immediately lock the vehicle using the remote
control or the "Keyless Entry and Start" system.
Only the exterior perimeter monitoring is
activated; the button's red indicator lamp flashes
once every second.
To be taken into account, the deactivation must be carried out every time the
ignition is switched off.
Reactivating the interior volumetric
and anti-tilt monitoring
► Deactivate the exterior perimeter monitoring
by unlocking the vehicle using the remote control
or the "Keyless Entry and Start" system.
The indicator lamp in the button goes off.
►
Reactivate all monitoring by locking the
vehicle using the remote control or the "Keyless
Entry and Start" system.
The red indicator lamp in the button once again
flashes every second.
Triggering of the alarm
This is indicated by sounding of the siren
and flashing of the direction indicators for 30
seconds.
Depending on the country of sale, certain
monitoring functions remain active until the alarm
has been triggered eleven times consecutively.
When the vehicle is unlocked using the remote
control or the "Keyless Entry and Start" system,
rapid flashing of the indicator lamp in the button informs you that the alarm was triggered during
your absence. When the ignition is switched on,
this flashing stops immediately.
Failure of the remote control
To deactivate the monitoring functions:
►
Unlock the vehicle using the key in the front
left-hand door lock.
►
Open the door; the alarm is triggered.
►
Switch on the ignition; this stops the alarm.
The indicator lamp in the button goes off.
Locking the vehicle without
activating the alarm
► Lock or deadlock the vehicle using the key
(built-in the remote control) in the driver's door
lock.
Malfunction
When the ignition is switched on, the fixed
lighting of the red indicator lamp in the button
indicates a system malfunction.
Have it checked by a CITROËN dealer or a
qualified workshop.
Automatic activation
(Depending on version)
The system is activated automatically 2 minutes
after the last door or the boot is closed.
►
T
o avoid triggering the alarm on entering the
vehicle, first press the unlocking button on the remote control or unlock the vehicle using the
"Keyless Entry and Start" system.
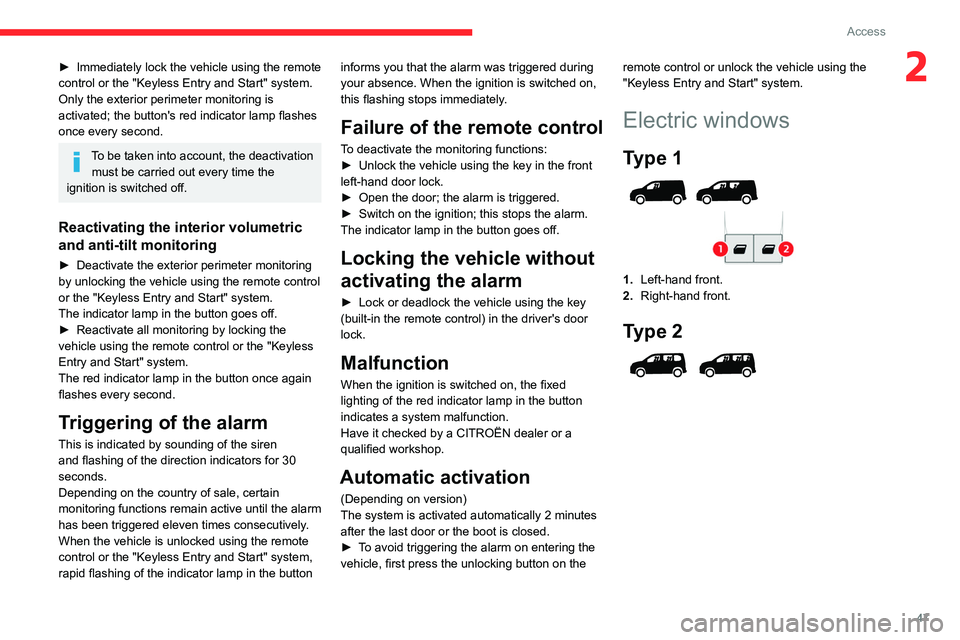
Electric windows
Type 1
1.
Left-hand front.
2. Right-hand front.
Type 2
Page 51 of 324

49
Access
2Be aware of passengers and/or other persons
present when closing windows remotely using
the electronic key.
Do not put your head or arms through the
open windows when the vehicle is moving -
risk of serious injury!
Tilting rear door windows
Opening
► Turn the lever outwards.
► Push it fully to secure the window in the open
position.
Closing
► Pull the lever to release the window .
► T urn the lever fully inwards to secure the
window in the closed position.
Page 52 of 324

50
Ease of use and comfort
General
recommendations for the
seats
For safety reasons, seat adjustments
must only be made when the vehicle is
stationary.
Folding or unfolding the seat backrests
must only be done with the vehicle
stationary.
Before moving the seat backwards,
ensure that there is no person or object
that might prevent the full travel of the seat.
There is a risk of trapping or pinching
passengers if present in the rear seats or of
jamming the seat if large objects are placed
on the floor behind the seat.
Do not place hard or heavy objects on
the backrests forming a table. They could
become dangerous projectiles in the event of
sudden braking or a collision.
–
Do not remove a head restraint without
stowing it; secure it to a support inside the
vehicle.
–
Check that the seat belts remain accessible
to the passenger and easy to fasten.
–
Passengers must never take their seat
without adjusting and fastening their seat belt.
– In row 3, be careful not to leave your feet
under the row 2 seat while it is being tilted.
–
When a row 3 seat is in the fully folded
position, ensure that the strap is correctly
hooked to the
Top Tether fixing of the row 2
backrest: risk of unexpected tipping of the
seat.
Before carrying out the manoeuvres,
check that nothing and no one is
obstructing the moving elements and their
locking.
To avoid sudden folding, take care to hold the
backrest and support it until it is horizontal.
Never put your hand underneath the seat
cushion to guide the seat downwards or
upwards, you could get your fingers trapped.
Place your hand on the grip/strap (depending
on equipment) at the top of the seat cushion.
Please note: an incorrectly latched
backrest compromises the safety of
passengers in the event of sudden braking or
an impact.
The contents of the boot may be thrown
forward - risk of severe injury!
Front seats
Correct driving position
Before taking to the road and to make the most
of the ergonomic layout of the instruments and
controls, carry out these adjustments in the
following order:
–
head restraint height.
–
seat backrest angle.
–
seat cushion height.
–
longitudinal seat position.
–
steering wheel height and reach.
–
rear view mirror and door mirrors.
Once these adjustments have been
made, check that the instrument panel
can be viewed correctly from your driving
position.
Page 54 of 324

52
Ease of use and comfort
► Slot the armrest into the backrest, ensuring
that you align the bayonet lugs with the holes.
►
Push the armrest shaft towards the backrest.
►
While holding it in this position, rotate the
armrest towards the front.
The armrest is once
again secured onto the backrest.
Storage compartment under
the seat
► Lift the passenger ’s seat cushion to access
the storage compartment.
Retractable position
► If the centre console inconveniences you,
remove the passenger's seat armrest.
►
Push the control rearwards fully to tilt and
guide the assembly
.
This position allows you to transport long loads
inside the vehicle with the doors closed.
When retracted, the maximum permitted weight
on the backrest is 50
kg.
►
T
o reposition the seat cushion, raise the
backrest until it locks in the raised position.
Heated seat control
► Approximately 30 seconds after starting the
engine, press the control.
It can be activated when the outside temperature
is below 20°C.
The temperature is controlled automatically
.
Pressing again interrupts operation.
If you press the control while the engine
is not running, the request will be
memorised for approximately 2 minutes.
With the two-seat front bench seat, the driver's
seat control switches the heating on or off for the
bench seat’s outer seat.
Do not use the function when the seat
is not occupied.
Reduce the heating intensity as soon as
possible.
When the seat and passenger compartment
have reached a satisfactory temperature,
Page 57 of 324

55
Ease of use and comfort
3A child-monitoring mirror is installed above
the interior rear view mirror. It allows the
vehicle's rear passengers to be observed and
facilitates discussion between the front and rear
passengers without changing the mirror setting
and without turning around. It can be folded
easily to avoid dazzle.
2-seat front bench seat
Central seat
Table position
► To lower the backrest, pull the tab on the
lower edge of the seat.
The backrest of the central seat of the bench
seat tilts to form a work table, creating a mobile
office (for use while stationary).
The vehicle may also be fitted with a pivoting
table.
►
T
o return the backrest to the sitting position,
stow the table, then guide it until it locks.
Take care not to jam the tab under the seat
cushion while moving the backrest.
Never use the table while the vehicle is
being driven.
In the event of sudden braking or impact, any
objects on the table might become dangerous
projectiles that could cause injury.
Storage compartment under seats
► Lift the central seat to access the storage
compartment. This space can be secured by
fitting a padlock (not supplied).
Each time you lock the seat in the sitting
position, make sure that passengers
have access to the seat belt end pieces and
the associated straps.
Page 62 of 324

60
Ease of use and comfort
Never drive with passengers seated at
the rear when the head restraints are
removed or not in the high position; the head
restraints must be in place and in the high
position.
For more information on the Seat belts,
refer to the corresponding section.
Interior fittings
Mats
Fitting
When fitting it on the driver's side, only use the
mountings present on the carpet.
The other mats are simply laid over the carpet.
Removing/refitting
► To remove it on the driver's side, move
the seat as far back as possible and give the
fasteners a quarter turn.
► To refit it, position the mat and replace the
fasteners, giving them a quarter turn.
►
Check that the mat is secured correctly
.
To avoid any risk of jamming the pedals:– Only use mats which are suited to the
fixings already present in the vehicle; these
fixings must be used.
–
Never fit one mat on top of another
.
The use of mats not approved by CITROËN
may interfere with access to the pedals and
hinder the operation of the cruise control/
speed limiter.
The approved mats have two fasteners
located underneath the seat.
Overhead storage unit
This compartment, located above the sun visors,
can be used to store various objects.
Roof and roof storage
Overhead storage compartment and
central storage compartment
The overhead storage compartment (1) is
located above the sun visors and can be used to
store miscellaneous objects.
There is a storage space
(2)
located in the roof
lining.
The maximum permitted load is 6
kg.