headlamp CITROEN BERLINGO ELECTRIC 2017 Handbook (in English)
[x] Cancel search | Manufacturer: CITROEN, Model Year: 2017, Model line: BERLINGO ELECTRIC, Model: CITROEN BERLINGO ELECTRIC 2017Pages: 328, PDF Size: 11.85 MB
Page 59 of 328
57
Berlingo-2-VU_en_Chap04_Ergonomie_ed01-2015
Guide-me-home lighting
Keeping the dipped beam headlamps
on temporarily with the ignition off,
makes the driver's exit easier when the
light is poor.
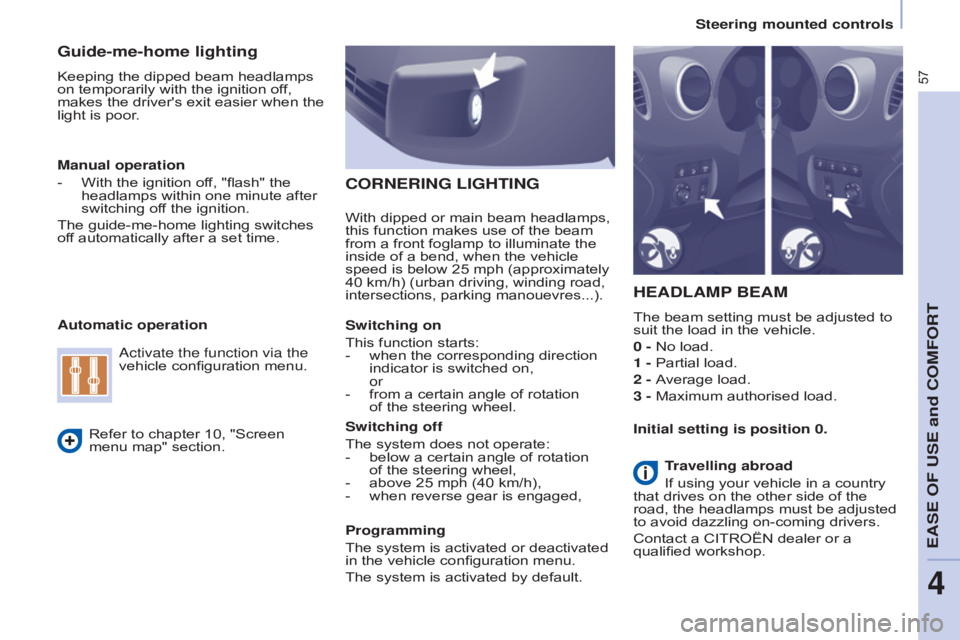
HEADLAMP BEAM
The beam setting must be adjusted to
suit the load in the vehicle.
0 - No load.
1 - Partial load.
2 - Average load.
3 - Maximum authorised load.
Manual operation
-
With the ignition of
f, "flash" the
headlamps within one minute after
switching off the ignition.
The guide-me-home lighting switches
off automatically after a set time.
Automatic operation
Refer to chapter 10, "Screen
menu map" section.
a
ctivate the function via the
vehicle configuration menu.
Initial setting is position 0.
CORnERInG LIGHTInG
With dipped or main beam headlamps,
this function makes use of the beam
from a front foglamp to illuminate the
inside of a bend, when the vehicle
speed is below 25 mph (approximately
40 km/h) (urban driving, winding road,
intersections, parking manouevres...).
Switching on
This function starts:
-
when the corresponding direction
indicator is switched on,
or
-
from a certain angle of rotation
of the steering wheel.
Switching off
The system does not operate:
-
below a certain angle of rotation
of the steering wheel,
-
above 25 mph (40 km/h),
-
when reverse gear is engaged,
Programming
The system is activated or deactivated
in the vehicle configuration menu.
The system is activated by default. T
ravelling abroad
If using your vehicle in a country
that drives on the other side of the
road, the headlamps must be adjusted
to avoid dazzling on-coming drivers.
Contact a CITROËN dealer or a
qualified workshop.
Steering mounted controls
EASE OF USE and COMFORT
4
Page 61 of 328
59
Berlingo-2-VU_en_Chap04_Ergonomie_ed01-2015
Screenwash and headlamp wash
Pull the stalk towards you, the wash-
wipe is accompanied by a timed sweep
of the wipers.
The headlamp wash is linked with the
wash-wipe, it is triggered if the dipped
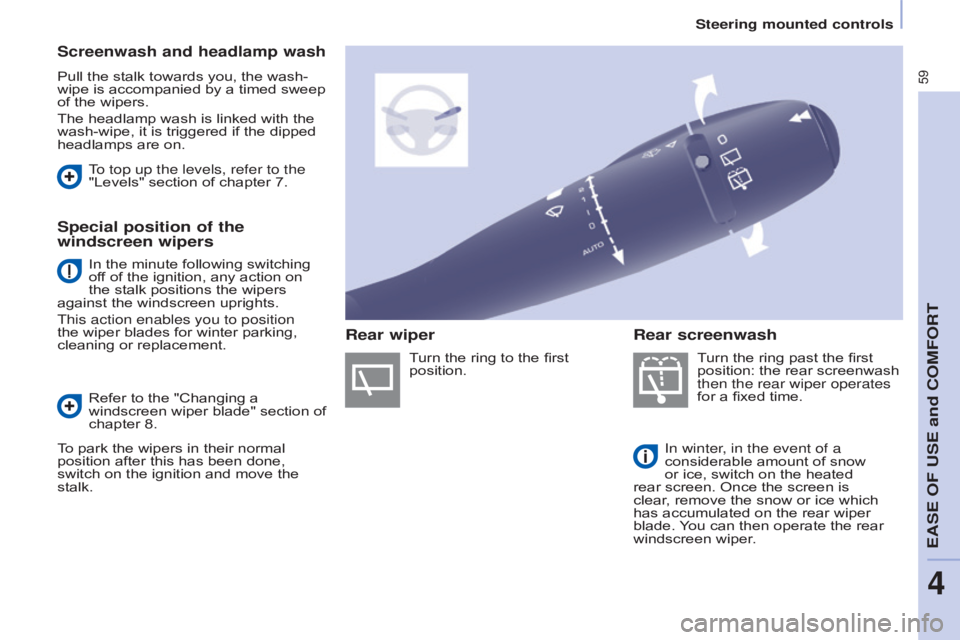
headlamps are on.Turn the ring past the first
position: the rear screenwash
then the rear wiper operates
for a fixed time.
In winter, in the event of a
considerable amount of snow
or ice, switch on the heated
rear screen. Once the screen is
clear, remove the snow or ice which
has accumulated on the rear wiper
blade. You can then operate the rear
windscreen wiper.
To top up the levels, refer to the
"Levels" section of chapter 7.
Special position of the
windscreen wipers
Refer to the "Changing a
windscreen wiper blade" section of
chapter 8.
To park the wipers in their normal
position after this has been done,
switch on the ignition and move the
stalk. Turn the ring to the first
position.
Rear screenwash
Rear wiper
In the minute following switching
off of the ignition, any action on
the stalk positions the wipers
against the windscreen uprights.
This action enables you to position
the wiper blades for winter parking,
cleaning or replacement.
Steering mounted controls
EASE OF USE and COMFORT
4
Page 130 of 328
128
Berlingo-2-VU_en_Chap07_Verification_ed01-2015Berlingo-2-VU_en_Chap07_Verification_ed01-2015
Cooling system
Only use the fluid recommended by the
manufacturer.
Otherwise, you risk seriously damaging
your engine.
When the engine is warm, the
temperature of the coolant is controlled
by the engine fan. As this fan can
operate with the ignition key removed
and because the cooling system is
pressurised, wait for at least one hour
after the engine has stopped before
carrying out any work.
Slacken the cap by 1/4 of a turn to
release the pressure to prevent any
risk of scalding. When the pressure
has dropped, remove the cap and top
up the level with coolant.
If fluid has to be added frequently,
this indicates a fault which must be
checked by a CITROËN dealer as
soon as possible.
Power steering fluid level
The vehicle must be parked on level
ground with the engine cold. Unscrew
the cap integrated with the gauge and
check the level which must be between
the MIN and MAX marks.In order to regenerate the filter, you
are advised to drive at a speed higher
than 40 mph (60 km/h) for at least five
minutes as soon as possible, when
traffic conditions permit (until the
message disappears and the service
warning lamp goes off).
During regeneration of the particle
emission filter, the noise of a relay
operating may be heard under the
dashboard.
If the message is still displayed and
if the service warning lamp remains
on, contact a CITROËN dealer or a
qualified workshop.
Topping up
The level must be between the MIN
and MAX marks on the expansion
bottle. If more than 1 litre of fluid is
required to top up the level, have the
system checked by a CITROËN dealer
or a qualified workshop.
Screenwash and headlamp
wash level
For best quality cleaning and for your
safety, we would advise that you use
products of the CITROËN range.
For optimum cleaning and to avoid
freezing, this fluid must not be topped
up or replaced with plain water.
Capacity of the screenwash reservoir:
approximately 3 litres.
If your vehicle is fitted with headlamp
washers, the capacity of the reservoir
is 6 litres.
Diesel additive level
(Diesel with particle
filter)
Topping up
This additive must be topped up by
a CITROËN dealer or a qualified
workshop without delay.
Waste products
Avoid prolonged contact of used oil
with the skin.
Brake fluid is harmful to health and
very corrosive.
Do not dispose of used oil, brake fluid
or coolant into drains or into the ground
but into the containers dedicated to this
use at a CITROËN dealer (France) or
an authorised waste disposal site.
The minimum level of this additive
is indicated by lighting of the service
warning lamp, accompanied by an
audible signal and a message in the
screen.
When this occurs with the engine
running it is due to the start of
saturation of the particle filter
(exceptionally prolonged urban type
driving conditions: low speed, long
traffic jams, ...).
Levels
Page 151 of 328
149
Berlingo-2-VU_en_Chap08_Aide rapide_ed01-2015Berlingo-2-VU_en_Chap08_Aide rapide_ed01-2015
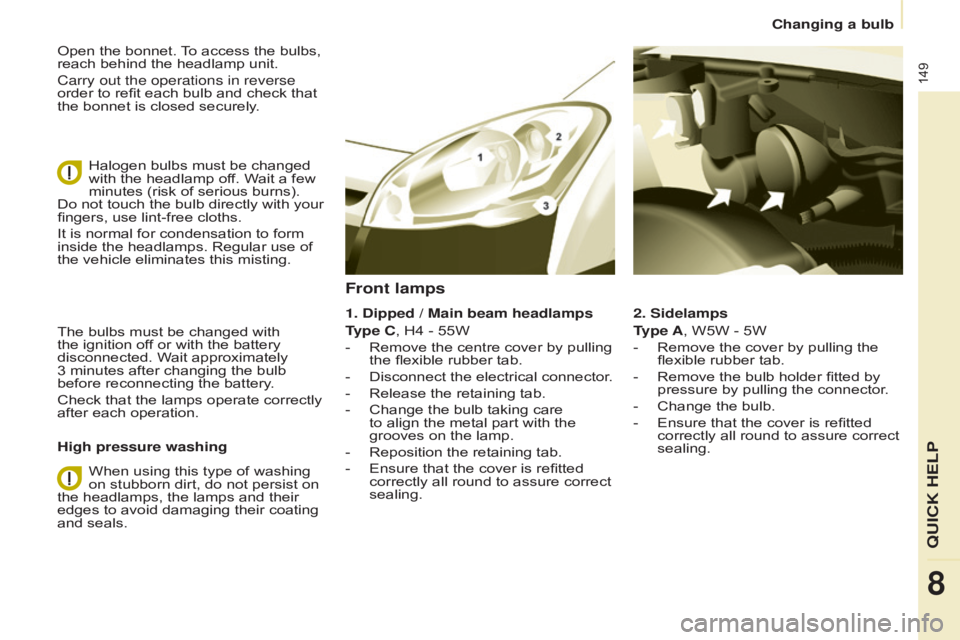
Open the bonnet. To access the bulbs,
reach behind the headlamp unit.
Carry out the operations in reverse
order to refit each bulb and check that
the bonnet is closed securely.Halogen bulbs must be changed
with the headlamp off. Wait a few
minutes (risk of serious burns).
Do not touch the bulb directly with your
fingers, use lint-free cloths.
It is normal for condensation to form
inside the headlamps. Regular use of
the vehicle eliminates this misting.
The bulbs must be changed with
the ignition off or with the battery
disconnected. Wait approximately
3 minutes after changing the bulb
before reconnecting the battery.
Check that the lamps operate correctly
after each operation.
High pressure washing
When using this type of washing
on stubborn dirt, do not persist on
the headlamps, the lamps and their
edges to avoid damaging their coating
and seals. 2. Sidelamps
Type A, W5W - 5W
-
Remove the cover by pullin
g the
flexible rubber tab.
-
Remove the bulb holder fitted by
pressure by pullin
g the connector.
-
Change the bulb.
-
Ensure that the cover is refitted
correctly all round to assure correct
sealing.
Front lamps
1. Dipped / Main beam headlamps
Type C, H4 - 55W
-
Remove the centre cover by pullin
g
the flexible rubber tab.
-
Disconnect the electrical connector
.
-
Release the retaining tab.
-
Change the bulb taking care
to align the metal part with the
grooves on the lamp.
-
Reposition the retaining tab.
-
Ensure that the cover is refitted
correctly all round to assure correct
sealing.
QUICk HELP
8
Changing a bulb
Page 154 of 328
152
Berlingo-2-VU_en_Chap08_Aide rapide_ed01-2015Berlingo-2-VU_en_Chap08_Aide rapide_ed01-2015
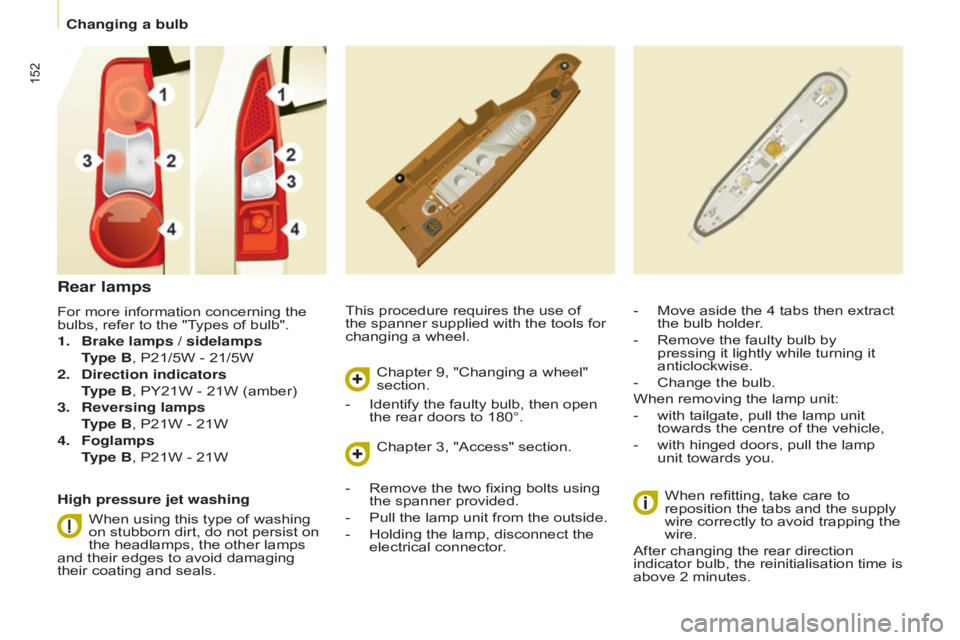
This procedure requires the use of
the spanner supplied with the tools for
changing a wheel.-
Move aside the 4 tabs then extract
the bulb holder
.
-
Remove the faulty bulb by
pressing it lightly while turning it
anticlockwise.
-
Change the bulb.
When removing the lamp unit:
-
with tailgate, pull the lamp unit
towards the centre of the vehicle,
-
with hinged doors, pull the lamp
unit towards you.When refitting, take care to
reposition the tabs and the supply
wire correctly to avoid trapping the
wire.
After changing the rear direction
indicator bulb, the reinitialisation time is
above 2 minutes.
Rear lamps
For more information concerning the
bulbs, refer to the "Types of bulb".
1.
Brake lamps / sidelamps
T
ype B, P21/5W - 21/5W
2.
Direction indicators
T
ype B, PY21W - 21W (amber)
3.
Reversing lamps
T
ype B, P21W - 21W
4.
Foglamps
T
ype B, P21W - 21W
High pressure jet washing When using this type of washing
on stubborn dirt, do not persist on
the headlamps, the other lamps
and their edges to avoid damaging
their coating and seals. Chapter 9, "Changing a wheel"
section.
Chapter 3, "Access" section.
-
Identify the faulty bulb, then open
the rear doors to 180°.
-
Remove the two fixing bolts using
the spanner provided.
-
Pull the lamp unit from the outside.
-
Holding the lamp, disconnect the
electrical connector
.
Changing a bulb
Page 157 of 328
155
Berlingo-2-VU_en_Chap08_Aide rapide_ed01-2015Berlingo-2-VU_en_Chap08_Aide rapide_ed01-2015
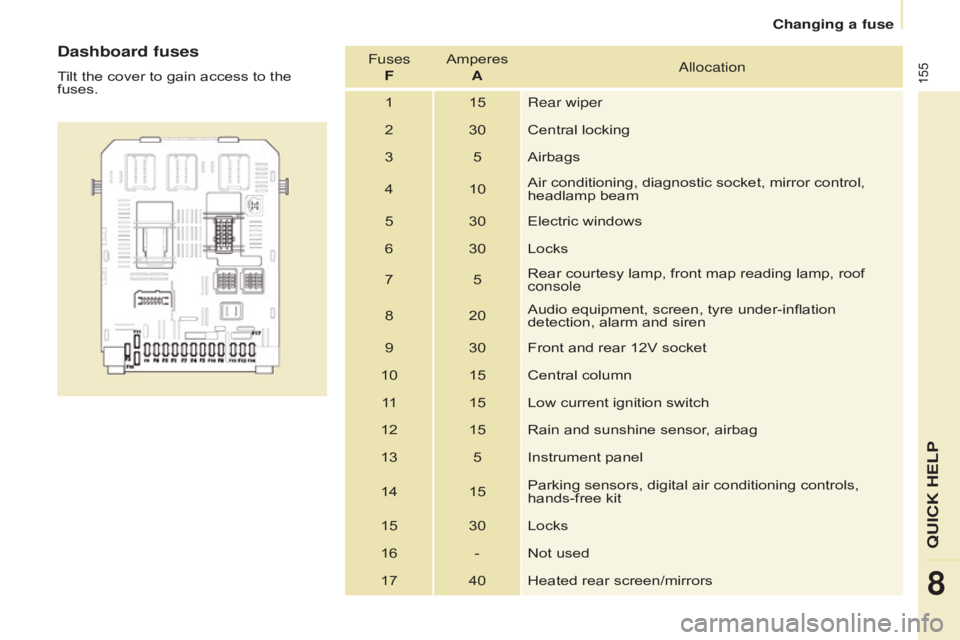
Dashboard fuses
Tilt the cover to gain access to the
fuses.Fuses
F Amperes
Aa llocation
1 15 Rear wiper
2 30 Central locking
3 5 Airbags
4 10 Air conditioning, diagnostic socket, mirror control,
headlamp beam
5 30 Electric windows
6 30 Locks
7 5Rear courtesy lamp, front map reading lamp, roof
console
8 20 Audio equipment, screen, tyre under-inflation
detection, alarm and siren
9 30 Front and rear 12V socket
10 15 Central column 11 15 Low current ignition switch
12 15 Rain and sunshine sensor, airbag
13 5 Instrument panel
14 15 Parking sensors, digital air conditioning controls,
hands-free kit
15 30 Locks
16 - Not used 17 40 Heated rear screen/mirrors
QUICK HELP
8
Changing a fuse
Page 159 of 328
157
Berlingo-2-VU_en_Chap08_Aide rapide_ed01-2015Berlingo-2-VU_en_Chap08_Aide rapide_ed01-2015
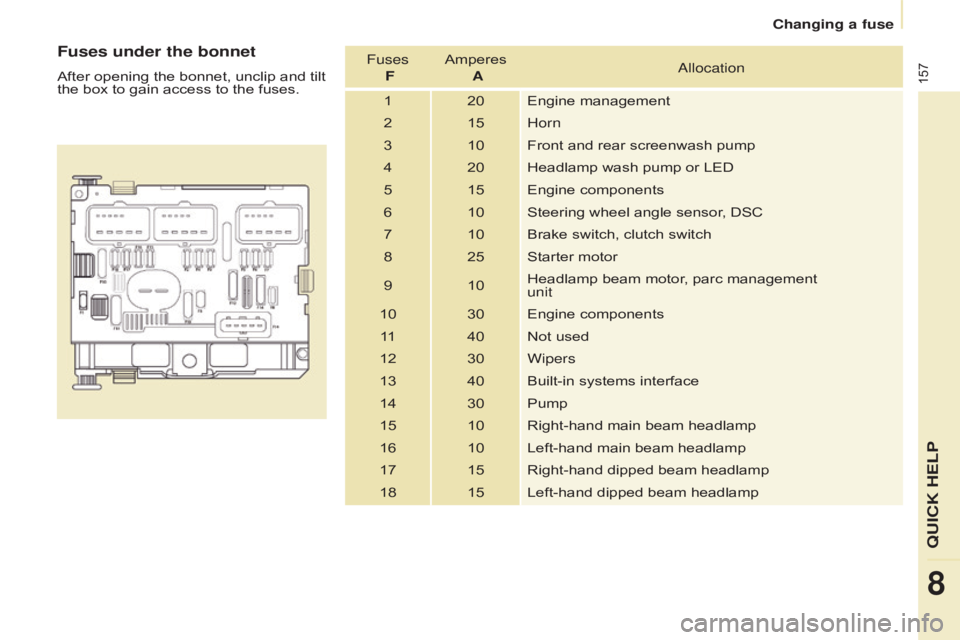
Fuses under the bonnet
After opening the bonnet, unclip and tilt
the box to gain access to the fuses.Fuses
F Amperes
Aa llocation
1 20 Engine management
2 15 Horn
3 10 Front and rear screenwash pump
4 20 Headlamp wash pump or LED
5 15 Engine components
6 10 Steering wheel angle sensor, DSC
7 10 Brake switch, clutch switch
8 25 Starter motor
9 10 Headlamp beam motor, parc management
unit
10 30 Engine components 11 40 Not used
12 30 Wipers
13 40 Built-in systems interface
14 30 Pump
15 10 Right-hand main beam headlamp
16 10 Left-hand main beam headlamp
17 15 Right-hand dipped beam headlamp
18 15 Left-hand dipped beam headlamp
QUICK HELP
8
Changing a fuse
Page 286 of 328
28
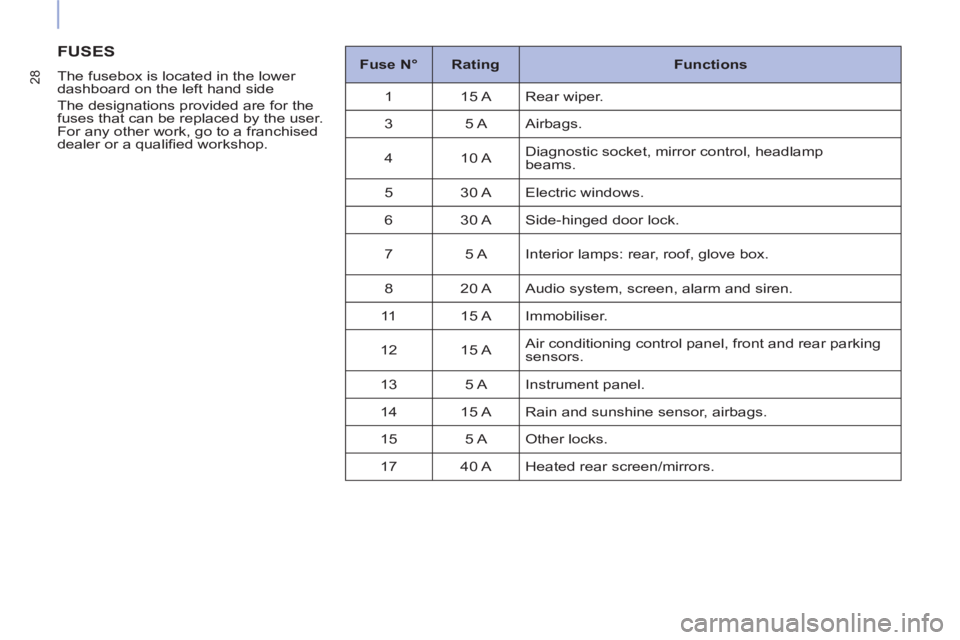
FUSES
The fusebox is located in the lower
dashboard on the left hand side
The designations provided are for the
fuses that can be replaced by the user.
For any other work, go to a franchised
dealer or a qualifi ed workshop.
Fuse N°
Rating
Functions
1 15 A Rear wiper.
3 5 A Airbags.
4 10 A Diagnostic socket, mirror control, headlamp
beams.
5 30 A Electric windows.
6 30 A Side-hinged door lock.
7 5 A Interior lamps: rear, roof, glove box.
8 20 A Audio system, screen, alarm and siren.
11 15 A Immobiliser.
12 15 A Air conditioning control panel, front and rear parking
sensors.
13 5 A Instrument panel.
14 15 A Rain and sunshine sensor, airbags.
15 5 A Other locks.
17 40 A Heated rear screen/mirrors.
Page 322 of 328
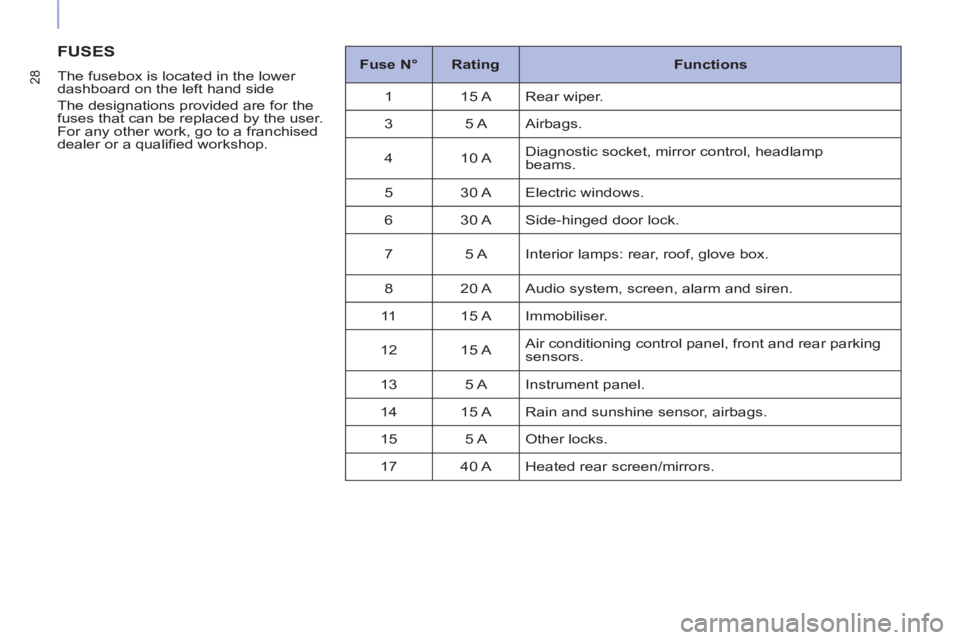
28
FUSES
The fusebox is located in the lower
dashboard on the left hand side
The designations provided are for the
fuses that can be replaced by the user.
For any other work, go to a franchised
dealer or a qualifi ed workshop.
Fuse N°
Rating
Functions
1 15 A Rear wiper.
3 5 A Airbags.
4 10 A Diagnostic socket, mirror control, headlamp
beams.
5 30 A Electric windows.
6 30 A Side-hinged door lock.
7 5 A Interior lamps: rear, roof, glove box.
8 20 A Audio system, screen, alarm and siren.
11 15 A Immobiliser.
12 15 A Air conditioning control panel, front and rear parking
sensors.
13 5 A Instrument panel.
14 15 A Rain and sunshine sensor, airbags.
15 5 A Other locks.
17 40 A Heated rear screen/mirrors.