change time Citroen BERLINGO MULTISPACE 2015 2.G User Guide
[x] Cancel search | Manufacturer: CITROEN, Model Year: 2015, Model line: BERLINGO MULTISPACE, Model: Citroen BERLINGO MULTISPACE 2015 2.GPages: 298, PDF Size: 12.69 MB
Page 165 of 298
163
Berlingo-2-VP_en_Chap07_Verification_ed01-2015Berlingo-2-VP_en_Chap07_Verification_ed01-2015
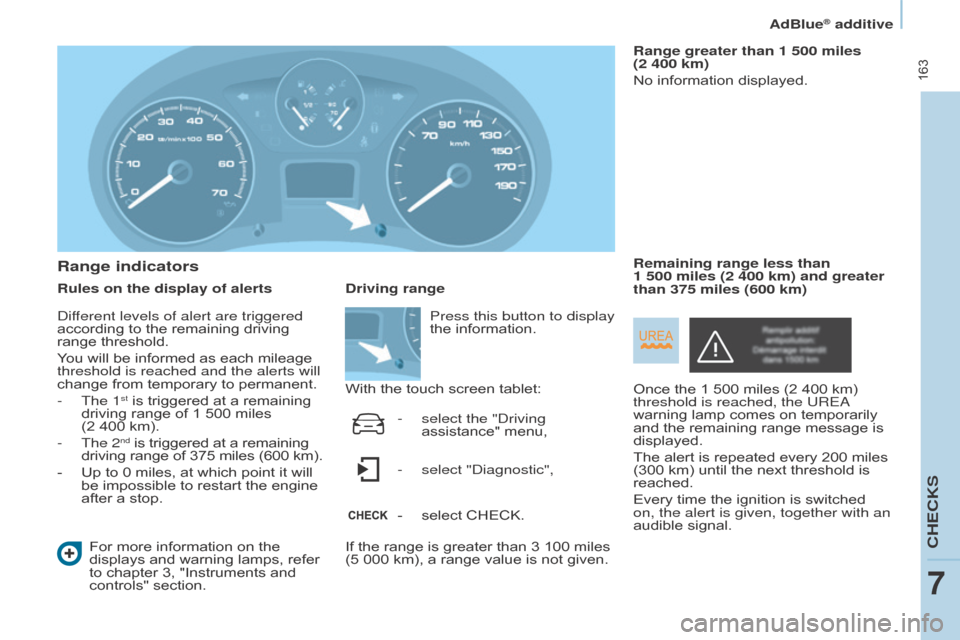
Range indicators
Rules on the display of alertsFor more information on the
displays
and warning lamps, refer
to
chapter 3, "Instruments and
controls"
section. Range greater than 1 500 miles
(2 400 km)
No
information displayed.
Once the 1 500 miles (2 400 km)
threshold is reached, the URE
a
warning
lamp comes on temporarily
and
the remaining range message is
displayed.
The
alert is repeated every 200 miles
(300
km) until the next threshold is
reached.
Every
time the ignition is switched
on, the alert is given, together with an
audible
signal.
Remaining range less than
1 500 miles (2 400 km) and greater
than 375 miles (600 km)
Driving range
With
the touch screen tablet:
If
the range is greater than 3 100 miles
(5
000 km), a range value is not given.
Press this button to display
the
information.
-
select the "
d riving
assistance"
menu,
-
select "
d iagnostic",
-
select
CHECK.
d
ifferent levels of alert are triggered
according
to the remaining driving
range
threshold.
You
will be informed as each mileage
threshold is reached and the alerts will
change
from temporary to permanent.
-
The 1st is triggered at a remaining driving
range of 1 500 miles
(2
400
km).
-
The 2nd is triggered at a remaining driving
range of 375 miles (600 km).
-
Up
to
0 miles, at which point it will
be
impossible to restart the engine
after
a
stop.
CHECKS
7
AdBlue® additive
Page 173 of 298
171
Berlingo-2-VP_en_Chap08_aide-rapide_ed01-2015Berlingo-2-VP_en_Chap08_aide-rapide_ed01-2015
1. Parking the vehicle
- The occupants must get out of the vehicle
and wait in a safe location.
-
If
possible, park the vehicle on
level, stable and non-slippery
ground.
-
Apply
the parking brake, switch
of
f the ignition and engage first or
reverse
gear. -
Place a chock under the wheel diagonally opposite the one to be
changed.
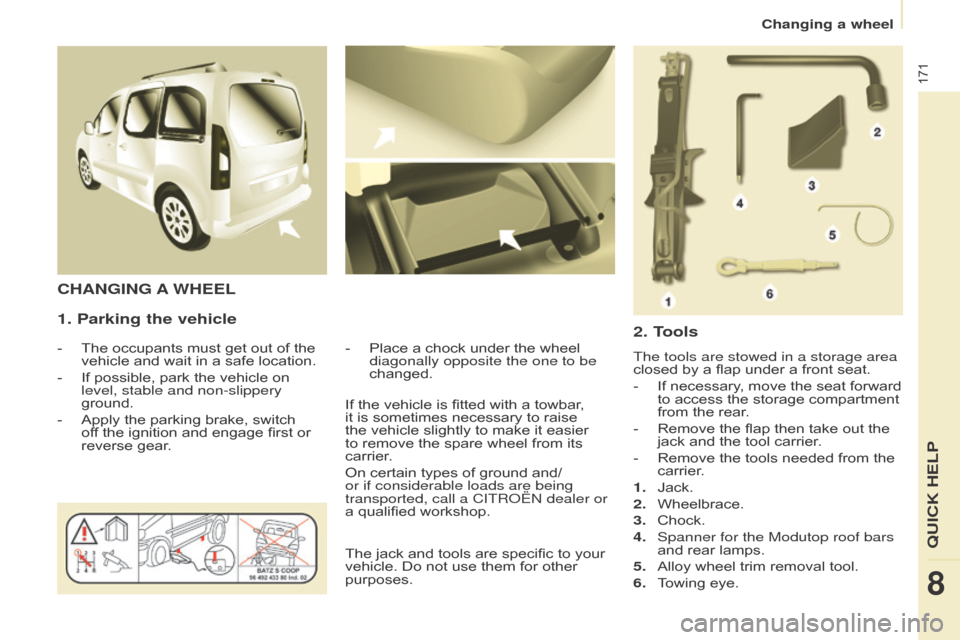
CHANGING A WHEEL
2. T
ools
The tools are stowed in a storage area
closed by a flap under a front seat.
-
If
necessary, move the seat forward
to
access the storage compartment
from
the rear.
-
Remove
the flap then take out the
jack
and the tool carrier.
-
Remove
the tools needed from the
carrier
.
1.
Jack.
2.
Wheelbrace.
3.
Chock.
4.
Spanner for the Modutop roof bars
and
rear lamps.
5.
Alloy
wheel trim removal tool.
6.
T
owing eye.
If
the
vehicle
is
fitted
with
a
towbar,
it
is
sometimes
necessary
to
raise
the
vehicle
slightly
to
make
it
easier
to
remove
the
spare
wheel
from
its
carrier
.
On
certain
types
of
ground
and/
or if considerable loads are being
transported, call a CITR
o
Ë
n
dealer or
a
qualified
workshop.
The
jack
and
tools
are
specific
to
your
vehicle.
Do
not
use
them
for
other
purposes.
QUICk HELP
8
Changing a wheel
Page 185 of 298

183
Berlingo-2-VP_en_Chap08_aide-rapide_ed01-2015Berlingo-2-VP_en_Chap08_aide-rapide_ed01-2015
Rear lamps
This procedure requires the use of
the spanner supplied with the tools for
changing a wheel.
When
refitting, take care to
reposition the tabs and the wiring
correctly to avoid trapping the
wiring.
a
fter changing the rear direction
indicator
bulb, the reinitialisation time is
above
2 minutes.
-
Move aside the 4 tabs then extract
the
bulb holder.
-
Remove
the faulty bulb by
pressing it lightly while turning it
anticlockwise.
-
Change
the bulb.
When
removing the lamp unit:
-
with
tailgate, pull the lamp unit
towards the centre of the vehicle,
-
with
hinged doors, pull the lamp
unit
towards you.
For
more
information
on
bulbs,
refer
to
the
"Types
of
bulb".
1.
Brake lamps / sidelamps
T
ype B,
P21/5W
-
21/5W
2.
Direction indicators
T
ype B,
PY21W
-
21W
(amber)
3.
Reversing lamps
T
ype B, P21W - 21W
4.
Foglamps
T
ype B, P21W - 21W
High pressure jet washing When using this type of washing
on stubborn dirt, do not persist on
the
headlamps,
the
other
lamps
and
their
edges
to
avoid
damaging
their
coating
and
seals. Chapter
9, "Changing a wheel"
section.
-
Identify the failed bulb, then open
the
rear doors to 180°.
Chapter
3, "Access" section.
-
Remove
the two fixing bolts using
the
spanner provided.
-
Pull
the lamp unit from the outside.
-
Holding
the lamp, disconnect the
electrical
connector.
QUICk HELP
8
Changing a bulb
Page 231 of 298
229
Berlingo-2-VP_en_Chap10a_SMEGplus_ed01-2015
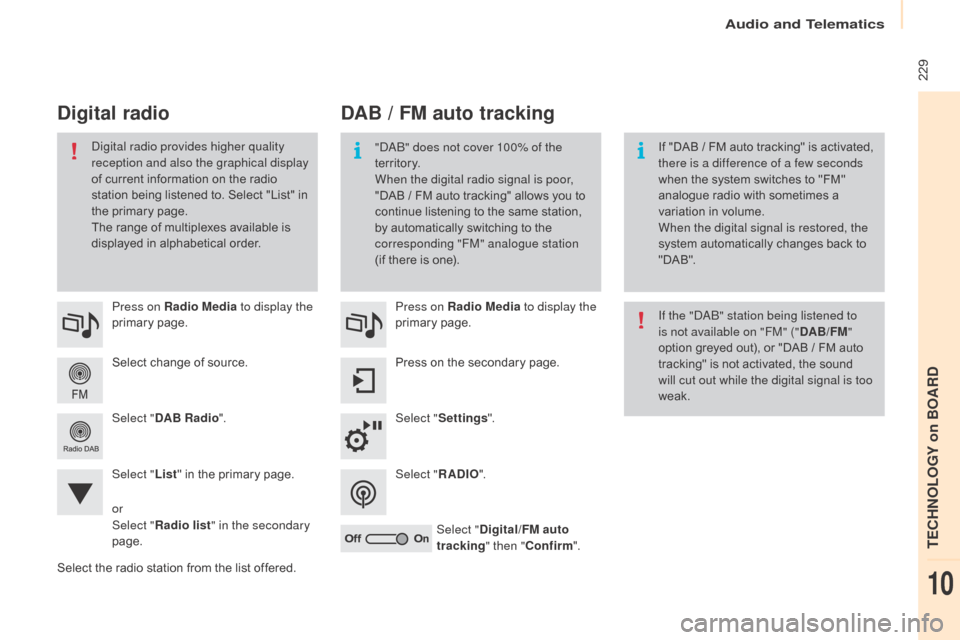
Select change of source.
P ress on Radio Media
to display the
primary
pag
e.
Select " DAB Radio ".
Select " List"
in the primary page.
Select
the radio station from the list offered.Press on Radio Media
to display the
primary
pag
e.
Press on the secondary page.
Select " Settings ".
Select " RADIO".
Select " Digital/FM auto
tracking " then "Confirm ".
DAB / FM auto tracking
Digital radio
"daB" does not cover 100% of the
te r r i to r y.
When the digital radio signal is poor,
"DAB / FM
auto tracking" allows you to
c
ontinue listening to the same station,
b
y automatically switching to the
c
orresponding "FM" analogue station
(if
there is one). If
"DAB / FM auto tracking" is activated, t
here is a difference of a few seconds
when
the system switches to "FM"
a
nalogue radio with sometimes a
v
ariation in volume.
When the digital signal is restored, the
system
automatically changes back to
"
DA B ".di
gital radio provides higher quality
reception and also the graphical display
of
current
information
on
the
radio
s
tation
being
listened
to.
Select
"List"
in
t
he
primary
page.
The
range
of
multiplexes
available
is
d
isplayed
in
alphabetical
order. If the "
d
a
B
" station being listened to
is not available on "FM" (" DAB/FM"
option
greyed out), or "DAB / FM auto
t
racking" is not activated, the sound
w
ill cut out while the digital signal is too
weak.
or
Select " Radio list " in the secondary
page.
audio and Telematics
TECHnoLoGY on BoaRd
10
Page 232 of 298
230
Berlingo-2-VP_en_Chap10a_SMEGplus_ed01-2015
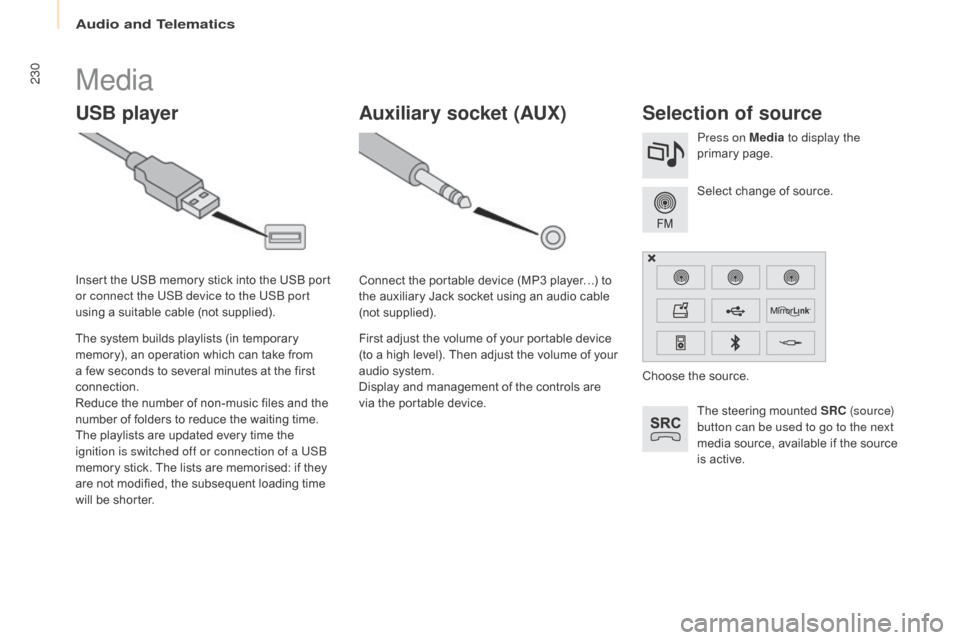
Media
USB playerSelection of source
The steering mounted SRC ( s o u r c e)
button can be used to go to the next
media
source, available if the source
i
s active.
Select
change of source.
Press on Media
to display the
primary
pag
e.
The
system
builds
playlists
(in
temporary
m
emory),
an
operation
which
can
take
from
a
few
seconds
to
several
minutes
at
the
first
c
onnection.
Reduce
the
number
of
non-music
files
and
the
n
umber
of
folders
to
reduce
the
waiting
time.
The
playlists
are
updated
every
time
the
i
gnition is switched off or connection of a USB
memory
stick.
The
lists
are
memorised:
if
they
a
re
not
modified,
the
subsequent
loading
time
w
ill
be
shorter.
Insert
the
USB
memory
stick
into
the
USB
port
o
r connect the USB device to the USB port
using
a
suitable
cable
(not
supplied).
Auxiliary socket (AUx)
Connect the portable device (MP3 player…) to t
he auxiliary Jack socket using an audio cable
(
not
sup
plied).
First
adjust the volume of your portable device
(
to a high level). Then adjust the volume of your
a
udio system.
Display
and management of the controls are
v
ia the portable device. Choose
the source.
audio and Telematics
Page 243 of 298
241
Berlingo-2-VP_en_Chap10a_SMEGplus_ed01-2015
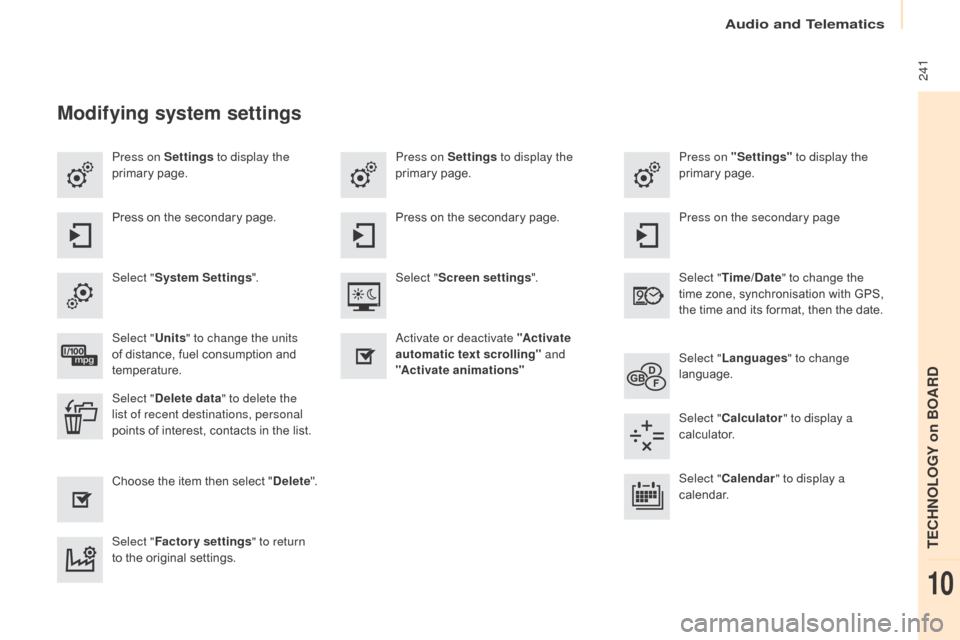
Press on Settings to display the
primary pag e. Press on "Settings"
to display the
primary pag e.
Press on Settings
to display the
primary pag e.
Press
on the secondary page. Press on the secondary page
Press
on the secondary page.
Select " System Settings ". Select "Time/Date " to change the
time
zone, synchronisation with GPS,
t
he time and its format, then the date.
Select "
Screen settings ".
Select " Units" to change the units
of
distance, fuel consumption and
t
emperature. Select "
Languages " to change
language.
ac
tivate or deactivate "Activate
automatic text scrolling" and
"Activate animations"
Select " Delete data " to delete the
list of recent destinations, personal
points
of interest, contacts in the list. Select "
Calculator " to display a
calculator.
Choose
t
he
i
tem
t
hen
se
lect
"D
elete". Select "
Calendar " to display a
calendar.
Select " Factory settings " to return
to
the original settings.
Modifying system settings
audio and Telematics
TECHnoLoGY on BoaRd
10
Page 270 of 298
268
Berlingo-2-VP_en_Chap10b_Rd45_ed01-2015
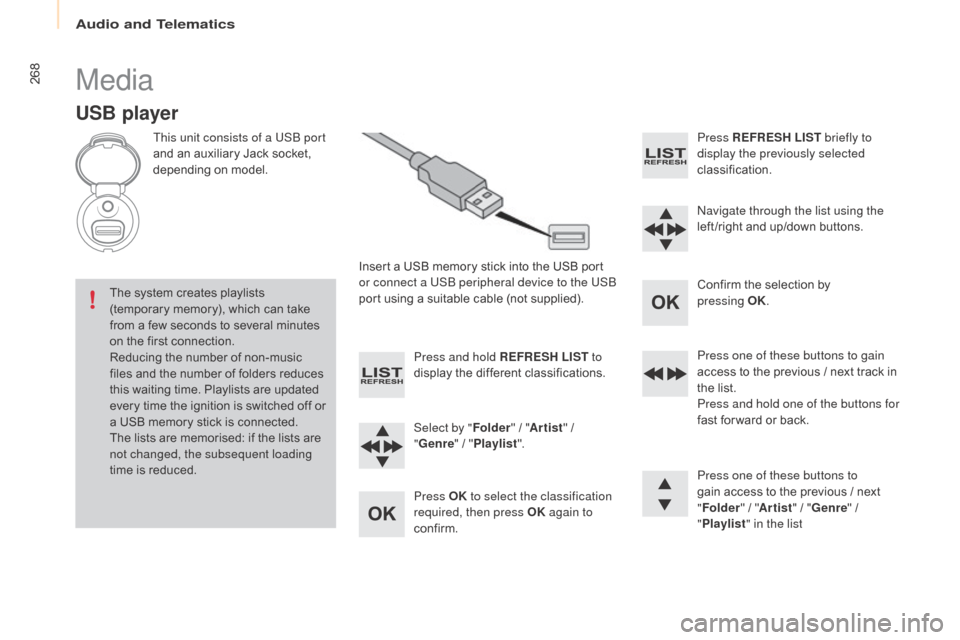
Media
USB player
This unit consists of a USB port
and an auxiliary Jack socket,
d
epending on model.
Insert
a USB memory stick into the USB port
o
r connect a USB peripheral device to the USB
port
using a suitable cable (not supplied).
The
system creates playlists
(
temporary memory), which can take
f
rom
a
few seconds to several minutes
o
n
the
first connection.
Reducing
the number of non-music
f
iles
and the number of folders reduces
t
his
waiting time. Playlists are updated
e
very
time the ignition is switched off or
a
USB
memory stick is connected.
The
lists are memorised: if the lists are
n
ot changed, the subsequent loading
time
is
reduced. Press and hold REFRESH LIST
to
display
the different classifications.
Select by " Folder"
/ "Artist "
/
"G
enre"
/
"Pl
aylist".
Press OK to select the classification
required, then press OK again to
confirm. Press REFRESH LIST
briefly to
display the previously selected
classification.
na
vigate through the list using the
left /right
and up/down buttons.
Confirm
the selection by
p
ressing
OK.
Press one of these buttons to gain
access
to the previous / next track in
t
he list.
Press and hold one of the buttons for
fast
for ward or back.
Press one of these buttons to
gain
access to the previous / next
"Fo
lder"
/ "Artist "
/ "Genre "
/
"Pl
aylist" in the list
audio and Telematics