instrument panel Citroen BERLINGO MULTISPACE 2015 2.G User Guide
[x] Cancel search | Manufacturer: CITROEN, Model Year: 2015, Model line: BERLINGO MULTISPACE, Model: Citroen BERLINGO MULTISPACE 2015 2.GPages: 298, PDF Size: 12.69 MB
Page 48 of 298
Berlingo-2-VP_en_Chap03_Pret-a-partir_ed01-2015
46
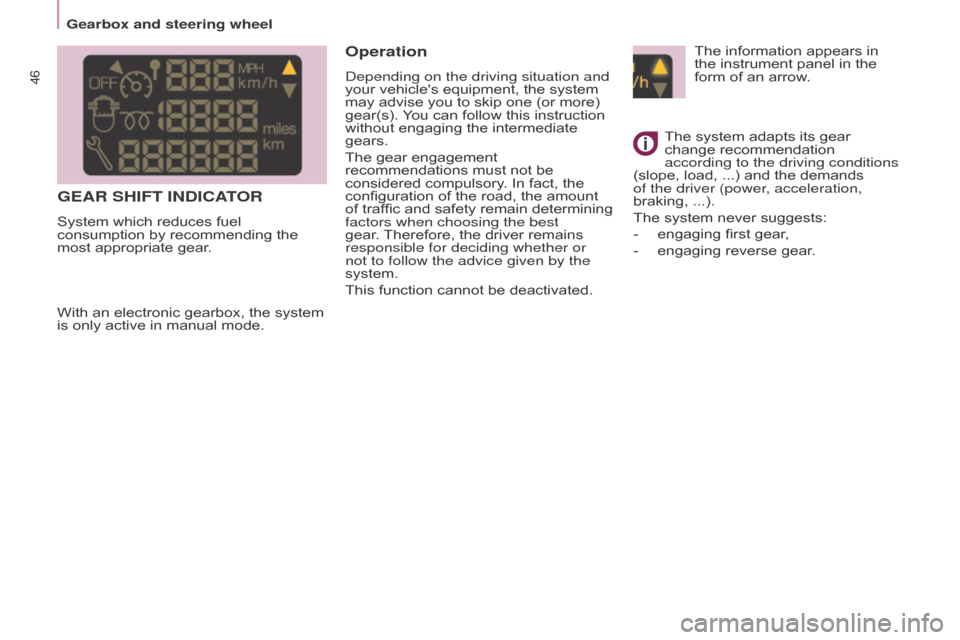
The information appears in the instrument panel in the
form
of an arrow.
The
system adapts its gear
change
recommendation
according to the driving conditions
(slope,
load, ...) and the demands
of the driver (power
, acceleration,
braking, ...).
The
system never suggests:
-
engaging
first gear,
-
engaging
reverse gear.
With
an
electronic
gearbox,
the
system
is
only
active
in
manual
mode.
GEAR SHIFT INDICATOR
System which reduces fuel consumption by recommending the
most
appropriate gear.
Operation
depending on the driving situation and
your vehicle's equipment, the system
may
advise you to skip one (or more)
gear(s).
Y
ou can follow this instruction
without
engaging the intermediate
gears.
The
gear engagement
recommendations
must not be
considered
compulsory. In fact, the
configuration
of the road, the amount
of
traffic and safety remain determining
factors when choosing the best
gear
.
Therefore,
the driver remains
responsible for deciding whether or
not to follow the advice given by the
system.
This
function cannot be deactivated.
Gearbox and steering wheel
Page 49 of 298
Berlingo-2-VP_en_Chap03_Pret-a-partir_ed01-2015
47
Berlingo-2-VP_en_Chap03_Pret-a-partir_ed01-2015
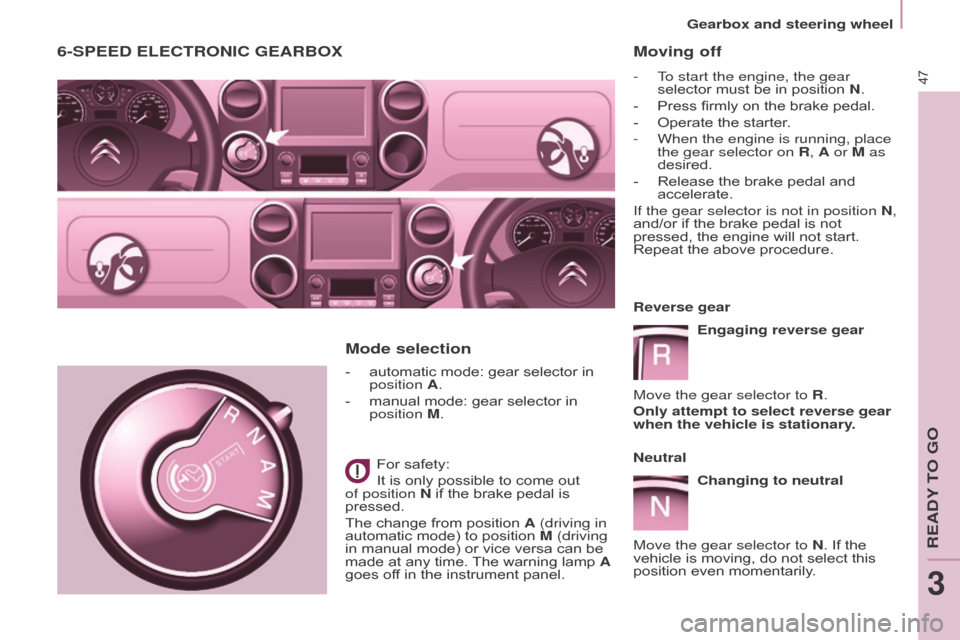
6-SPEED ELECTRONIC GEARBOx
- automatic mode: gear selector in position
A.
-
manual
mode: gear selector in
position
M.
For
safety:
It
is only possible to come out
of position
N if the brake pedal is
pressed.
The
change from position A (driving in
automatic
mode) to position M (driving
in
manual mode) or vice versa can be
made
at any time.
The
warning lamp A
goes
off in the instrument panel.
Mode selection Moving off
- To start the engine, the gear
selector must be in position N.
-
Press
firmly on the brake pedal.
-
Operate
the starter.
-
When the engine is running, place
the gear selector on
R, A or M as
desired.
-
Release
the brake pedal and
accelerate.
If the gear selector is not in position
N,
and/or
if the brake pedal is not
pressed,
the engine will not start.
Repeat
the above procedure.
Reverse gear Engaging reverse gear
Move the gear selector to R.
Only attempt to select reverse gear
when the vehicle is stationary.
Neutral Changing to neutral
Move the gear selector to N.
If the
vehicle
is moving, do not select this
position
even momentarily.
Gearbox and steering wheel
REadY To Go
3
Page 50 of 298
Berlingo-2-VP_en_Chap03_Pret-a-partir_ed01-2015
48
Acceleration
For optimum acceleration (e.g. to overtake another vehicle), simply
press the pedal beyond the point of
resistance at the end of its travel, by
pressing
down firmly.
Vehicle stationary, with the
engine running
In the event of a prolonged stop with
the engine running, the gearbox
changes automatically to neutral N.
Stopping the vehicle
Before stopping the engine, put the
gear selector in position N.
In all cases, it is essential to apply
the
parking brake. Check that the
parking
brake warning lamp is on in the
instrument
panel.
Before doing anything in the
engine
compartment, check that
the gear selector is in neutral
N.
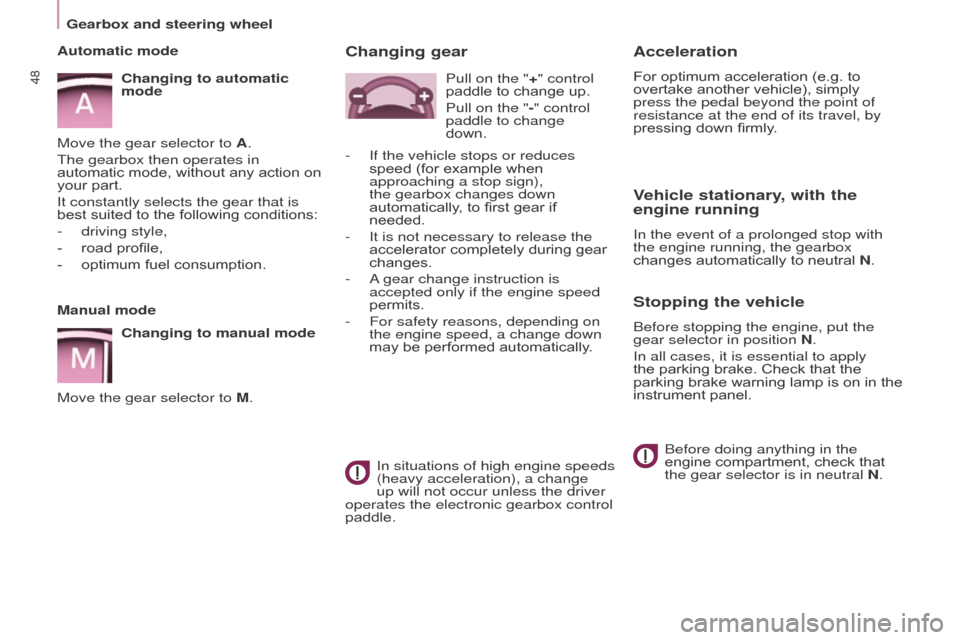
Changing gear
In situations of high engine speeds
(heavy acceleration), a change
up will not occur unless the driver
operates the electronic gearbox control
paddle. Pull on the "+" control
paddle
to change up.
Pull on the "-" control
paddle to change
down.
-
If the vehicle stops or reduces
speed
(for example when
approaching a stop sign),
the gearbox changes down
automatically
, to first gear if
needed.
-
It is not necessary to release the
accelerator
completely during gear
changes.
-
a
gear change instruction is
accepted only if the engine speed
permits.
-
For safety reasons, depending on
the engine speed, a change down
may
be performed automatically.
Manual mode
Changing to manual mode
Move the gear selector to M. Automatic mode Changing to automatic
mode
Move the gear selector to A.
The gearbox then operates in
automatic
mode,
without
any
action
on
your
part.
It constantly selects the gear that is
best
suited
to
the
following
conditions:
-
driving style,
-
road
profile,
-
optimum
fuel
consumption.
Gearbox and steering wheel
Page 51 of 298
Berlingo-2-VP_en_Chap03_Pret-a-partir_ed01-2015Berlingo-2-VP_en_Chap03_Pret-a-partir_ed01-2015
49
STOP & START
The Stop & Start system puts the engine
temporarily on standby - STOP mode
- during stops in the traffic (red
lights,
traffic jams, or other...).
The
engine
restarts automatically - START
mode
- as soon as you want to move
of
f.
The
restart takes place instantly,
quickly
and silently.
Perfect for urban use, the Stop & Start
system
reduces fuel consumption and
exhaust
emissions as well as the noise
level
when stationary.
Operation
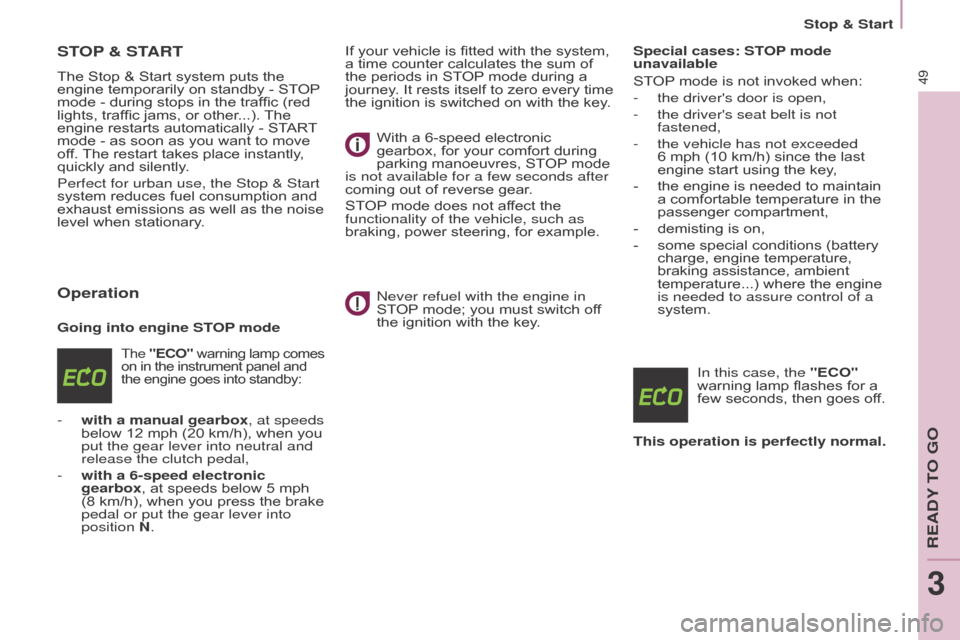
Going into engine STOP mode
The "ECO" warning lamp comes on
in the instrument panel and the
engine goes into standby:
- with a manual gearbox , at speeds
below 12 mph (20 km/h), when you
put the gear lever into neutral and
release the clutch pedal,
-
with
a 6-speed electronic
gearbox,
at speeds below 5 mph
(8
km/h), when you press the brake
pedal or put the gear lever into
position
N. If
your vehicle is fitted with the system,
a
time counter calculates the sum of
the
periods in STOP
mode during a
journey
. It rests itself to zero every time
the
ignition is switched on with the key.
With a 6-speed electronic
gearbox,
for your comfort during
parking
manoeuvres, STOP
mode
is not available for a few seconds after
coming
out of reverse gear.
STOP
mode does not affect the
functionality of the vehicle, such as
braking,
power steering, for example.
n
ever refuel with the engine in
STOP
mode; you must switch off
the
ignition with the key.Special cases: STOP mode
unavailable
STOP
mode is not invoked when:
-
the driver's door is open,
-
the driver's seat belt is not
fastened,
-
the vehicle has not exceeded
6 mph
(10 km/h) since the last
engine
start using the key,
-
the
engine is needed to maintain
a
comfortable temperature in the
passenger
compartment,
-
demisting
is on,
-
some
special conditions (battery
charge,
engine temperature,
braking
assistance, ambient
temperature...)
where the engine
is needed to assure control of a
system.
In this case, the
"ECO"
warning lamp flashes for a
few
seconds, then goes off.
This operation is perfectly normal.
Stop & Start
REadY To Go
3
Page 53 of 298

Berlingo-2-VP_en_Chap03_Pret-a-partir_ed01-2015Berlingo-2-VP_en_Chap03_Pret-a-partir_ed01-2015
51
Reactivation
Press the "ECO OFF" switch again.
The system is active again; this is
confirmed
by the switch warning
lamp
going off and a message in the
instrument
panel.
The
system is reactivated
automatically
at every new start
using
the key.
Operating fault
In the event of a malfunction with the system, the "ECO
OFF"
switch warning lamp
flashes,
then comes on
continuously
.
Maintenance
Before working under the bonnet, deactivate the Stop & Start system
to
avoid any risk of injury resulting
from
automatic operation of START
mode.
This
system requires a specific
battery
with a special specification
and
technology (reference numbers
available
from a CITROËN dealer or a
qualified
workshop).
Fitting a battery not listed by
CITROËN introduces
the risk of
malfunction
of the system.
The
Stop & Start system makes
use
of advanced technology.
All
work
on this type of battery must
be done only by a CITR
o Ë n dealer or
a
qualified workshop.
have
it
checked
by
a
CITROËN
dealer
or
a
qualified
workshop.
In
the
event
of
a
fault
in
STOP
mode,
the
vehicle
may
stall.
All
of
the
warning
lamps
in
the
instrument
panel
come
on.
It
is
then
necessary
to
switch
off
the ignition and start the engine again
using
the
key.
Stop & Start
REadY To Go
3
Page 57 of 298
55
Berlingo-2-VP_en_Chap04_Ergonomie_ed01-2015
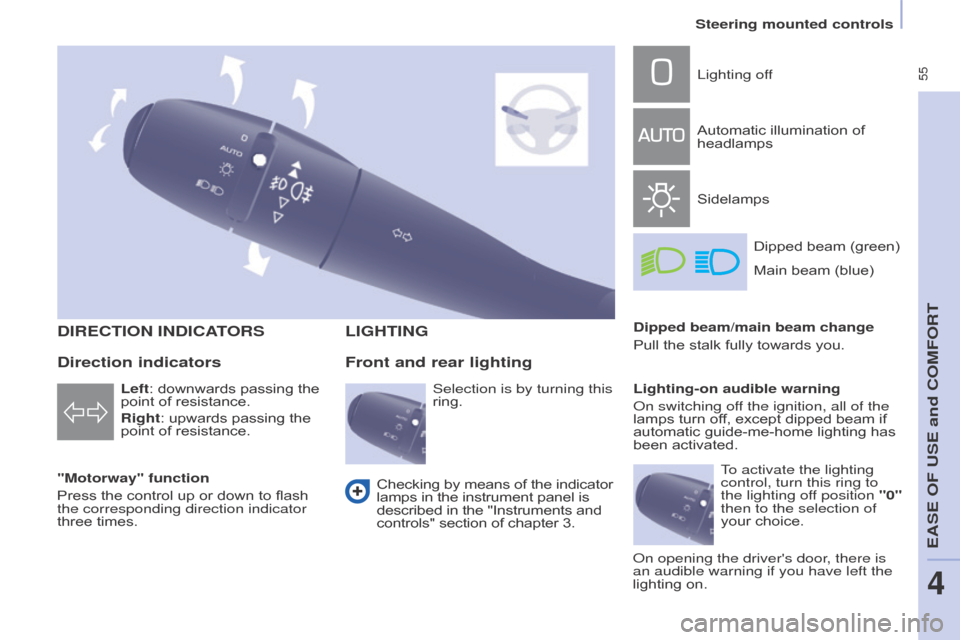
DIRECTION INDICATORS
"Motorway" function
Press the control up or down to flash
the corresponding direction indicator
three
times.
LIGHTING
Left: downwards passing the point of resistance.
Right:
upwards passing the
point
of resistance.
Front and rear lighting
Lighting off
Automatic
illumination of
headlamps
SidelampsDipped
beam (green)
Dipped beam/main beam change
Pull
the
stalk fully towards you.
Lighting-on audible warning
o
n switching off the ignition, all of the
lamps
turn off, except dipped beam if
automatic
guide-me-home lighting has
been
activated.
Checking
by
means
of
the
indicator
lamps
in
the
instrument
panel
is
described
in
the
"Instruments
and
controls"
section
of
chapter
3.
Direction indicators
Selection is by turning this
ring. Main
beam (blue)
To activate the lighting
control, turn this ring to
the lighting off position "0"
then to the selection of
your choice.
o
n opening the driver's door, there is
an audible warning if you have left the
lighting
on.
Steering mounted controls
EaSE oF USE and CoMFoRT
4
Page 58 of 298
56
Berlingo-2-VP_en_Chap04_Ergonomie_ed01-2015
LED DAYTIME RUNNING LAMPS
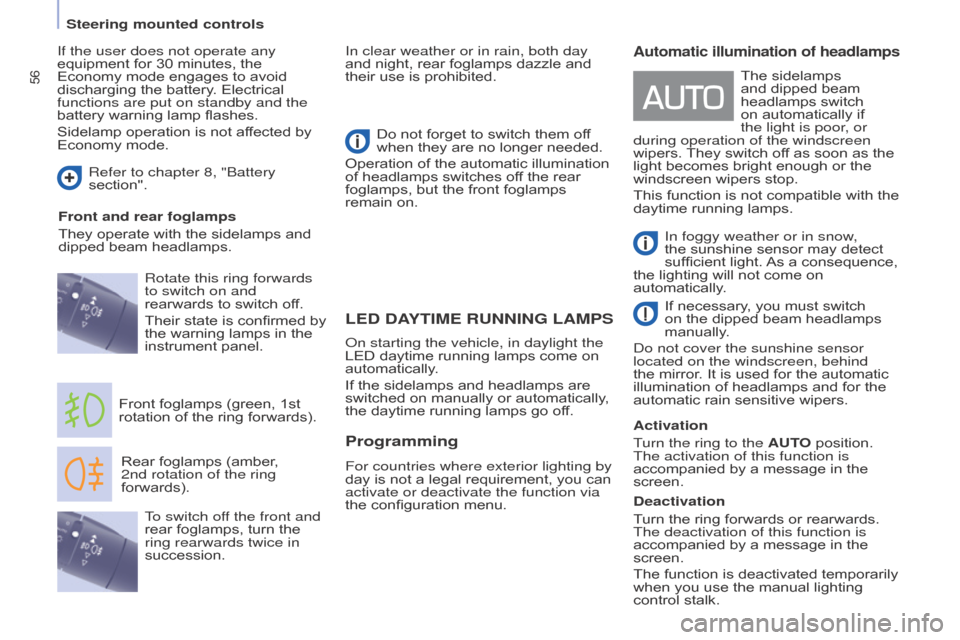
Rear foglamps (amber,
2nd rotation of the ring
forwards).
Front
foglamps (green, 1st
rotation
of the ring forwards).
Rotate this ring forwards
to switch on and
rearwards to switch off.
Their state is confirmed by
the
warning lamps in the
instrument
panel. Do not forget to switch them off
when
they are no longer needed.
Operation of the automatic illumination
of
headlamps switches off the rear
foglamps,
but the front foglamps
remain
on.
To switch off the front and
rear foglamps, turn the
ring rearwards twice in
succession.
Automatic illumination of headlamps
In foggy weather or in snow,
the sunshine sensor may detect
sufficient
light.
As
a consequence,
the
lighting will not come on
automatically
.
If
necessary, you must switch
on
the dipped beam headlamps
manually
.
d
o not cover the sunshine sensor
located on the windscreen, behind
the
mirror. It is used for the automatic
illu
mination of headlamps and for the
automatic
rain sensitive wipers.
Activation
Turn the ring to the AUTO
position.
The activation of this function is
accompanied
by a message in the
screen.
Deactivation
T
urn
the ring forwards or rearwards.
The deactivation of this function is
accompanied
by a message in the
screen.
The
function is deactivated temporarily
when
you use the manual lighting
control
stalk. The
sidelamps
and
dipped beam
headlamps
switch
on
automatically if
the light is poor
, or
during operation of the windscreen
wipers.
They
switch off as soon as the
light
becomes bright enough or the
windscreen
wipers stop.
This
function is not compatible with the
daytime
running lamps.
o
n starting the vehicle, in daylight the
LED
daytime
running
lamps
come
on
automatically
.
If
the
sidelamps
and
headlamps
are
switched
on
manually
or
automatically,
the
daytime
running
lamps
go
off.
Programming
For countries where exterior lighting by
day is not a legal requirement, you can
activate or deactivate the function via
the
configuration menu.
If the user does not operate any
equipment
for
30
minutes,
the
Economy
mode
engages
to
avoid
discharging
the
battery.
Electrical
functions are put on standby and the
battery
warning
lamp
flashes.
Sidelamp
operation
is
not
affected
by
Economy
mode.
In clear weather or in rain, both day
and night, rear foglamps dazzle and
their
use is prohibited.
Refer to chapter 8, "Battery
section".
Front and rear foglamps
They
operate
with
the
sidelamps
and
dipped
beam
headlamps.
Steering mounted controls
Page 63 of 298

61
Berlingo-2-VP_en_Chap04_Ergonomie_ed01-2015
CRUISE CONTROL
"CRUISE"
"This is the speed at which the driver
wishes to drive".
This
aid to driving in free-flowing
traffic
enables the vehicle to maintain
the
speed programmed by the driver,
unless
a steep gradient makes this
impossible.
For
the system to be programmed or
activated,
the vehicle speed must be
greater
than 25 mph (40 km/h) with
4th gear
or higher engaged. The
state of the cruise control system
can
be seen in the instrument panel
together
with the the programmed
speed
setting.
Function selected,
display of the "Cruise
Control" symbol.
Function off
OFF
Function on
Vehicle speed above,
the programmed
speed
flashes.
o
perating fault
detected,
OFF - the dashes
flash.
1.
Cruise
control
mode
On
/
Off.
2.
Reduce
cruise
speed
setting.
3.
Increase
cruise
speed
setting.
4.
Pause
/
Resume
cruise
control.
Steering mounted controls
EASE OF USE and COMFORT
4
Page 66 of 298
64
Berlingo-2-VP_en_Chap04_Ergonomie_ed01-2015
The speed of the vehicle responds to
the pressure of the driver's foot, up
to the the accelerator pedal's point of
resistance, which indicates that the
programmed speed has been reached.
However, pressing the pedal beyond
this
point of resistance to the floor
allows
the programmed speed to be
exceeded.
T
o resume use of the limiter,
simply
reduce the pressure on the
accelerator pedal gradually and return
to
a speed below that programmed.
Adjustments can be carried out
when stationary, with the engine
running, or with the vehicle moving. This
speed limiter shows the function
selection
status in the instrument panel
and
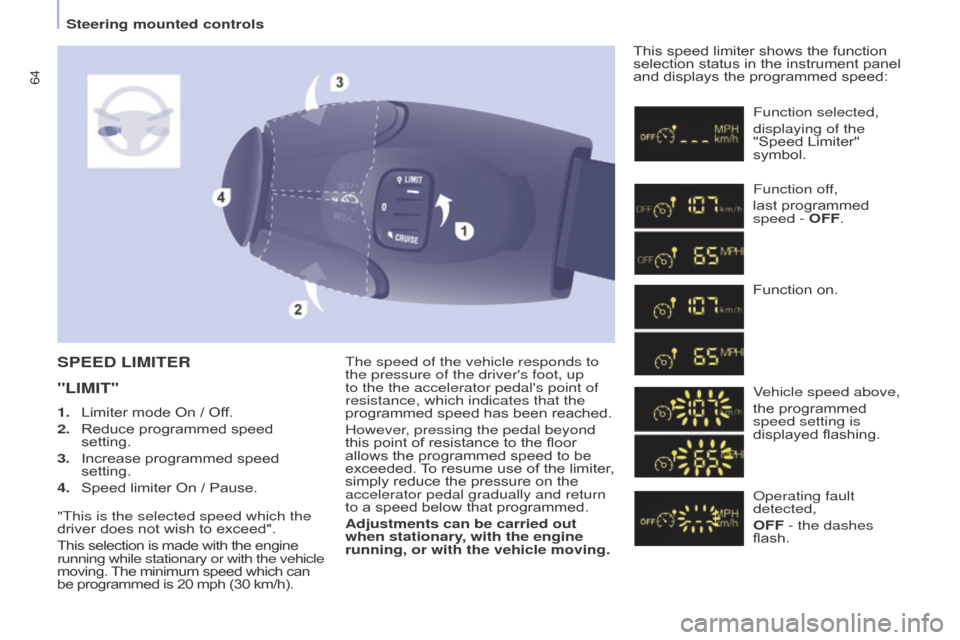
displays the programmed speed:SPEED LIMITER
"LIMIT"
Function selected,
displaying of the
"Speed
Limiter"
symbol.
Function of
f,
last
programmed
speed -
OFF.
Function
on.
Vehicle speed above,
the
programmed
speed setting is
displayed
flashing.
o
perating fault
detected,
OFF - the dashes
flash.
1.
Limiter
mode
On
/
Off.
2.
Reduce
programmed
speed
setting.
3.
Increase
programmed
speed
setting.
4.
Speed
limiter
On
/
Pause.
"This is the selected speed which the
driver
does
not
wish
to
exceed".
This
selection
is
made
with
the
engine
running while stationary or with the vehicle
moving.
The
minimum
speed
which
can
be
programmed
is
20
mph
(30
km/h).
Steering mounted controls
Page 94 of 298
92
Berlingo-2-VP_en_Chap04_Ergonomie_ed01-2015Berlingo-2-VP_en_Chap04_Ergonomie_ed01-2015
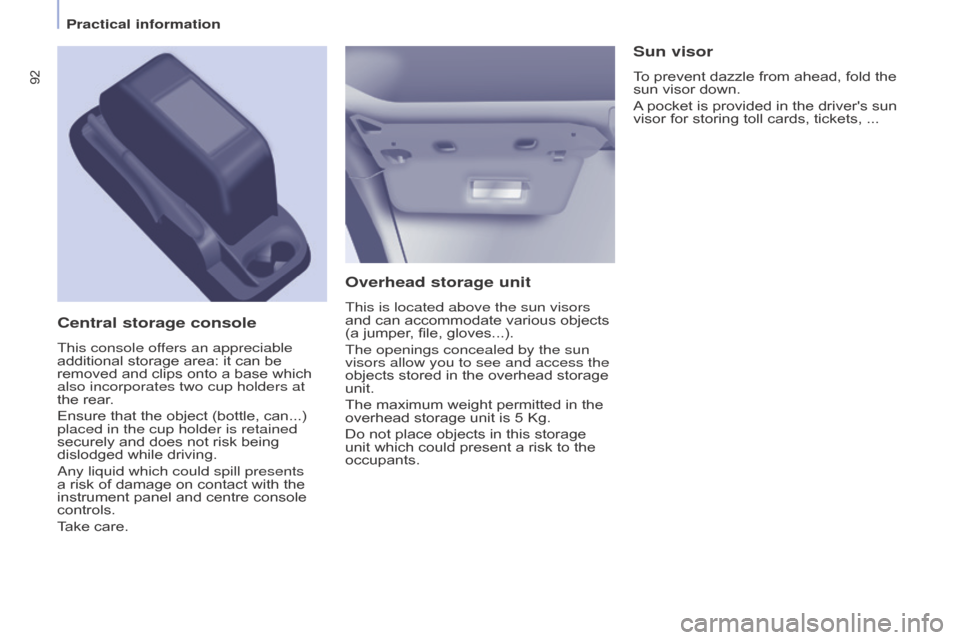
Overhead storage unit
This is located above the sun visors
and can accommodate various objects
(a
jumper, file, gloves...).
The openings concealed by the sun
visors allow you to see and access the
objects
stored in the overhead storage
unit.
The
maximum weight permitted in the
overhead
storage unit is 5 Kg.
Do
not place objects in this storage
unit
which could present a risk to the
occupants.
Central storage console
This console offers an appreciable
additional storage area: it can be
removed
and clips onto a base which
also incorporates two cup holders at
the
rear.
Ensure
that the object (bottle, can...)
placed in the cup holder is retained
securely
and does not risk being
dislodged
while driving.
a
ny liquid which could spill presents
a
risk of damage on contact with the
instrument
panel and centre console
controls.
T
ake care.
Sun visor
To prevent dazzle from ahead, fold the sun visor down.
A
pocket is provided in the driver's sun
visor
for storing toll cards, tickets, ...
Practical information