clock Citroen BERLINGO MULTISPACE RHD 2014.5 2.G Owner's Manual
[x] Cancel search | Manufacturer: CITROEN, Model Year: 2014.5, Model line: BERLINGO MULTISPACE RHD, Model: Citroen BERLINGO MULTISPACE RHD 2014.5 2.GPages: 276, PDF Size: 12.15 MB
Page 31 of 276

Berlingo_2_VP_en_Chap03_Pret-a-partir_ed02-2014
29
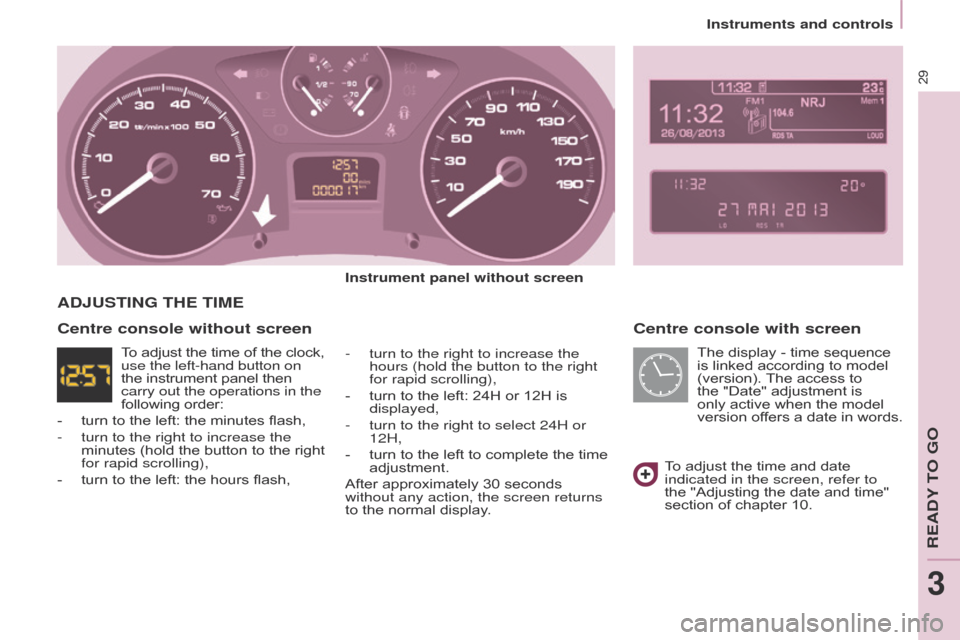
centre console with screen
Instrument panel without screen
-
turn to the right to increase the
hours (hold the button to the right
for rapid scrollin
g),
-
turn
to the left: 24H or 12H is
displayed,
-
turn to the right to select 24H or
12H,
-
turn
to the left to complete the time
adjustment.
After
approximately 30 seconds
without any action, the screen returns
to
the normal display.
AdJuStInG tHE tIME
To adjust the time and date indicated in the screen, refer to
the "Adjusting the date and time"
section
of chapter 10.
centre console without screen
The display - time sequence is linked according to model
(version).
The
access to
the
"Date" adjustment is
only
active when the model
version
of
fers
a
date
in
words.
T
o
adjust
the
time
of
the
clock, use the left-hand button on
the
instrument
panel
then
carry out the operations in the
following
order:
-
turn
to
the
left:
the
minutes
flash,
-
turn to the right to increase the
minutes
(hold
the
button
to
the
right
for rapid scrollin
g),
-
turn
to
the
left:
the
hours
flash,
Instruments and controls
REadY To Go
3
Page 157 of 276

Berlingo_2_VP_en_Chap07_Verification_ed02-2014
155
recommendations on storage
a
dBlue® freezes at about -11°C and
deteriorates above 25°C. It is
recommended
that bottles be stored in
a
cool
area and protected from direct
sunlight.
Under these conditions, the additive
can
be
kept for at least a year.
If the additive has frozen, can be used
once
it
has completely thawed out.
n
ever store bottles of
a
dBlue
® in
your
vehicle. Procedure
Before topping-up, ensure that the
vehicle
is parked on a flat and level
surface.
In wintry conditions, ensure that
the
temperature of the vehicle is
above -1
1°C. Otherwise, by freezing,
the
a dBlue
® cannot be poured into its
tank.
Park
your vehicle in a warmer
area for a few hours to allow the top-up
to
be
carried out.
F
Switch
off the ignition and remove
the
key. -
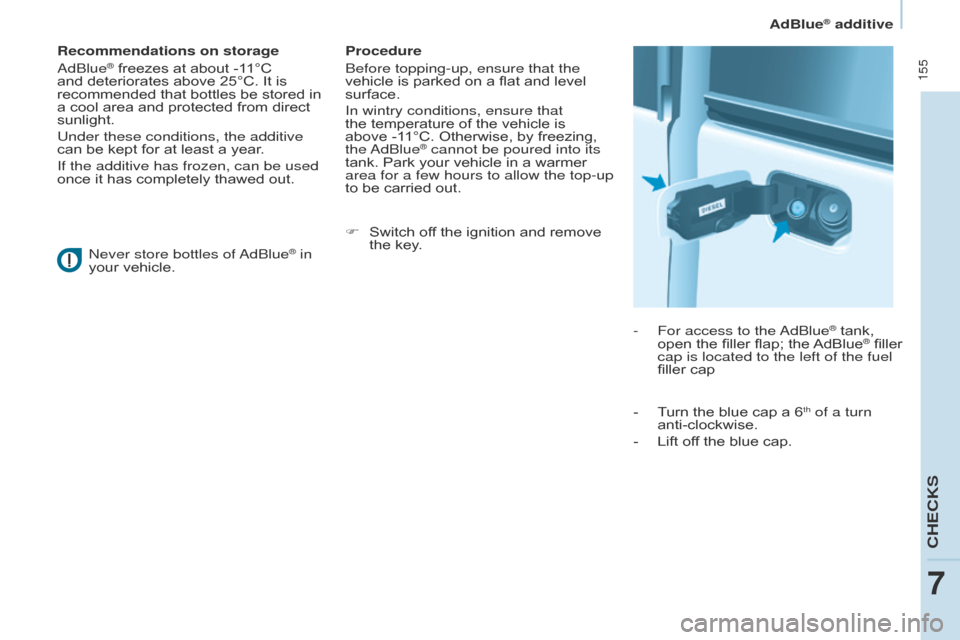
For access to the a
dBlue
® tank, open
the
filler
flap;
the
AdBlue® filler cap is located to the left of the fuel
filler
cap
-
T
urn
the
blue
cap
a
6
th of a turn
anti-clockwise.
-
Lift
off
the
blue
cap.
adBlue® additive
CHECkS
7
Page 158 of 276

Berlingo_2_VP_en_Chap07_Verification_ed02-2014
156
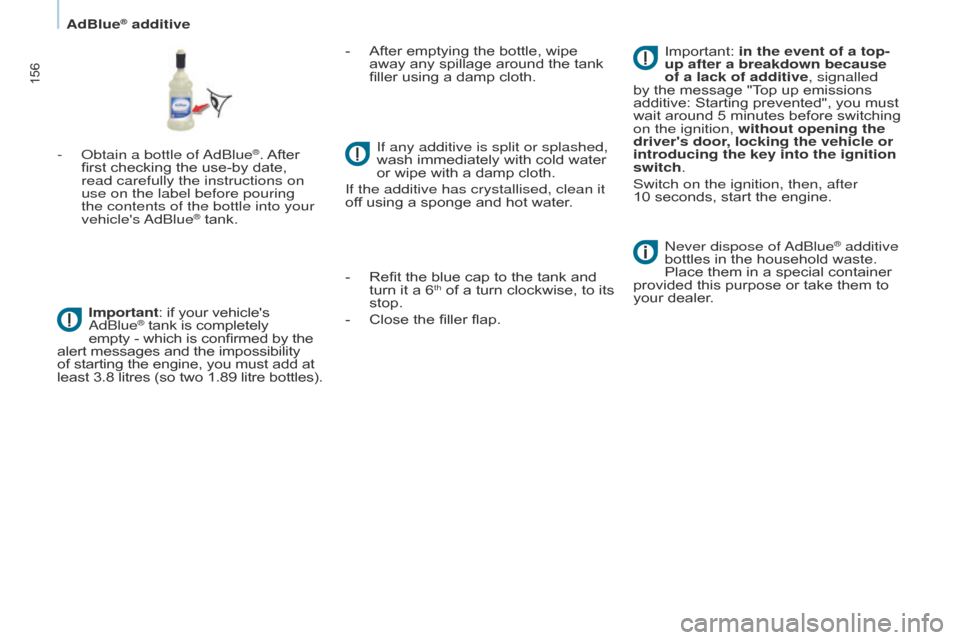
- obtain a bottle of adBlue®. After first
checking
the
use-by
date,
read carefully the instructions on
use on the label before pouring
the contents of the bottle into your
vehicle's
a
dBlue
® tank.
Important
:
if
your vehicle's
a
dBlue
® tank is completely
empty
-
which is confirmed by the alert
messages and the impossibility
of
starting
the engine, you must add at
least
3.8
litres (so two 1.89 litre bottles). -
After
emptying the bottle, wipe
away
any spillage around the tank
filler
using a damp cloth.
If any additive is split or splashed,
wash immediately with cold water
or
wipe with a damp cloth.
If the additive has crystallised, clean it
off using a sponge and hot water.
-
Refit
the blue cap to the tank and
turn
it a 6
th of a turn clockwise, to its stop.
-
Close
the
filler flap.
n
ever dispose of
a
dBlue
® additive
bottles
in
the
household
waste.
Place
them
in
a
special
container
provided
this
purpose
or
take
them to
your
dealer.
Important:
in the event of a top-
up after a breakdown because
of a lack of additive, signalled
by
the
message
"Top
up
emissions
additive:
Starting
prevented",
you must
wait
around
5
minutes
before
switching
on the ignition,
without opening the
driver's door, locking the vehicle or
introducing the key into the ignition
switch.
Switch on the ignition, then, after
10
seconds,
start
the
engine.
adBlue® additive
Page 170 of 276

Berlingo_2_VP_en_Chap08_aide-rapide_ed02-2014
168
cHAnGInG A BuLB
type A
All glass bulb: pull gently
as
it is fitted by pressure.
High pressure washing
Open the bonnet. T o access the bulbs, reach
behind the headlamp unit.
Carry out the operations in reverse
order
to refit each bulb and check that
the
bonnet is closed securely.type c
Halogen
bulb: release the
retaining
spring from its
housing.
type B
Bayonet
bulb: press
on the bulb then turn it
anticlockwise.
Halogen
bulbs must be changed with
the headlamp off. Wait a few
minutes
(risk of serious burns).
d
o not touch the bulb directly with your
fingers,
use lint-free cloths.
It
is normal for condensation to form
inside
the headlamps. Regular use of
the
vehicle eliminates this misting.The
bulbs must be changed with
the ignition of
f or with the battery
disconnected. Wait approximately
3 minutes
after changing the bulb
before
reconnecting the battery.
Check that the lamps operate correctly
after
each operation.
When using this type of washing
on stubborn dirt, do not persist on
the headlamps, the lamps and their
edges
to avoid damaging their coating
and
seals.
types of bulb
Various types of bulb are fitted to your vehicle.
T o remove them:
type
d
Light
emitting diode
(LED):
for replacement
of
the daytime running
lamps,
contact a
CITR
o Ë n dealer or a
qualified
workshop.
Changing a bulb
Page 171 of 276

Berlingo_2_VP_en_Chap08_aide-rapide_ed02-2014
169
3. d irection indicators
type B
, PY21W - 21W (amber)
-
Remove
the cover by pulling the
flexible
rubber tab.
-
T
urn the bulb holder a quarter
turn
anticlockwise.
-
Remove
the bulb by pressing
it lightly while turning it
anticlockwise.
-
Change
the bulb.
-
Ensure
that the cover is refitted
correctly all round to assure
correct
sealing.
2.
Sidelamps
type A
, W5W - 5W
-
Remove
the
cover
by
pulling
the
flexible
rubber
tab.
-
Remove
the
bulb
holder
fitted
by
pressure
by
pullin
g
the
connector
.
-
Change
the
bulb.
-
Ensure
that
the
cover
is
refitted
correctly all round to assure
correct
sealing.
FrOnt LAMPS
1. d ipped / Main beam headlamps
type
c , H4 - 55W
-
Remove
the centre cover by
pullin
g the flexible rubber tab.
-
d isconnect the electrical
connector.
-
Release
the retaining tab.
-
Change
the bulb taking care
to
align the metal part with the
grooves
on the lamp.
-
Reposition
the retaining tab.
-
Ensure
that the cover is refitted
correctly all round to assure
correct
sealing.
Changing a bulb
QUICk HELP
8
Page 173 of 276

Berlingo_2_VP_en_Chap08_aide-rapide_ed02-2014
171
rEAr LAMPS
This procedure requires the use of the spanner supplied with the tools for
changing a wheel.
When
refitting, take care to
reposition the tabs and the supply
wire correctly to avoid trapping
the
wire.
a
fter changing the rear direction
indicator
bulb, the reinitialisation time
is
above 2 minutes.
-
Move aside the 4 tabs then extract
the
bulb holder.
-
Remove
the faulty bulb by
pressing it lightly while turning it
anticlockwise.
-
Change
the bulb.
When
removing the lamp unit:
-
with
tailgate, pull the lamp unit
towards the centre of the vehicle,
-
with
hinged doors, pull the lamp
unit
towards you.
For
more
information
concerning
the
bulbs,
refer
to
the
"Types
of
bulb".
1.
Brake lamps / sidelamps
type B
,
P21/5W
-
21/5W
2.
d
irection indicators
type B
,
PY21W
-
21W
(amber)
3.
r
eversing lamps
type B
, P21W - 21W
4.
Foglamps
type B
, P21W - 21W
High pressure jet washing When using this type of washing
on stubborn dirt, do not persist on
the
headlamps,
the
other
lamps
and
their
edges
to
avoid
damaging
their
coating
and
seals. Chapter
9, "Changing a wheel"
section.
-
Identify the faulty bulb, then open
the
rear doors to 180°.
Chapter
3, "Access" section.
-
Remove
the two fixing bolts using
the
spanner provided.
-
Pull
the lamp unit from the outside.
-
Holding
the lamp, disconnect the
electrical
connector.
Changing a bulb
QUICk HELP
8
Page 174 of 276

Berlingo_2_VP_en_Chap08_aide-rapide_ed02-2014
172
nuMBEr PLAtE LAMPS
- Unscrew the two nuts.
-
Push
the pins.
-
If necessary
, disconnect the
connector
to remove the lamp.
-
Change
the bulb.
With tailgate
-
d
isengage the plastic lens using a
screwdriver.
-
Change
the
bulb.
-
Replace the plastic lens and press
on
it.
tHIrd BrAKE LAMP
type A , W16W - 16W
With hinged doors
-
Unclip
the
interior
trim.
-
d
isconnect the connector by
moving
aside
its
tab.
-
T
urn
the
bulb
holder
a
quarter
turn
anticlockwise.
-
Change
the
bulb.
-
Put
the
bulb
holder
back
in
place
and
reconnect
the
connector.
-
Put
the
trim
back
in
place.type A
, W5W - 5W
Changing a bulb