touch Citroen BERLINGO MULTISPACE RHD 2017 2.G Owner's Manual
[x] Cancel search | Manufacturer: CITROEN, Model Year: 2017, Model line: BERLINGO MULTISPACE RHD, Model: Citroen BERLINGO MULTISPACE RHD 2017 2.GPages: 292, PDF Size: 10.19 MB
Page 5 of 292

3
Berlingo2VP_en_Chap00a_Sommaire_ed02-2016
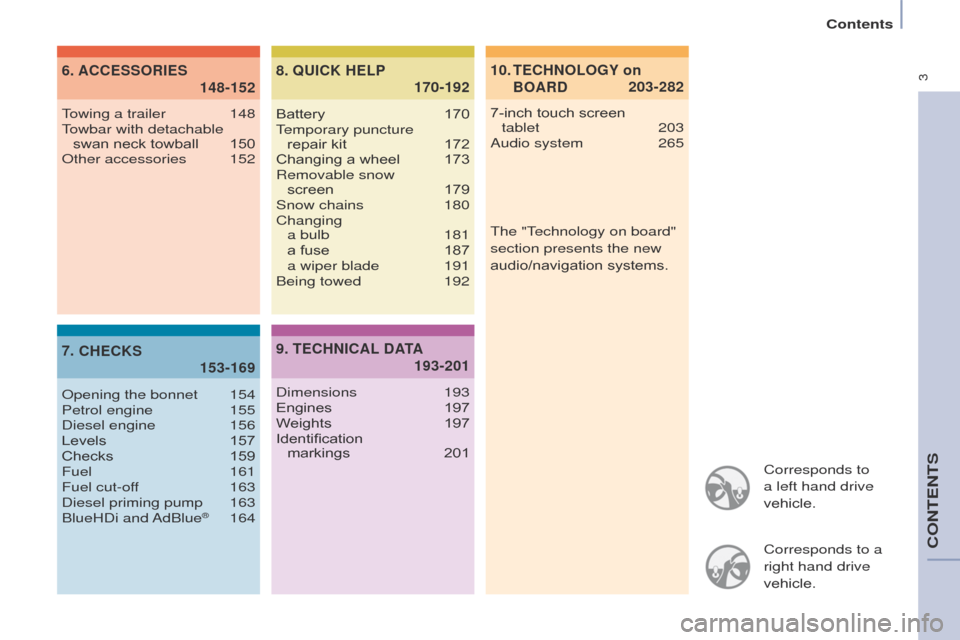
Corresponds to
a left hand drive
vehicle.
Corresponds to a
right hand drive
vehicle.
TECHNOLOGY on
BOARD
10.
203-282
ACCESSORIES
6
.
148-152
CHECKS
7
.
153-169 QUICK HELP
8
.
170-192
7-inch touch screen
tablet 203
Audio system
265
T
owing a trailer
148
T
owbar with detachable swan
neck
towball
150
Other accessories
152
Opening the bonnet
154
Petrol engine
155
Diesel engine
156
Levels
157
Checks
159
Fuel
161
Fuel cut-off
163
Diesel priming pump
163
BlueHDi
and AdBlue
® 164 Battery
170
T
emporary puncture
repair kit
172
Changing
a wheel
173
Removable snow
screen
179
Snow chains
180
Changing
a bulb
181 a
fuse
187 a wiper blade
191
Being towed
192
TECHNICAL DATA
9.
193-201
Dimensions 193
Engines 197
W
eights
197
Identification
markings
201The "T
echnology on board"
section presents the new
audio/navigation systems.
Contents
CONTENTS
Page 11 of 292

9
Berlingo2VP_en_Chap01_vue-ensemble_ed02-2016
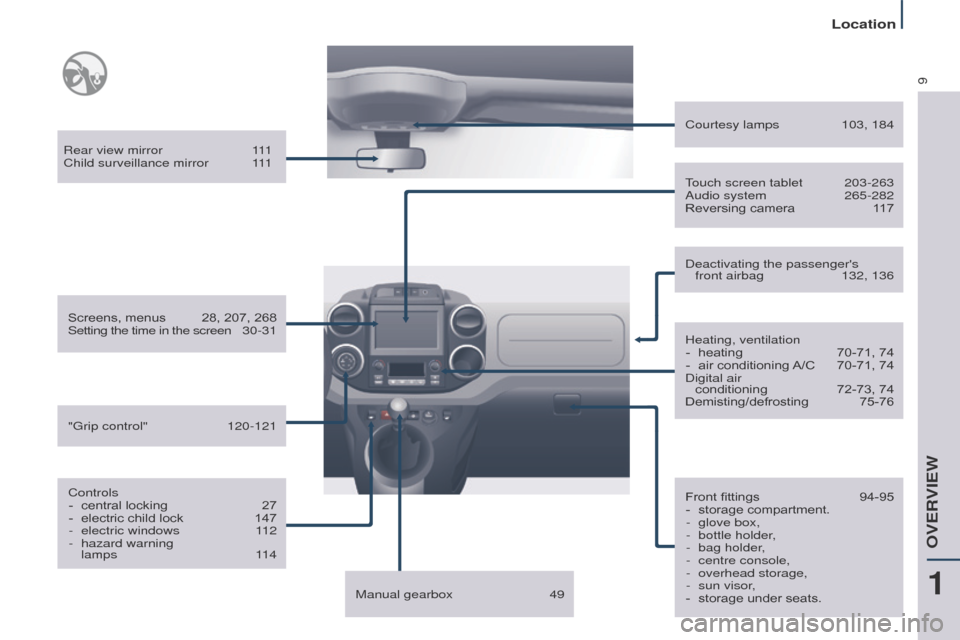
Rear view mirror 111
Child surveillance mirror 1 11
Screens,
menus
28,
207, 268
Setting the time in the screen
3
0-31
Controls -
central
locking
27
-
electric
child lock
147
-
electric windows
1
12
-
hazard warning
lamps
114 Heating, ventilation
-
heating
70-71,
74
-
air
conditioning
A/C
70-71,
74
Digital air conditioning
72-73,
74
Demisting/defrosting
75-76
Courtesy lamps
103, 184
Front
fittings
94-95
-
storage
compartment.
-
glove box,
-
bottle holder
,
-
bag holder
,
-
centre console,
-
overhead storage,
-
sun visor
,
-
storage
under seats.
Touch screen tablet
203-263
Audio system
265-282
Reversing
camera
1
17
Deactivating the passenger's front airbag
132, 136
Manual gearbox
49
"Grip control"
120-121
1
OVERVIEW
Location
Page 30 of 292

28
Berlingo2VP_en_Chap03_Pret-a-partir_ed02-2016
Instruments and controls
Berlingo2VP_en_Chap03_Pret-a-partir_ed02-2016
Dials
1. Distance recorder in kilometres / miles.
2.
Display
screen.
3.
Fuel gauge, coolant temperature
gauge.
4.
Rev
counter.
5.
T
rip distance recorder / service
indicator
reset.
6.
Instrument
panel lighting dimmer.Level 1
INSTRUMENT PANELDisplay screens
Screens
The format of the information
presented in the screen depends on
the
vehicle's equipment level.
Level 2
with the touch screen tablet
Page 33 of 292

31
Berlingo2VP_en_Chap03_Pret-a-partir_ed02-2016
Instruments and controls
Berlingo2VP_en_Chap03_Pret-a-partir_ed02-2016
Touch screen tabletF
Select the "
Configuration"
menu.
F
In the secondary page,
press on "
Time/Date". F
Select "
Adjust time" or "Adjust
date" and modify the settings using
the
number keypad, then confirm.F
Press "
Confirm" to quit.
READY TO GO
3
Page 40 of 292

+
38
Berlingo2VP_en_Chap03_Pret-a-partir_ed02-2016
Instruments and controls
Berlingo2VP_en_Chap03_Pret-a-partir_ed02-2016
AdBlue®
For more information on filling, refer to the chapter 7, AdBlue® section.
Alert
Information Solution - action
1
st level of alert
There is an audible signal when the ignition is switched on.
The warnings are intermittent and then become
permanent when switching on the ignition or when driving.
The remaining driving range is counted down from
1 500 miles (2 400 km) to 375 miles (600 km).
The range figure reduces in steps of 200 miles (300 km).
The contents of the AdBlue® tank has dropped to a level
sufficient
for
a
range
of less than 1 500 miles
(2
400
km).
Have
the
fluid
topped-up
using an
AdBlue®
container
or
bottles.
2
nd level of alert
There is an audible signal when the ignition is
switched
on.
The warnings are intermittent (every 30 seconds)
and then become permanent every time the ignition
is
switched on or when driving.
The remaining driving range is counted down from 350 miles
(600 km) to zero, reducing in steps of 30 miles (50 km).
You must have the AdBlue® topped-up and not wait
for
a
breakdown.
In the display
screen. Temporary
display:
"NO START IN".
In the touch
screen
tablet. Select:
-
"Driving
assistance".
-
"Diagnostic". The
driving
range
is
displayed.
3
rd level of alert
The AdBlue® tank is empty. Starting is impossible.
It is essential to add at least 3.8 litres of AdBlue®
additive
to
the
additive
tank.
Page 103 of 292

101
Berlingo2VP_en_Chap04_Ergonomie_ed02-2016Berlingo2VP_en_Chap04_Ergonomie_ed02-2016
MODUTOP ROOF BARS
The maximum authorised weight on
each
roof bar is 35 kg. In all cases, the load must rest on
the non-slip bands provided for this
purpose and must not touch the roof or
the
glazing of the roof.
Recommendations for loading the
roof
This procedure requires the use of
a spanner supplied with the tools for
changing
a wheel.
These two longitudinal Modutop roof
bars can be removed.
Chapter 9, "Changing a wheel"
section.
-
Open
the protective covers.
-
Slacken
the four screws using the
spanner
and remove them.
-
T
urn the bars 90° placing the
hollow
parts towards the front.
-
Refit
the the 4 screws and tighten
them
using the spanner.
-
Close
the protective covers.
-
Use the strap passages
A only to
secure
the load firmly.
EASE OF USE and COMFORT
4
Practical information
Page 114 of 292

11 2
Berlingo2VP_en_Chap04_Ergonomie_ed02-2016Berlingo2VP_en_Chap04_Ergonomie_ed02-2016
ELECTRIC WINDOWS
Lower the window fully, then raise it, it
will rise in steps of a few centimetres
each time the control is pressed.
Repeat the operation until the window
is
fully closed.
Continue to press the control for at
least one second after the window
closed
position has been reached.
The safety anti-pinch does not operate
during
these operations.
Safety anti-pinch
When the window rises and meets an
obstacle, it stops and partially lowers.
Manual mode
This mode is available
depending on equipment; it is
identified
by this symbol on the
control
in question.
Good practice
If the electric windows meet an
obstacle during operation, you must
reverse the movement of the window.
T
o
do
this,
press
the
control
concerned.
When the driver operates the
passenger electric window controls,
they must ensure that no one is
preventing correct closing of the
windows.
The driver must ensure that the
passengers use the electric windows
correctly
.
Be aware of children when operating
the
windows.
Following
several consecutive closing/
opening operations of the electric
window control, a protection system
is triggered which only allows closing
of
the window.
After
closing, wait
approximately
40 minutes. Once this
time has elapsed, the control becomes
operational
again.
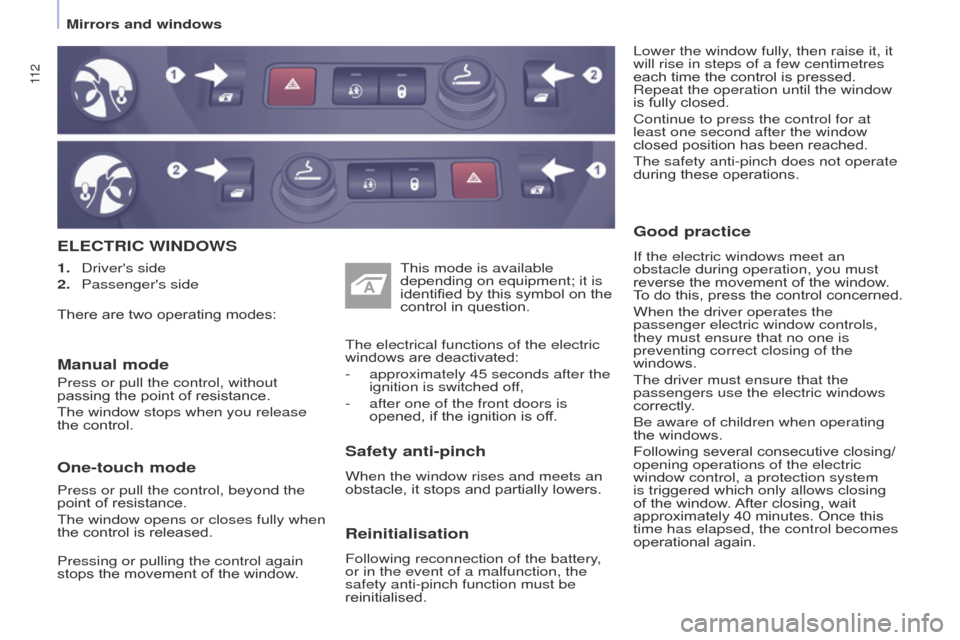
1.
Driver's side
2.
Passenger's side
Reinitialisation
Following reconnection of the battery,
or in the event of a malfunction, the
safety anti-pinch function must be
reinitialised. The electrical functions of the electric
windows are deactivated:
-
approximately 45 seconds after the
ignition is switched of
f,
-
after one of the front doors is
opened,
if the ignition is off.
There
are
two
operating
modes:
Press or pull the control, without
passing
the
point
of
resistance.
The window stops when you release
the
control.
One-touch mode
Press or pull the control, beyond the
point
of resistance.
The window opens or closes fully when
the
control is released.
Pressing or pulling the control again
stops
the movement of the window.
Mirrors and windows
Page 119 of 292

117
Berlingo2VP_en_Chap05_Securite_ed02-2016
REVERSING CAMERA
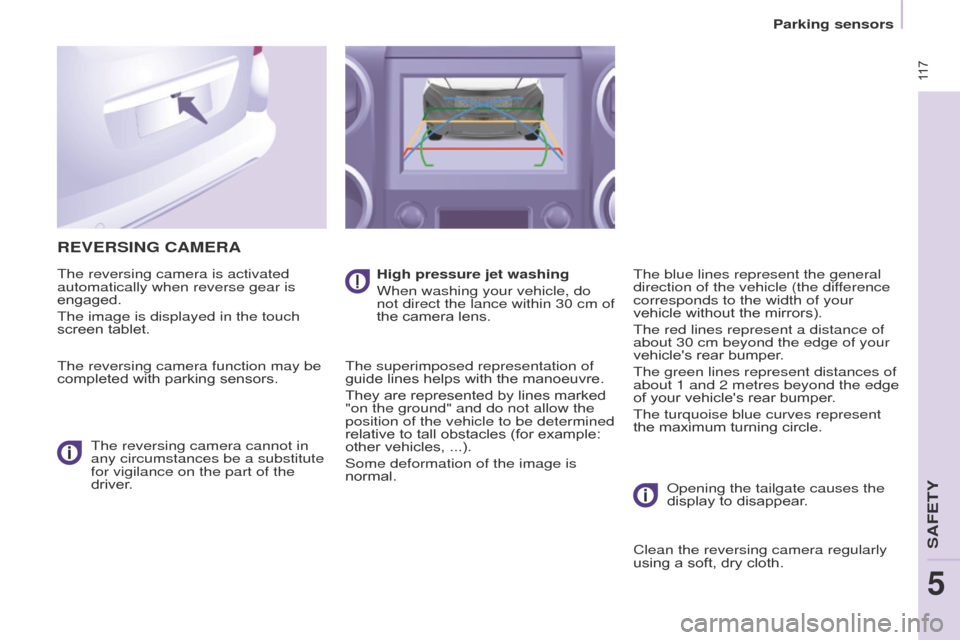
The reversing camera is activated
automatically when reverse gear is
engaged.
The image is displayed in the touch
screen tablet.
The reversing camera function may be
completed
with parking sensors.
The reversing camera cannot in
any circumstances be a substitute
for vigilance on the part of the
driver. High pressure jet washing
When washing your vehicle, do
not direct the lance within 30 cm of
the
camera lens.
The superimposed representation of
guide
lines helps with the manoeuvre.
They
are represented by lines marked
"on the ground" and do not allow the
position of the vehicle to be determined
relative
to tall obstacles (for example:
other
vehicles, ...).
Some deformation of the image is
normal. The blue lines represent the general
direction of the vehicle (the difference
corresponds to the width of your
vehicle
without the mirrors).
The red lines represent a distance of
about 30 cm beyond the edge of your
vehicle's
rear bumper.
The green lines represent distances of
about 1 and 2 metres beyond the edge
of
your vehicle's rear bumper.
The turquoise blue curves represent
the
maximum turning circle.
Opening the tailgate causes the
display
to disappear.
Clean the reversing camera regularly
using
a soft, dry cloth.
Parking sensors
SAFETY
5
Page 126 of 292

124
Berlingo2VP_en_Chap05_Securite_ed02-2016
Deactivation
The system is deactivated in the
vehicle configuration menu, accessible
with
the ignition on.
Its state is memorised when the
ignition
is switched off.
When the system is deactivated,
a message is displayed every
time the ignition is switched on,
to warn
you. With the monochrome screen C
F
Press the
MENU button for access
to
the main menu.
F
Select "
Personalisation-
Configuration".
F
Select "
Define vehicle
parameters".
F
Select "
Driving assistance".
F
Select "
Automatic emergency
braking: OFF" or "Automatic
emergency braking: ON".
F
Press the "
7" or "8" button to
check
or uncheck the box and
activate or deactivate the system
respectively
.
F
Press the "
5" or "6" button, then
the OK button to select the "OK"
box
and confirm or the Back button
to
cancel.With the touch screen tablet
F
Press the "MENU" button.
F Select the " Driving " menu.
F
In the secondary page, select
"
Vehicle settings".
F
Select the "
Driving assistance"
tab.
F
Check
or uncheck the "Auto
emergency braking" box to
activate
or deactivate the system.
F
Confirm.
Driving safely
Page 137 of 292

135
Berlingo2VP_en_Chap05_Securite_ed02-2016
135
Berlingo2VP_en_Chap05_Securite_ed02-2016
CHILD SEAT AT THE REAR
Rearward facing
When a rearward facing child seat is
installed on a rear passenger seat,
move the vehicle's front seat forwards
and
straighten the backrest so that the
rearward facing child seat does not
touch
the vehicle's front seat.
Forward facing
When a forward facing child seat is
installed on a rear passenger seat,
move the vehicle's front seat forwards
and straighten the backrest so that the
legs of the child in the forward facing
child seat do not touch the vehicle's
front
seat.
Ensure that the seat belt is
correctly
tensioned.
For child seats with a support leg,
ensure
that this is in firm contact with
the
floor. When a child seat is installed on a
passenger seat in row 3, put the
backrests
of the outer and centre seats
in row 2 forward of the seat occupied
by the child seat, in the table position,
or
if this is not sufficient, rermove the
seats in row 2 so that the child seat or
the the legs of the child do not touch
the
seats in row 2.
Seats in row 3
A child seat with a support leg
must never be installed on a
passenger seat in row 3.
SAFETY
5
Child safety