low Citroen BERLINGO RHD 2013 2.G Owner's Guide
[x] Cancel search | Manufacturer: CITROEN, Model Year: 2013, Model line: BERLINGO RHD, Model: Citroen BERLINGO RHD 2013 2.GPages: 236, PDF Size: 7.88 MB
Page 43 of 236
Gearbox and steering wheel
41
READY TO GO
22
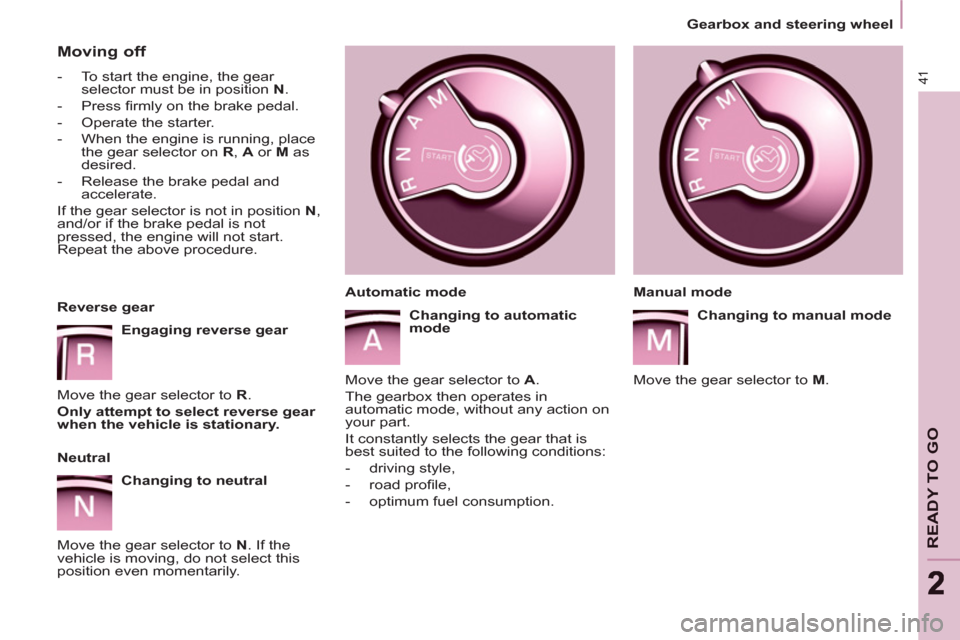
Moving off
- To start the engine, the gear
selector must be in position N
.
- Press fi rmly on the brake pedal.
- Operate the starter.
- When the engine is running, place
the gear selector on R
, A
or M
as
desired.
- Release the brake pedal and
accelerate.
If the gear selector is not in position N
,
and/or if the brake pedal is not
pressed, the engine will not start.
Repeat the above procedure.
Reverse gear
Engaging reverse gear
Move the gear selector to R
.
Only attempt to select reverse gear
when the vehicle is stationary.
Neutral
Changing to neutral
Move the gear selector to N
. If the
vehicle is moving, do not select this
position even momentarily.
Manual mode
Changing to manual mode
Move the gear selector to M
.
Automatic mode
Changing to automatic
mode
Move the gear selector to A
.
The gearbox then operates in
automatic mode, without any action on
your part.
It constantly selects the gear that is
best suited to the following conditions:
- driving style,
- road profi le,
- optimum fuel consumption.
Page 45 of 236
Stop & Start
43
READY TO GO
22
STOP & START
The Stop & Start system puts the
engine temporarily on standby - STOP
mode - during stops in the traffi c (red
lights, traffi c jams, or other...). The
engine restarts automatically - START
mode - as soon as you want to move
off. The restart takes place instantly,
quickly and silently.
Perfect for urban use, the Stop & Start
system reduces fuel consumption and
exhaust emissions as well as the noise
level when stationary.
Operation
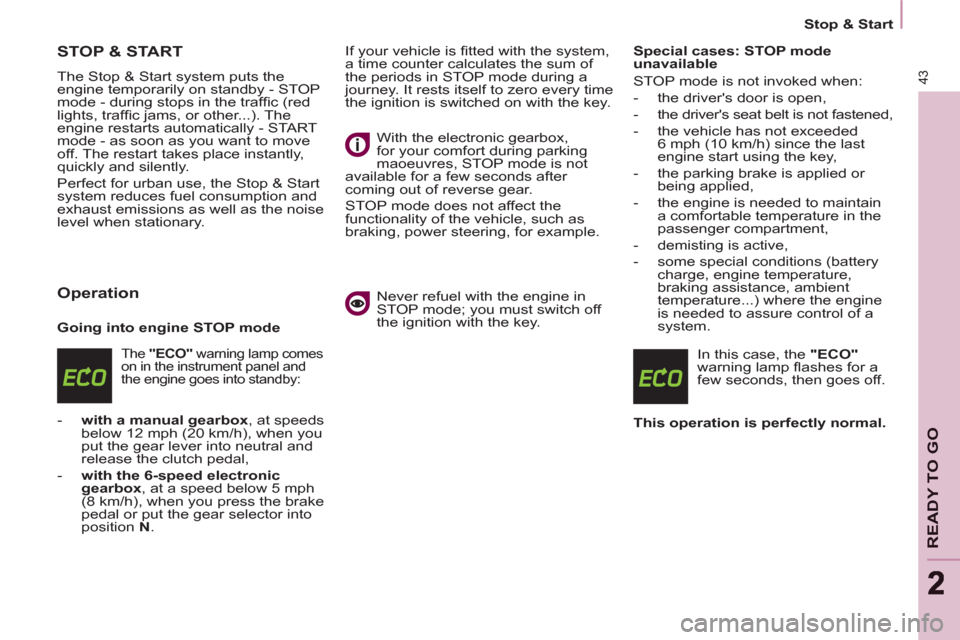
Going into engine STOP mode
The "ECO"
warning lamp comes
on in the instrument panel and
the engine goes into standby:
- with a manual gearbox
, at speeds
below 12 mph (20 km/h), when you
put the gear lever into neutral and
release the clutch pedal,
- with the 6-speed electronic
gearbox
, at a speed below 5 mph
(8 km/h), when you press the brake
pedal or put the gear selector into
position N
. If your vehicle is fi tted with the system,
a time counter calculates the sum of
the periods in STOP mode during a
journey. It rests itself to zero every time
the ignition is switched on with the key.
With the electronic gearbox,
for your comfort during parking
maoeuvres, STOP mode is not
available for a few seconds after
coming out of reverse gear.
STOP mode does not affect the
functionality of the vehicle, such as
braking, power steering, for example.
Never refuel with the engine in
STOP mode; you must switch off
the ignition with the key.
Special cases: STOP mode
unavailable
STOP mode is not invoked when:
- the driver's door is open,
- the driver's seat belt is not fastened,
- the vehicle has not exceeded
6 mph (10 km/h) since the last
engine start using the key,
- the parking brake is applied or
being applied,
- the engine is needed to maintain
a comfortable temperature in the
passenger compartment,
- demisting is active,
- some special conditions (battery
charge, engine temperature,
braking assistance, ambient
temperature...) where the engine
is needed to assure control of a
system.
In this case, the "ECO"
warning lamp fl ashes for a
few seconds, then goes off.
This operation is perfectly normal.
Page 48 of 236
Starting and stopping
Good practice when stopping
Good practice when starting
Diesel pre-heating warning
lamp
If the temperature is high
enough, the warning lamp
comes on for less than one
second, you can start without
waiting.
In cold weather, wait for this warning
lamp to go off then operate the starter
(Starting position) until the engine
starts.
Door or bonnet open
warning lamp
If this comes on, a door or the
bonnet is not closed correctly, check!
Minimise engine and gearbox wear
When switching off the ignition, let the
engine run for a few seconds to allow
the turbocharger (Diesel engine) to
return to idle.
Do not press the accelerator when
switching off the ignition.
There is no need to engage a gear
after parking the vehicle.
STARTING AND STOPPING
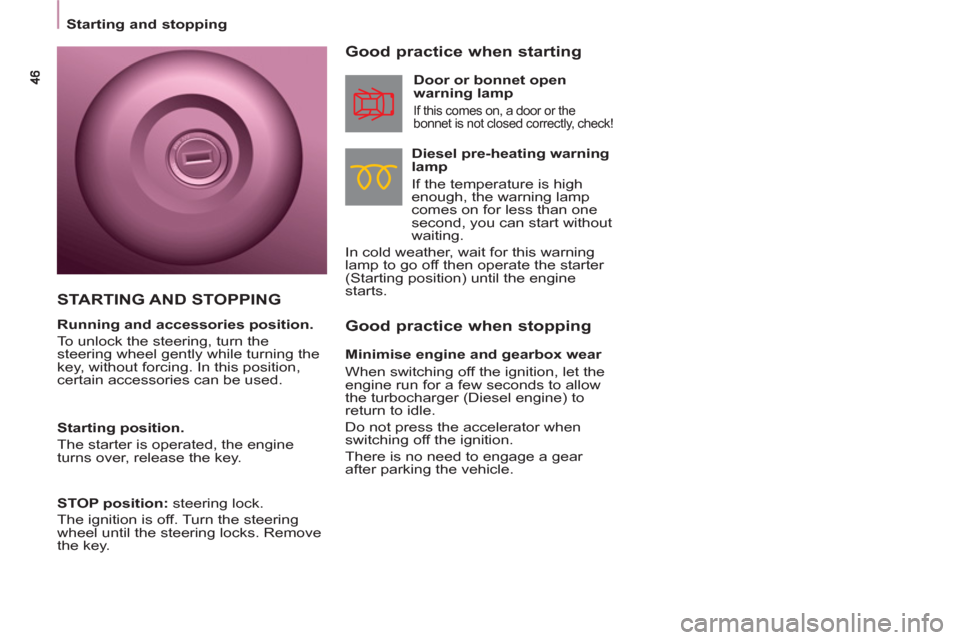
Running and accessories position.
To unlock the steering, turn the
steering wheel gently while turning the
key, without forcing. In this position,
certain accessories can be used.
Starting position.
The starter is operated, the engine
turns over, release the key.
STOP position:
steering lock.
The ignition is off. Turn the steering
wheel until the steering locks. Remove
the key.
Page 49 of 236
47
READY TO GO
22
Starting and stopping
HILL START ASSIST
Operation
With the brake pedal and clutch pedal
pressed, from the time you release the
brake pedal you have approximately
2 seconds before the vehicle starts to
roll back and without using the parking
brake within which to move off.
During the moving off phase, the
function is deactivated automatically,
gradually releasing the braking
pressure. During this phase, the
characteristic noise of mechanical
release of the brakes may be heard,
indicating the imminent movement of
the vehicle.
Operating fault
Hill start assist is deactivated in the
following situations:
- when the clutch pedal is released,
- when the parking brake is applied,
- when the engine is switched off,
- when the engine stalls.
If a malfunction of the system
occurs, this warning lamp
comes on accompanied
by an audible signal and
confi rmed by a message in
the screen. Contact a CITROËN dealer
or a qualifi ed workshop to have the
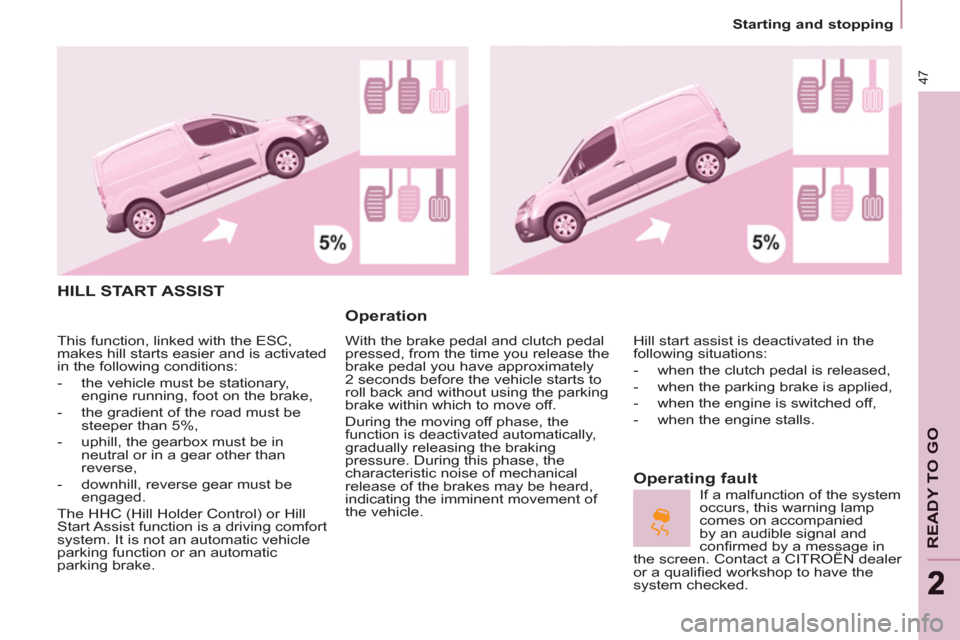
system checked. This function, linked with the ESC,
makes hill starts easier and is activated
in the following conditions:
- the vehicle must be stationary,
engine running, foot on the brake,
- the gradient of the road must be
steeper than 5%,
- uphill, the gearbox must be in
neutral or in a gear other than
reverse,
- downhill, reverse gear must be
engaged.
The HHC (Hill Holder Control) or Hill
Start Assist function is a driving comfort
system. It is not an automatic vehicle
parking function or an automatic
parking brake.
Page 52 of 236
50
Steering mounted controls
If the sunshine sensor does
not function correctly
, the
lighting comes on accompanied
by the service warning lamp,
an audible signal and a
message in the screen.
Contact a CITROËN dealer or a
qualifi ed workshop.
Guide-me-home lighting
Keeping the dipped beam headlamps
on temporarily with the ignition off,
makes the driver's exit easier when the
light is poor.
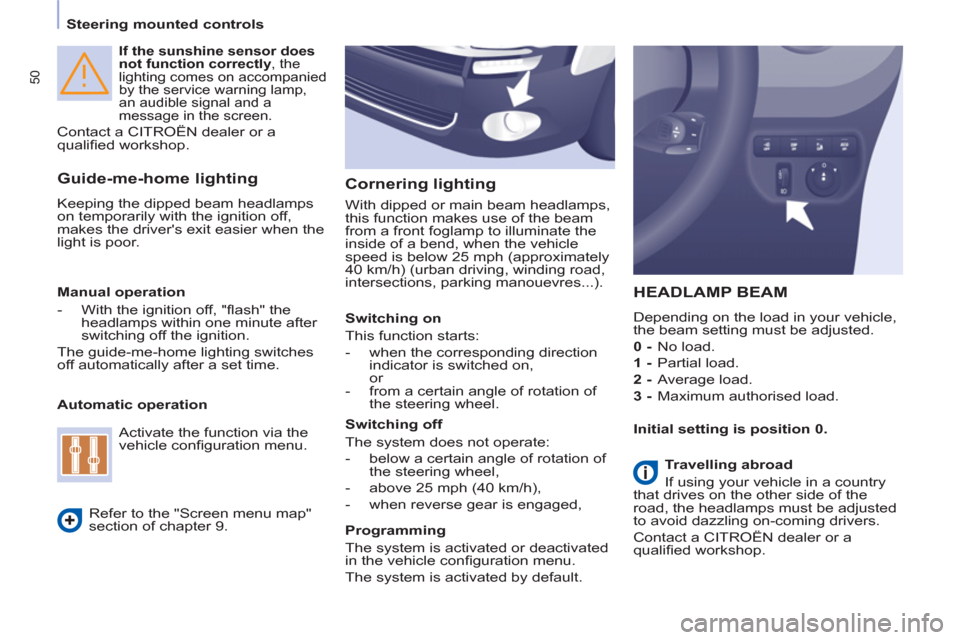
HEADLAMP BEAM
Depending on the load in your vehicle,
the beam setting must be adjusted.
0 -
No load.
1 -
Partial load.
2 -
Average load.
3 -
Maximum authorised load.
Manual operation
- With the ignition off, "fl ash" the
headlamps within one minute after
switching off the ignition.
The guide-me-home lighting switches
off automatically after a set time.
Automatic operation
Refer to the "Screen menu map"
section of chapter 9.
Activate the function via the
vehicle confi guration menu.
Initial setting is position 0.
Cornering lighting
With dipped or main beam headlamps,
this function makes use of the beam
from a front foglamp to illuminate the
inside of a bend, when the vehicle
speed is below 25 mph (approximately
40 km/h) (urban driving, winding road,
intersections, parking manouevres...).
Switching on
This function starts:
- when the corresponding direction
indicator is switched on,
or
- from a certain angle of rotation of
the steering wheel.
Switching off
The system does not operate:
- below a certain angle of rotation of
the steering wheel,
- above 25 mph (40 km/h),
- when reverse gear is engaged,
Programming
The system is activated or deactivated
in the vehicle confi guration menu.
The system is activated by default.
Travelling abroad
If using your vehicle in a country
that drives on the other side of the
road, the headlamps must be adjusted
to avoid dazzling on-coming drivers.
Contact a CITROËN dealer or a
qualifi ed workshop.
Page 54 of 236
52
Steering mounted controls
Wash-wipe and headlamp wash
Pull the stalk towards you, the wash-
wipe is accompanied by a timed sweep
of the wipers.
The headlamp wash is linked with the
wash-wipe, it is triggered if the dipped
headlamps are on.
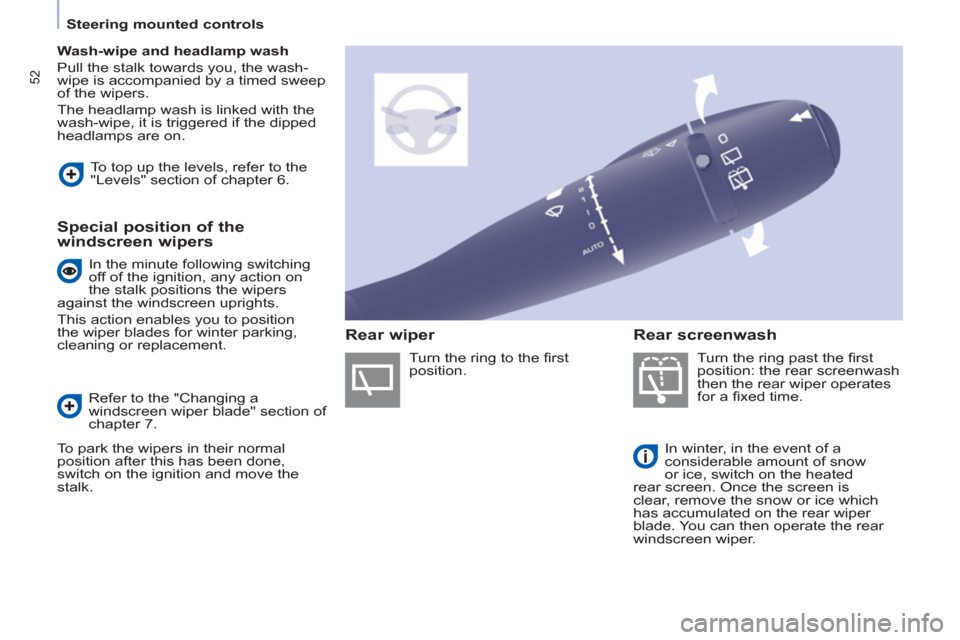
Turn the ring past the fi rst
position: the rear screenwash
then the rear wiper operates
for a fi xed time.
In winter, in the event of a
considerable amount of snow
or ice, switch on the heated
rear screen. Once the screen is
clear, remove the snow or ice which
has accumulated on the rear wiper
blade. You can then operate the rear
windscreen wiper. To top up the levels, refer to the
"Levels" section of chapter 6.
Special position of the
windscreen wipers
Refer to the "Changing a
windscreen wiper blade" section of
chapter 7.
To park the wipers in their normal
position after this has been done,
switch on the ignition and move the
stalk. Turn the ring to the fi rst
position.
Rear screenwash
Rear wiper
In the minute following switching
off of the ignition, any action on
the stalk positions the wipers
against the windscreen uprights.
This action enables you to position
the wiper blades for winter parking,
cleaning or replacement.
Page 56 of 236
54
Steering mounted controls
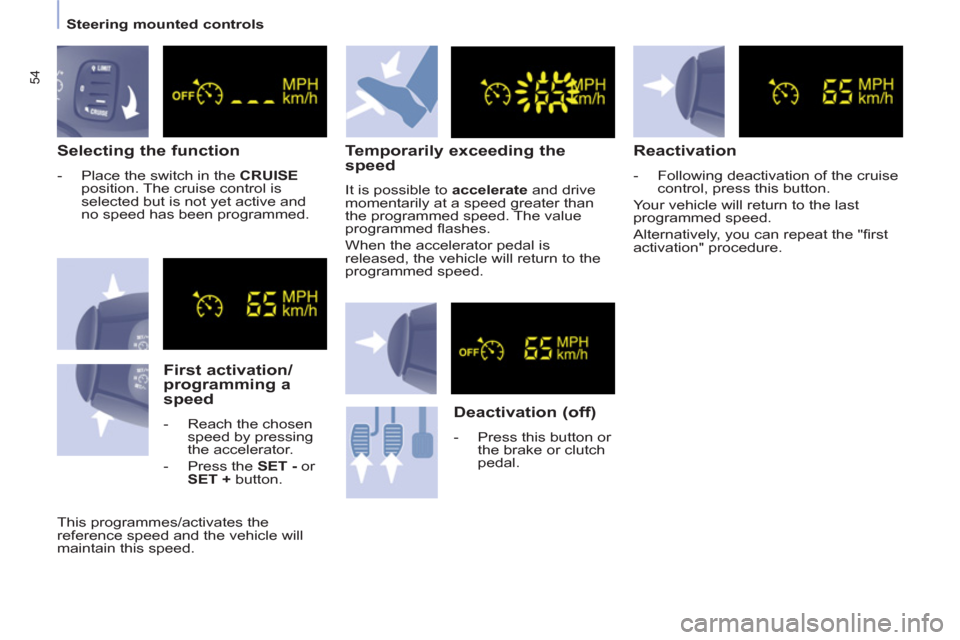
Selecting the function
- Place the switch in the CRUISE
position. The cruise control is
selected but is not yet active and
no speed has been programmed.
First activation/
programming a
speed
- Reach the chosen
speed by pressing
the accelerator.
- Press the SET -
or
SET +
button.
Temporarily exceeding the
speed
It is possible to accelerate
and drive
momentarily at a speed greater than
the programmed speed. The value
programmed fl ashes.
When the accelerator pedal is
released, the vehicle will return to the
programmed speed.
Deactivation (off)
- Press this button or
the brake or clutch
pedal.
Reactivation
- Following deactivation of the cruise
control, press this button.
Your vehicle will return to the last
programmed speed.
Alternatively, you can repeat the "fi rst
activation" procedure.
This programmes/activates the
reference speed and the vehicle will
maintain this speed.
Page 57 of 236
55
Steering mounted controls
EASE OF USE and COMFOR
T
3
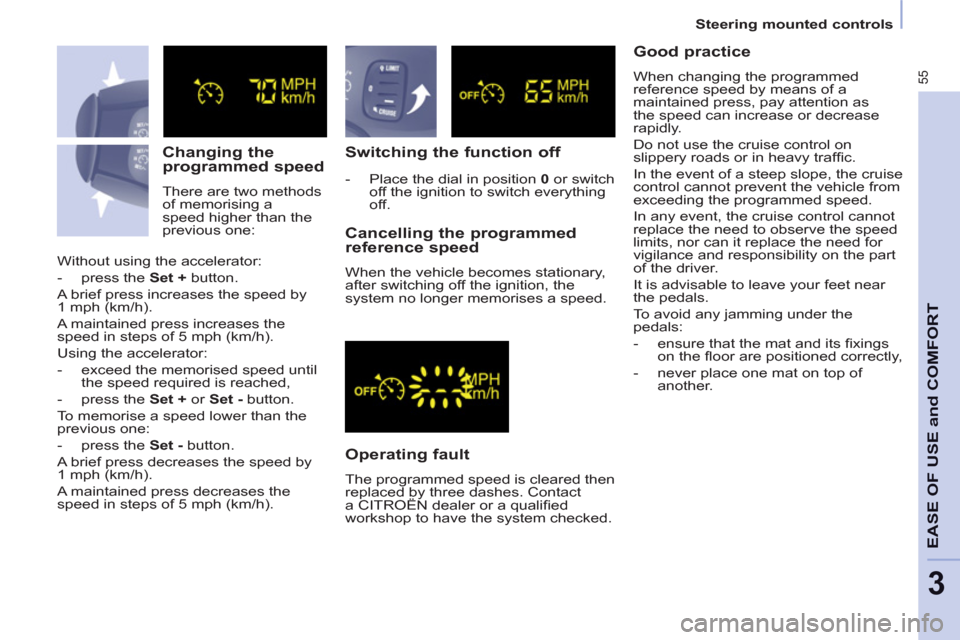
Changing the
programmed speed
There are two methods
of memorising a
speed higher than the
previous one:
Switching the function off
Operating fault
The programmed speed is cleared then
replaced by three dashes. Contact
a CITROËN dealer or a qualifi ed
workshop to have the system checked.
Cancelling the programmed
reference speed
When the vehicle becomes stationary,
after switching off the ignition, the
system no longer memorises a speed. Without using the accelerator:
- press the Set +
button.
A brief press increases the speed by
1 mph (km/h).
A maintained press increases the
speed in steps of 5 mph (km/h).
Using the accelerator:
- exceed the memorised speed until
the speed required is reached,
- press the Set +
or Set -
button.
To memorise a speed lower than the
previous one:
- press the Set -
button.
A brief press decreases the speed by
1 mph (km/h).
A maintained press decreases the
speed in steps of 5 mph (km/h).
- Place the dial in position 0
or switch
off the ignition to switch everything
off.
Good practice
When changing the programmed
reference speed by means of a
maintained press, pay attention as
the speed can increase or decrease
rapidly.
Do not use the cruise control on
slippery roads or in heavy traffi c.
In the event of a steep slope, the cruise
control cannot prevent the vehicle from
exceeding the programmed speed.
In any event, the cruise control cannot
replace the need to observe the speed
limits, nor can it replace the need for
vigilance and responsibility on the part
of the driver.
It is advisable to leave your feet near
the pedals.
To avoid any jamming under the
pedals:
- ensure that the mat and its fi xings
on the fl oor are positioned correctly,
- never place one mat on top of
another.
Page 58 of 236
56
Steering mounted controls
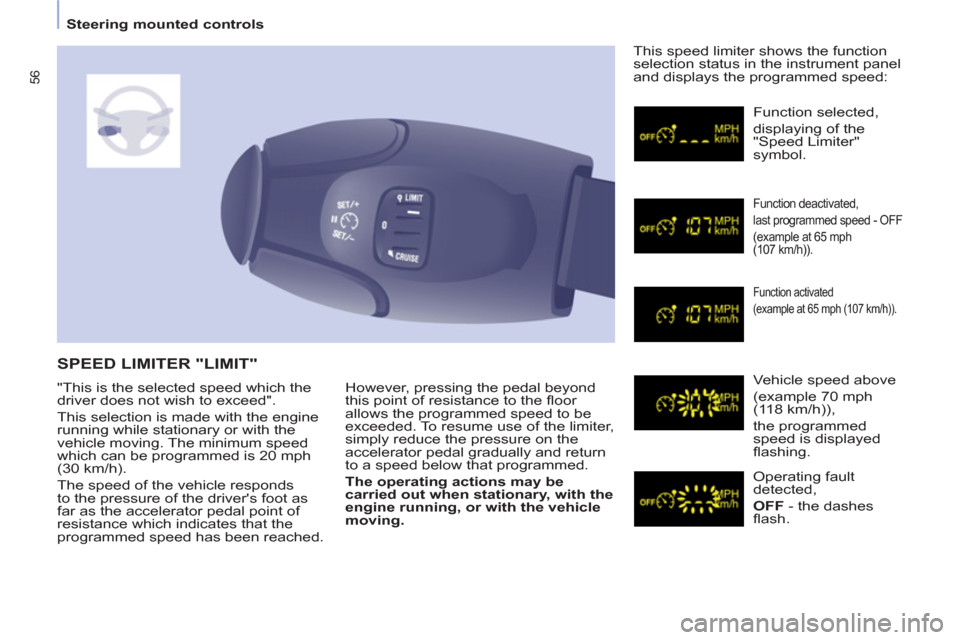
However, pressing the pedal beyond
this point of resistance to the fl oor
allows the programmed speed to be
exceeded. To resume use of the limiter,
simply reduce the pressure on the
accelerator pedal gradually and return
to a speed below that programmed.
The operating actions may be
carried out when stationary, with the
engine running, or with the vehicle
moving.
This speed limiter shows the function
selection status in the instrument panel
and displays the programmed speed:
SPEED LIMITER "LIMIT"
Function selected,
displaying of the
"Speed Limiter"
symbol.
Function deactivated,
last programmed speed - OFF
(example at 65 mph
(107 km/h)).
Function activated
(example at 65 mph (107 km/h)).
Vehicle speed above
(example 70 mph
(118 km/h)),
the programmed
speed is displayed
fl ashing.
Operating fault
detected,
OFF
- the dashes
fl ash. "This is the selected speed which the
driver does not wish to exceed".
This selection is made with the engine
running while stationary or with the
vehicle moving. The minimum speed
which can be programmed is 20 mph
(30 km/h).
The speed of the vehicle responds
to the pressure of the driver's foot as
far as the accelerator pedal point of
resistance which indicates that the
programmed speed has been reached.
Page 59 of 236
57
Steering mounted controls
3
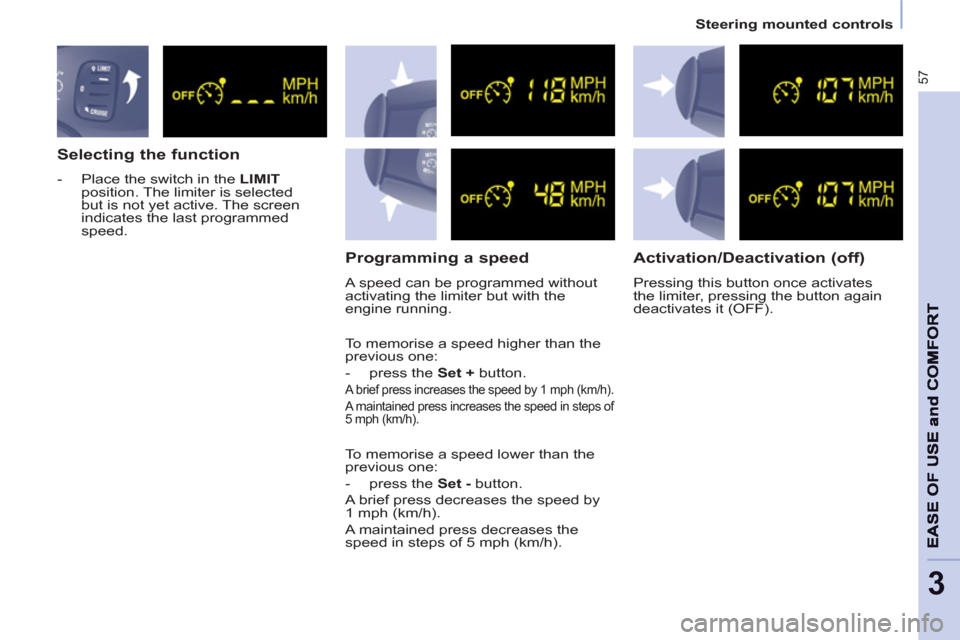
Selecting the function
- Place the switch in the LIMIT
position. The limiter is selected
but is not yet active. The screen
indicates the last programmed
speed.
Programming a speed
A speed can be programmed without
activating the limiter but with the
engine running.
Activation/Deactivation (off)
Pressing this button once activates
the limiter, pressing the button again
deactivates it (OFF).
To memorise a speed higher than the
previous one:
- press the Set +
button.
A brief press increases the speed by 1 mph (km/h).
A maintained press increases the speed in steps of
5 mph (km/h).
To memorise a speed lower than the
previous one:
- press the Set -
button.
A brief press decreases the speed by
1 mph (km/h).
A maintained press decreases the
speed in steps of 5 mph (km/h).